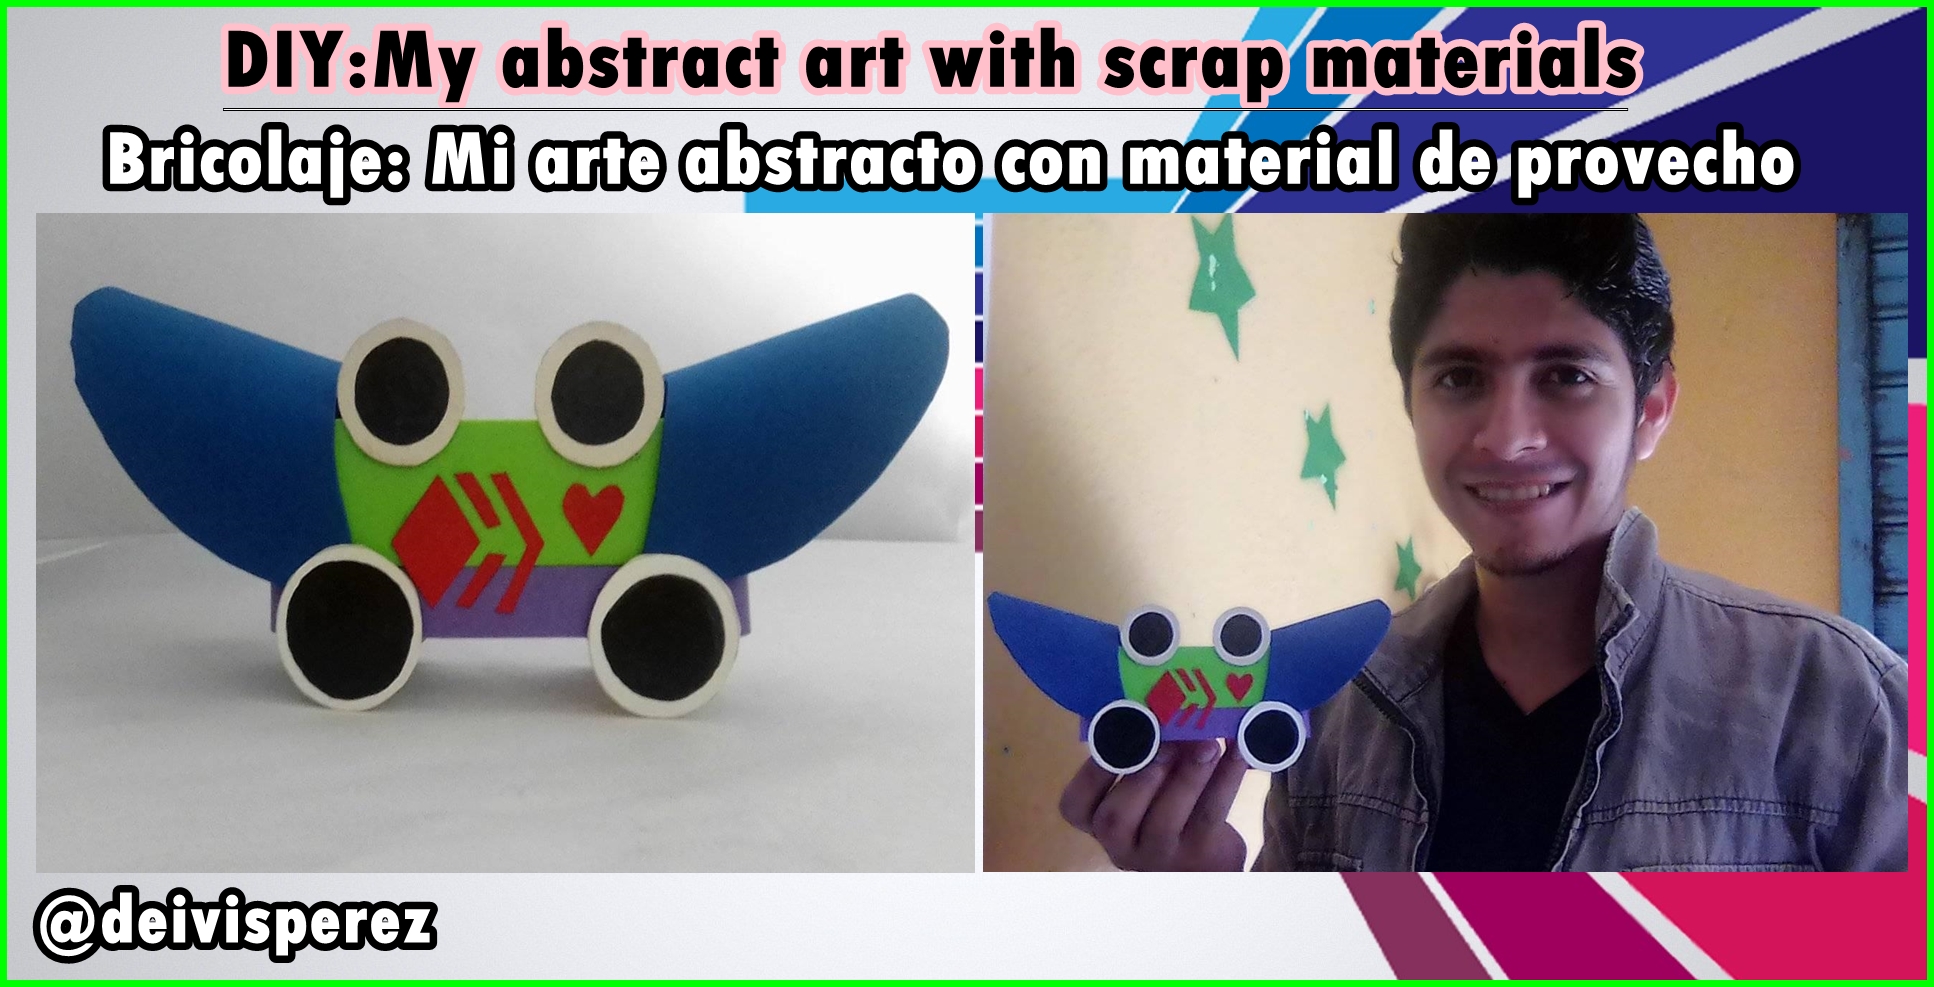
You can give it any meaning you like, a car, a frog, a bird, a helmet. Let your imagination fly, let's get to work...
Que tal mi comunidad comunidad bonita, feliz martes para todos ustedes, espero que esta semana sea una semana de buena suerte para todos. Que te parece si el día de hoy te muestro mi arte abstracto que hice usando material de provecho?
Puedes darle el significado que mejor te parezca, un carro, un sapo, un ave, un casco. Deja volar tu imaginación, manos a la obra...


•Small cardboard box.
•Blank sheet (recyclable).
•Foami color: Blue, Green, Purple.
•Silicone.
•Red cardboard.
•Black marker.
•Crayon pencil.
•Scissors.
•1 caja de cartón pequeña.
•Hoja en blanco (reciclable).
•Foami color: Azul, Vede, Morado.
•Silicón.
•Cartulina color rojo.
•Marcador color negro.
•Lápiz crayón.
•Tijera.

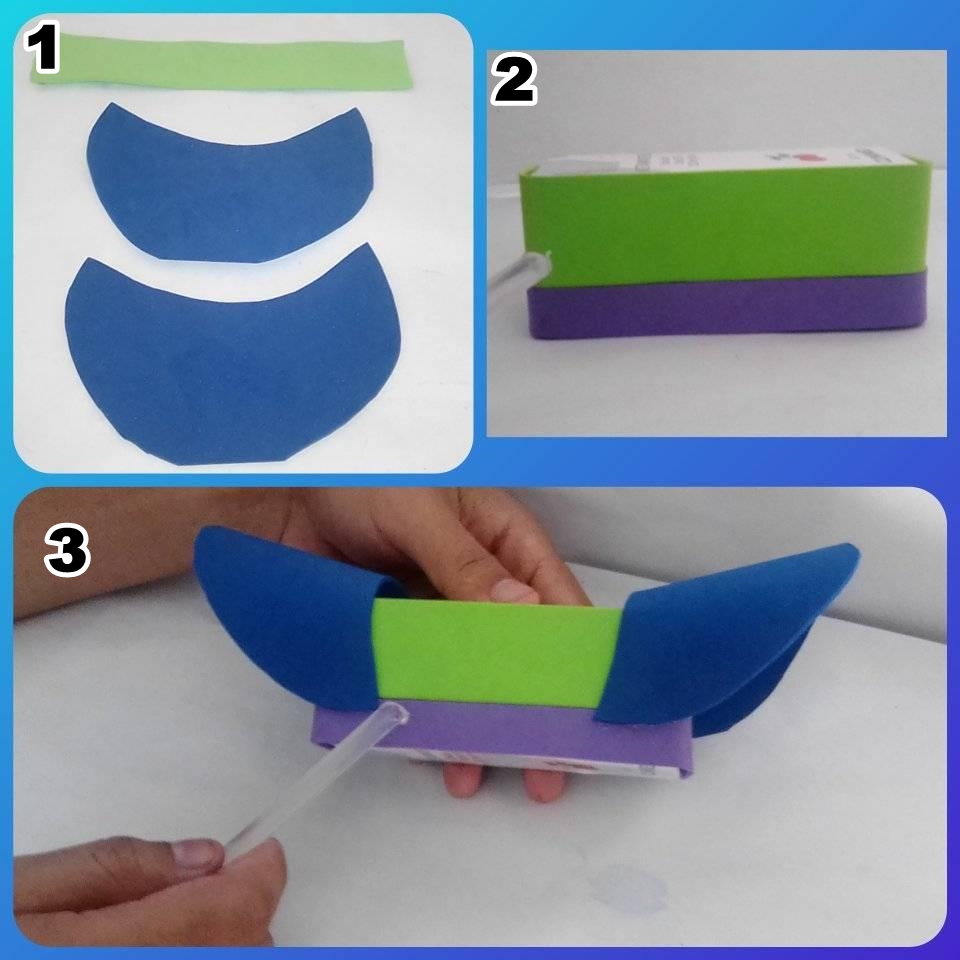
•STEP 1: Cut out a strip of green foami, a strip of purple foami, then cut out 2 pieces of blue foami in the shape of a moon.
•STEP 2: Glue the green strip to the box horizontally, then glue the foami strip to the side also horizontally, until the cardboard box is covered (use silicone).
•STEP 3: Glue the blue moon-shaped foami to each side of the cardboard box simulating 2 shoulder pads (use silicone).
•PASO 1: Recortar una tira de foami color verde, una tira color morado, luego recortar 2 trozos de foami azul en forma de luna.
•PASO 2: Pegar la tira verde a la caja en forma horizontal, luego pegar la tira de foami al lado también de forma horizontal, hasta cubrir la caja de cartón (usar silicón).
•PASO 3: Pegar los foami color azul en forma de luna a cada lateral de la caja de cartón simulando 2 hombreras (usar silicón).
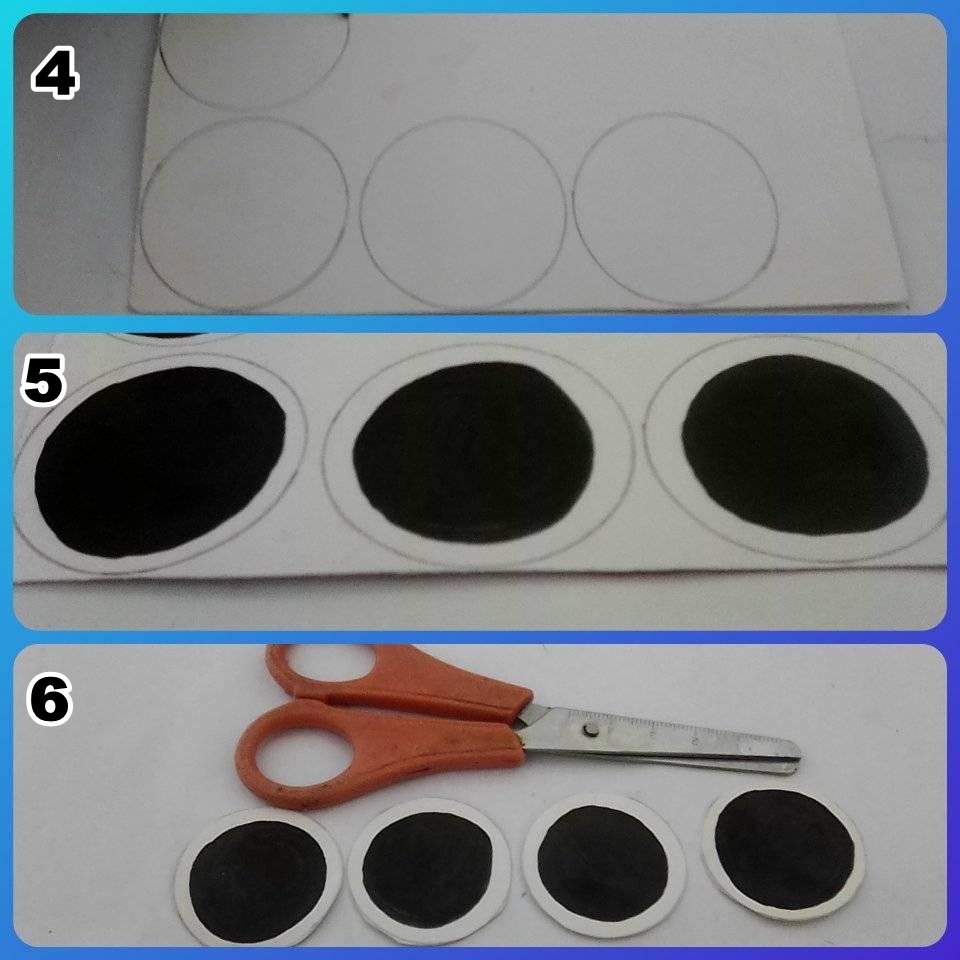
•STEP 4: Draw 6 circles in the shape of wheels on the blank sheet or cardboard.
•STEP 5: Fill in with the black marker the 6 circles we just created leaving a ½ centimeter space at each one.
•STEP 6: Cut out the 6 circles using the scissors.
•PASO 4: Dibujar 6 círculos en forma de ruedas en la hoja o cartón en blanco.
•PASO 5: Rellenar con el marcador negro los 6 círculos que acabamos de crear dejando un espacio de ½ centímetro a cada uno.
•PASO 6: Recortar los 6 círculos usando la tijera.
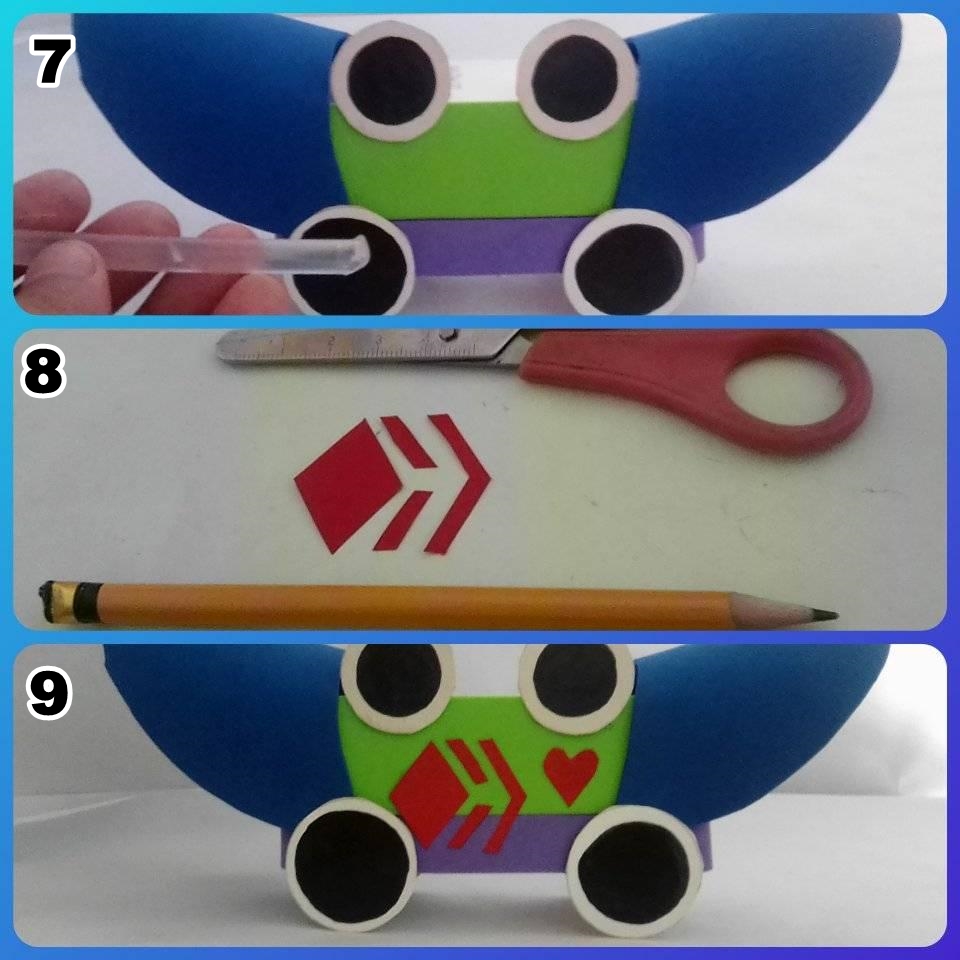
•STEP 7: Glue 4 of the 6 circles to the bottom of the box simulating wheels, then glue the remaining 2 circles to the top simulating 2 eyes (use silicone).
•STEP 8: Draw our HIVE logo on the red cardboard with the help of the crayon pencil, then draw a small heart on the red cardboard, then cut it out.
•STEP 9: In this last step, we glue the logo and the heart in the center of the box.
•PASO 7: Pegamos 4 de los 6 círculos a la parte inferior de la caja simulando ruedas, luego pegamos los 2 círculos restantes a la parte superior simulando 2 ojos (usar silicón).
•PASO 8: Dibujar en la cartulina roja con la ayuda del lápiz crayón nuestro logo HIVE, seguidamente dibujamos un corazón pequeño en la cartulina roja, luego recortamos.
•PASO 9: En este último paso, pegamos el logo y el corazón en el centro de la caja.


All photos are my own, edited in PhotoScape, translator used: DeepL.
Congratulations @deivisperez! You have completed the following achievement on the Hive blockchain and have been rewarded with new badge(s) :
Your next target is to reach 2000 upvotes.
You can view your badges on your board and compare yourself to others in the Ranking
If you no longer want to receive notifications, reply to this comment with the word
STOPCheck out the last post from @hivebuzz:
Support the HiveBuzz project. Vote for our proposal!