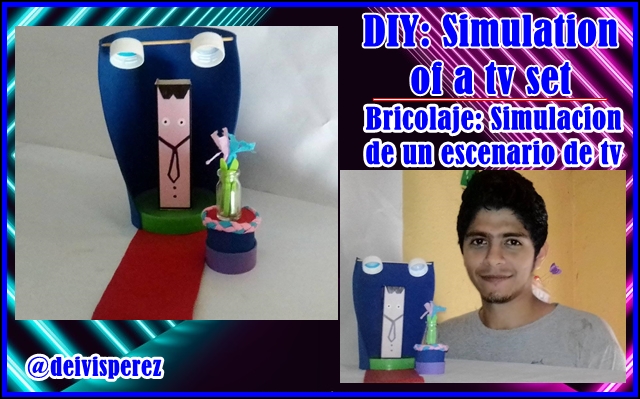
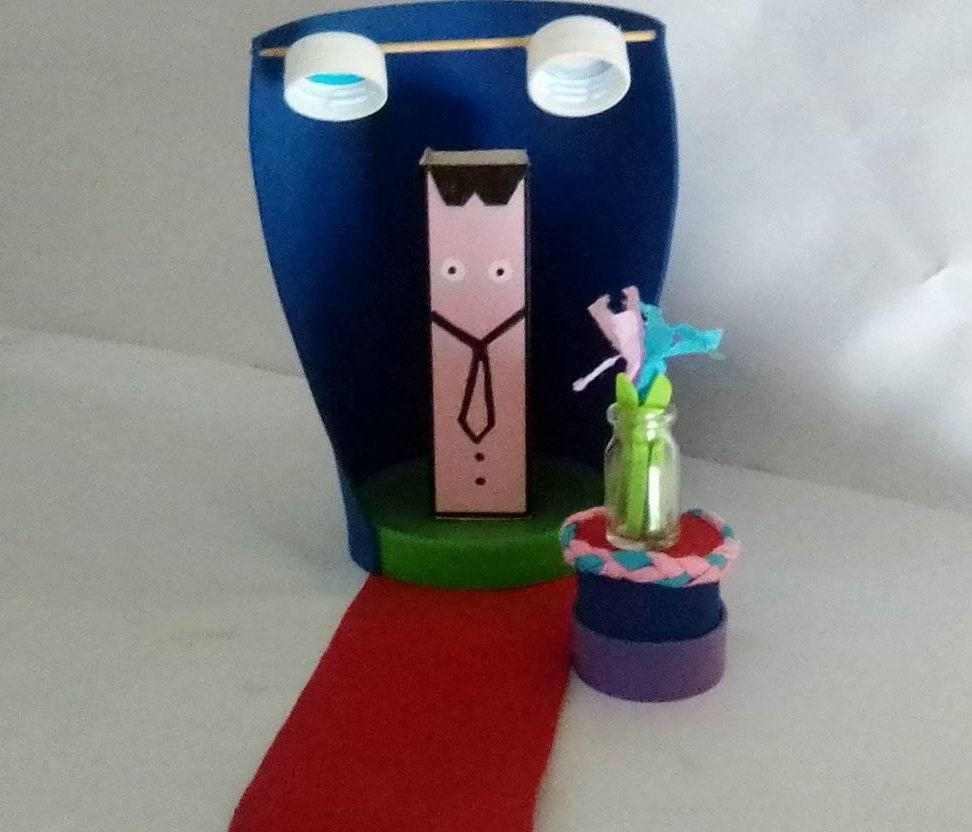
This day I want to present you this beautiful and elegant simulation of a television set made with useful material.
Saludos amigos creadores HIVERS, mis buenos deseos para todos ustedes.
Este día quiero presentarte esta bonita y elegante simulación de un escenario de televisión realizado con material de provecho.

•Large plastic lid.
•Small cardboard box.
•3 small plastic lids.
•Mini glass container.
•Foami: blue, purple, green.
•Crepe paper: pink, blue.
•Scissors.
•High toothpick.
•Red cardboard.
•Black marker.
•Crayon pencil.
•1 Tapa de plástico grande.
•Caja de cartón pequeña.
•3 tapas de plástico pequeñas.
•Mini envase de vidrio.
•Foami: azul, morado, verde.
•Papel crepe: Rosa, Azul.
•Tijera.
•Palillo de altura.
•Cartulina color rojo.
•Marcador negro.
•Lápiz Crayón.
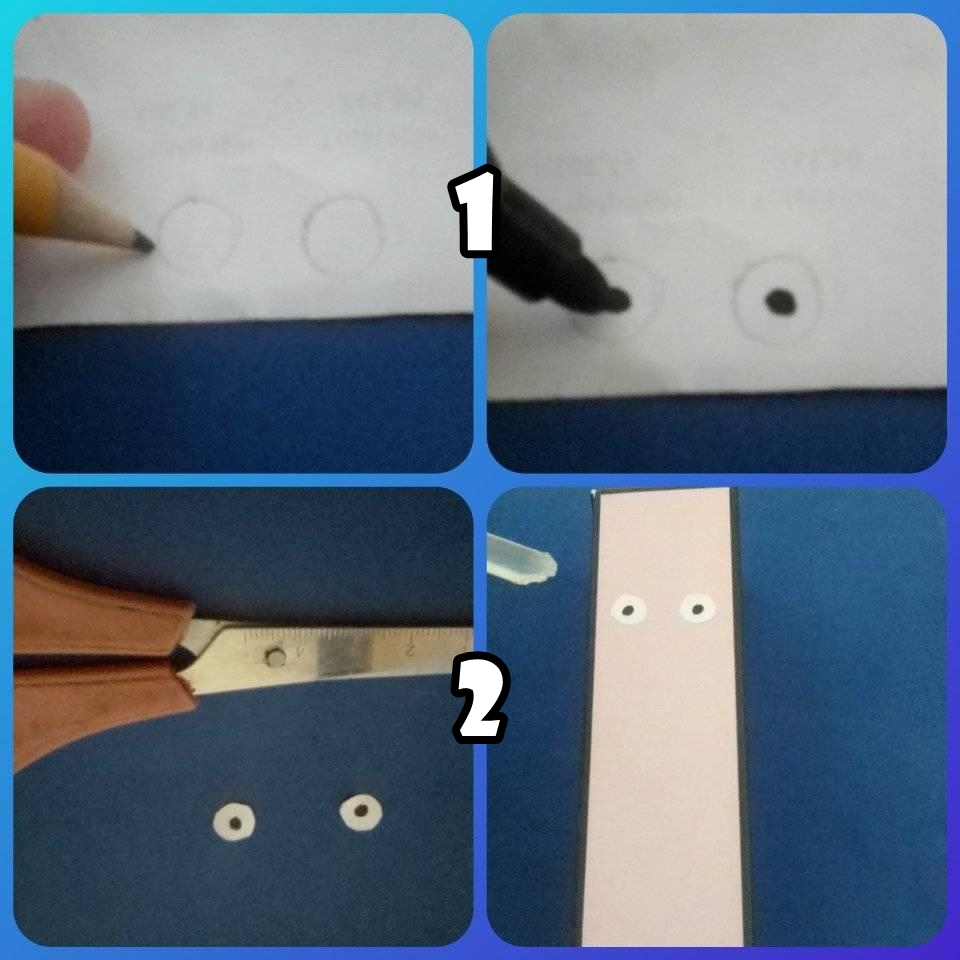
•STEP 1: Draw 2 small eyes on the white paper using the crayon pencil, then inside them draw 2 dots with the black marker.
•STEP 2: With the scissors cut out the 2 eyes we just drew, then glue them both to one side of the box (use silicone).
•PASO 1: Dibujar 2 ojos pequeños en el papel blanco usando el lápiz crayón, luego dentro de los mismos dibujar 2 puntos con el marcador negro.
•PASO 2: Con la tijera recortamos los 2 ojos que acabamos de dibujar, luego pegamos ambos a uno de los lados de la caja (usar silicón).
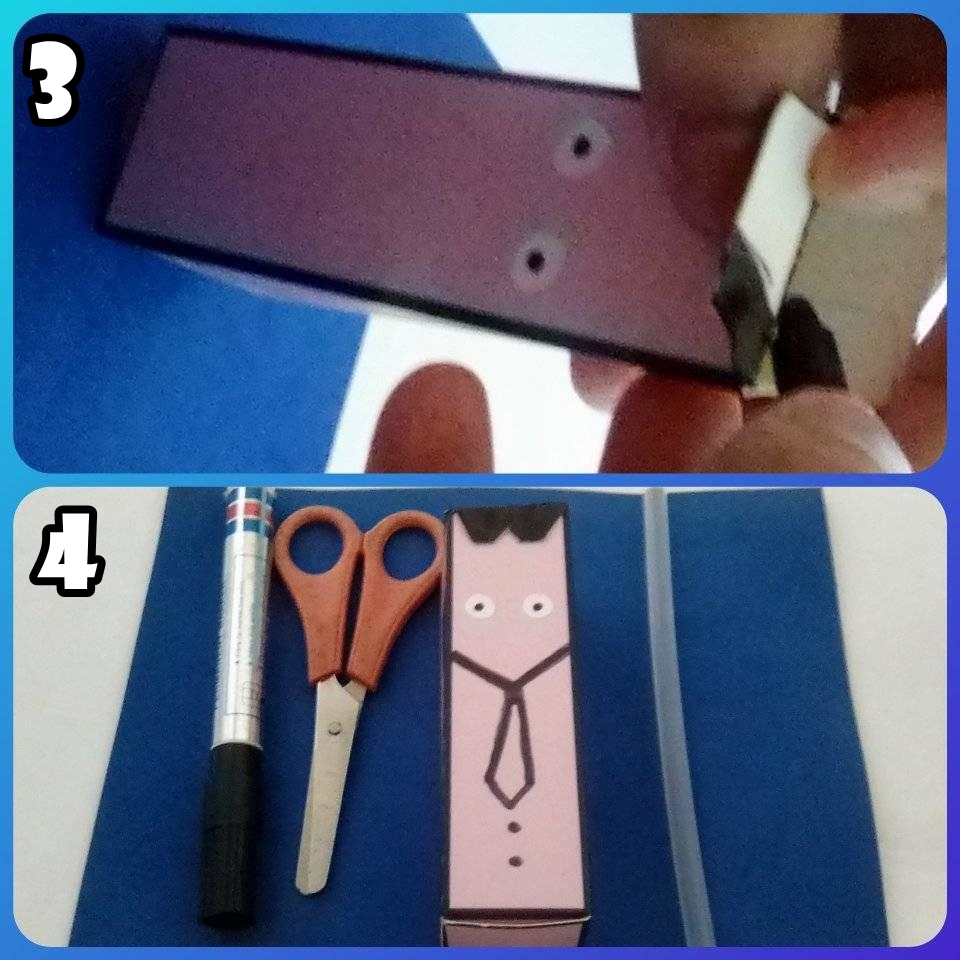
•STEP 3: Now we fold one of the strips left over from the box (the strip that is on the side where we glued the eyes), then we cover it in black with the marker, cut out a small piece in the shape of a triangle in the middle of the strip we just drew.
•STEP 4: Glue the strip to the box, then draw a tie and several buttons simulating a shirt (use the black marker).
•PASO 3: Ahora doblamos una de las tiras que sobran de la caja (la tira que está del lado donde pegamos los ojos), luego la cubrimos de negro con el marcador, recortar un trozo pequeño en forma de triángulo en medio de la tira que acabamos de dibujar.
•PASO 4: Pegamos la tira a la caja, luego dibujamos una corbata y varios botones simulando una camisa (usar el marcador negro)
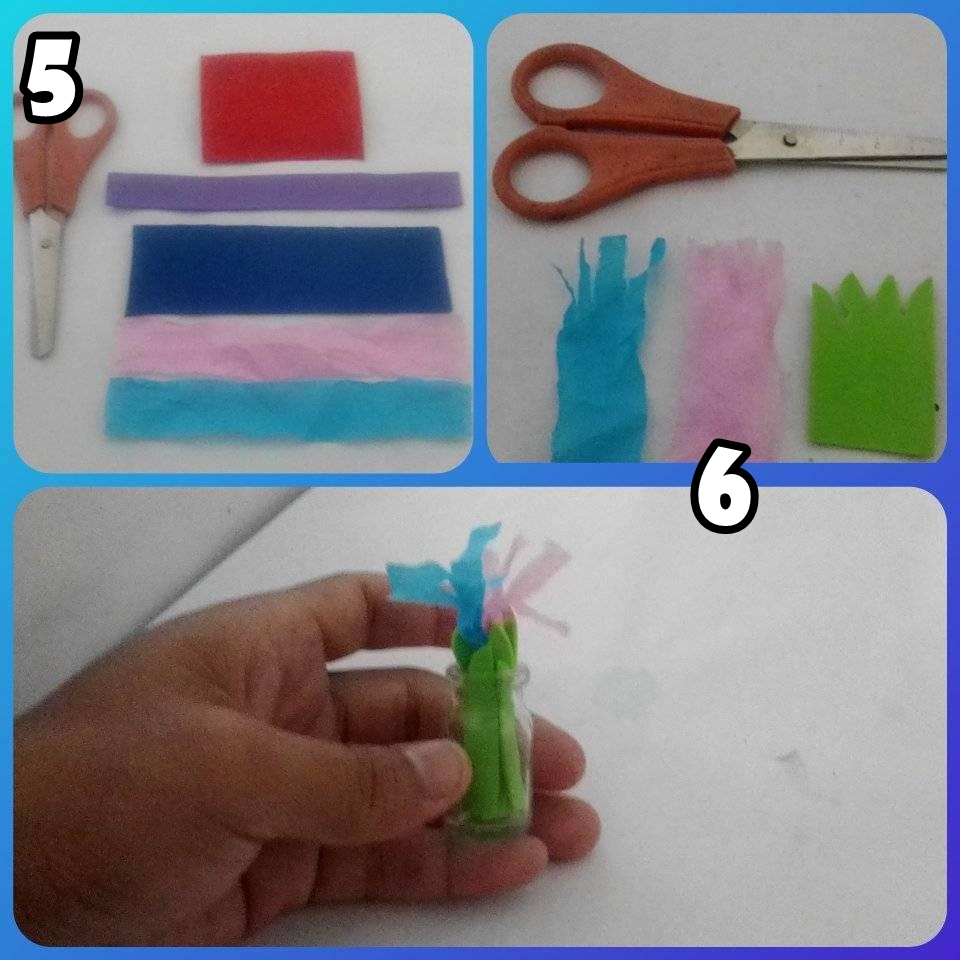
•STEP 5: Cut out: a 4x4 centimeter square of red cardboard, 18x2 centimeters of purple foami, 18x5 centimeters of blue foami, 19x2 centimeters of pink and blue crepe paper.
•STEP 6: Cut out: a 4x4 piece of green foami, then we cut out again forming several thin strips (do this with the crepe paper), then we introduce it into the mini glass jar simulating a vase with flowers.
•PASO 5: Recortar: un cuadro de 4x4 centímetros de cartulina roja, 18x2 centímetros de foami color morado, 18x5 centímetros de foami color azul, 19x2 centímetros de papel crepe color rosa y color azul.
•PASO 6: Recortar: un trozo de 4x4 de foami verde, luego volvemos a recortar formando varias tiras delgadas (hacer esto con el papel crepe), luego lo introducimos en el mini frasco de vidrio simulando un jarrón con flores.
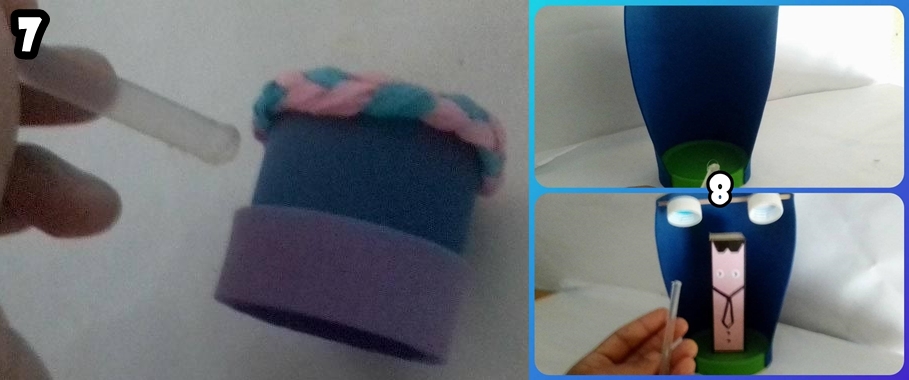
•STEP 7: Glue the blue foami strip forming a circle, then glue the purple strip also forming a circle, then we intertwine the pink and blue crepe paper strips forming a braid, this we glue it on top of the purple foami forming a circle (this will be a table).
•STEP 8: Glue with silicone the big lid to one of the ends of the blue foami simulating a wall, then glue 2 small lids to the high stick, glue the stick to the foami that simulates a stop, then glue the box in the shape of a doll to the big lid.
•PASO 7: Pegamos la tira de foami azul formando un circulo, luego pegamos encima la tira color morado también formando un circulo, seguidamente entrelazamos las tiras de papel crepe rosa y azul formando una trenza, esta mis la pegamos encima del foami morado formando un circulo (esta será una mesa).
PASO 8: Pegar con silicón la tapa grande a uno de los extremos del foami azul simulando una pared, seguidamente pegamos 2 tapas pequeñas al palillo de altura, el palillo lo pegamos a el foami que simula pare, luego pegamos la caja en forma de muñeco a la tapa grande.
All photos are my own, edited in PhotoScape, translator used: DeepL.