Bendiciones amigos de Hive, espero se encuentren bien! En ésta oportunidad traigo para ustedes un tutorial de cómo diseñar una manzana en madera de forma sencilla y práctica
Blessings Hive friends, I hope you are well! This time I bring you a tutorial on how to design a wooden apple in a simple and practical way
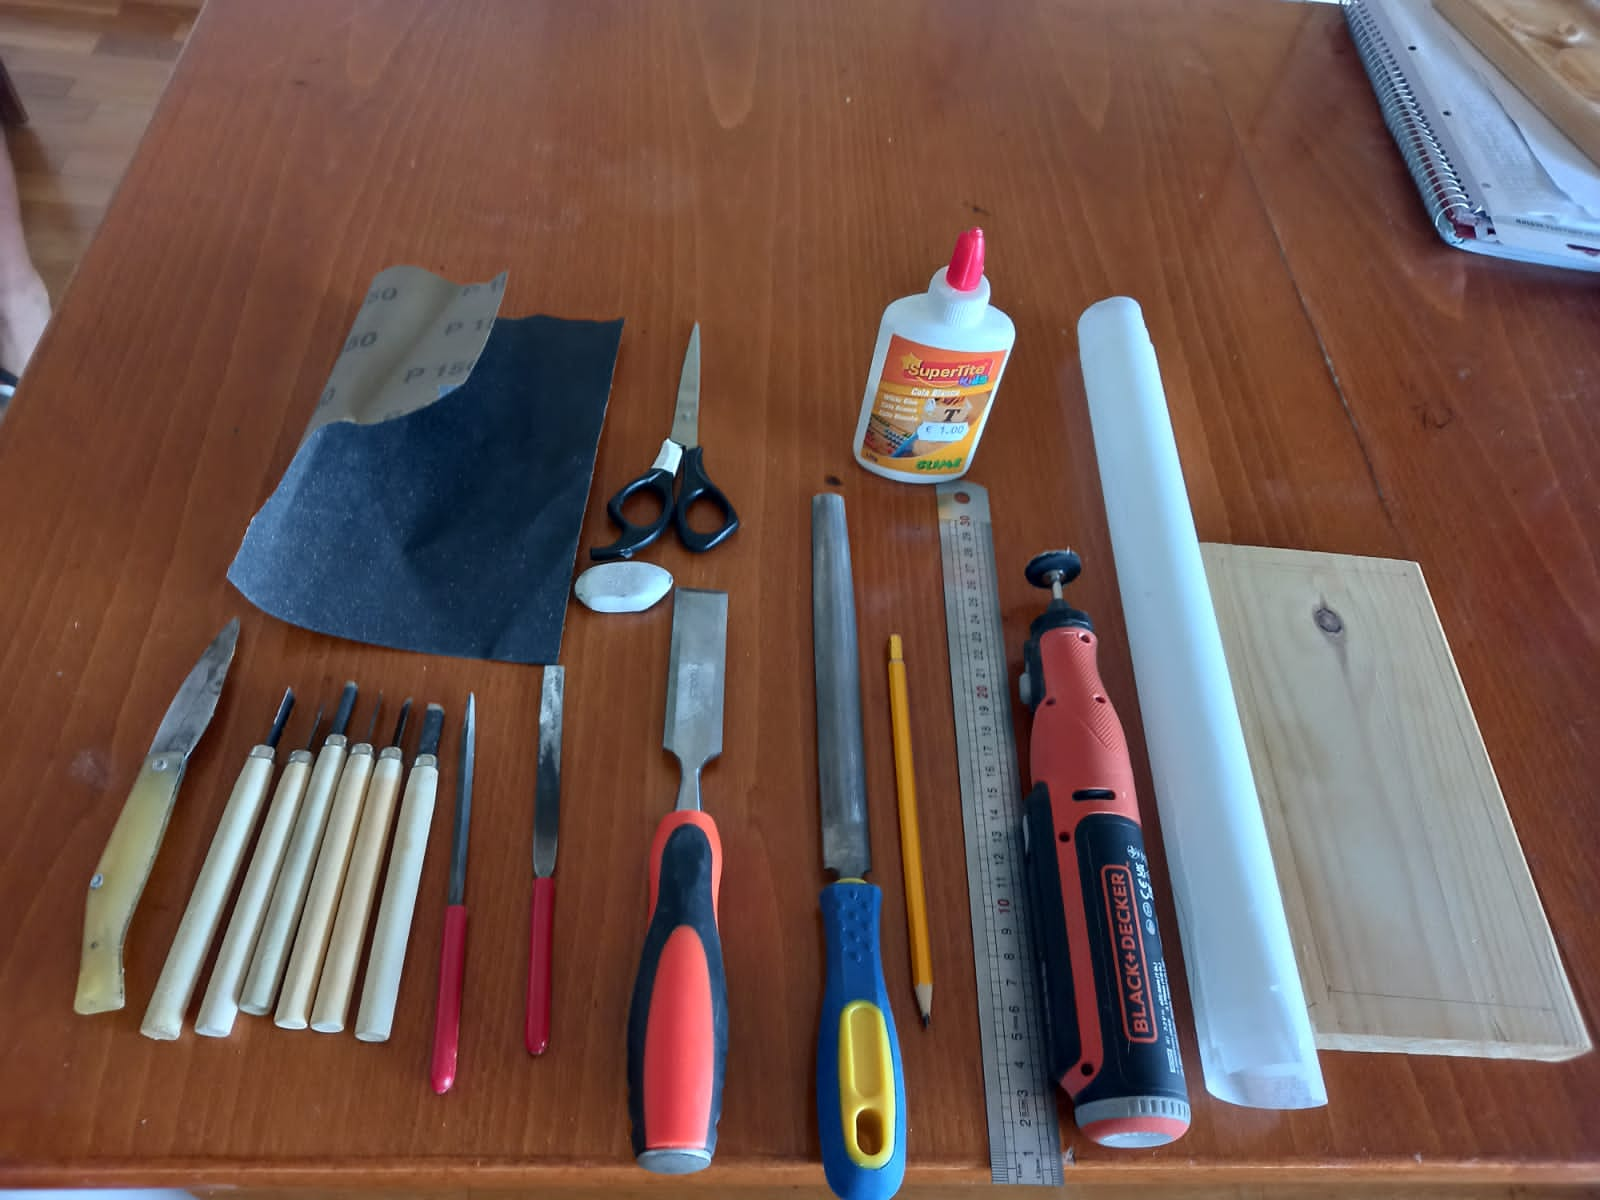
Los materiales utilizados son cómo siguen:
-Madera
-Papel
-Dremel
-Regla
-Pega
-Lima
-Tijera
-Navaja
-Borrador
-Lija
-Bujias de diferentes tamaños
The materials used are as follows:
- Wood
- Paper
- Dremel
- Rule
- Job
- Lime
- Scissor
- Razor
- Eraser
- Sandpaper
- Spark plugs of different sizes
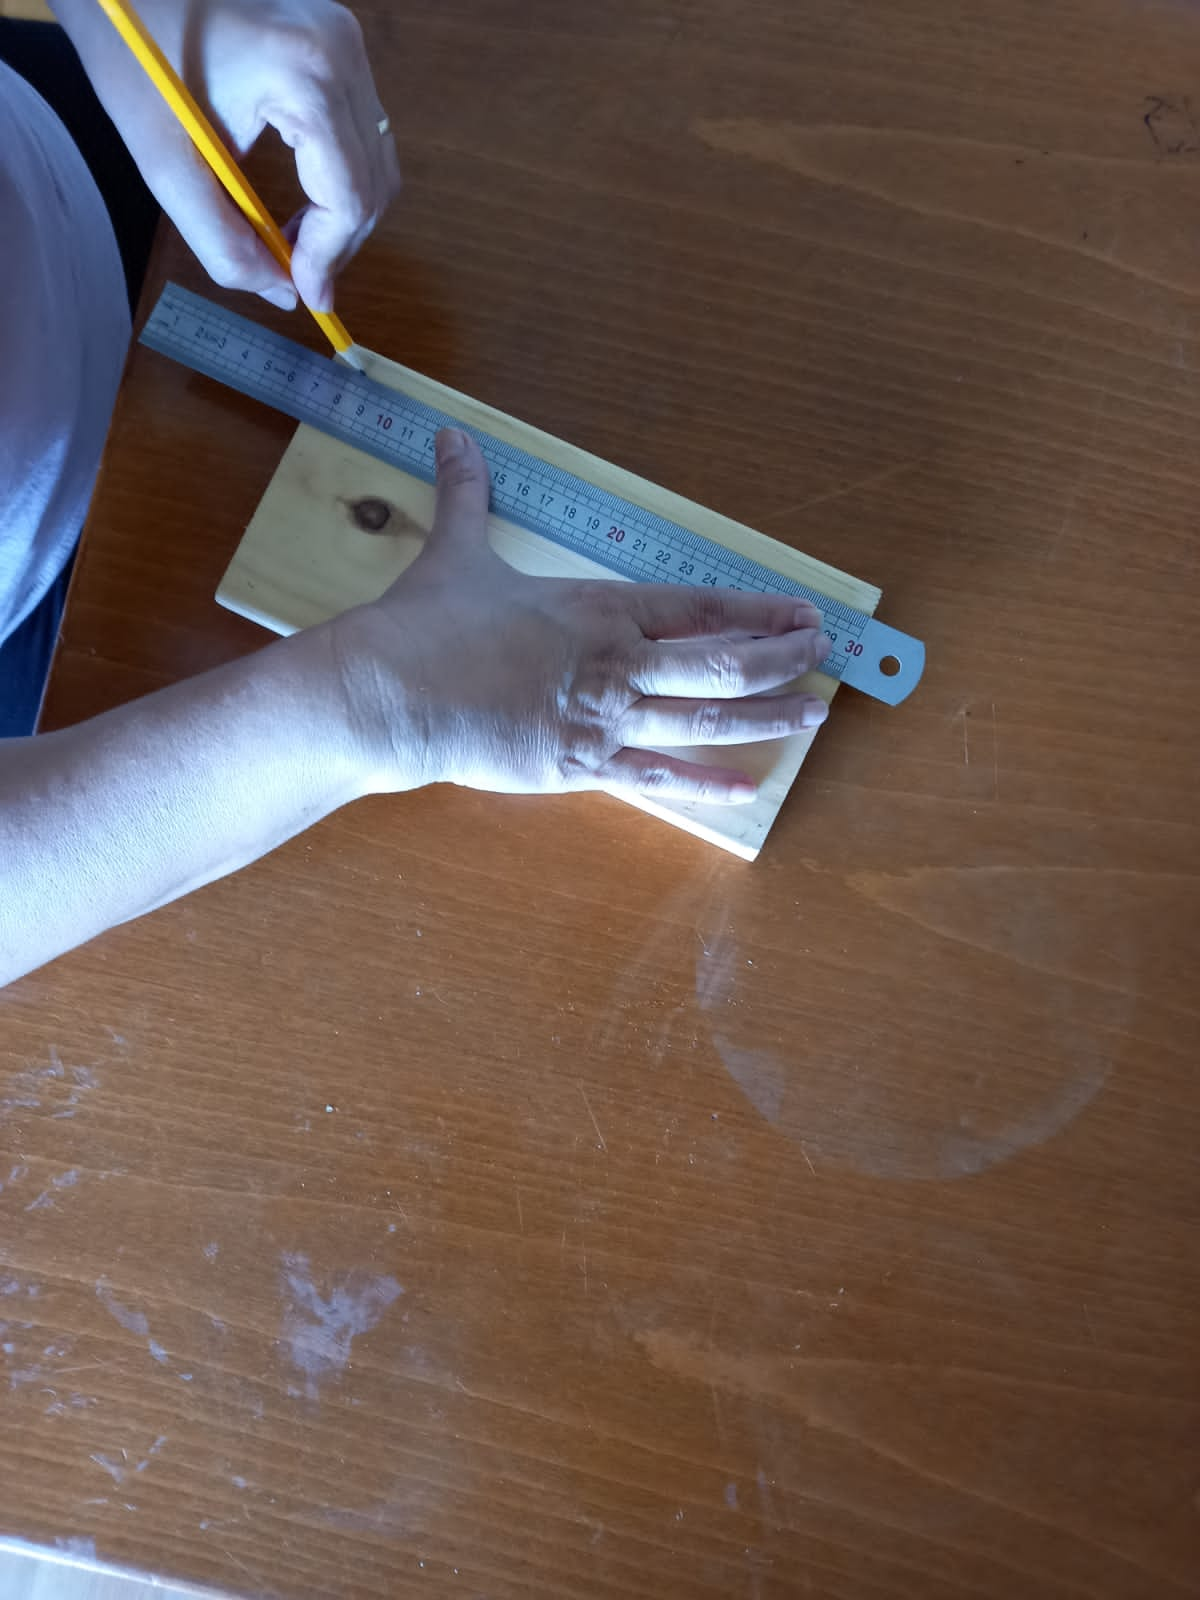
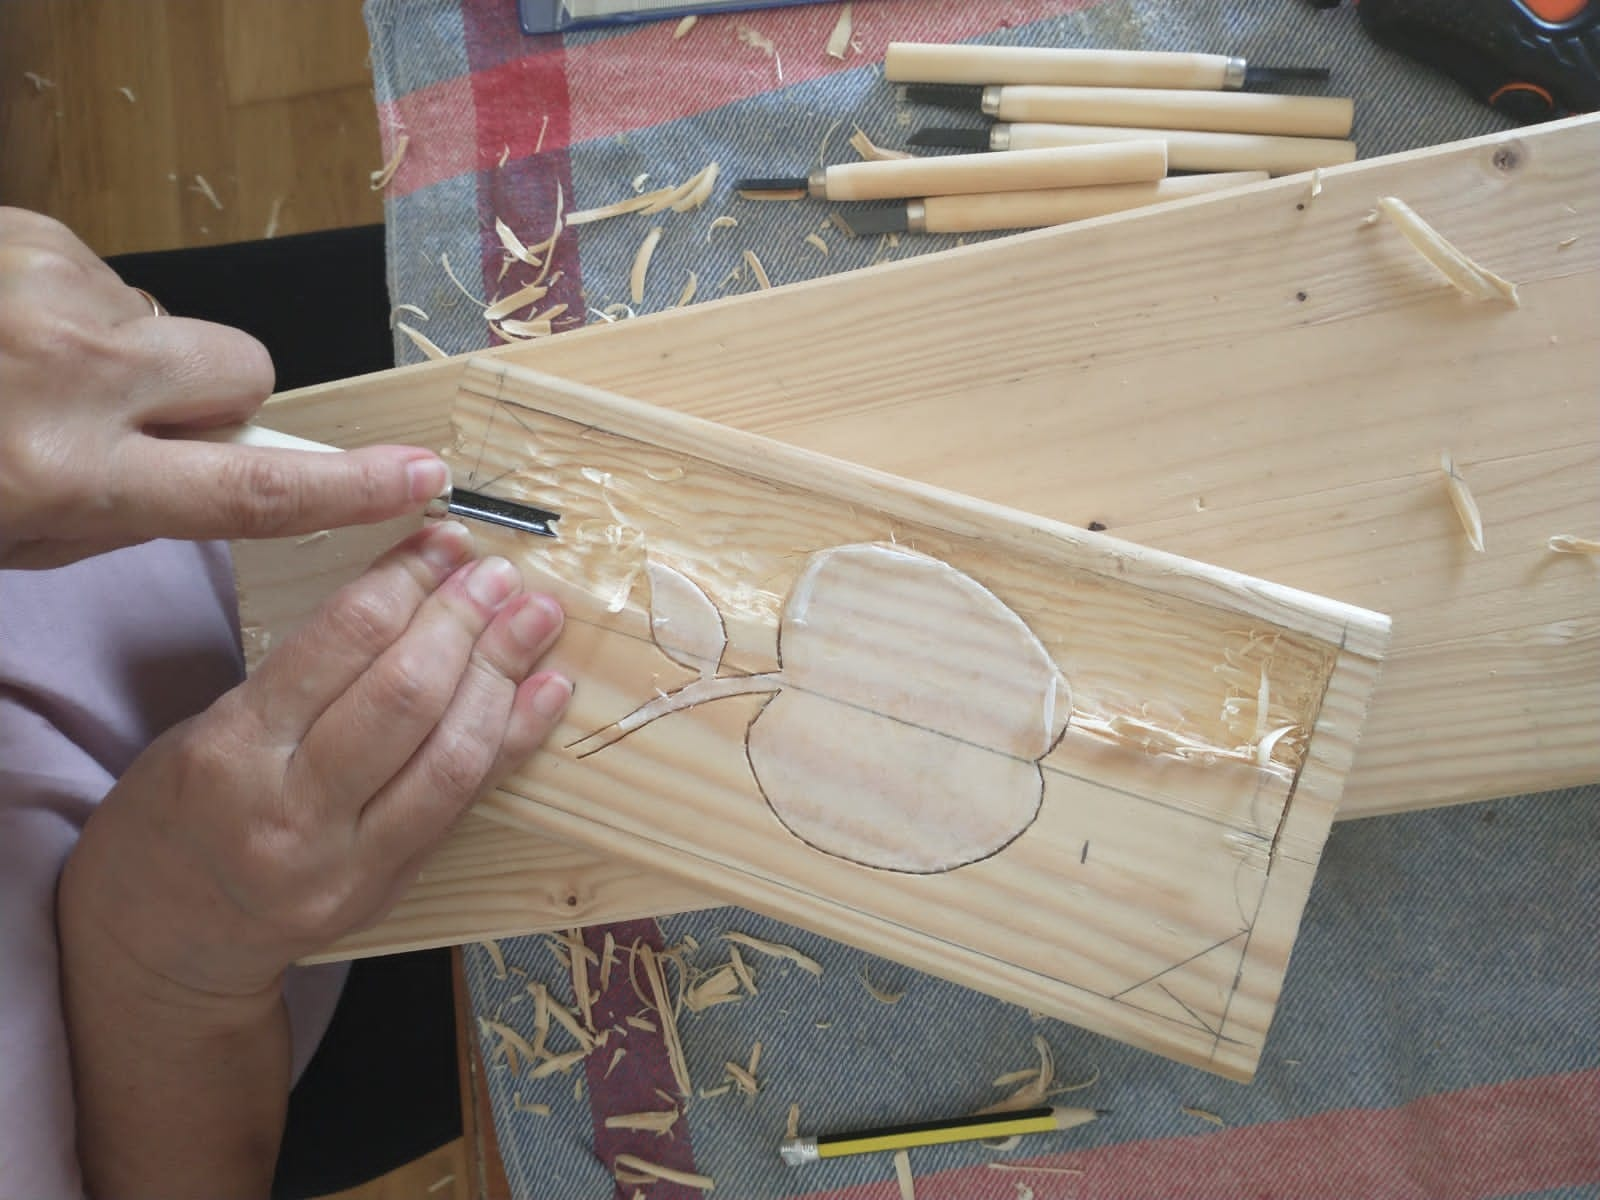
El primer paso será tomarle una medida al cuadro de 1cm el cual nos permitirá obtener el marco del cuadro
The first step will be to take a measurement of the painting of 1cm which will allow us to obtain the frame of the painting
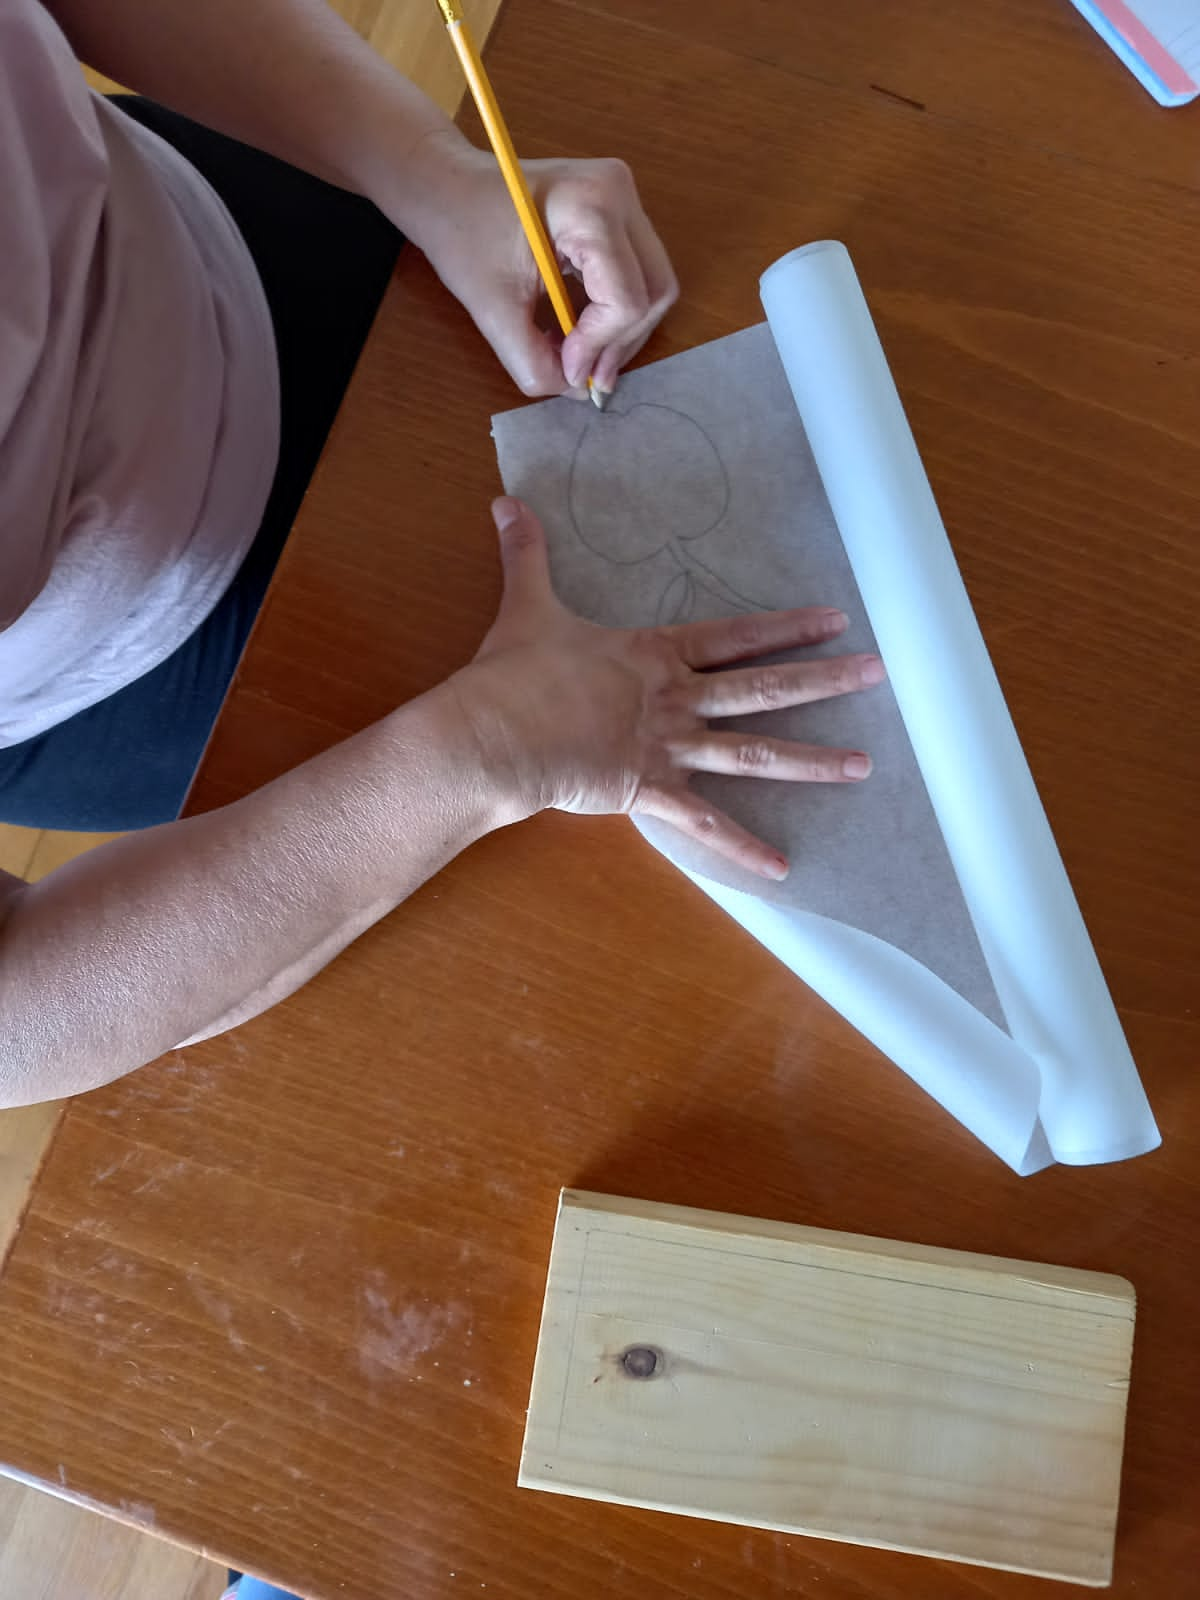
Ahora dibujamos una manzana en una hoja, la recortamos y pegamos en la madera para obtener el diseño perfecto
Now we draw an apple on a sheet, cut it out and glue it on the wood to get the perfect design
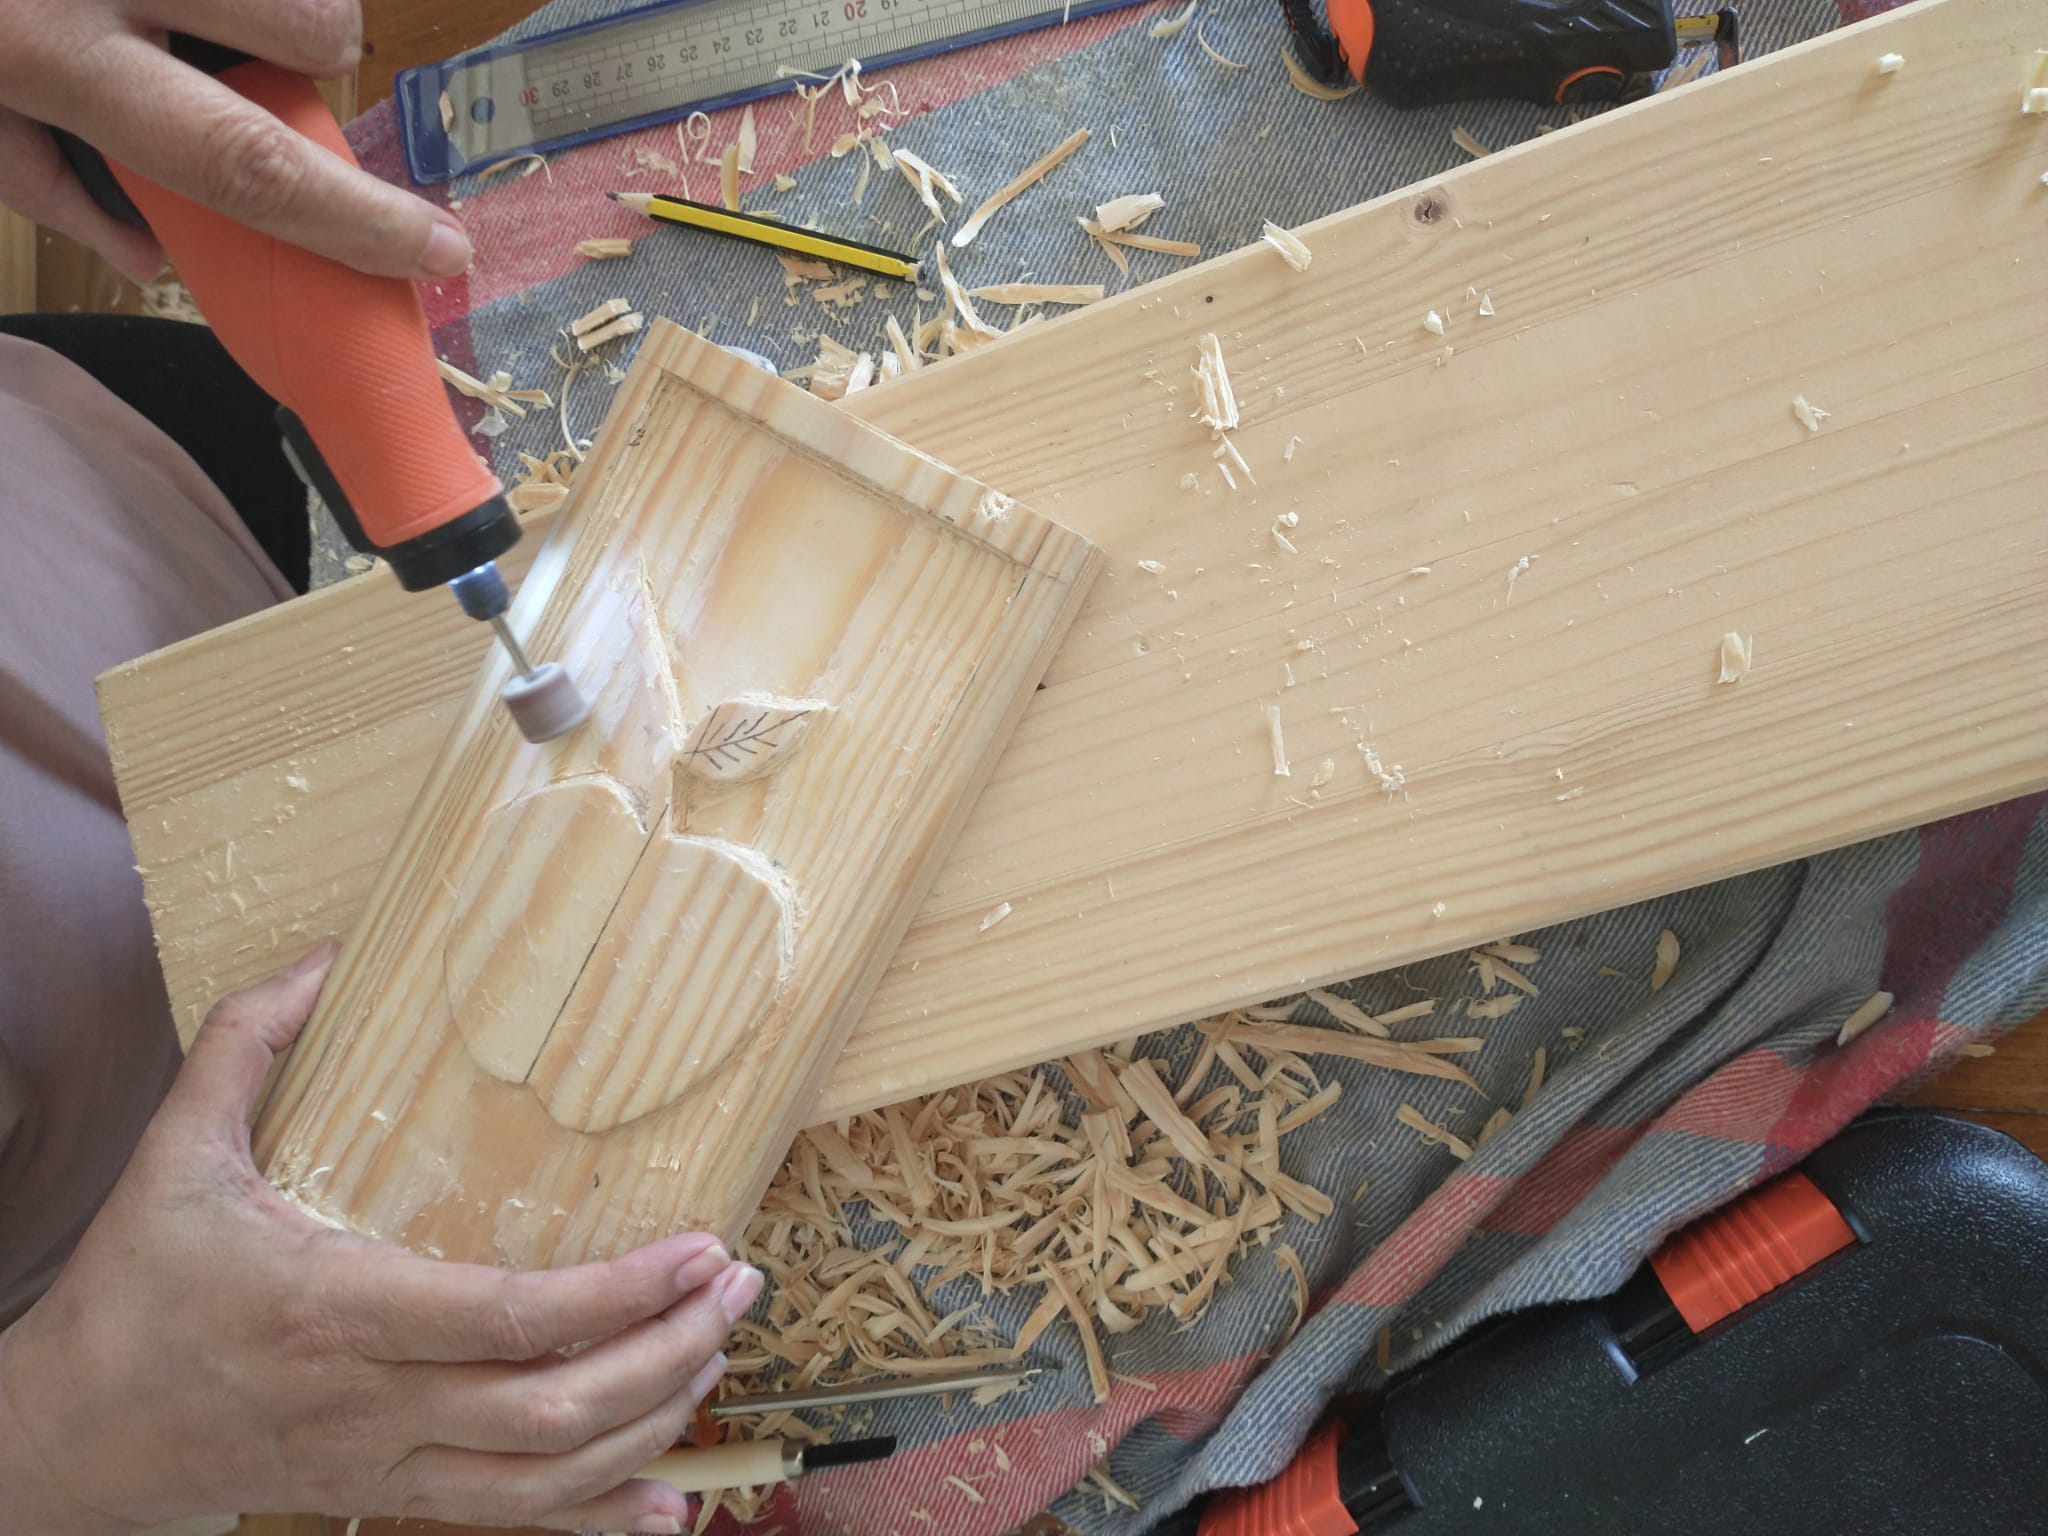
El tercer paso será tallar la madera, para sacar el cuadro y el diseño del dibujo que hemos plasmado en papel.
The third step will be to carve the wood, to get the painting and the design of the drawing that we have captured on paper.
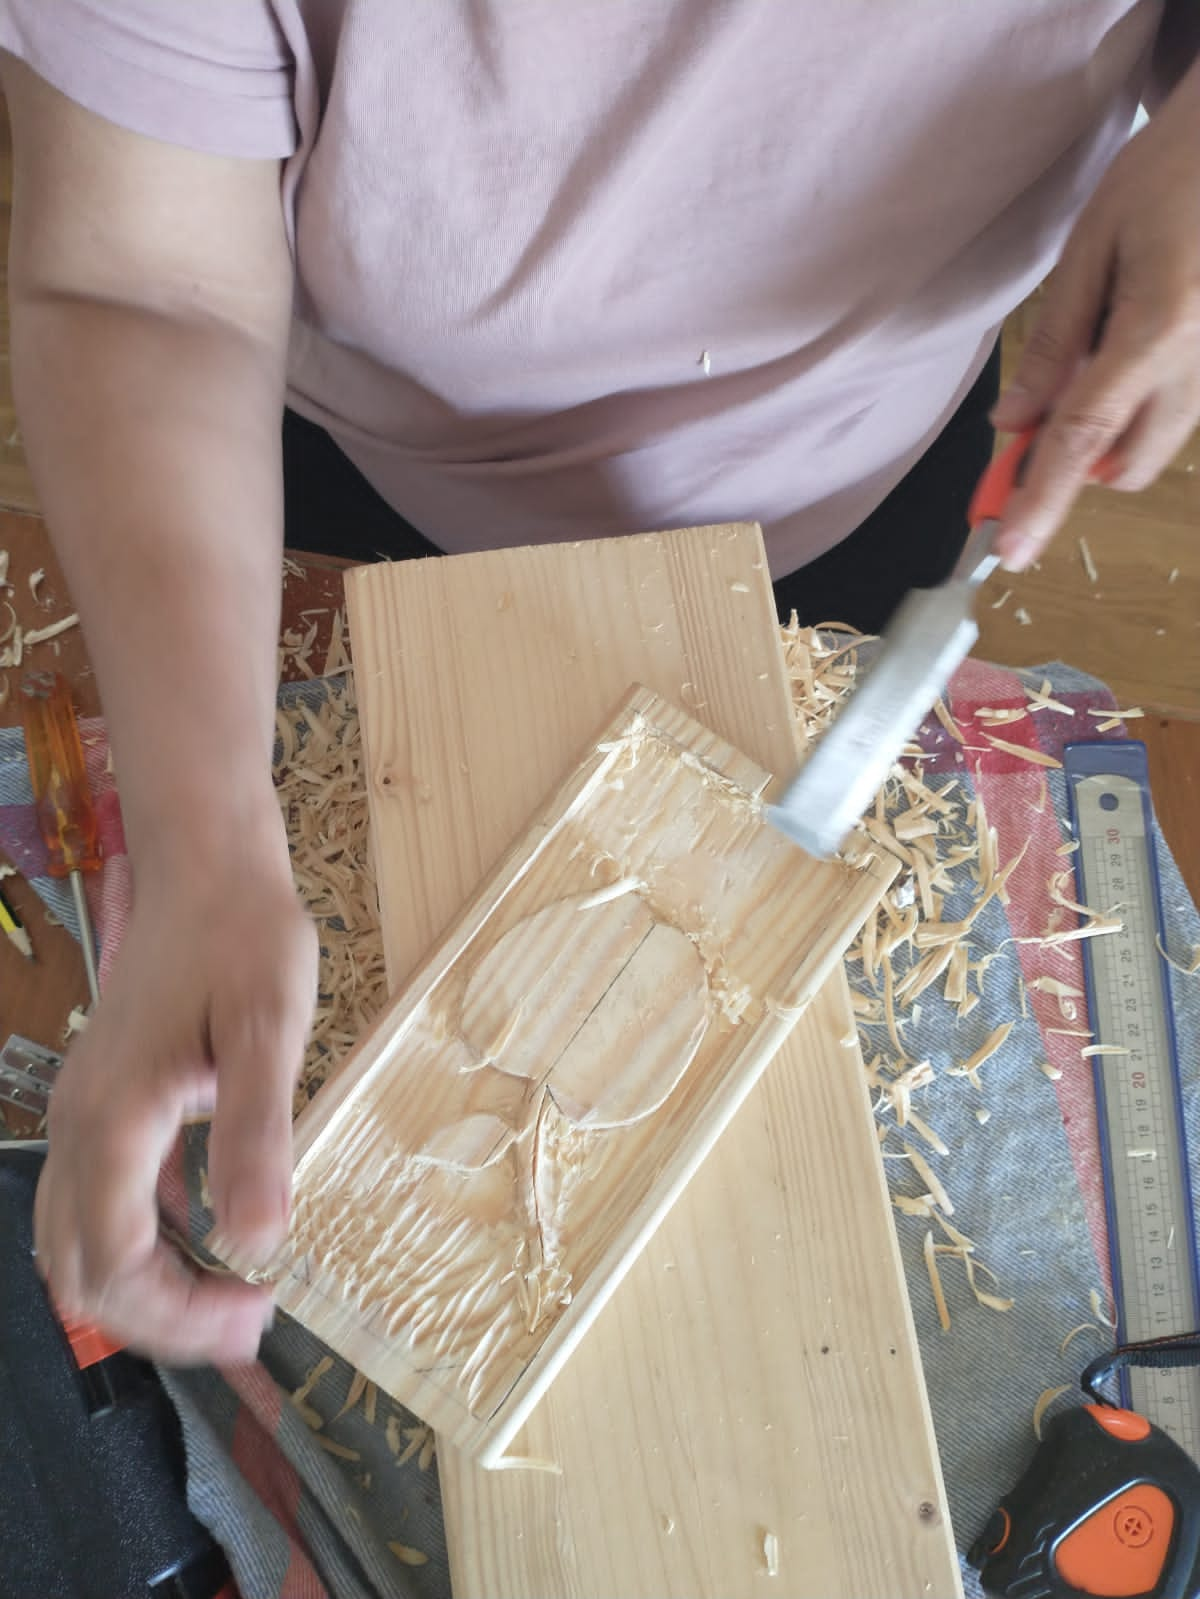
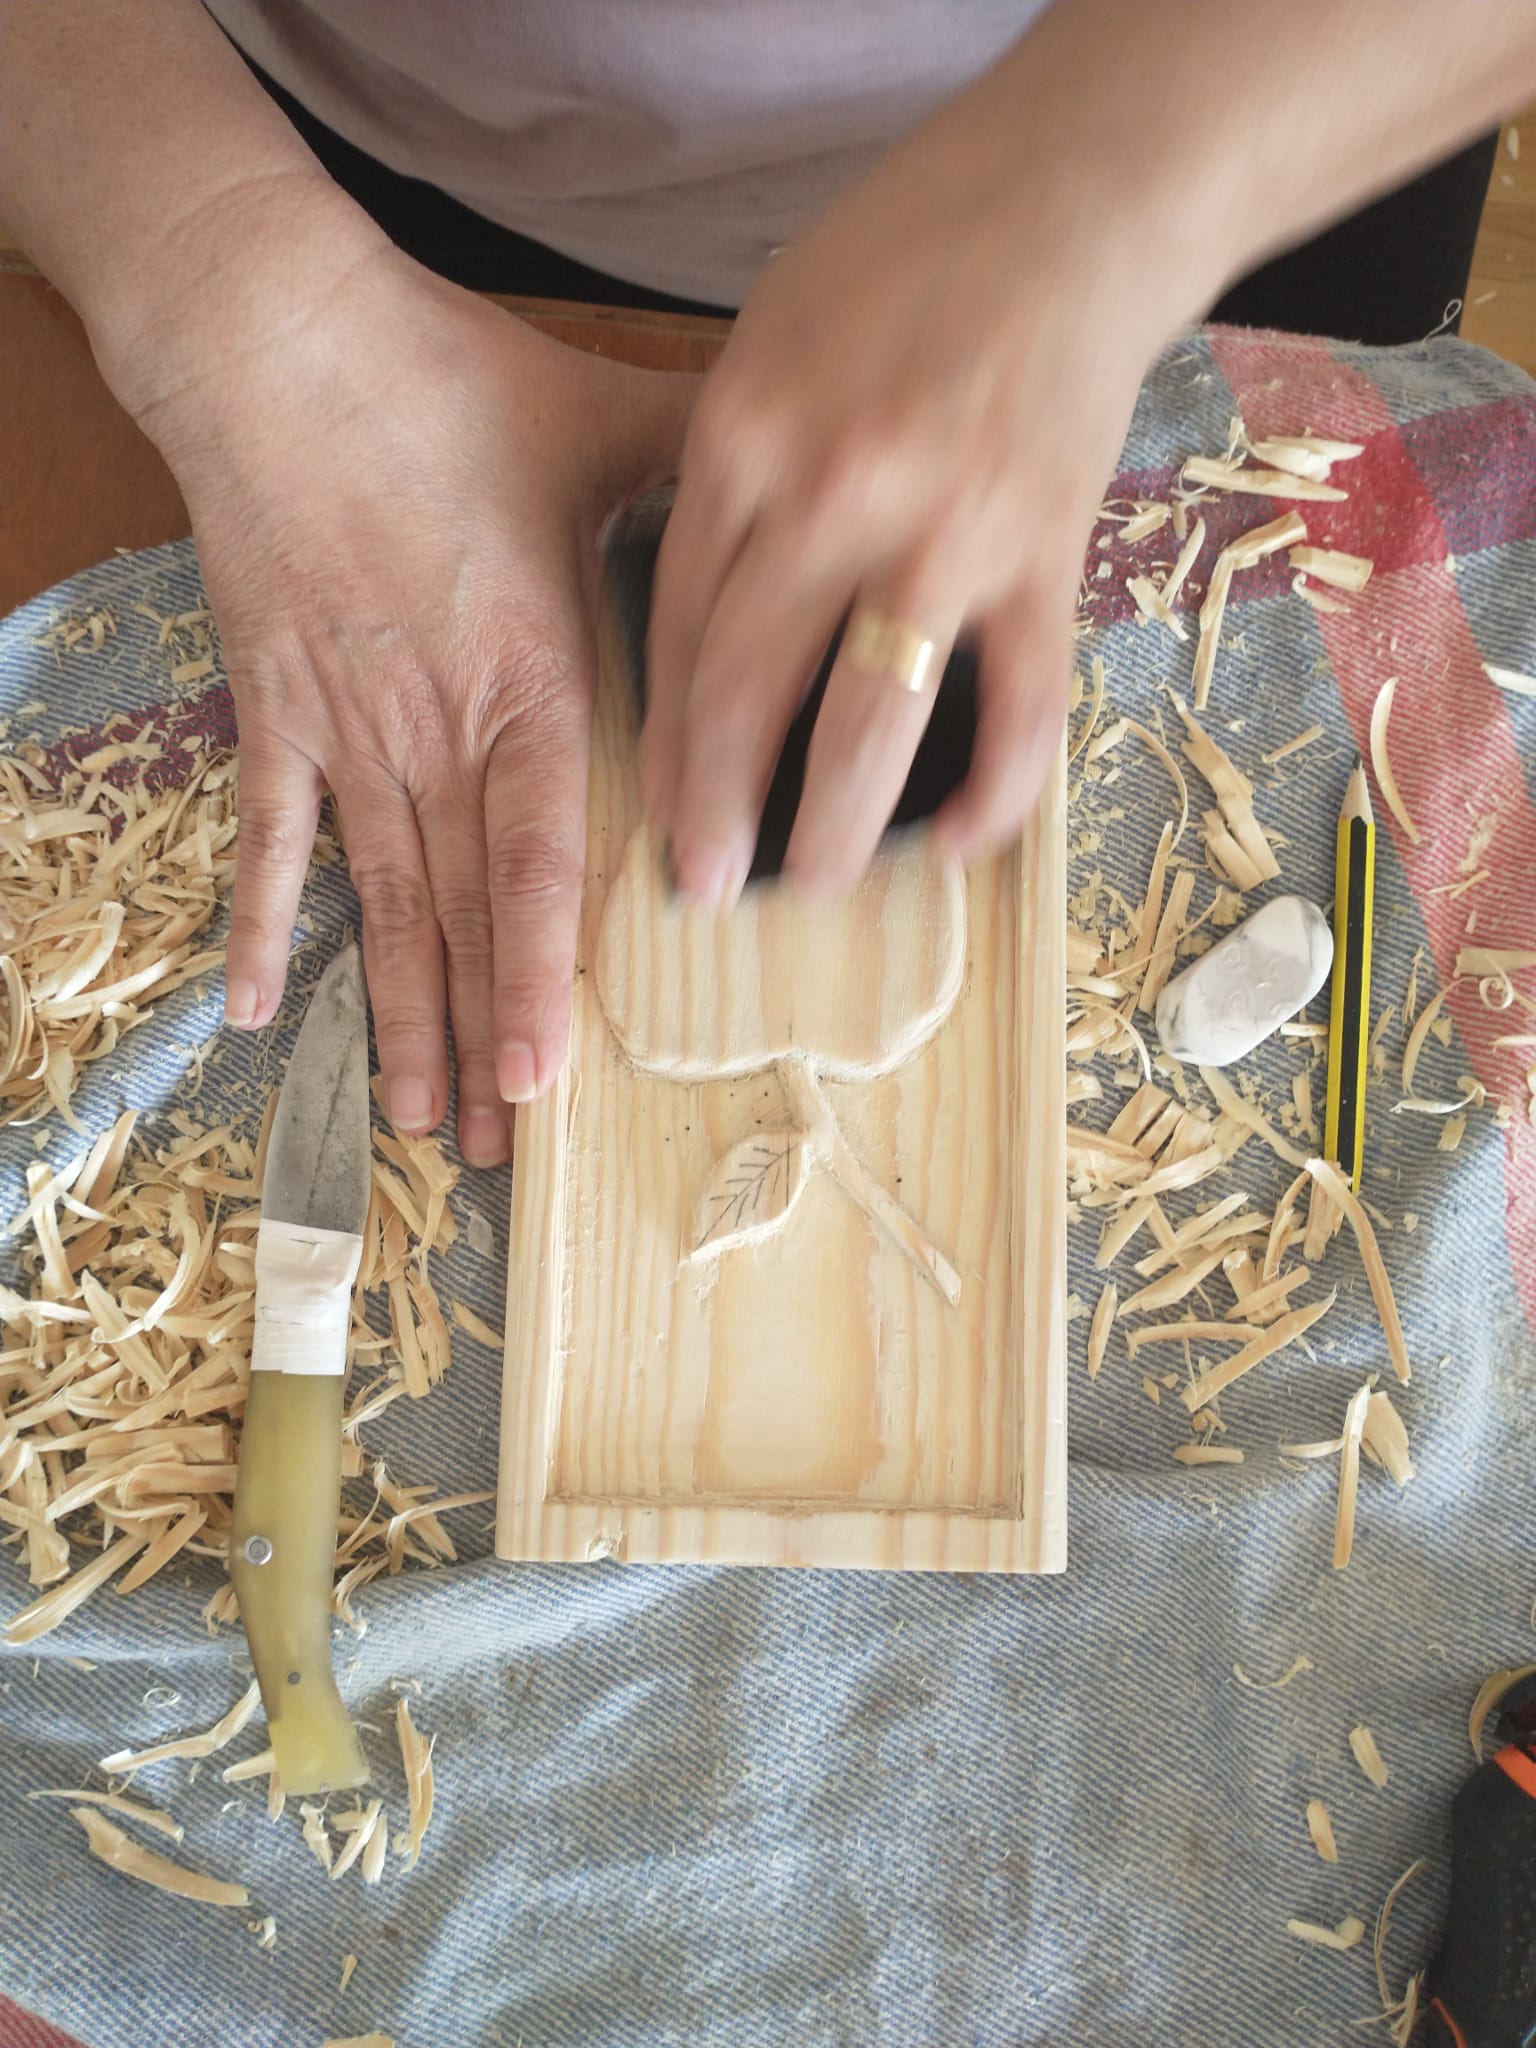
Ya terminado el trabajo de tallar, perfeccionamos un poco algún detalle del dibujo.
Once the carving work is finished, we refine some detail of the drawing a little.
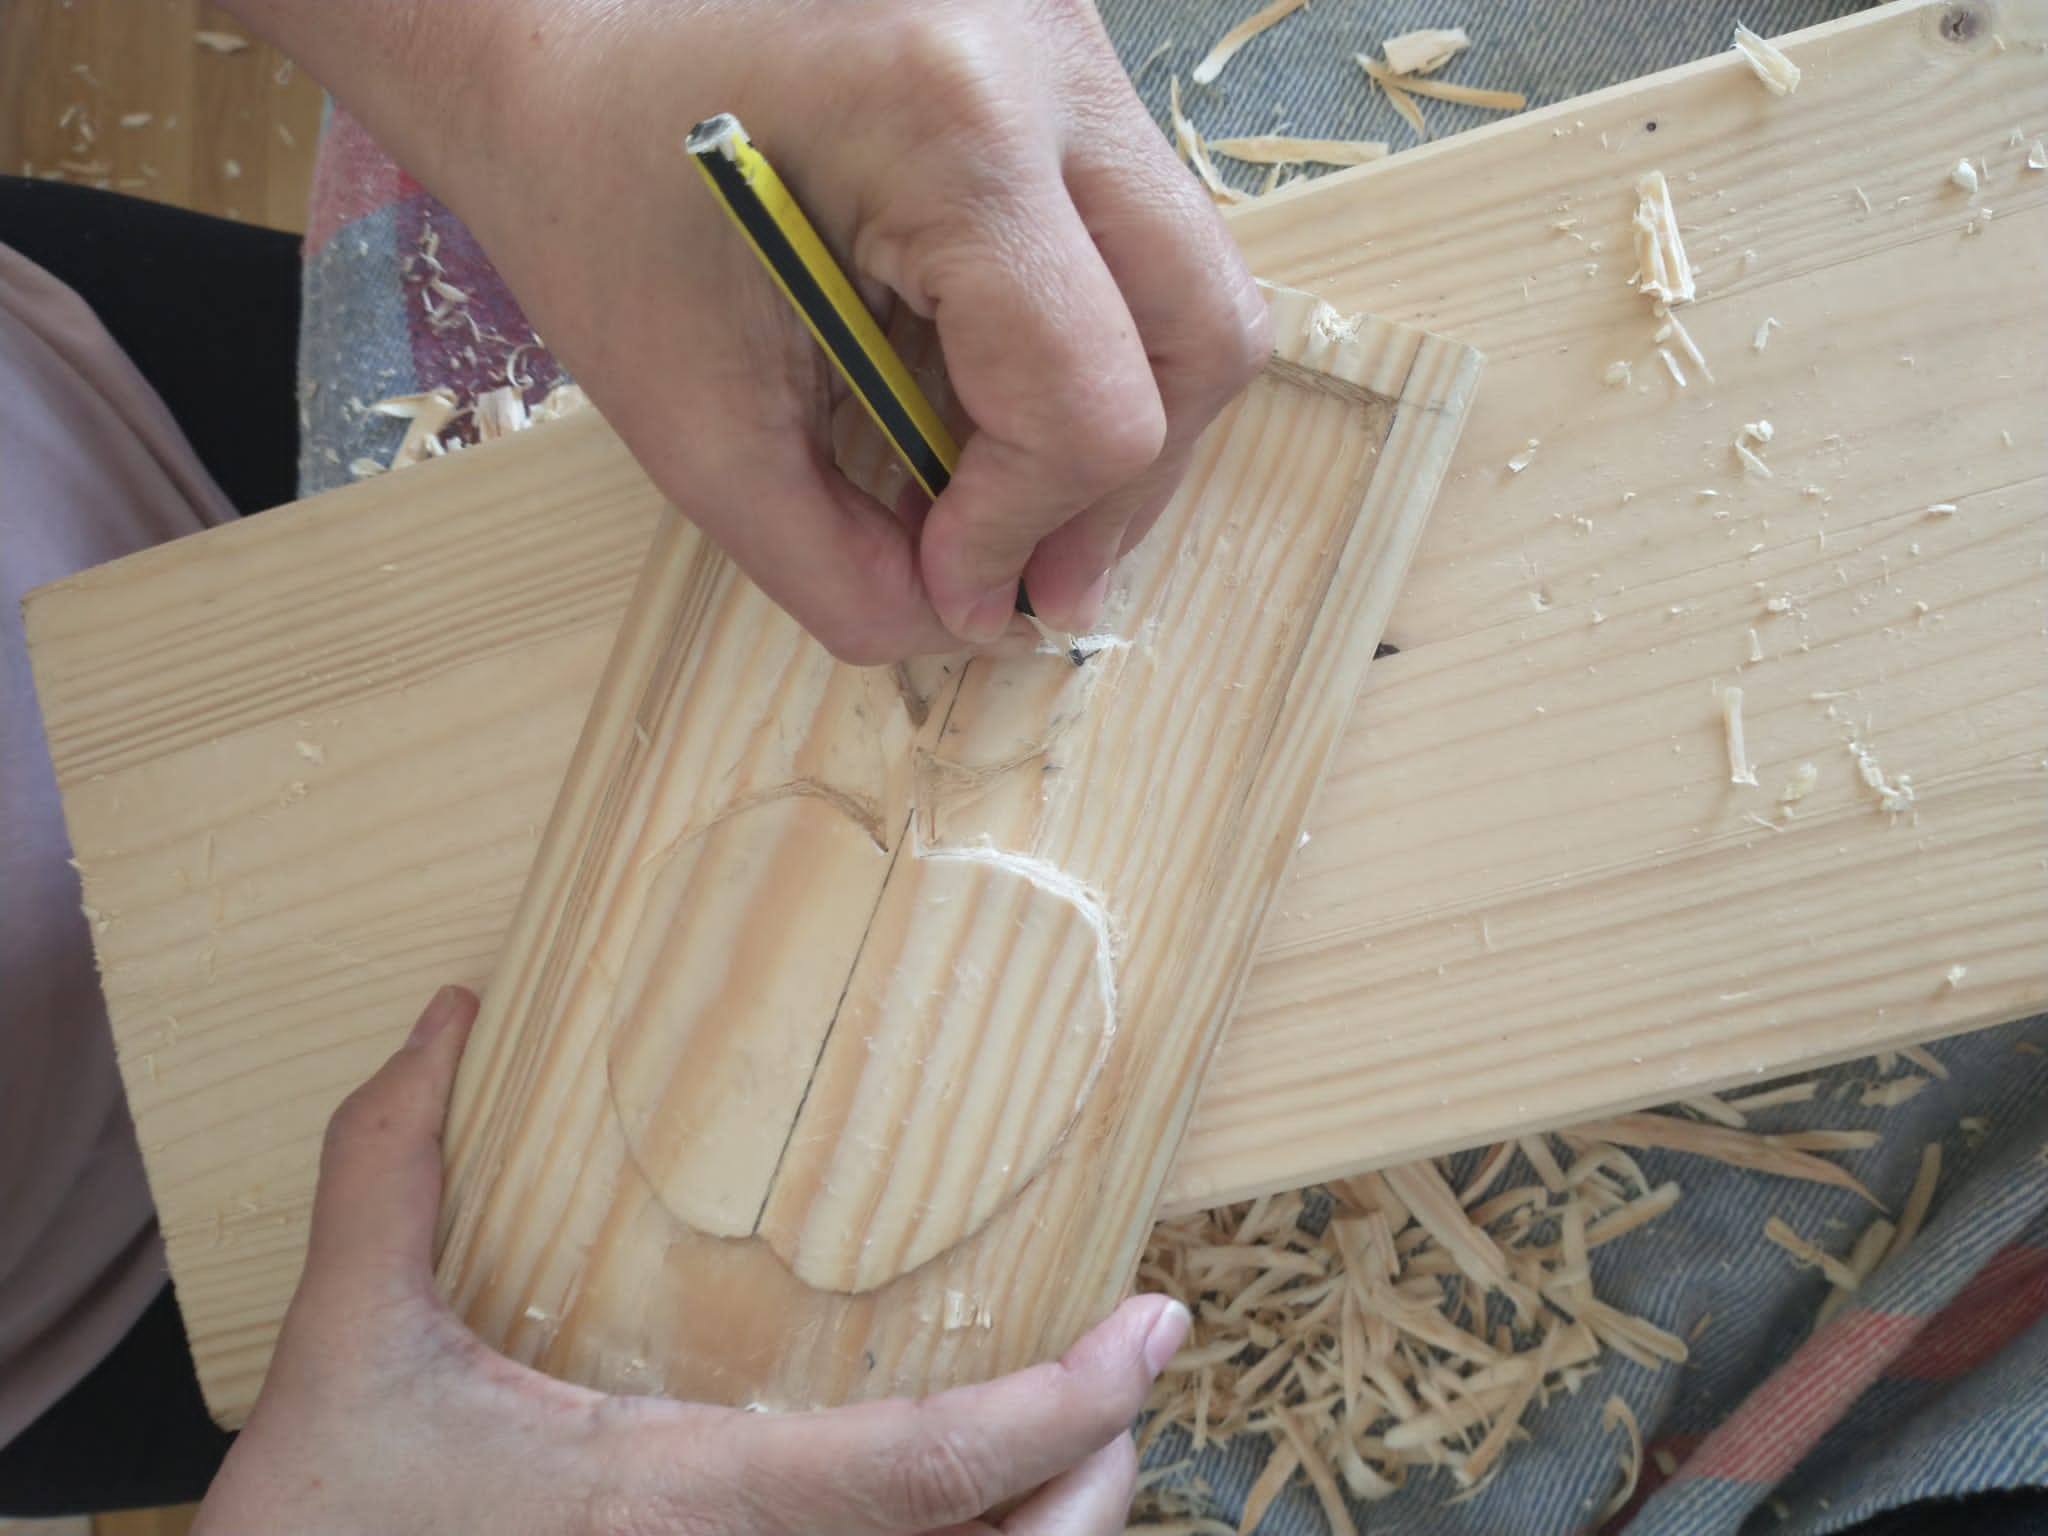
Continuamos usando el dramel para quitarle todos los defectos al contorno de lo diseñado.
We continue using the dramel to remove all the defects from the outline of the design.
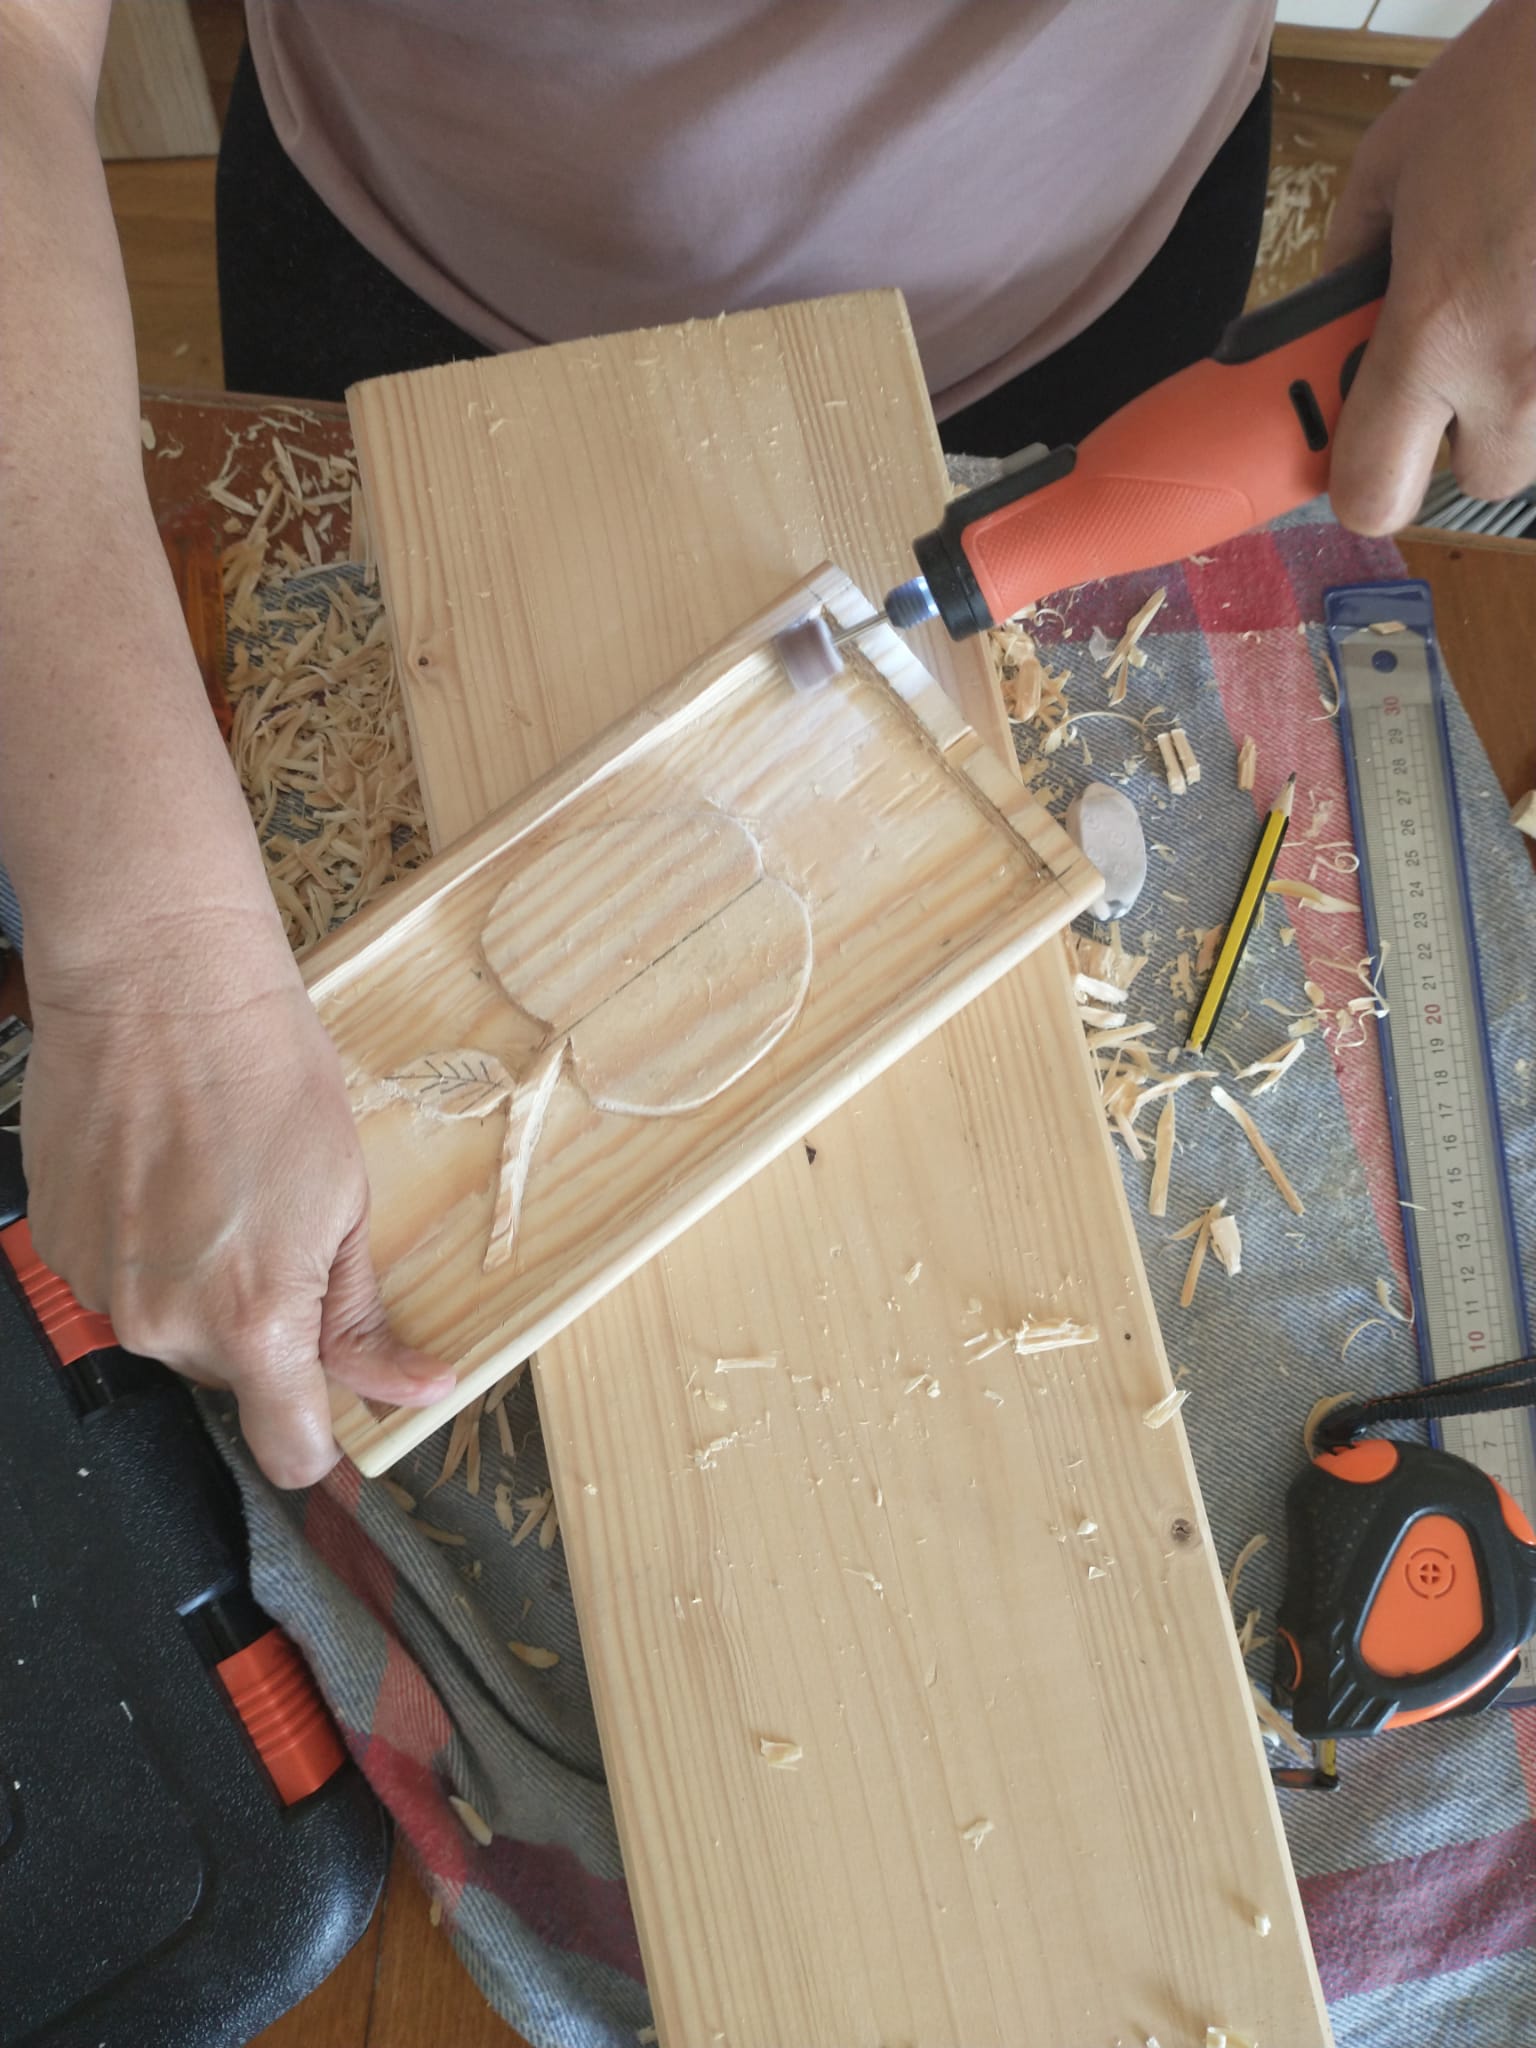
Ahora lijamos toda la pieza, para quitar lo poroso.
Now we sand the entire piece, to remove the porous.
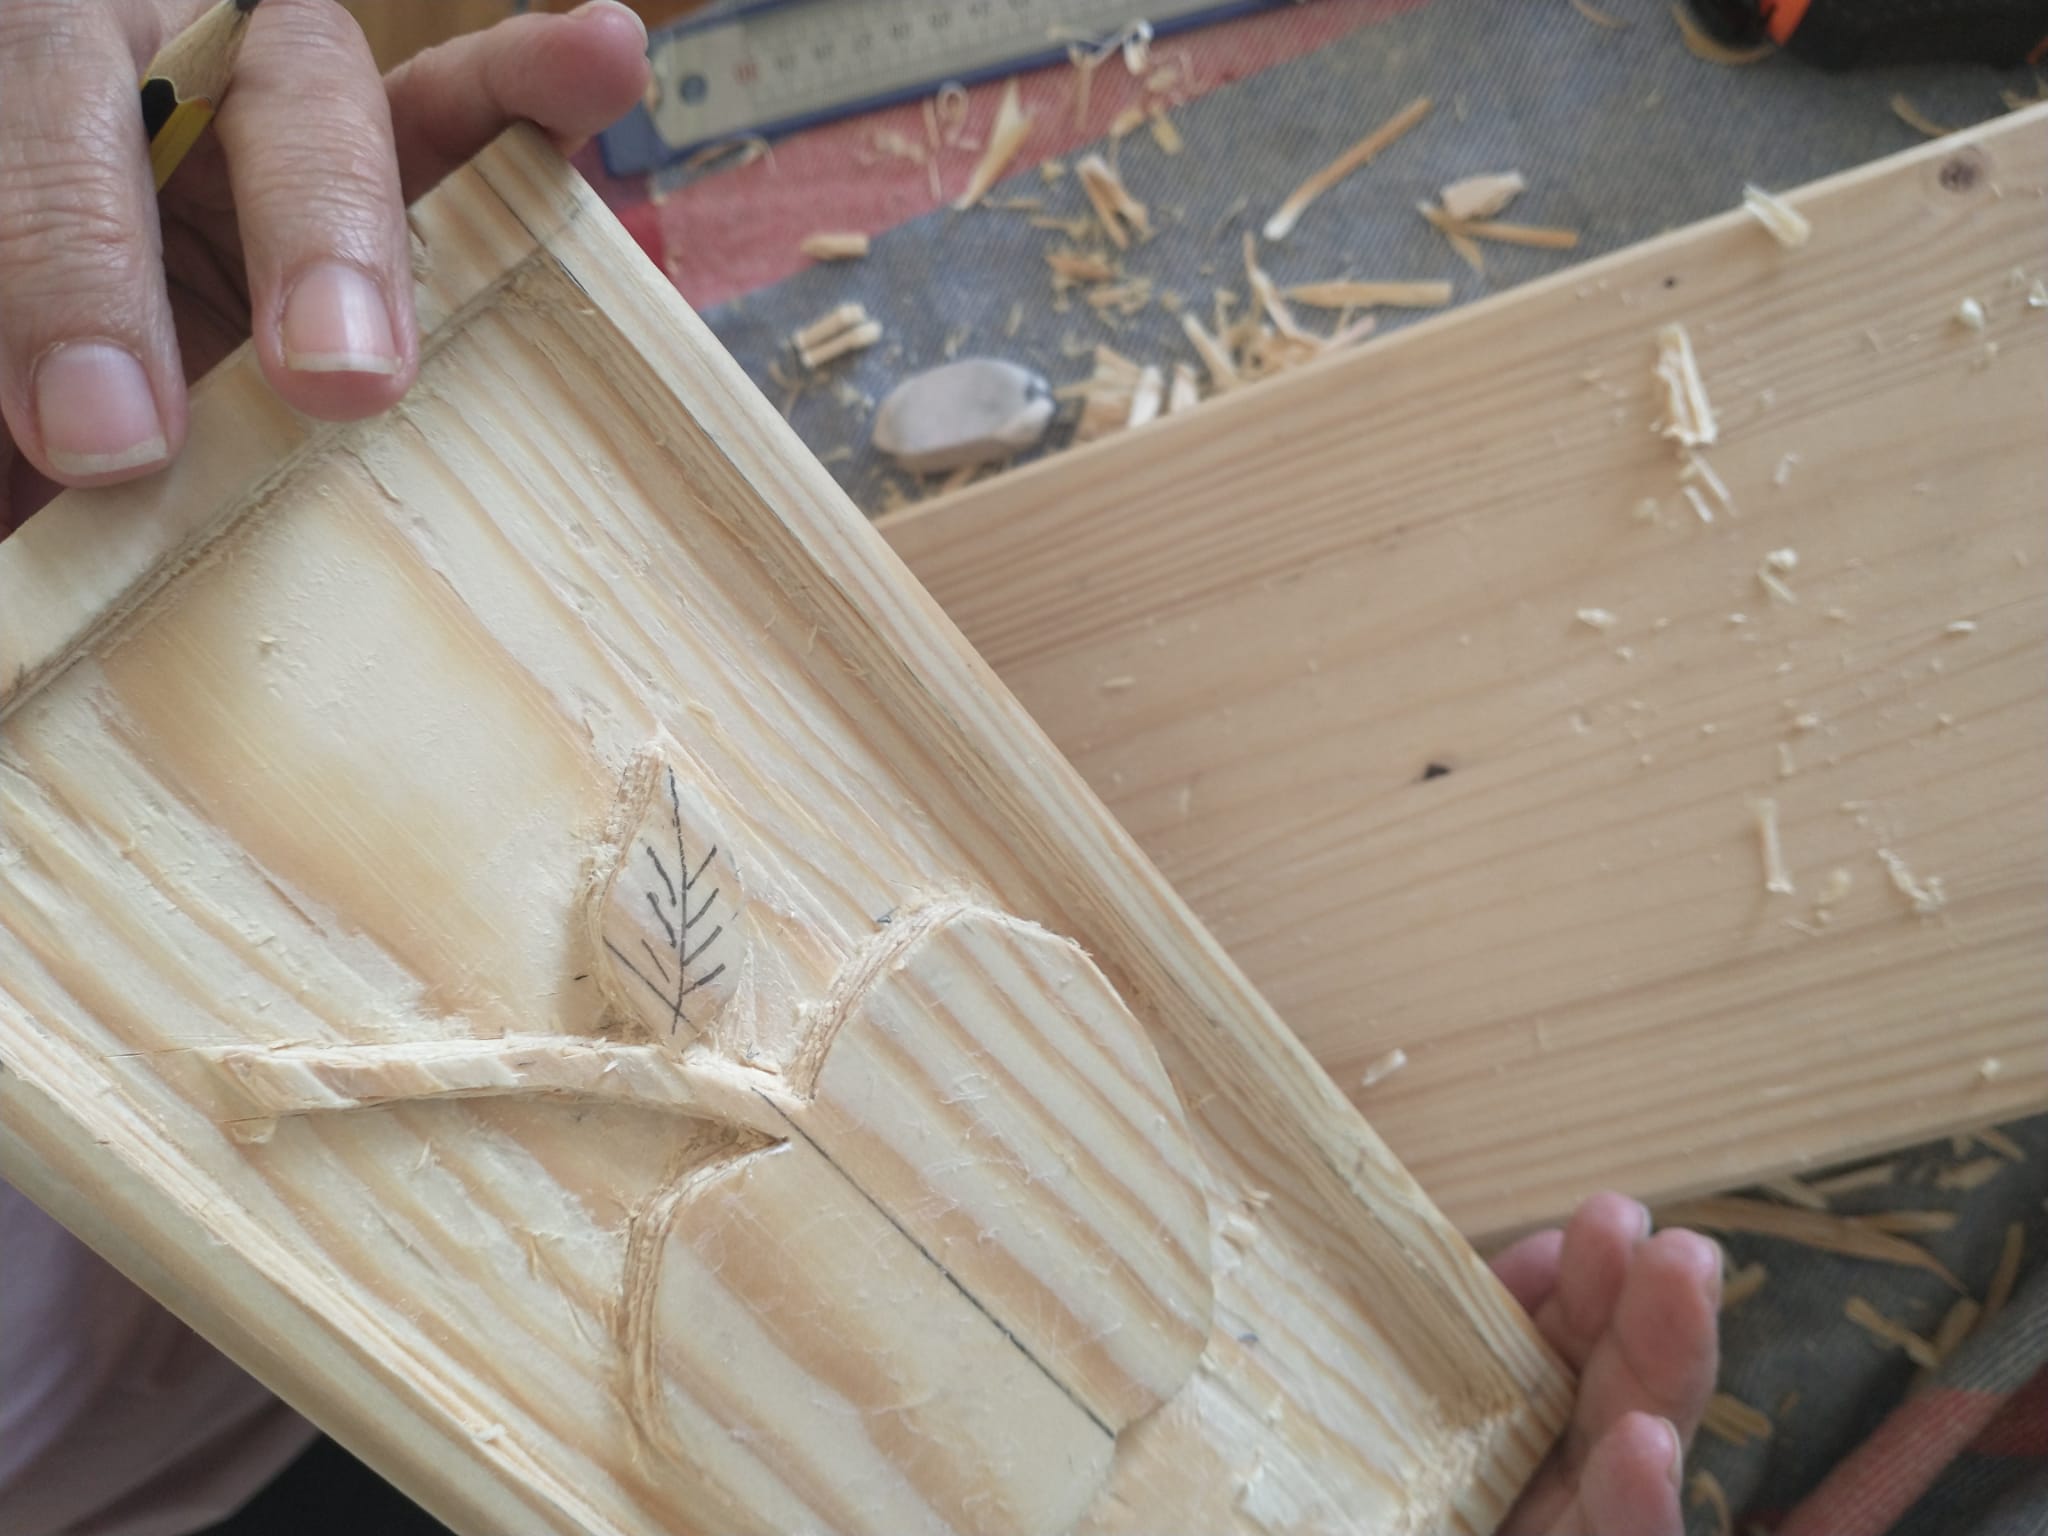
Volvemos a pasarle el Dremel, para dar forma en la hoja y el tallo de manzana.
We pass the Dremel again, to shape the leaf and the apple stem.
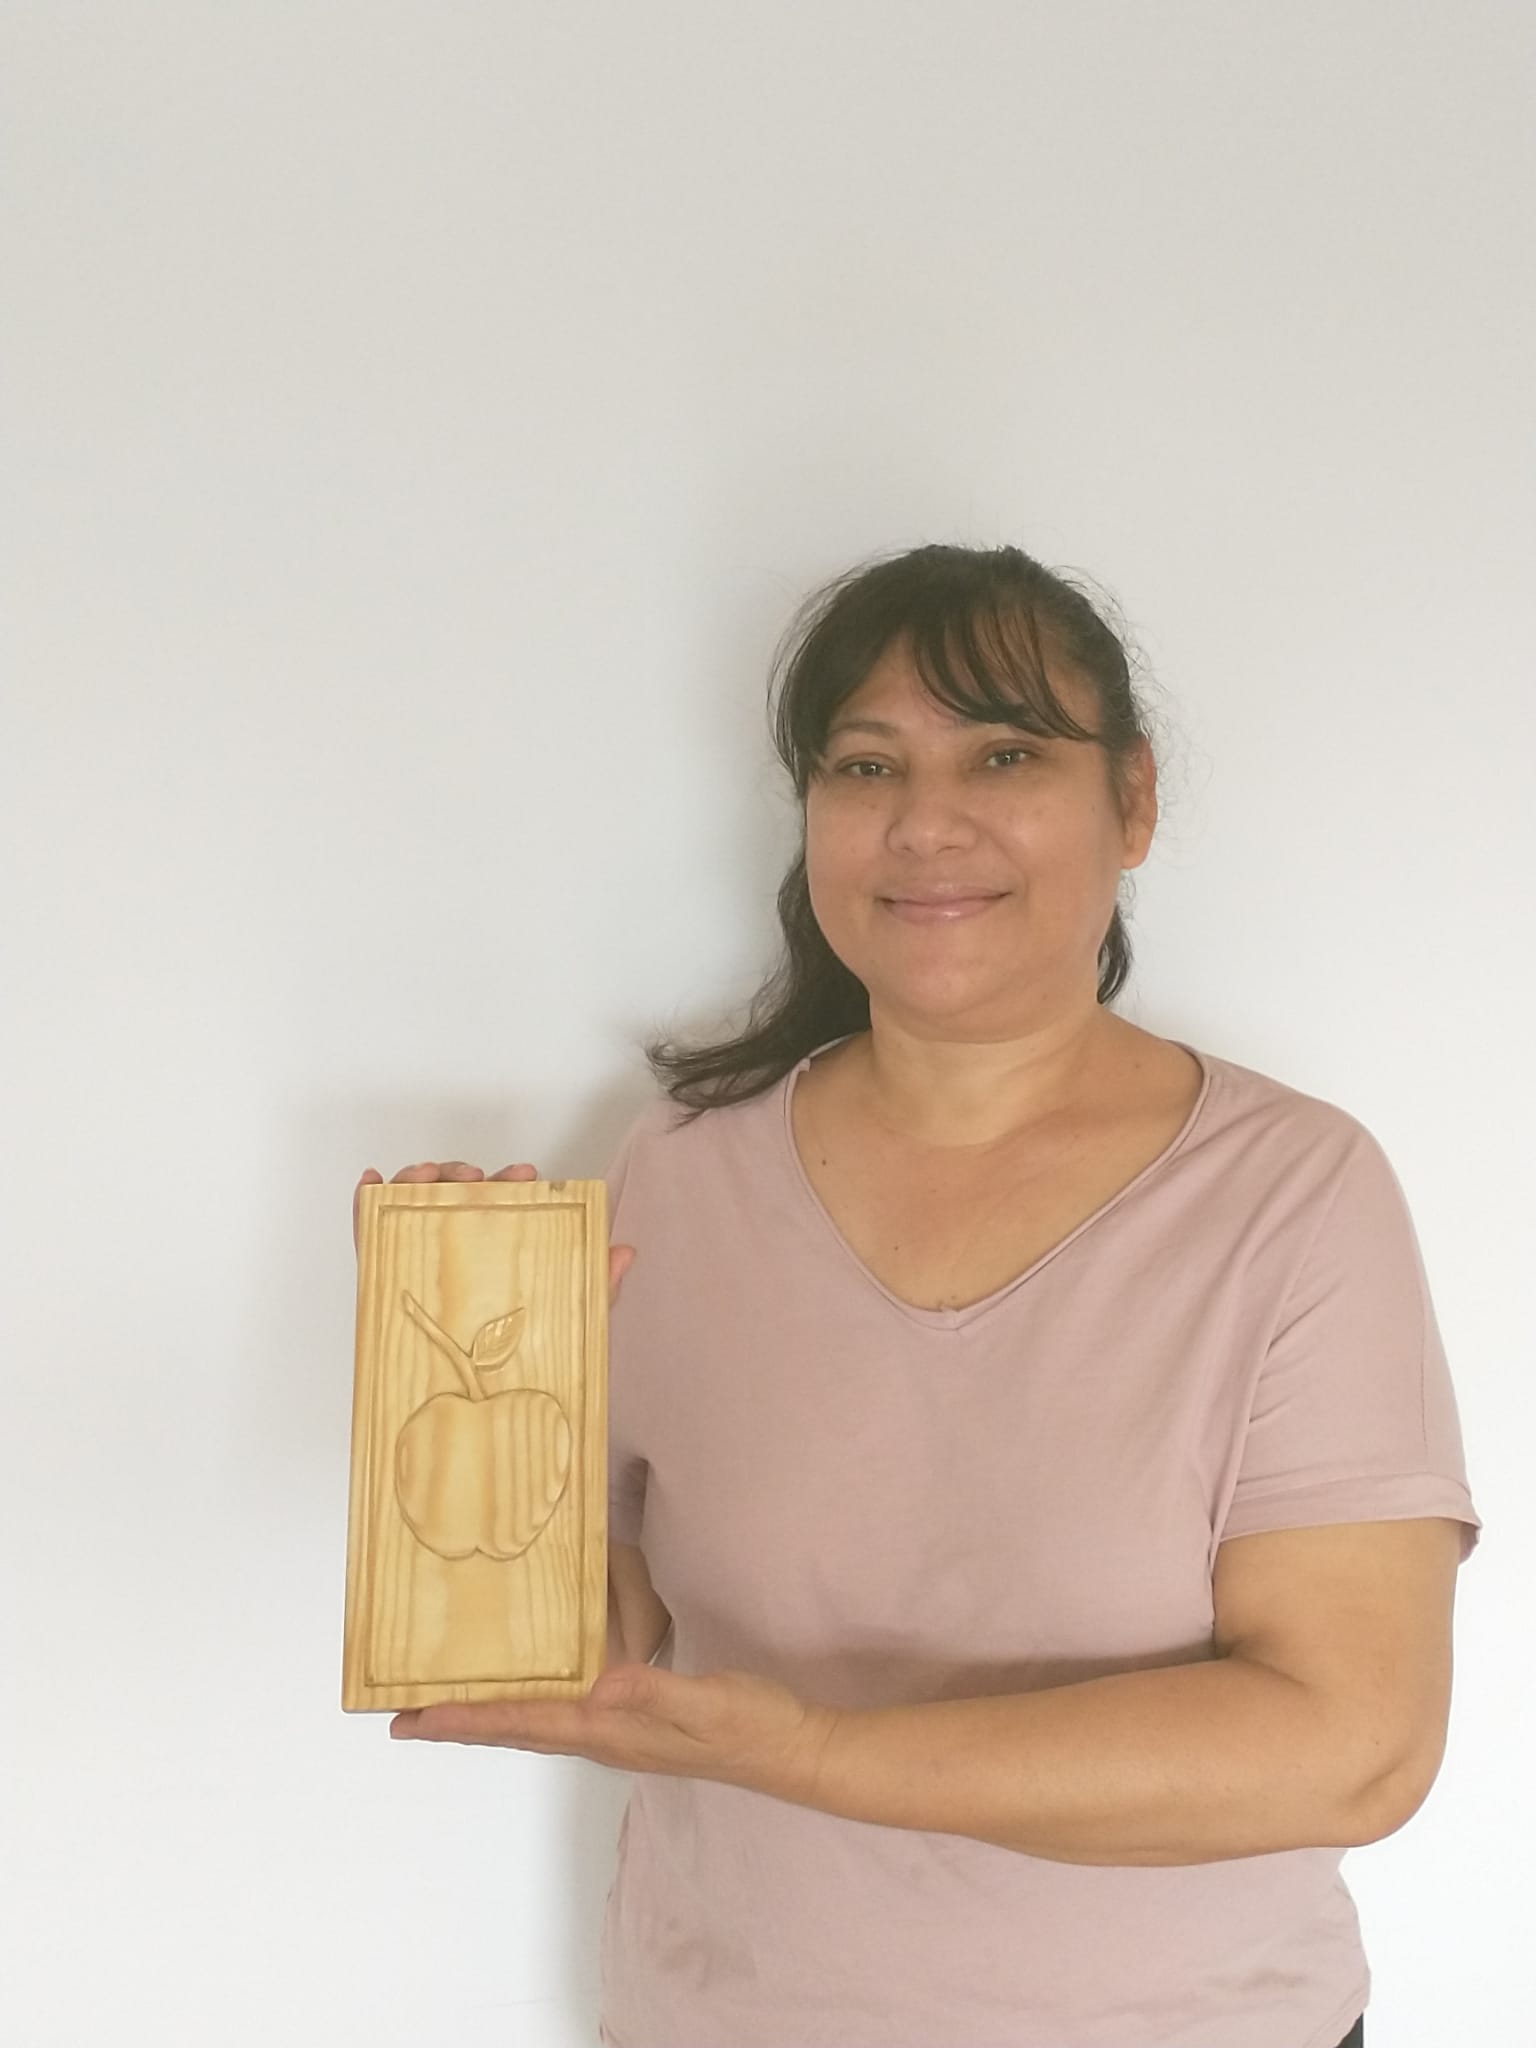
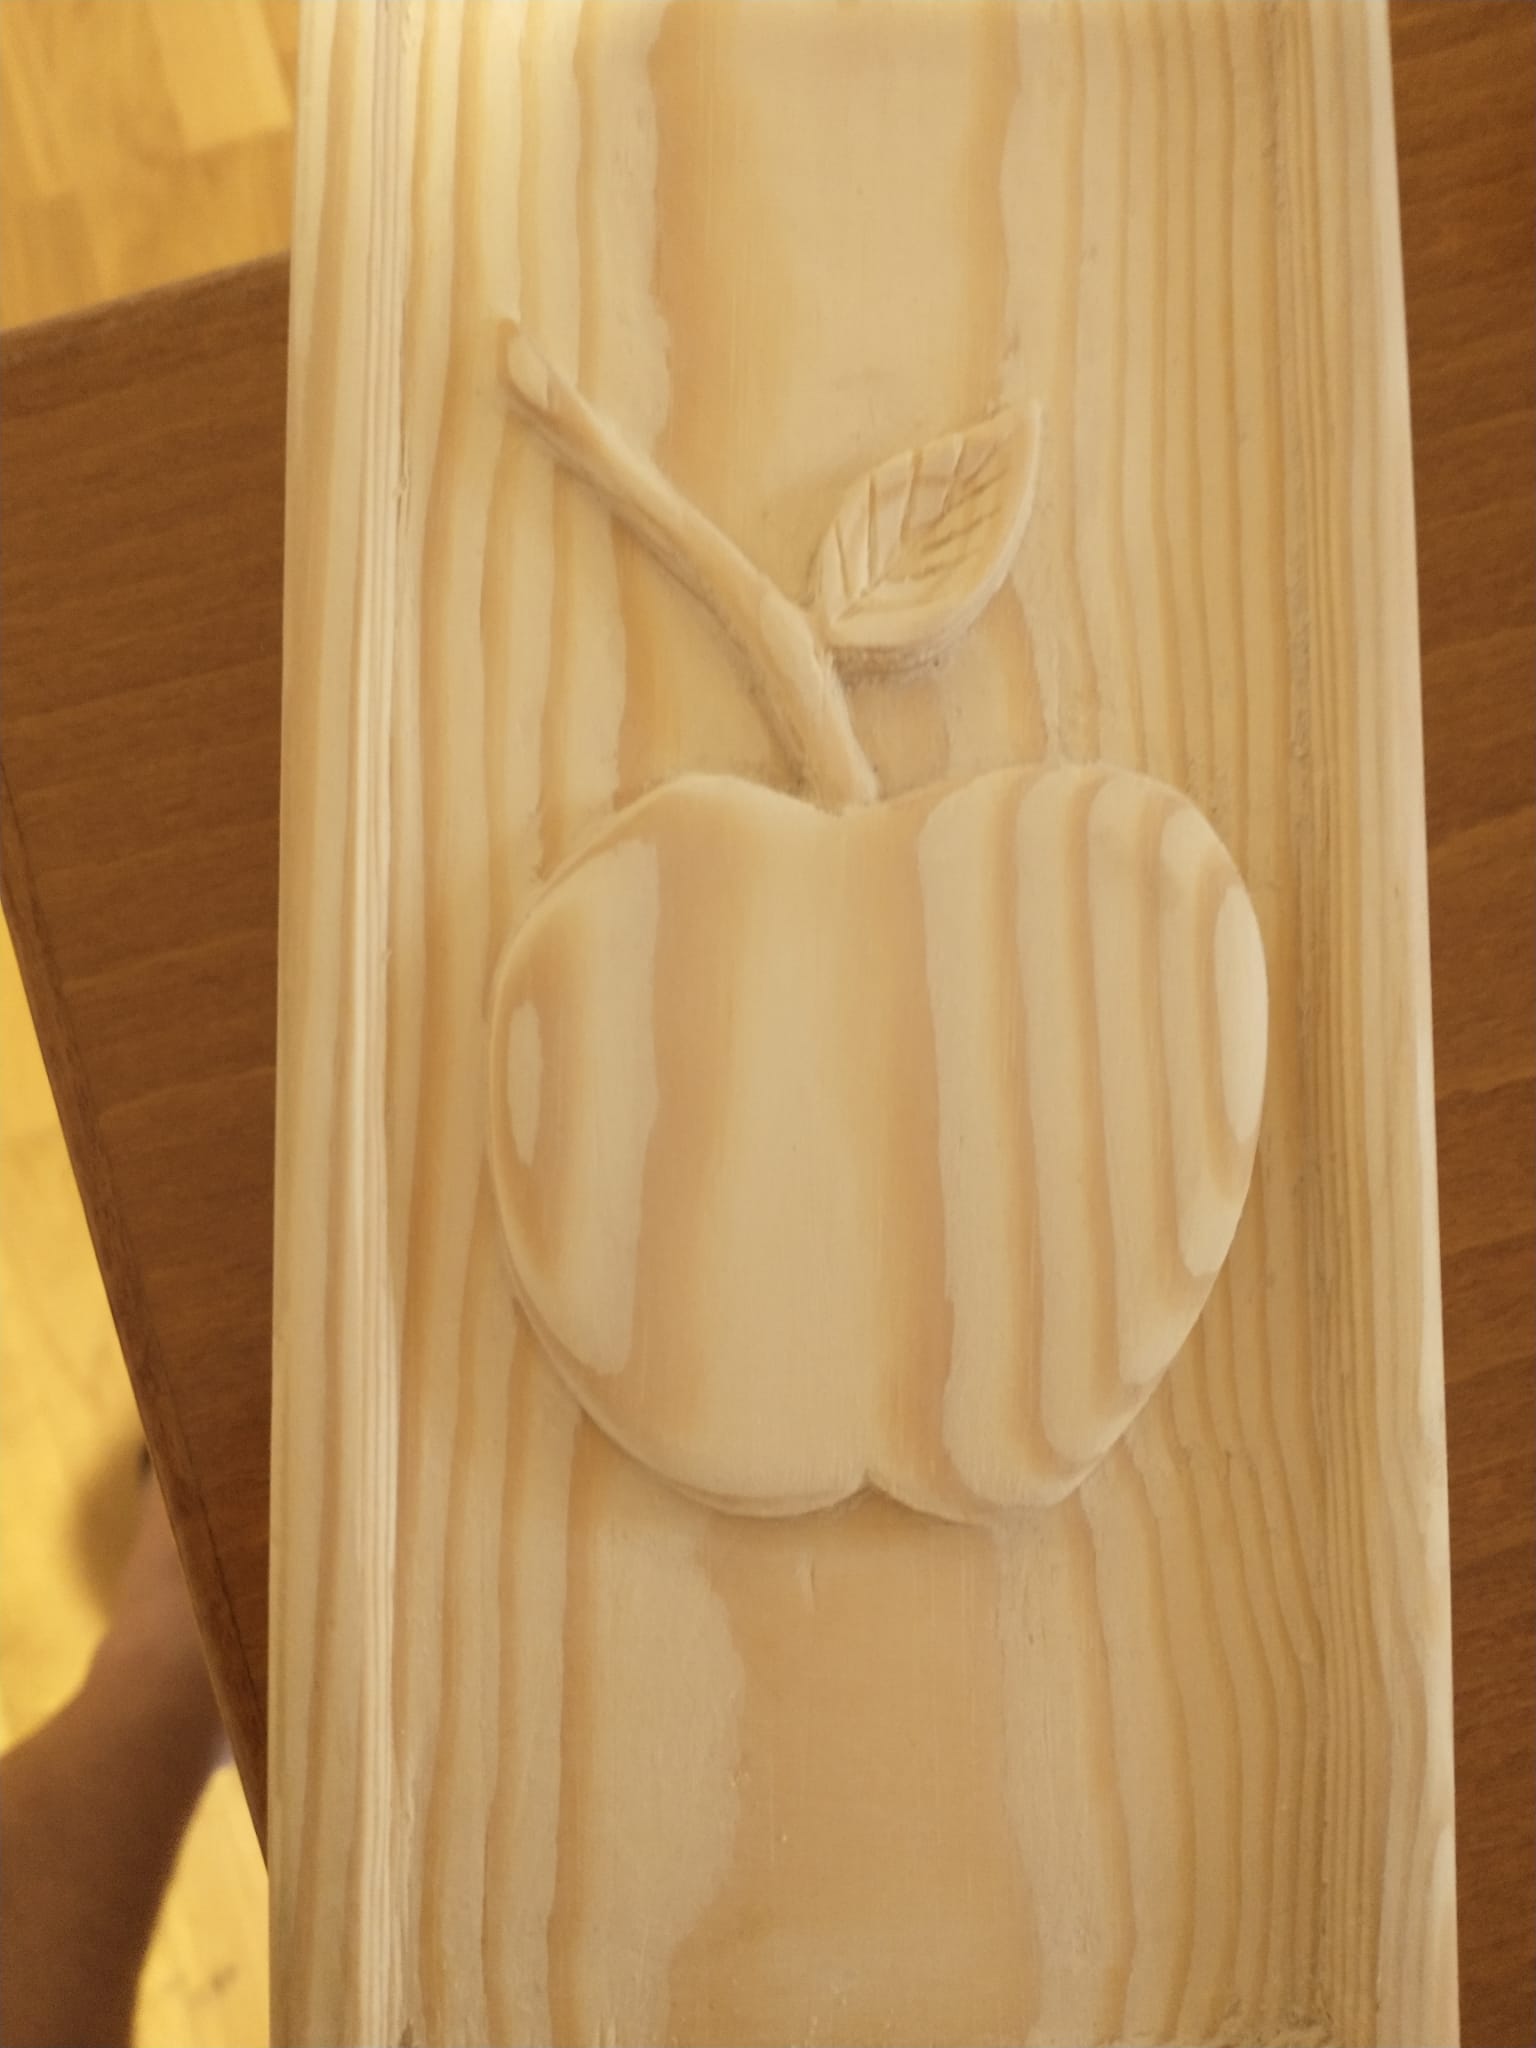
Procedemos a colocarle una mano de sellador transparente, dejar secar por un día. Y tenemos listo nuestro diseño.
We proceed to apply a coat of transparent sealer, let it dry for a day. And we have our design ready.
Espero les haya gustado este bonito tutorial hecho con mucho cariño para ustedes. Saludos familia Hive, nos vemos en mi próximo post. Gracias por visitarme, bendiciones!!! @creacionlilijul
I hope you liked this nice tutorial made with love for you. Greetings Hive family, see you in my next post. Thanks for visiting me, blessings !!! @creacionlilijul
Que bello trabajo, Dios bendiga tus manos.
Gracias, amiga bella! Amén ❤️