¡Buenas comunidad HIVE!
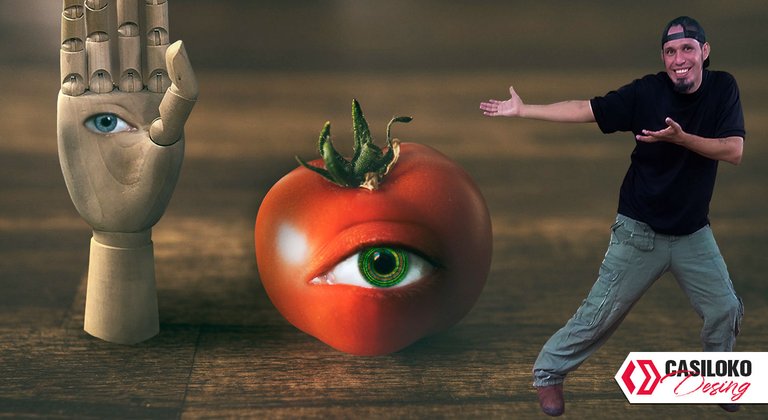
Estoy sumamente emocionado, vengo con este pequeño paso a paso de cómo realizar una foto manipulación con Photoshop logrando colocar ojos a cualquier objeto y poder utilizarlo en otras obras de arte. Para este caso les enseñaré el proceso de colocarle un ojo a un tomate, así con esta misma técnica la podrás utilizar con otros objetos que se les ocurra, en esta ocasión no realice un boceto, ya que es solo añadir el ojo al tomate. El boceto lo realicé fue para el diseño posterior para NFT que luego les enseñaré.
Lo primero es buscar la imagen, en este caso me llamó la atención en pixel la imagen del tomate, entonces al conseguir este tomate busque un ojo que tenga una iluminación similar.
English
English
Good
HIVEcommunity!I am extremely excited, I come with this small step by step of how to make a photo manipulation with Photoshop managing to place eyes to any object and to be able to use it in other works of art. For this case I will show you the process of placing an eye on a tomato, so with this same technique you can use it with other objects that come to mind, this time I did not make a sketch, as it is just adding the eye to the tomato. I made the sketch for the later design for NFT that I will show you later.The first thing is to look for the image, in this case the image of the tomato caught my attention in pixel, then when I got this tomato I looked for an eye that has a similar illumination.

Paso 1/ Step 1
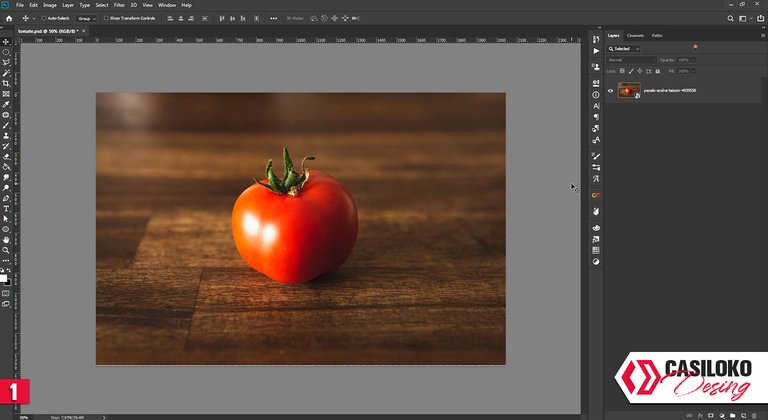
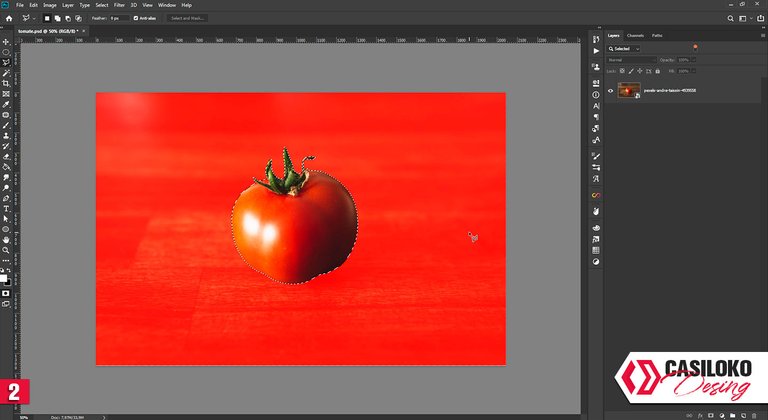
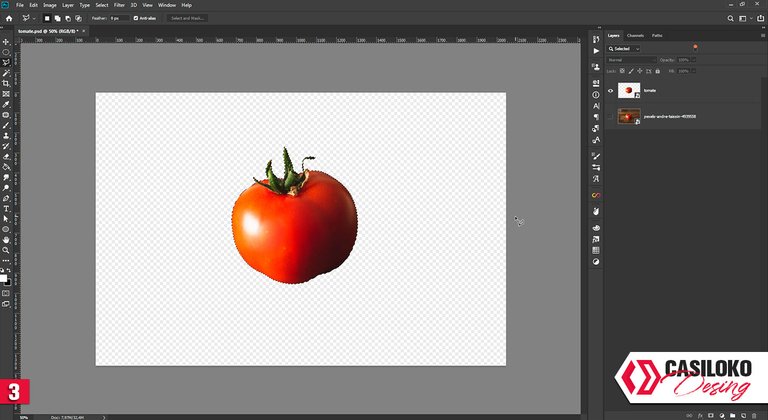
Abrimos la imagen (img 1) seleccionamos el tomate utilizando la herramienta que más nos sintamos cómodo, en mi caso utilizo lazo poligonal (L) (img 2) teniendo la imagen seleccionada presionamos CTRL+J para hacer una nueva capa con el área seleccionada (img 3) añadimos el ojo a utilizar (img 4) añadimos una máscara de capa y seleccionamos pincel (B) con una opacidad 15% y una dureza de 0% (img 5) vamos pintando con color negro para ocultar el alrededor (img 6) terminamos de ocultar el resto del alrededor del ojo (img 7)
English
English
We open the image (img 1) and select the tomato using the tool we feel most comfortable with, in my case I use polygonal loop (L) (img 2) having the image selected we press CTRL+J to make a new layer with the selected area (img 3) we add the eye to be used (img 4) we add a layer mask and select brush (B) with an opacity 15% and a hardness of 0% (img 5) we paint with black color to hide the surrounding (img 6)we finish hiding the rest of the surrounding of the eye (img 7)
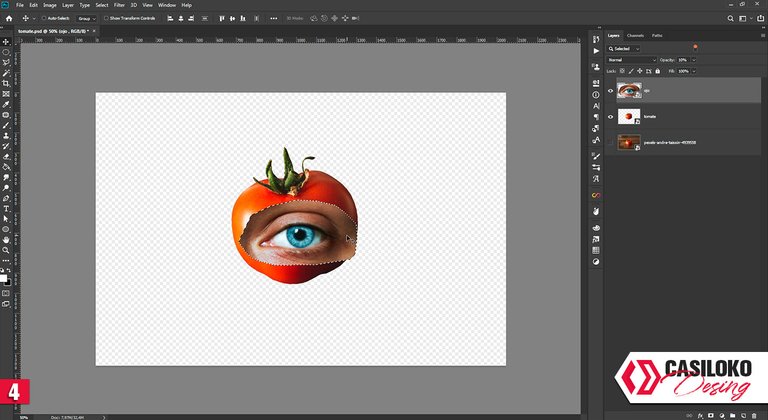
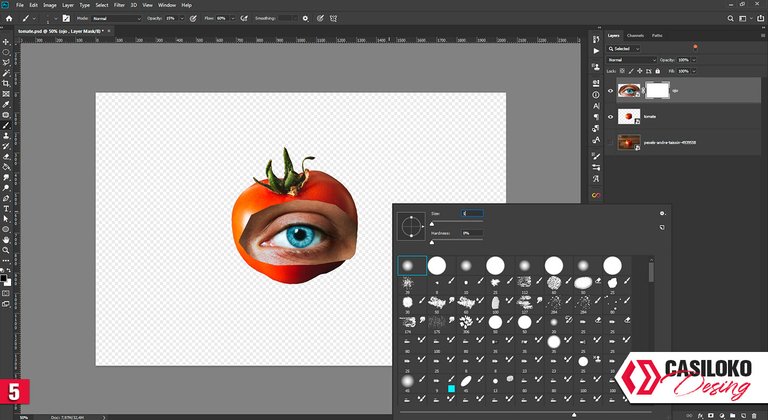
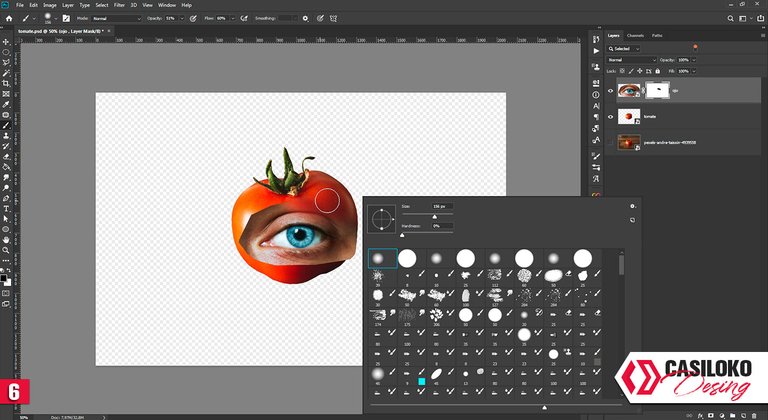
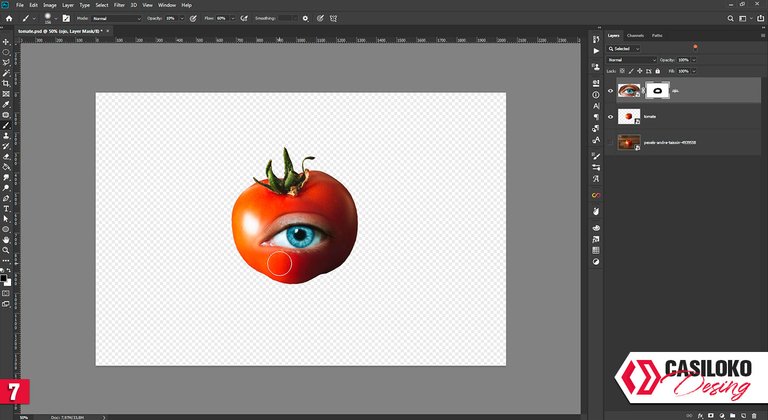
Paso 2/ Step 2
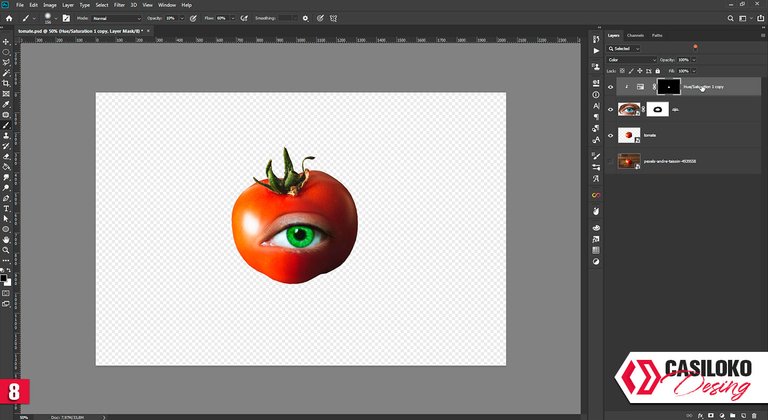
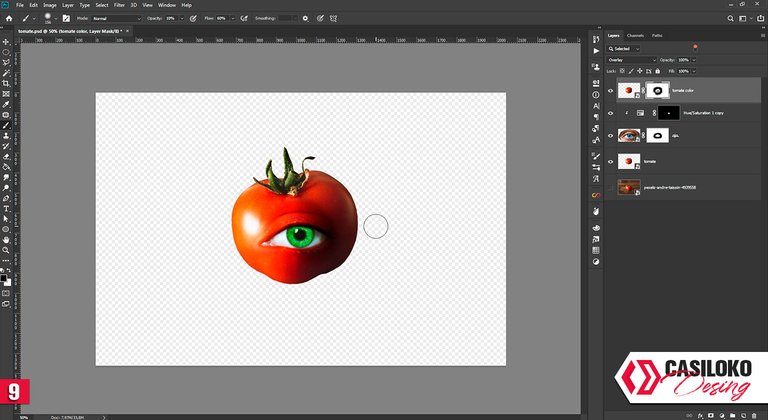
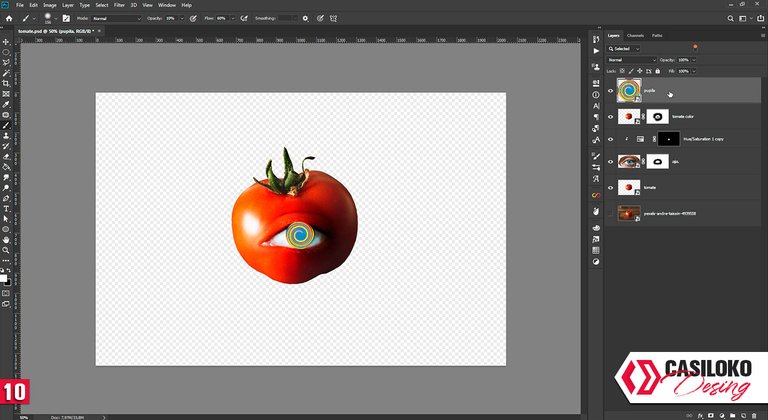
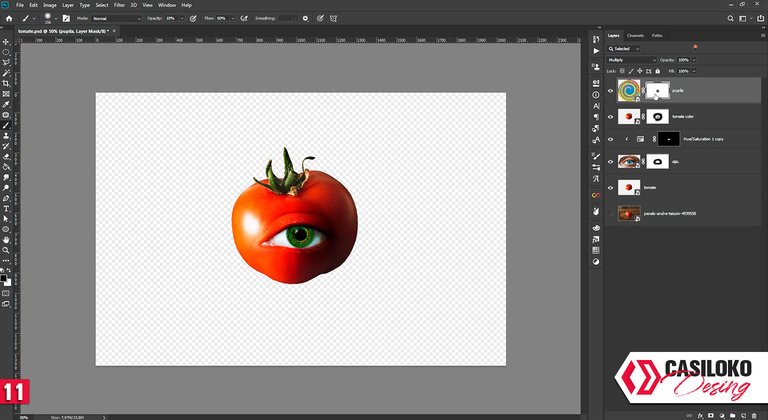
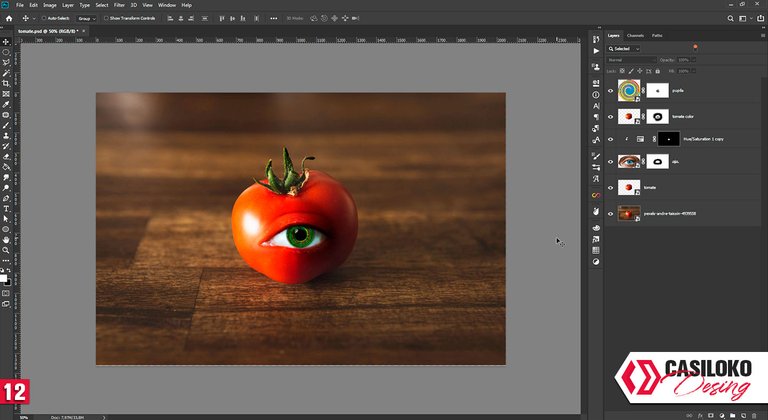
Pintamos la pupila del ojo con capa de saturación (img 8) duplicamos la capa del tomate, la colocamos encima de todas las capas en modo superponer, le colocamos mascara de capa y pintamos todo el alrededor y en la pupila (img 9) colocamos una imagen espiral para la pupila y la ajustamos (img 10) la colocamos en modo multiplicar (img 11) y listo, ya tenemos la imagen (img 12). 😉
English
English
We paint the pupil of the eye with a saturation layer (img 8) we duplicate the layer of the tomato, we put it on top of all the layers in superimposed mode, we put a layer mask and paint all around it and in the pupil (img 9) we put a spiral image for the pupil and adjust it (img 10) we put it in multiplied mode (img 11) and that's it, we have the image (img 12)😉

Agradecido cada una de las personas que me votó, para mí es muy valiosa su votación. GRACIAS AMIGOS MIOS, por el voto de confianza en el post anterior y por tomar un tiempo para leer mis locuras.
También, quiero mandar un saludo a todos los amigos que me comentaron el post anterior, aprecio cada una de sus comentarios y bueno día a día iré mejorando mis post para traerles contenido de calidad.
GRACIAS HIVE
por esta aventura.
English
English
I am grateful to each and every one of the people who voted for me, for me their vote is very valuable. THANK YOU MY FRIENDS, for the vote of confidence in the previous post and for taking some time to read my crazy stuff. Also, I want to send a greeting to all the friends who commented on the previous post, I appreciate each of your comments and good day by day I will improve my posts to bring you quality content. THANK YOU HIVE for this adventure.

Bueno, ante los problemas y las adversidades solo les puedo aconsejar con todo mi corazón ❤️:

|
English

|
|---|
Gracias amigo.
muchas gracias por el comentario se aprecia
Excelente trabajo.
gracias
Interesantísimo muy buen post.
muchas gracias espero que te allá gustado
Definitivamente hace falta aprenderse tus trucos, que trabajo tan genial
gracias por el comentario, si poco a poco voy a poder mostrar mas trucos t tecnicas que ayude a la gente
Congratulations @casilokodesing! You have completed the following achievement on the Hive blockchain and have been rewarded with new badge(s) :
You can view your badges on your board and compare yourself to others in the Ranking
If you no longer want to receive notifications, reply to this comment with the word
STOPHo Ho Ho! @casilokodesing, one of your Hive friends wishes you a Merry Christmas and asked me to give you a new badge!
HiveBuzz wish you a Merry Christmas!
May you have good health, abundance and everlasting joy in your life.
To find out who wanted you to receive this special gift, click here!
You can view your badges on your board and compare yourself to others in the Ranking
Do not miss the last post from @hivebuzz: