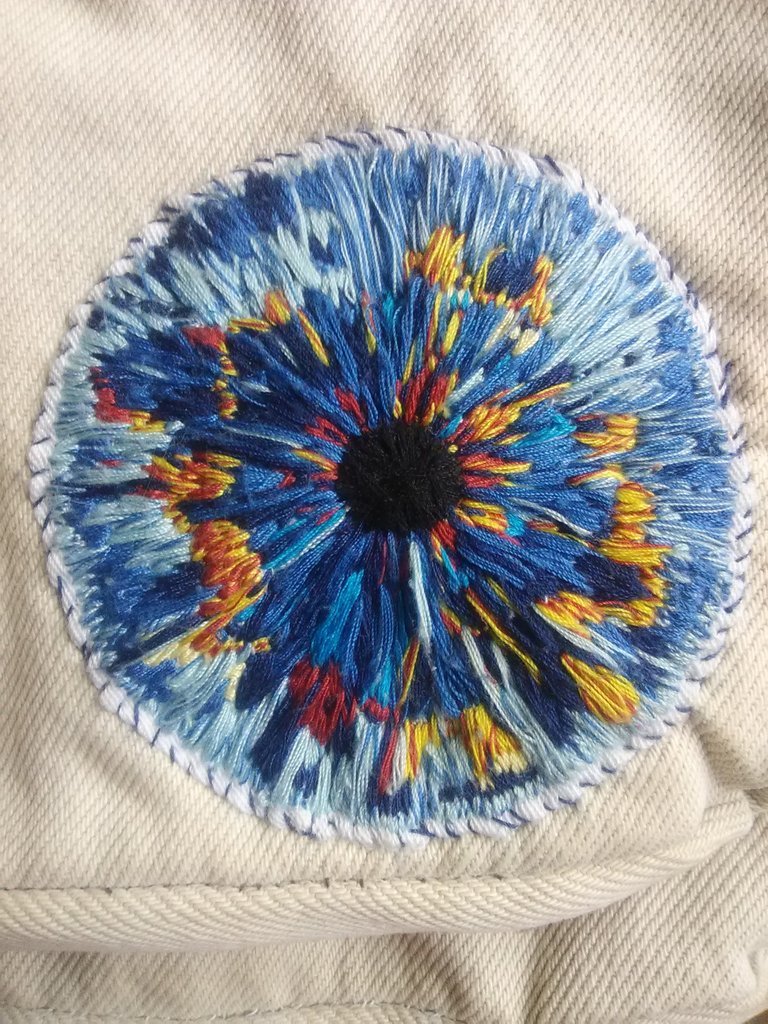
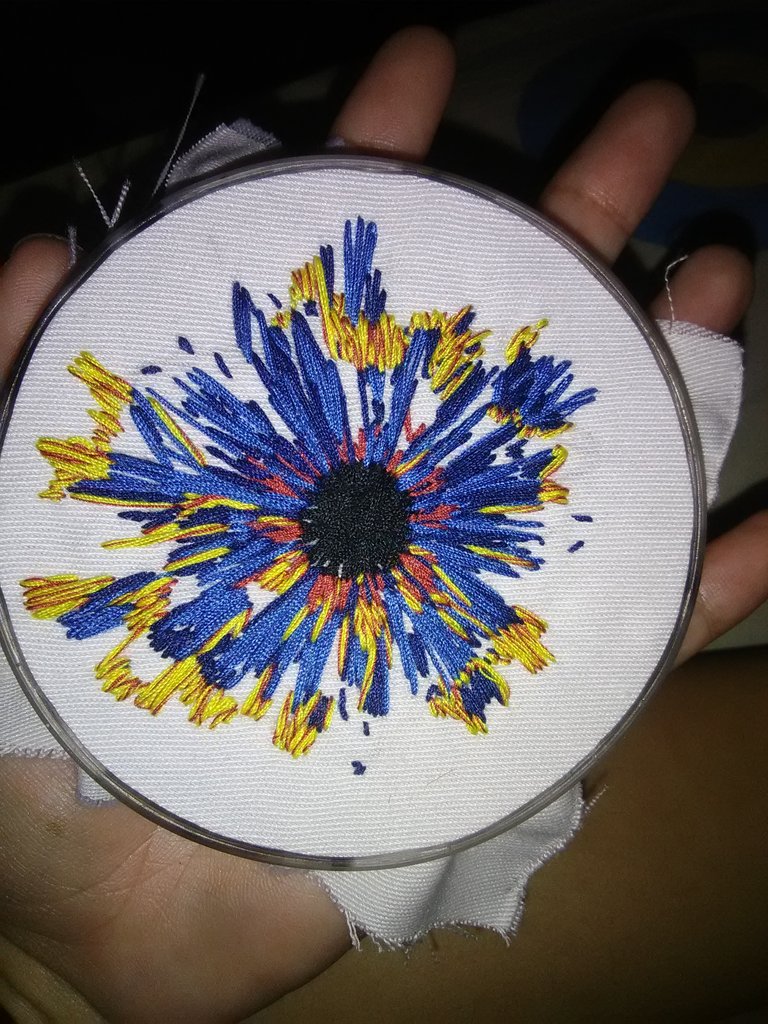
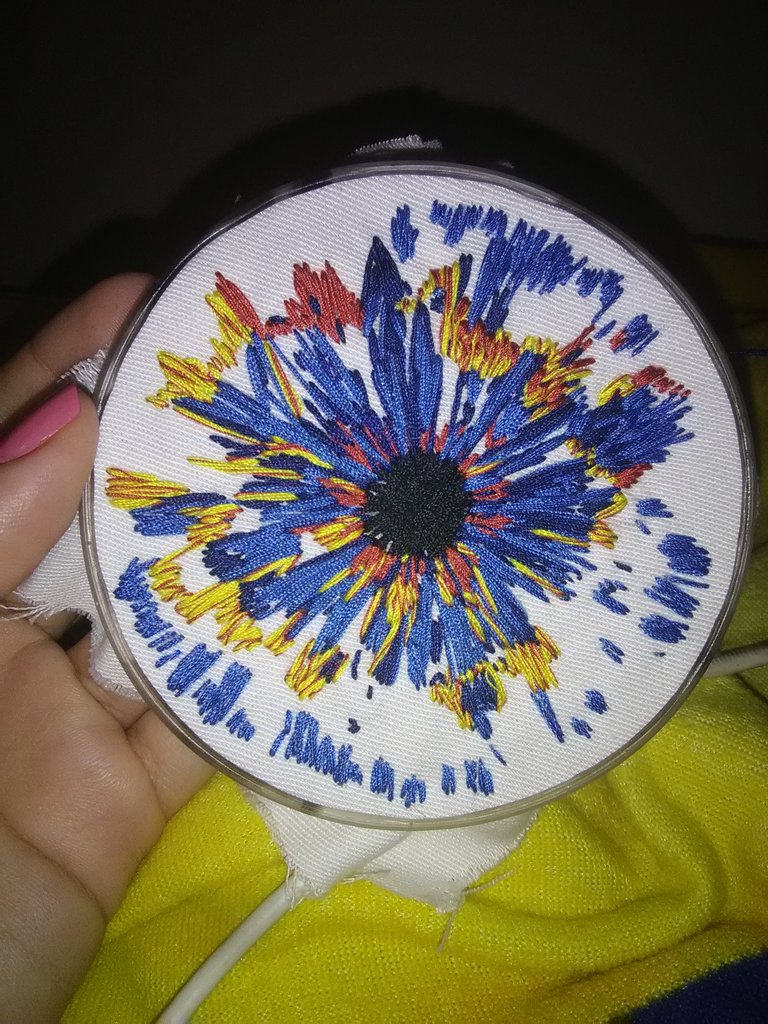
¡Hola comunidad de Hive! Espero comenzaran esta semana con muchas energías, hoy quiero mostrarles uno de los primeros bordados que experimente, lo llamo Iris, ya que mi inspiración fue todo el color y textura que puede presentar un iris si lo analizamos.

El punto que utilice es conocido como puntada de relleno, su función es rellenar, otra fue puntada de Satén long and short (larga y corta) este es muy sencillo, su costura va de lado a lado al igual que el de rellenar, podría decir que es el mismo.
Puntada de Satin o Satén: también se conoce como puntada de damasco, esta es para rellenar en el diseño de un bordado, lo utilizan mucho en el de hojas, o pétalos de flores, otra es la puntada de Satén largo y corto esta es de forma irregular, las costuras son mas cortas y largas según el efecto que se quiera lograr.
Este bordado lo realice directo en la tela.
Su medida es de 8cm x 8cm cuadrados.
Los hilos que utilice no son nada especiales, son hilos de coser (hilo de algodón) me gusta mas bordar con ellos.
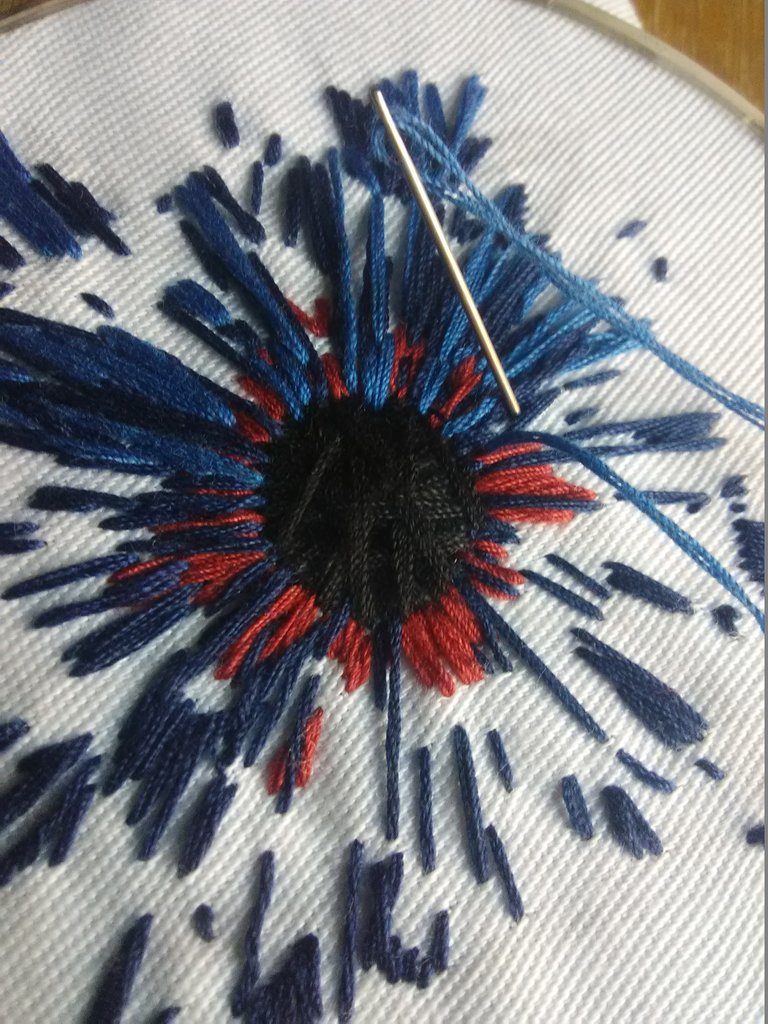
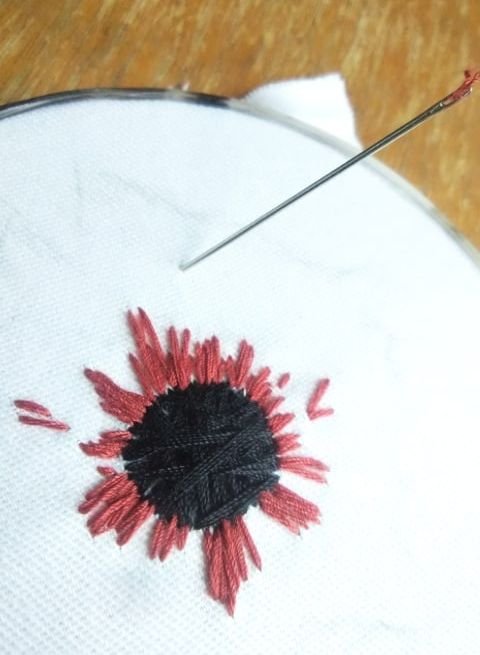
El centro negro que es la pupila, y los tonos que fui poco a poco agregando, el marrón oscuro, azul marino,azul rey, azul oscuro, azul cielo, en la red fui observando muchas referencias de iris en modo macro y fui creando una propia.
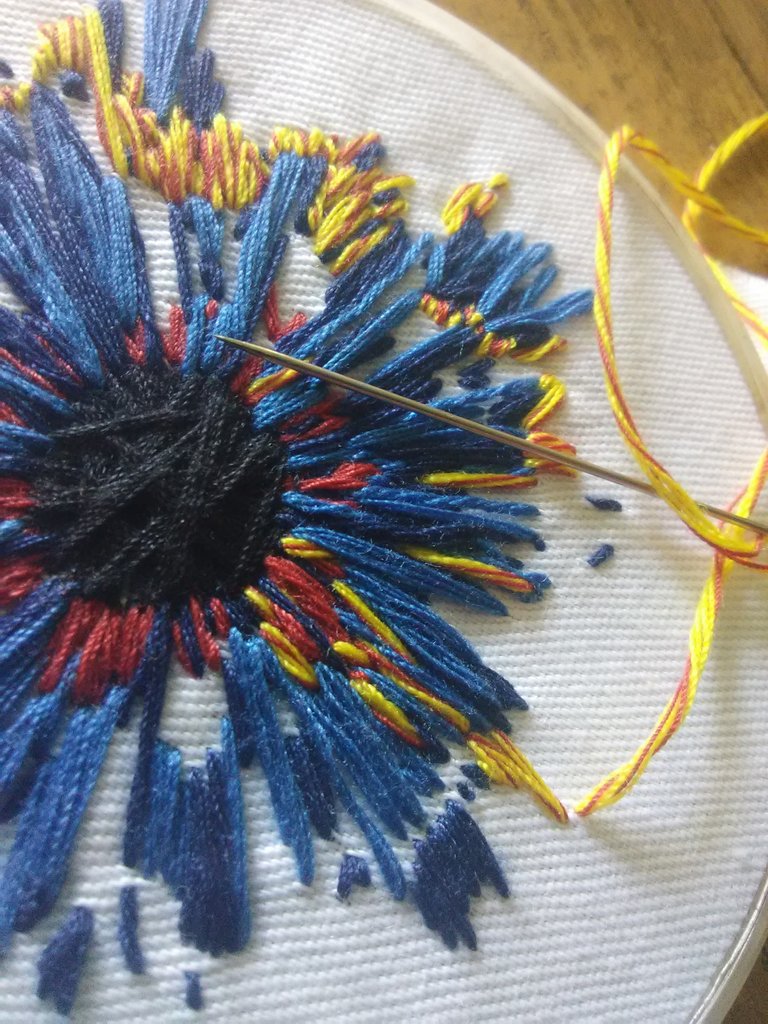
Agregue un amarillo porque sentía que necesitaba un poco de esa luz que contraste con todos los tonos azules, el numero de hebras de hilo que utilice fueron 4, es decir 2 hebras dentro del ojo de la aguja para cerrar 4 hebras y anudar, esto por el hecho de que quería mucho relleno, y así fui dándole forma a mi iris.
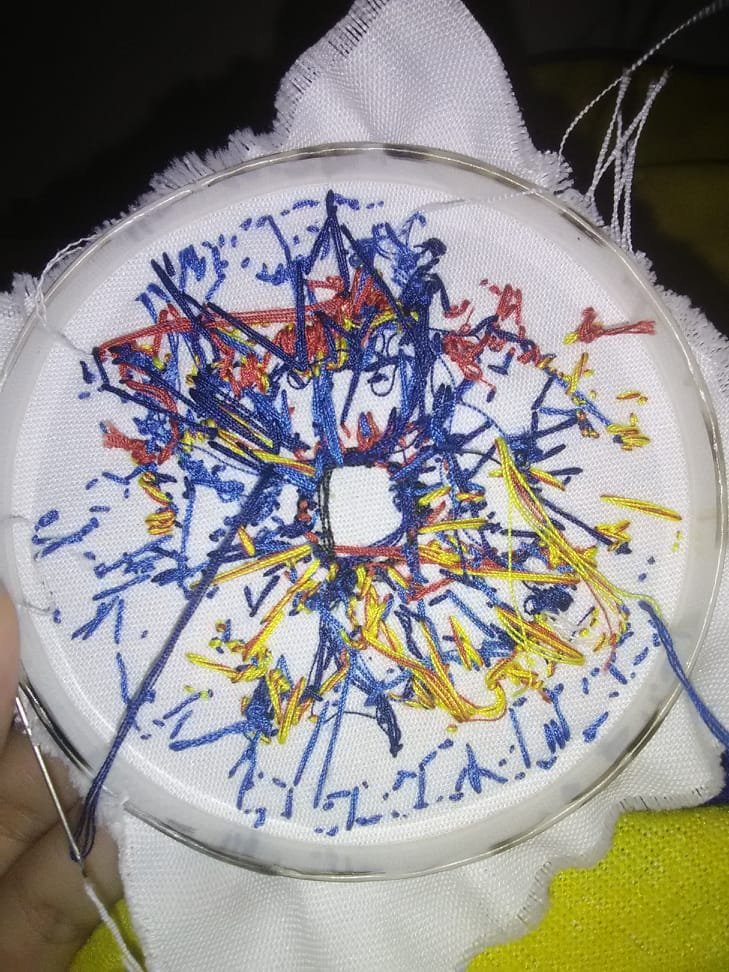
Para quienes tienen curiosidad de como se ve un bordado por detrás, pues es algo así, y hasta mucho mas, cuando se es principiante en este oficio los hilos se nos enredan mucho, se cometen muchos errores, saltas puntos o sigues de largo, con esta puntada es muy fácil disimular estos errores y sobretodo en la parte trasera.
¡CASI TERMINADO!
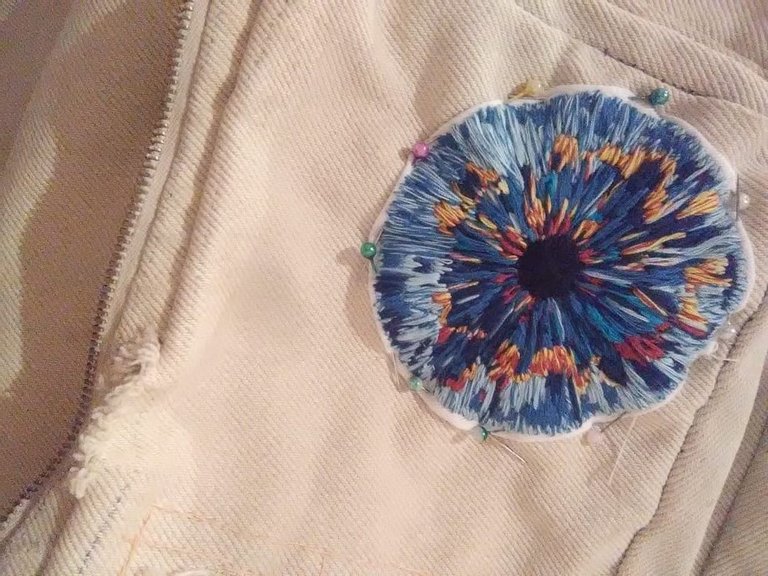
Cuando decidí que estaba listo, con unas tijeras corté el exceso de tela del aro y procedí a fijarlo donde quería coserlo en el bolsillo delantero de un bolso que hice hace mucho tiempo con mis manos.
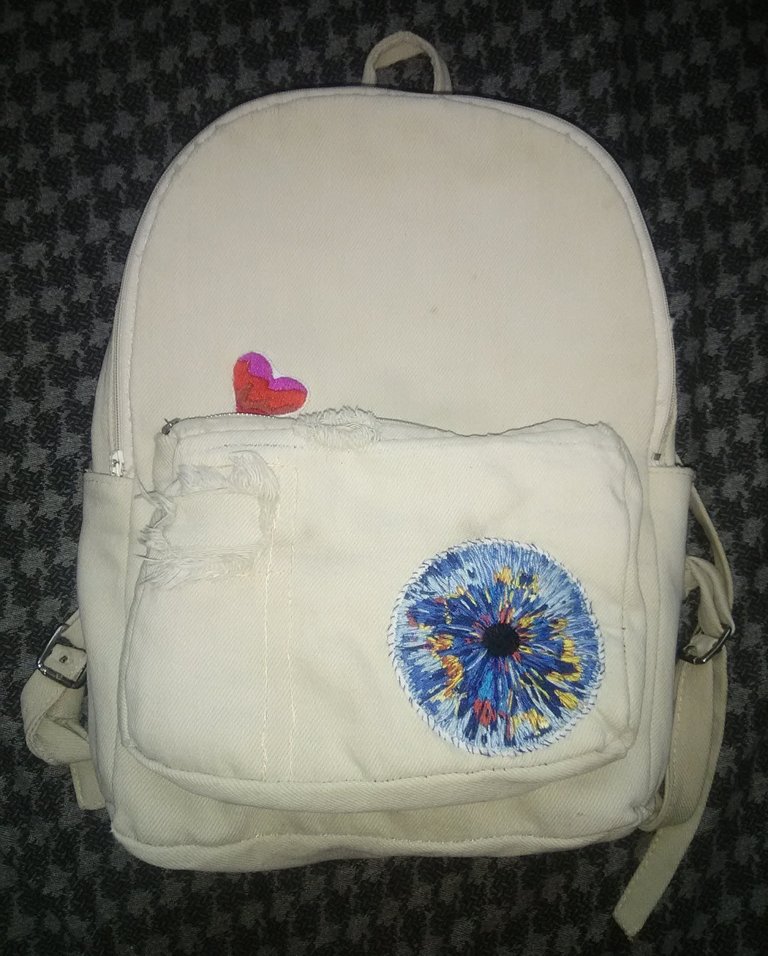
Este es el resultado de uno de mis primeros experimentos en el mundo del bordado, espero les guste y aprecien como a mi. ¡Saludos hasta un nuevo post!
(ENG)
Hello Hive community! I hope you started this week with a lot of energy, today I want to show you one of the first embroidery that I experienced, I call it Iris, since my inspiration was all the color and texture that an iris can present if we analyze it.
The point that I use is known as a fill stitch, its function is to fill, another was Satin Stitch long and short this is very simple, its seam goes from side to side like the one to fill, I can say is the same.
Satin or Satin stitch: it is also known as damask stitch, this is to fill in the design of an embroidery, they use it a lot in that of leaves, or flower petals, another is the long and short satin stitch this is irregularly shaped, the seams are shorter and longer depending on the effect you want to achieve.
This embroidery is done directly on the fabric.
Its measurement is 8cm x 8cm square.
The threads I use are nothing special, they are sewing threads (cotton thread). I like to embroider with them more.
The black center that is the pupil, and the tones that I was adding little by little, dark brown, navy blue, royal blue, dark blue, sky blue, on the web I was observing many iris references in macro mode and I was creating one own.
I added a yellow to it because I felt that I needed a bit of that light that contrasts with all the blue tones, the amount of thread I used was 4, that is, 2 threads inside the eye of the needle to close 4 threads and knot, this is It is due to the fact that I wanted a lot of filling, and that's how I was shaping my iris.
For those who are curious about how an embroidery looks from behind, it is something like that, and even much more, when you are a beginner in this trade, the threads get tangled up a lot, many mistakes are made, you skip stitches or you continue long, with This stitch is very easy to hide these errors and especially on the back.
When I decided it was ready, with a pair of scissors I cut the excess fabric from the hoop and proceeded to pin it where I wanted to sew it into the front pocket of a bag I made a long time ago with my hands.
This is the result of one of my first experiments in the world of embroidery, I hope you like it and appreciate it as I do. Greetings until a new post!
Este post ha sido votado por el equipo de curación de Cervantes.
¡Gracias! @don.quijote
¡Chacha, esto está buenísimo! :o
Holaaa! Muchas gracias 😄
Congratulations @ada.embroidery! You have completed the following achievement on the Hive blockchain and have been rewarded with new badge(s) :
Your next target is to reach 600 upvotes.
You can view your badges on your board and compare yourself to others in the Ranking
If you no longer want to receive notifications, reply to this comment with the word
STOPCheck out the last post from @hivebuzz:
Support the HiveBuzz project. Vote for our proposal!