English
Hello, receive a warm greeting. I hope the information I'm going to provide you with will be very useful.
I will tell you about how to make fertilizer with good nutrients, so that when you plant a plant, whether it's a fruit or medicinal plant, among others, it will develop properly and strengthen. Of course, the fertilizer can be very good, but if the plant is not given proper care, it will die.
For fertilizer, if you have a backyard, there are two ways to make a large amount of fertilizer. If you don't have much space, don't worry, I will tell you how to prepare a small amount of fertilizer.
There are two methods that I know and have implemented to make fertilizer in large quantities. One of them is by digging a hole in the yard or garden, it can be about 50 cm x 50 cm, but it can be less deep according to your needs. Once the hole is made, we are going to put a layer of lime or ashes, the ashes should be from wood logs. This is to disinfect and prevent contamination.
The other method is to select a space in your yard or garden and also put a layer of lime or ashes.
Once we have our space ready, we are going to start putting all the vegetable, fruit, and vegetable scraps. It is very important not to put any seeds. We usually throw all this away, but this time we will use it to prepare our organic fertilizer. You should not put anything citrus in it. You can also add leaves from other plants for them to decompose. After you have a layer of two to three centimeters, put a layer of soil and repeat with lime or ashes. Keep repeating this process until the hole is filled. If you are doing it on the surface, you should also make layers until you reach a height of thirty cm.
You should add some water, not too much, before covering it. Insert a tube or hose into your fertilizer and when you cover it, it should remain free so that the gases can escape and it can breathe and get oxygen.
I recommend that you mix or turn your fertilizer once a week. The minimum time, based on my practice and experience, for decomposition to occur is about eight months or even longer, depending on how the soil reacts.
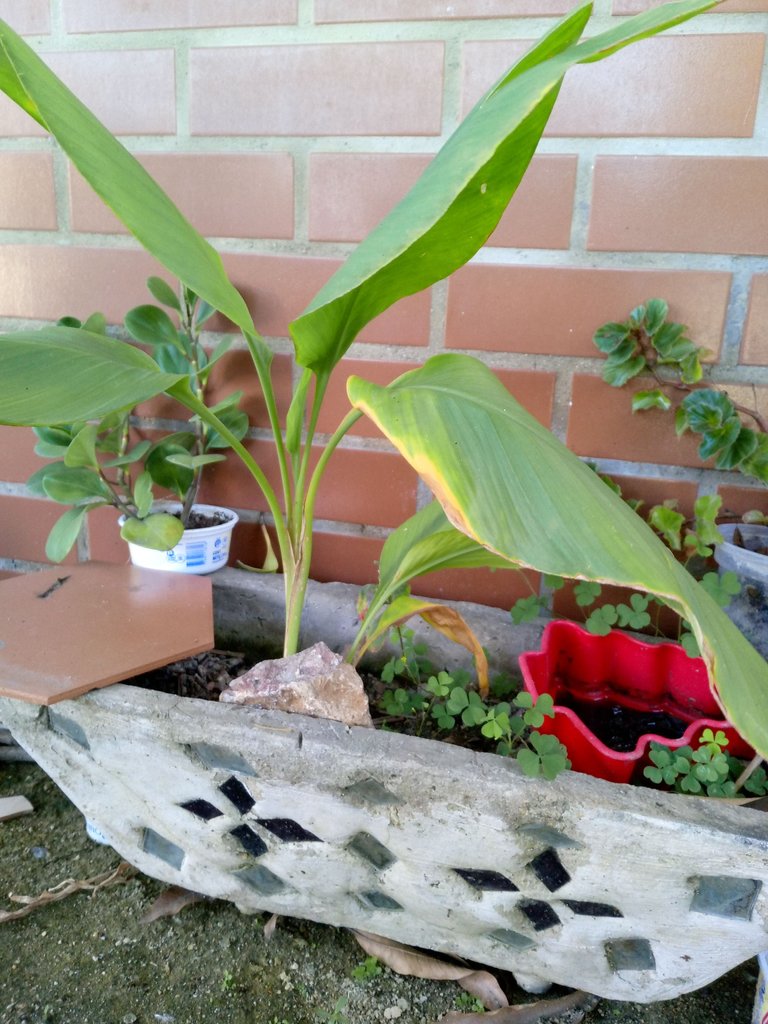
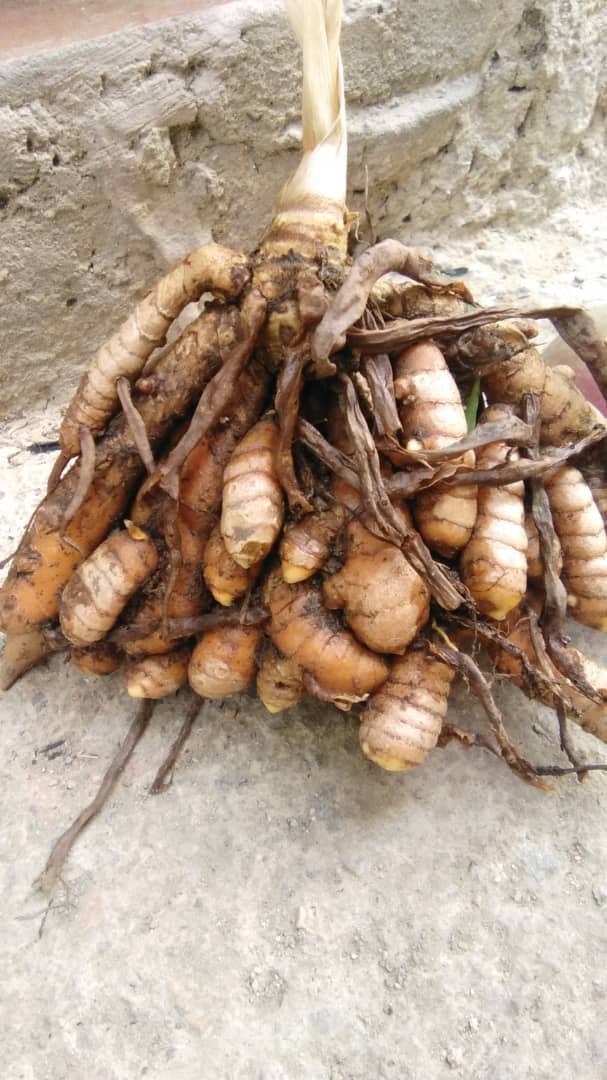
This plant is a substitute for saffron in some countries, mainly because saffron is expensive and hard to find in other places. Besides being used for cooking, it has many medicinal properties. This time I will mention two of them: it is anti-inflammatory and can be used for psoriasis.
Turmeric takes approximately six to ten months to mature after planting before it can be harvested.
Spanish
Hola reciba un cordial saludo, espero le sirva de mucho la información que voy a dejarle a continuación.
Les hablare sobre como realizar un abono con buenos nutrientes, cuando siembren una planta bien sea una planta frutal, medicinal entre otras, estas se desarrolle correctamente y se fortalezcan, claro esta que el abono puede ser muy bueno pero si la planta no se le da sus cuidados respectivos estas morirá.
Para el abono, si tiene un patio tiene dos formas de realizar gran cantidad de abono, si no tiene mucho espacio no se preocupe yo le diré como haremos para preparar un poco de abono.
Hay dos formas que yo se y e implementado para realizar abono en grandes cantidades, una de ella es abriendo un hueco en el patio o jardin puede ser como de 50 cm X 50 cm, claro puede ser menos profundo según sus necesidades, una vez se realice el hueco le vamos a colocar una capa de cal o cenizas, las cenizas de en ser de palos troncos, esto es para desinfestar y no se contamine.
El otro método es seleccionar un espacio de su patio o jardin, a este igual que el otro se debe colocar una capa de cal o cenizas.
Luego que tengamos nuestros espacio listo vamos a empezar a colocar todo los corte de verduras frutas y hortalizas, muy importante no colocarle semilla, todo esto siempre lo botamos pero esta vez lo utilizaremos para preparar nuestro abono orgánico, no deben colocar nada cítrico, también pueden colocarle hojas de otras matar para que se descompongan, luego de que tengan una capa de dos a tres centímetros le colocamos una capa de tierra y repetimos cal o cenizas y así asta tapar el hueco, en caso de hacerlo en la superficie de igual manera debe hacer las capas asta llegar una altura de treinta cm.
Debe colocarle agua no mucha luego de e tapar y colocar un tubo o manguera lo inserta en su abono y cuando tape este debe queda libre para que los gases salgan y respire se oxigene.
Recomiendo que una vez a la semana remueva o mezcle su abono, un tiempo mínimo según mis prácticas mi experiencia tardaría en ocho mese o mucho mas todo depende el suelo o reaccione la descomposición.
Esta planta en algunos países es el sustituto de azafrán, en primer lugar por lo costoso de el azafrán y en otras partes cuesta conseguirlo, así como es utilizado para las comida tiene muchas propiedades medicinales, en esta ocasión le mencionare dos y una de ella es para desinflamar, la otra es para la soriasis.
La cúrcuma después de plantada dura aproximadamente seis meses a diez meses, para que madure y pueda ser cosechada.


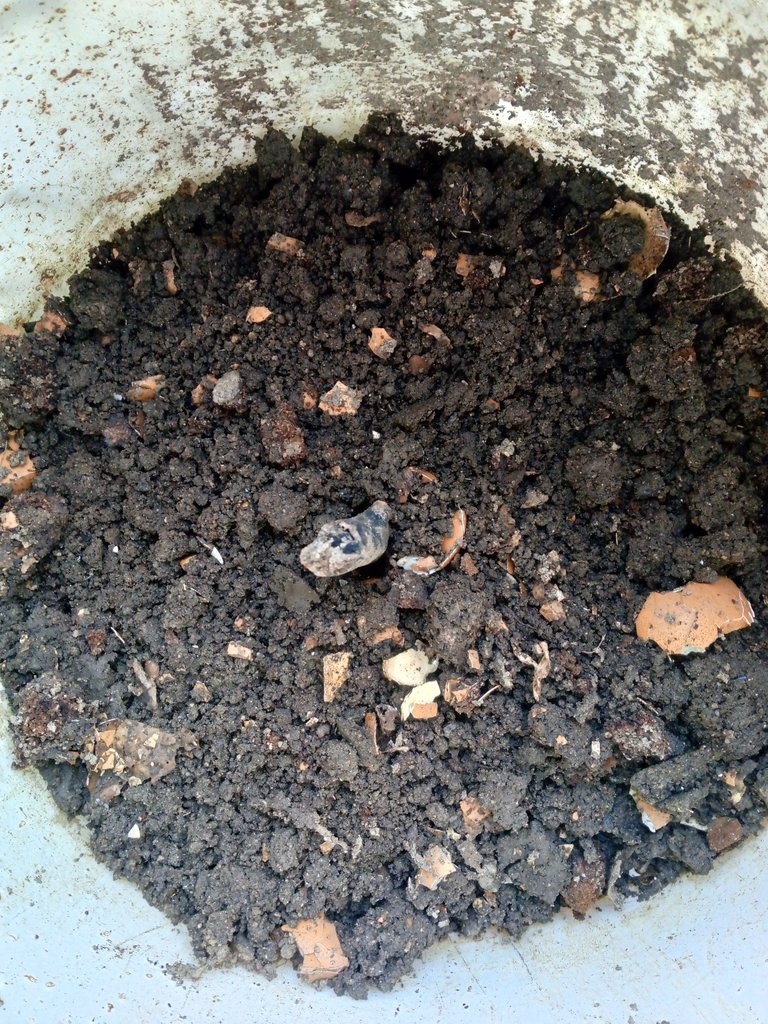
English This time I didn't have a larger space, so I made a little compost in a bucket with this amount. With this quantity, easily in two or three medium-sized pots, we can plant a plant that doesn't require as much space to grow. With this amount and on that surface, I will plant a turmeric plant, also known as turmeric or longa. It is a very strong and versatile plant that can be used for cooking and medicinal purposesSpanish Esta vez no contaba con un espacio mayor, por tanto realice un poco de abono en un tobo ( cubeta ) con esta cantidad fácilmente en unas dos o tres macetas medianas podemos sembrar una planta que no requiera tanto espacio para desarrollarse, con esta cantidad y en esa superficie plantare una planta de cúrcuma, también llamada ( turmérico o longa ) es una plata muy fuerte y versátil ya que se puedes usar para cocinar, como medicinal


Congratulations @angelok! You have completed the following achievement on the Hive blockchain And have been rewarded with New badge(s)
Your next target is to reach 100 upvotes.
You can view your badges on your board and compare yourself to others in the Ranking
If you no longer want to receive notifications, reply to this comment with the word
STOPCheck out our last posts:
Are these yellow ginger?
It's not ginger, it's turmeric ( Curcuma )
I boil the vegetable shells and use the water to fertilize, this way I prevent the substrate from being contaminated, but placing lime and ashes seems to me to be a good way to avoid contaminating agents. Thanks for sharing this way of preparing your fertilizer @angelok
If you boil the vegetable peels, you lose their properties such as vitamins and other nutrients. The correct way is to leave them natural and let the decomposition process take place.
The recommended ash should be from sticks, logs, and wood.
You can add eggshells to your compost. Crush the eggshells into a powder, as this adds calcium.
I love that you are making your own compost/abono and sharing your experiences here! Also, the cúrcuma looks great!! I am growing some too but it is much smaller.
Hello! If I make my own compost, this turmeric plant turned out small because the pot is shallow and there is no more space for it to grow a little more. Although the difference is not much, I will still be sharing. Greetings.