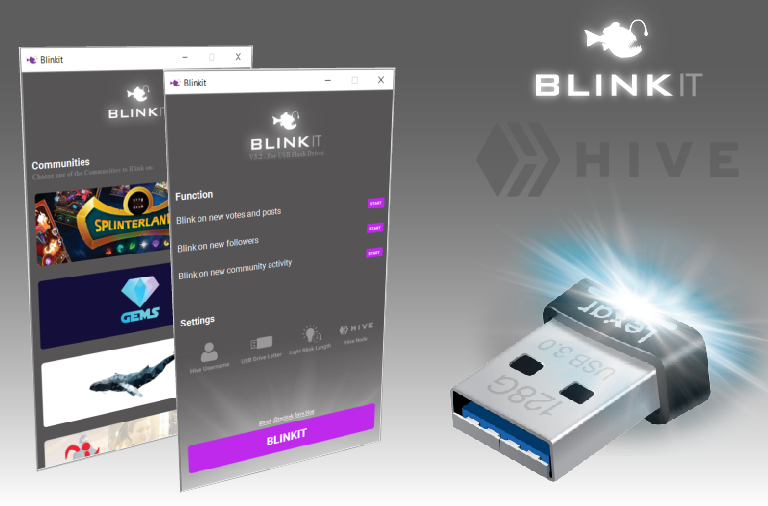
With Blinkit you can blink your devices, and trigger them when Hive blockchain actions occur. Use it to get sound and light notifications of new posts, followers and votes!
The previous released version 3.1 was about the new interface and coding approach for the interface.
Latest release
This new release of Blinkit has the following new functions and changes.

Communities
- 6 Communities are added to receive notification on, they are added with a banner to start each one of them: @ocd, @gems-community, @splinterlands, @actifit, @stemgeeks, @alienarthive. Notifications are triggered on new, and interactions with, the latest post in the selected Hive community.
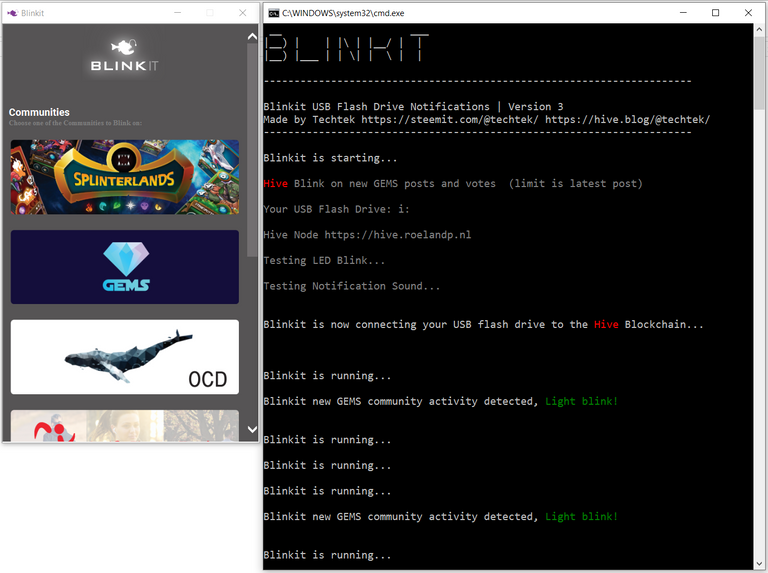
Blinkit blinking on GEMS community activity
Hive Nodes
- Added a new setting and a button to make it possible to edit the Hive node that is used to get the Hive blockchain data from. The suggested nodes that are added, come from these posts from @fullnodeupdate and are verified to have been accepting API requests. the default node that Blinkit uses is set to @roelandp his node:
Other nodes you can choose to use:
https://api.hive.blog @blocktrades
https://api.pharesim.me @pharesim
https://rpc.ausbit.dev @ausbitbank
http://anyx.io @anyx
https://api.hivekings.com @drakos
https://techcoderx.com @techcoderx
https://api.openhive.network @gtg
https://rpc.esteem.app @esteemapp
The above witness nodes are accepting api requests, not every node is accepting these kind of API requests, therefore consider to vote for the above users if they are a witness because they are helping to make Hive more decentralised and make it possible to have apps like Blinkit.
Interface
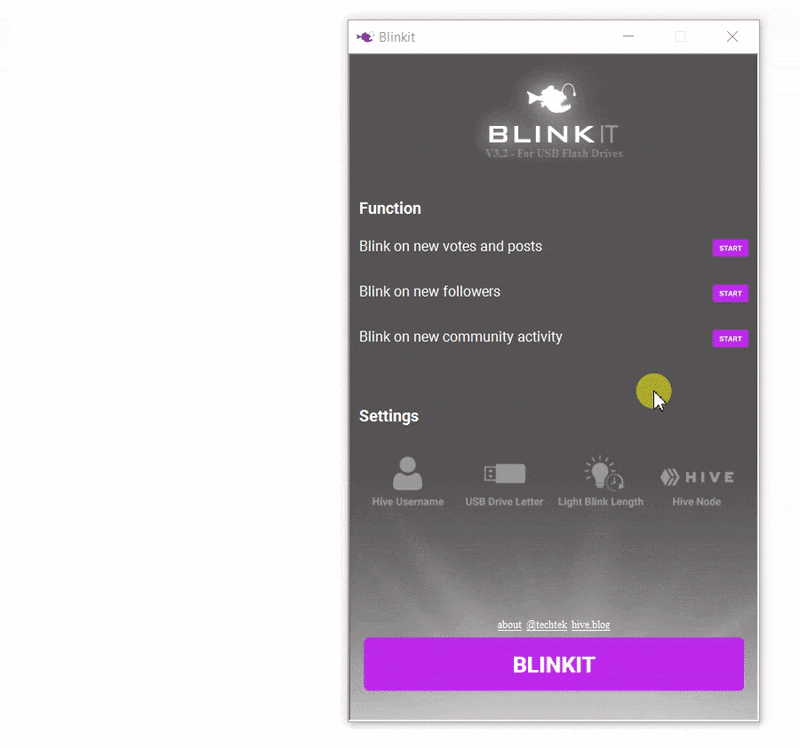
- Interface updates: settings are now icons to save space on the main screen, an extra screen is added to house the community related functions.
Settings are now icons, and a Hive node setting is added.
How to use
To use Blinkit, download the compressed files from Github and extract the content and put the Blinkit folder somewhere and run Blinkit.hta to start the interface.
(Make sure the path to the Blinkit folder does not contain any spaces, because it will result in a error and the program will not function properly)
When Blinkit is started you can press the edit buttons to set the Hive username you want to get notification on, you can set your own or someone else's username. And here you can set the light blink length, Hive Node and USB drive letter, where your USB flash drive is located at and that you want to blink.
After you have edited the settings you can press the purple Blinkit button located at the bottom of the mainscreen to test blink your device, and if it blink you then can press the start button next to the function you want to start.
Supported devices
All USB flash drives are supported and any brand, you probably have one laying around, alternatively a USB Flash card reader can be used, or even a external HDD, but best are USB sticks, for example the Lexar S45 series have a very bright led light, and even some of the most common and inexpensive promotional USB drives have a bright LED light as well.
Technical details
This version of Blinkit is made for Windows 10 and uses batch scripts to interact with the hardware devices. HTA (HTML application) is used for the interface, this approach makes sure that the application will work without the use of heavy SDK's or compiled code.
All the scripts to interact with the devices, as well as the interface can be easily edited with just a text editor. and uses just HTML and CSS for the interface.
Contributing
Contributing is made easy because the coding and project approach is kept easy and straightforward, If you are interested in contributing to the Blinkit project, please find me in the Blinkit Discord server or leave a message under this post.
Please report bugs you may encounter so that they can be fixed.
Feedback is always very welcome, and helps to improve the Blinkit project, Thank you for your interest in the Blinkit project.
Blinkit v3.2

Testing
test
test
test
test
test
Test
Testing