We remain here

English
Greetings Holozing friends!
I'm glad to be with you once again, I hope you are very well.
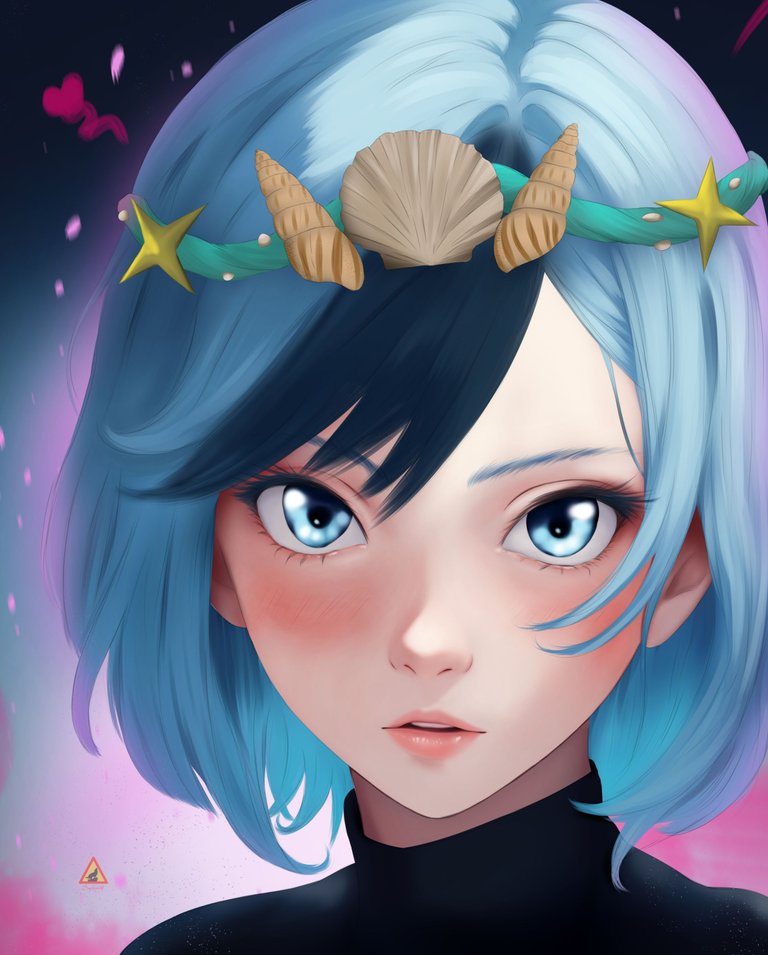
This time I want to share with you a different illustration, I wanted to make a new avatar for my blog using one of the holozing characters, I had a long time without trying this style of drawing so I wanted to take some time to finish it.
I didn't get the result I was originally looking for BUT I admit that this result is very nice, I already want to use it as my avatar image in my profile.
I will try to explain in detail the whole creative process, as well as the step by step.
without more to say let's get started!
Español
Saludos amigos de Holozing!
Me alegra estar con ustedes una vez mas, espero estén muy bien.
En esta oportunidad les quiero compartir una ilustración un tanto diferente, quería hacer un nuevo avatar para mi blog usando uno de los personajes de holozing, tenia muchísimo tiempo sin intentar este estilo de dibujo por lo que quise tomarme un buen tiempo para terminarla.
No conseguí el resultado que buscaba originalmente PERO admito que este resultado es muy bonito, ya quiero usarla de imagen de avatar en mi perfil.
Tratare de explicar a detalle todo el proceso creativo, asi como tambien el paso a paso.
sin mas que decir empecemos!

Reference

Process/Proceso
My first impression, being only a face, was that this illustration would not take me much time, nothing could be further from the truth. As I was building the character I wanted to experiment with brushes, details, filters, colors, etc.
Therefore, this illustration beyond everything is also an experiment and learning.
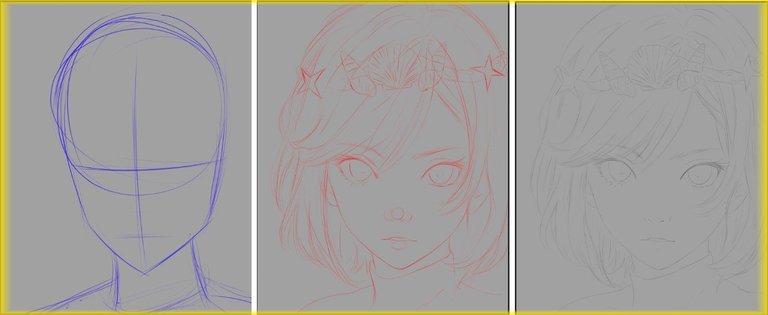
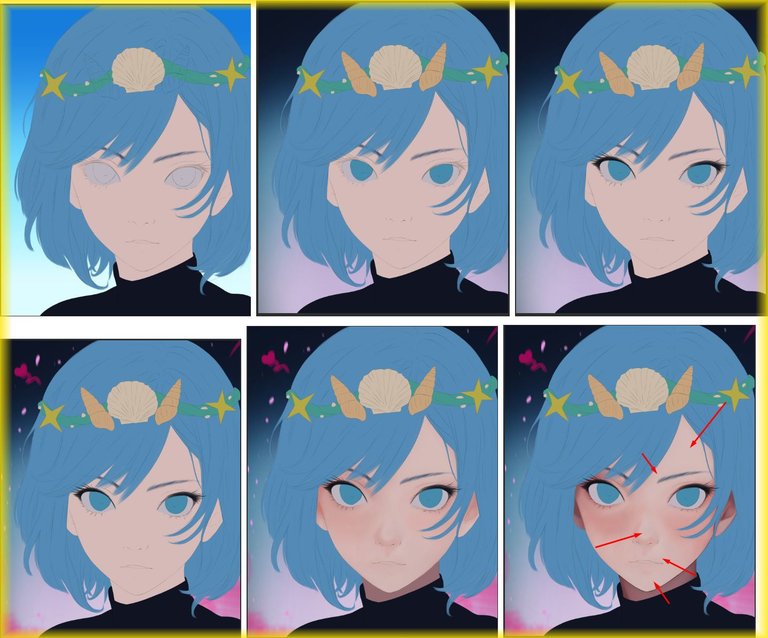
- We make the base shape of the face in blue, the view is frontal, but I didn't want it to look too flat so I gave it a slight touch to the left.
- In blue color we make the sketch, at this point we correct the proportions, for the nose we use 3 small circles which are very important when giving color.
- Once the sketch is ready we create the lineart in black color and a transparency of 50%, I was very tempted to put thick lines and see how it looks, I really thought a lot about it, in the end I decided to stay with the ones I always use, maybe for the next one.
Mi primera impresión al ser solo un rostro es que esta ilustración no me llevaría mucho tiempo, nada mas alejado de la realidad a medida que fui construyendo el personaje quise experimentar con pinceles, detalles, filtros, colores, etc.
Por lo tanto, esta ilustración más allá de todo también es un experimento y aprendizaje.
- Hacemos la forma base del rostro en color azul, la vista es frontal, pero no quería que se viera muy plana por eso le di un ligero toque a la izquierda.
- En color azul hacemos el boceto, en este punto corregimos las proporciones, para la nariz usamos 3 pequeños círculos los cuales son muy importantes al momento de dar color.
- una vez listo el boceto creamos el lineart en color negro y una transparencia del 50%, estaba muy tentado a colocar lineas gruesas y ver como queda, realmente lo pensé mucho al final decidí quedarme con las que siempre utilizo tal vez para la próxima.
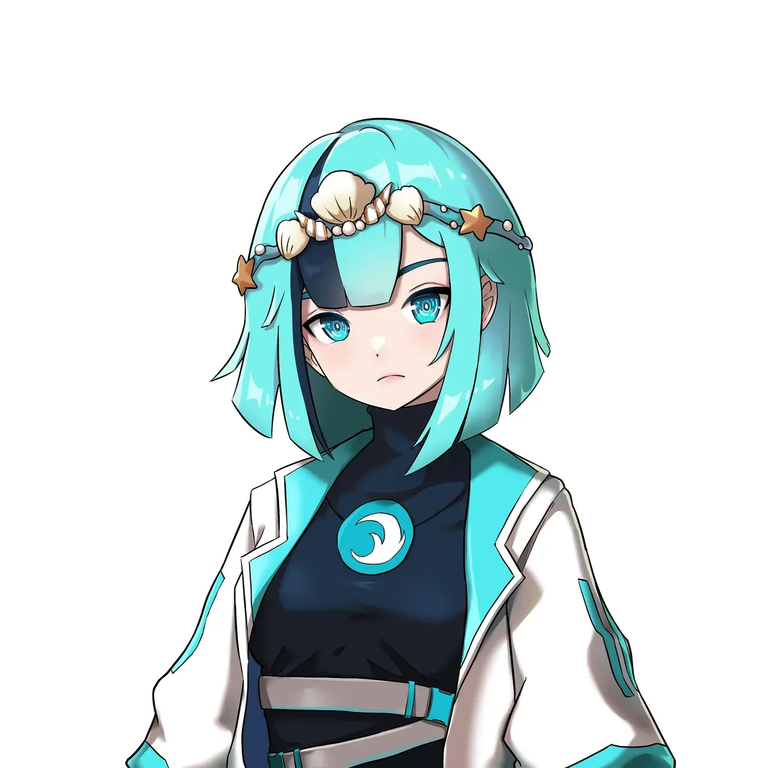
We apply the base color, for this we take into account the version we are using of the character, as some of you may know this character has many variants, but this is the classic one so to speak.
Aplicamos el color base, para esto tenemos en cuenta la versión que estamos usando del personaje, como algunos sabrán este personaje tiene muchas variantes, pero esta es la clásica por decirlo de alguna forma.
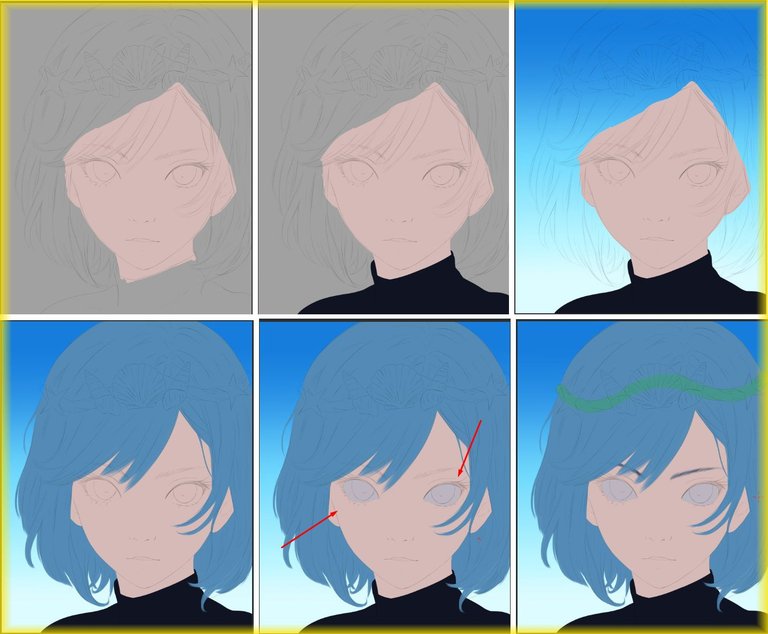
Once all the base color is ready, we apply a background as you could notice this change from light blue tones to a darker one, I did this in order to create more contrast between the character and the background.
Also highlight the purple lights.
The skin, here I want to make a small parenthesis, in spite of being a relatively small area, it was the part that took me more time to finish.
To start with the skin we make a very soft shadow, almost imperceptible, with reddish tones.
Here we can see where the areas with more light will be.
Una vez listo todo el color base, aplicamos un fondo como pudieron notar este cambio de tonos azul claro a uno mas oscuro, esto lo hice con la finalidad de crear mas contraste entre el personaje y el fondo
También resaltar las luces de color morado.
La piel, aqui quiero hacer un pequeño paréntesis, a pesar de ser una zona relativamente pequeña, fue la parte que más tiempo me llevo terminar.
Para iniciar con la piel hacemos una sombra muy suave, casi imperceptible, con tonos rojizos.
Aqui podemos apreciar donde estarán las zonas con más luz
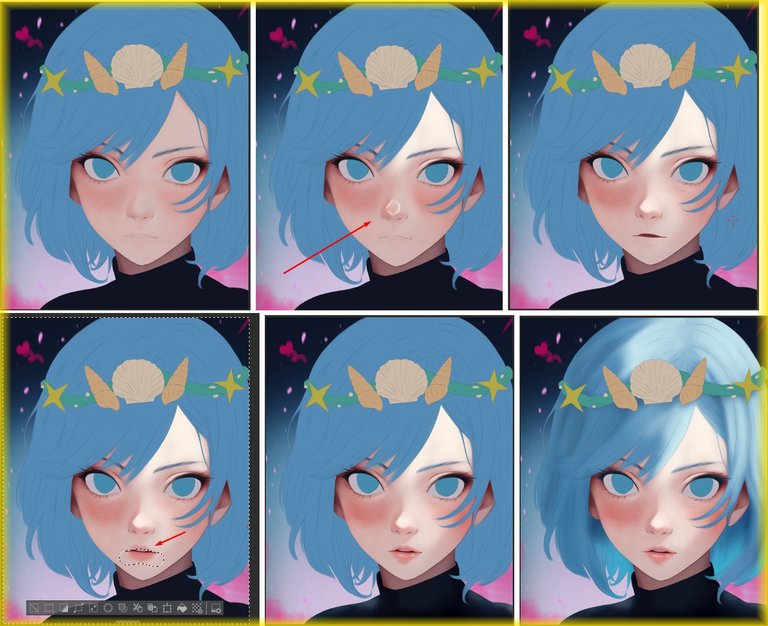
Remember the sketch, it helps us to give relief to the nose as well as the lips.
I know there are many ways, but this is the one I know best in this type of drawing.
For the lips I helped myself with the selection tools to avoid staining other areas, I must emphasize that all this process was done with the airbrush tool.
All the skin took me quite a while, partly because I wanted to experiment with colors and ways to do it and partly because of those little details.
With respect to the hair we will do something similar, some soft shadows delimit where the shadows and lights will be in the hair.
Recuerdan el boceto, este nos ayuda al momento de darle relieve a la nariz al igual que en los labios.
sé que existen muchas formas, pero esta es la que yo mas conozco en este tipo de dibujos.
Para los labios me ayude con las herramientas de selección para evitar manchar otras zonas, debo resaltar que todo este proceso lo realice con la herramienta de aerógrafo.
Toda la piel me llevo un buen rato, en parte porque quise experimentar con colores y formas de hacerlo y otra por esos pequeños detalles.
Con respecto al cabello haremos algo parecido, unas sombras suaves delimitan donde estarán las sombras y luces en el mismo.
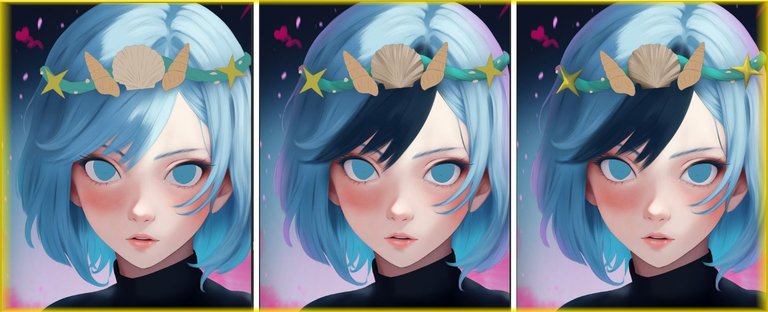
We give much more detail to the hair, at the end we apply a light purple light reflected on the hair.
The dark strand I did it in a new layer using the multiply effect, with this we take advantage of the relief that I added in the other layer.
Le damos muchos mas detalles al cabello, al finalizar aplicamos una ligera luz morada reflejada en el cabello.
El mechón oscuro lo hice en una nueva capa usando el efecto multiplicar, con esto aprovechamos el relieve que agregue en la otra capa.
Finally we added the details of the headband, these little shells were inspired by the character and some I found on the beach very similar, they had that beautiful striped design.
As last detail and most important part of the illustration, the eyes, I was experimenting with the shines and shadows until I found something I was happy with.
At this stage I took some time to correct certain details and colors, I was looking for all the colors to look in harmony.
Para finalizar agregamos los detalles del cintillo, estos pequeños caracoles fueron inspirados en los del personaje y unos que encontré en la playa muy parecida, ellos tenían ese hermoso diseño rayado.
Como último detalle y parte más importante de la ilustración, los ojos, estuve experimentando con los brillos y sombras hasta encontrar algo con lo que estar conforme.
ya en esta etapa me tomé un tiempo para corregir ciertos detalles y colores, estuve buscando que todos los colores se vean en harmonía.


Friends we reached the end, I hope you liked it as much as I did, I'm considering doing a series of illustrations with other curators of the game following the same style, it would be great to have one of each hehe.
I want to thank you for being here and for all the support.
See you cowboys!
Amigos llegamos al final, espero les haya gustado tanto como a mí, estoy considerando hacer una serie de ilustraciones con otros curadores del juego siguiendo el mismo estilo, sería genial tener una de cada una jeje.
Quiero darles las gracias por estar aquí y por todo el apoyo.
¡Nos vemos vaqueros!
Tools:
- CLIP STUDIO
- Inspiroy H640 Pen Tablets
- Corel PHOTO-PAINT 2019
- www.deepl.com/translator
She was so fine 😍
!PIZZA
$PIZZA slices delivered:
(9/10) @danzocal tipped @sephiwolf
Congratulations @sephiwolf! You have completed the following achievement on the Hive blockchain And have been rewarded with New badge(s)
Your next target is to reach 68000 upvotes.
You can view your badges on your board and compare yourself to others in the Ranking
If you no longer want to receive notifications, reply to this comment with the word
STOP