Arte Digital | Digital Art
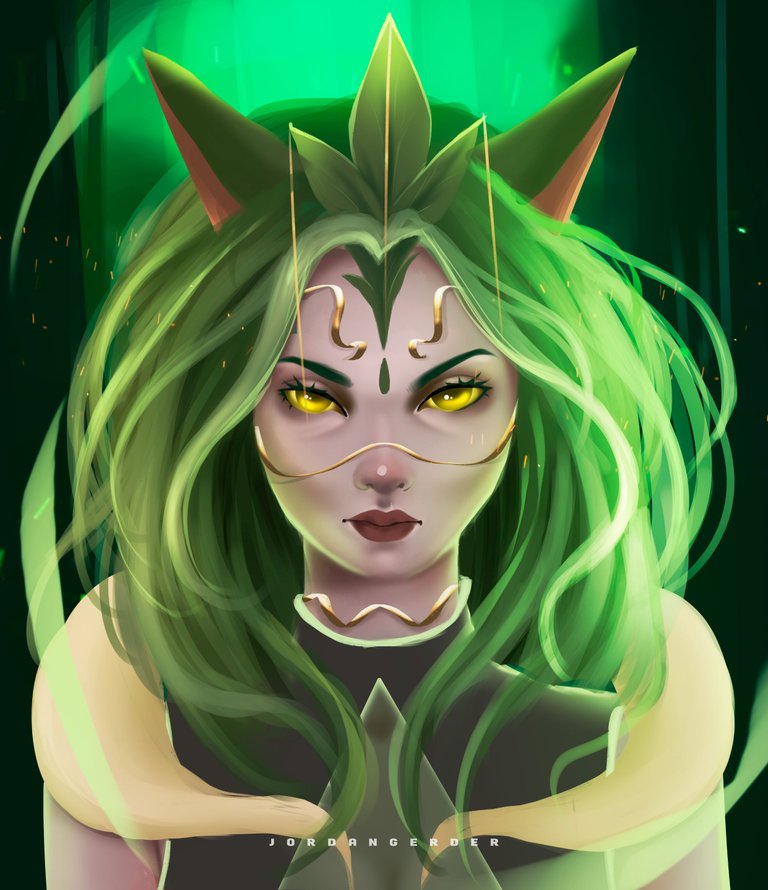
Let's see a little about the creation process, it's always good to see what's behind each art, join me⏩⏩⏩...Hello people, how are you today? I hope that very good. Today I decided to make a new fanart for the @holozing community and I had days imagining what the human version of the raccoon would be like, at the beginning I wanted to make a fusion between the forest healer with the characteristics of the raccoon beast, but in the end it became and looking like this character, I remember that it was the first fanart I made, I loved it very much, its colors are very vivid and striking so I decided to use it on this magical face, I want to know what you think 🤗
Materiales | Materials
- Desktop computer
- Tableta Huion H950P
- Programa Adobe Photoshop 2019
- Ordenador de mesa
- Huion H950P tablet
- Adobe Photoshop 2019 program
Proceso | Process
Paso 1
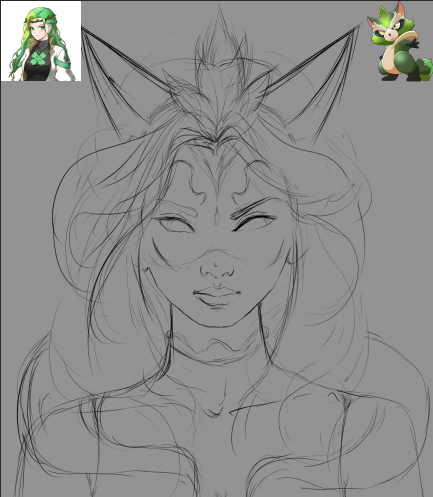
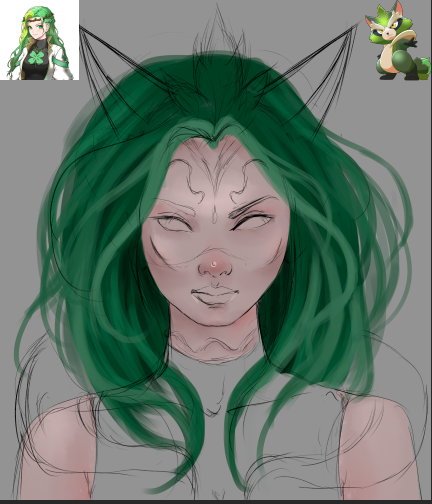
- Iniciamos con un bosquejo de lo que sería el personaje, creando una silueta y dejando que fluyan lineas sobre él, asi es como resulta mas facil su creación:
Step 1
- We start with a sketch of what the character would be, creating a silhouette and letting lines flow over it, this is how its creation is easier:
Paso 2
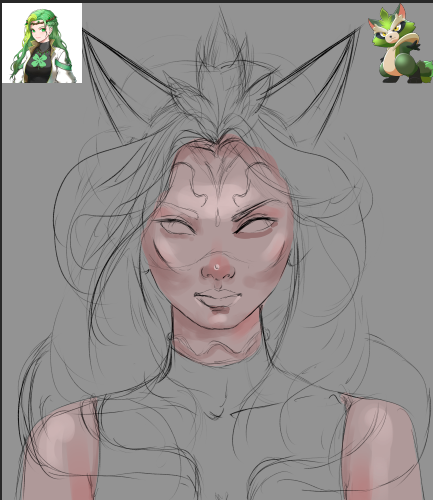
- Una ves que conseguimos un bosquejo mas claro, o donde se aprecie el personaje al cual agregaremos volumen y forma, agrego parches de tres colores no muy sataturados, una base, un color para identificar sus sombras y otro tono para identificar la luz o la parte alta del cuerpo:
Step 2
- Once we get a clearer sketch, or where the character to which we will add volume and shape can be seen, I add patches of three not very saturated colors, a base, a color to identify its shadows and another tone to identify the light or the part. body height:
Paso 3
- Mezclamos los colores que agregamos anteriormente, para esto uso un pincel suave de bordes difusos, con este el proceso es mucho mas facil:
Step 3
- We mix the colors that we added previously, for this I use a soft brush with diffuse edges, with this the process is much easier:
Paso 4
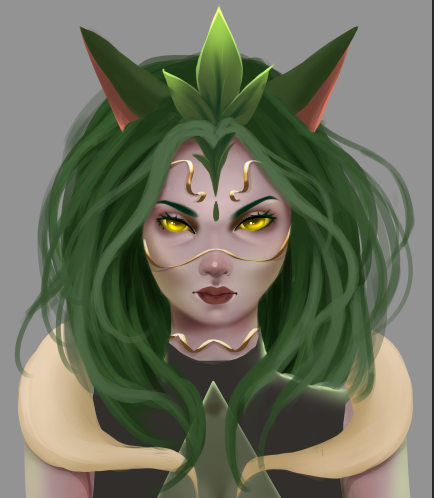
- Ajusté un poco el color del cabello quería que fuera mas verde. Trabajé en su ojos lo hice amarilloo tambien su esclera, esto le dió algo de misterio al personaje, agregué las partes de raccoon sus orejas y la planta que lo representa, añadí algunos metales en su rostro para que tuviera mas detalle y no estuviera tan vacío el rostro...
Step 4
- I adjusted the hair color a little, I wanted it to be more green. I worked on his eyes, I made them yellow or also his sclera, this gave some mystery to the character, I added the raccoon parts, his ears and the plant that represents him, I added some metals on his face so that it had more detail and was not so empty the face...

Paso final
- Para finalizar todo el proceso de creación agregué detalles finales como brillos, mas luces y ajustes totales de color.
Final step
- To finalize the entire creation process, I added final details such as highlights, more highlights and total color adjustments.
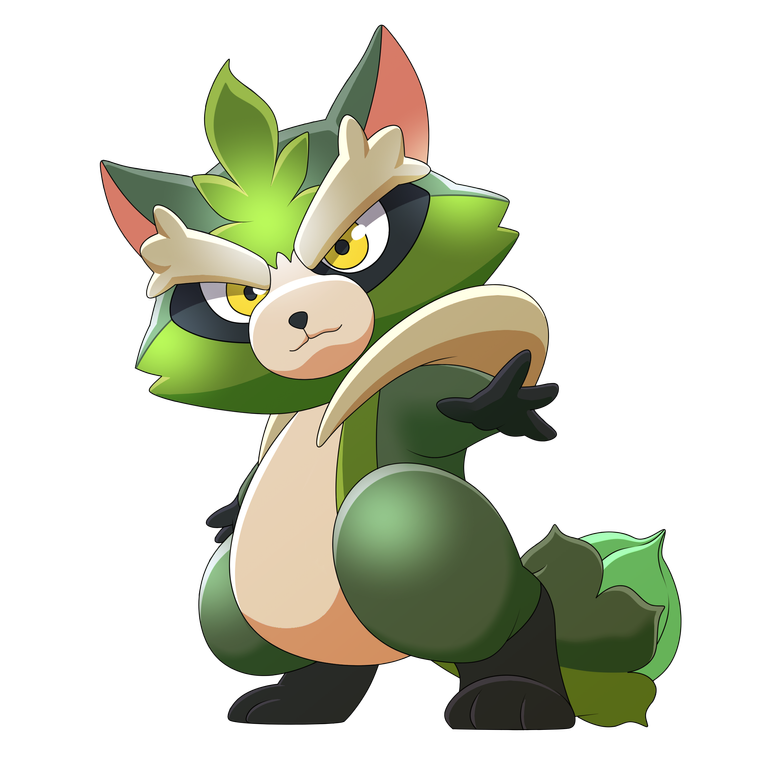
We got an incredible result, I really enjoyed the creation process. I hope you liked it, I have elaborated it with love for all the viewers who visit this publication, see you in the next one 😍
𝑮𝒓𝒂𝒄𝒊𝒂𝒔 𝒑𝒐𝒓 𝒗𝒊𝒔𝒊𝒕𝒂𝒓 𝒎𝒊 𝒃𝒍𝒐𝒈, 𝒂𝒑𝒓𝒆𝒄𝒊𝒐 𝒎𝒖𝒄𝒉𝒐 𝒕𝒖 𝒂𝒑𝒐𝒚𝒐 / 𝑻𝒉𝒂𝒏𝒌 𝒚𝒐𝒖 𝒇𝒐𝒓 𝒗𝒊𝒔𝒊𝒕𝒊𝒏𝒈 𝒎𝒚 𝒃𝒍𝒐𝒈, 𝑰 𝒓𝒆𝒂𝒍𝒍𝒚 𝒂𝒑𝒑𝒓𝒆𝒄𝒊𝒂𝒕𝒆 𝒚𝒐𝒖𝒓 𝒔𝒖𝒑𝒑𝒐𝒓𝒕.
TWITTER ⚪ NFT SHOWROOM ⚪ INSTAGRAM ⚪ DISCORD



Holo! We've chosen your wonderful artwork to be viewed on holozing.com/fanart, please let us know if you'd like it removed from there for any reason. Thank you!
Oh thank you very much, it will be incredible to see you there, it makes me happy