Saludos 👋 Queridos 💞 Amigos de Hive Diy 😃!! // Greetings 👋 Dear 💞 Hive Diy Friends 😃!!!
Tutorial de cómo elaborar un hermoso collar en tela de blue jeans. // Tutorial on how to make a beautiful necklace out of blue jeans fabric.
Una vez más vengo por esta maravillosa comunidad para enseñarles un poco de mi trabajo, hoy elabore un collar con retazos de tela de blue jeans que me quedó super hermoso 😍. Este collar es muy sencillo de hacer, además que al usarlo queda precioso 🤩 y lo puedes combinar con unos pantalones de jeans.
Once again I come to this wonderful community to show you some of my work, today I made a necklace with scraps of blue jeans fabric that was super beautiful 😍. This necklace is very easy to make, and when you wear it it looks beautiful 🤩 and you can combine it with jeans pants.
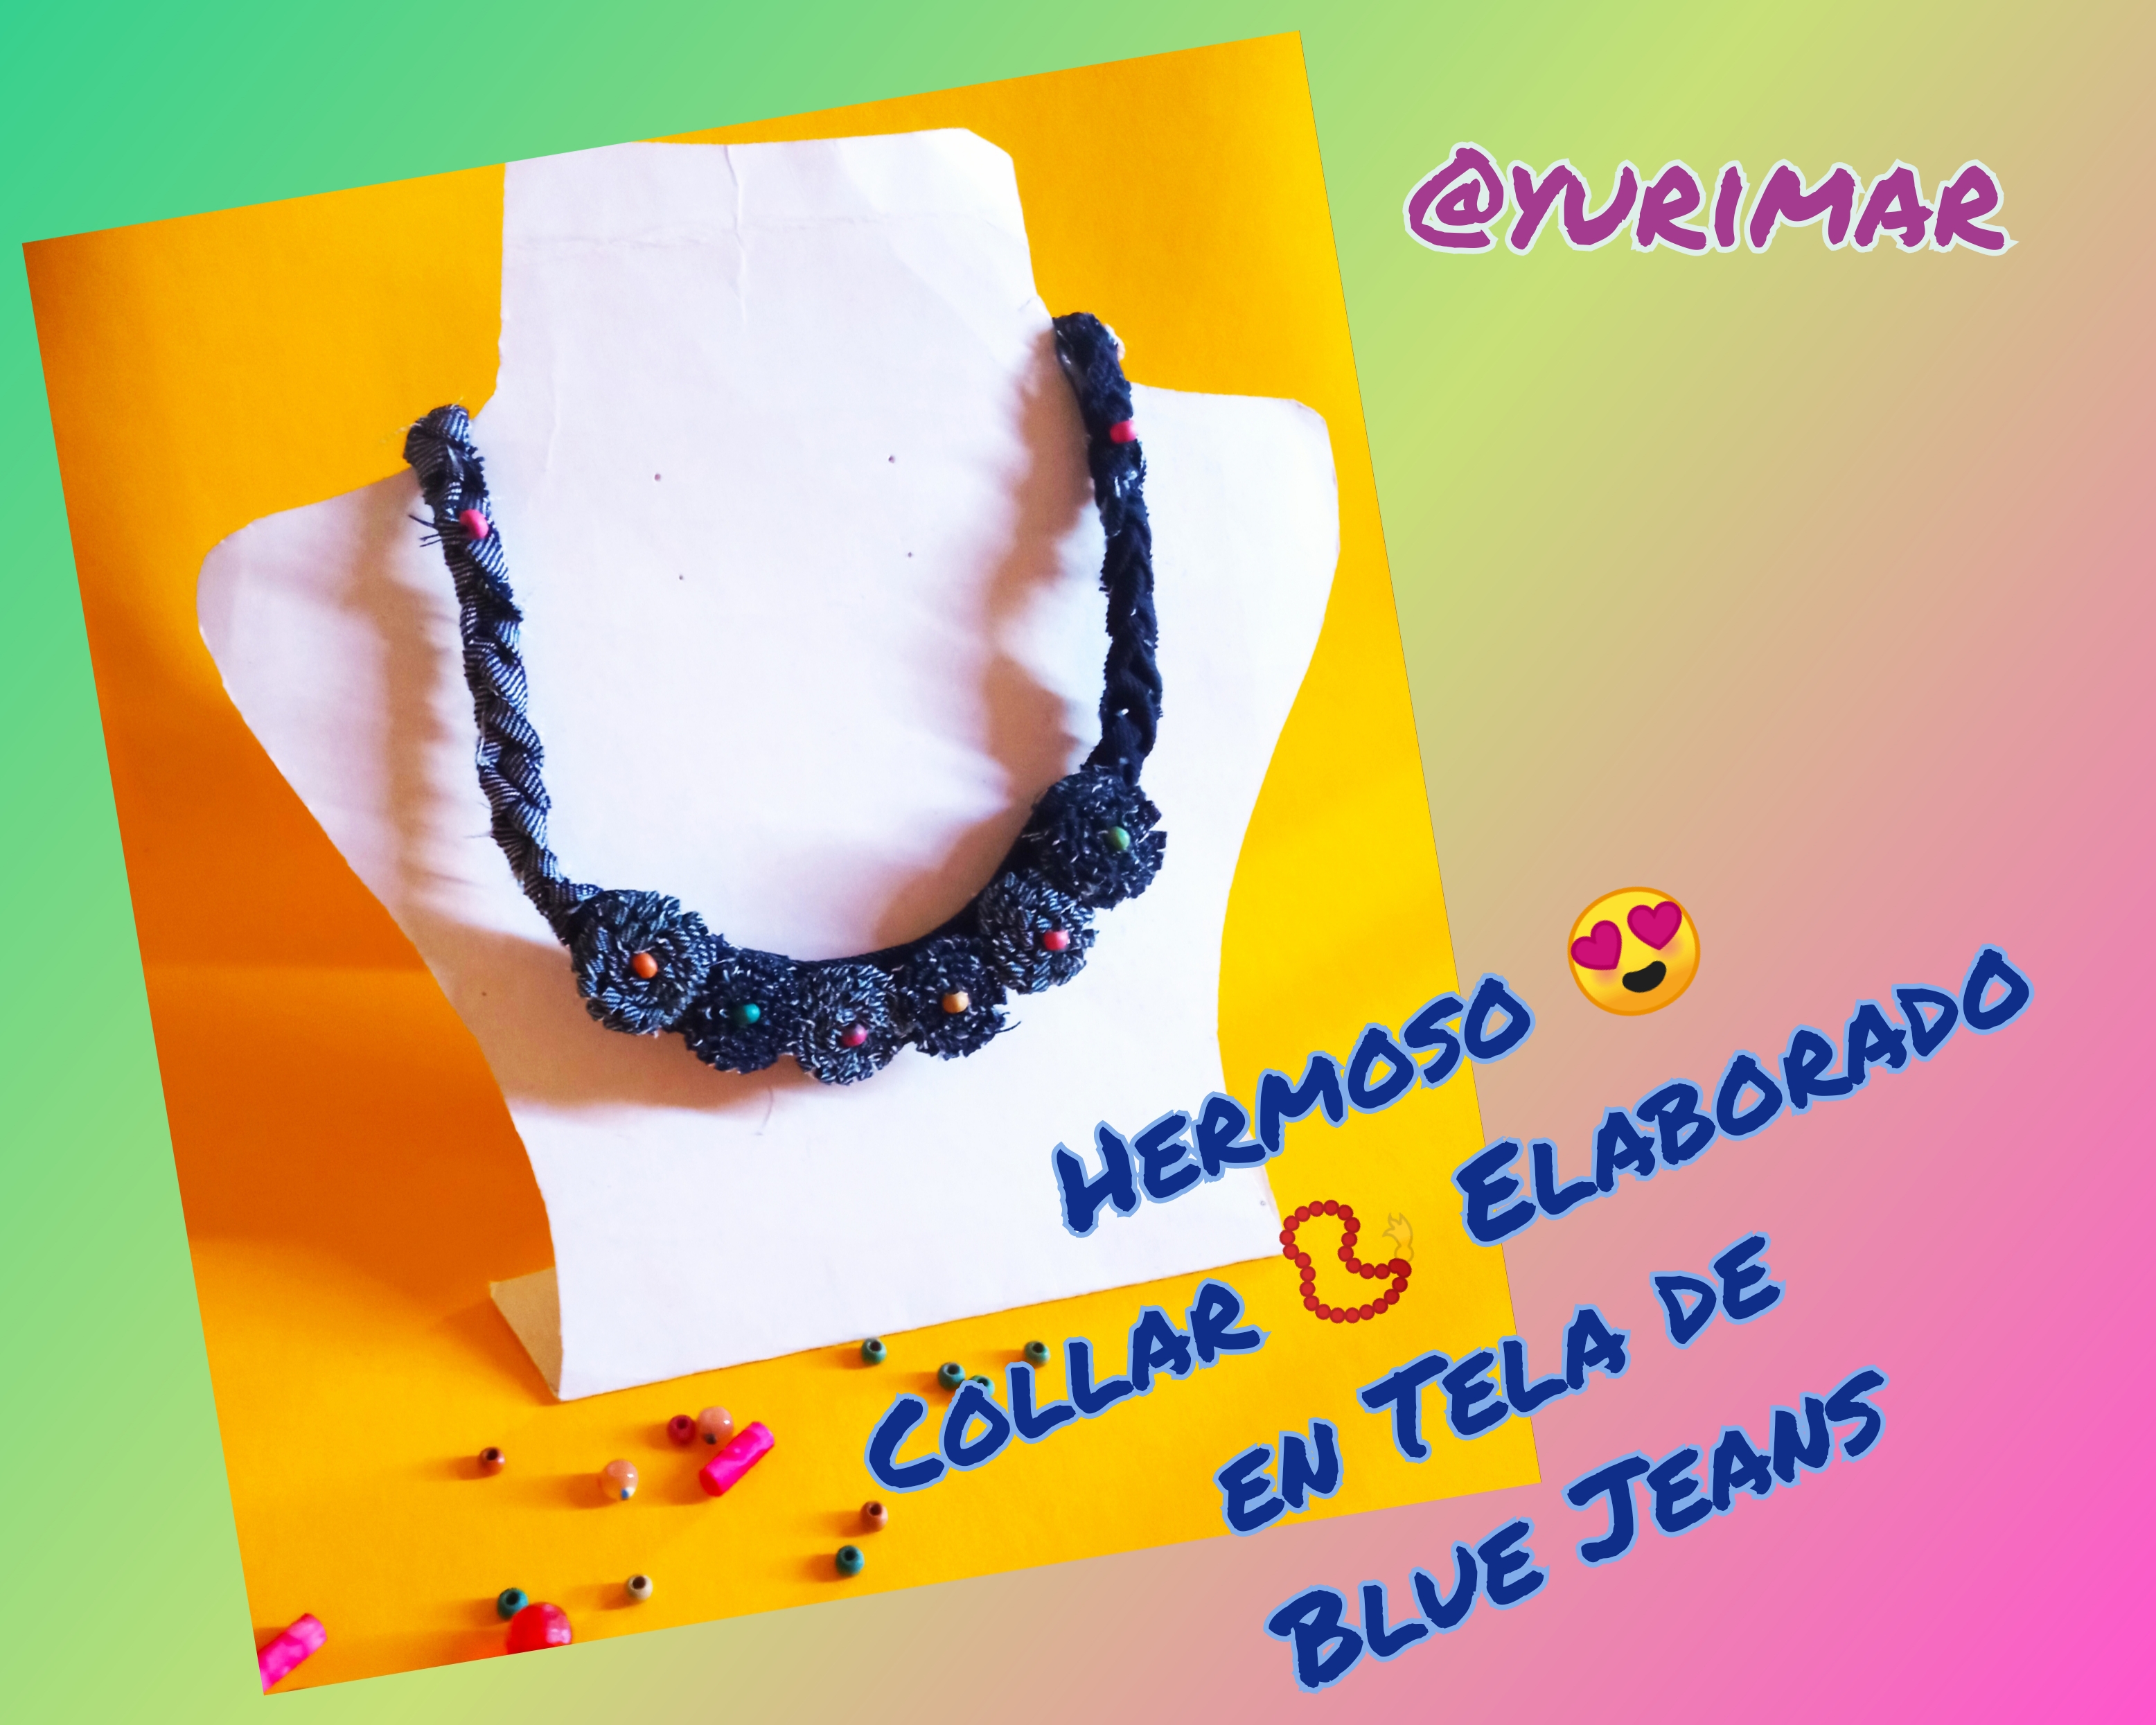
Hace dos años que elaboró collares con tela y los que más me piden son los elaborados con tela de blue jeans. Es por ello que al realizar este collar quise capturar el paso a paso para mostrarselos a ustedes. Para la elaboración de este collar les voy a detallar los materiales que utilice.
I have been making necklaces with fabric for two years now and the ones I get the most requests for are the ones made with blue jeans fabric. That is why when I made this necklace I wanted to capture the step by step to show it to you. For the elaboration of this necklace I am going to detail the materials I used.
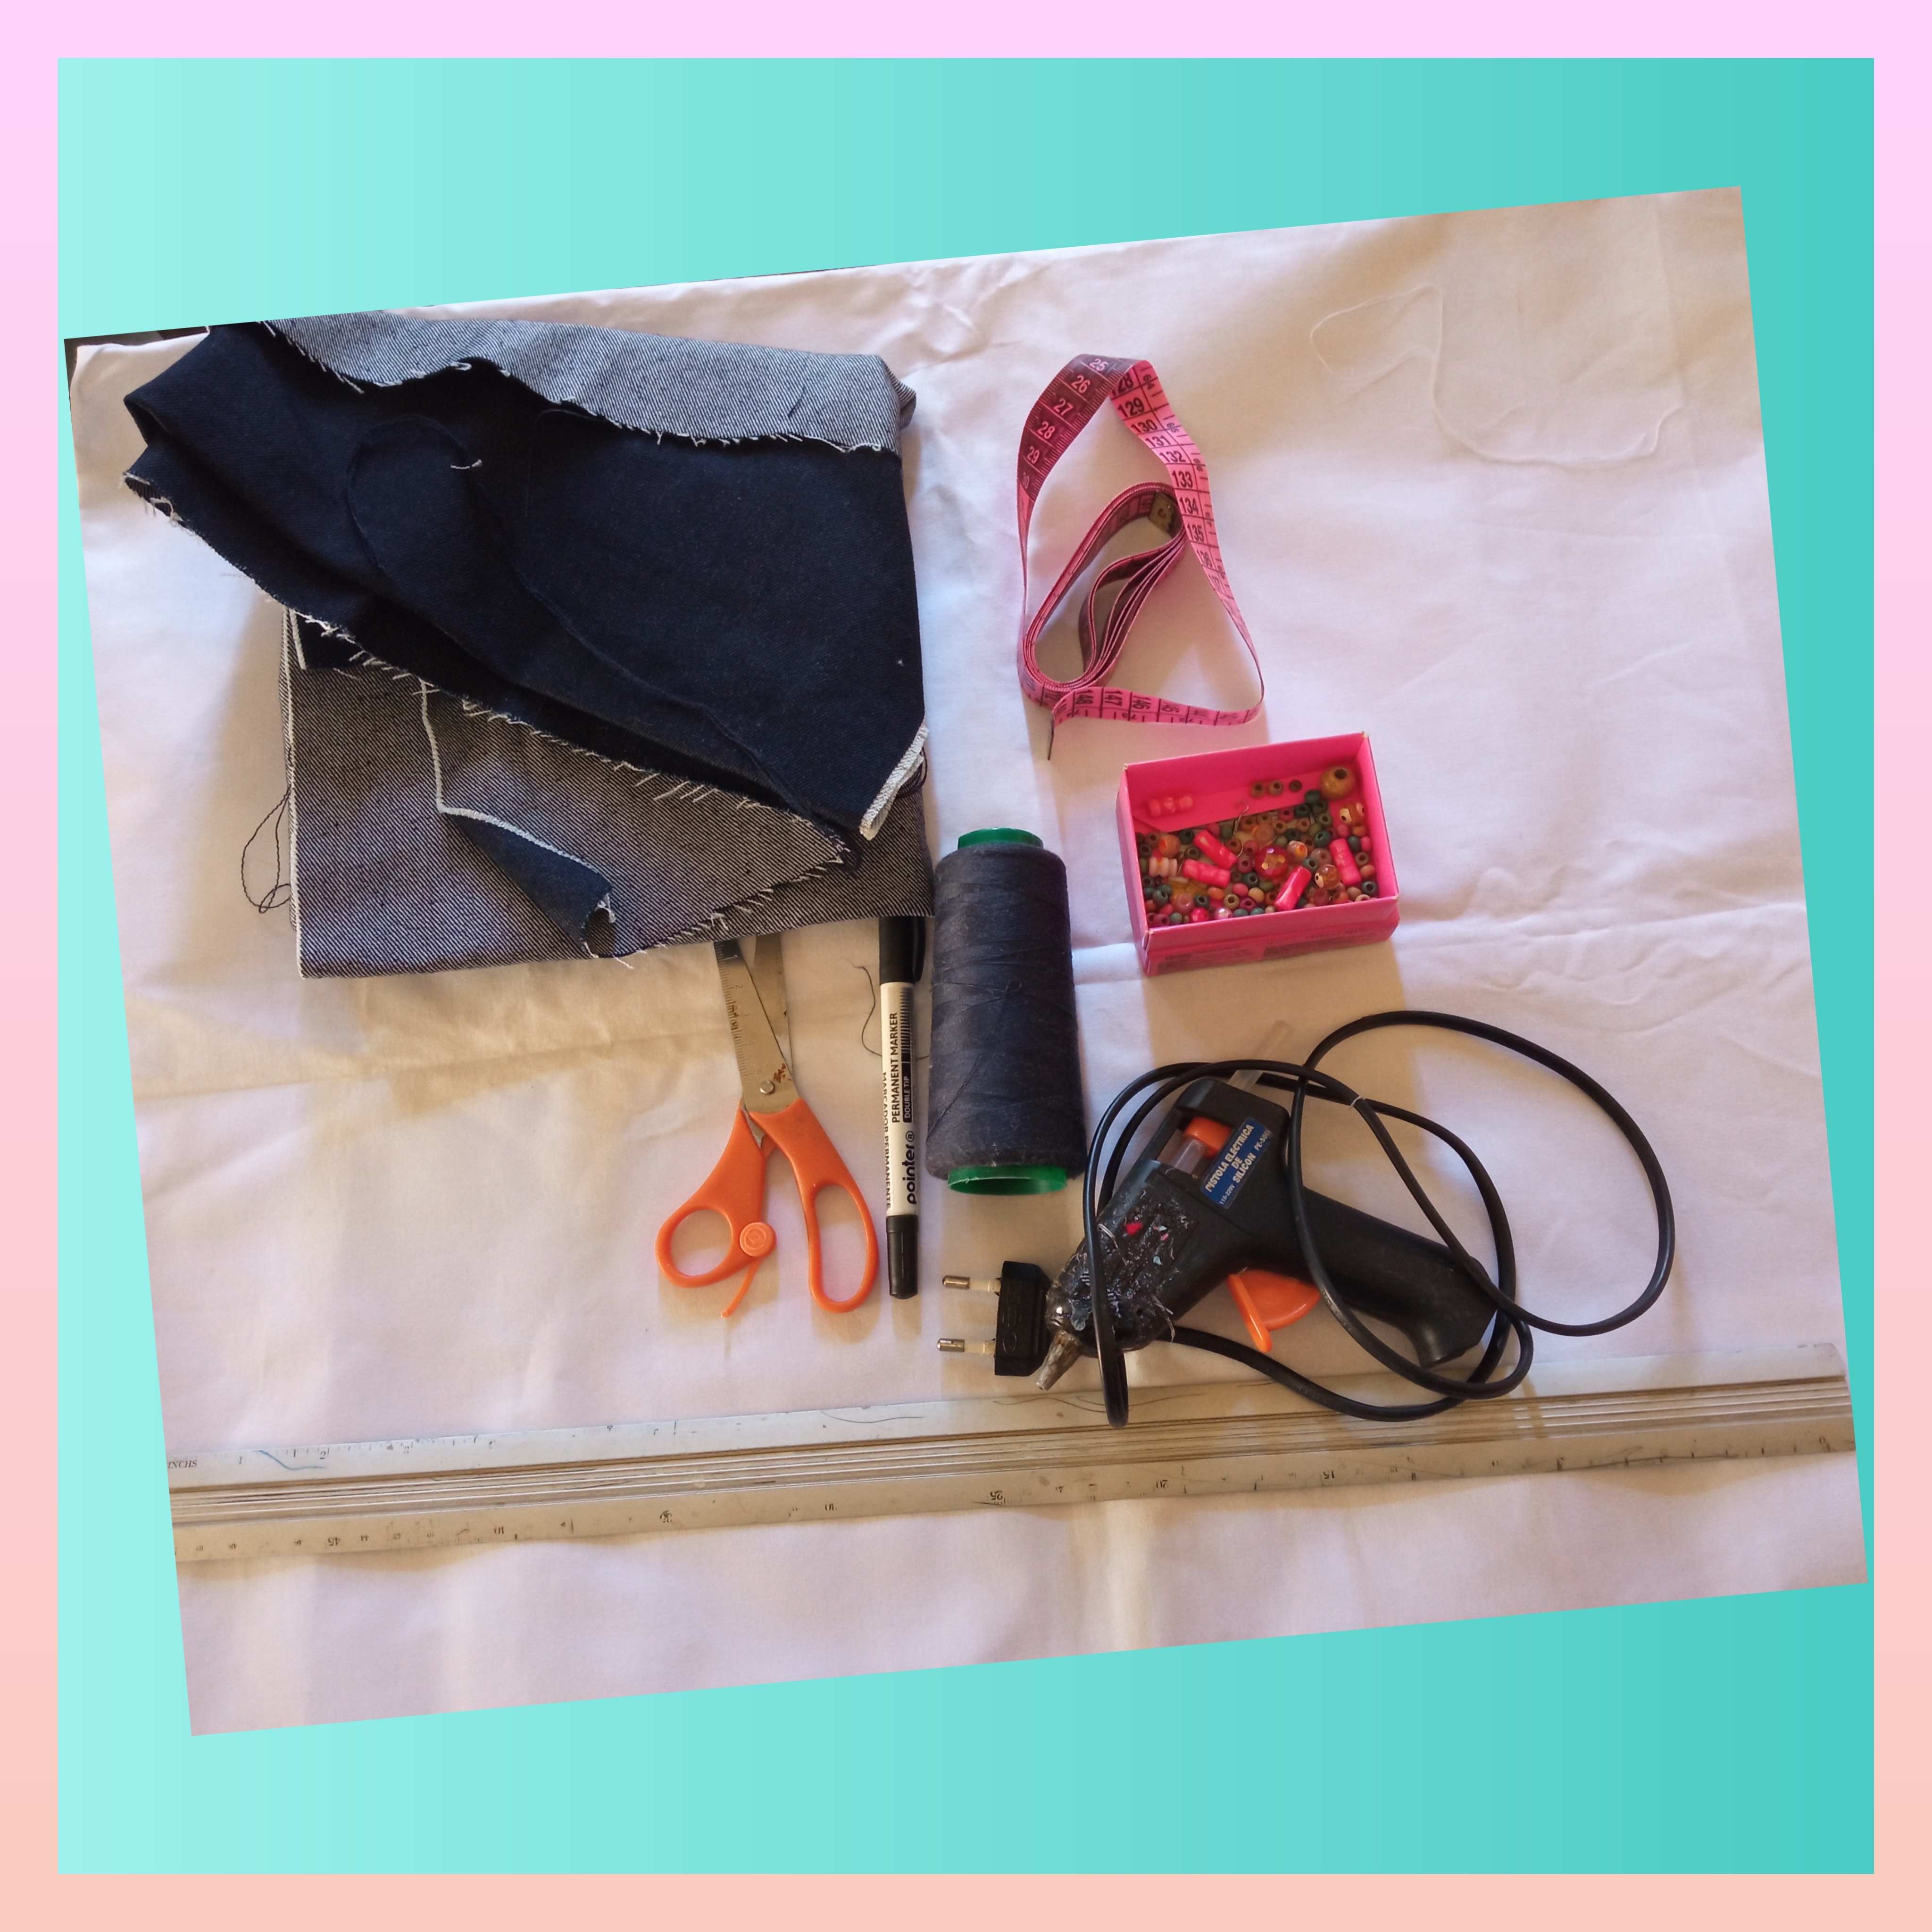
📿Materiales:📿
- Retazos de telas de blue jeans.
- Cartón.
- Pelas de colores.
- Hilo negro.
- Aguja.
- Tijera.
- Pistola de Silicon.
📿Materials:📿
- Blue jeans fabric scraps.
- Cardboard.
- Colored fabrics.
- Black thread.
- Needle.
- Scissors.
- Silicon gun.
📿 Elaboración:📿 // Prepared by:
Paso 1:
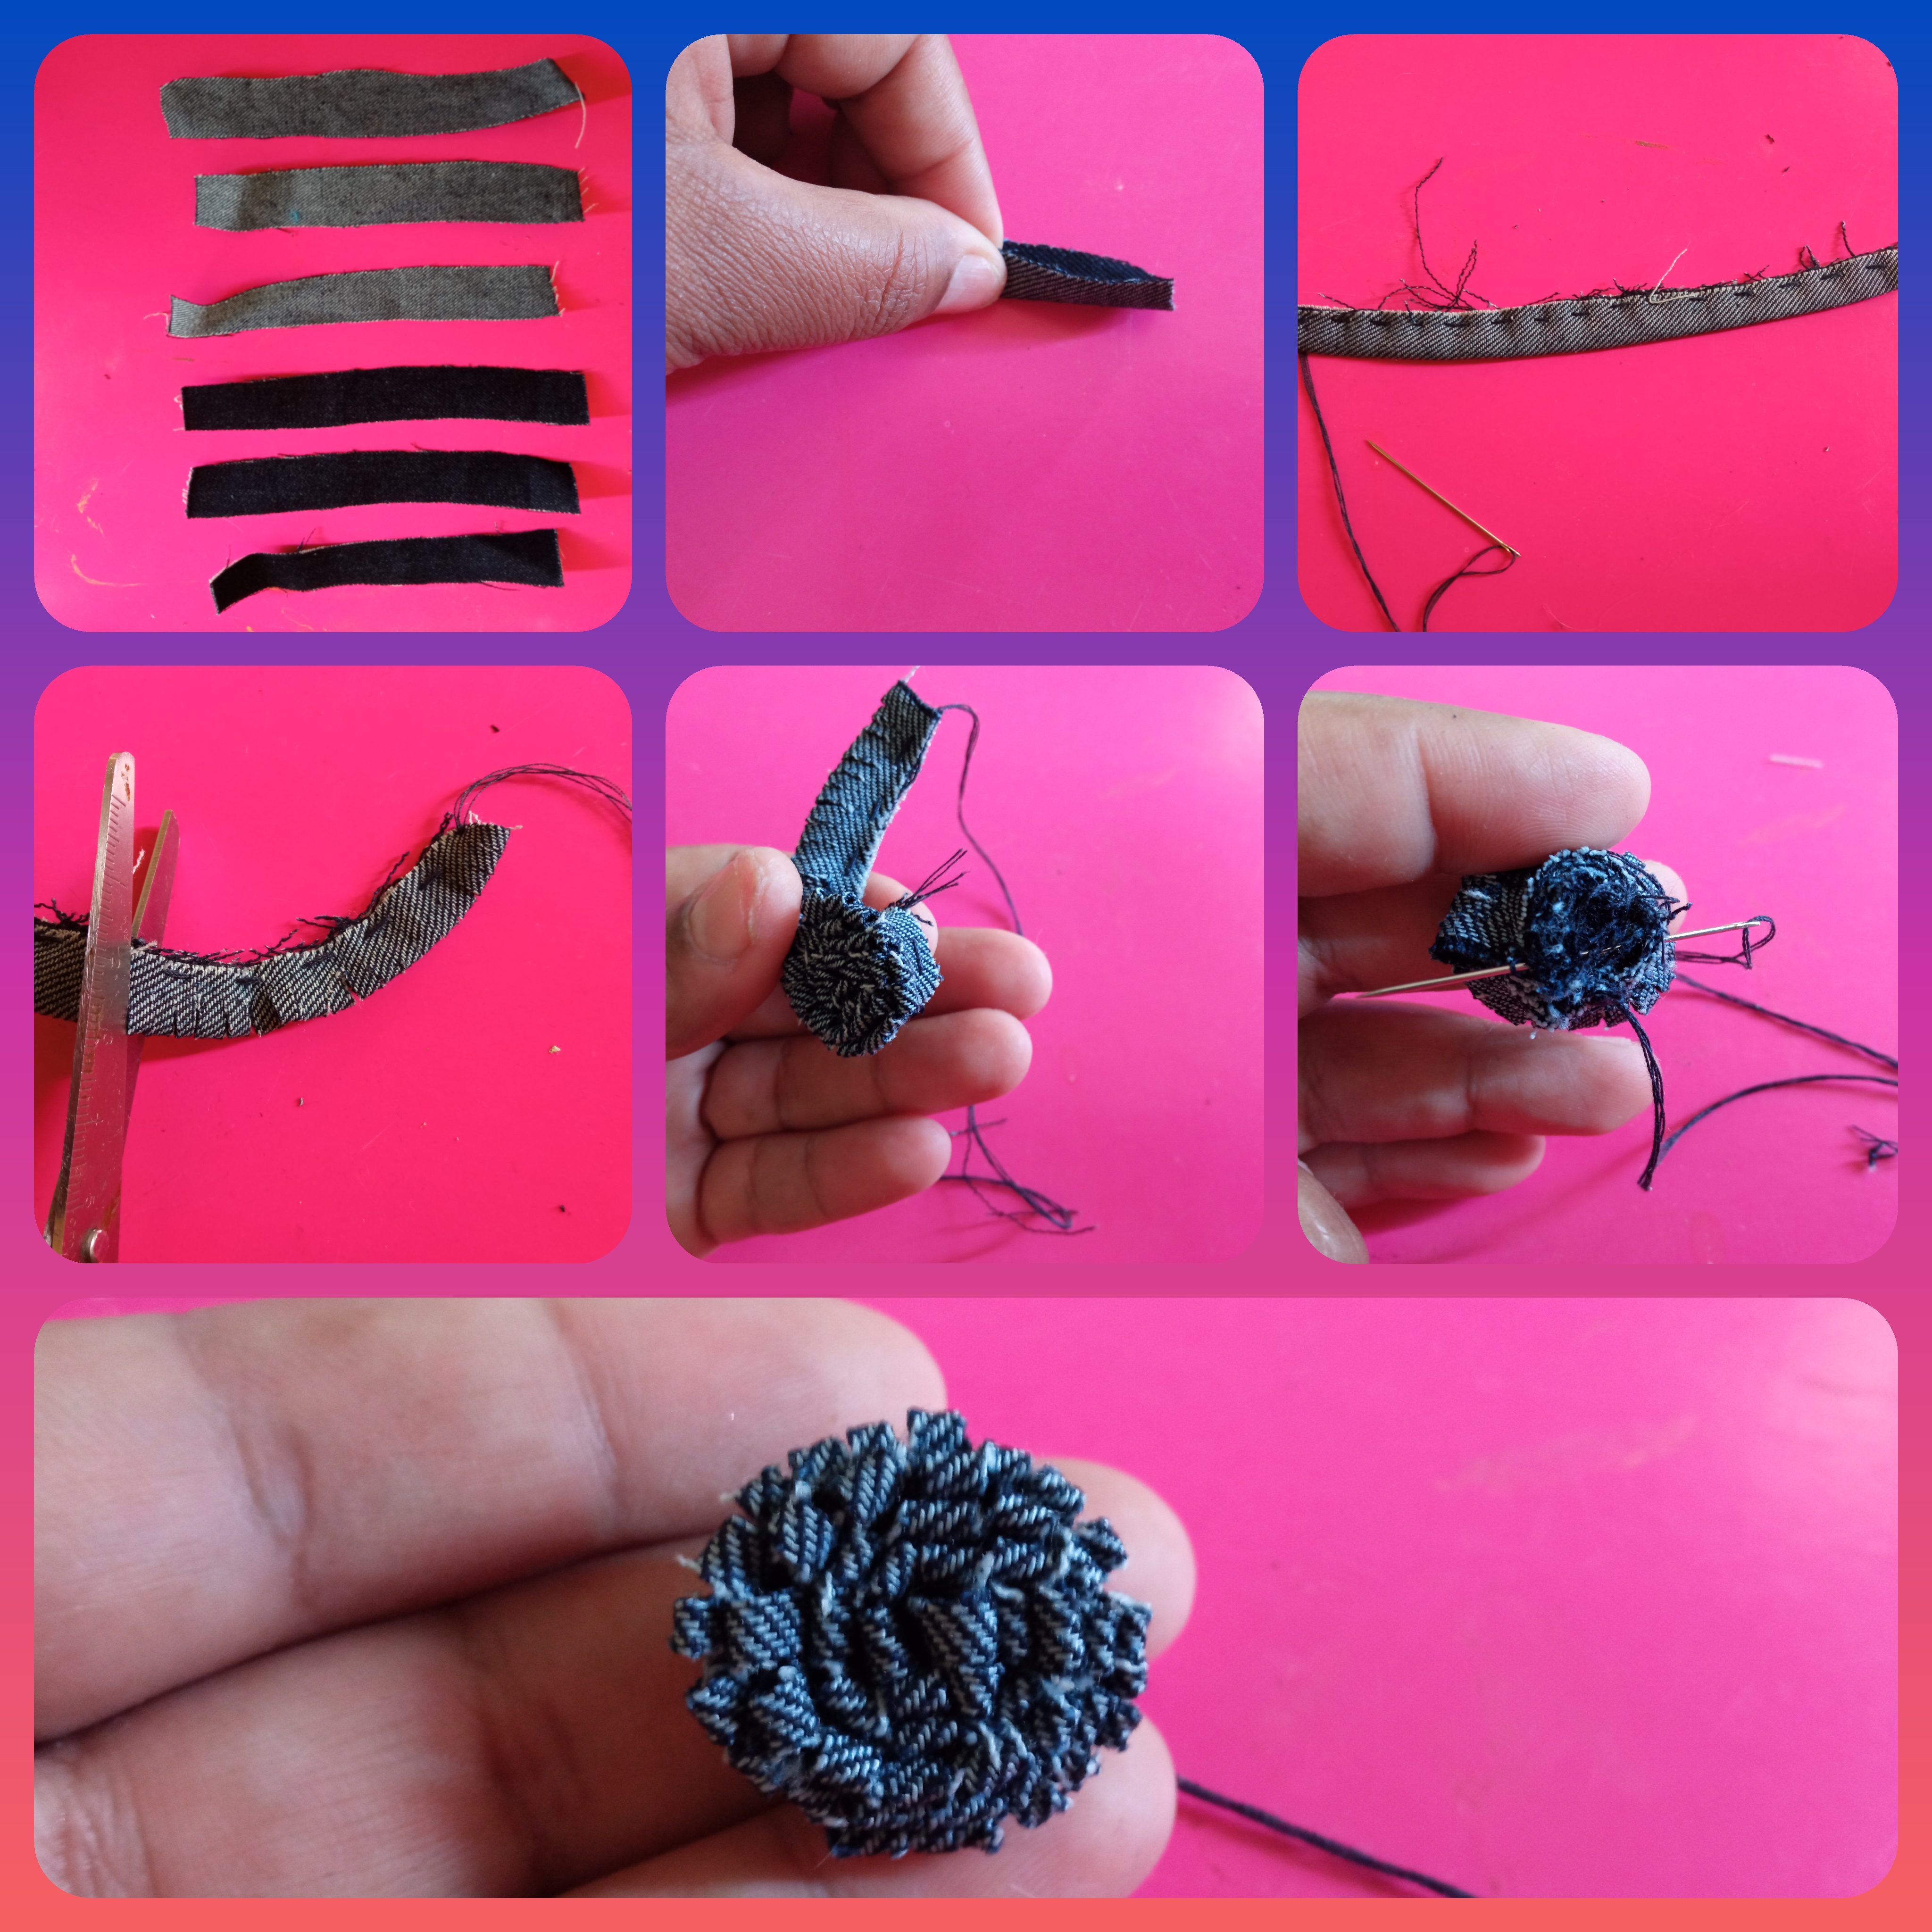
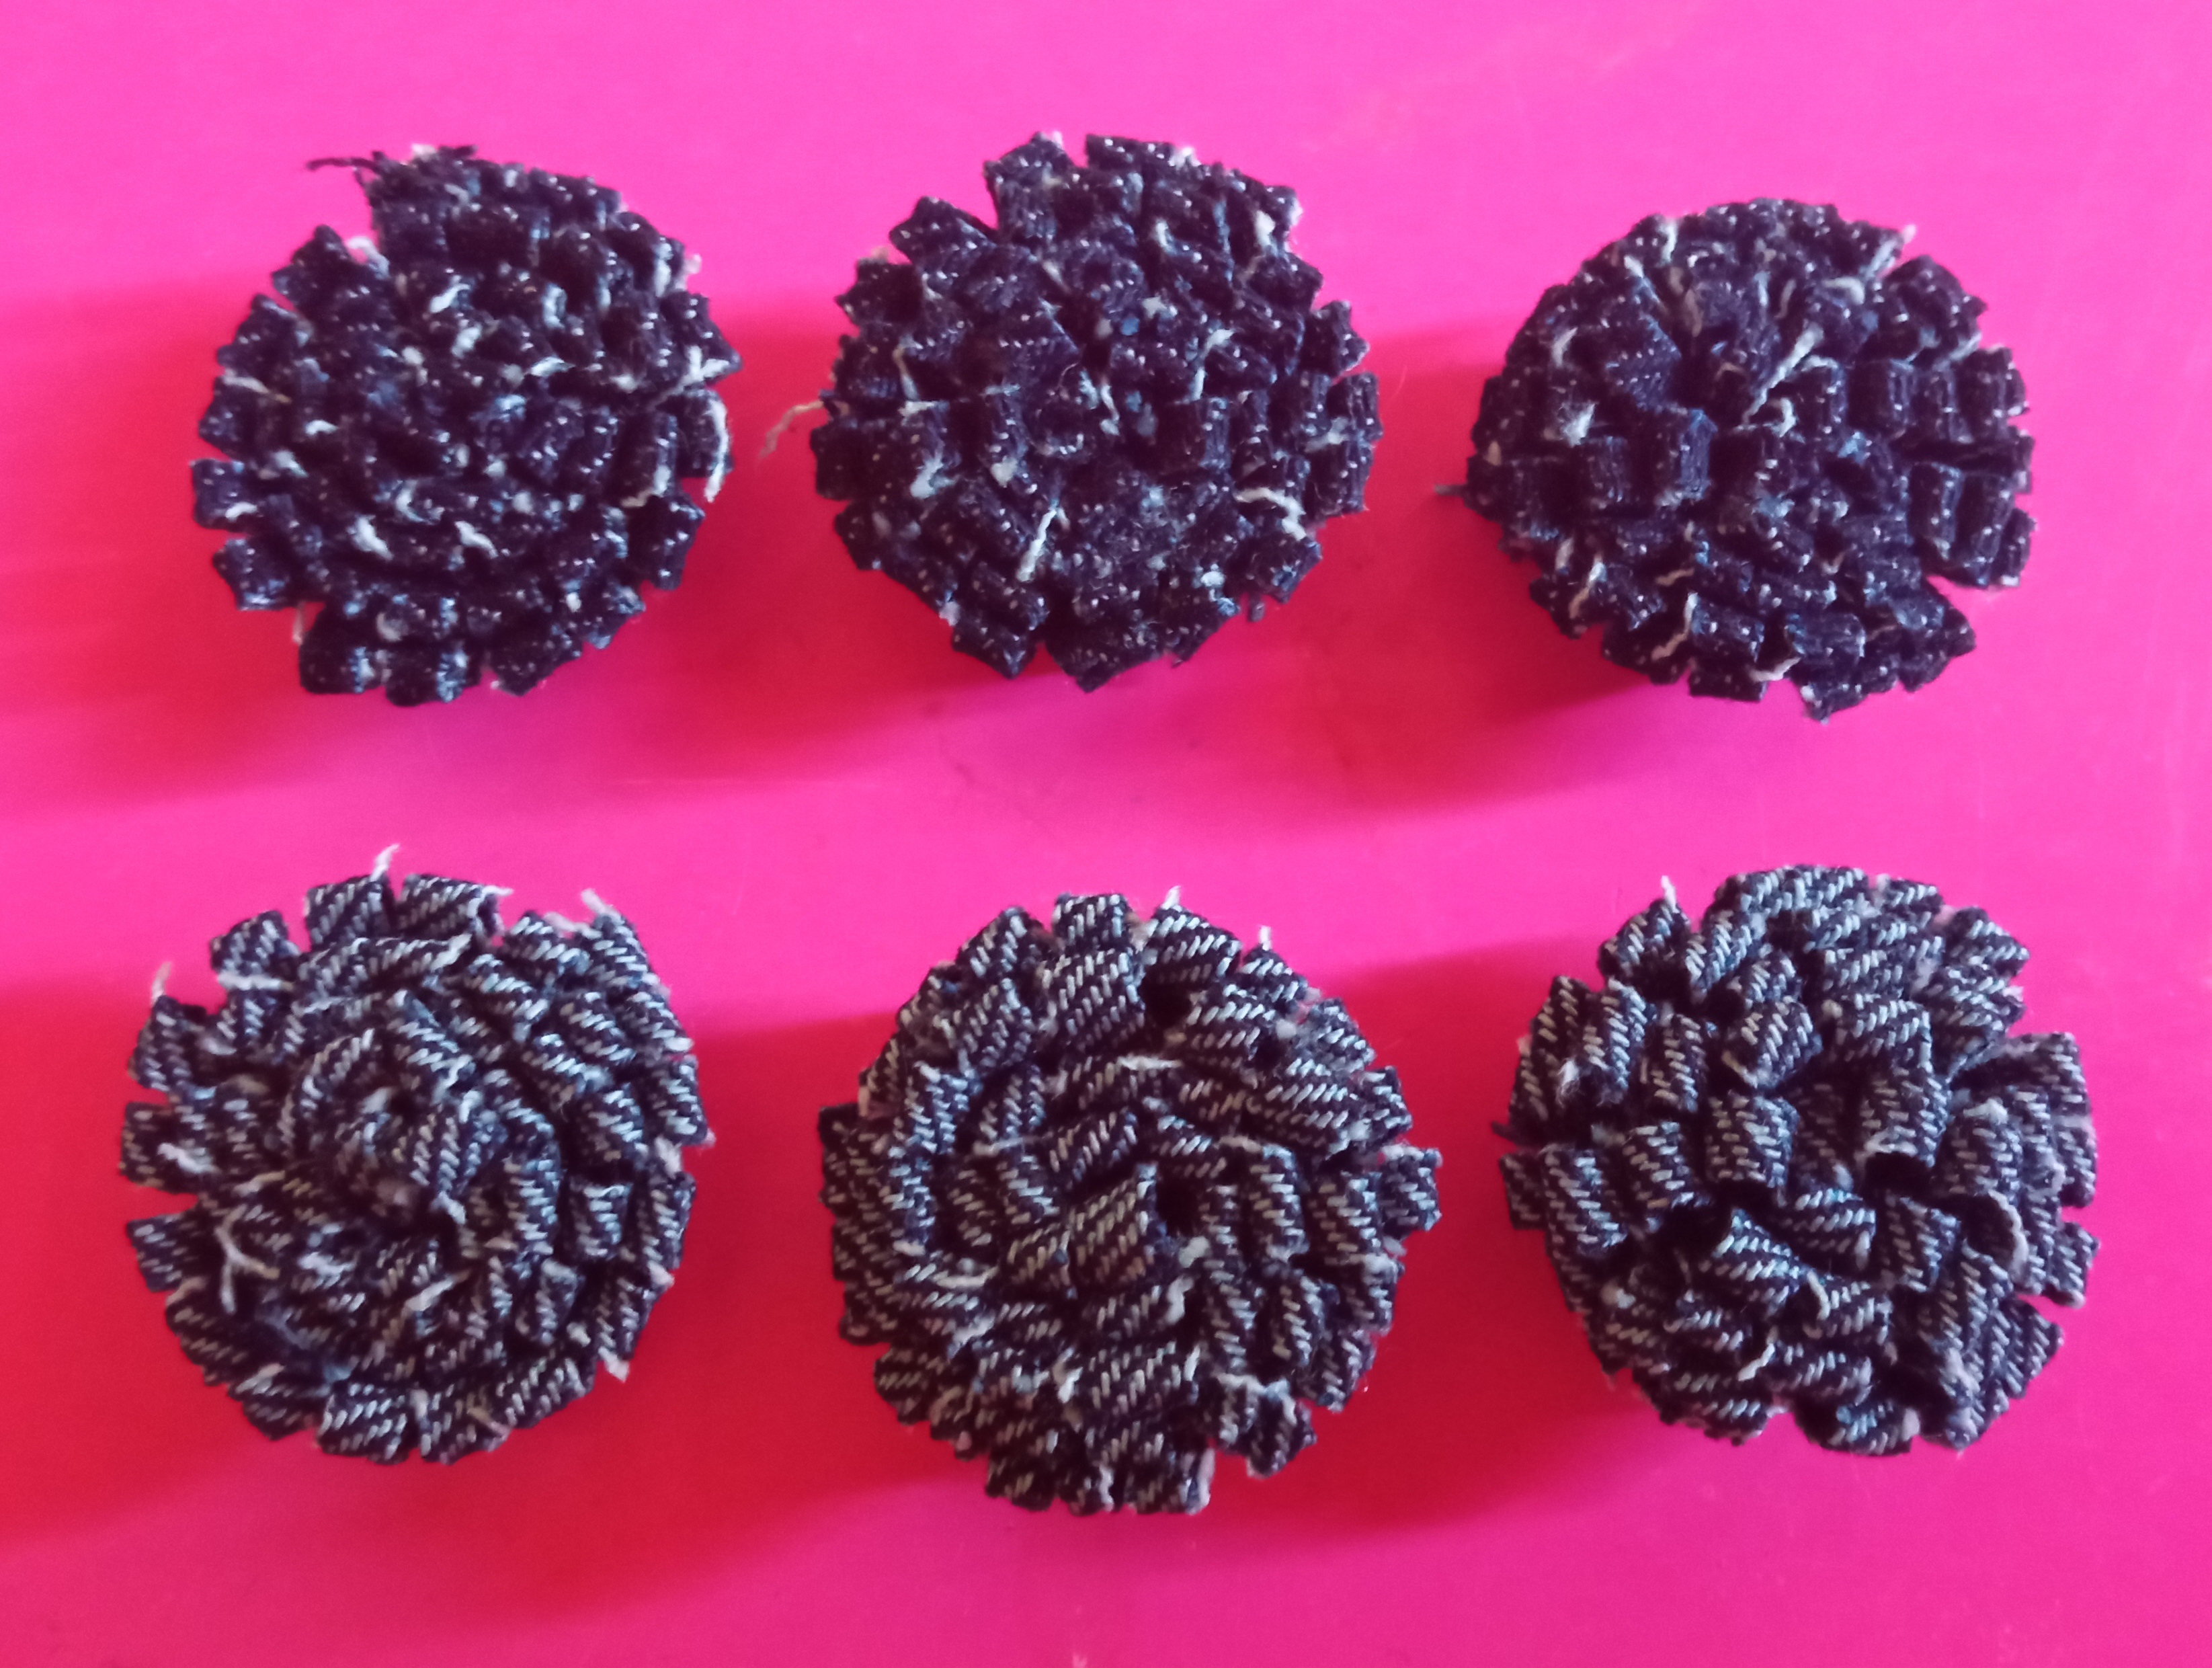
Para comenzar cortamos 6 tiras en telas de jeans, tres la utilizaremos al revés, doblando a la mitad luego cosemos de extremo a extremo, con la tijera hacemos piquetes o flecos hasta el final. Luego enrrollamos y cosemos para que no se suelte y quedará como ven en la foto.
Step 1:
To begin we cut 6 strips of jeans fabric, three of them we will use upside down, folding them in half, then we sew from end to end, with the scissors we make picks or bangs until the end. Then we roll it up and sew so that it does not come loose and it will look like you see in the photo.
Paso 2:
Ahora tomamos las 3 tiras del lado derecho y doblamos, cosemos de extremo a extremo luego con la tijera hacemos piquetes o flecos hasta el final, enrrollamos y cosemos para que no se suelte.
Step 2:
Now we take the 3 strips on the right side and fold, sew from end to end then with the scissors we make picks or bangs until the end, roll up and sew so that it does not come loose.
Paso 3:
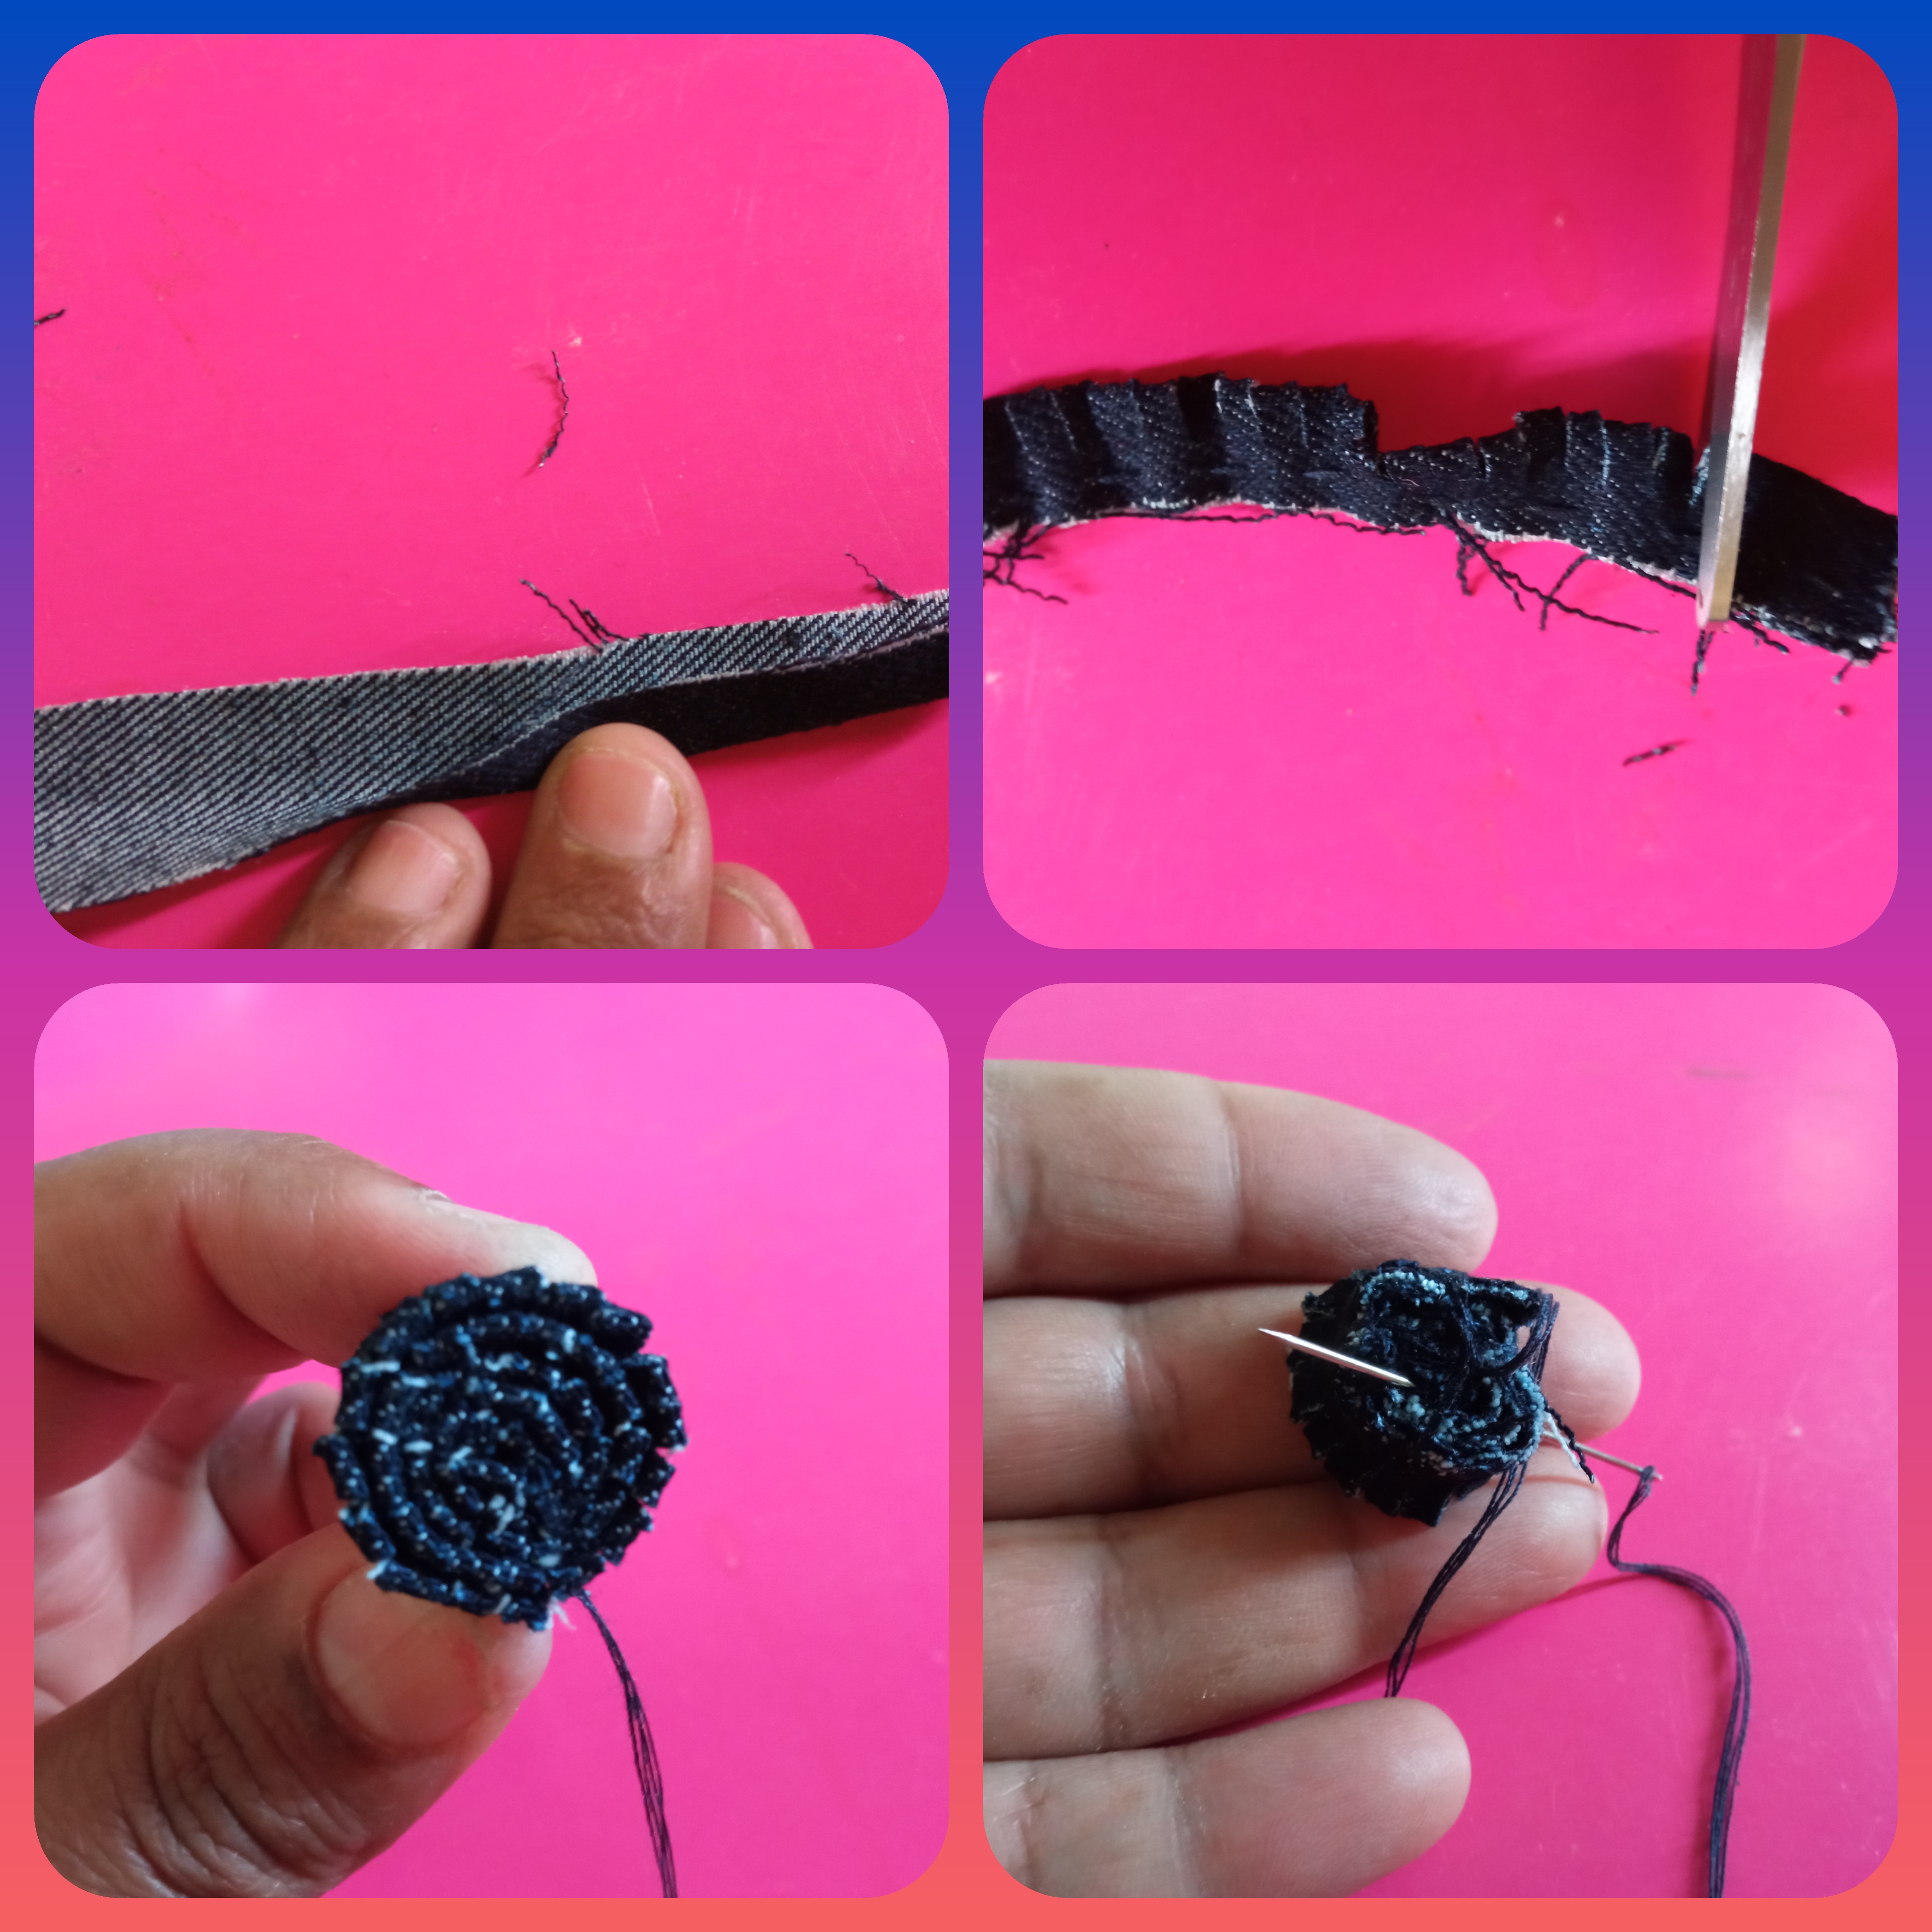
Como ven tenemos 3 flores con la tela jeans al revés y 3 flores Con la tela de jean al derecho.
Step 3:
As you can see we have 3 flowers with the jeans fabric upside down and 3 flowers with the jean fabric right side up.
Paso 4:
Ahora vamos a cortar 2 tiras de 50 cm de largo y 2,5 cm de ancho. Cortamos cada tira en tres partes, luego tejemos una clineja con la tela al revés y otra clineja con la tela al derecho. Al finalizar cortamos dos rectángulos y lo pegamos al final de las clinejas para que no se suelte.
Step 4:
Now we are going to cut 2 strips of 50 cm long and 2.5 cm wide. We cut each strip in three parts, then we weave a sieve with the fabric inside out and another sieve with the fabric right side out. At the end we cut two rectangles and glue them at the end of the stitches so that they do not come loose.

Paso 5:
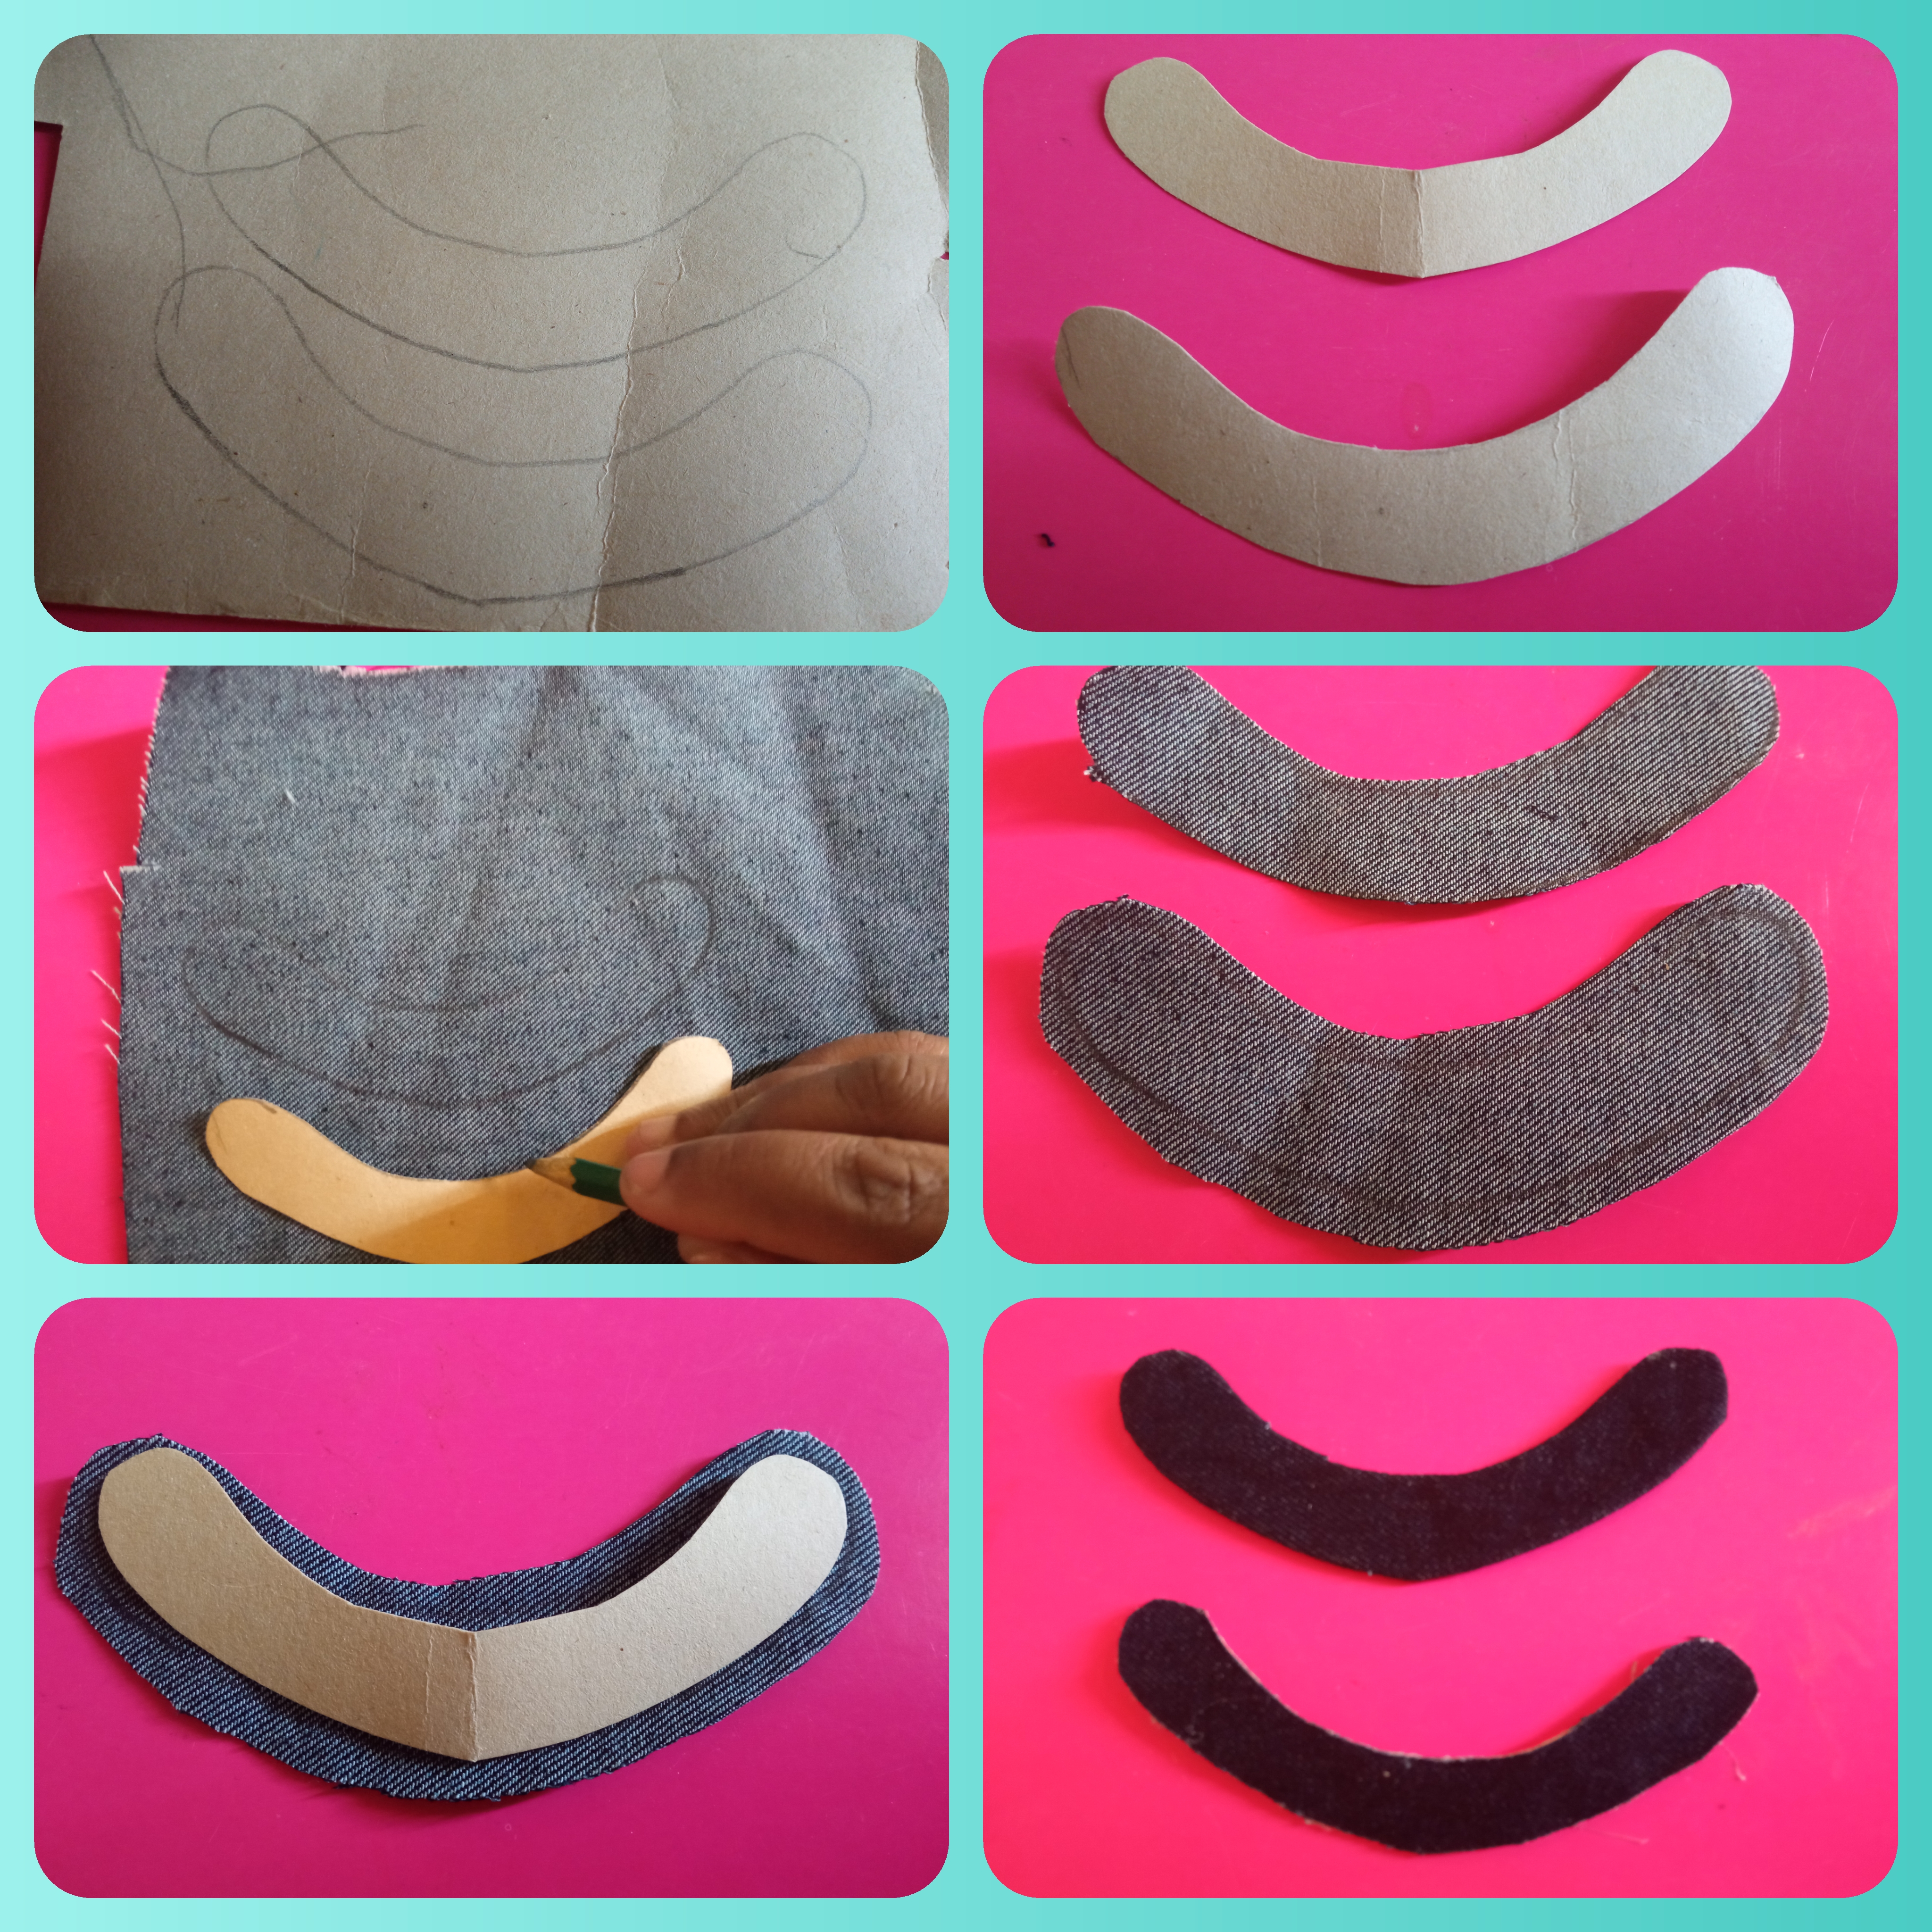
Ahora vamos hacer la base, en un cartón resistente cortamos dos bases en forma de U, luego lo marcamos en tela de jeans para luego forrar cada base así como ven en las fotos.
Step 5:
Now we are going to make the base, in a resistant cardboard we cut two bases in a U shape, then we mark it in jeans fabric and then we cover each base as you can see in the pictures.
Paso 6:
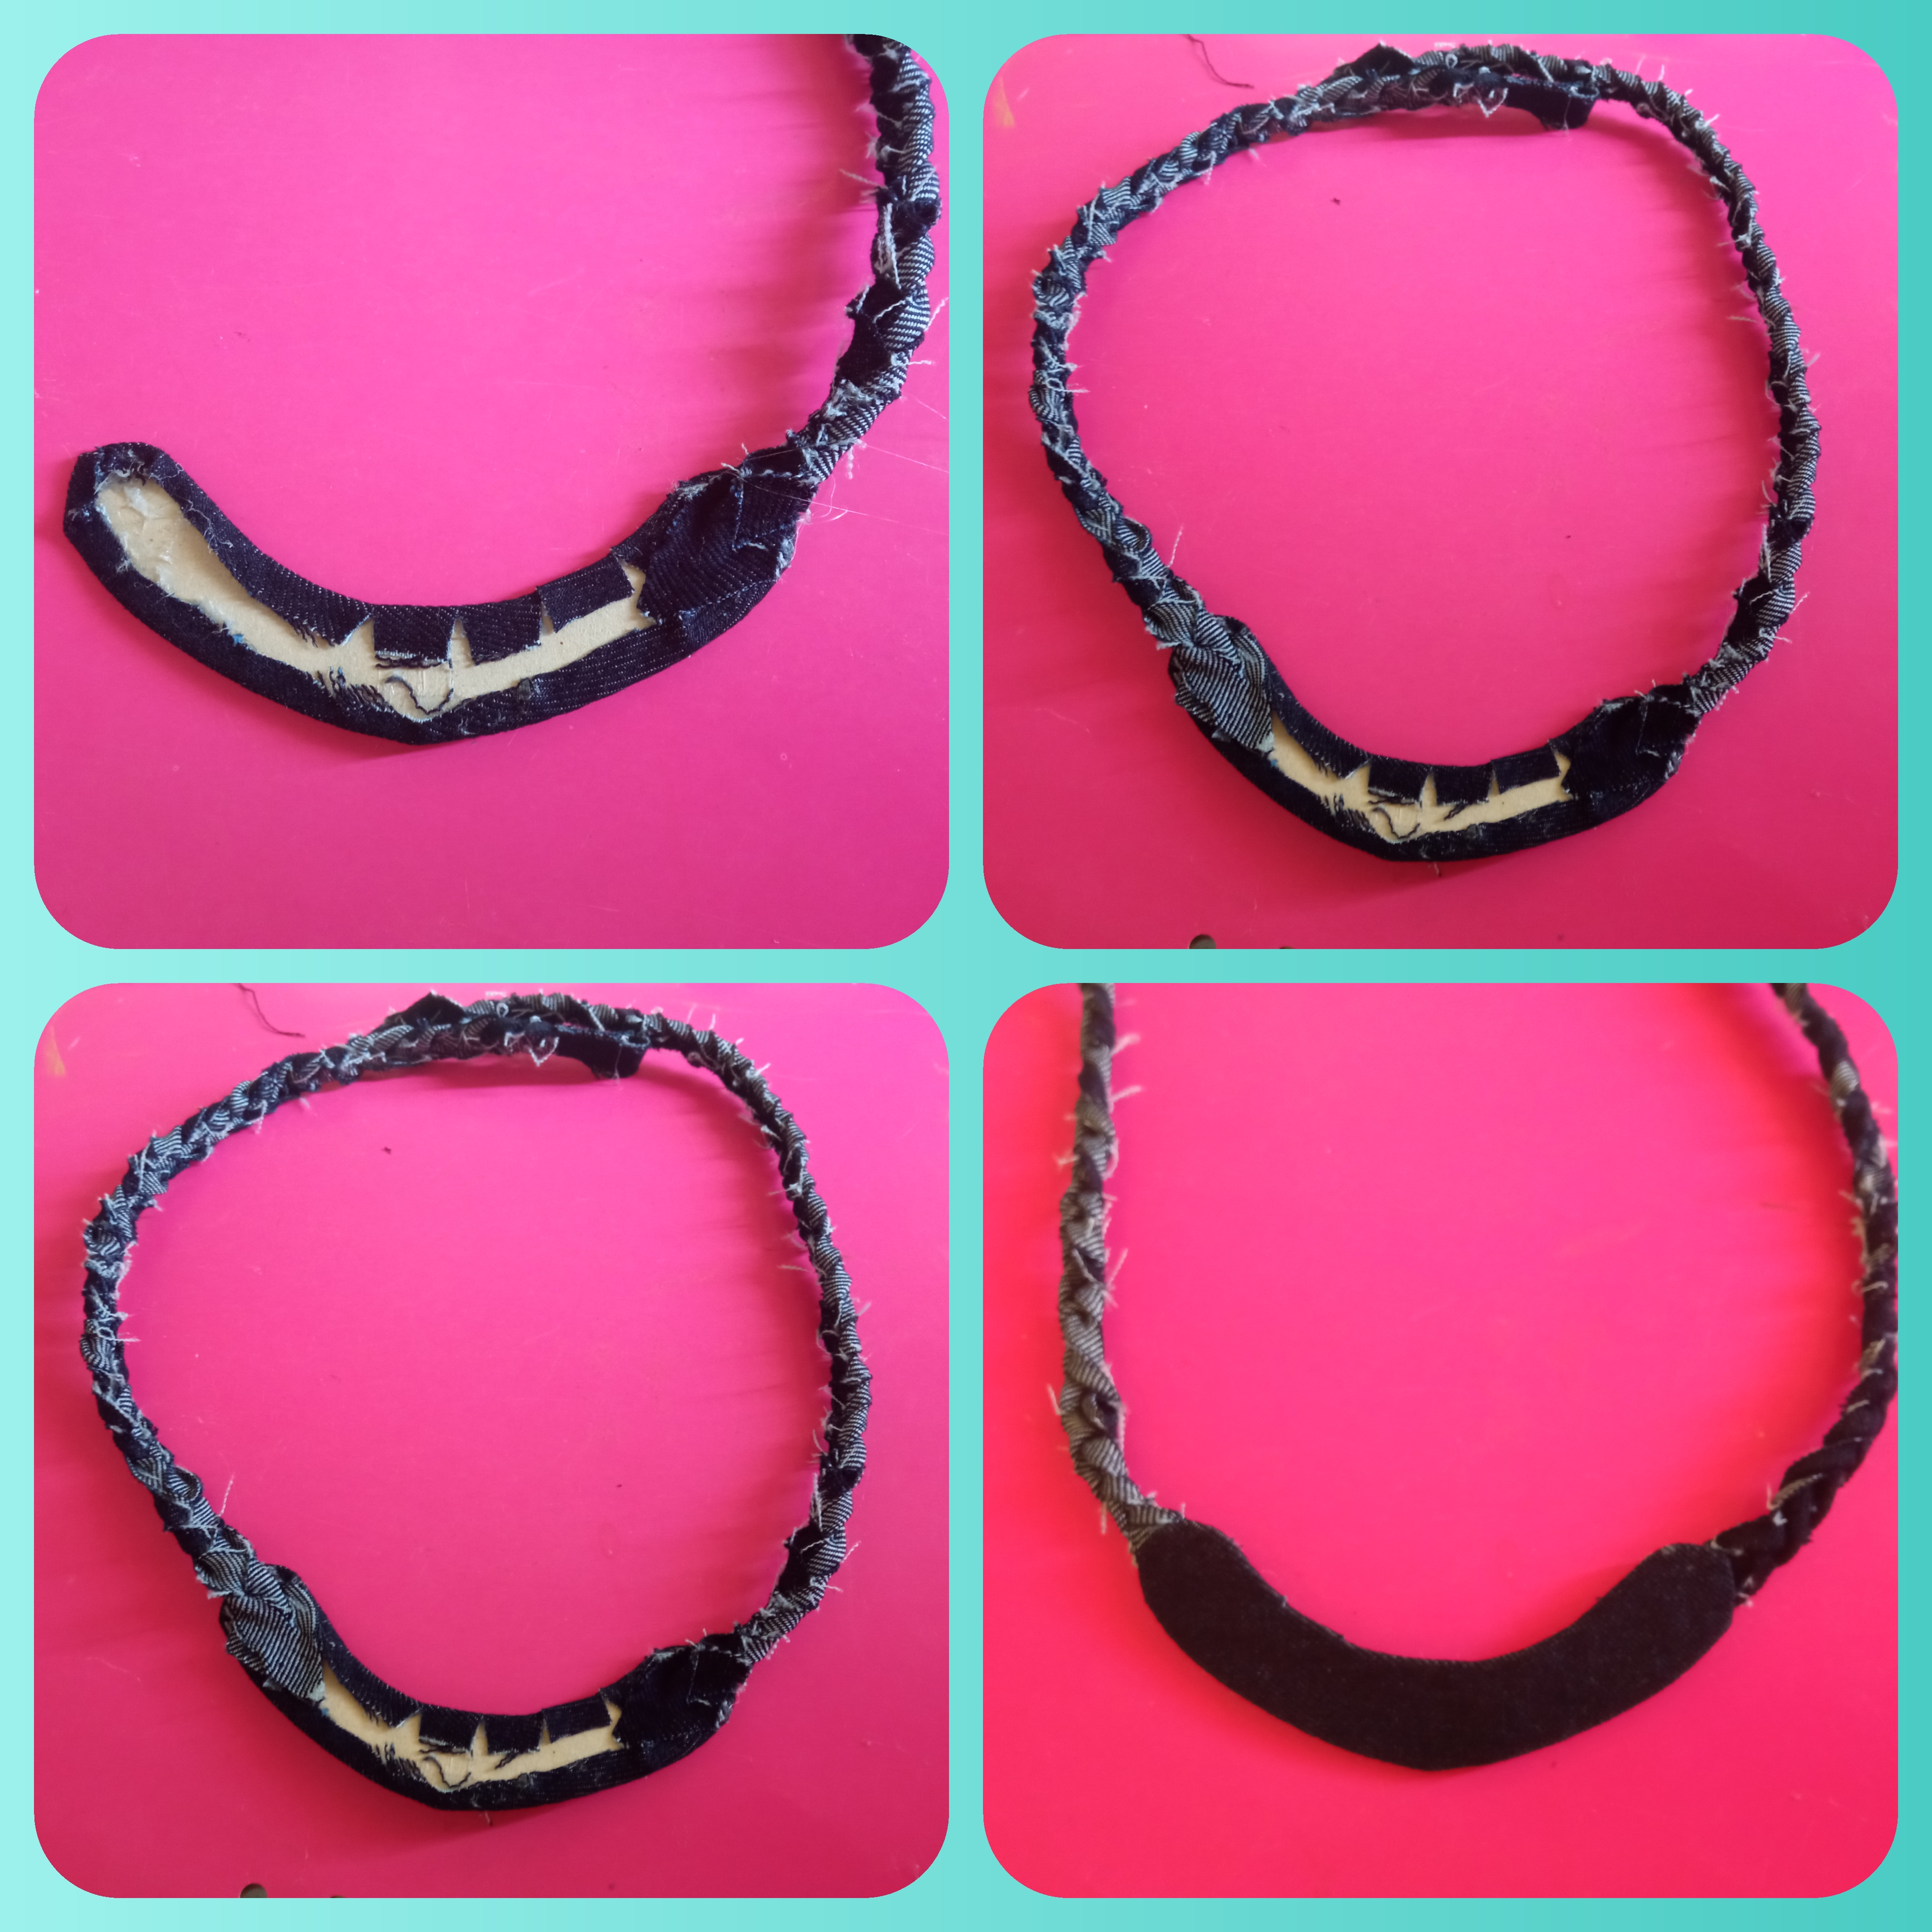
Teniendo la bases forradas tomamos las tiras y la pegamos a una base a los extremos con silicon caliente, después montamos la otra base y pegamos muy bien.
Step 6:
Having the bases lined we take the strips and glue them to one base at the ends with hot silicone, then we assemble the other base and glue it very well.
Paso 7:
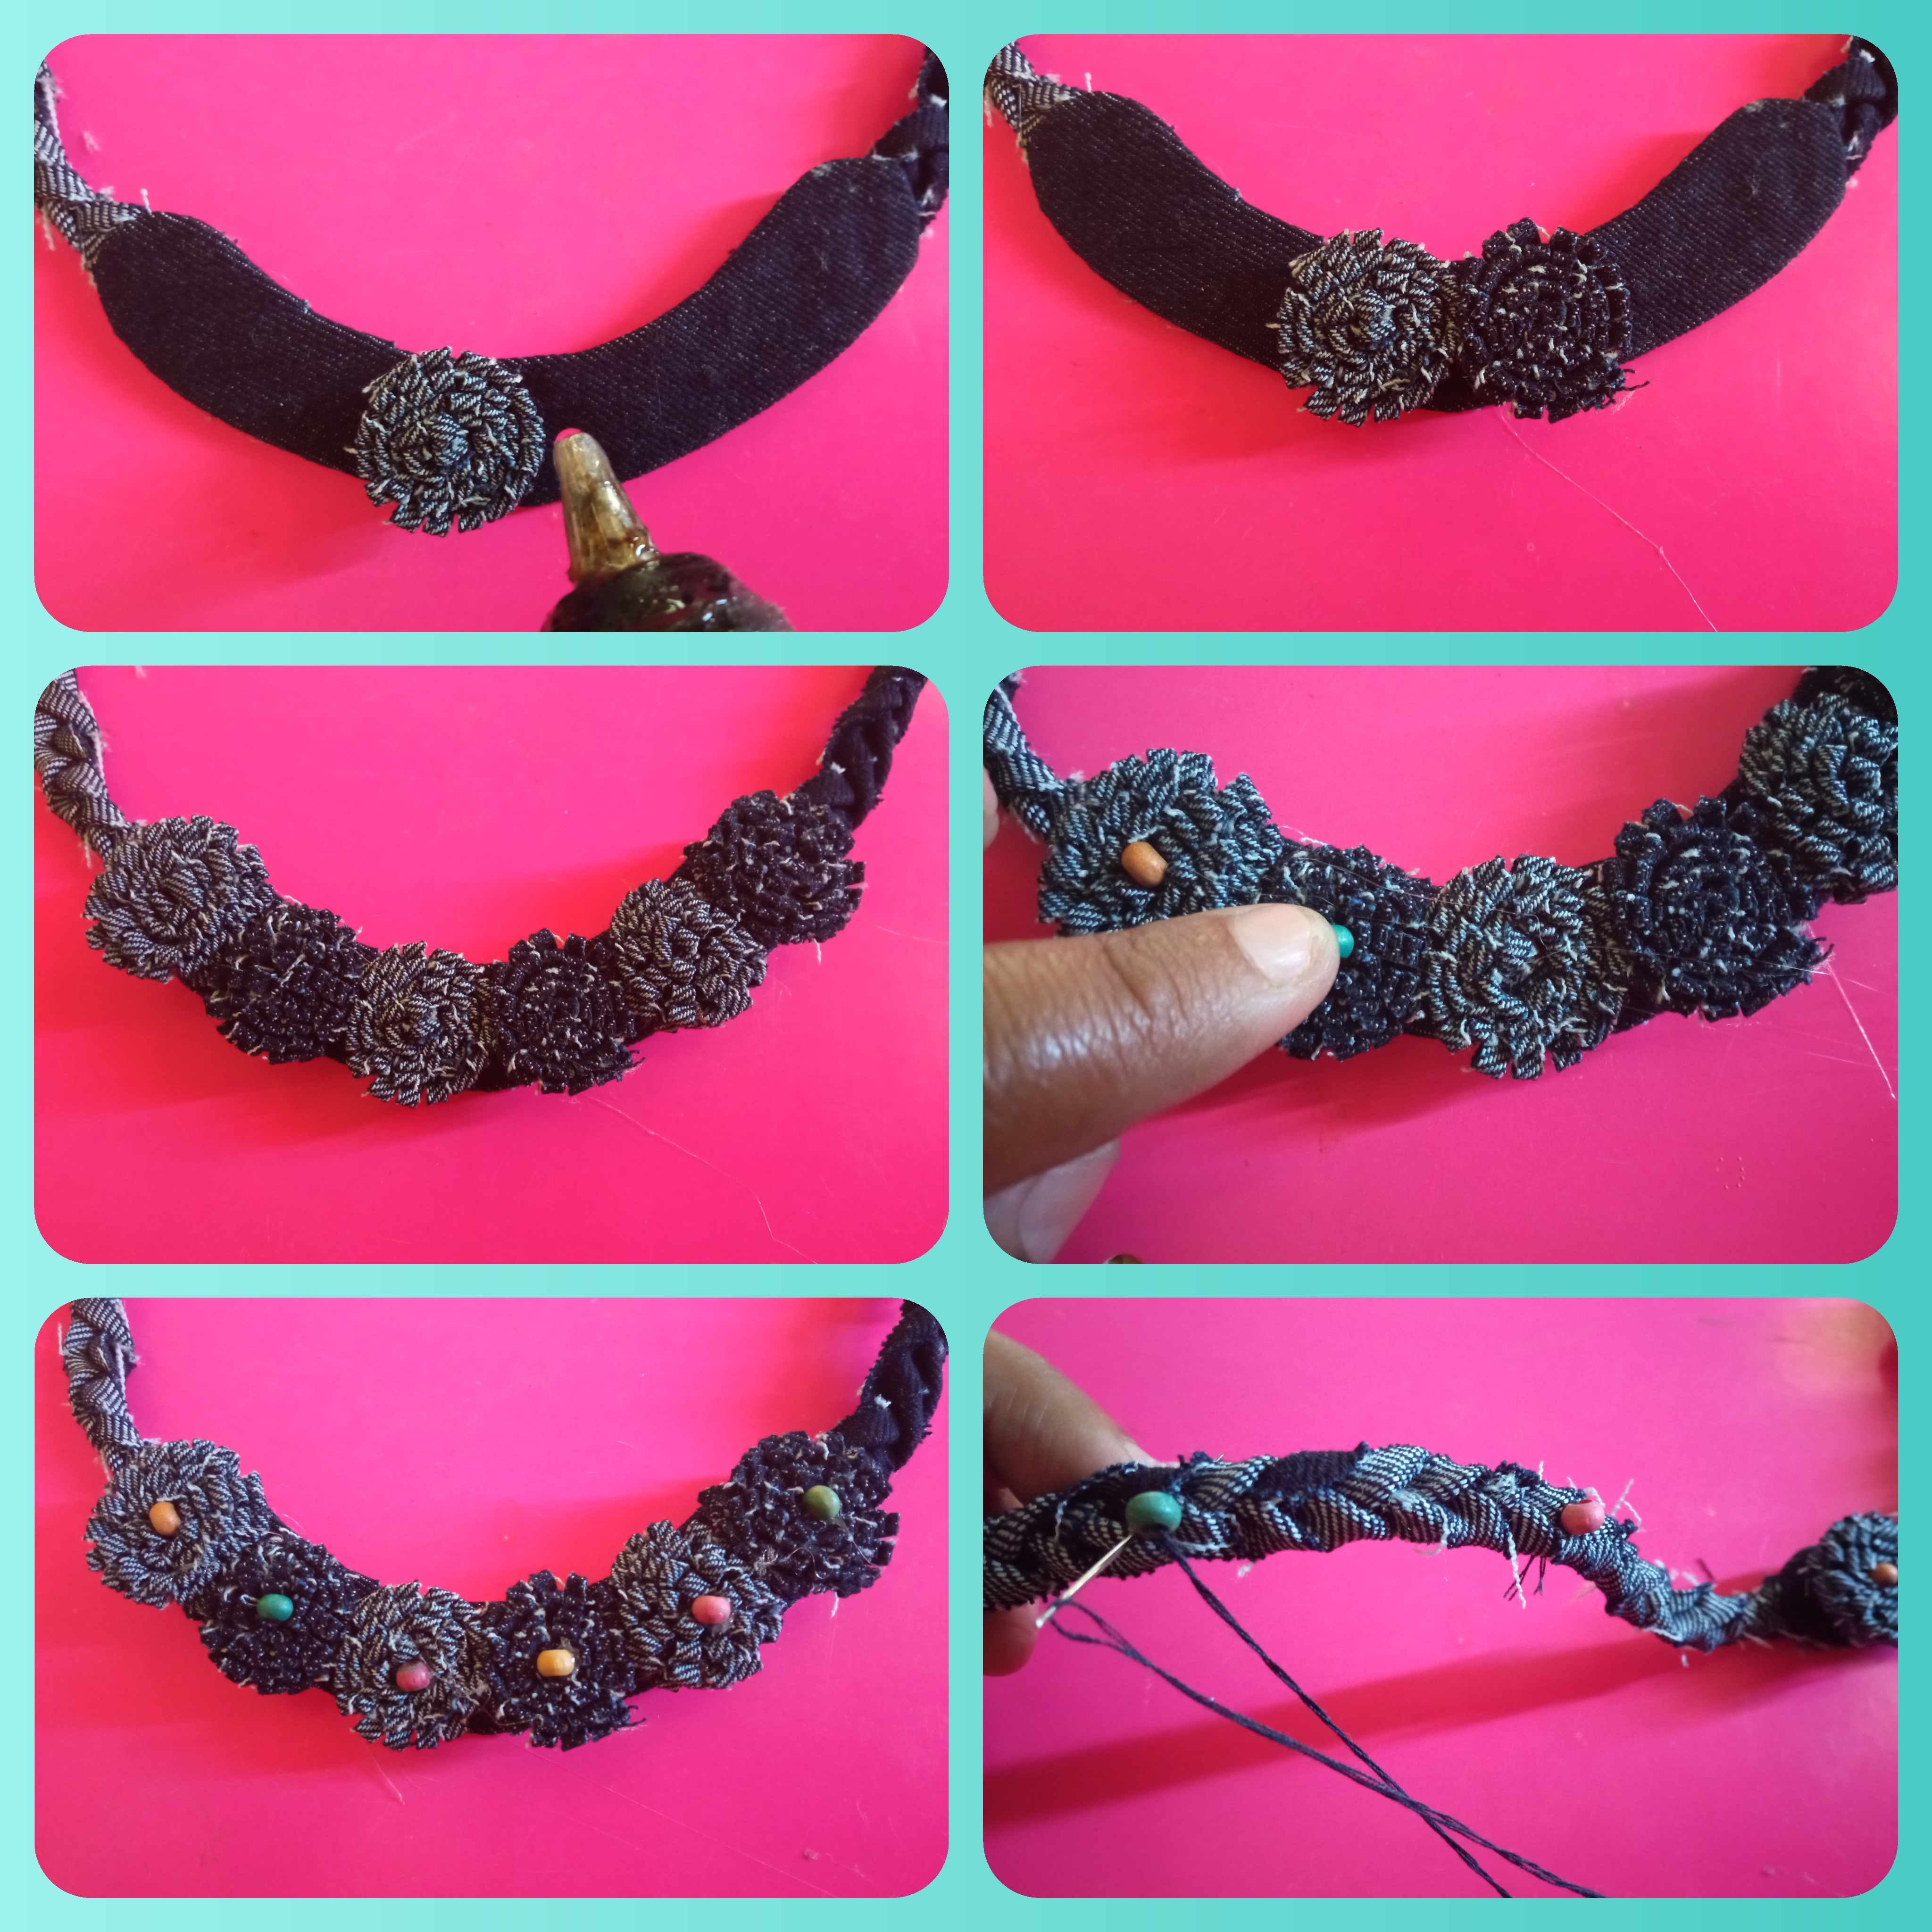
Ahora procedemos a pegar las flores de la base comenzando desde el centro una flor con tela al derecho y otra flor con tela al revés, así hasta pegar las 6 flores. luego cosemos las pepas de colores en el centro de cada flor y en las tiras del collar.
Step 7:
Now we proceed to glue the flowers of the base starting from the center, one flower with fabric right side up and another flower with fabric upside down, and so on until we glue the 6 flowers. then we sew the colored seeds in the center of each flower and in the strips of the necklace.
Ya mi Hermoso 😍 Collar 📿 en Tela de Jeans está Terminado!! //My Beautiful 😍 Necklace 📿 in Jeans Fabric is Finished!
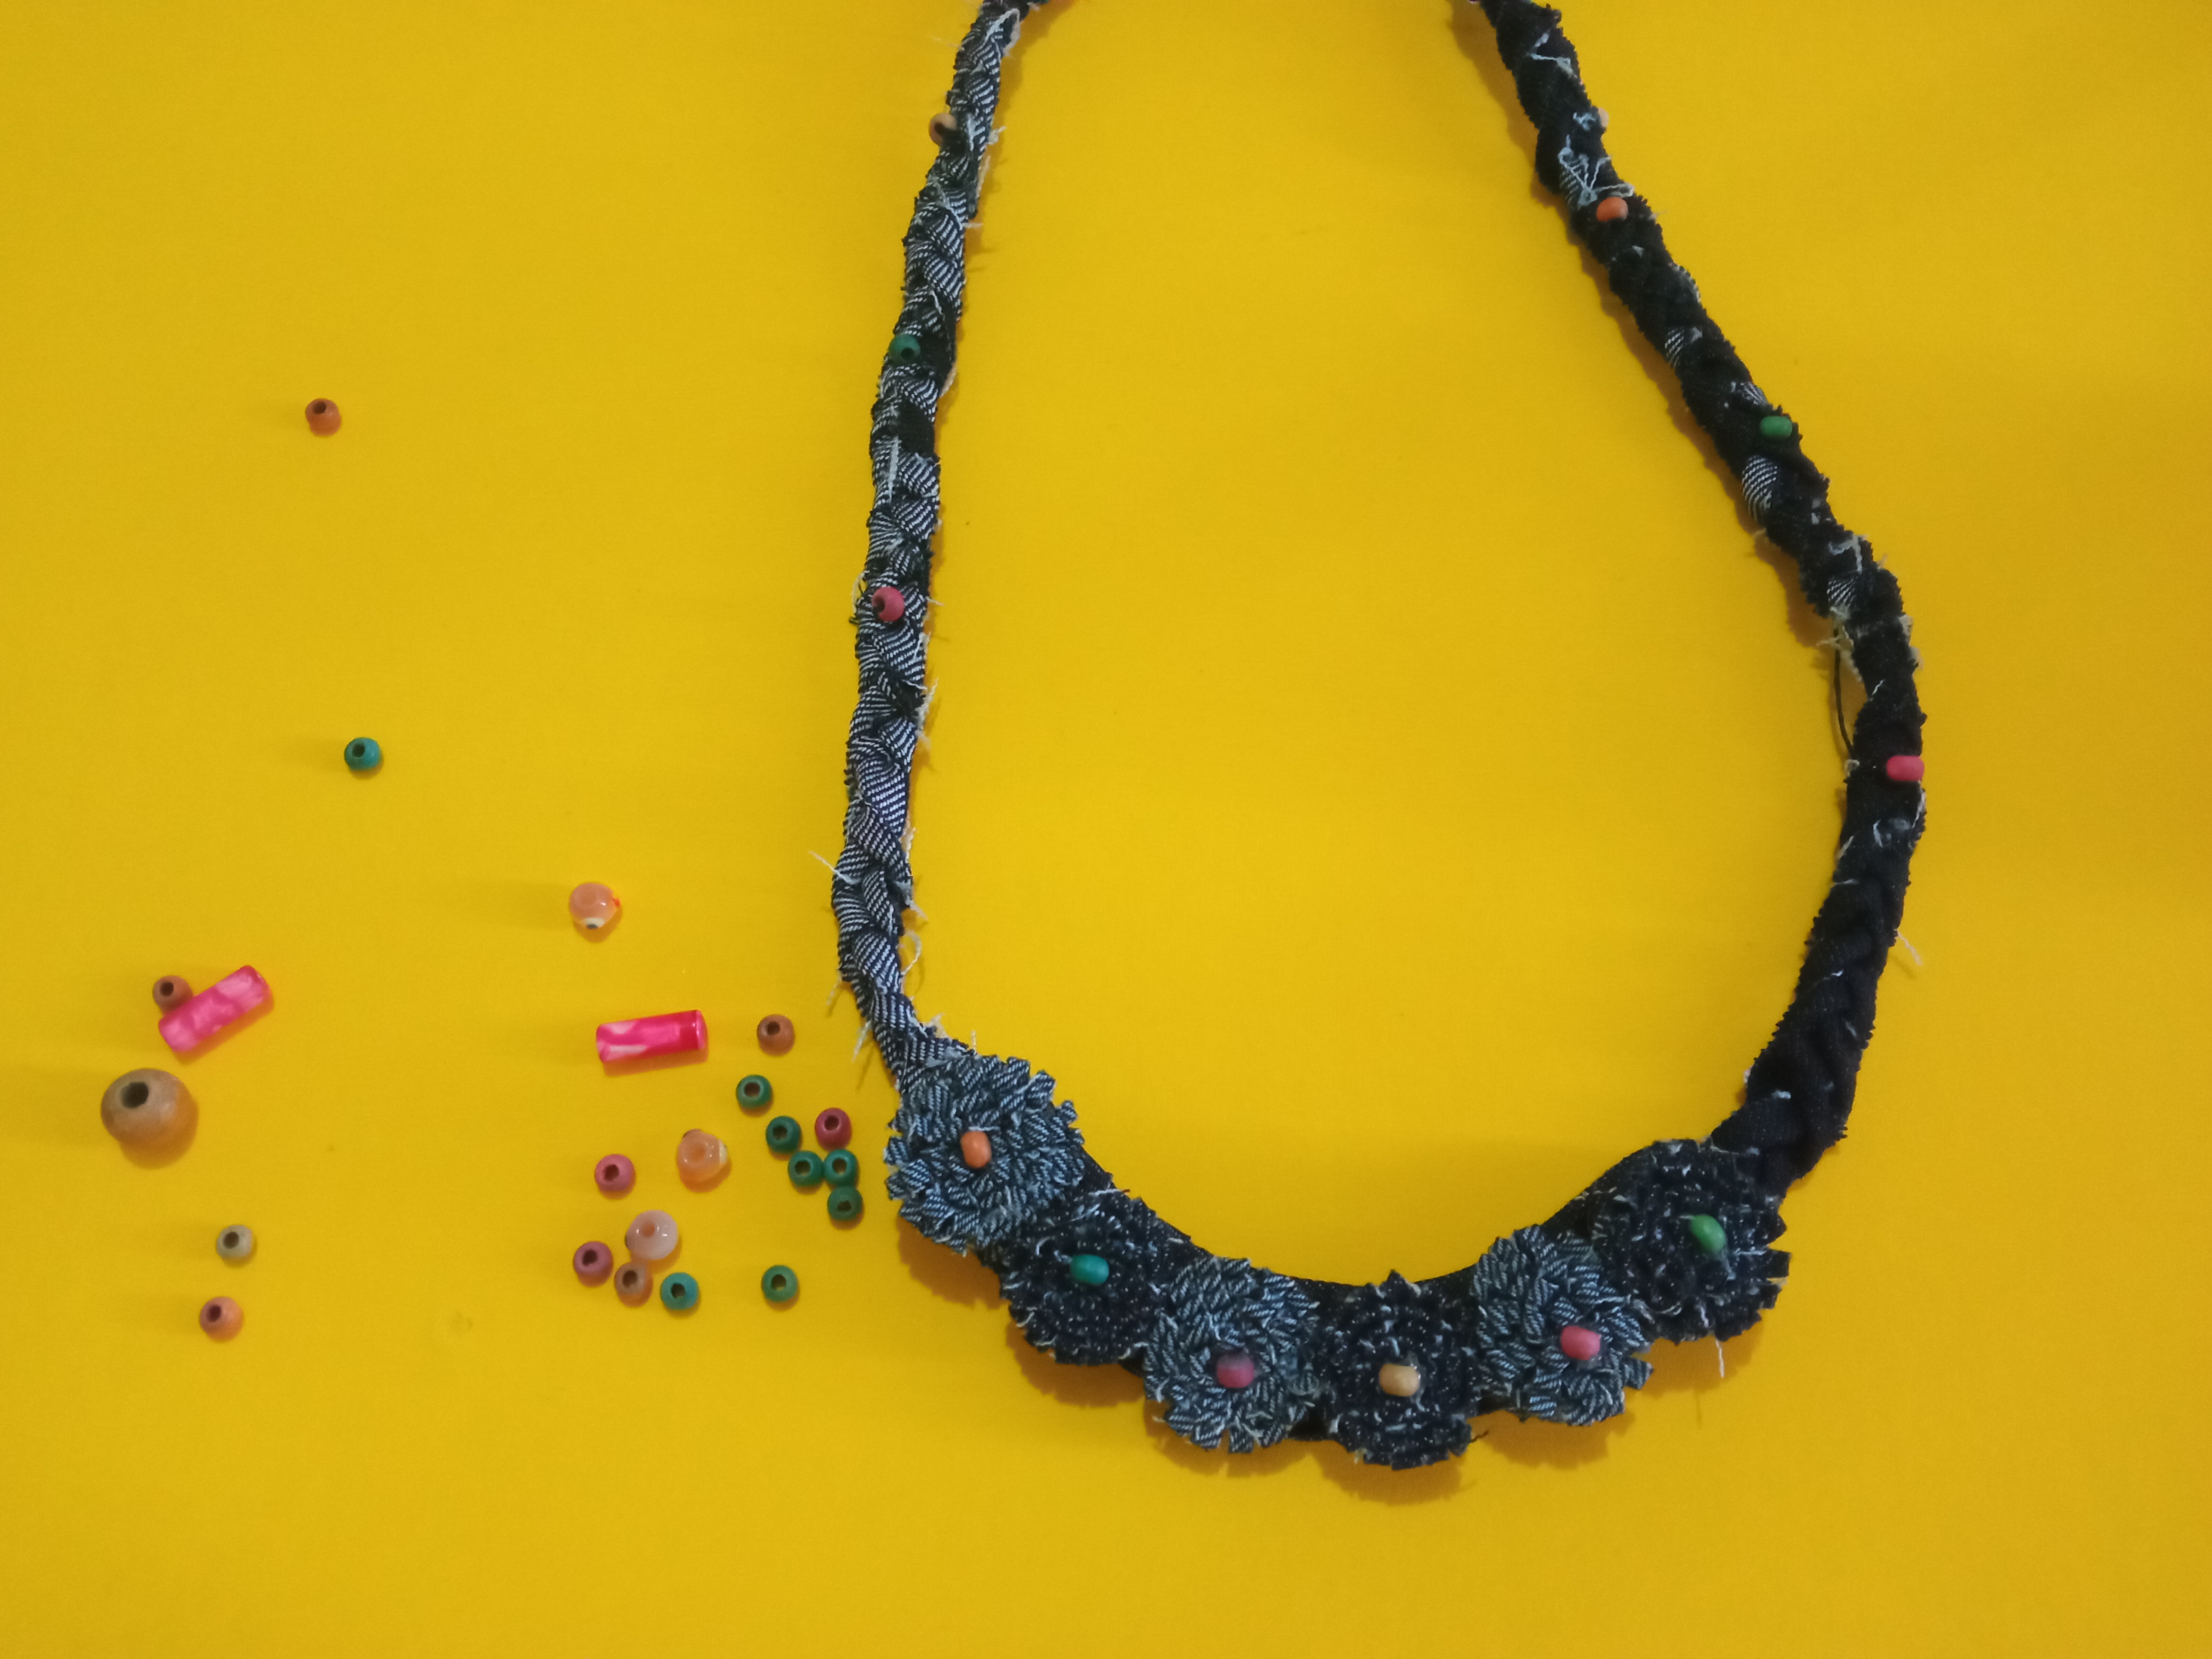
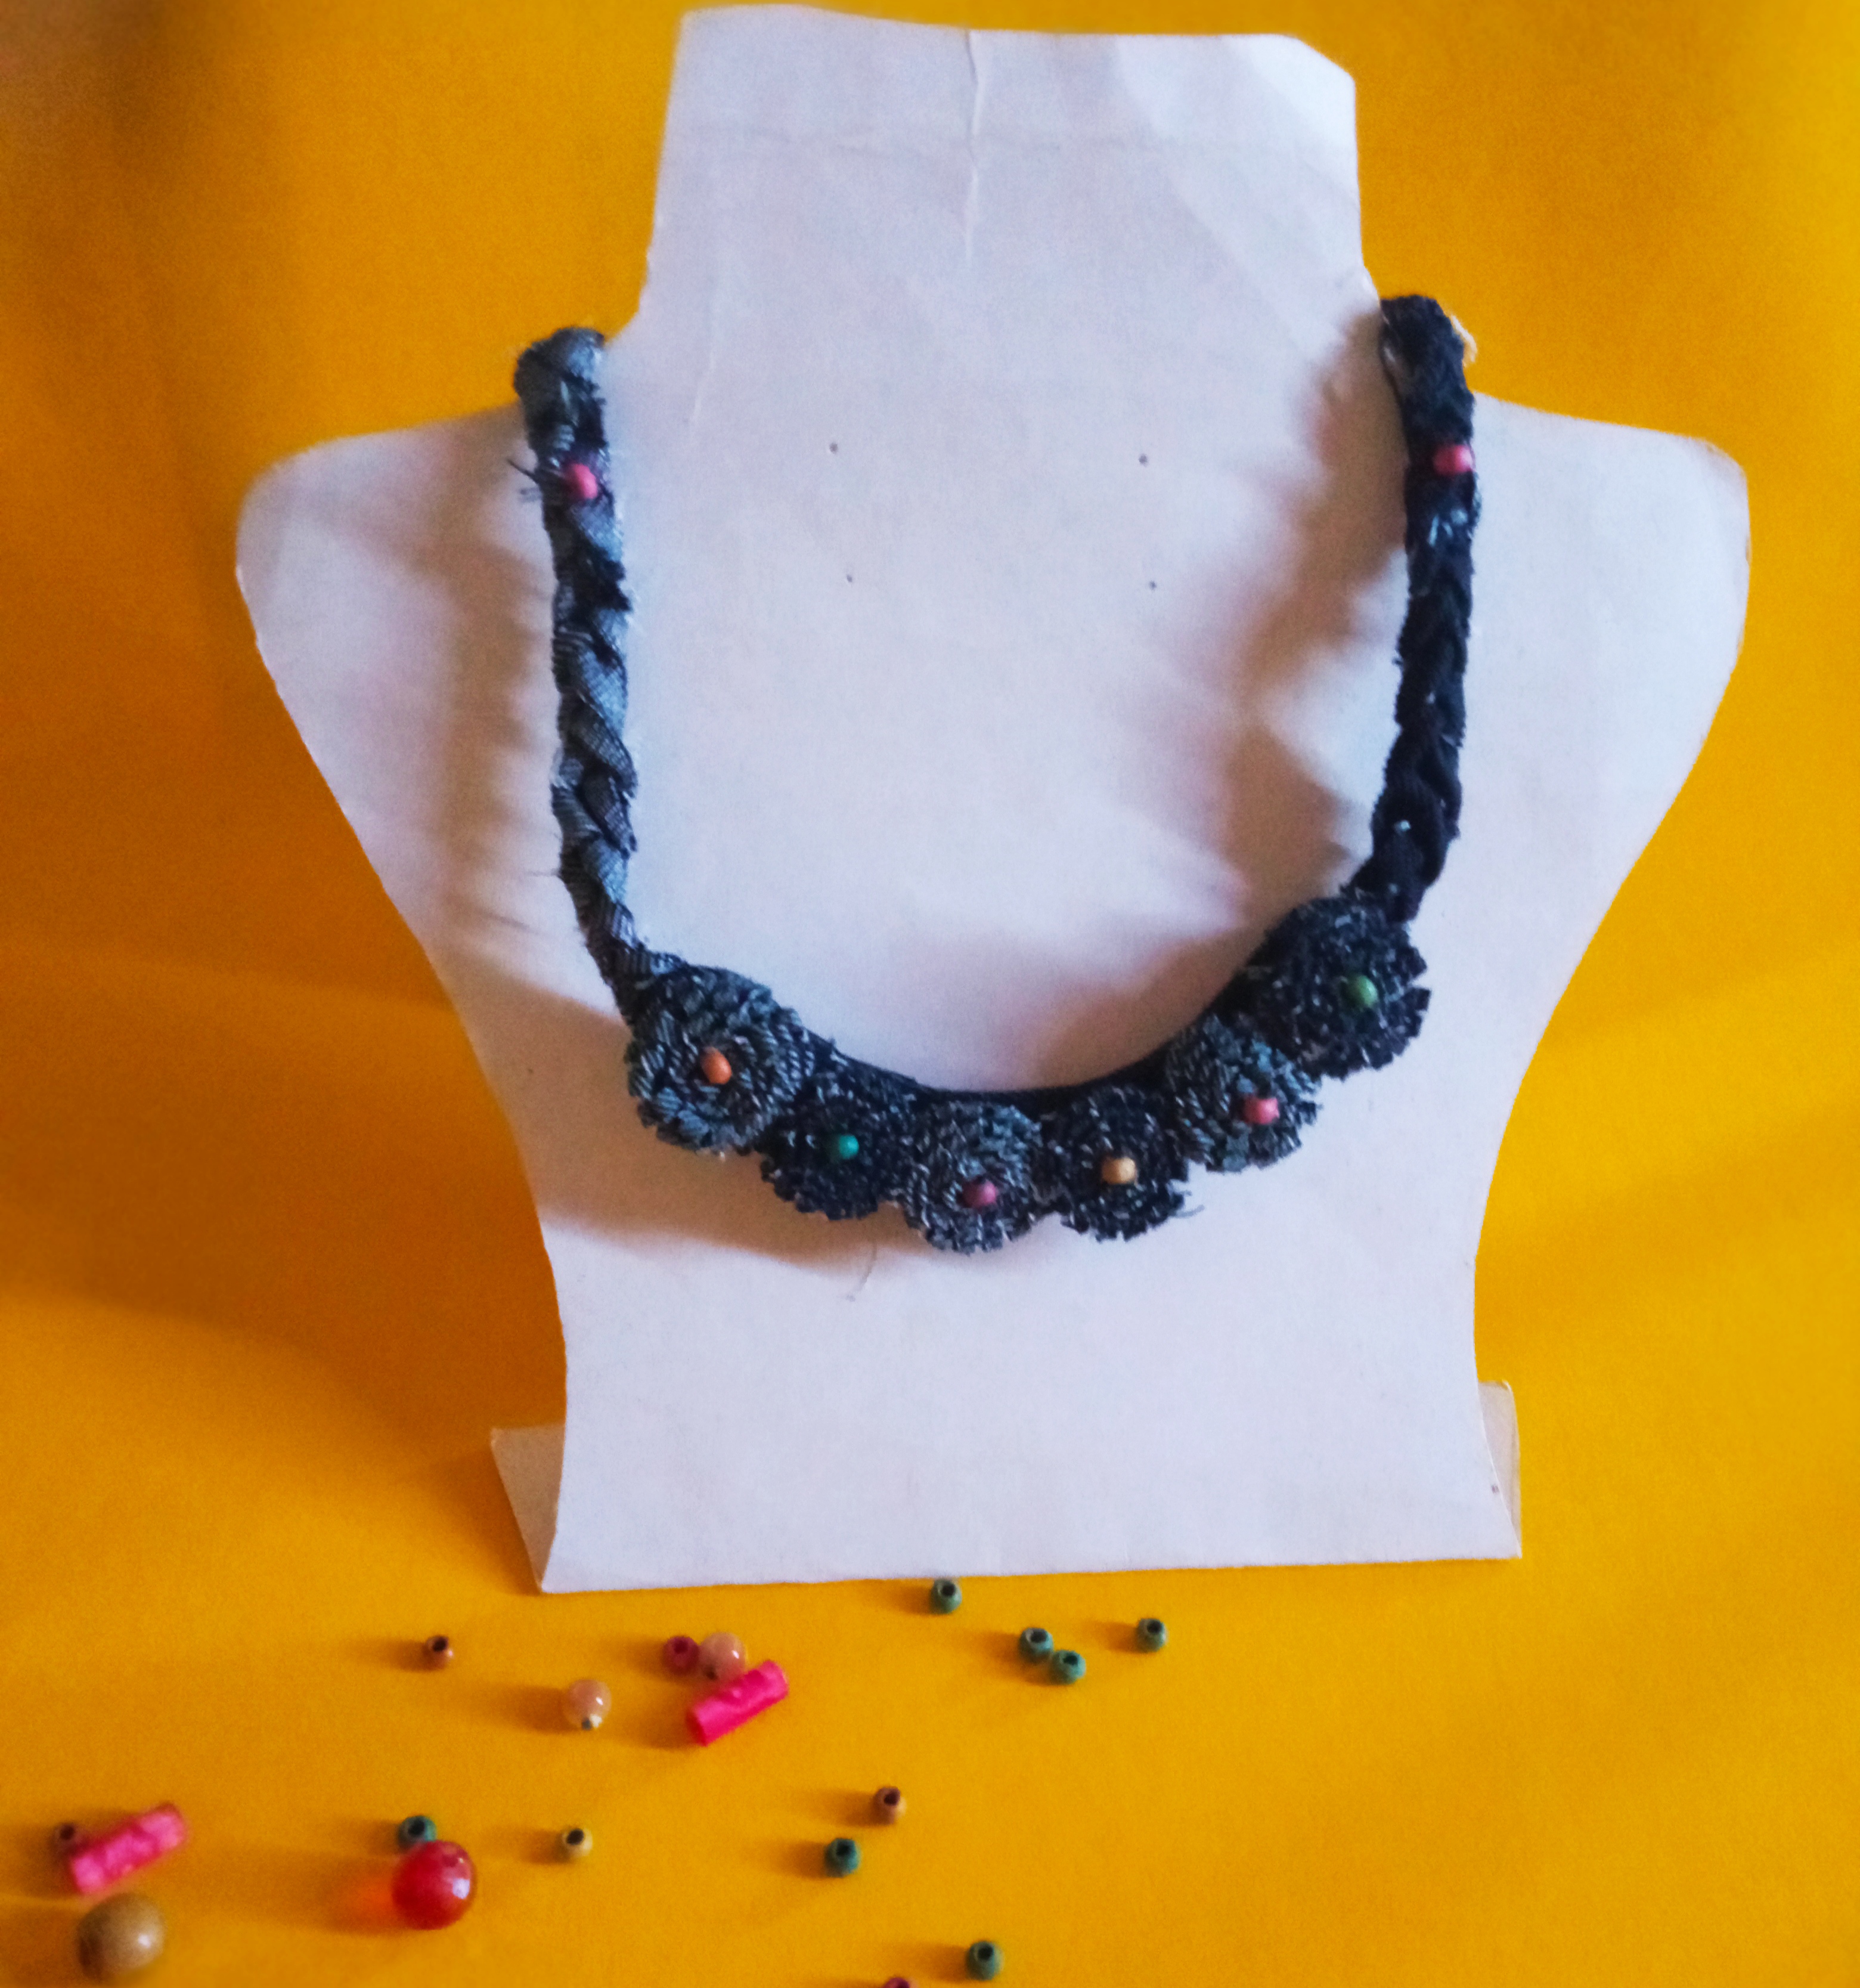

Espero que les hayan gustado cómo quedo este hermoso collar y se animen en elaborarlo para ustedes ☺️ ya verán que les quedará super hermoso 😍.
I hope you liked how this beautiful necklace turned out and I encourage you to make it for yourselves ☺️ you will see that it will be super beautiful 😍.
The rewards earned on this comment will go directly to the person sharing the post on Twitter as long as they are registered with @poshtoken. Sign up at https://hiveposh.com.
Gracias por el apoyo!!
Gracias por su apoyo!