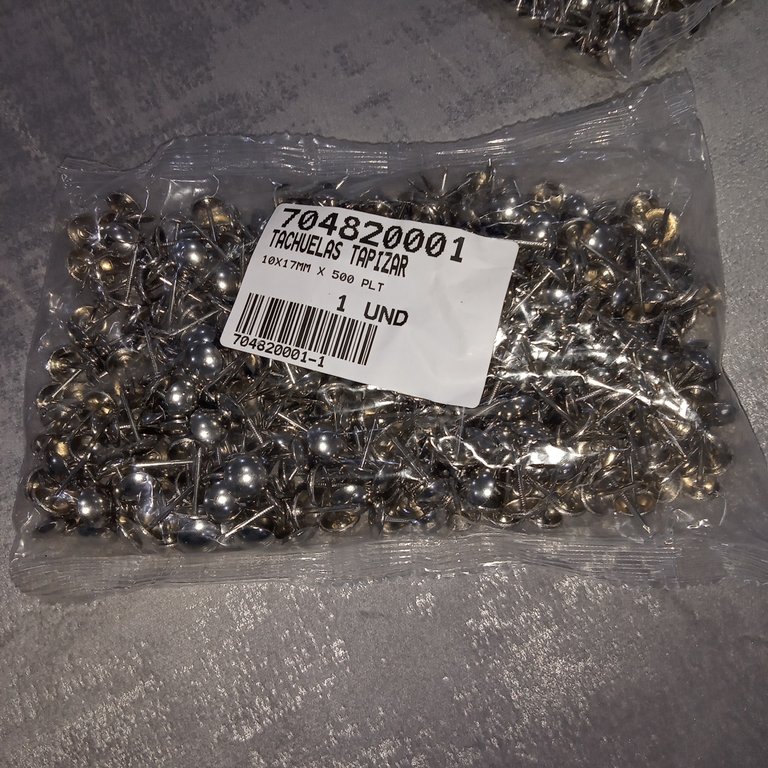
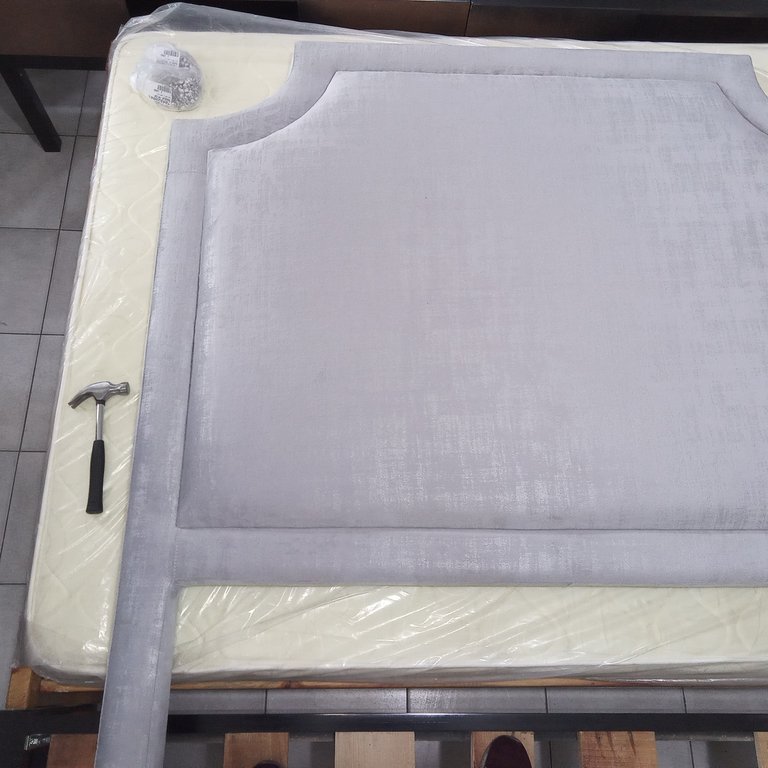
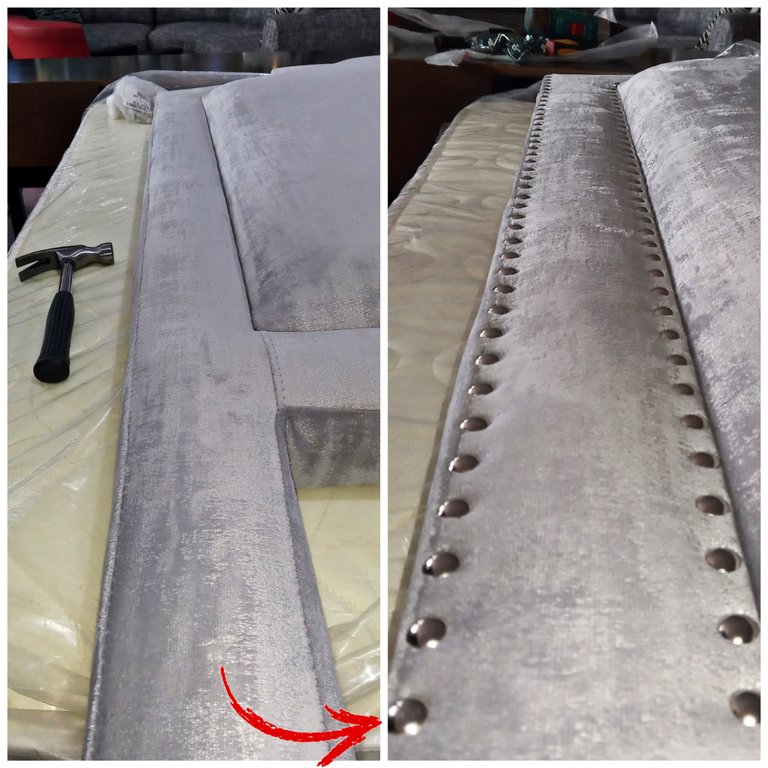
- Upholstery tacks.
- Hammer
- Tweezers
- Spade screwdriver
Process:
1- I decided to set a separation measure to fix the tacks so I could start nailing them.
2- In my case I established that the separation would be 1cm.
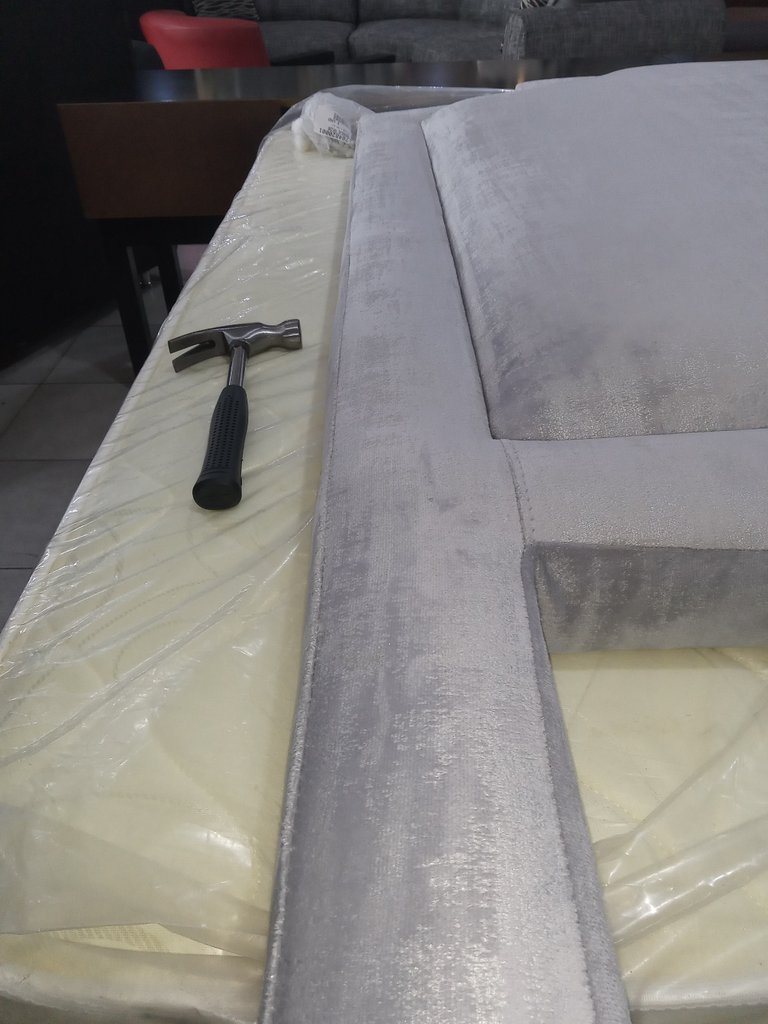
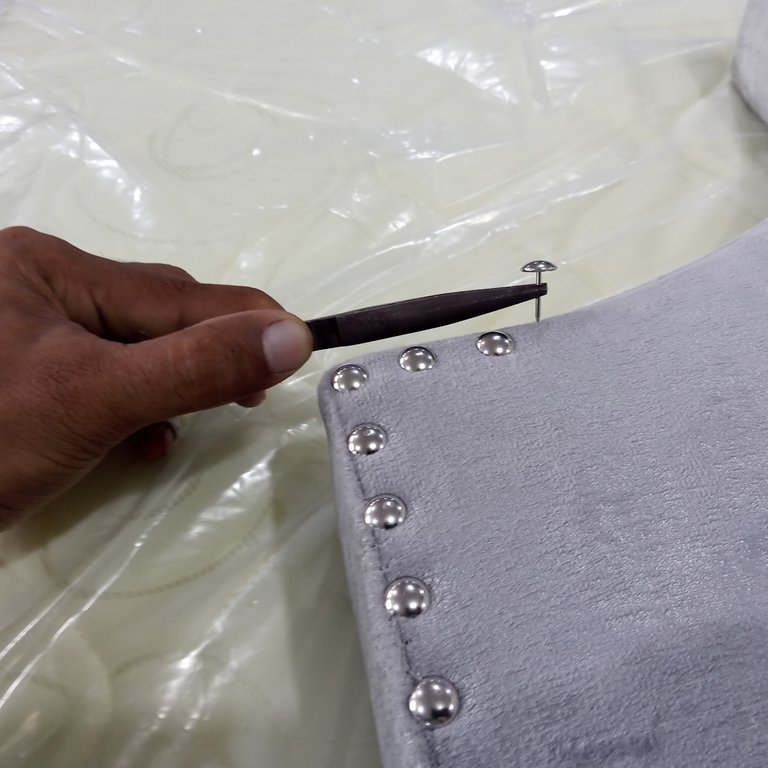
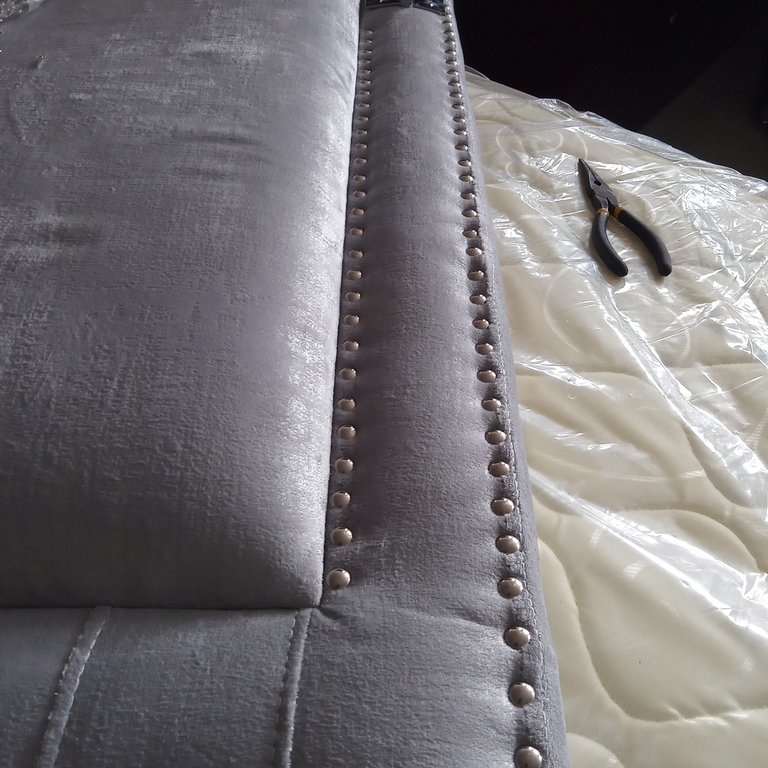
3- I started by grabbing the tacks with the clamp and then nailing them.
4- When I had the tacks gripped with the clamp I started to hit them to fix them, the clamp is to make the process faster and not to hit me with the hammer.
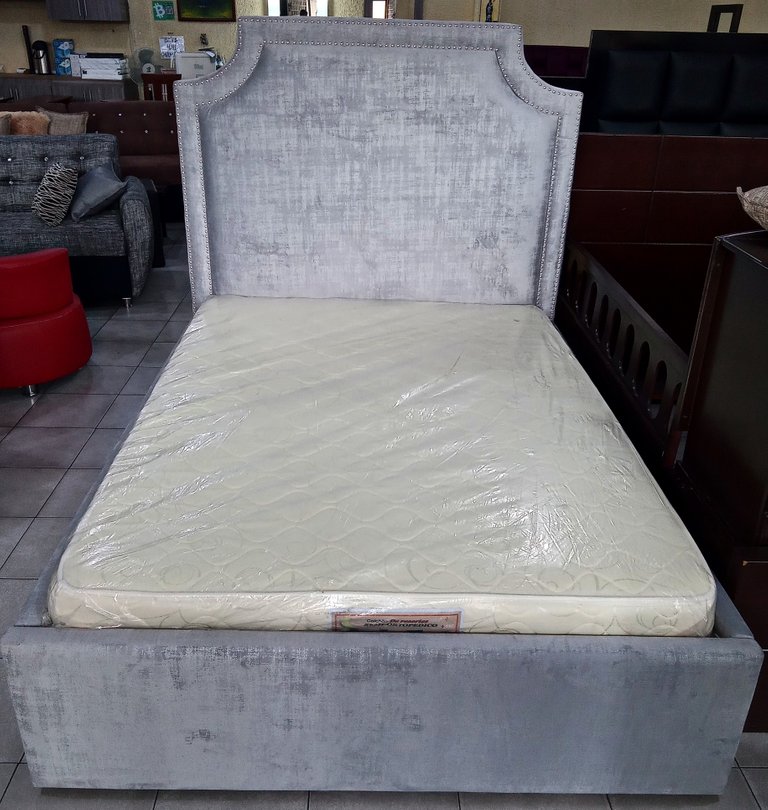
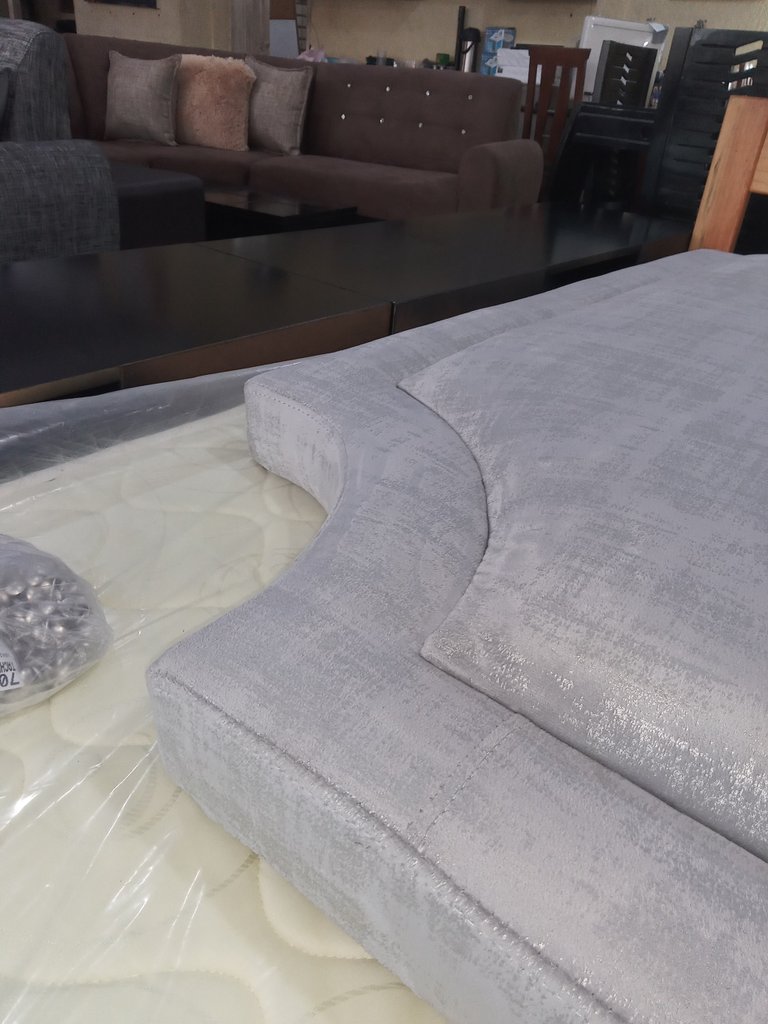
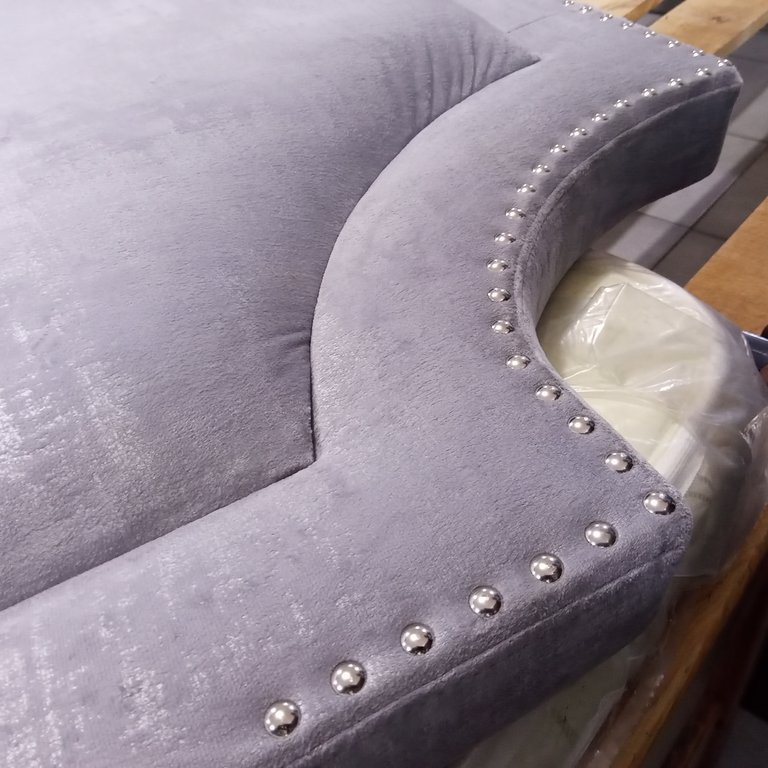
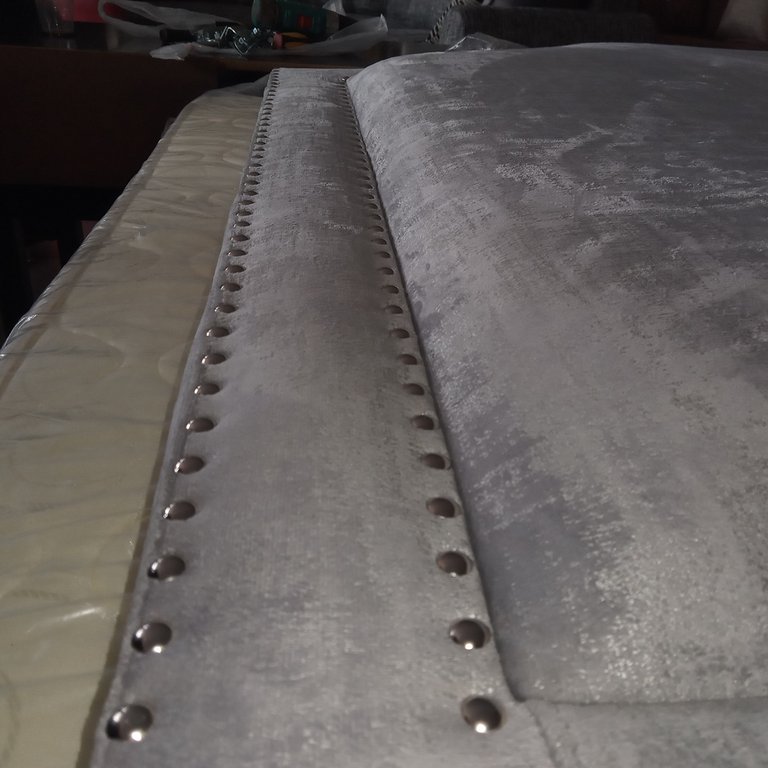
5- I continued nailing with a distance of 1cm along the external edge of the bed, until I reached the other end.
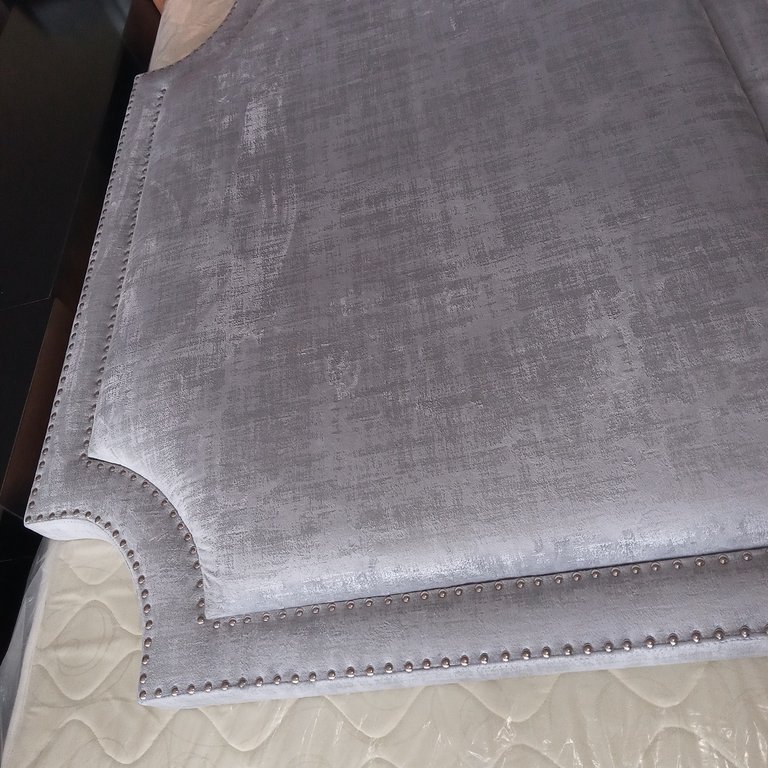
6- When I noticed that it looked better, I decided to place it along the internal line, following the same pattern so that it would look even.
7- I used the screwdriver for when a tack came off or I placed a wrong tack, so I took it out and placed another one.
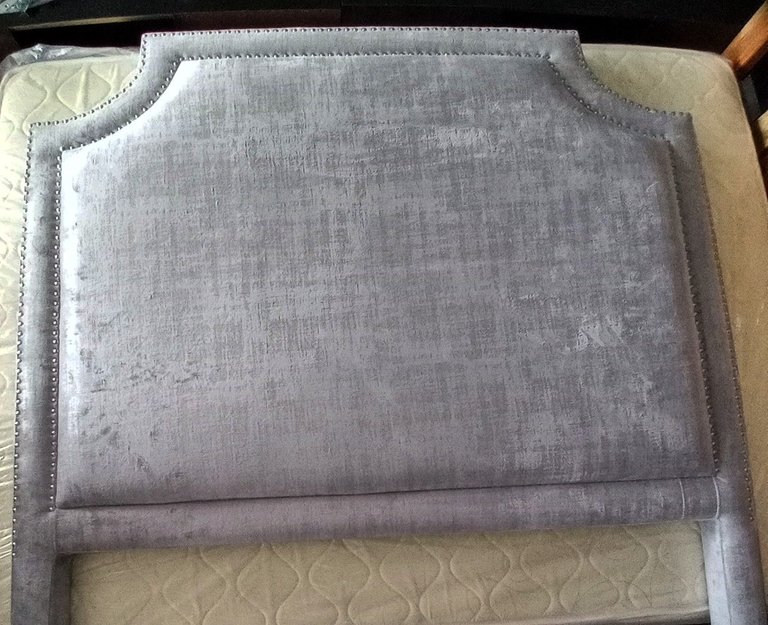
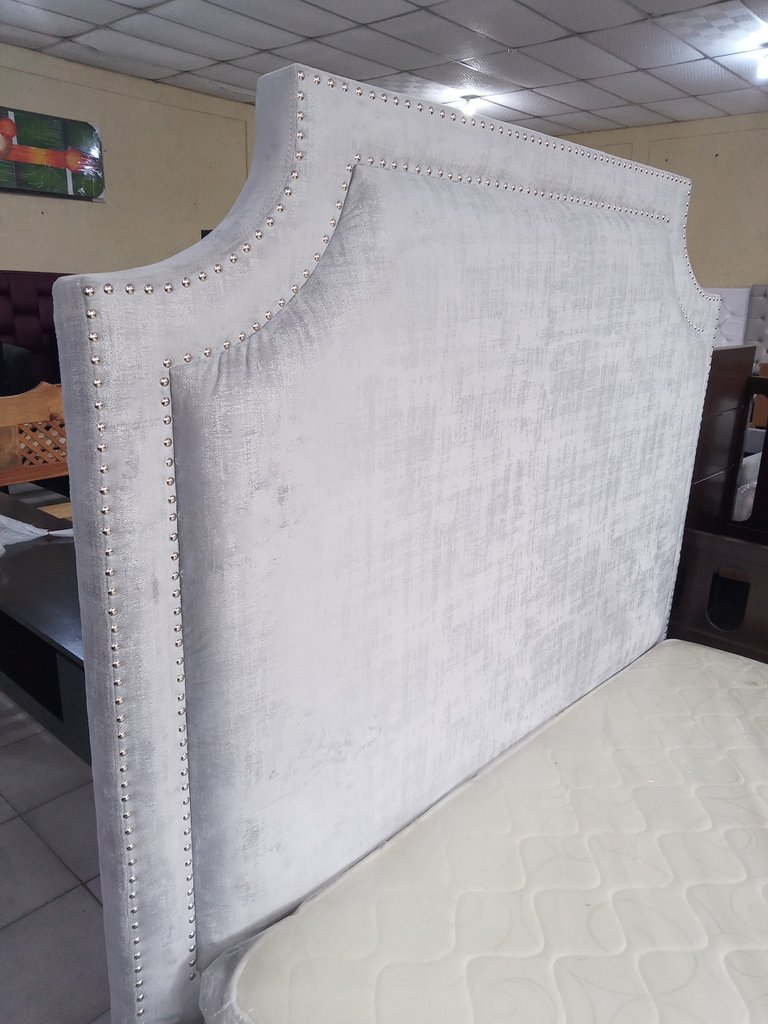
In the photos you will see a better detail of the work, I hope you like it.
- Tachuelas de tapicería.
- Martillo
- Pinza
- Destornillador de pala
Proceso:
1- Decidí colocar una medida de separación para fijar las tachuelas y así poder comenzar a clavarlas.
2- En mí caso establecí que la separación sería de un 1cm.
3- comenzé por agarrar las tachuelas con la pinza para posteriormente clavarlas.
4- Al tener la tachuela agarrada con la pinza comencé a golpear para así fijar, la pinza es para hacer más rápido el proceso y no golpearme con el martillo.
5- Seguí clavando con la distancia de 1cm por el borde externo de la cama, así hasta que llegue hasta su otro extremo.
6- Al Observar que se veía mejor decidí colocarle por la línea interna, llevando el mismo patrón para que se viera parejo.
7- El destornillador lo usé para cuando se me corría o colocaba una tachuela mal, con ello la sacaba y colocaba otra.
En las fotos se detallará mejor el trabajo espero y les guste.


![[000234] (1) (1).png](https://images.hive.blog/768x0/https://cdn.steemitimages.com/DQmfPLmEneyDeEt4PMGhnAUSvHKZaAemND4AthwXqJrnC8B/[000234]%20(1)%20(1).png)

Hola Yos, te quedo muy linda la decoracion de esta cama tapizada. Buena suerte y que tengas un feliz dia.