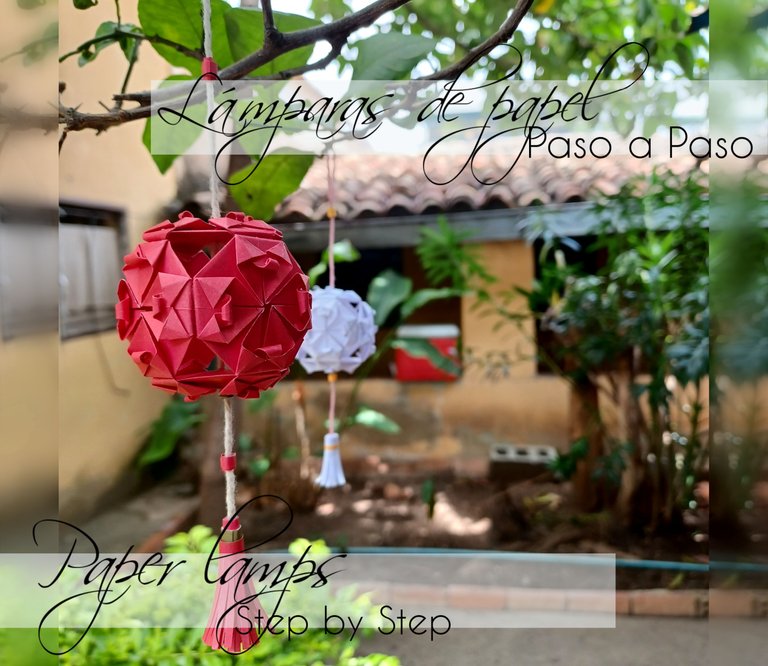
Saludos amigos!
Hoy quiero mostrarles una de las manualidades más lindas y decorativas que he hecho se trata de unos farolitos de papel, son muy vistosos yo los he hecho de unas dimensiones bastante pequeñas, pero incluso en este tamaño lucen muy bonitas, son muy sencillas, les mostrare un paso a paso a paso espero se animen a seguirlo.
Greetings friends!
Today I want to show you one of the most beautiful and decorative crafts I've done, it's about paper lanterns, they are very colorful, I've made them quite small, but even in this size they look very nice, they are very simple, I'll show you a step by step, I hope you are encouraged to follow it.
- Materials:
White or colored paper
Scissors
Lanyard
Glue
- Materiales:
Papel blanco o de colores
Tijeras
Cordón
Pega
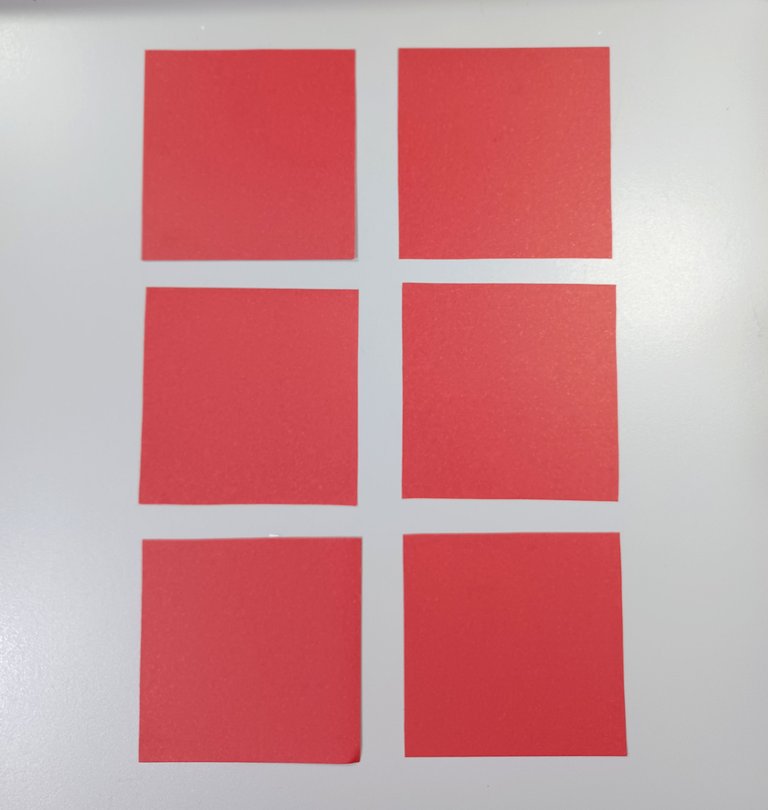
Lo primero que se debe hacer es recortar seis cuadrados de papel, en esta oportunidad yo he usado la medida de 7cm para cada uno para una esfera de 5cm aproximadamente, pero pueden usar la medida que se adapte a su preferencia.
The first thing to do is to cut out six squares of paper, in this opportunity I have used the measure of 7cm for each one for a sphere of 5cm approximately, but you can use the measure that adapts to your preference.
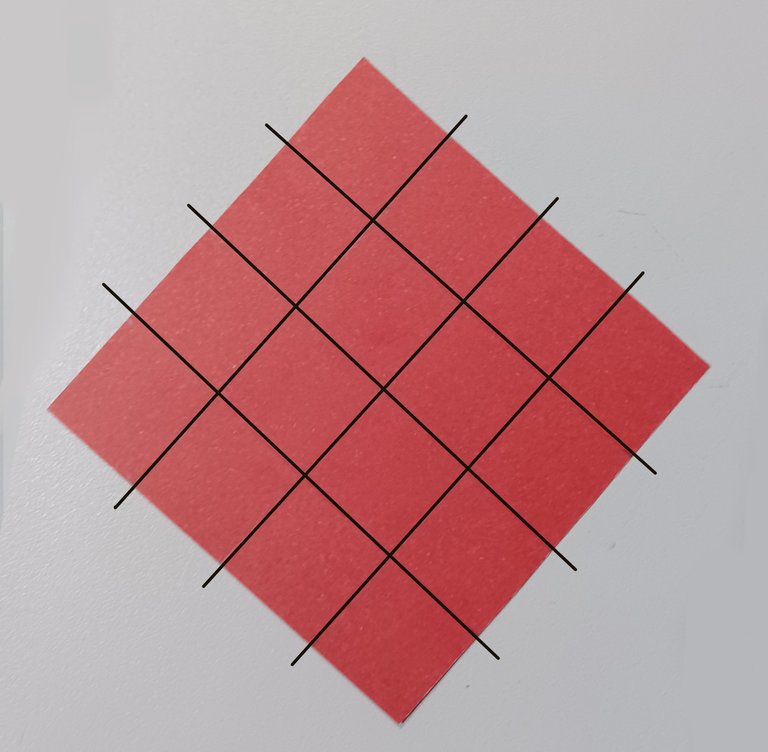
Lo siguiente es dividir el papel en cuatro lados iguales, formando una cuadricula como la que dibujo en el siguiente cuadro.
The next step is to divide the paper into four equal sides, forming a grid as shown in the following picture.
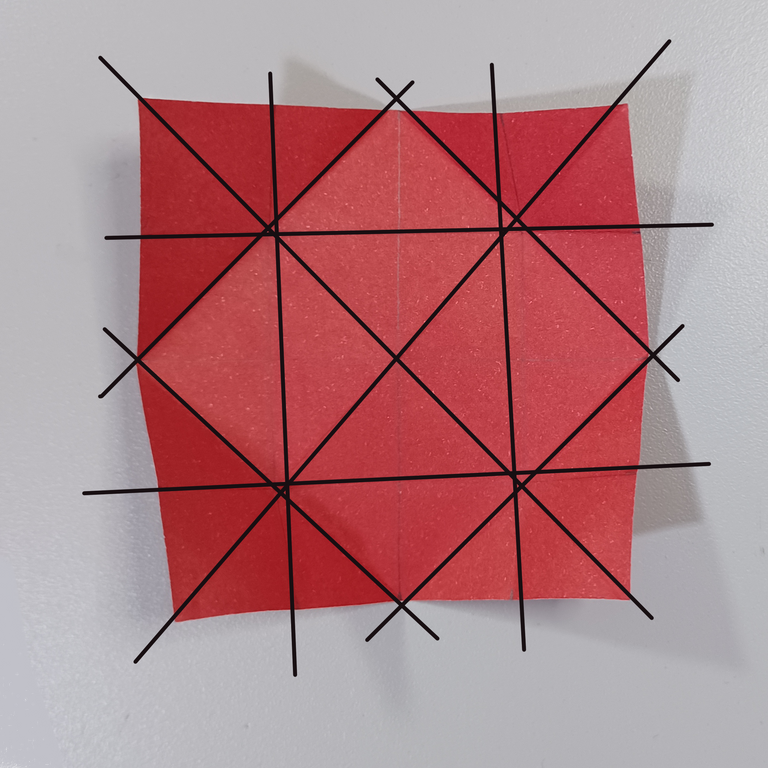
Luego se debe doblar el papel como muestro en las siguientes imágenes, solo doblar y desdoblar para marcar.
Then fold the paper as shown in the following images, just fold and unfold to mark.

Los dobleces previamente realizados deben resultar de la siguiente manera:
The previously made folds should look as follows:
Luego tomando como referencia los dobleces realizados se, doblan los dos cuatro lados hacía el centro formando cuatro nuevos cuadros pequeños.
Then, taking as a reference the folds made, the two four sides are folded towards the center forming four new small squares.

Seguidamente con la nueva forma que ha resultado se procede a dobla nuevamente las esquinas libres hacia el centro, se repite el mismo proceso en cada una, luego se abre formando un pequeño triangulo en sobre este.
Next, with the new shape that has resulted, the free corners are folded again towards the center, the same process is repeated in each one, then it is opened forming a small triangle on top of it.
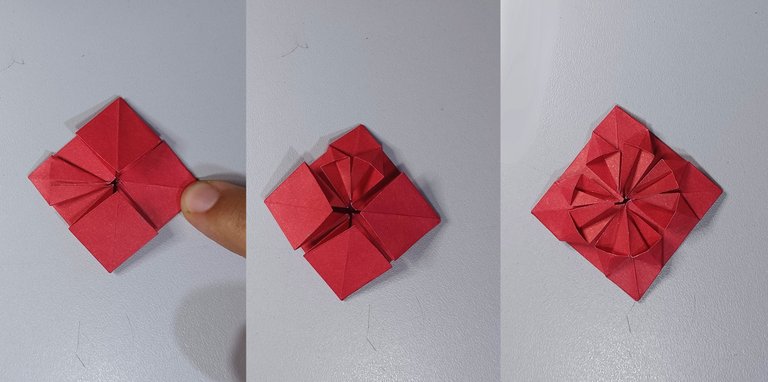
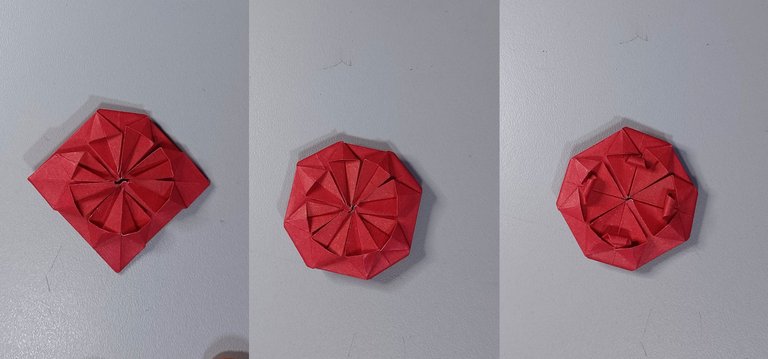
Lo siguiente será enrollar sobre si misma las puntas en el centro de la forma y doblar cada una de las esquinas.
The next thing to do is to roll the ends over itself in the center of the shape and fold each of the corners.
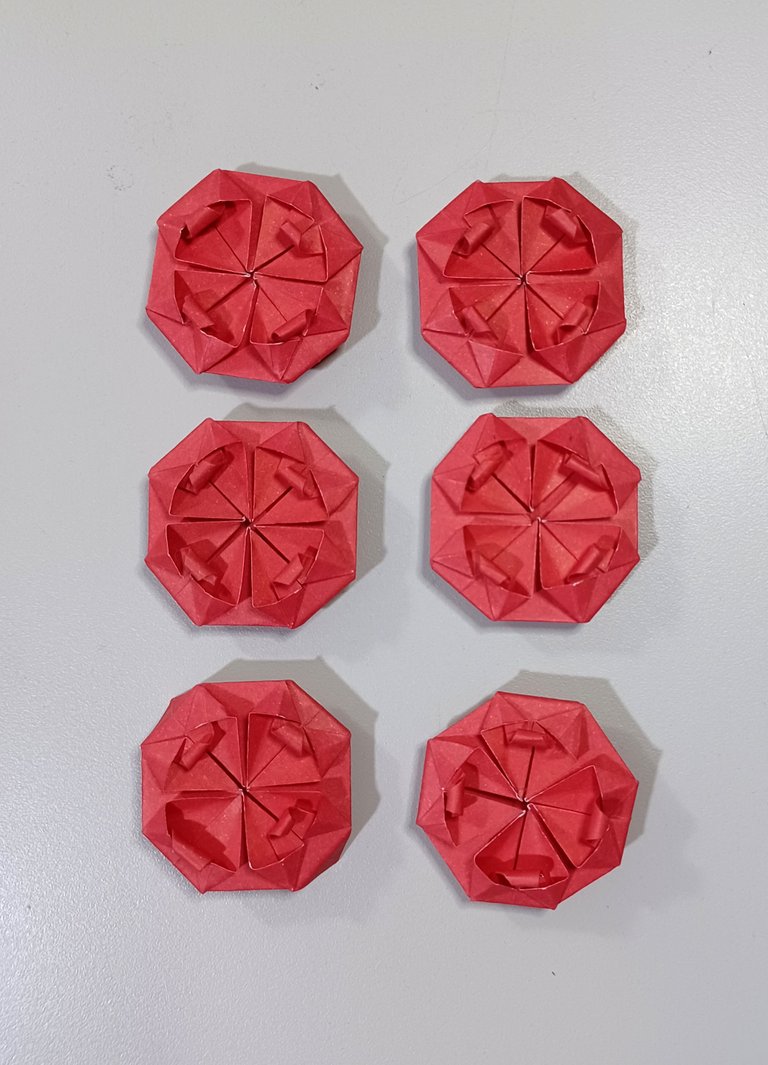
Luego repetimos este mismo proceso sobre cada uno de los 5 pedazos de papel restantes, que luego formaran nuestra lámpara.
Then we repeat this same process on each of the 5 remaining pieces of paper, which will later form our lamp.
Lo primero será unir cuatro de nuestras seis caras, para ello colocaremos pega sobre las esquinas que doblamos anteriormente y la pegamos a la esquina de la otra hasta formar una tira con las cuatro, luego pegamos los dos extremos juntos para formar un circulo.
The first thing to do is to join four of our six faces, to do this we will place glue on the corners that we folded previously and glue it to the corner of the other to form a strip with the four, then glue the two ends together to form a circle.
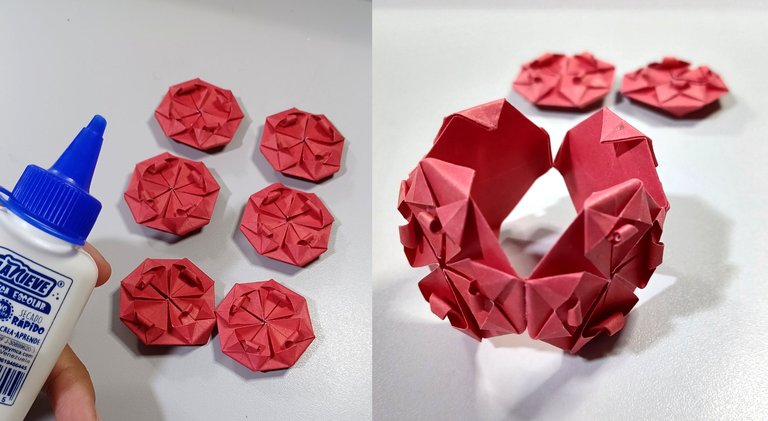
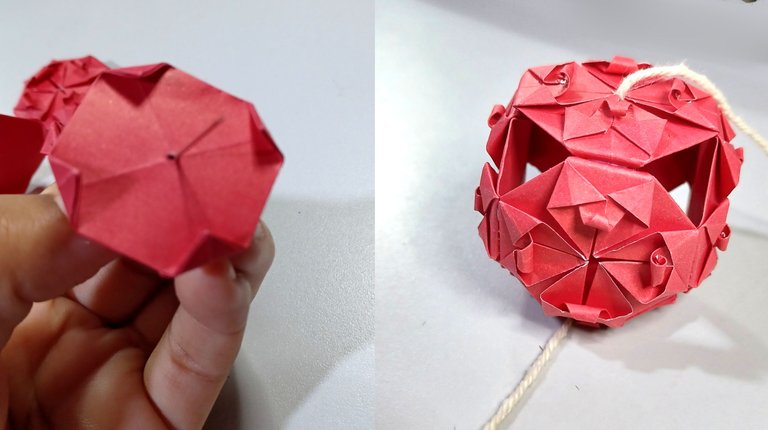
Luego a las dos caras restantes y con la ayuda de un objeto puntiagudo hacer un pequeño agujero en el centro para atravesar el cordón, luego estas dos caras se pegan en la parte superior e inferior del circulo para formar la esfera.
Then to the two remaining faces and with the help of a pointed object make a small hole in the center to pierce the cord, then these two faces are glued to the top and bottom of the circle to form the sphere.
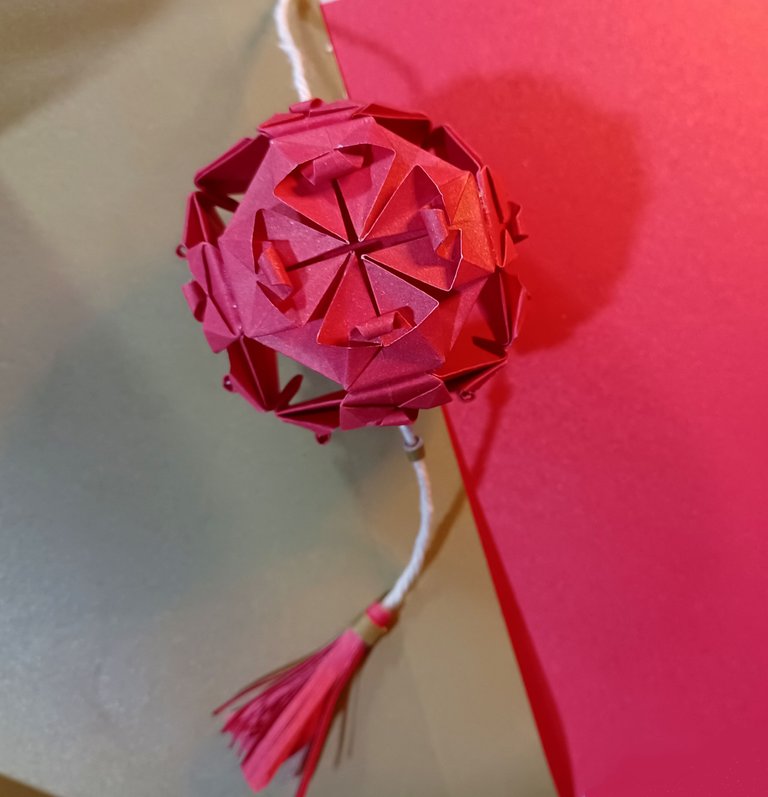
Por ultimo solo resta decorar un poco con alguna borla hecha con el mismo papel, yo he colocado varios trozos de papel envueltos alrededor del cordón para decorar, pero ya esta parte dependerá del gusto de cada quien
Finally it only remains to decorate a little with a tassel made with the same paper, I have placed several pieces of paper wrapped around the cord to decorate, but this part will depend on the taste of each person.
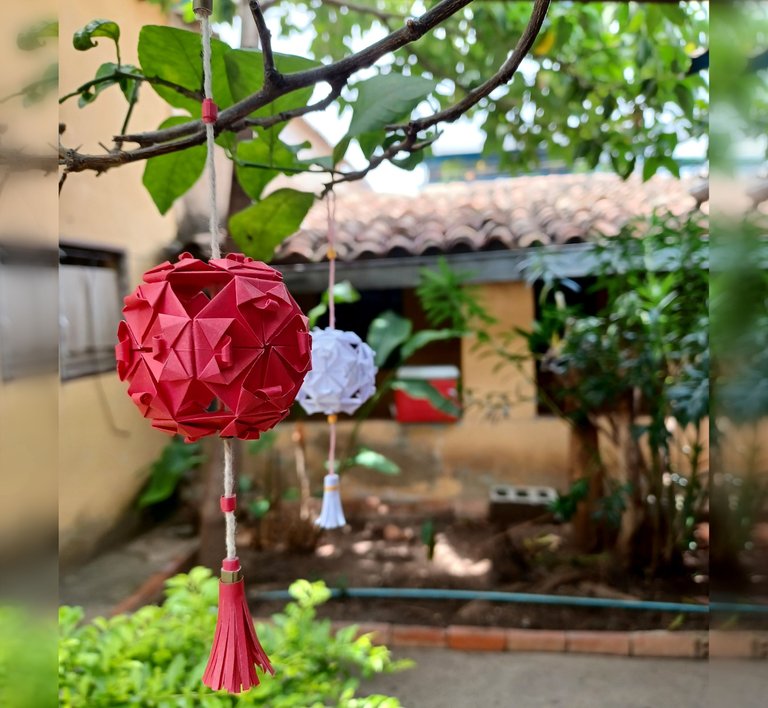
Yo tome las lámparas que hice y las coloque en un pequeño jardín que queda a las afueras de mi cuarto en la residencia donde vivo y luce realmente muy bonitas decorando el pequeño árbol de limones, espero se animen también a hacer estas bellísimas lámparas y que mi tutorial les sea útil.
I took the lamps I made and placed them in a small garden that is just outside my room in the residence where I live and it looks really nice decorating the small lemon tree, I hope you are also encouraged to make these beautiful lamps and that my tutorial will be useful.
¡Espero que les haya gustado esta publicación!
¡Muchas gracias por leer, hasta la próxima!
Hoping you liked this post!
Thank you very much for reading, see you next time!
Wow esos farolillos quedaron supremos, además como se ven allí colgados lo hace como un hambiente de jardín oriental me encanta 💖
Gracias Irene💖💖 justo por eso pensé en usar rojo en una de ellas para aportar esa vibra oriental
Holaaa mi Yetsimar, de verdad que te han quedado muy bonitas estas lámparas en pequeñas dimensiones 💕
Muchas Gracias mi Aliz! si son muy cuchis estas lamparitas :3
Hola me encantan como quedaraon felicitaciones, muy bellas.
Muchas Gracias Amiga!! <3
Es un hermoso trabajo 😍... quedaría muy linda en el jardín. Gracias por compartir 😊🥰.
Un abrazo 😘
💜🌸⭐🌹🌙🍁🌳🌟🌲🌈🏵️🌵🍀💫💫🍂🥀✨🌺🎊💙🐞💮🌷🌱🌼🎉☺️😉😃🥰🤗😘😊👍🏼
Gracias Diana, me alegra mucho que te haya gustado!! 💕💕🥰
Thank you for sharing this amazing post on HIVE!
Your content got selected by our fellow curator @rezoanulvibes & you just received a little thank you via an upvote from our non-profit curation initiative!
You will be featured in one of our recurring curation compilations and on our pinterest boards! Both are aiming to offer you a stage to widen your audience within and outside of the DIY scene of hive.
Join the official DIYHub community on HIVE and show us more of your amazing work and feel free to connect with us and other DIYers via our discord server: https://discord.gg/mY5uCfQ !
If you want to support our goal to motivate other DIY/art/music/homesteading/... creators just delegate to us and earn 100% of your curation rewards!
Stay creative & hive on!