
ESPAÑOL
Estimados amigos digitales pertenecientes al mundo de Hive, es un placer saludarles y agradecerles por todo su amor en la publicación anterior😊
Desde el preescolar nos ponen actividades para realizar obsequios con nuestras manos para nuestras madres en este día especial y en lo particular es algo que continuo haciendo debido a que me gusta mucho, esta vez quise hacer algo poco común con mucho significado ya que estas flores transmiten paz, calma, un olor relajante así como los abrazos de mi mami en tiempos que me parecen difíciles; he decido realizar un ramo de ellas e incluirlos en el proceso. Comencemos…
Desde el preescolar nos ponen actividades para realizar obsequios con nuestras manos para nuestras madres en este día especial y en lo particular es algo que continuo haciendo debido a que me gusta mucho, esta vez quise hacer algo poco común con mucho significado ya que estas flores transmiten paz, calma, un olor relajante así como los abrazos de mi mami en tiempos que me parecen difíciles; he decido realizar un ramo de ellas e incluirlos en el proceso. Comencemos…
ENGLISH
Dear digital friends belonging to the world of Hive, it is a pleasure to greet you and thank you for all your love in the previous publication😊
Since preschool we are given activities to make gifts with our hands for our mothers on this special day and in particular is something that I continue doing because I like it very much, this time I wanted to do something unusual with a lot of meaning because these flowers convey peace, calm, a relaxing smell and the hugs of my mommy in times that seem difficult to me; I decided to make a bouquet of them and include them in the process. Let's start...
Since preschool we are given activities to make gifts with our hands for our mothers on this special day and in particular is something that I continue doing because I like it very much, this time I wanted to do something unusual with a lot of meaning because these flowers convey peace, calm, a relaxing smell and the hugs of my mommy in times that seem difficult to me; I decided to make a bouquet of them and include them in the process. Let's start...

Materiales
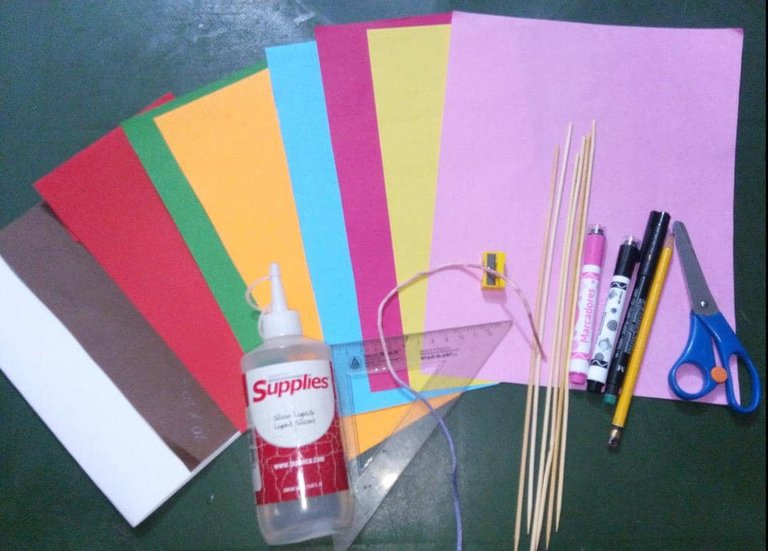
- Hojas de colores.
- Palitos de altura.
- Cinta.
- Silicon.
- Marcadores.
- Lápiz.
- Tijera.
- Sacapunta.
- Regla.
- Papel crepe.
Materials
- Colored leaves.
- Sticks of height.
- Tape.
- Silicon.
- Markers.
- Pencil.
- Scissors.
- Pencil sharpener.
- Ruler.
- Crepe paper.

Paso a Paso
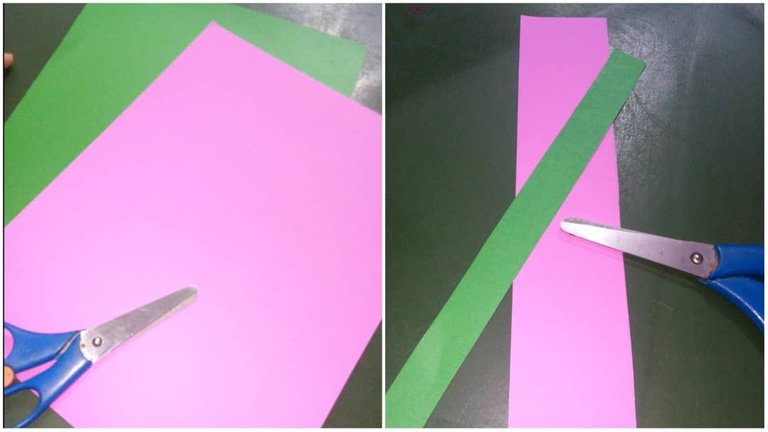
1.- Recorte dos tiras en hoja de papel, la verde de 2cm y la otra de 5cm.
Step by Step
1.- Cut out two strips of paper, the green one of 2cm and the other of 5cm.
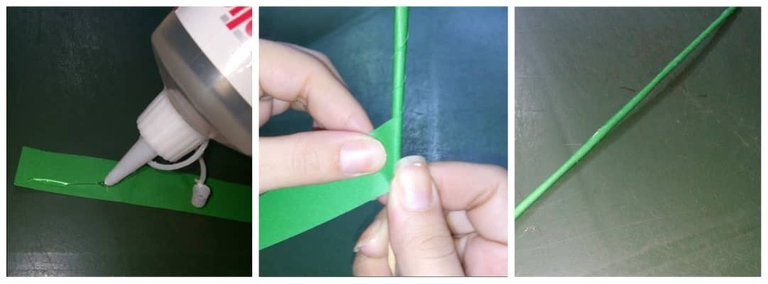
2.- Utilice la hoja de papel verde agregándole silicón y dando vueltas alrededor del palito de altura, de esta manera se cubre el mismo
2.- Use the green sheet of paper adding silicone and turning it around the height stick, in this way the stick is covered.
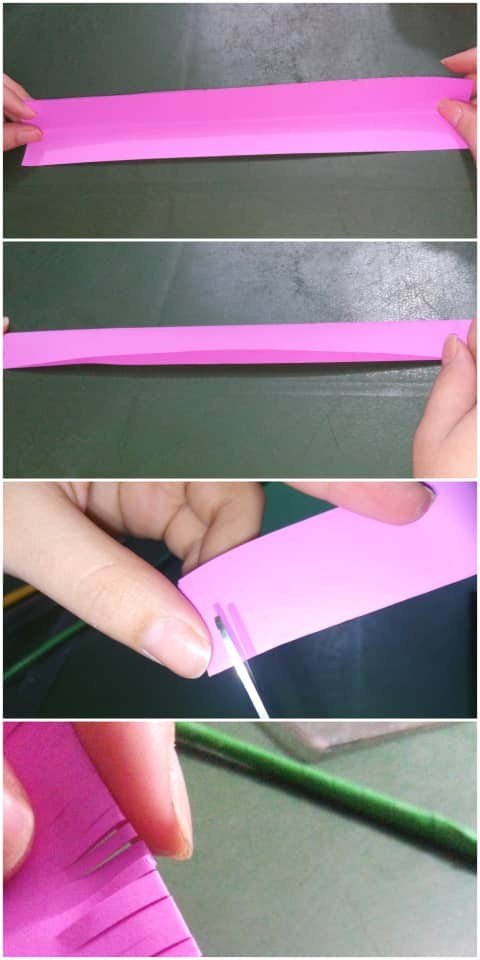
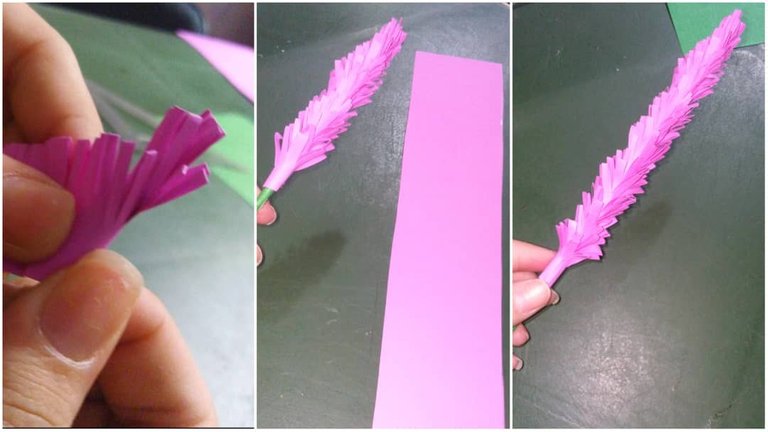
3.- El siguiente trozo de papel lo doble hasta quedar en la forma que se ve en la imagen, posteriormente realice pequeños cortes en el centro de la unión.
3.- Fold the next piece of paper into the shape shown in the image, then make small cuts in the center of the joint.
4.- Comencé a pegar alrededor del palito de altura ya forrado anteriormente. Luego recorte otro trozo de papel del mismo color y tamaño, ya que me pareció que había quedado muy corta la forma de la flor.
Con el trozo ya recortado, repetí el mismo procedimiento y terminé de forrar.
4.- I started gluing around the stick of height already lined previously. Then I cut out another piece of paper of the same color and size, since I thought the flower shape was too short.
With the piece already cut out, I repeated the same procedure and finished lining.
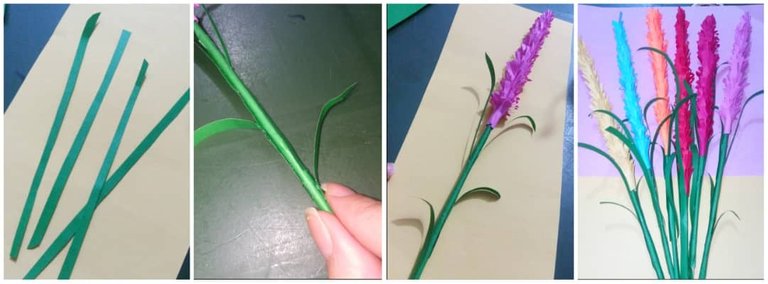
5.- Realice cortes de color verde de 0.50cm, los cuales servirán como tallo para la flor. Luego pegue las tiras en el palito de la flor, realizando unos pequeños dobles en cada punta de las tiras pegadas.
Repetí los procesos anteriores con diferentes hojas de colores.
5.- Make 0.50cm green cuts, which will serve as stems for the flower. Then glue the strips on the flower stick, making small doubles on each end of the glued strips.
Repeat the above processes with different colored leaves.
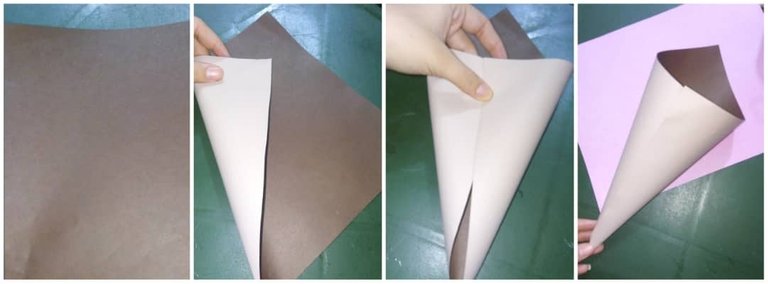
6.- Con una hoja de color diferente a las que había usado, para realizar el ramo. Traslade una punta hasta la mitad de la hoja, de esta misma forma doble la otra punta y pegue
6.- With a different colored leaf than the ones you had used to make the bouquet. Transfer one end to the middle of the leaf, fold the other end in the same way and glue.
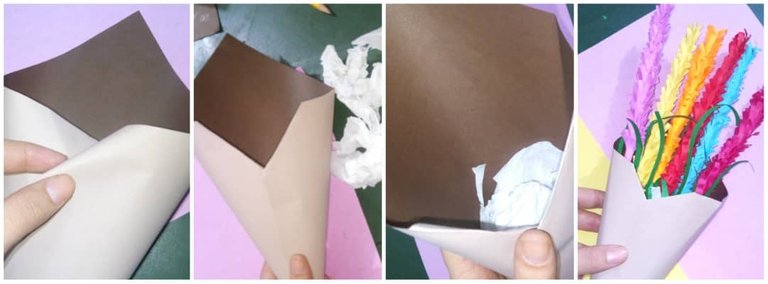
7.- Doble un poquito las puntas del medio para que las flores se puedan observar mejor. Utilice papel crepe para rellenar el ramo, y de esta manera las flores no se movieran de un lado a otro.
7.- Fold a little bit the ends in the middle so that the flowers can be seen better. Use crepe paper to fill the bouquet, so the flowers will not move from one side to the other.
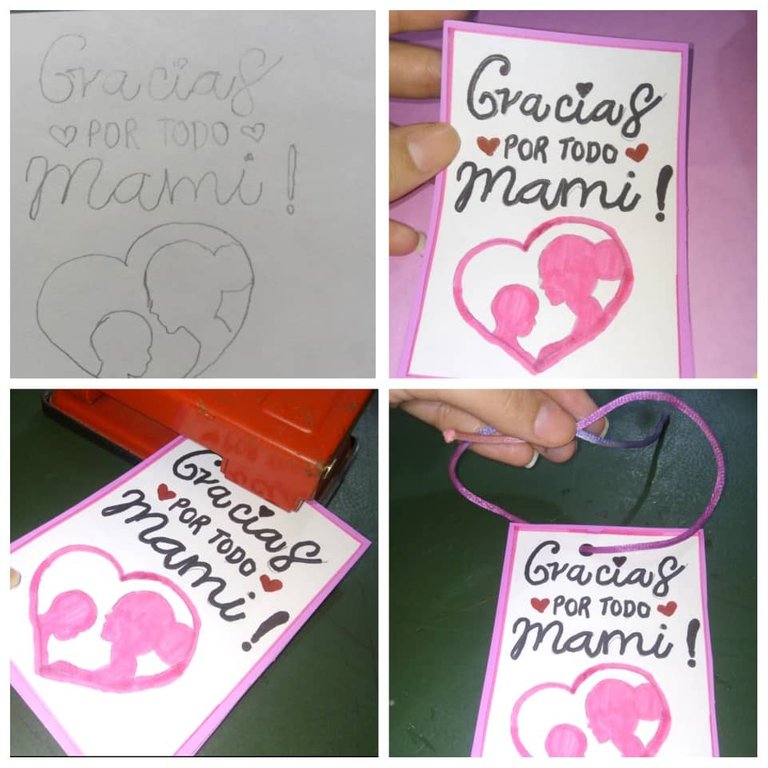
8.- Realice una tarjeta, con solo hoja de papel, dibuje el modelo que quería utilizando una letra corrida, con un pequeño dibujo. Posteriormente, decore con marcadores y recorte; la pegue sobre una hoja de color diferente, recorte dejando un pequeño borde.
Con la ayuda de una perforadora, realice dos agujeros e introduci un trozo de cinta, luego un pequeño nudo para que la tarjeta pueda quedar colgando en el ramo
8.- Make a card, with only one sheet of paper, draw the model you wanted using a running letter, with a small drawing. Then, decorate it with markers and cut it out; paste it on a different color sheet, cut it out leaving a small border.
With the help of a hole punch, make two holes and insert a piece of ribbon, then tie a small knot so that the card can hang in the bouquet.
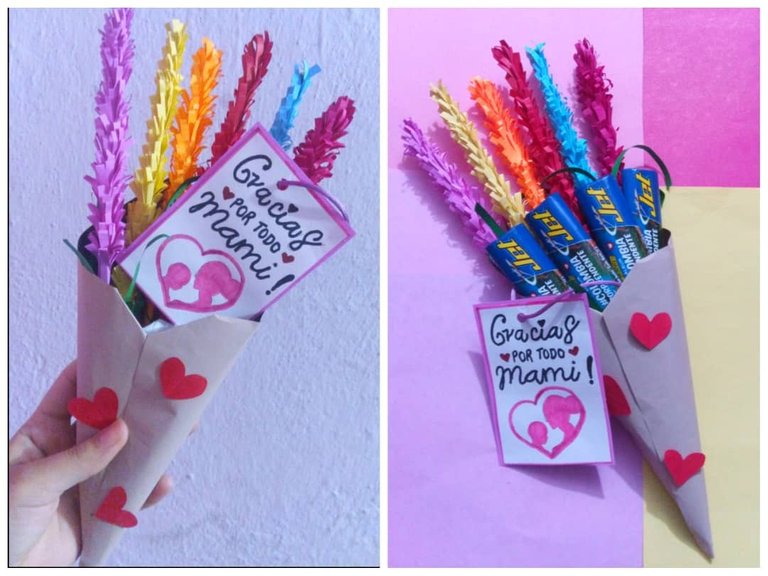
9.- Para culminar, corte pequeños corazones y pegue en el ramo.
Y de esta manera obtendremos un pequeño ramo de flores para entregar a esa mami especial.
También se le puede agregar dulces🤤😍
9.- To finish, cut small hearts and glue them on the bouquet.
And in this way we will get a small bouquet of flowers to give to that special mommy.
You can also add candies🤤😍.

Resultado
Result
Gracias por leerme una vez más.
Nos vemos en una próxima publicación.
Ediciones en Canvas e InShot
Traducción en DeeLp.com
Thank you for reading me once again.
See you in a future publication.
Editions in Canvas and InShot.
Translation in DeeLp

Congratulations @yagelybr! You have completed the following achievement on the Hive blockchain and have been rewarded with new badge(s):
Your next target is to reach 50 replies.
You can view your badges on your board and compare yourself to others in the Ranking
If you no longer want to receive notifications, reply to this comment with the word
STOPCheck out the last post from @hivebuzz:
Support the HiveBuzz project. Vote for our proposal!
The rewards earned on this comment will go directly to the person sharing the post on Twitter as long as they are registered with @poshtoken. Sign up at https://hiveposh.com.
Esta ideas esta realmente linda y delicada, me encantó.
Me alegra mucho que te haya encatado. Gracias por comentar. Bendiciones🤗