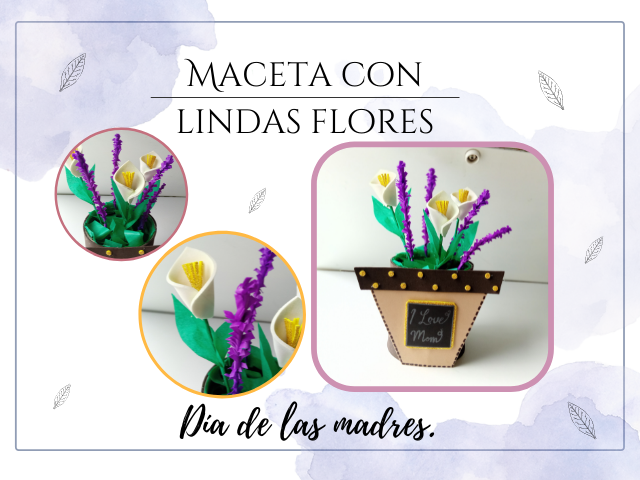
🌼¡Hola amigos de esta hermosa comunidad creativa! Espero que tengas un buen comienzo de semana.🌼
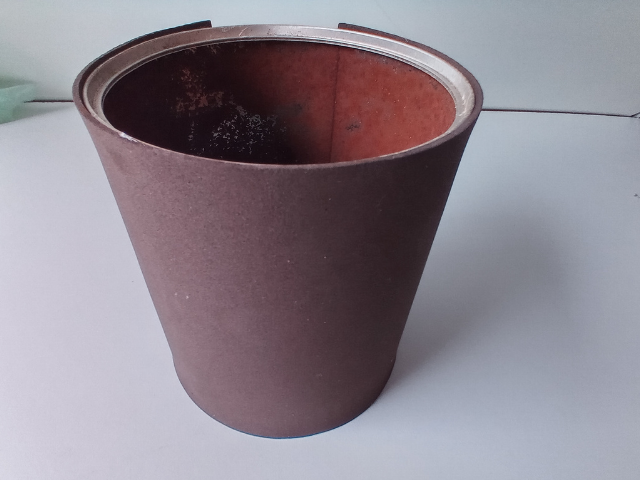
Hoy les traigo una bonita decoración de un macetero con flores para el día de la madre. Siempre intento traerles cosas que sean fáciles de hacer, con pocos materiales o, si es necesario, que estos se puedan sustituir por otros para la comodidad de cada uno y que no haya excusas para hacer un bonito detalle nosotros mismos. Las flores que elaboré para esta decoración son: lavanda y Cala. puedes hacer las flores de tu elección, simplemente espero que esta decoración te sirva de inspiración. A continuación, te dejó el paso a paso de cómo hacer este hermoso macetero con flores.
🌼¡Hello friends of this beautiful creative community! I hope you have a good start of the week.🌼 Today I bring you a beautiful flower pot decoration for Mother's Day. Always try to bring them things that are easy to do, with few materials or, if necessary, that these can be replaced by others for the comfort of each one and that there are no excuses to make a nice detail ourselves. The flowers that I made for this decoration are: lavender and Cala. you can make the flowers of your choice, I simply hope that this decoration will inspire you. Next, we leave you the step by step of how to make this beautiful flower pot.
♥️ESPERO QUE TE GUSTE,
¡Empecemos!
♥️I HOPE YOU LIKE IT,
Let's start!

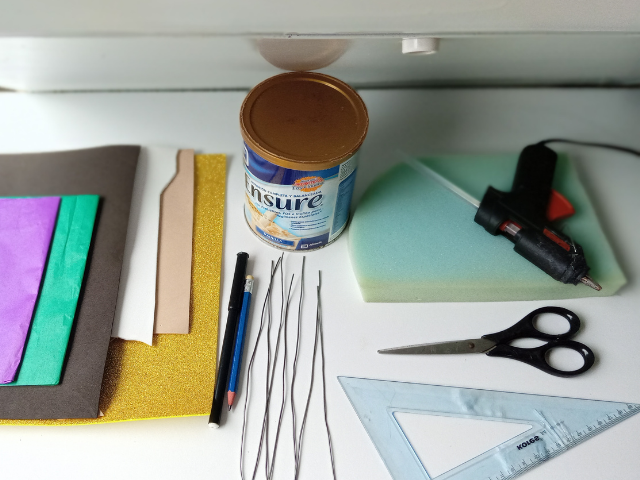
🌼 MATERIALES | 🌼 MATERIALS
- Lata o envase redondo (tamaño de tu preferencia).
- Anime o goma espuma.
- Alambre o palitos de altura.
- hoja blanca o cartulina negra.
- Papel de seda verde.
- Papel de seda morado.
- Foami dorado escarchado.
- Foami marron.
- Foami beige.
- Foami blanco.
- Marcador negro.
- Abre huecos.
- Silicón caliente.
- Tijera.
- Lápiz.
- Can or round container (size of your preference).
- Anime or foam rubber.
- Wire or height sticks.
- white sheet or black cardstock.
- Green tissue paper.
- Purple tissue paper.
- Gold foami with glitter.
- brown foam.
- beige foam.
- white foam.
- black marker
- perforator.
- Hot silicone.
- pair of scissors.
- Pencil.
🌸 PROCEDIMIENTO | 🌸 PROCESS
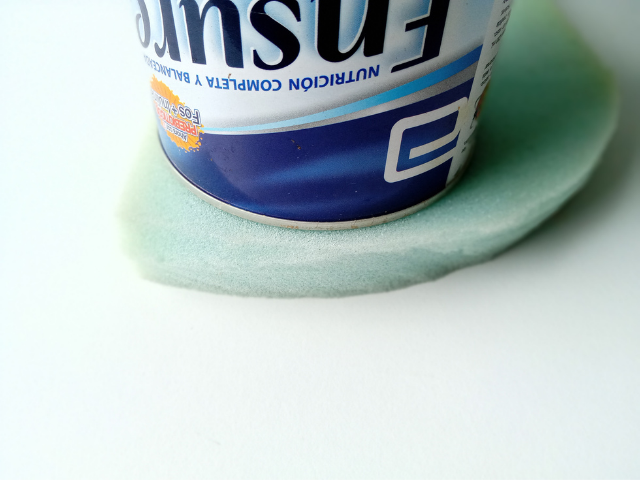
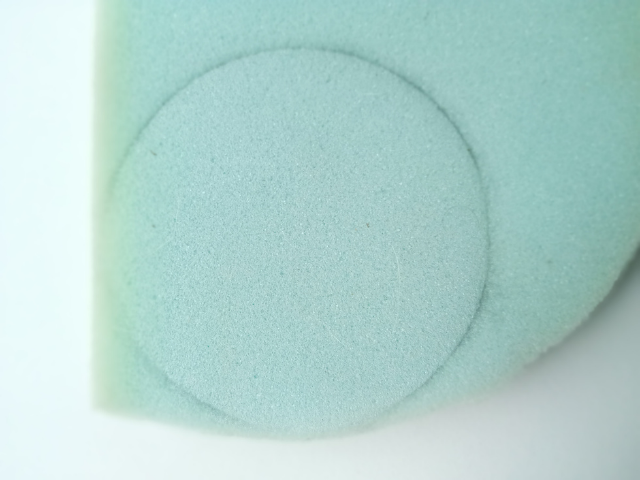
- PASO 1:
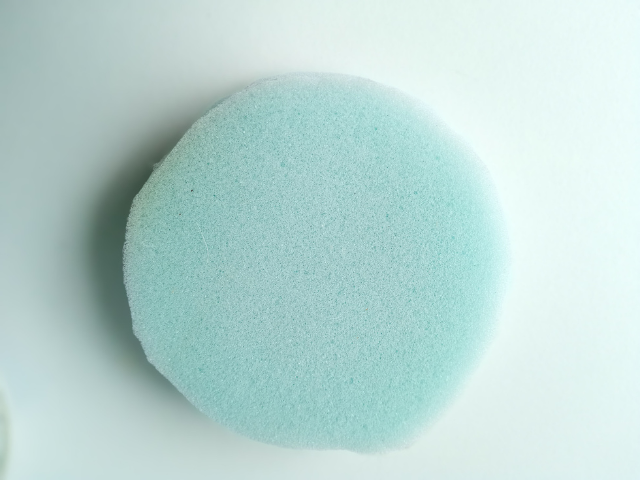
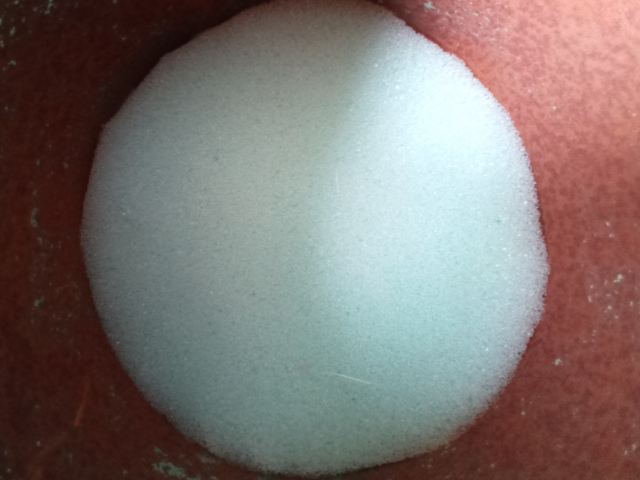
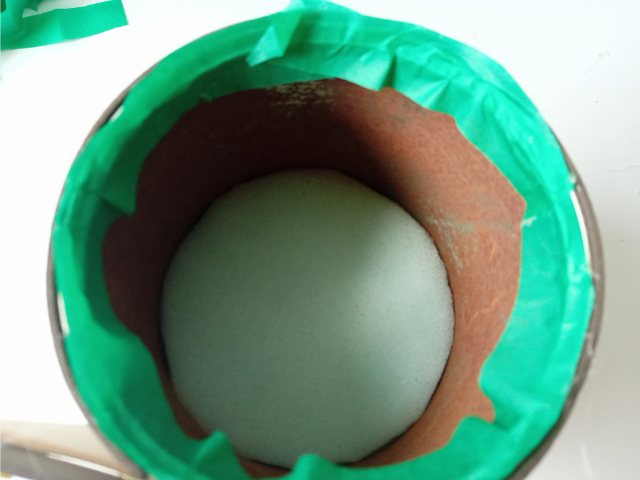
Comenzamos haciendo un círculo un poco más pequeño que nuestra lata o envase redondo en el anime o gomaespuma, cortamos y metemos dentro de la caja para que sea la base donde van a ir incrustados los alambres o palos de altura.
- STEP 1:
We start by making a circle a little smaller than our can or round container in the anime or foam rubber, we cut it and put it inside the box so that it is the base where the wires or height sticks will be embedded.
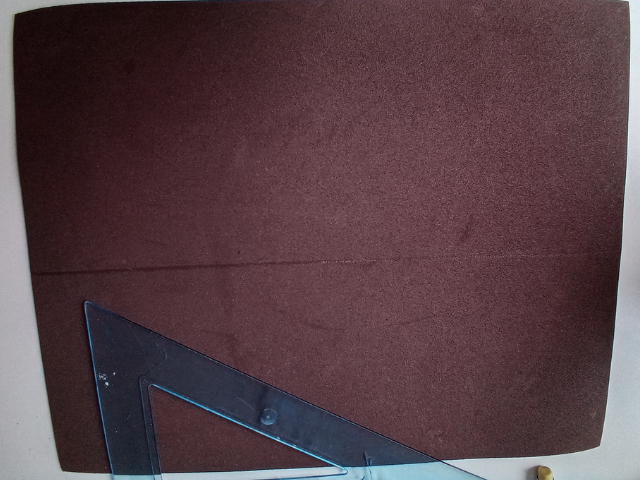
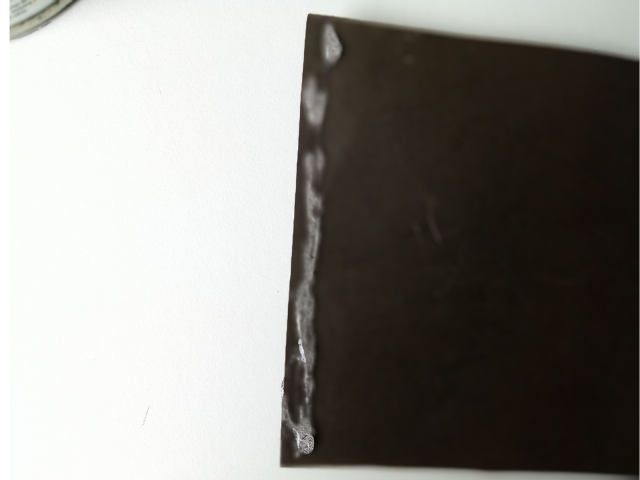
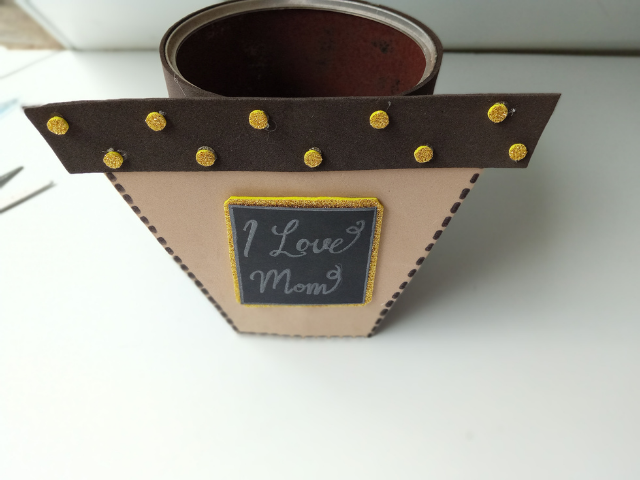
- PASO 2:
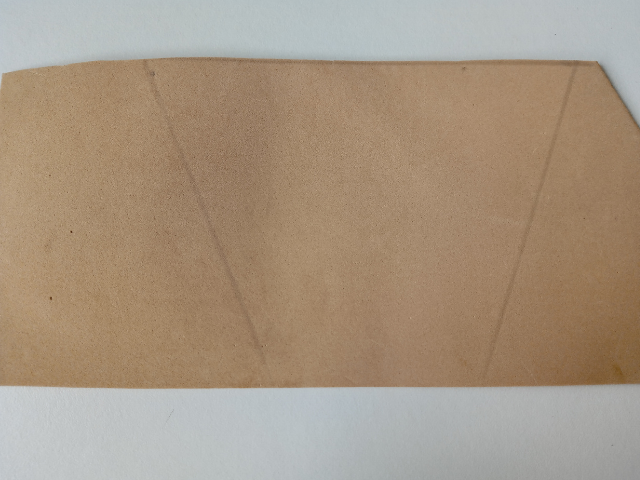
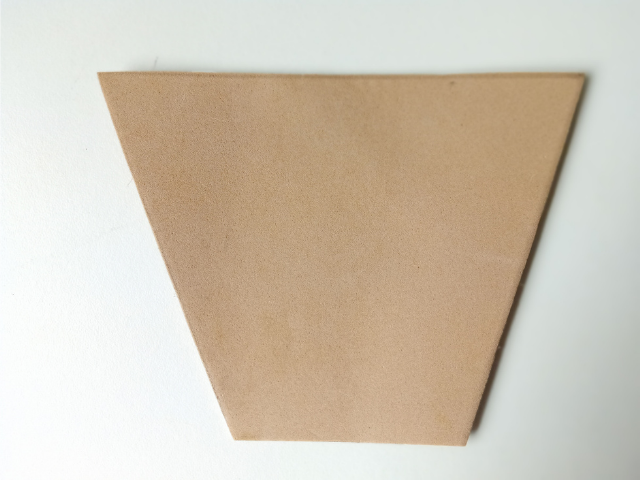
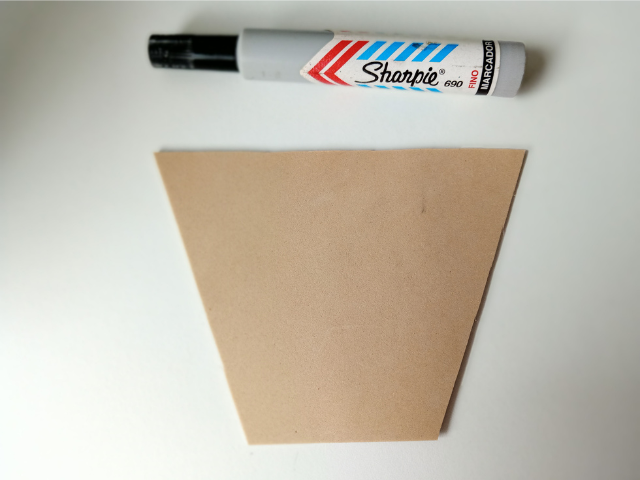
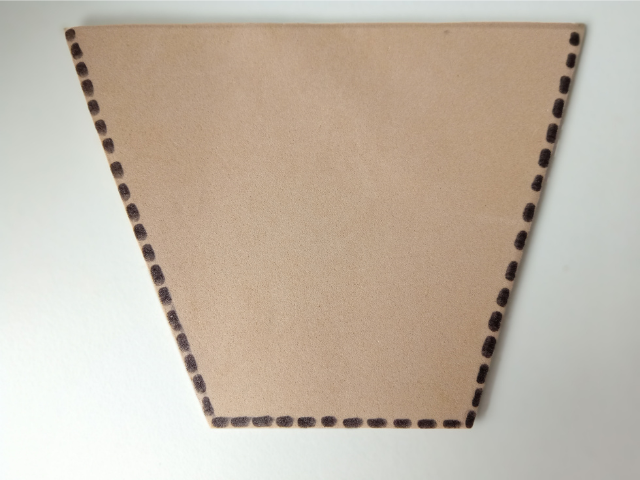
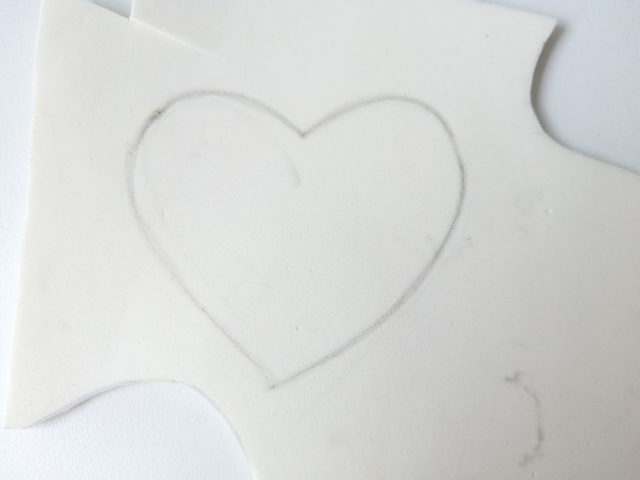
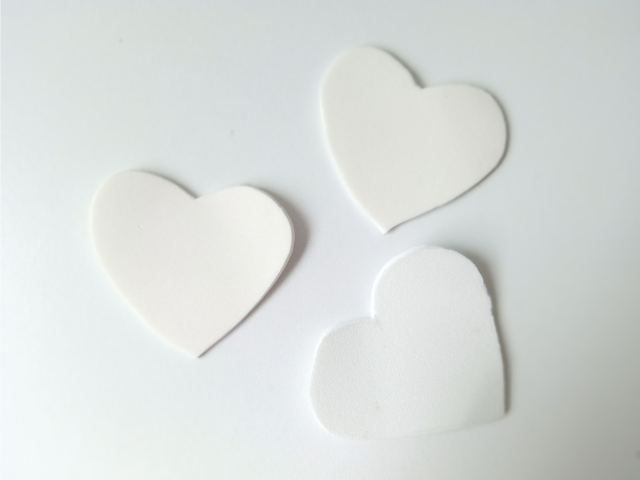
Medimos el largo del envase, pasamos esas medidas al foami marrón, cortamos y pegamos al envase. Luego, tomamos el foami beige y dibujamos la forma que le queremos dar a la maseta, en mi caso; la hice más ancha arriba y un poco más cerrada en la parte de abajo, cortamos y con ayuda de un marcador negro decoramos los bordes con pequeñas líneas, dejando un espacio entre cada una.
A continuación, te muestro fotos de cómo las hice.
- STEP 2:
We measure the length of the container, pass those measurements to the brown foami, cut and glue to the container. Then, we take the beige foami and draw the shape that we want to give to the pot, in my case; I made it wider at the top and a little more closed at the bottom, we cut and with the help of a black marker we decorated the edges with small lines, leaving a space between each one.
Below are photos of how I made them.
- PASO 3:
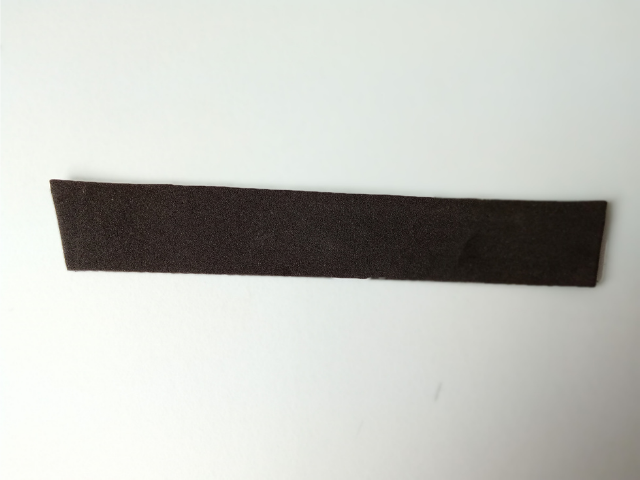
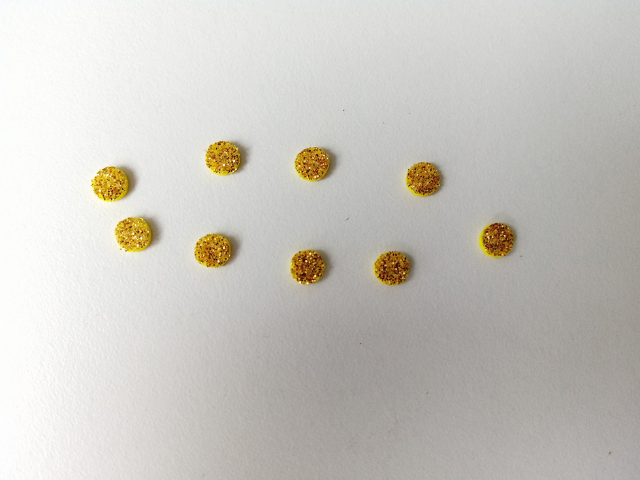
Tomamos el foami marrón y cortamos una tira de 2.5cm de ancho y aproximadamente 2 cm más larga que el ancho del foami beige que cortamos anteriormente. Tomamos el foami dorado escarchado y con ayuda del abre huecos cortamos algunos círculos, pegar en la tira de foami marrón y, una vez hecho esto, pegar la tira en la parte superior del foami beige, cuando tengamos listo nuestro diseño de maceta podemos pegar al envase.
- STEP 3:
We take the brown foami and cut a strip 2.5 cm wide and approximately 2 cm longer than the width of the beige foami that we cut earlier. We take the frosty gold foami and with the help of the opener we cut some circles, we paste on the strip of brown foami and, once this is done, we paste the strip on top of the beige foami, when we have our pot design ready we can paste it in the container.


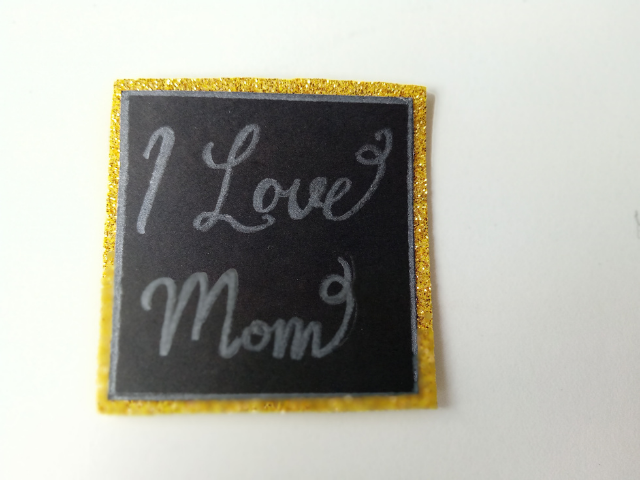
- PASO 4:
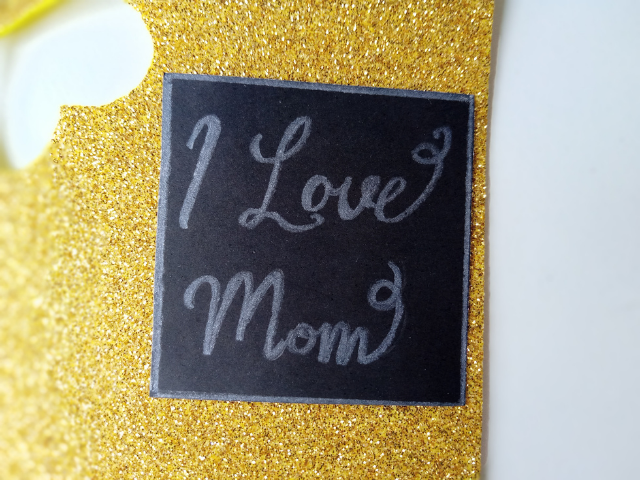
Luego, para hacer el cartel de la maseta, corte un cuadrado pequeño de cartulina escolar negra pero tu puedes utilizar una hoja blanca y escribir lo que sea de tu agrado. Yo escribí “I LOVE MOM”. Luego, pegar en el foami dorado escarchado y cortar un poco más grande que la cartulina negra. Si en tu caso no quieres escribir nada, puedes tomar el foami dorado escarchado, hacer un par de corazones, pegarlos y listo.
- STEP 4:
Then, to make the flower pot sign, cut a small square out of black school construction paper, but you can use a white sheet of paper and write whatever you want. I wrote “I LOVE MOM”. Then glue the gold foami and cut it a little bigger than the black construction paper. If in your case you don't want to write anything, you can take the frosted gold foami, make a couple of hearts, glue them and that's it.

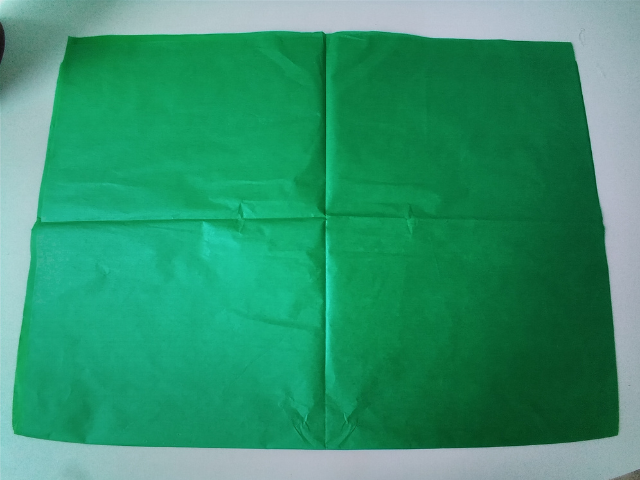
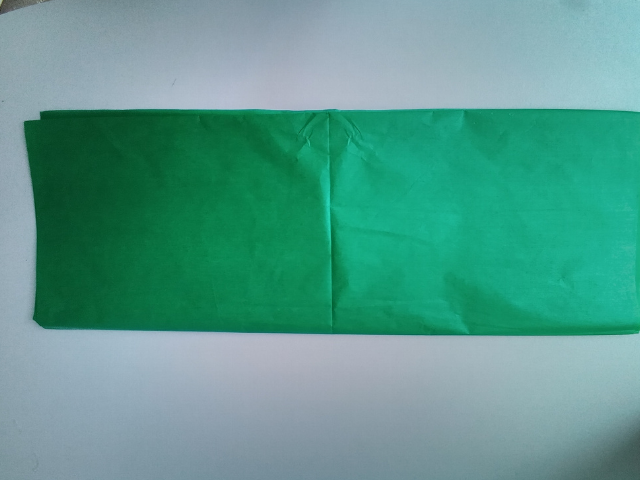
- PASO 5:
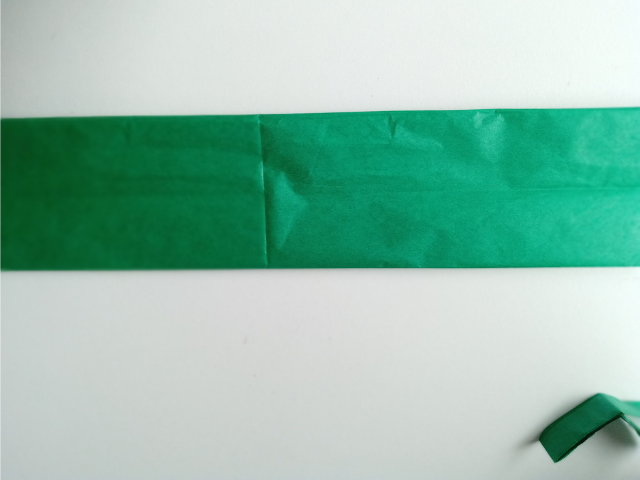
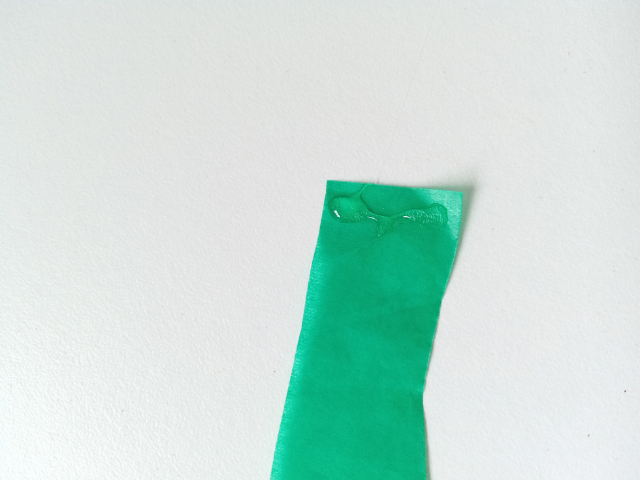
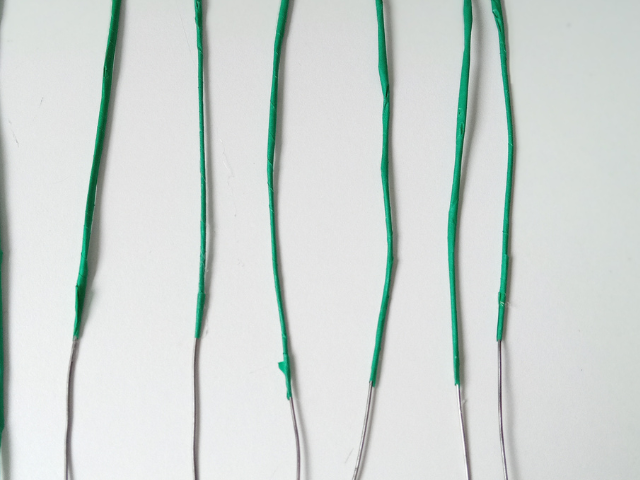
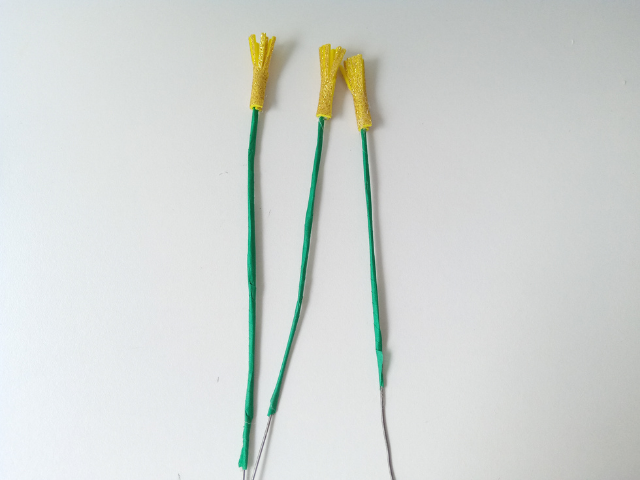
Tomar el papel de seda verde, doblar a lo largo en tres partes (puedes guiarte con las líneas de doblaje que ya trae el papel). Cortar las tiras de 1cm aproximadamente. Separar las tiras, tomar una y pegar en el borde de la lata o envase. Luego, con las mismas tiras verdes, comenzar a forrar las varas de alambre o palos de altura, yo forre 7. Agregar un poco de silicón, enrollar hasta la mitad de la vara y pegar el otro extremo de la tira.
- STEP 5:
Take the green tissue paper, fold lengthwise in three parts (you can guide yourself with the folding lines that the paper already has). Cut strips of approximately 1 cm. Separate the strips, take one and stick to the edge of the can or container. Then, with the same green strips, begin to cover the wire rods or height sticks, I covered 7. Add a little silicone, roll up to the middle of the rod and glue the other end of the strip.
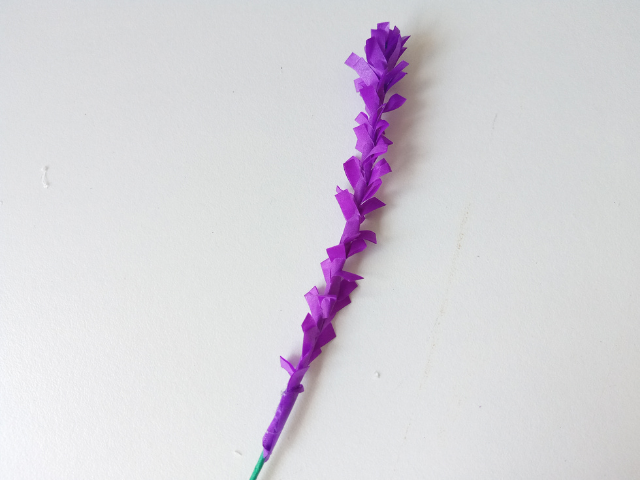
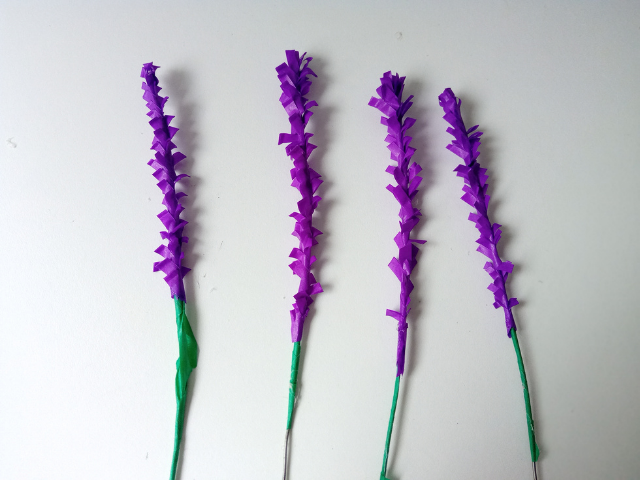
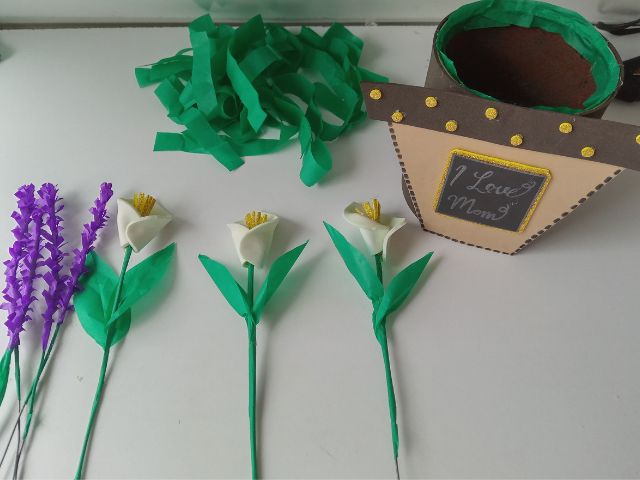
- PASO 6:
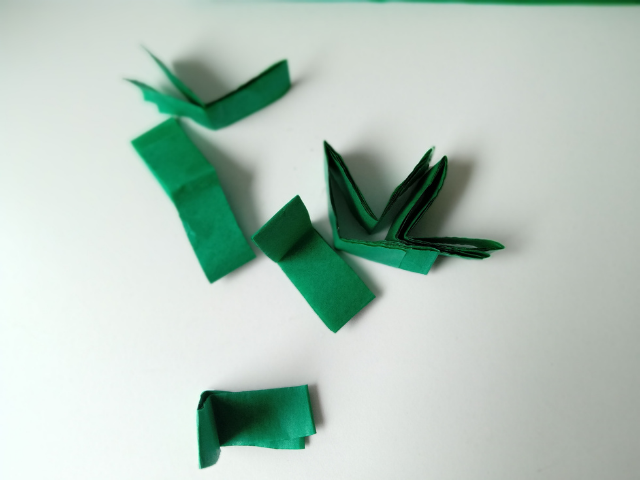
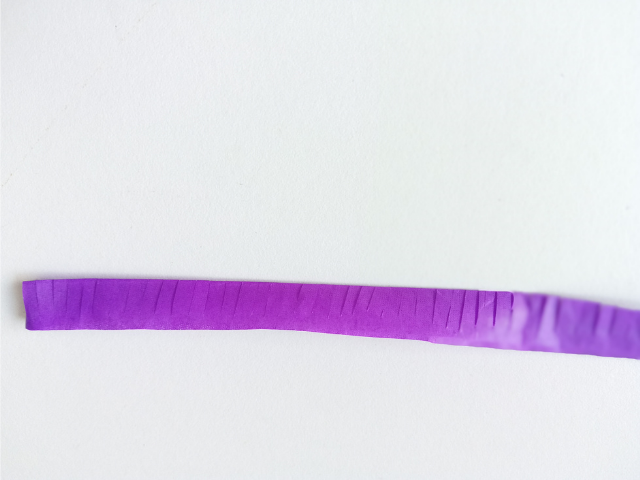
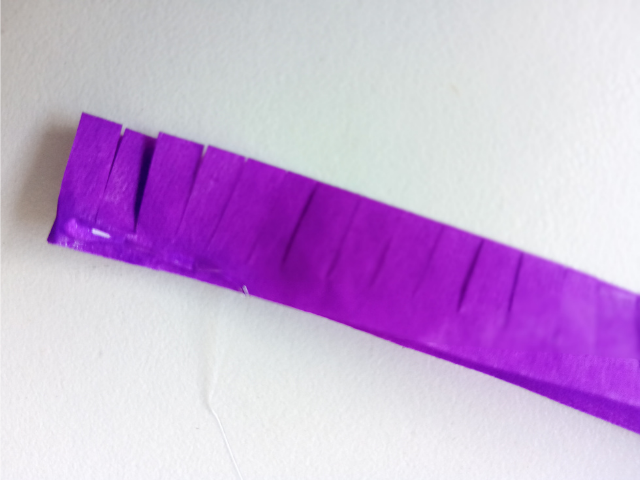
Con el papel de seda morado, cortar tiras de 2 cm de ancho, doblar a la mitad hasta que nos de 1cm y hacer pequeños cortes por la parte de los dobles, solo hasta la mitad. Agregar silicón en uno de los extremos, en la parte donde no hicimos cortes y comenzamos a enrollar hasta la mitad de nuestra vara de alambre, como hicimos anteriormente con el papel de seda verde.
- STEP 6:
With the purple tissue paper, cut strips 2 cm wide, fold in half until it is 1 cm wide and make small cuts in the part of the folds, only halfway. We added silicone in one of the ends, in the part where we did not make cuts and we began to roll up to the middle of our wire , as we did before with the green tissue paper.

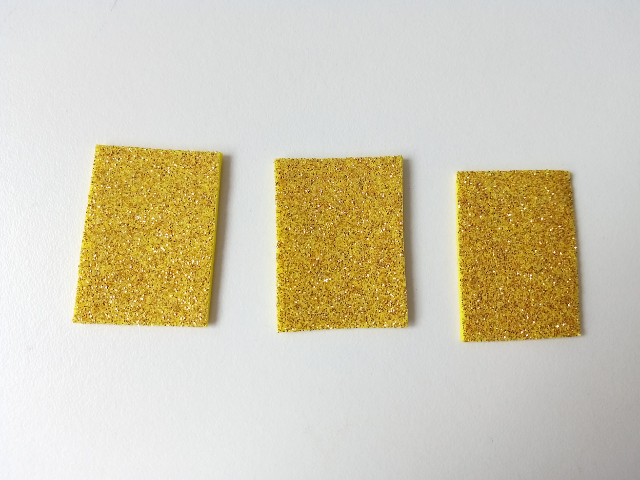
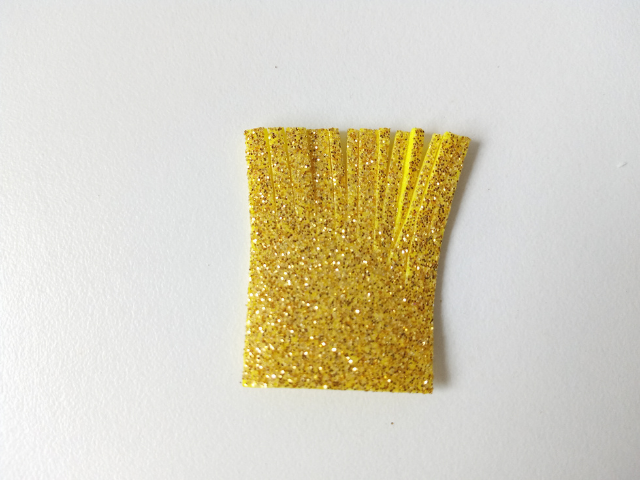
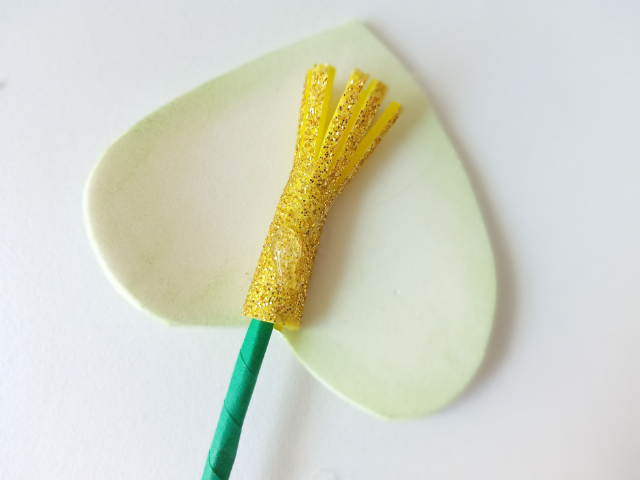
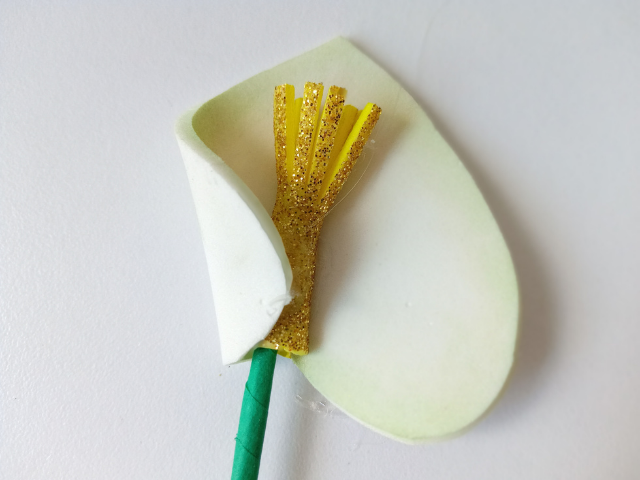
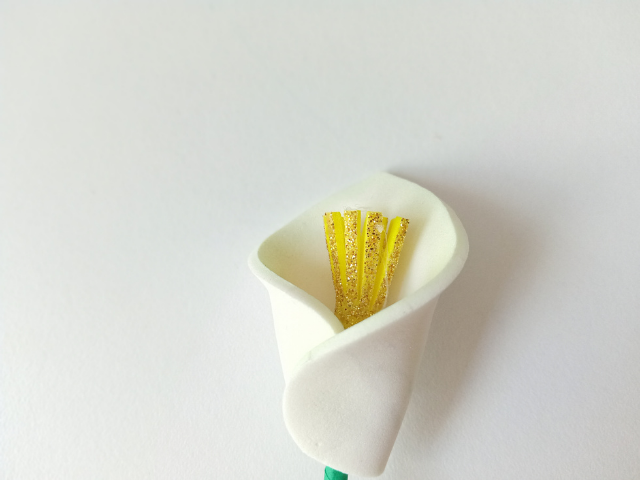
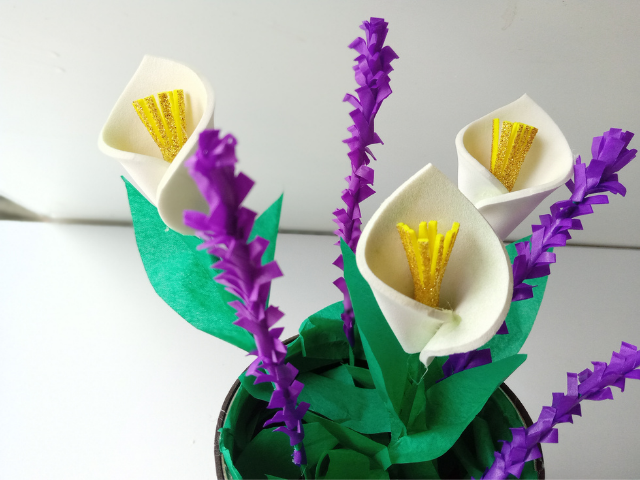
- PASO 7:
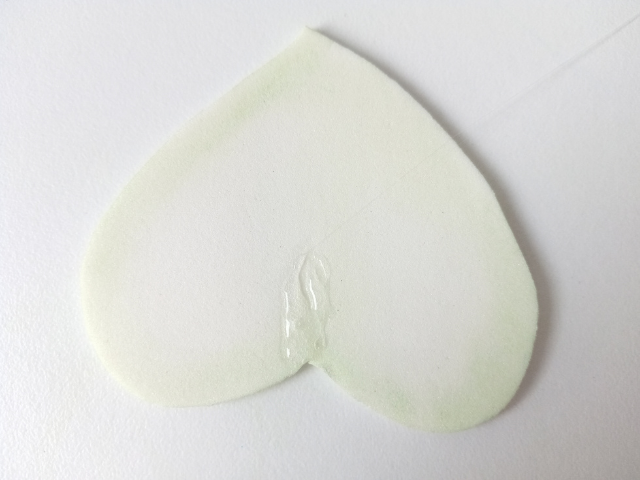
Continuamos con las flores de cala. Tomar el foami dorado escarchado, cortar tres rectángulos, hacer cortes hasta la mitad del rectángulo y enrollar en la parte de arriba de las varas (este será el centro de la flor). Luego, dibujar tres corazones en el foami blanco, (yo las pinte por el borde con un poco de sombra verde) recortar y pegar de forma invertida los corazones. agregar un poco de silicón en el centro y pegar cubriendo el centro de la flor. Luego, agregar un punto de silicón en el centro y pegar los extremos uno sobre el otro.
- STEP 7:
We continue with the calla flowers. Take the foami with gold glitter, cut three rectangles, make cuts to the middle of the rectangle and roll up the top of the sticks (this will be the center of the flower). Next, draw three hearts on the white foami, (I painted them around the edge with a bit of green shadow) cut and glue the hearts upside down. add a bit of silicone in the center and paste covering the center of the flower. Then add a dot of silicone in the center and glue the ends on top of each other.
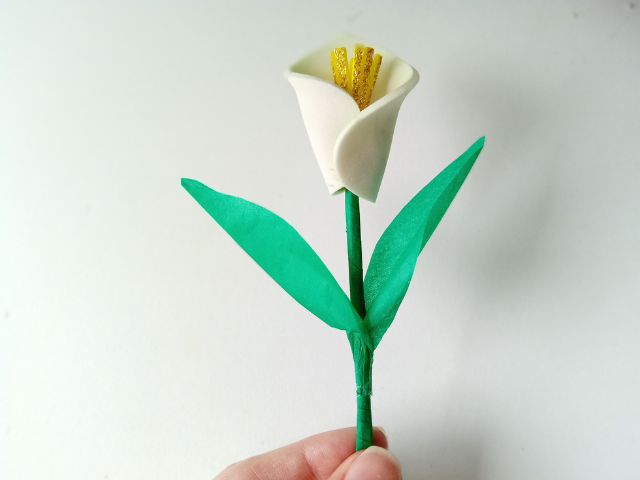
- PASO 8:
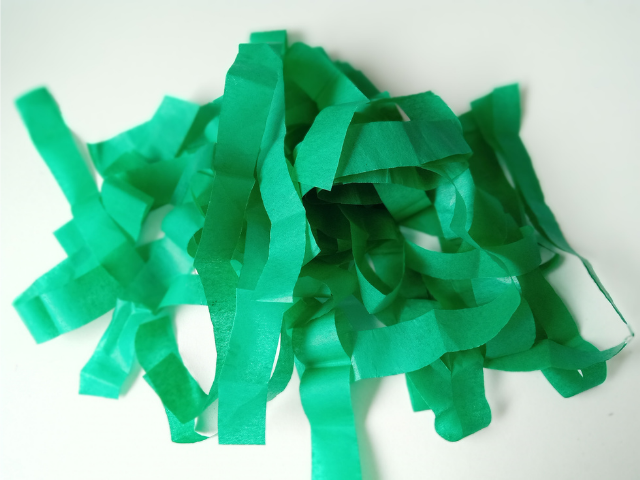
Por último, puedes recortar unas hojitas con el papel de seda verde, recortar y pegar en las varas. También, puedes rellenar el envase con tiras de papel de seda verde.
- STEP 8:
Finally, they can cut out some leaves with the green tissue paper, cut them out and stick them on the sticks. Also, you can fill the container with strips of green tissue paper.

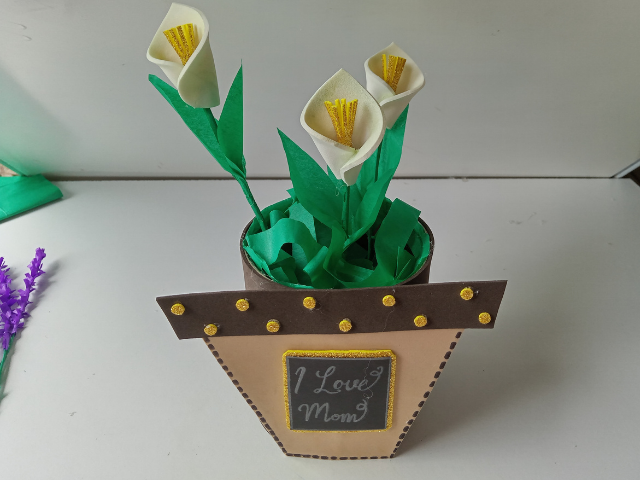
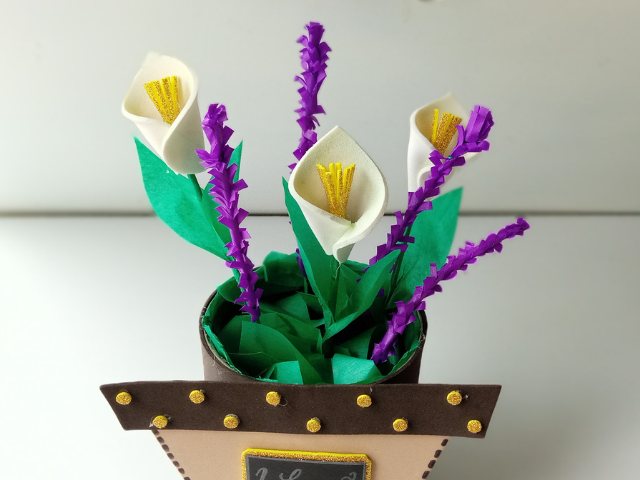
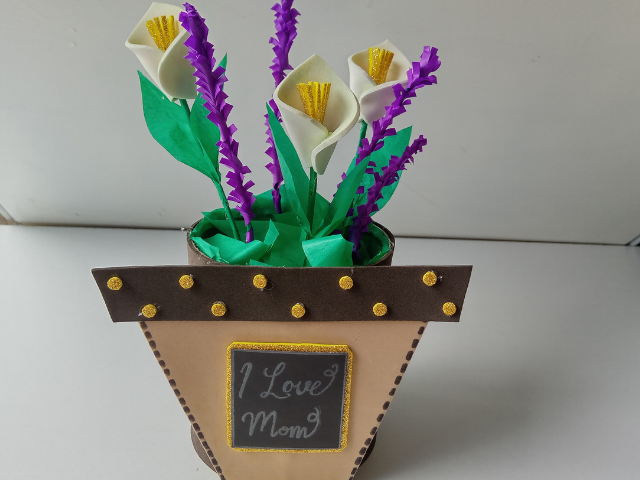
🎀¡Y listo!🎀 Ya tienes esta linda decoración de maseta con flores para regalar el día de las madres, ideal para dar ambiente a una habitación, sala, cocina u oficina. Espero les haya gustado y si se atreven a hacerla espero les guste mucho a sus madres.
🎀¡And ready!🎀 You already have this beautiful flower pot decoration to give as a gift on Mother's Day, ideal to give atmosphere to a room, living room, kitchen or office. I hope you liked it and if you dare to do it, I hope your mothers like it a lot.


Todas las fotografías son de mi propiedad.
Separador y Fotos editadas en Canva
All photographs are my property.
Photos edited in Canva
The rewards earned on this comment will go directly to the person sharing the post on Twitter as long as they are registered with @poshtoken. Sign up at https://hiveposh.com.
Your content has been voted as a part of Encouragement program. Keep up the good work!
Use Ecency daily to boost your growth on platform!
Support Ecency
Vote for new Proposal
Delegate HP and earn more
Congratulations @valenpba! You have completed the following achievement on the Hive blockchain and have been rewarded with new badge(s):
Your next target is to reach 4750 upvotes.
You can view your badges on your board and compare yourself to others in the Ranking
If you no longer want to receive notifications, reply to this comment with the word
STOPCheck out the last post from @hivebuzz:
Support the HiveBuzz project. Vote for our proposal!
Quedó muy lindo tu trabajo amiga, a las madres les gustan mucho las macetas 😍😍 me incluyo jajaja saludos
Hola amiga. ☺️👋🏻 Gracias por leer mi post y apoyarme.
Jaja así es, a las madres les encantan y, aunque aún no soy mamá 😊 a mi también me encantan las flore y cuidar de ellas. Me alegra que te haya gustado. Saludos 👋🏻☺️
Hola amiga que lindo el macetero, las flores Cala quedaron súper tiernas 😍😍 me encantaron. 🥰
¡Hola amiga! ☺️ Muchísimas gracia por comentar mi post y apoyarme.
La verdad sí, estoy feliz porque me quedaron lindas y son fáciles de hacer. Saludos 😊👋🏻
Excellent job dear! <3Is there anything that @valenpba can't DYI?! This time her talented and creative mind has left us with a step by step process on making a flower pot for Mother's Day...
☺️ muchas gracias nuevamente por apoyar mi post y por sus palabras palabras. Motiva mucho su apoyo. Saludos. ☺️👋🏻
You have been manually curated by Brotherhood Community for sharing this awesome work.
Brotherhood community will support 5 bloggers on daily basis.
For more information about how to get curated by Brotherhood Community, check this Hive Blog.
Delegate your Hive Power to @brotherhood for supporting more such blogs and also receive curation rewards.
Buen día @bhdc,Muchas gracias por curar, apoyar y seleccionar mi contenido una vez más . Siempre súper agradecida con ustedes. ☺️👋🏻🥰
¡¡¡Estan super lindos !!! me ha gustado como se ven las flores moradas , no se como se llaman 😃
Muchas gracias! Son flores de lavanda. Sí, realmente quedaron muy bonitas. Saludos ☺️👋🏻Hola @dragonplateado ☺️👋🏻. Gracias por pasarte a leer mi post.
Thank you for sharing this amazing post on HIVE!
non-profit curation initiative!Your content got selected by our fellow curator @stevenson7 & you just received a little thank you via an upvote from our
You will be featured in one of our recurring curation compilations and on our pinterest boards! Both are aiming to offer you a stage to widen your audience within and outside of the DIY scene of hive.
Join the official DIYHub community on HIVE and show us more of your amazing work and feel free to connect with us and other DIYers via our discord server: https://discord.gg/mY5uCfQ !
If you want to support our goal to motivate other DIY/art/music/homesteading/... creators just delegate to us and earn 100% of your curation rewards!
Stay creative & hive on!
thank you very much friends of @diyhub @stevenson7 . for voting and supporting my content one more day. grateful. ☺️👋🏻🥰