✨¡Hola amigos amantes de la creatividad! Espero que hayan pasado un muy buen comienzo de semana.✨
🔸Sin más que añadir, a continuación los dejo con el paso a paso:
✨¡Hello friends who love creativity! I hope you had a very good start to the week.✨
¡Good afternoon friends! I hope you are having a great week. For my part, I'm quite happy, good things have happened these days. On this occasion I share with you the step by step to make a beautiful pendant for the kitchen towels. That's right, lately I've been sharing ideas that are different from the ones I usually make, of course they always have my personal touch, but I've tried doing some different things and I'm struggling with the results of each one.
🔸Without more to add, then I leave you with the step by step:
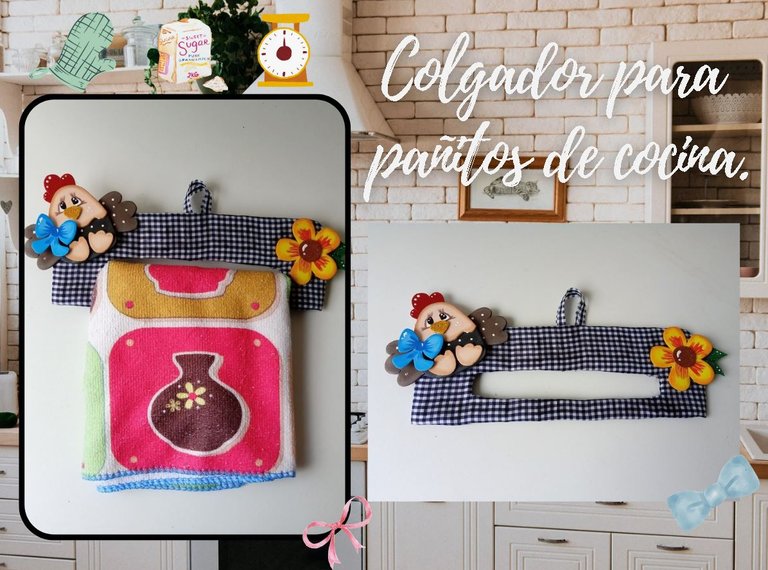
♥️ESPERO QUE TE GUSTE,
¡Empecemos!
♥️I HOPE YOU LIKE IT,
Let's start!

✂️ MATERIALES | ✂️ MATERIALS

- Cartón grueso.
- Retazo de tela.
- Cinta delgada.
- Foami crema, negro,
marrón, azul y amarillo. - Foami metalizado rojo.
- Foami escarchado dorado y verde.
- Marcadores y pinturas.
- Hoja blanca.
- Pegamento.
- Lápiz.
- Thick cardboard.
- Piece of cloth.
- Thin tape.
- Foami cream, black,
brown, blue and yellow. - Red metallic foam.
- Gold and green frosted foam.
- Markers and paints.
- White sheet.
- Glue.
- Pencil.

PROCEDIMIENTO | PROCESS

- PASO 1:
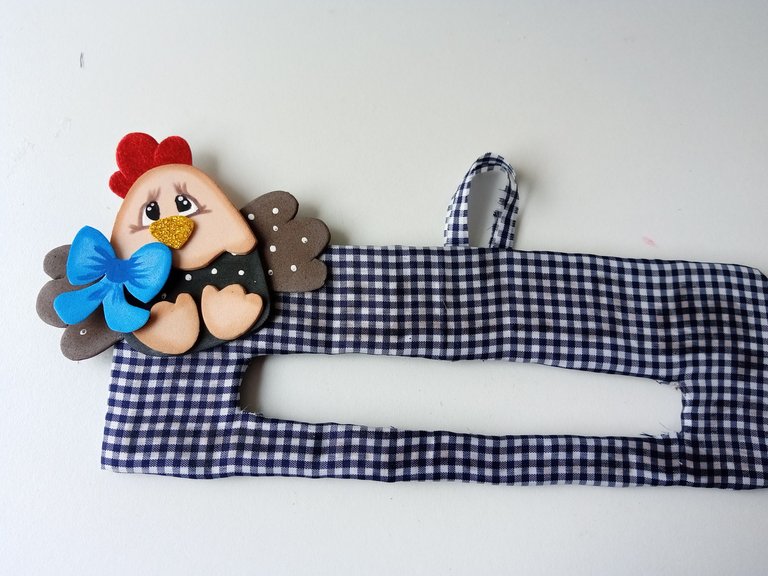
Lo primero que hice fue elaborar el patrón de la base en la que iría colgado el paño. En este caso, tracé y recorté en hoja blanca para luego trazar y recortar en cartón grueso las medidas de la base, que fueron un rectángulo de 21.5 cm x 7.5 cm y un agujero en medio de 14 cm x 2.5 cm. El cual retiré con ayuda de un cutter y al estar listo, tomé un retazo de tela y forré toda esta base.
- STEP 1:
The first thing I did was make the pattern for the base on which the cloth would be hung. In this case, I traced and cut out on white paper and then traced and cut out the measurements of the base on thick cardboard, which were a rectangle of 21.5 cm x 7.5 cm and a hole in the middle of 14 cm x 2.5 cm. Which I removed with the help of a cutter and when I was ready, I took a piece of fabric and lined this entire base.

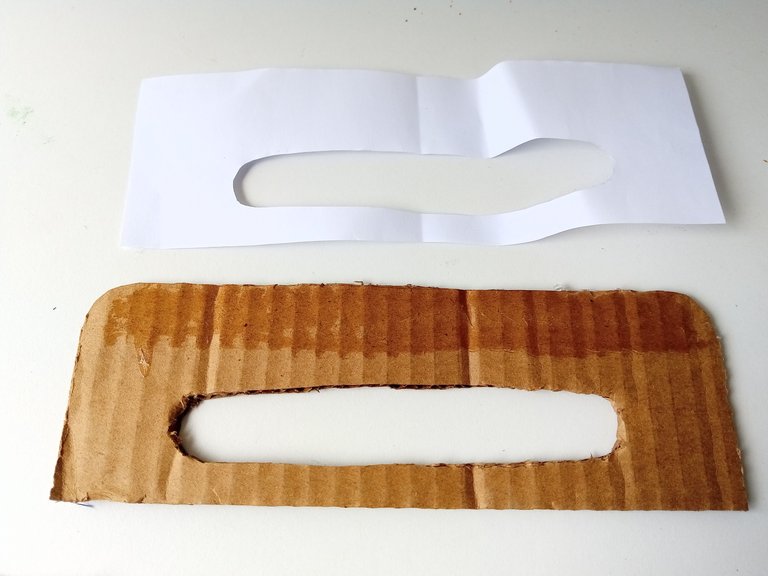
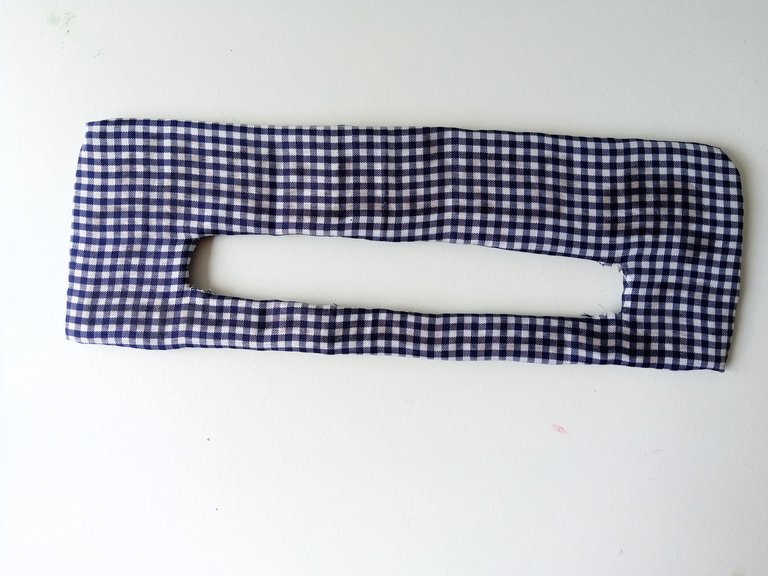

- PASO 2:
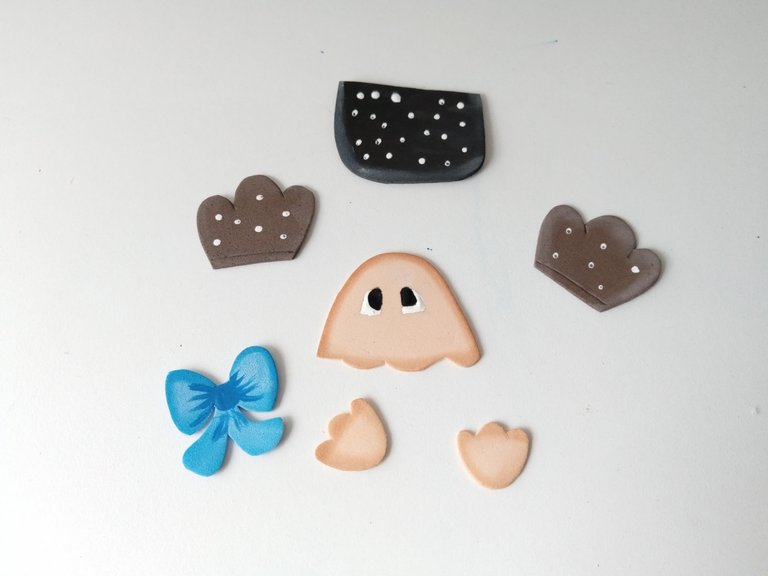
Luego comencé a elaborar el patrón de la gallina, dibujándola por partes en una hoja blanca y luego, transfiriendo y recorté, cada una de las partes a los colores correspondiente de foami, de la siguiente manera: el rostro y patas en foami crema, las alas en foami marrón, el cuerpo en foami negro, el pico en foami escarchado dorado y la cresta en foami metalizado rojo.
- STEP 2:
Then I began to make the chicken pattern, drawing it in parts on a white sheet and then, transferring and cutting out each of the parts to the corresponding foam colors, as follows: the face and legs in cream foam, the wings in brown foami, the body in black foami, the beak in frosty gold foami and the crest in red metallic foami.

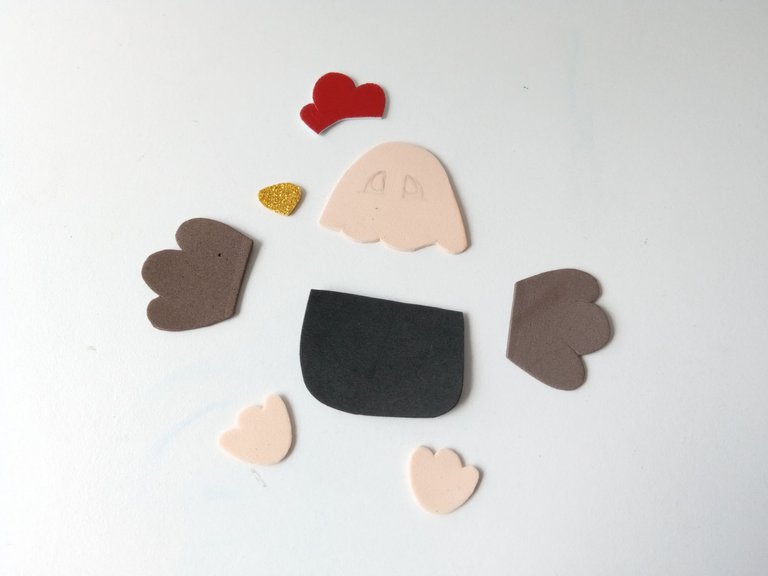

- PASO 3:
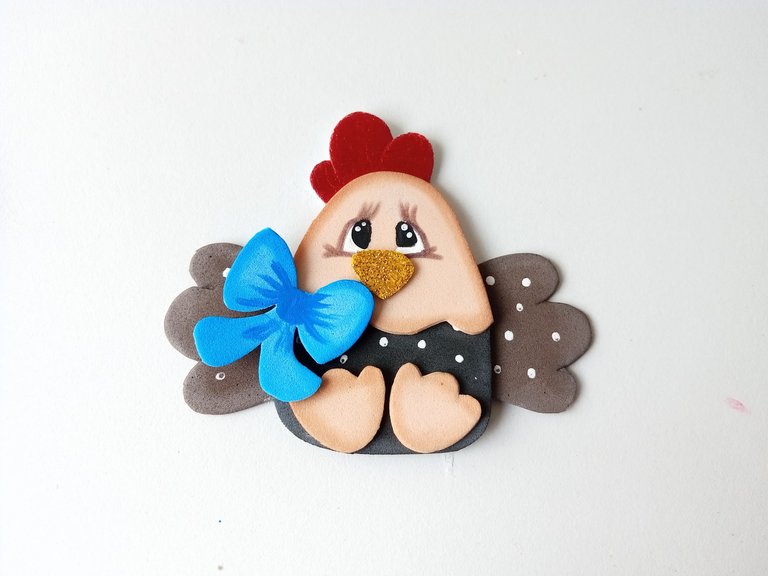
Al tener todas las piezas listas, di detalles con pintura, difuminando en los bordes de cada una de las piezas, utilizando un tono de color más oscuro o que contrasté con el mismo. También, elaboré un lazo azul como parte de la decoración. Luego, pinté los ojos, hice algunos puntos blancos en algunas partes del cuerpo y pegué toda la pieza.
- STEP 3:
Having all the pieces ready, I gave details with paint, blurring the edges of each of the pieces, using a darker tone of color or one that contrasted with it. Also, I made a blue bow as part of the decoration. Then, I painted the eyes, did some white dots on some parts of the body, and glued the entire piece together.


- PASO 4:
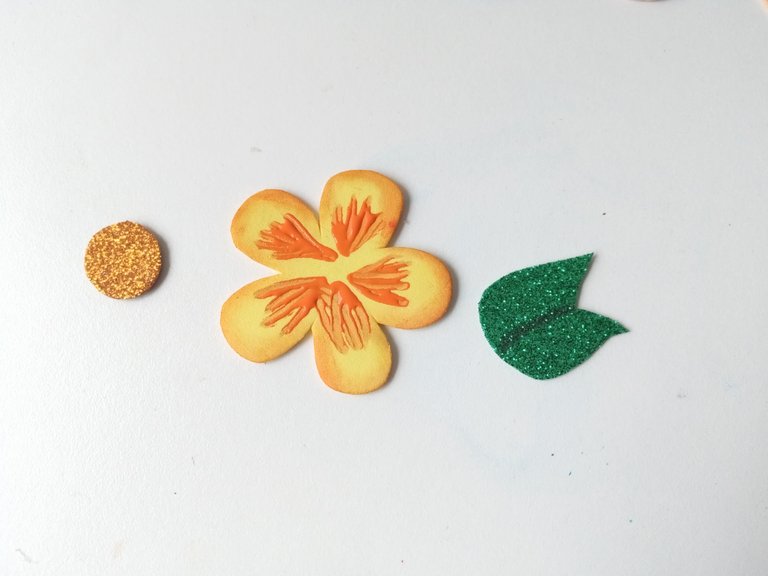
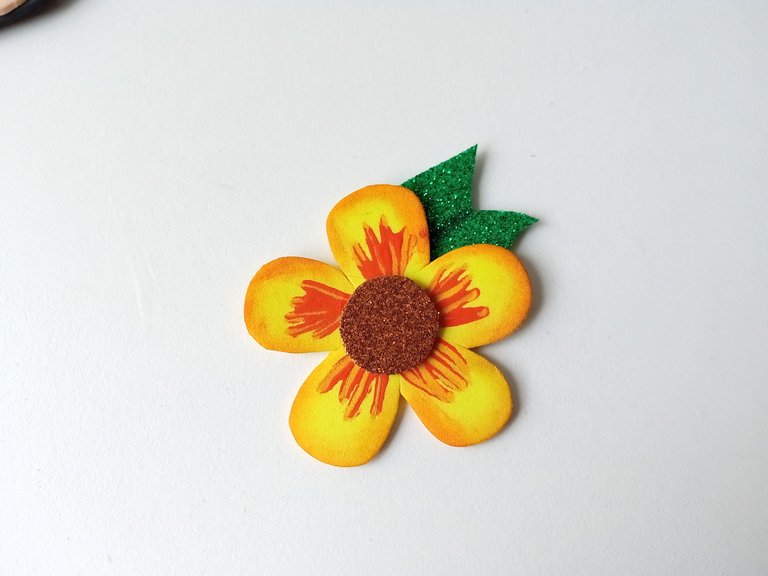
También quise incluir una bonita flor de decoración, así que dibujé una flor en foami amarillo, el centro en foami escarchado dorado y las hojas en foami escarchado verde. Luego, di detalles a la flor con pintura naranja y pegué hasta formar la flor.
- STEP 4:
I also wanted to include a pretty flower decoration, so I drew a flower in yellow foam, the center in gold frosted foam, and the leaves in green frosted foam. Then, I gave details to the flower with orange paint and glued until the flower was formed.


- PASO 5:
Al estar todo listo, pegué ambas decoraciones en las esquinas superiores del colgante y pinté algunos puntos de luz extras con pintura blanca. Y si desean, pueden colocar la cinta para colgar, utilizando un trozo de la misma tela o una cinta y pegando en medio de la parte trasera.
- STEP 5:
Once everything was ready, I glued both decorations to the upper corners of the pendant and painted some spots of the extras with white paint. And if you want, you can place the ribbon to hang, using a piece of the same fabric or a ribbon and sticking it in the middle of the back.

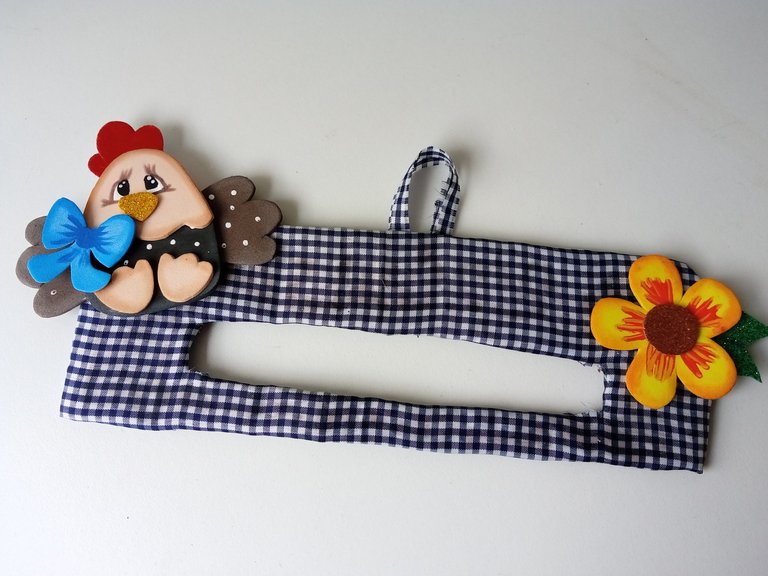

✨¡And ready!✨You can now hang your kitchen towels on this beautiful and simple hanging, decorated to your liking. I must confess that I really liked the final result of the decorations and that in general, I think it is an excellent idea to personalize or give life to the kitchen walls. I hope you liked the step by step and are encouraged to develop this beautiful idea.
❤️Until the next post.

✨RESULTADO: | ✨RESULT:

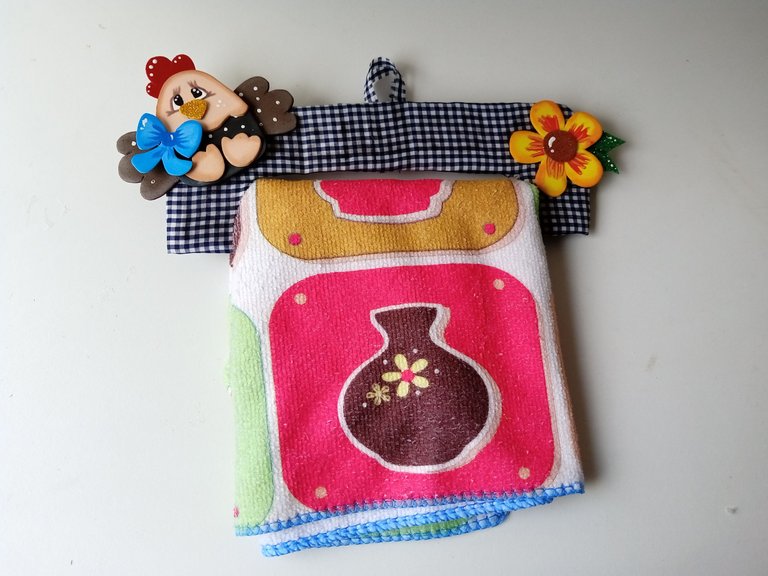


Todas las fotografías son de mi propiedad.
Separador y Fotos editadas en Canva
All photographs are my property.
Photos edited in Canva
This post has been manually curated by @steemflow from Indiaunited community. Join us on our Discord Server.
Do you know that you can earn a passive income by delegating to @indiaunited. We share more than 100 % of the curation rewards with the delegators in the form of IUC tokens. HP delegators and IUC token holders also get upto 20% additional vote weight.
Here are some handy links for delegations: 100HP, 250HP, 500HP, 1000HP.
100% of the rewards from this comment goes to the curator for their manual curation efforts. Please encourage the curator @steemflow by upvoting this comment and support the community by voting the posts made by @indiaunited.
Muchas gracias por el apoyo 💕
Ami que bello te quedó ese adorno para colgar los pañitos de cocina 😍 Yo tengo tiempo con ganas de hacer uno y aun no me pongo en eso, esta idea está muy linda y fácil, me encanta como quedó, ¡es perfecto! ❤️
Muchas gracias amiga bella!! Espero que te sirva de inspiración y nos compartas una hermosa idea como siempre Ami 🤭💕
Que ternura!!! No había visto una propuesta así antes, esta bastante creativo, súper genial Valen 🙌🏻✨💞
Muchas gracias , Ely!! Me alegra mucho que te haya gustado, la verdad que la idea vino a mi cabeza y tenía que elaborarla jaja. Muchas gracias 💕✨
Vale me encanto esta idea, es super linda y práctica ya que así los trapitos de la cocina no están por ahí regados 🩷
Eso es verdad mi Vane, así los trapitos se mantienen en un solo lugar jaja 🤭 Yo lo necesitaba por eso mismo.💕
muy necesario hermoso.
Muchas gracias amiga! Me alegra que te haya gustado.💕
!discovery 45
Muchas gracias, amigo ✨✨
This post was shared and voted inside the discord by the curators team of discovery-it
Join our Community and follow our Curation Trail
Discovery-it is also a Witness, vote for us here
Delegate to us for passive income. Check our 80% fee-back Program
Muchas gracias por el apoyo 💕
Congratulations @valenpba! You have completed the following achievement on the Hive blockchain And have been rewarded with New badge(s)
Your next target is to reach 85000 upvotes.
You can view your badges on your board and compare yourself to others in the Ranking
If you no longer want to receive notifications, reply to this comment with the word
STOPCongratulations, your post has been curated by @dsc-r2cornell. You can use the tag #R2cornell. Also, find us on Discord
Felicitaciones, su publicación ha sido votada por @ dsc-r2cornell. Puedes usar el tag #R2cornell. También, nos puedes encontrar en Discord
Muchas gracias por el apoyo amigos 🤭💕
Te quedo muy original, y la gallinita es una ternura, te felicito por tu lindo trabajo.
Muchas gracias, bella! Agradezco tus lindas palabras.🥰💕
Que asombroso y creativo trabajo nos has compartido, es hermoso y muy útil en la cocina, gracias por compartir
Tu comunidad artesana ahora es testigo

Muchas gracias por sus bonitas palabras! Me alegra muchísimo que les haya gustado.💕
Amiiiiga, pero y está belleza queee? Aparte que es realmente útil para mantener en orden y siempre a la vista nuestros pañitos de cocina!
Gracias por compartir tal belleza amiga bella🩷✨