Bzzz!
Even though I plan to leave my house in search of a safer place for my family, but while the paperwork is being processed I decided not to sit idle.
I've always wanted to make a meat smoker so I could learn how to make a variety of smoked meats myself..... I really like smoked meat and cheese, and my beloved will surely appreciate smoked fish.
For this purpose I need a container in which I can hang seasoned products for smoking, and a pipe connected to it from the bottom, through which the smoke from the fireplace will flow....
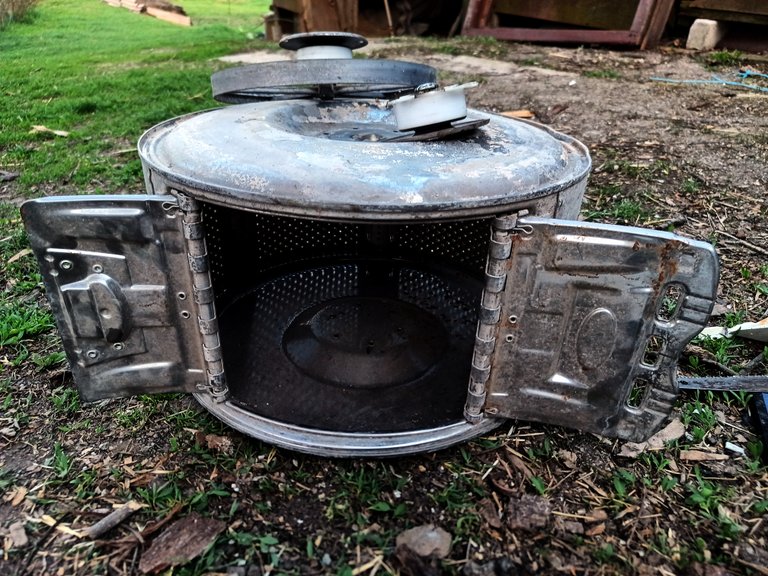
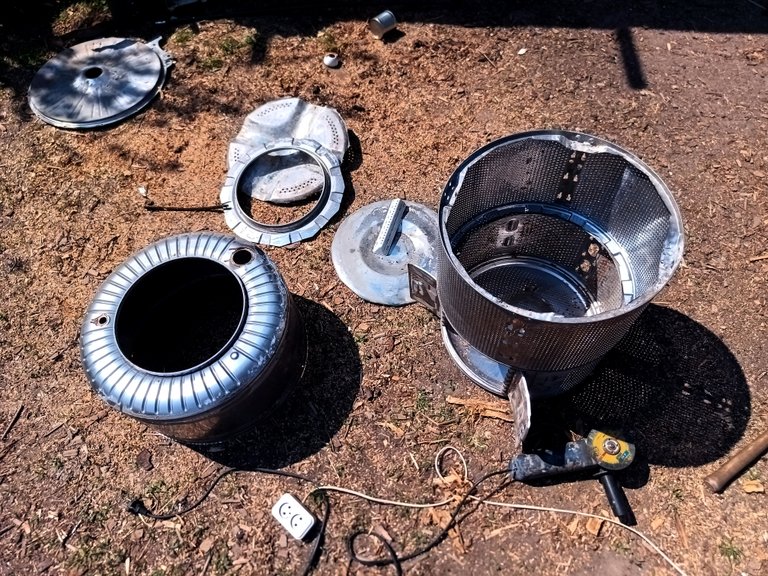
I decided to make the tank from washing machine tanks, which are not subject to restoration. They were left to me at work as garbage, and I consider it too wasteful to throw away so many materials and spare parts.
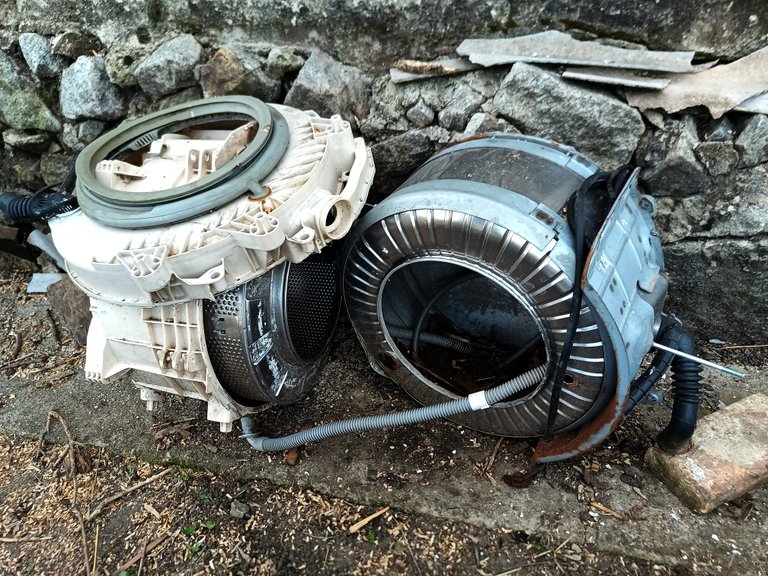
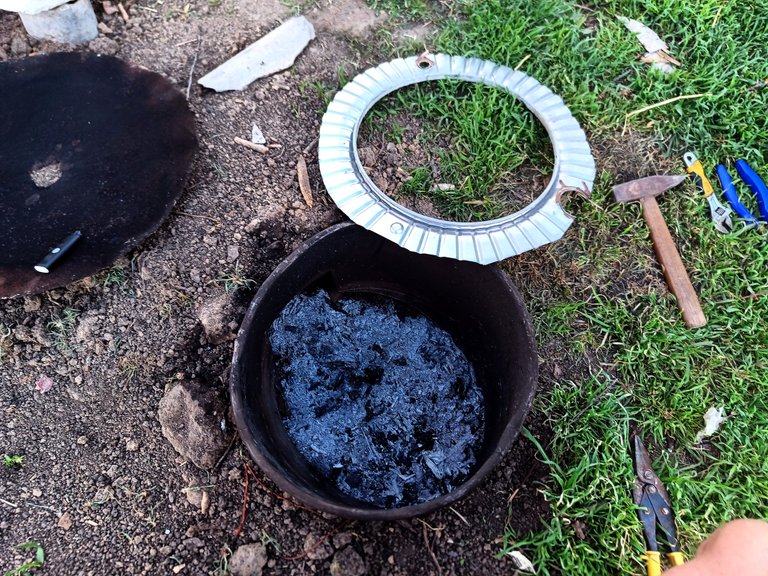
The heating element here is completely burnt out and cannot be used again.
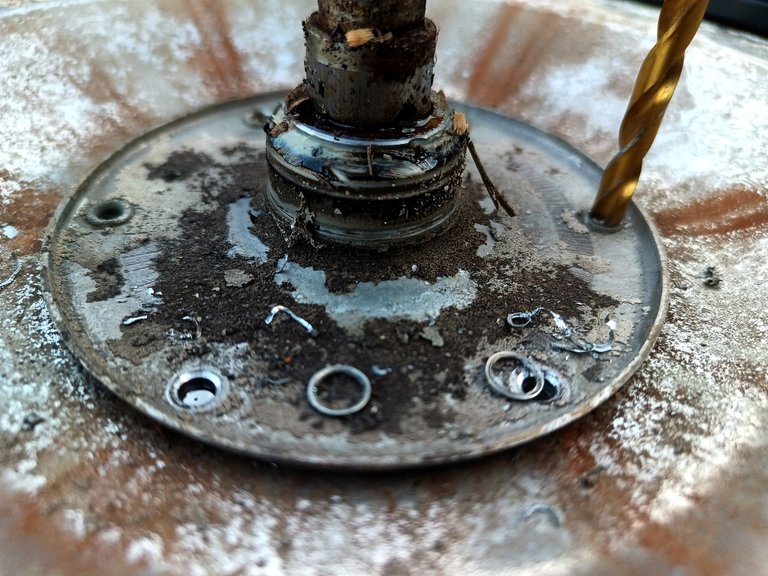
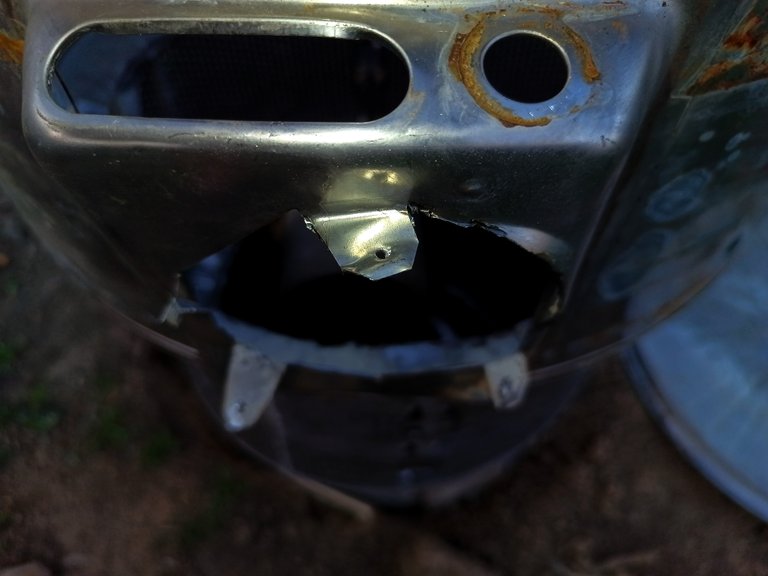
I need to remove the metal parts in order to crack the plastic container that holds the drum I need
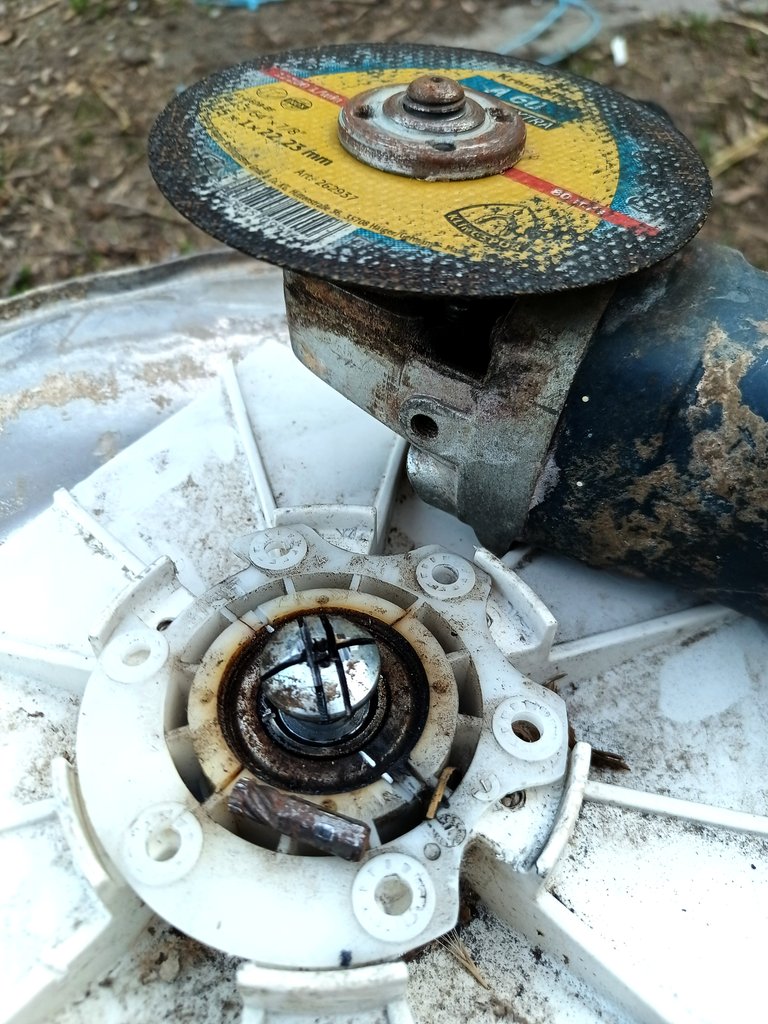
I was only able to unscrew the old, oxidized screw after it was heated during the sawing process with the grinder

I had to make even more cuts on the back side because the bolt didn't want to unscrew at all. The shaped screwdriver tip was turned almost 90 degrees because of the excessive force.
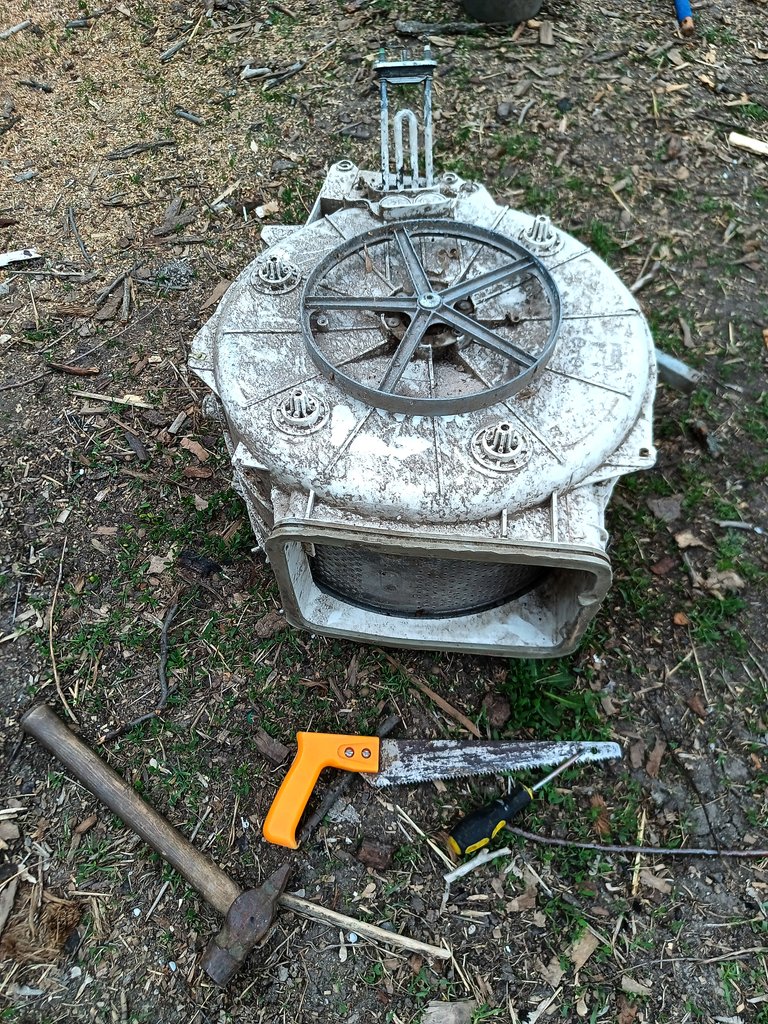
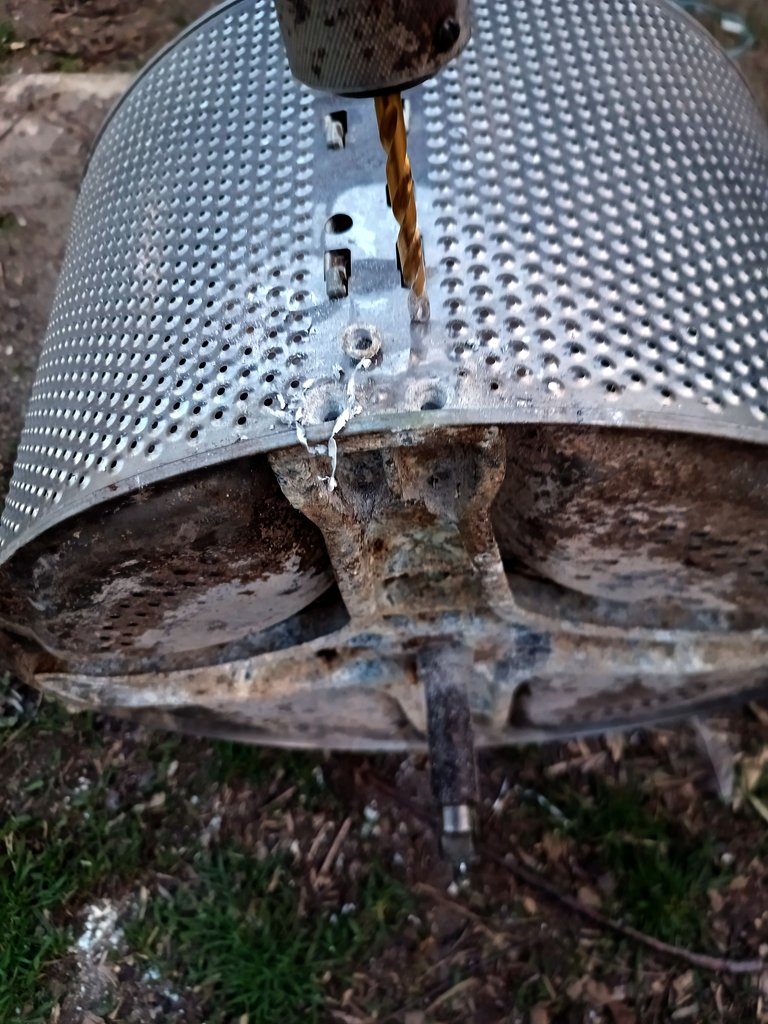
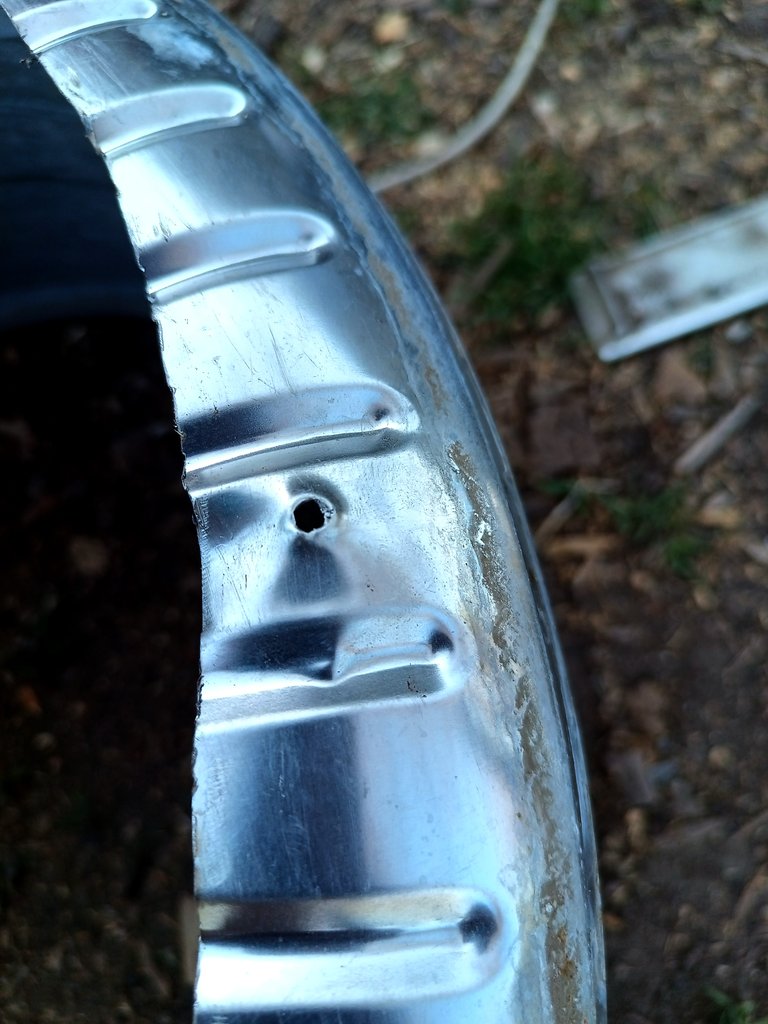
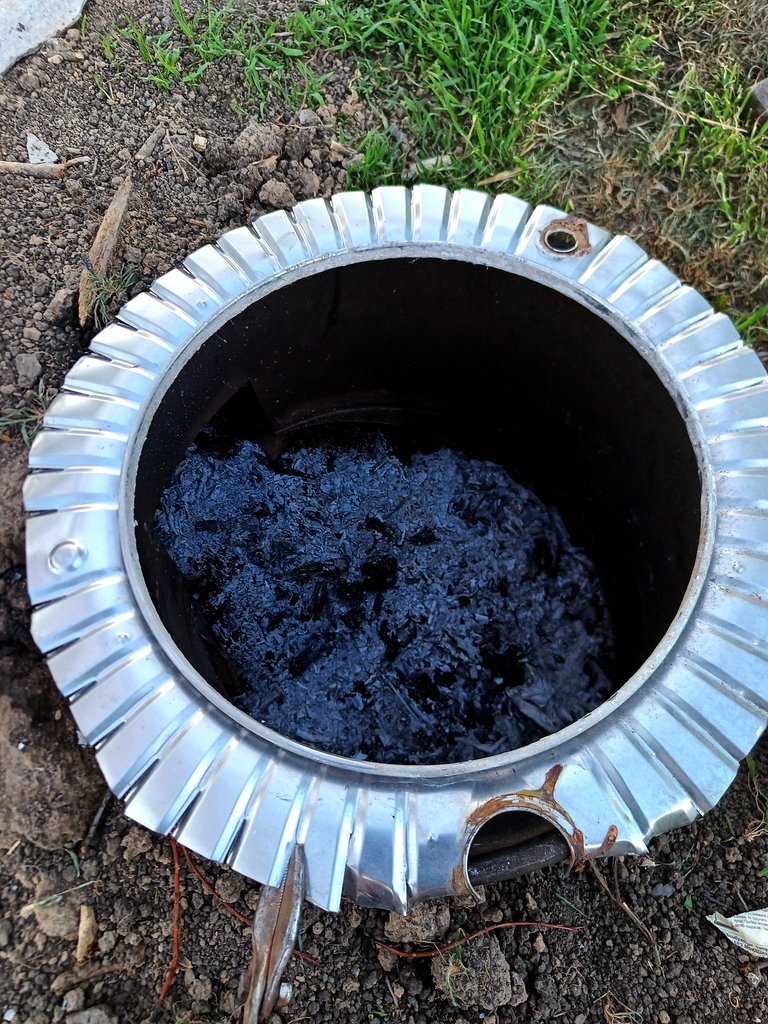
Getting the drum out I had some nice bushings with bearings for future projects. It's worth completing the kit by adding the pulley where the washing drum mounts to it
To do this, I drill out the stainless rivets connecting the pulley and drum.
During my short stay in a private house I have not had time to acquire all the tools, so I carry out drilling work with a hand-held drill, which I inherited from my father
Even with a sharp drill bit, drilling stainless steel is not easy...
photographing the process with one hand was even more fun.
There was no way I wasn't going to make it
The first one's done, now do the same thing on the other side.

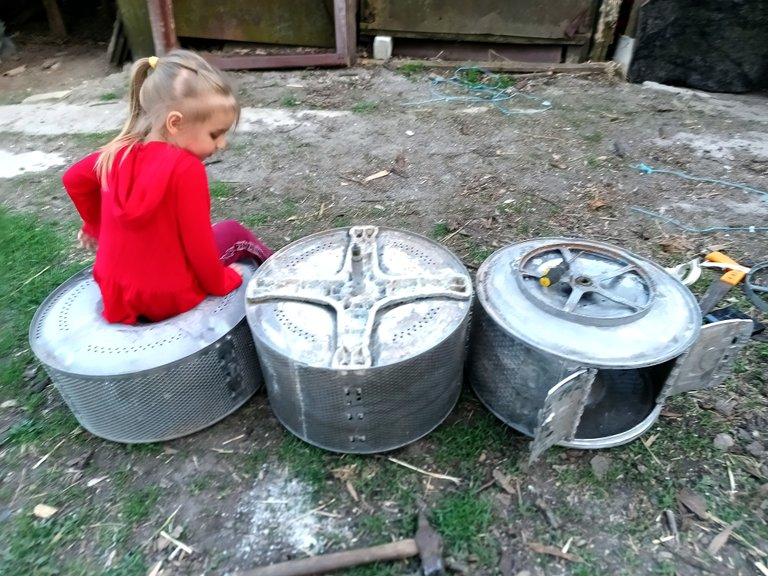
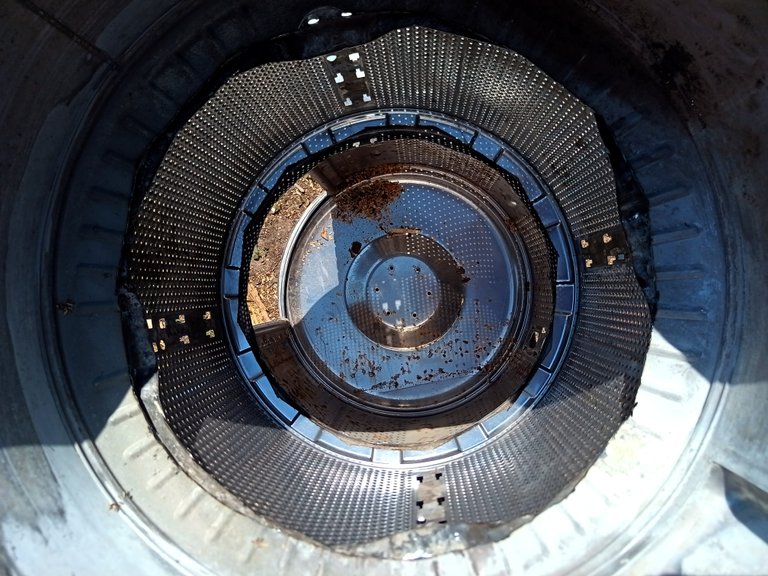
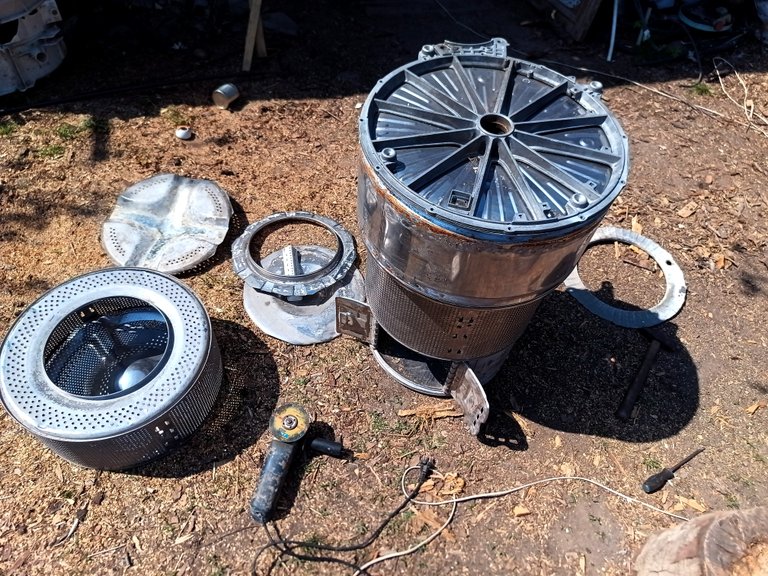
This is the set of parts I ended up with, but this time we only need a washing drum
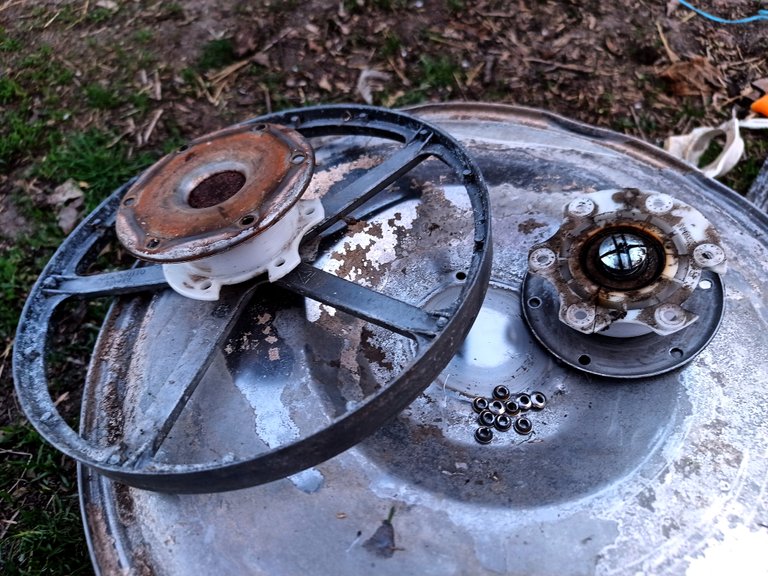
This drum is from a vertical-loading washing machine, which is why it has a hatch like this. The other drums will be from horizontal-loading washing machines
My daughter loves to participate in all of my adult activities that I allow her to participate in. This time, too, it was not without her playful games around the
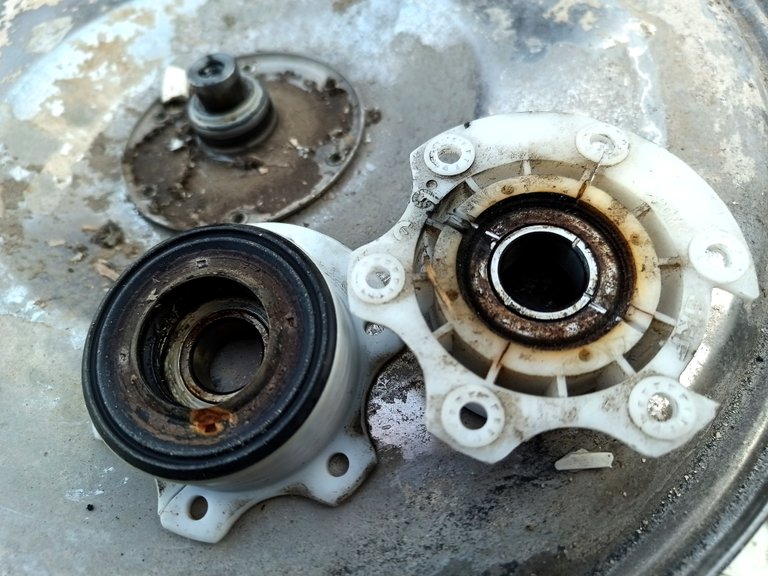
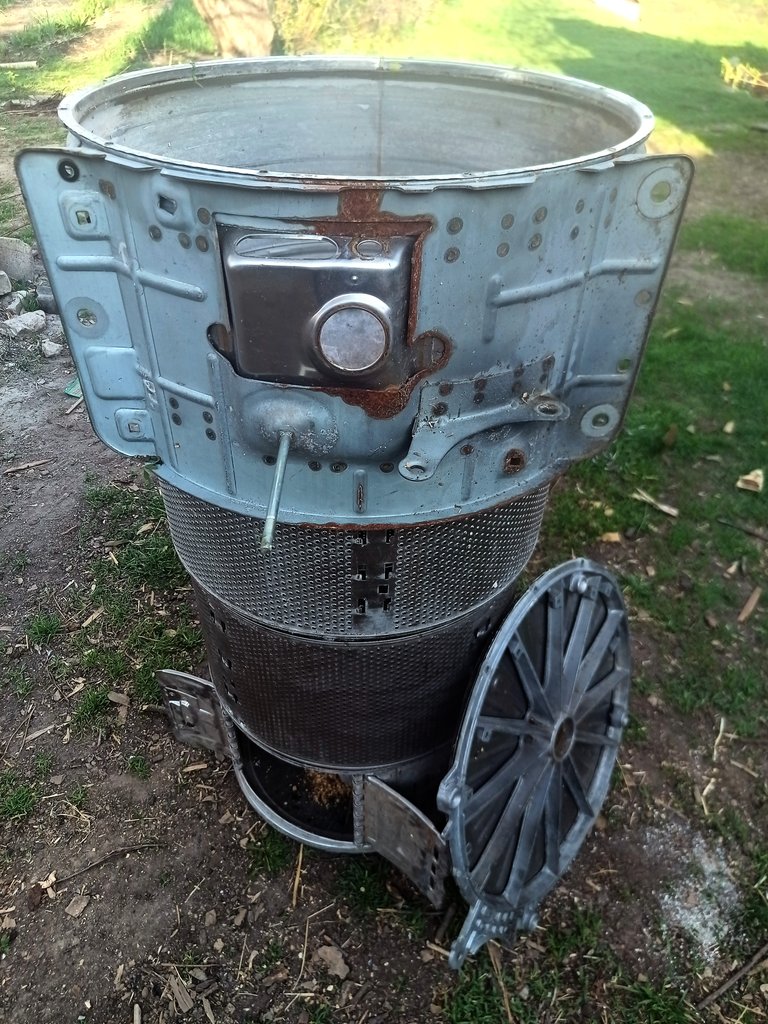
In order to disassemble this drum, we also had to start drilling. Lucky this time. The bolts that could not be unscrewed were made of soft aluminum and drilling them out was much faster and easier
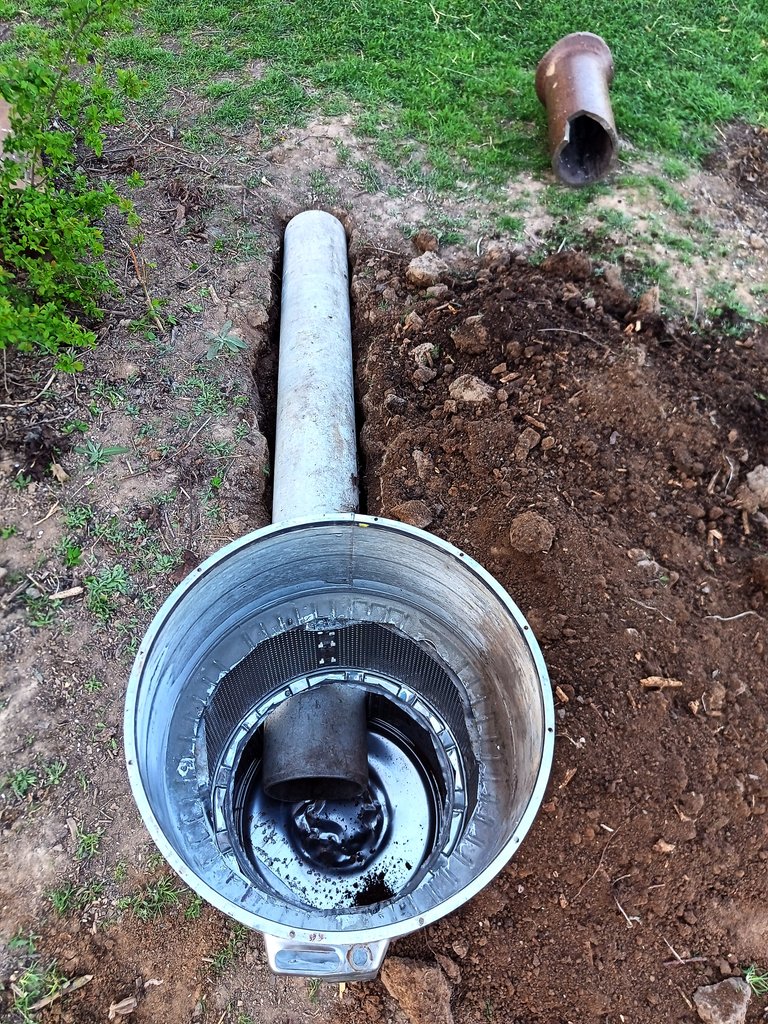
Because all the tanks are different shapes and sizes I had to do a little turret play to figure out how to best place them in relation to each other.
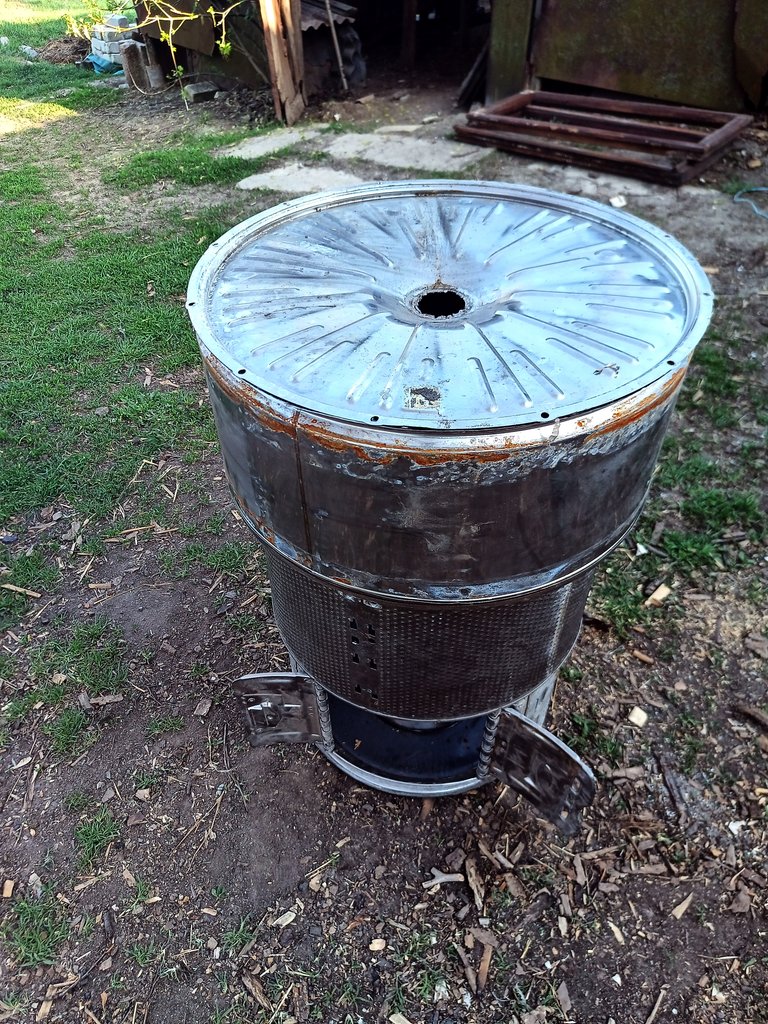
In the end, I settled on this variant of the assembly, where the smallest tank with a hatch on the side was on the bottom, and the large stainless outdoor tank was on top.
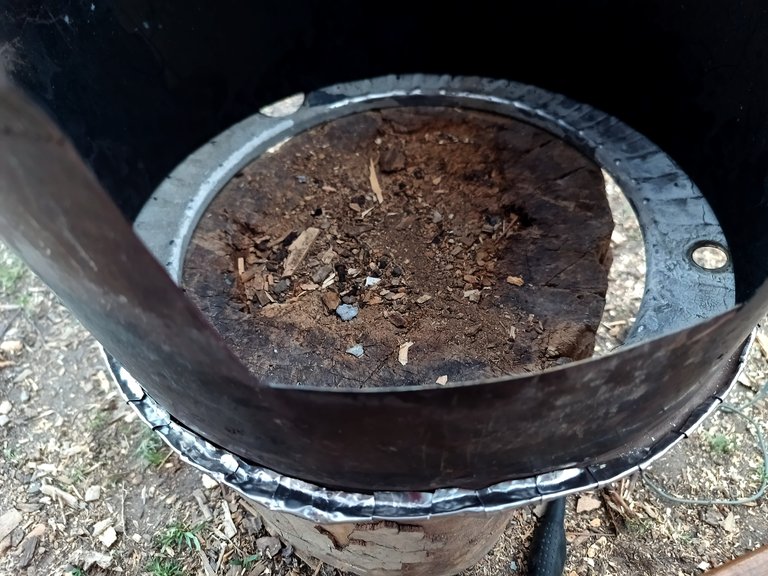
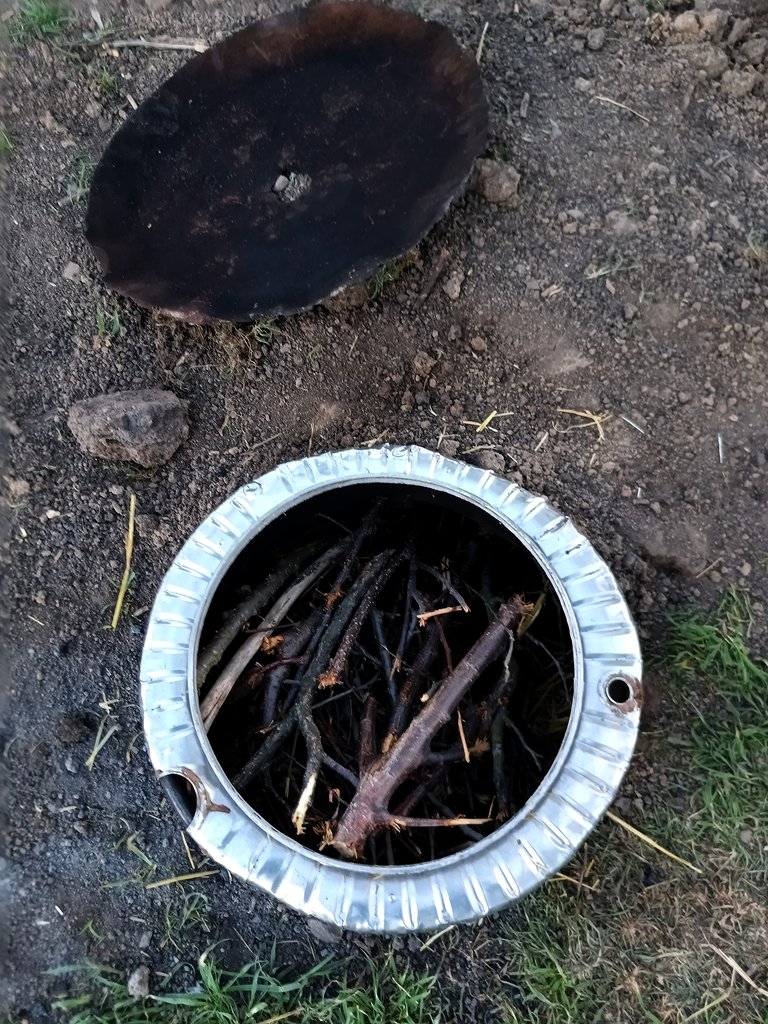
Now with a grinder I cut out the partitions of the drums, leaving a small indentation for later connecting the tanks to each other

Try it on as we go along, so we don't miss a size.
The cutting work is done, now you can start putting it together

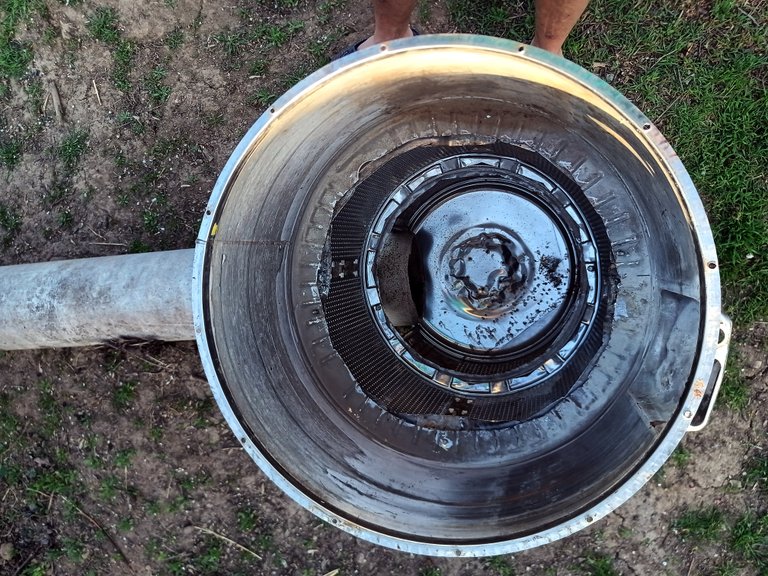
This is how the smokehouse vessel looks from the inside
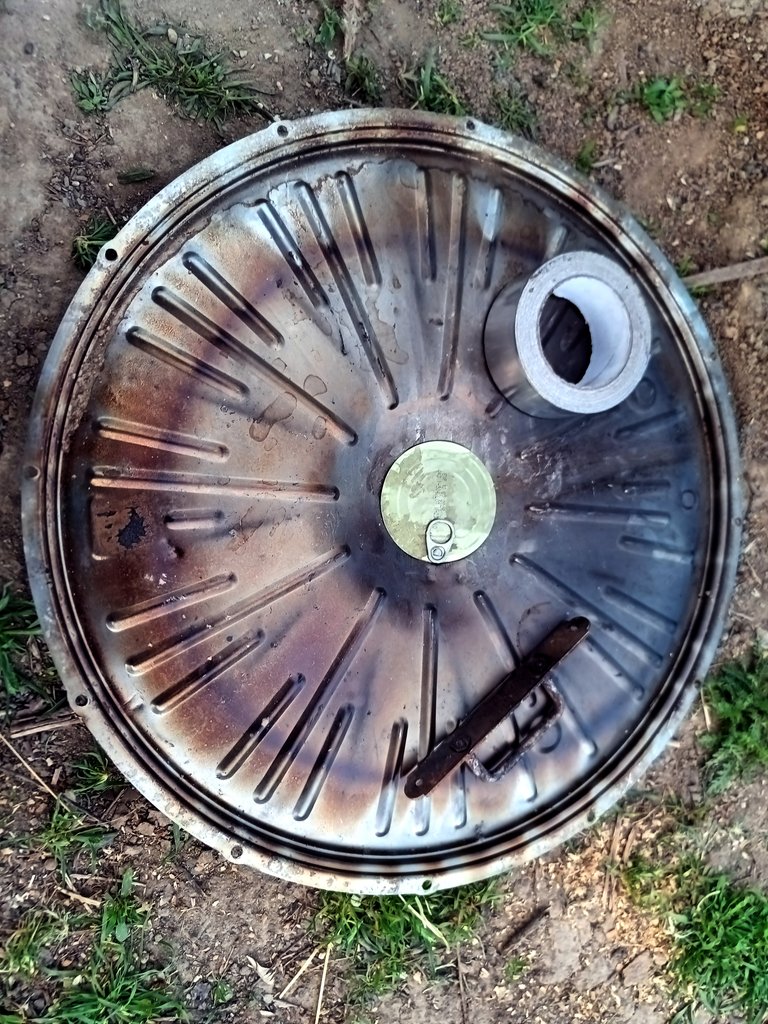
And the top lid came out of the same tank. Later on I will remove the dural steel frame as it is not needed in my project.
I use a nail to punch holes in the stainless steel where the drums will be connected to each other. It is important to use a nail with a smaller diameter than the screws used to fasten the drums together
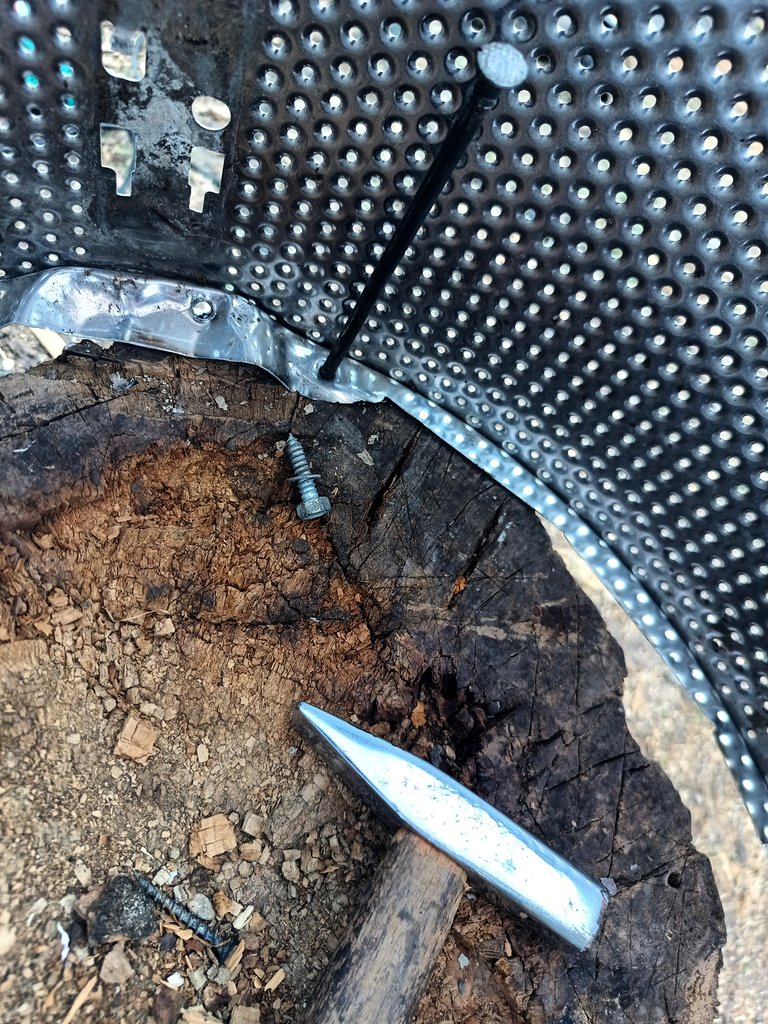
If the hole is larger than necessary, you can bend back the bent edges of the hole by hitting them with a hammer
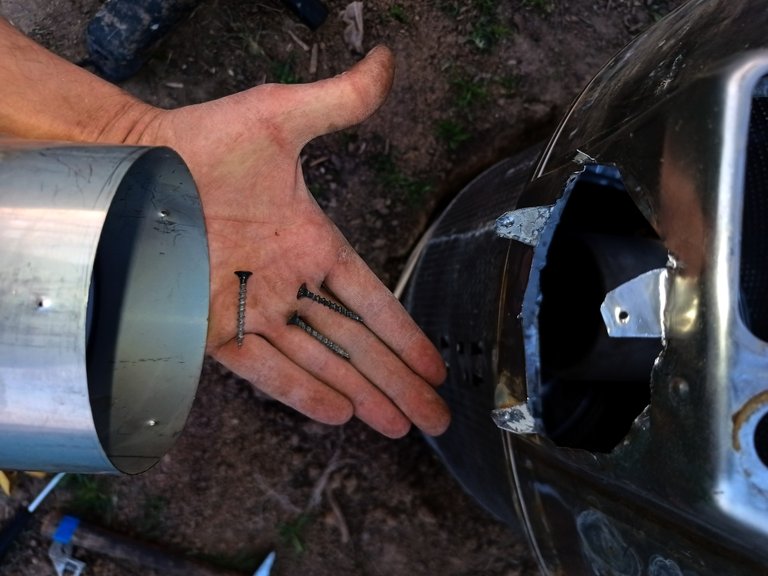
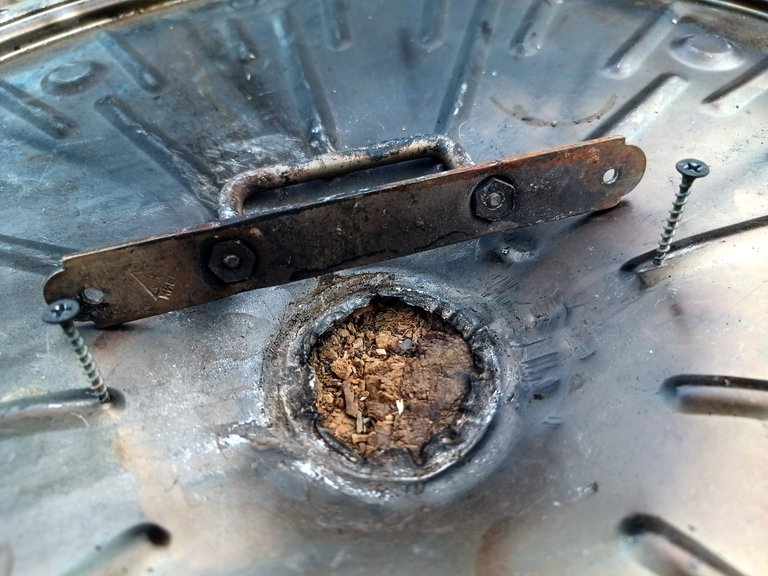
Screws extracted in the process of disassembly became the secure fasteners of my construction

And here's the cover with minimal unnecessary details
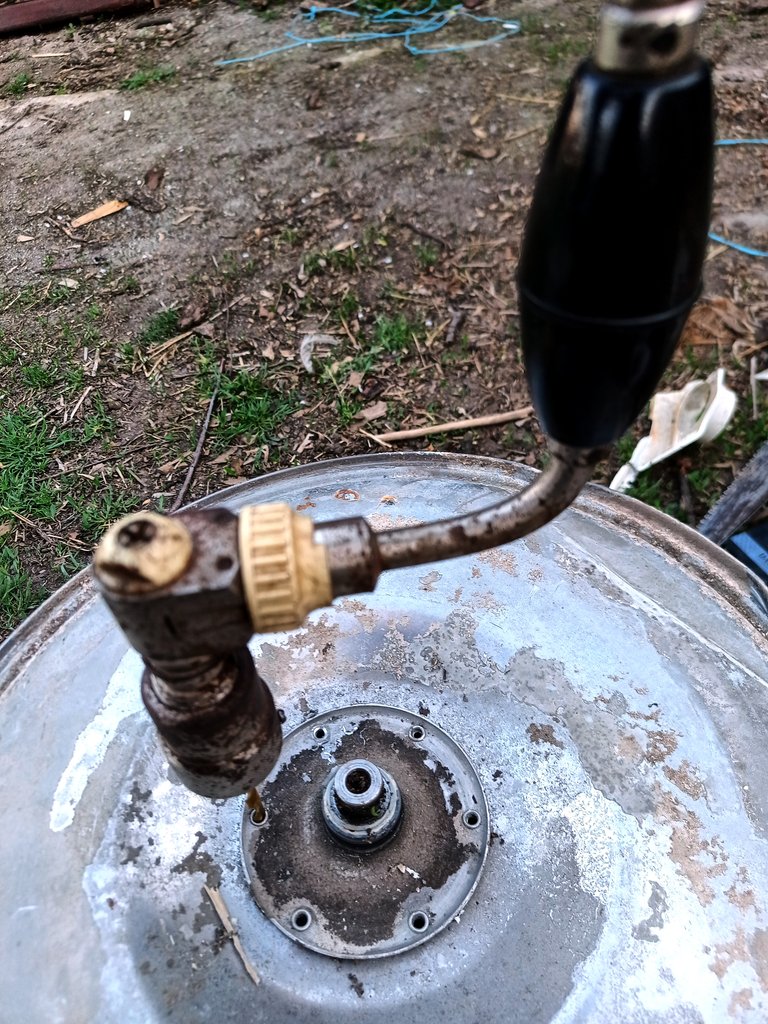
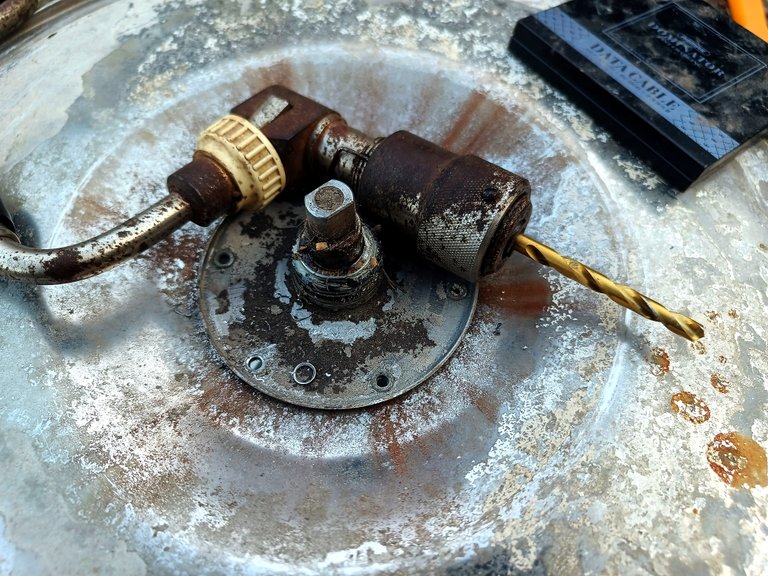
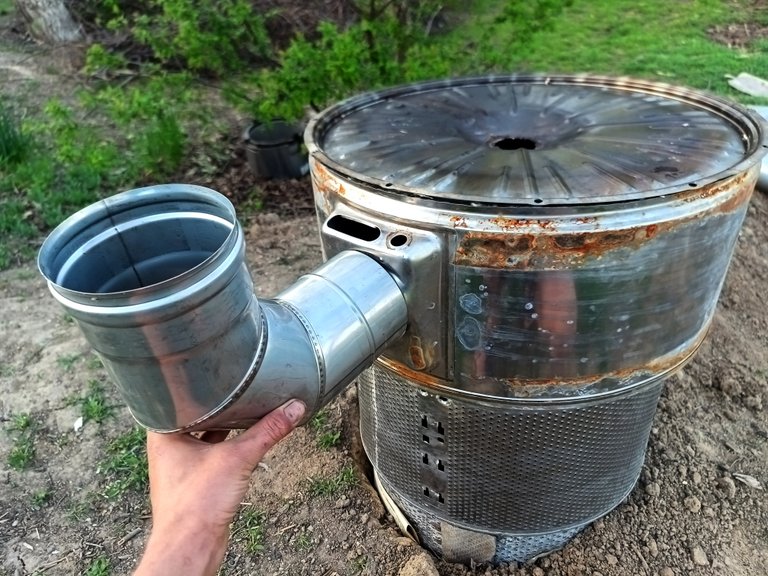
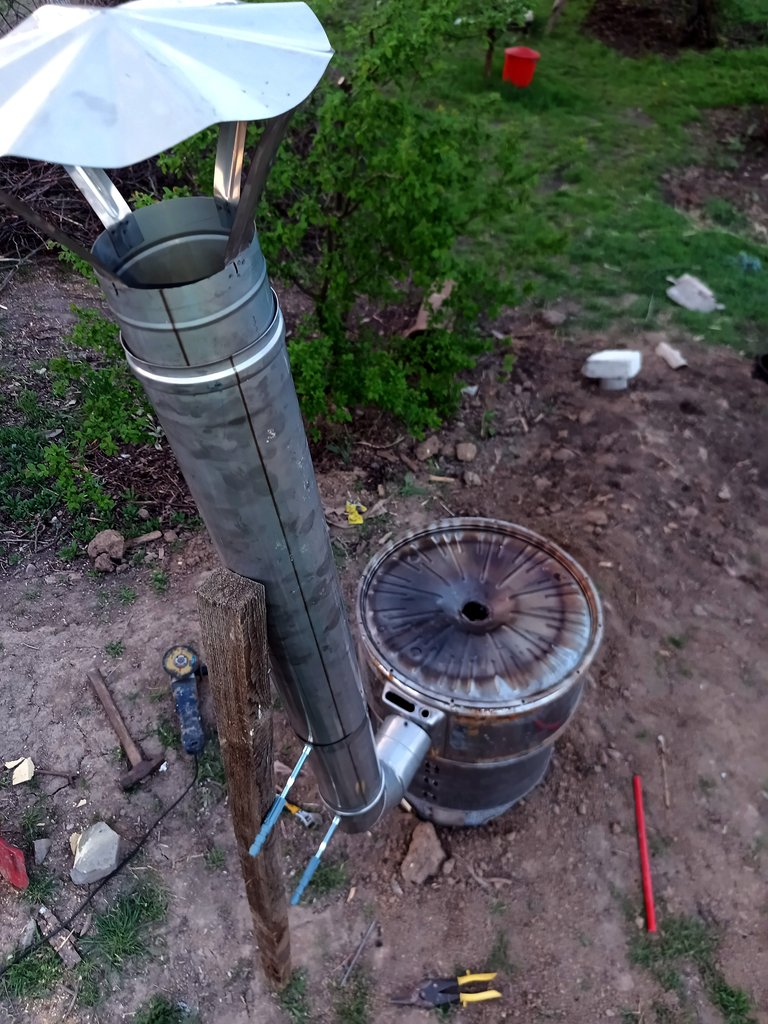
Try on the existing hatch for the chimney through which the smoke will be supplied
Such a pipe is used for chimneys among other things, so it will definitely suit me for not so high temperatures
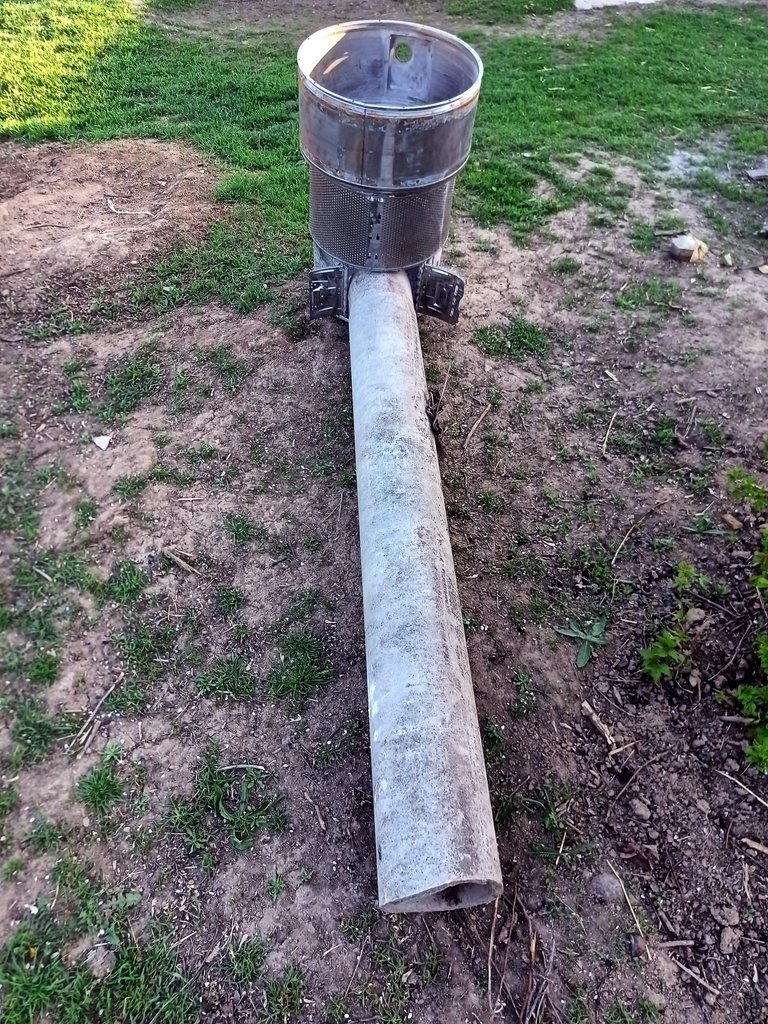
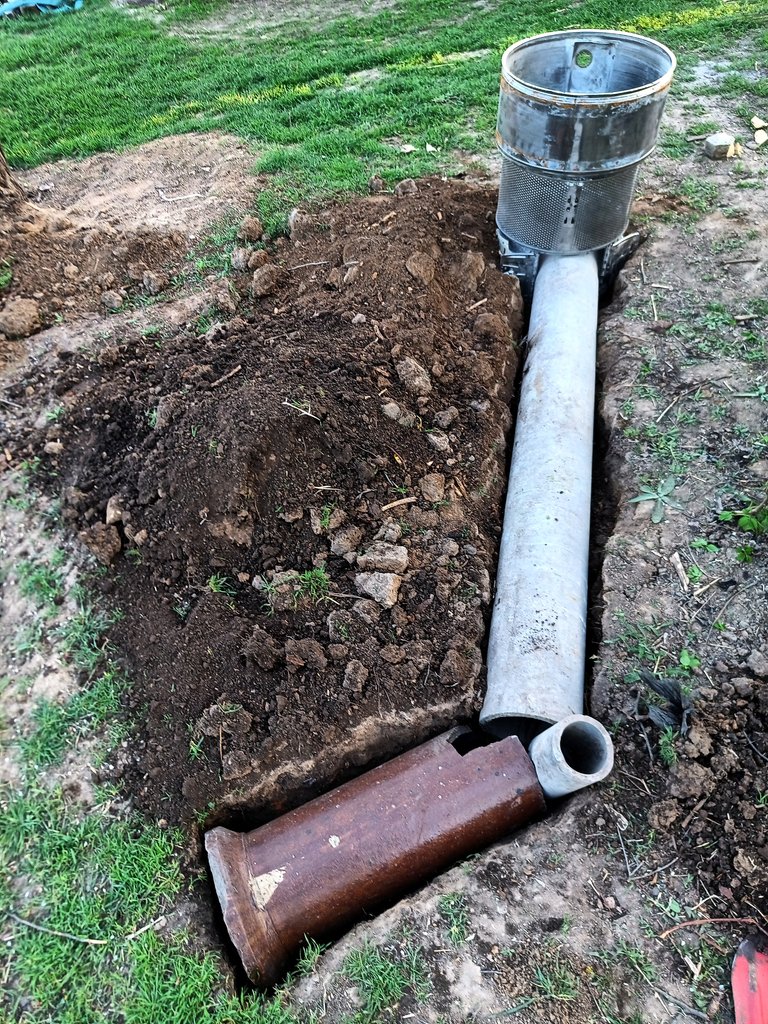
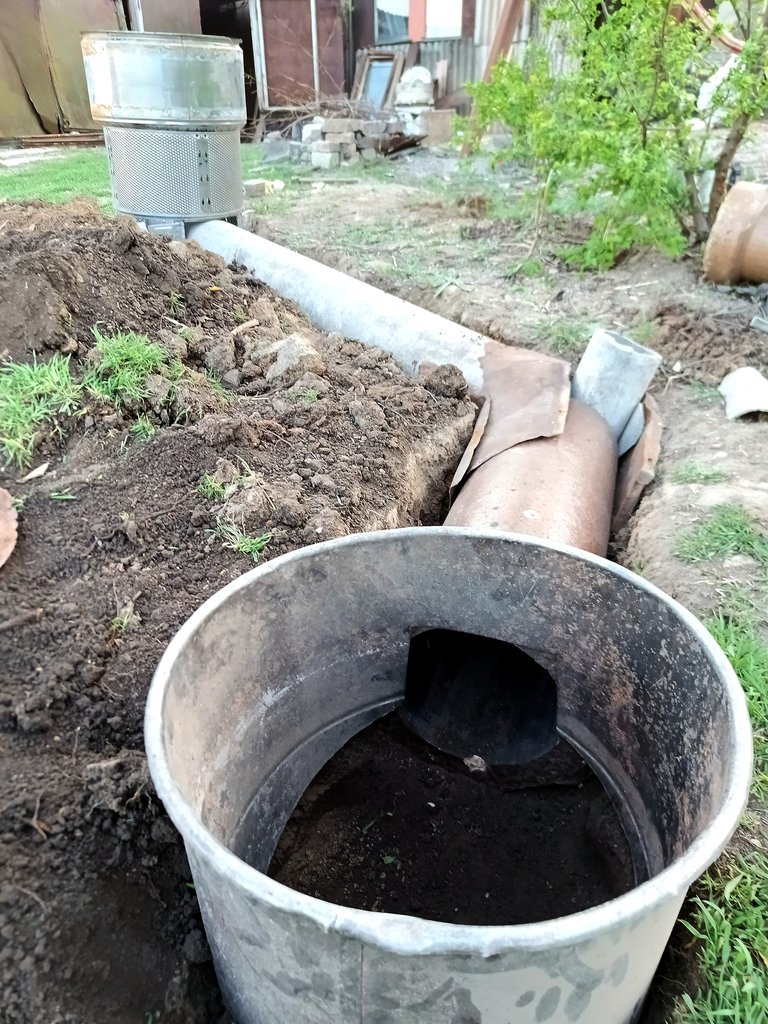
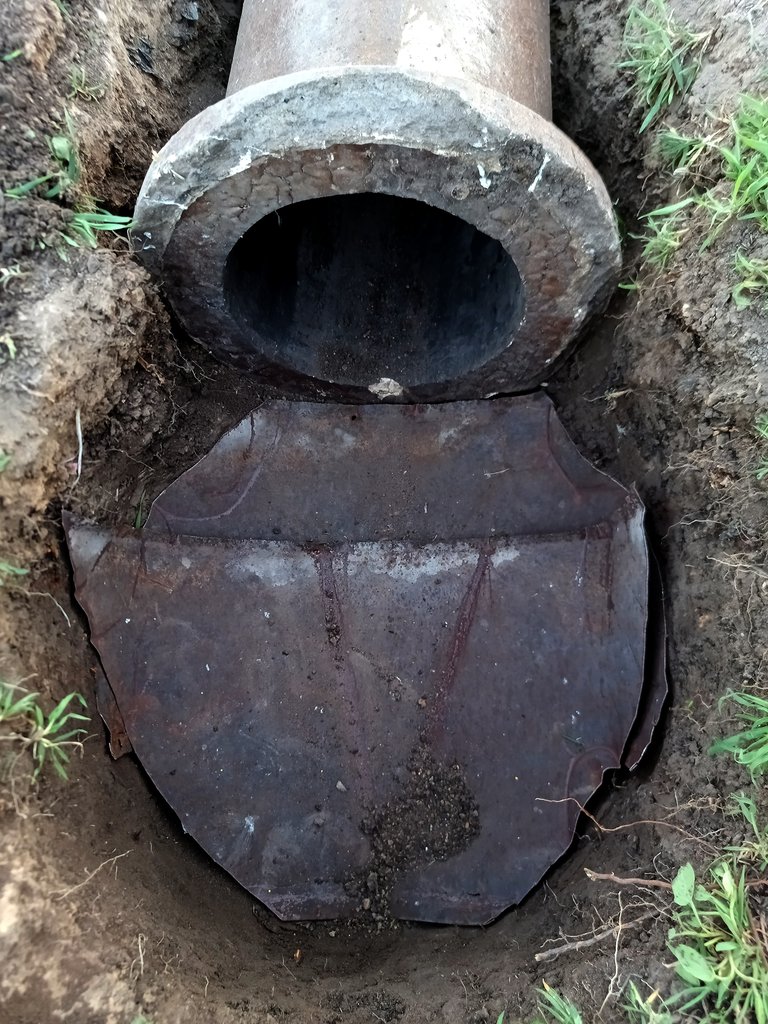
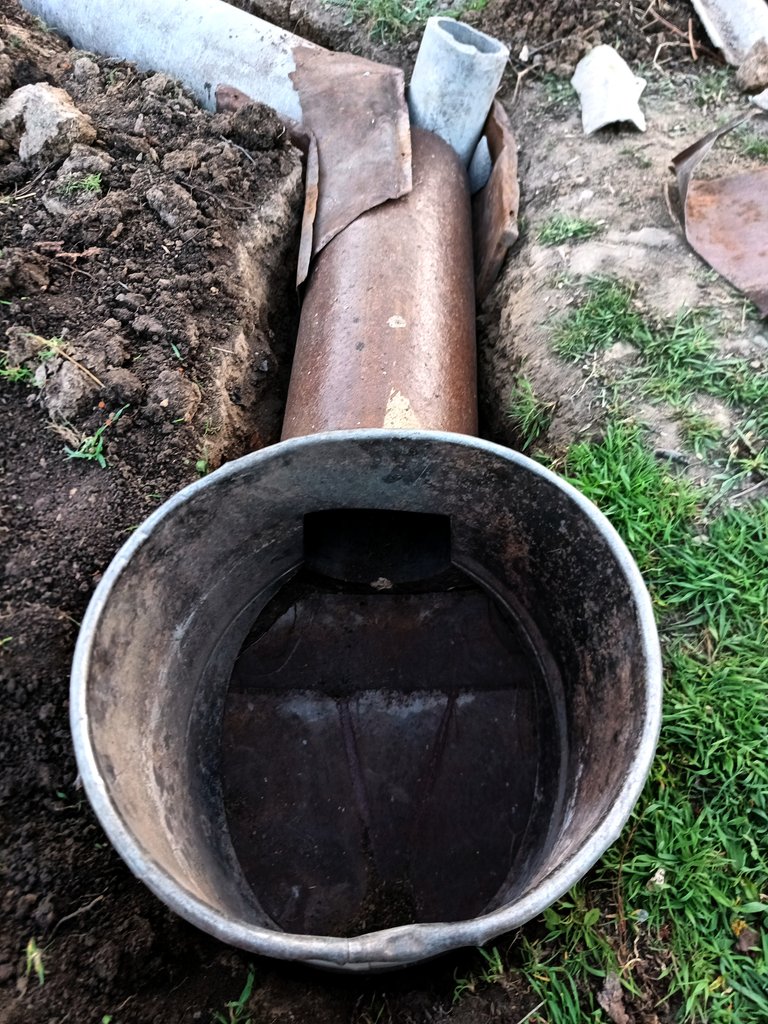
Now this needs to be lightly dug into the ground

The place is chosen so that the fire place is located slightly lower than the bottom of the smoking chamber. The smoke will then flow from the stove to the smoke chamber on its own
In the process, I decided to add another piece of pipe so that the smoke entering the smoking chamber would be cooler...
The revision hole may be needed during the chimney cleaning process, so I decided to schedule it in advance
I decided to make the size of the combustion chamber based on the dimensions of the existing lid.
I closed the gaps in the pipe joints with old tin sheets
Originally it was just going to be a hole in the ground, but in the process I came up with a more elegant solution.
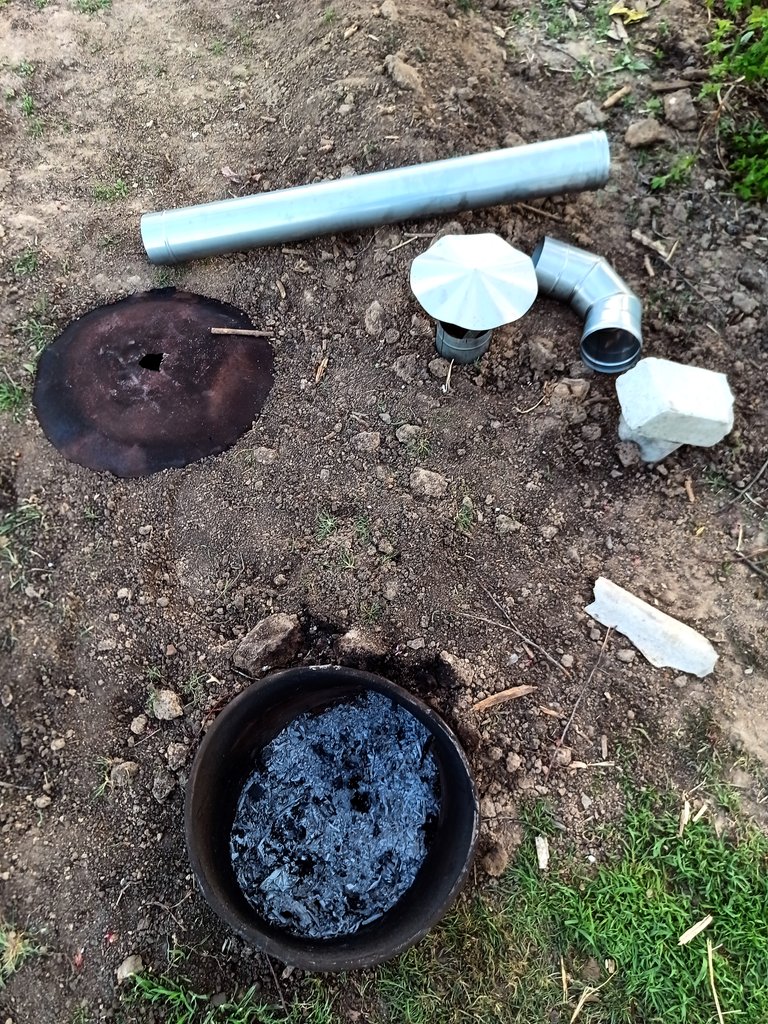
In my junk I found the remains of a tank from a very ancient washing machine - centrifugal.
I used it as a firebox wall
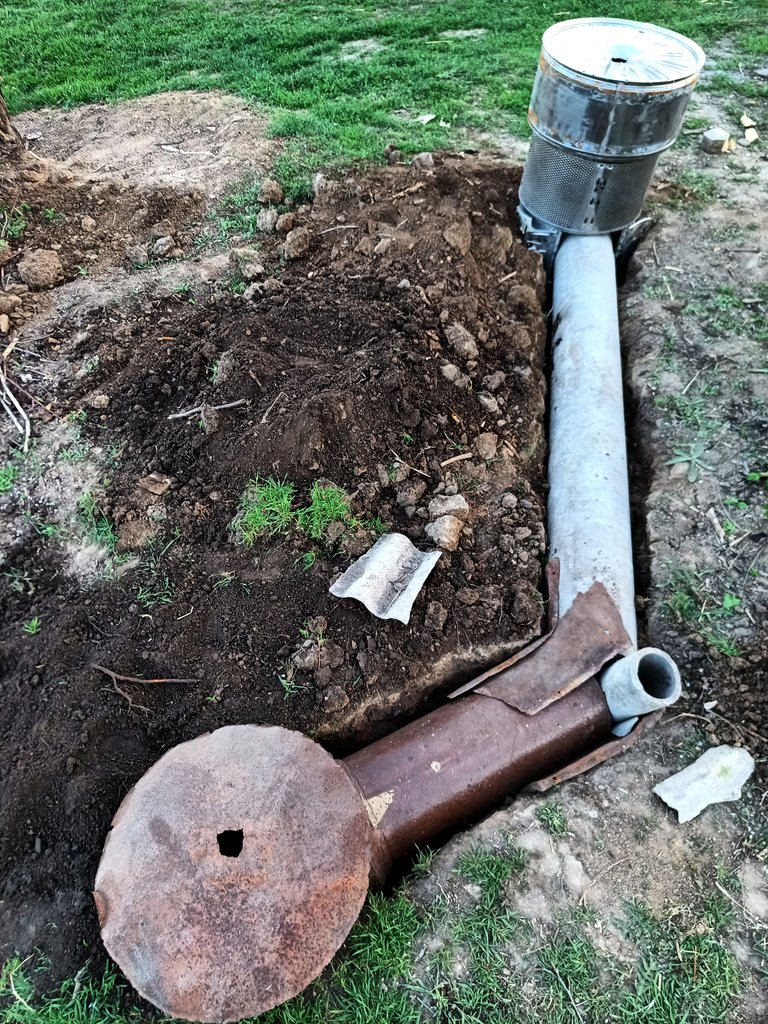
I lined the bottom with leftover rusty tin.
On the tin base I mounted and trenched the firebox walls
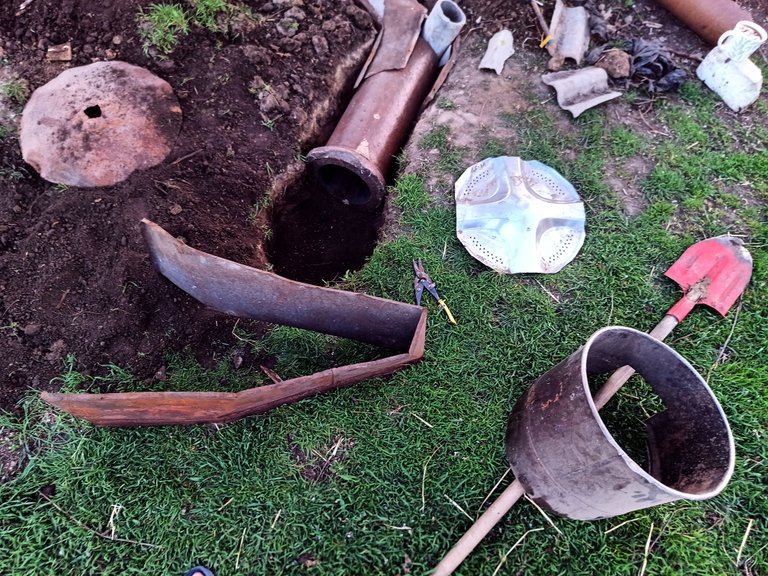
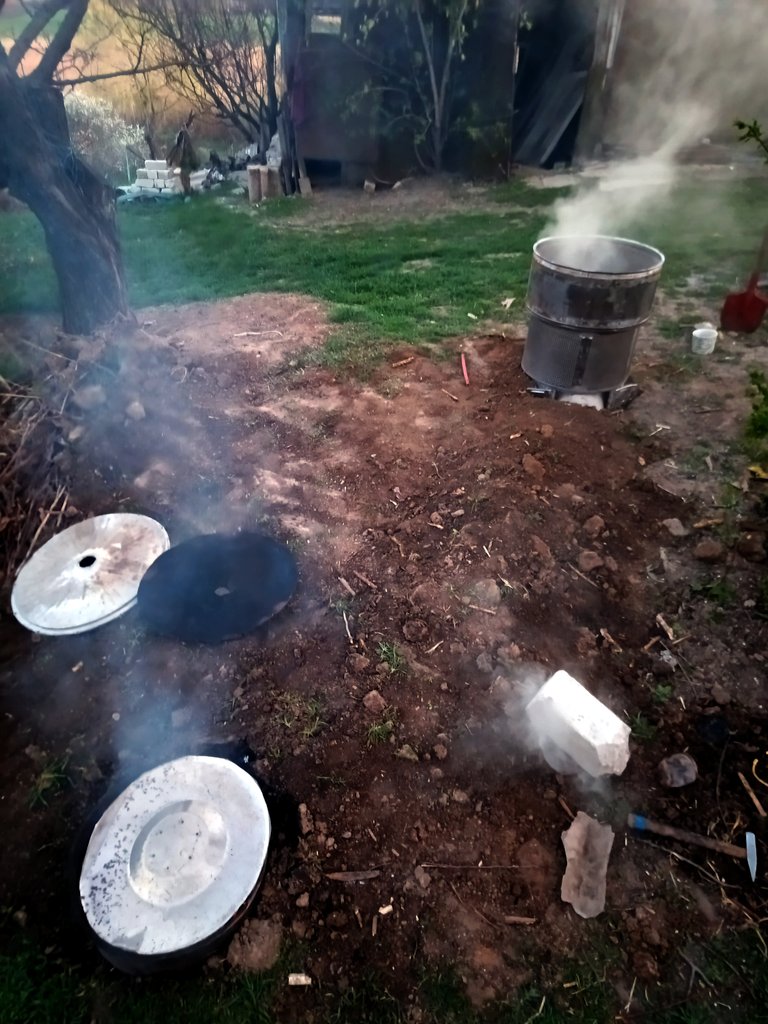
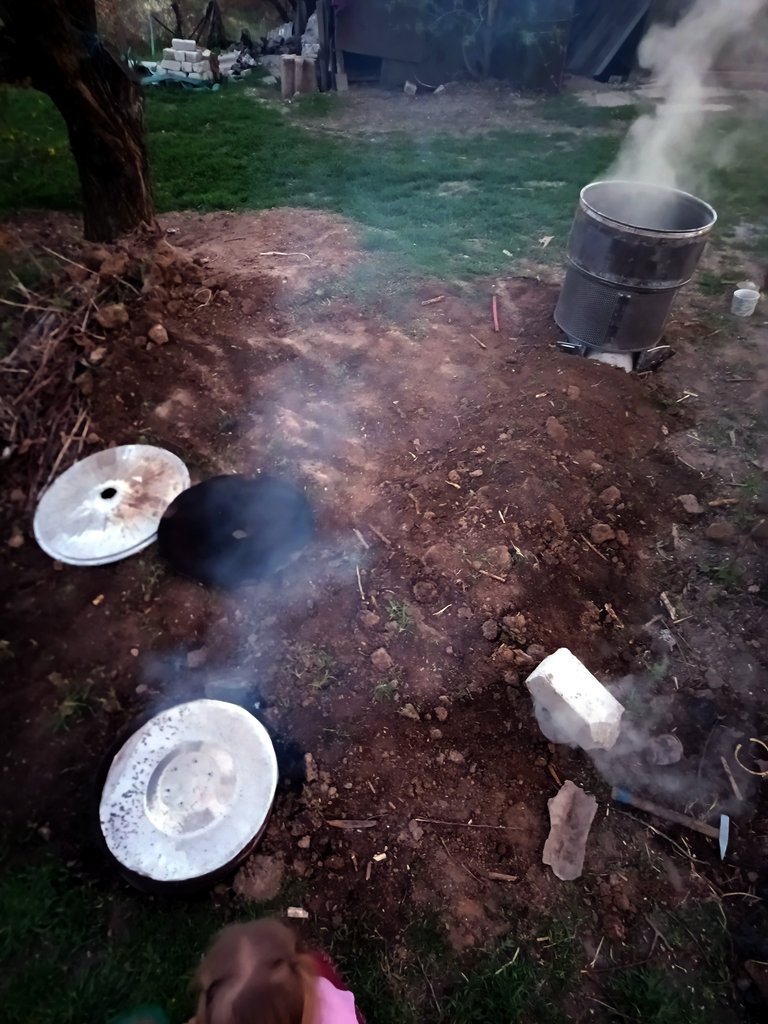
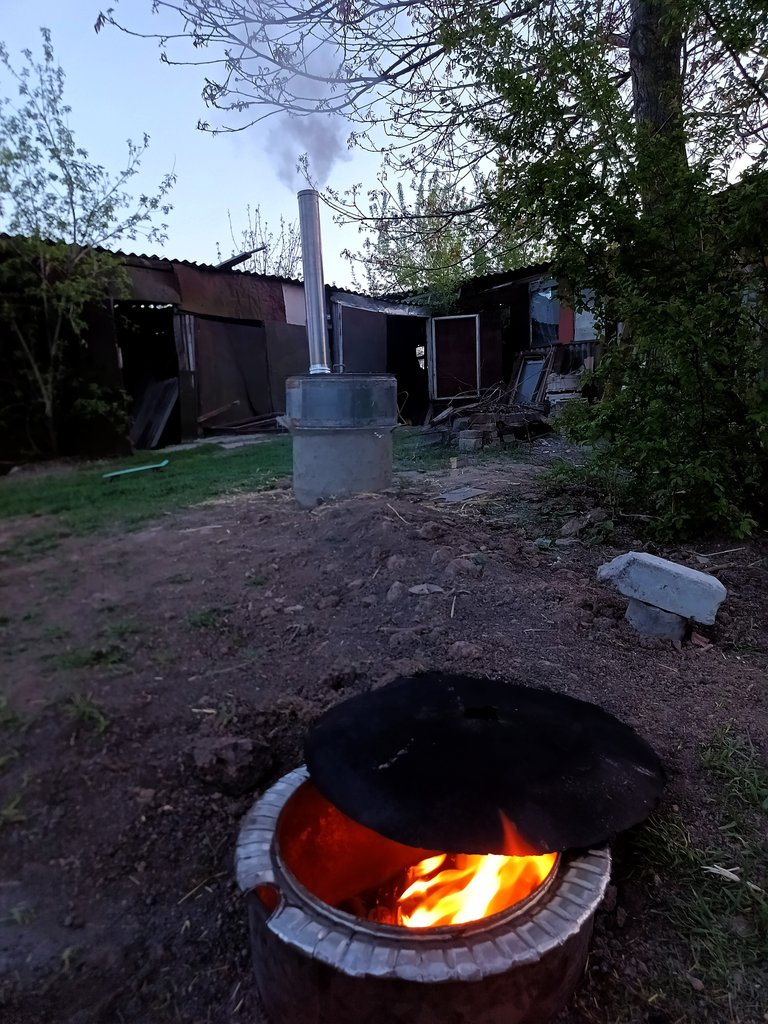
By the evening of the first day, I had managed to bury the chimney pipe and quench my interest with an intermediate test.

 |  |
|---|---|
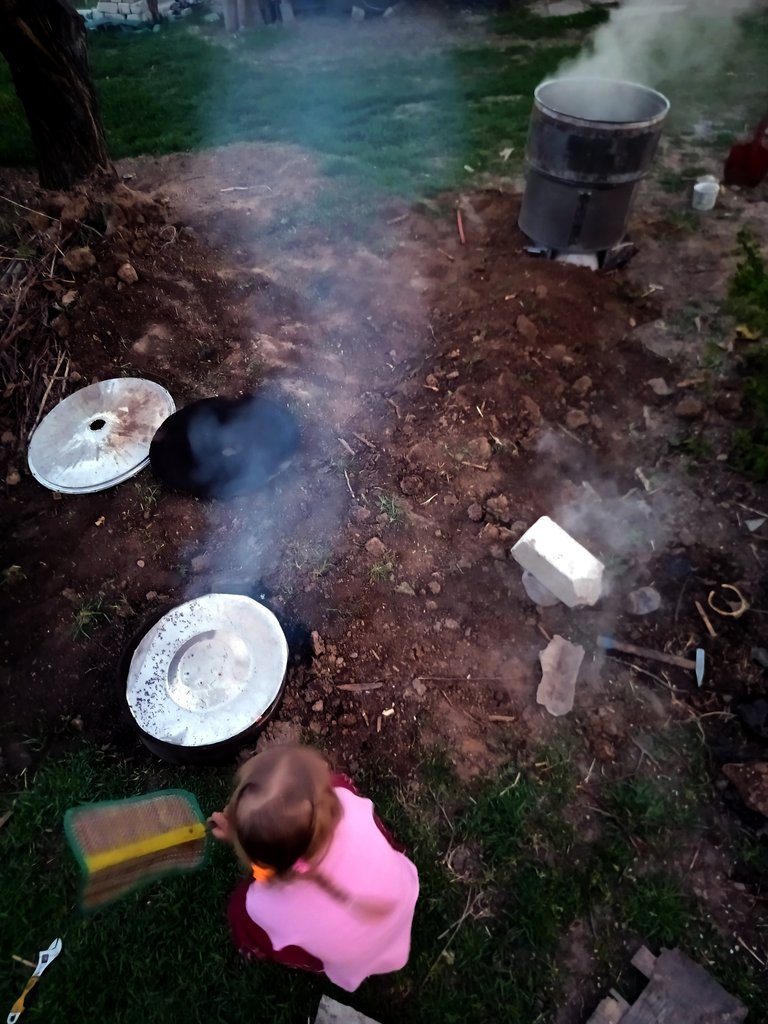 | 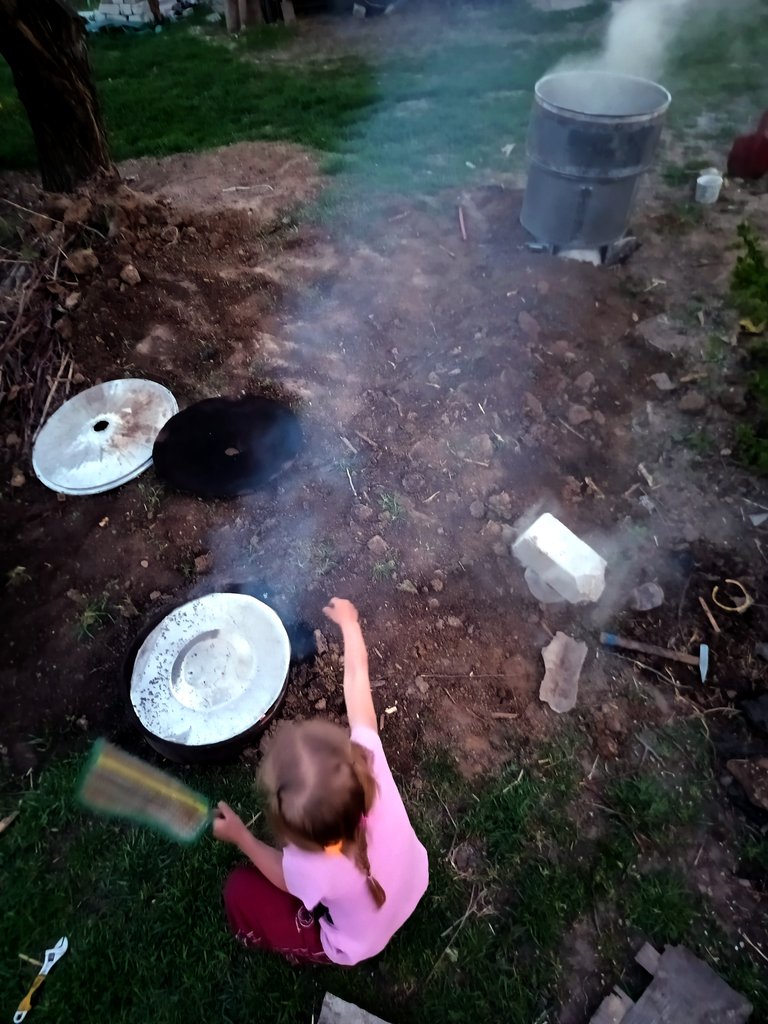 |
In the course of the evening's testing, my daughter and I came to the conclusion that we were lacking traction in our machine. This may be due to the holes in the walls of the washing drums that make up our smoking chamber.
After observing the process, I've outlined further work for tomorrow.
First, I decided to attach a chimney pipe, which will remove smoke from the smoking chamber, and then think about how to seal the holes around the circumference of my barrel.
I had all the parts pre-prepared so I was able to start work the next morning immediately.
With a nail, I scribbled on the barrel the location of the proposed stainless chimney elbow attachment and started thinking about mounting methods

To the circle scratched on the metal I drew three petals inwards in which I decided in advance to make mounting holes while the metal is intact and has not lost its rigidity
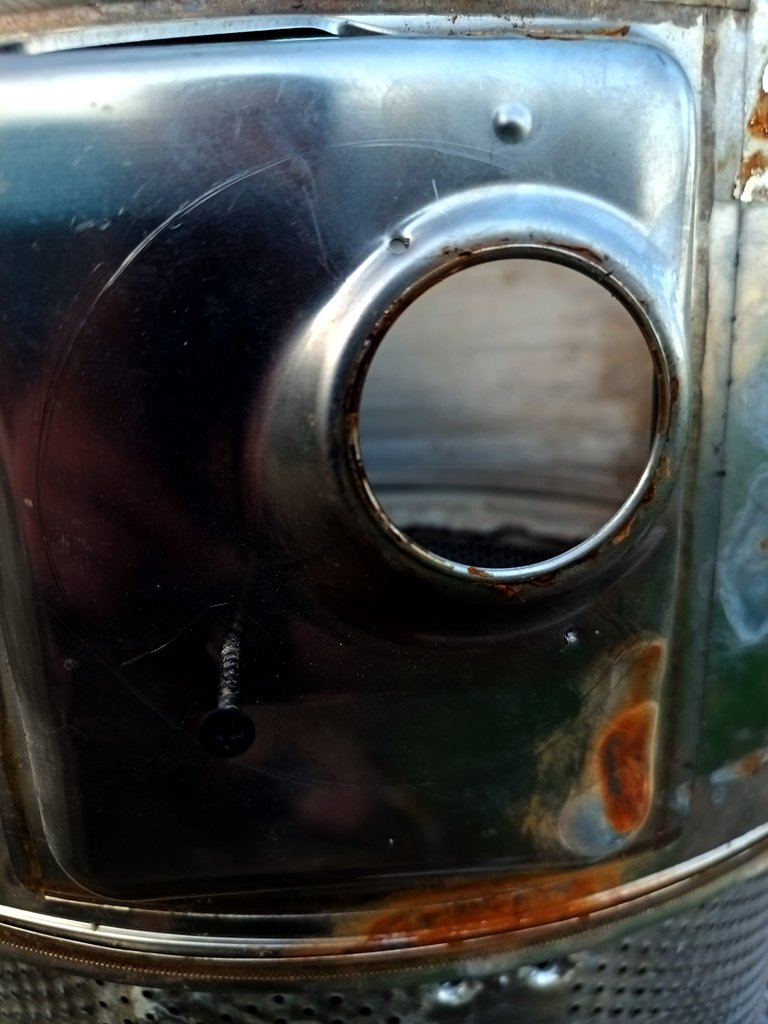
This time, instead of using a nail, I used a sharp caliber self-tapping screw to punch a hole in the stainless steel of the tank. I find this method less labor intensive than using a hand drill.
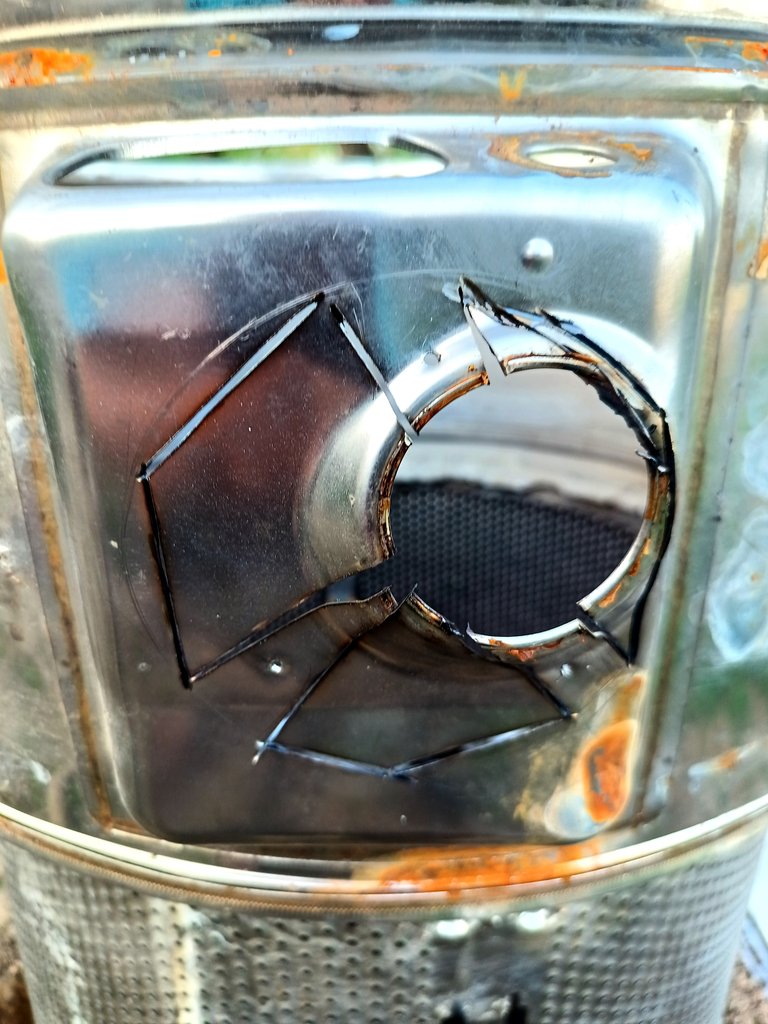
Cut out unnecessary metal with a grinder, leaving the petals with holes. It is important to remove sharp burrs from the edges of the metal with a file or sandpaper to avoid injuries during use
 |  |
|---|
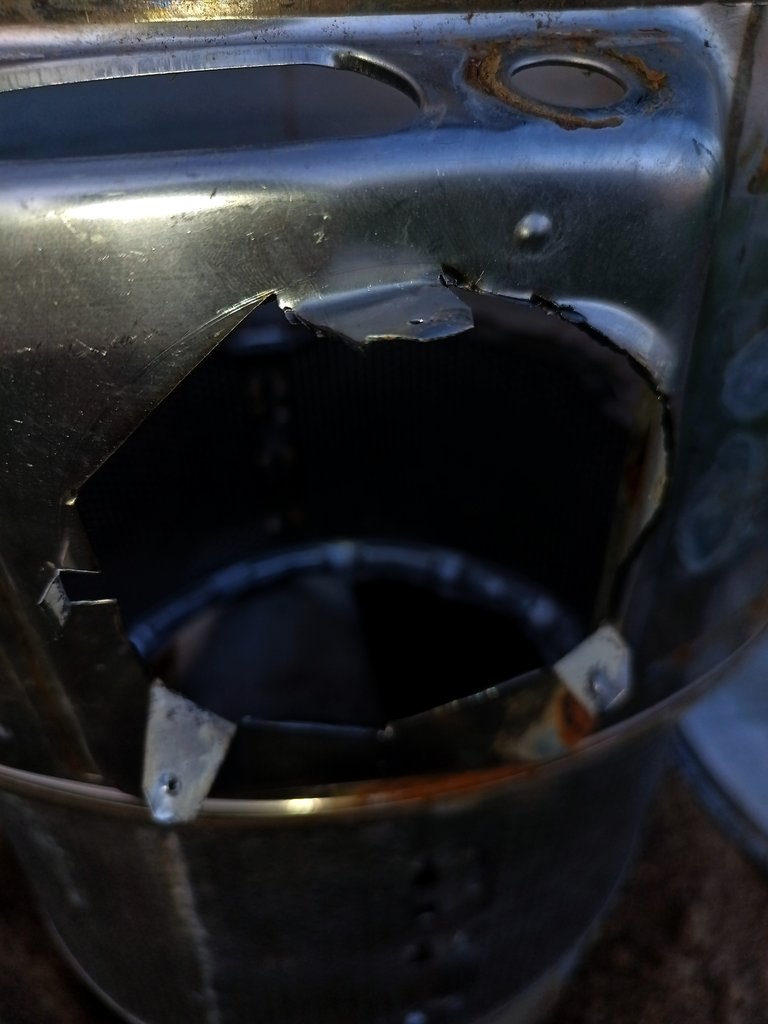
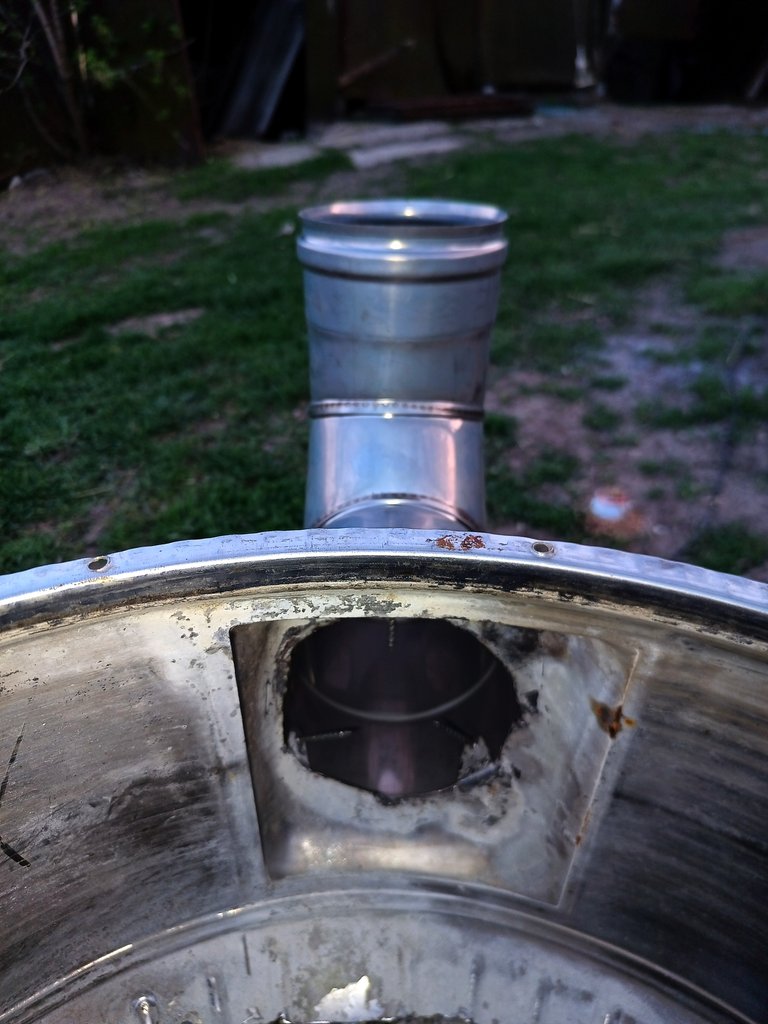
Transfer the locations of the resulting holes to the inside of the chimney elbow and punch the metal in the marked places.
For the connection I used used self-tapping wood screws that I had unscrewed somewhere for just such an occasion
It's quite secure, but it's worth considering sealing the remaining gaps and holes
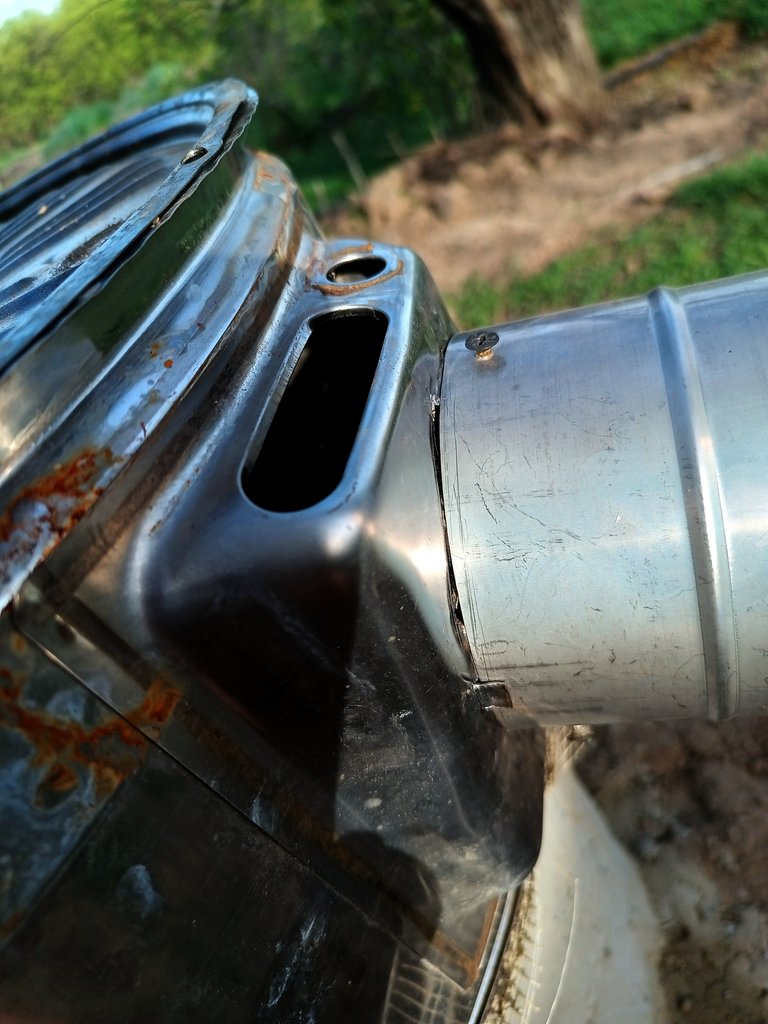
According to my idea, the chimney pipe should look like this
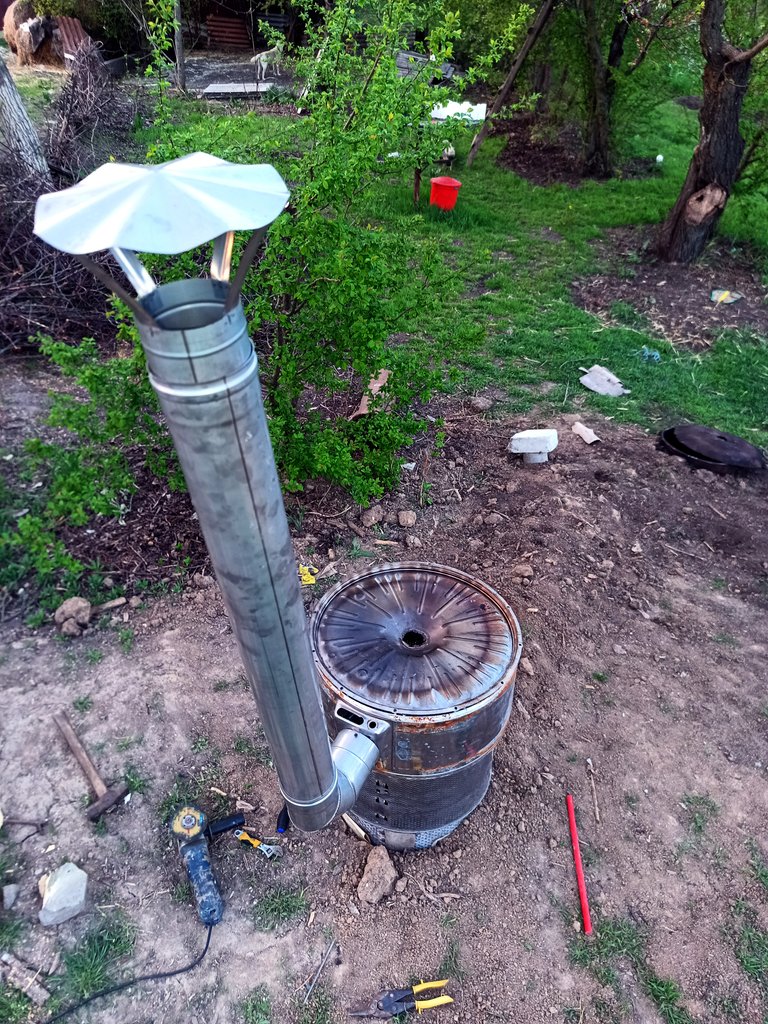
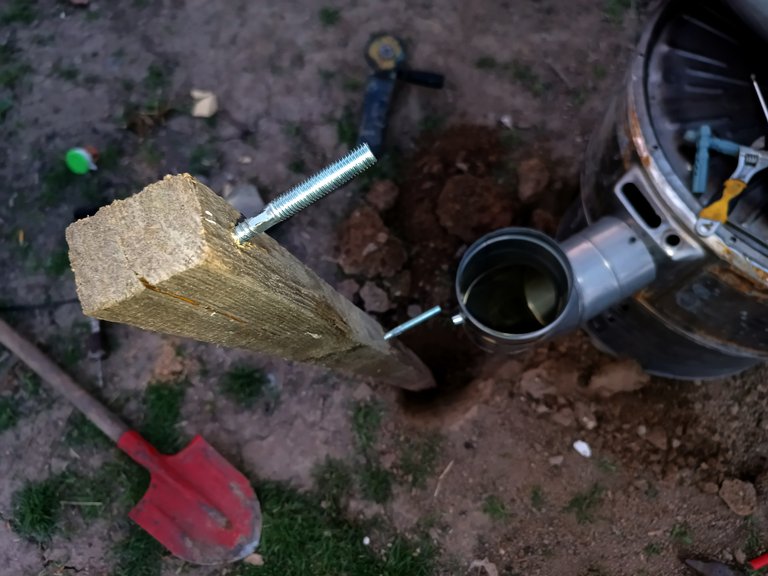
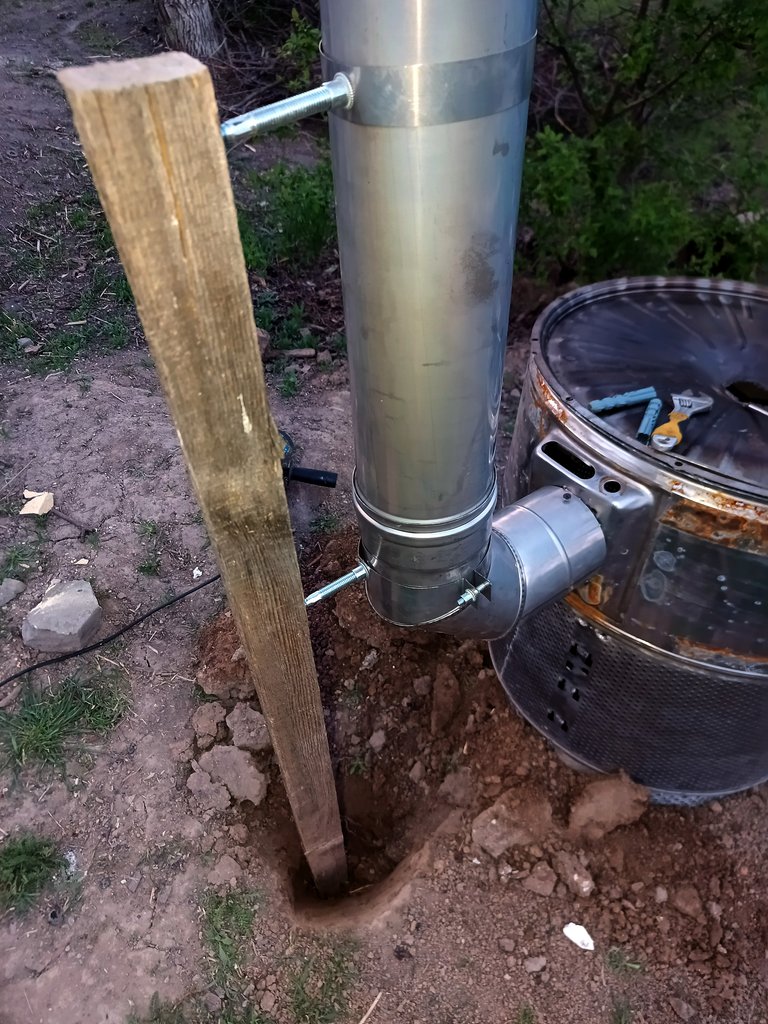
But so that all the load from the long arm of the pipe did not fall on the three petals with self-tapping screws, it was decided to add a wooden post with clamps dug into the ground, which will give rigidity to the pipe and elbow holding them with clamps
After roughly estimating the length of the stick, I screwed the bolts for the clamps into it and dug a hole of the desired depth
I then attached the post with clamps to the pipe and started burying the hole and compacting the soil
Now it is time to remove all the gaps and holes that are preventing a good draught.
I decided to fill the numerous small holes around the perimeter with cement.
In order to ensure reliable stability of the construction from inside the chamber, I inserted thick nails into the holes in a circle, which will later be a kind of reinforcement.
In order for the grout to adhere well to the stainless tank, I used leftover fiberglass mesh that I will lay between the layers of grout.
I start by making cuts so that the elastic mesh can take the shape of my tank.
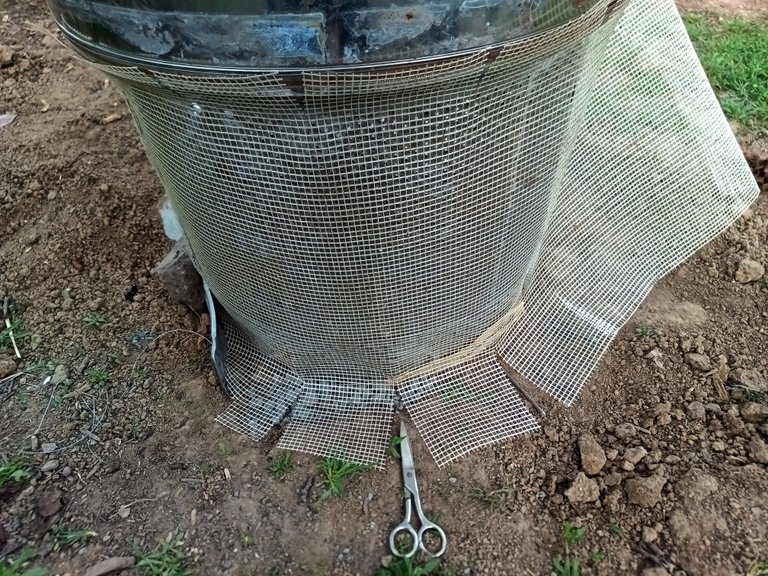
Having attached one edge of the mesh to the tank with a wire through the existing holes, I started to apply the first layer of cement to the tank. I also applied cement at the base where the nails were sticking out from inside the tank
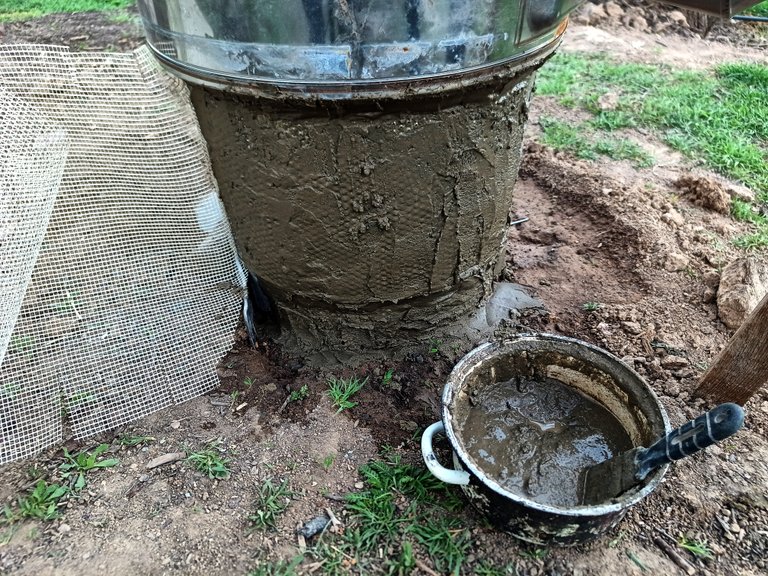
The first layer of cement is applied around the perimeter on all sides of the barrel at once, and then we wrap it all with a grid fixing its second edge

the notches allow the barrel to be wrapped tightly with netting so that the cement comes out all the way through.

I purposely did not cut them so that they would provide rigidity at the joints of the drums, and at the place of formwork around them
Apply a second layer of cement on top of the mesh and leave to dry
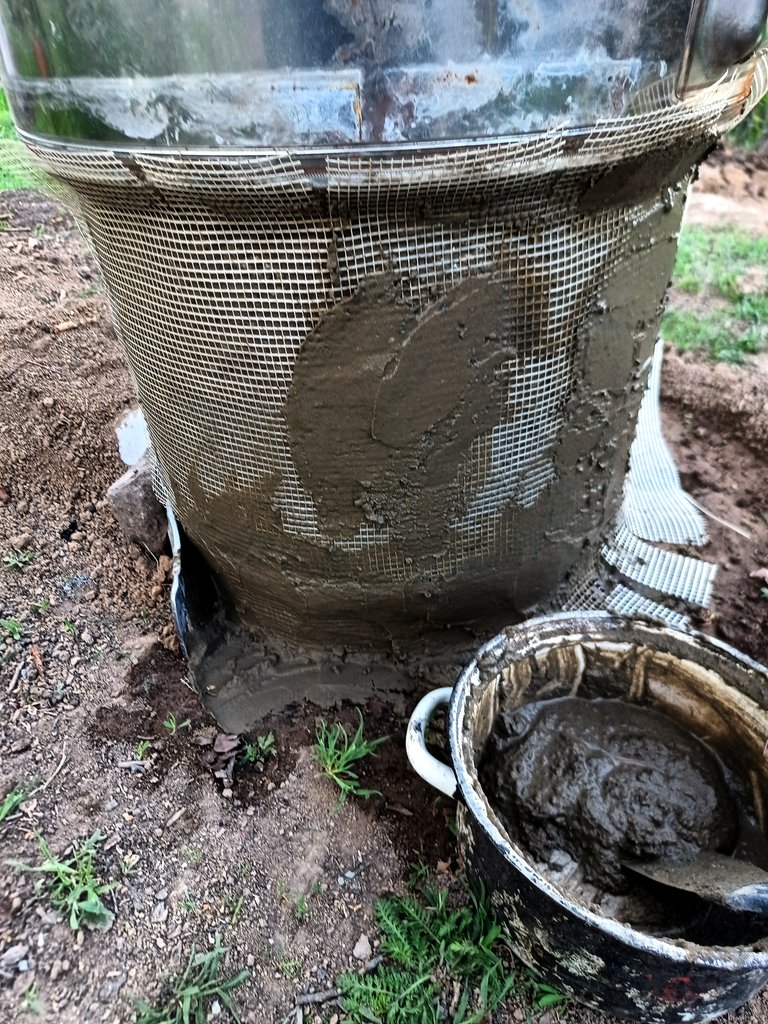
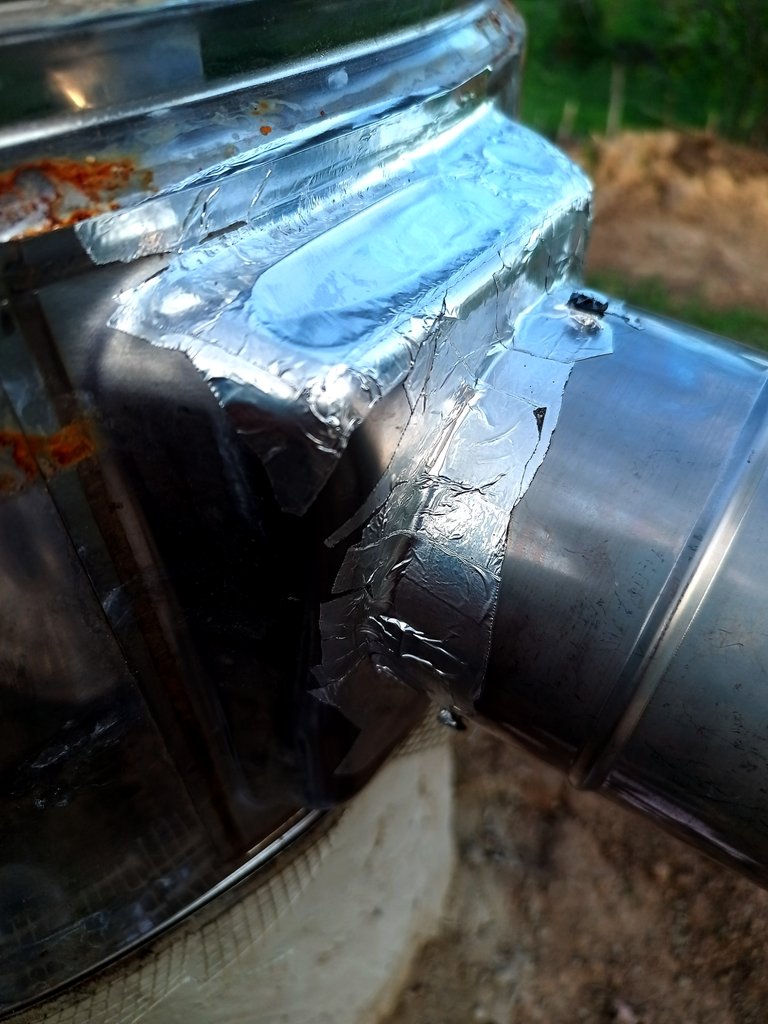
On the third day, I continued fixing the gaps with metal duct tape

Metal scotch tape is used for joining and sealing chimneys and air ducts, so it will cope with this task without much effort on my part
To connect the circle to the plane, I didn't bother much and just used short scraps of duct tape.
Metal is not elastic and tears when trying to give it an irregular complex shape, so in this case short narrow strips were suitable
an old doorknob burned in the stove along with the wood it was attached to, got a chance at a second life.
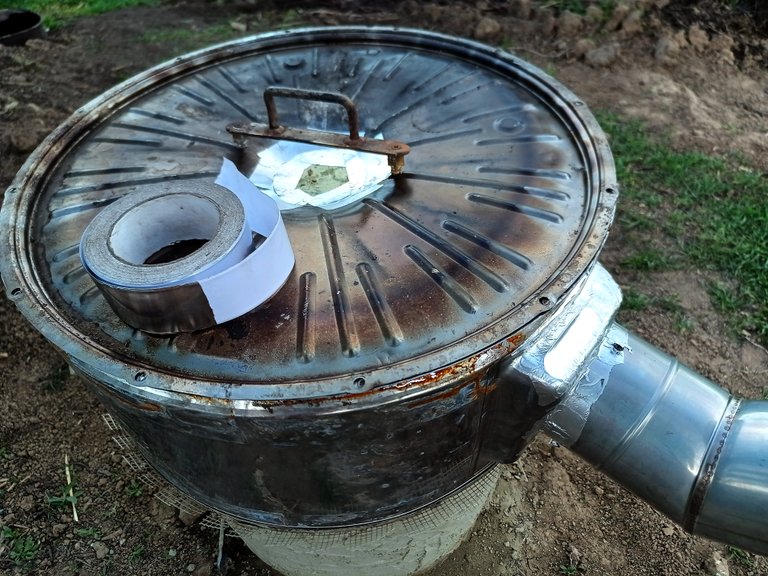
I also fixed the hole in the lid with metal tape and a piece of tin from a tin can.
It looks like all the cracks have been sealed))
Sometimes once you start a creative project, it's hard to stop yourself....
So in this case, everything seems to be ready and we can proceed to the final tests, but I wanted to adapt a metal scrap from the drum to the top of the furnace for a tighter fit of the lid.
In this hot spot, a metal tape connection would not serve securely, so I decided to roll the edges of the disk
Again, in order for my disk to wrap around the circumference more comfortably I had to cut the edges into strips. Thin strips of metal will be easier to bend and provide a tighter fit.

I had to retrieve the tank that served as the firebox chamber walls to make it easier to bend the disk lobes around the protrusion at the edge of the firebox circumference
Sorry if my translator stopped coping with the translation of my thought, I hope everything is clear from the pictures as well)))
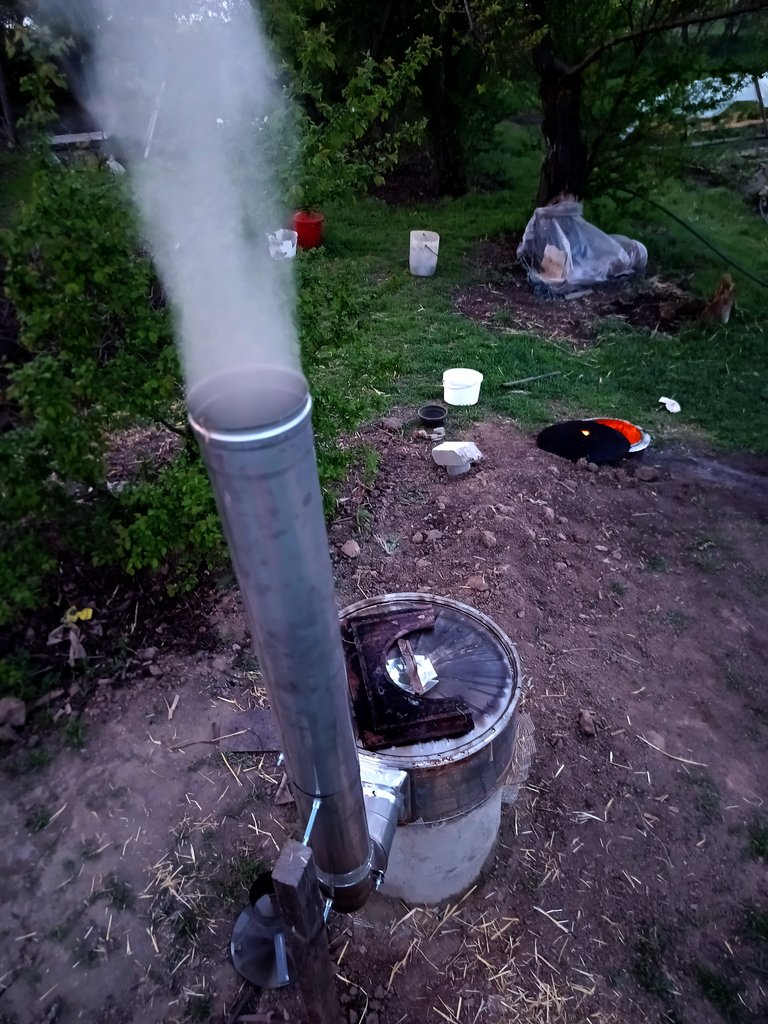
Now everything is ready and you can start the final performance test.
We take firewood and put it our in the combustion chamber, build a fire and watch where the smoke will go
To our all-family joy, once warmed up, the smoke travels hollowly down the chimney through our smoking chamber as intended!
Now it is worth searching and trying different marinade recipes to have something to write in the community of food lovers))))
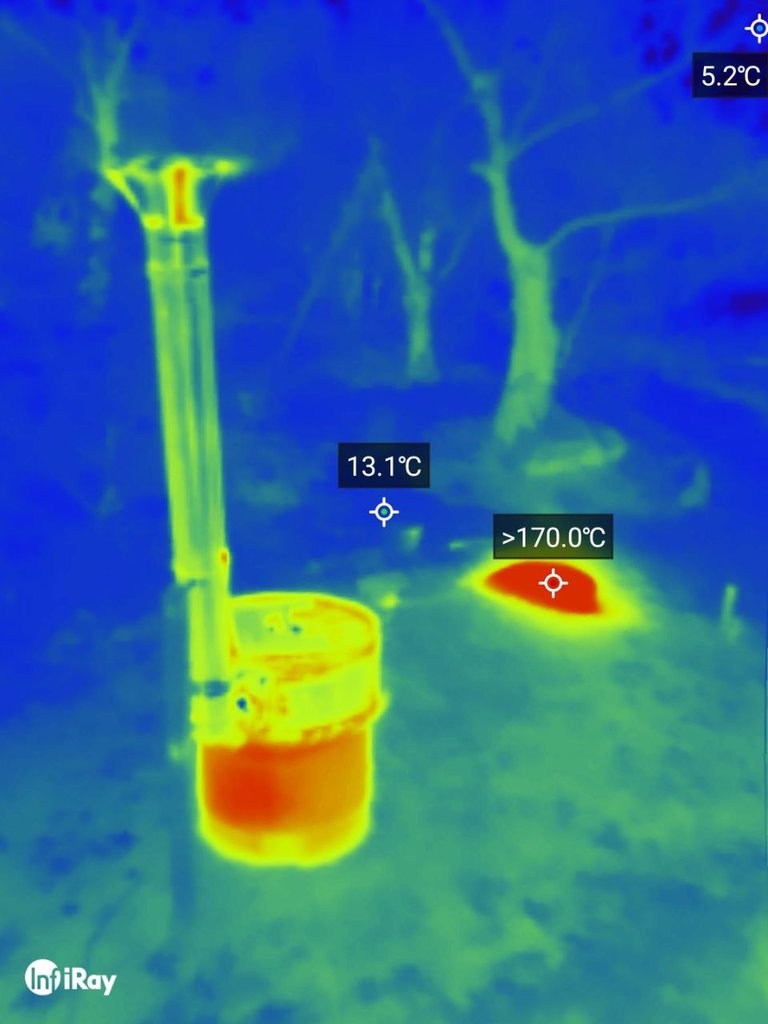
This is what it looks like in my phone's thermal imager in the infrared spectrum.
A little sad to live out the last few months in your home before being forced to leave but the safety and integrity of your family is a priority.
PhoneCamera
Springr 2024 | Ukraine
!only original content your can find in my blog!
And this gif of my ducklings swimming. 🦆


banner and feather divider created by @barbara-orenya

Trade conveniently on HiveDex.io.
Thanks to @Mahdiyari!

I am always impressed how folks intent on achieving a thing make it happen with what they have. I guess the fruit woods that smoke meats so well are commonly available in your homeland, although I learned to use Sitka Alder where I grew up, and nothing else tastes as good on my tongue.
Thanks!
The scent of natural wood is very pleasant. Smoking is indeed preferably done with fruit trees, which are really abundant here.... but I would be interested in experimenting with birch and needles too!
Thanks for your visit!
When I live innawoods, I always cook over alder. However, I once tried to cook over spruce when faced with a shortage of alder, and the flavor was so overwhelming I could hardly eat the corn I roasted. It was literally coated with a sticky resin from the spruce wood. Some wood is even toxic, and not all species are palatable. Spruce bud tips can be used for a nutritious tea, but cannot be the exclusive wood for smoking or cooking over, because it is so resinous. It was like trying to eat smoked porcupine, or marinating meat in turpentine.
I wish you and your beautiful family all the best in a terrible situation. Your innovative thinking and willingness to work hard is a great asset I am sure will best enable your successful negotiation of the difficulties you face.
Sometime I used to make barbecue over a campfire entirely out of spruce cones. Of course, you have to wait until the resin burns out and the cones turn into coals, but I was pleasantly surprised by the faint pine flavor.
If you cook in a cauldron over a fire, the pine resin becomes a serious problem when cleaning the dishes, sticking with a hard glaze on the bottom of the dishes.
Nature gives us all the minimum we need, we have begun to forget how to use it harmoniously.
I am sure that the set tasks will be achieved! This is a good moment to test friends and others.
Be always sure you are right, then go ahead.--Davy Crockett
dude what an incredible post ahahaha.
bookmarked for when i finally need to do something like this.
need a place first ;)
blessings