Un saludo a todos aquellos creadores que con sus manos transforman, restauran y crean distintos espacios, ya sea a través de la madera, la mampostería y distintas vertientes de los oficios manuales; en pocas palabras, todos somos creadores dichosos de este don creativo.
Desde hace dos meses y unos días me encuentro de visita en el terruño de mi compañera, ya que sus padres viven en otro estado del país, así que cada vez que venimos de visita se alarga la estadía además de que fueron los meses de carpintería inesperada, resulta que mi suegro me estuvo guardando algunas madera que se conseguía para luego crear algo, así que con pocas herramientas, ya que estaba retirado de mi atelier me dispuse a diseñar una pequeña mesa y unos taburetes, estos son momentos donde rectifico la voluntad, la habilidad y destreza porque aunque en mi atelier no tengo muchas herramientas si facilitan el trabajo, pero al igual con pocas se puede lograr el proyecto planteado.
El contenido que proyecto en hive está vinculado con el arte de la luthería, la escultura, la restauración y la carpintería además de creación de herramientas, es decir es un atelier integrado en la madera y sus usos en como recurso creativo, así que en esta ocasión les compartiré como llevar a cabo un pequeño proyecto aplicando la carpintería tradicional, el post lo estaré dividiendo en dos partes en el presente armaremos la mesa y en el segundo estaré culminando los taburetes con las piezas barnizada así que a preparar los clavos y martillo.

Herramientas y materiales
- Martillo.
- Calvos de 1 1⁄2.
- Cola de carpintero.
- Serrucho (opcional para esta etapa del proyecto)
Paso 1
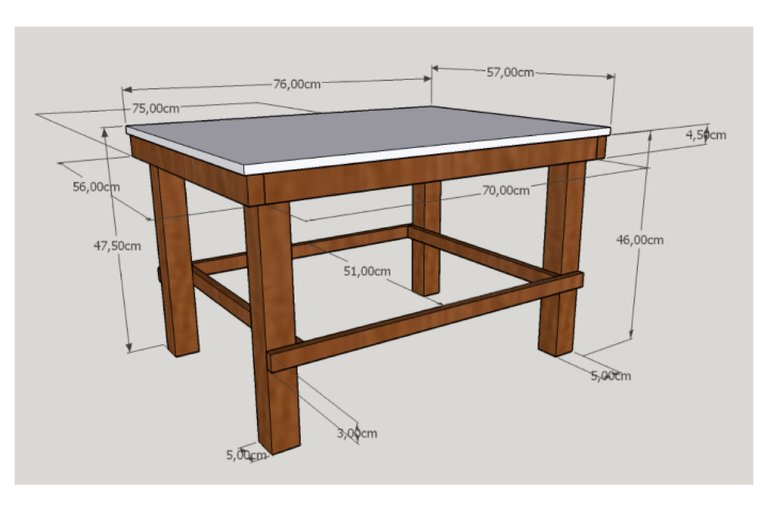
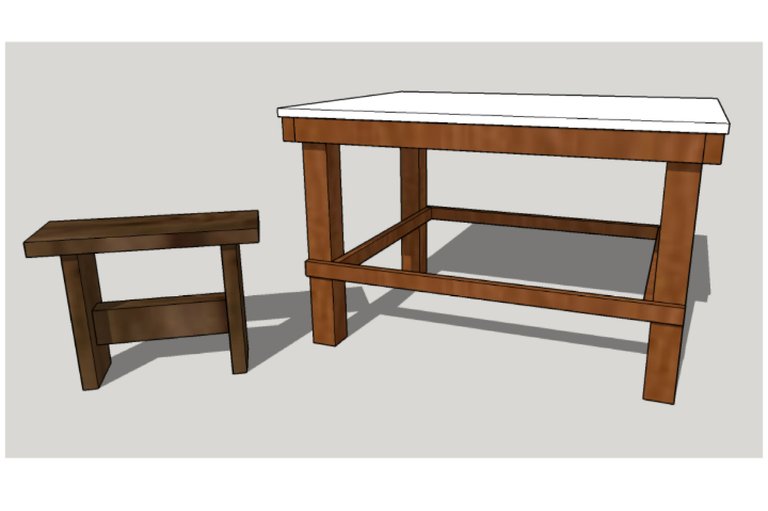
Siempre les comento lo esencial de un boceto en un proyecto, puesto que la idea en nuestra cabeza está abstracta y si no se expresa en un dibujo se puede perder en la imaginación, además de que es una forma de ir desarrollando el proyecto del pensamiento a la realidad, por lo general los hago en papel, pero como he estado practicando modelado digital aproveche estas maderas para pensar una mesa según los materiales al alcance, lo realice en un programa llamado sketshup 2015 un poco del pasado, pero es la que me permite mi mini portátil.
Paso 2
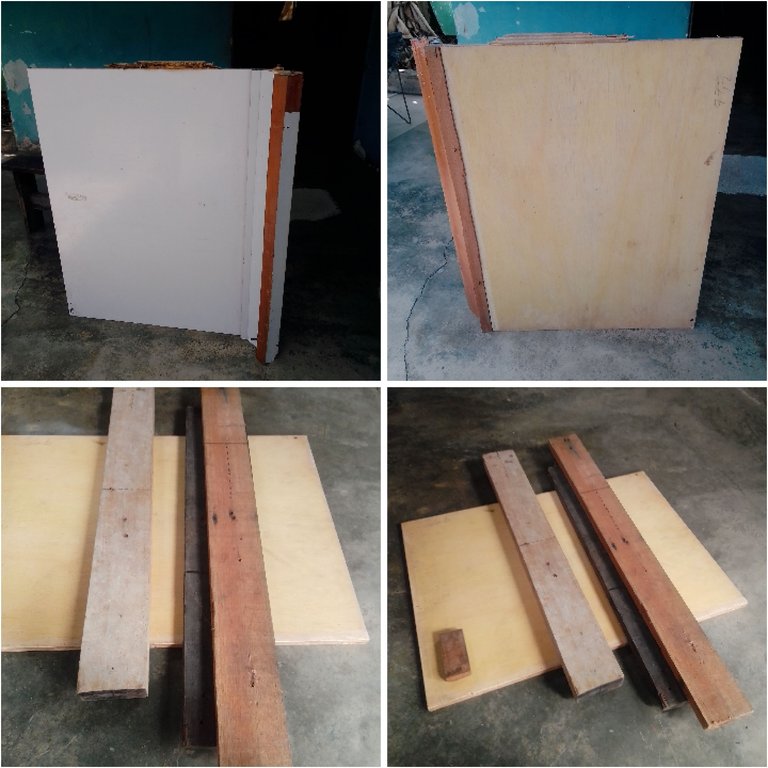
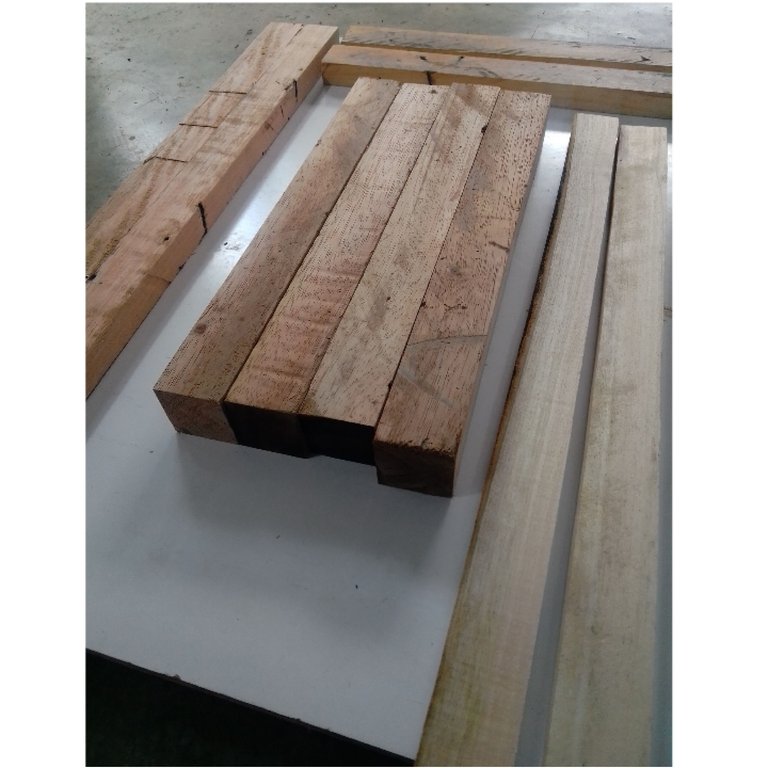
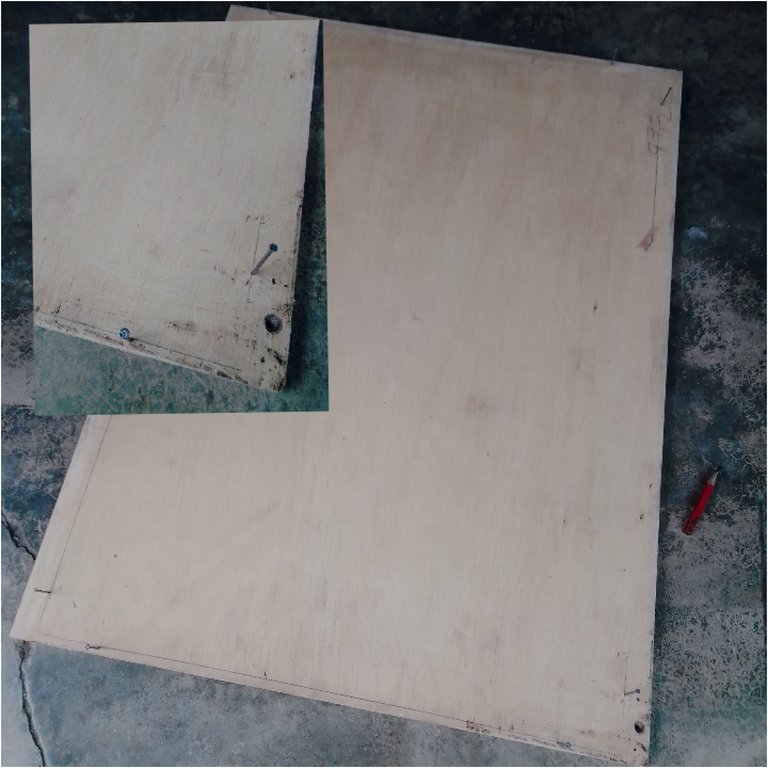
Aquí les presento los materiales que tengo para llevar adelante la primera parte, tenemos una madera contrachapada con un forro de formica blanca, un cuartón de madera de melina y otras de menor espesor que servirán para los travesaños, con la madera que servirá de soporte superior, (contrachapada) diseñe el boceto, puesto que diseñe a partir de estas madera, ya que estoy reciclando pedazos de piezas encontradas.
Paso 3
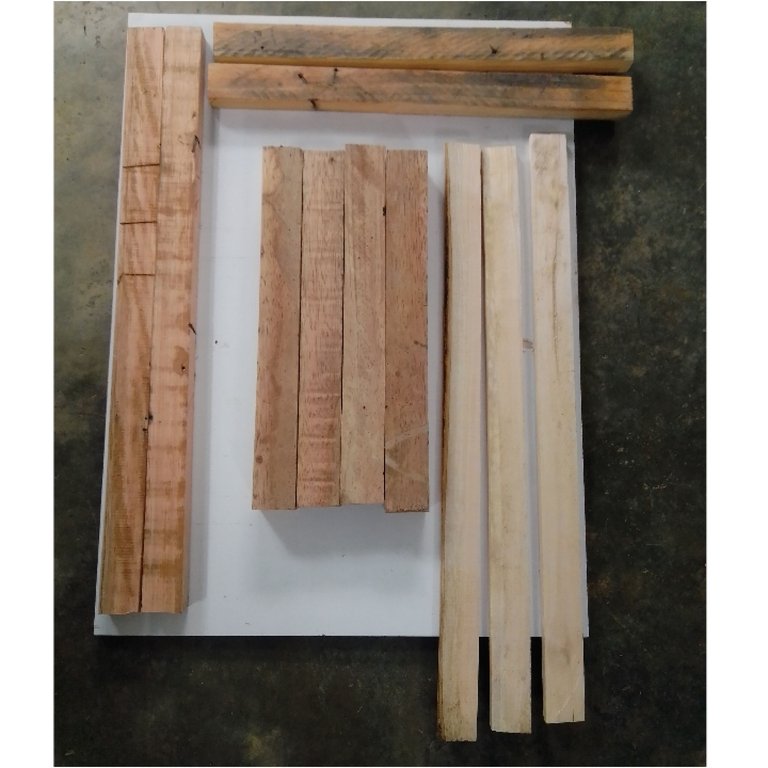
Como podemos notar, las maderas se multiplicaron, bueno, en realidad, por suerte tuve la oportunidad de usar una cierra de mesa por aquí, aunque al principio pensé en abrir la madera con un serrucho. ¿Se puede hacer? Claro con un buen serrucho, no se toma mucho tiempo siempre y cuando tenga buen filo, pero si tienen la oportunidad de ir a una carpintería y pedir que te corten la madera perfecto te ahorras un poco de tiempo y si consigues o compras madera con dimensiones similares mucho mejor con el serrucho si podemos contar las dimensiones fe los travesaños, ya que siempre en bueno conseguir la madera con unos 3 cm de margen.
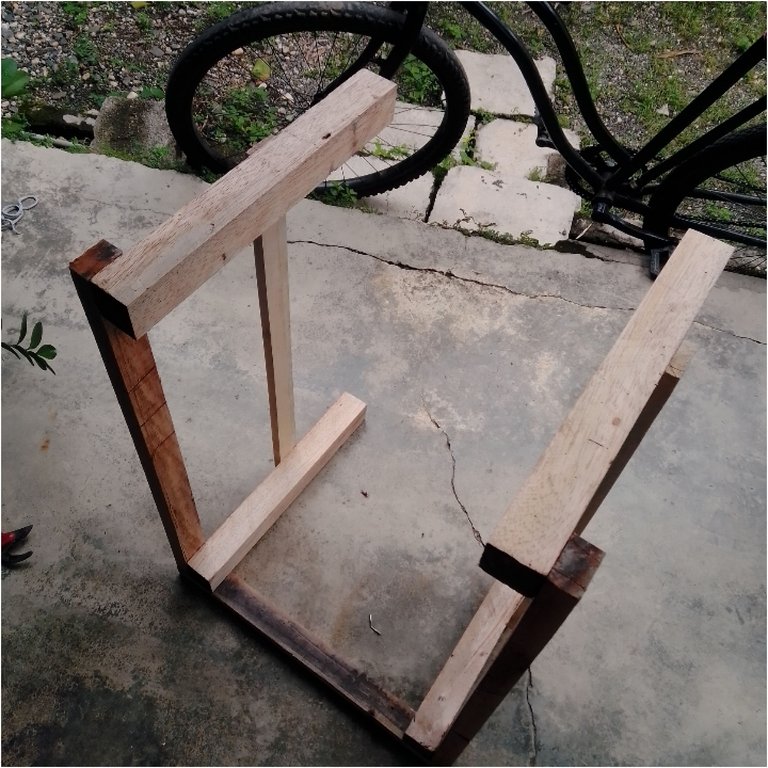
Paso 4
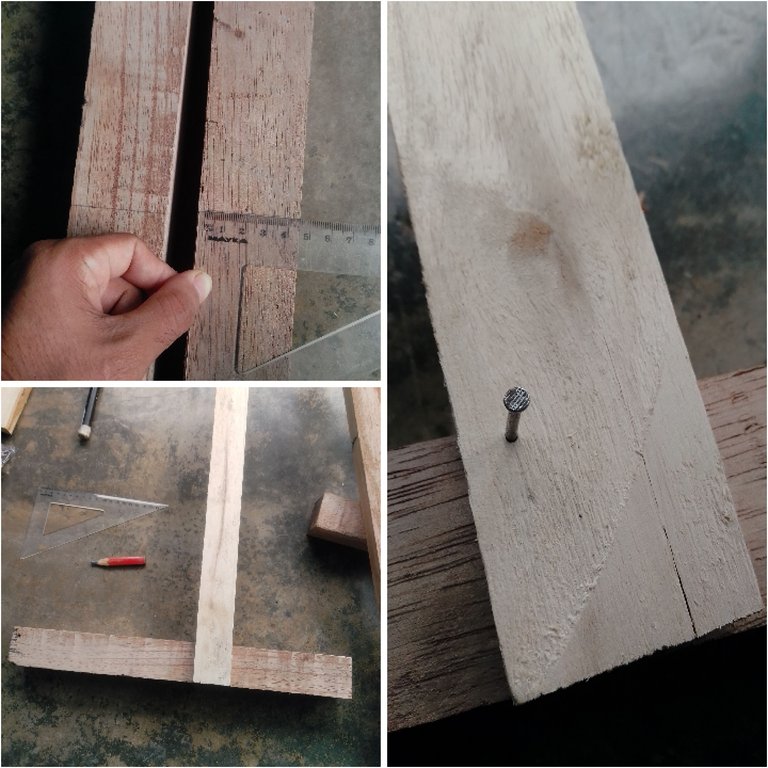
Siempre suelo presentar las maderas para desde ya ir observando su futuro desarrollo, también porque mido las divisiones donde clavaré posteriormente, el plano que dibujamos es una guía y acepta margen de error, pues a veces los cortes no quedan tan preciso y debemos de alterar unos milímetros 1 cm como mucho, no siempre, pero mientras no altere su estructura todo marchará de manera favorable.
Paso 5

Comencemos por clavar el travesaño inferior frontal, colocamos cola y clavamos. Cuidemos de no clavar mucho al borde para no abrir la madera, en mi caso me gusta comenzar de esta manera, ya es gusto de cada creador de abajo hacia arriba, pues una casa no se construye de arriba hacia de bajo
Paso 6
Seguimos con la pieza anterior y esta vez con el travesaño superior, repetimos el proceso y recuerden colocarle cola porque nos aseguramos que en el futuro no esté tambaleando.
El paso 5 y 6 lo repetimos con las otras dos patas.
Paso 7
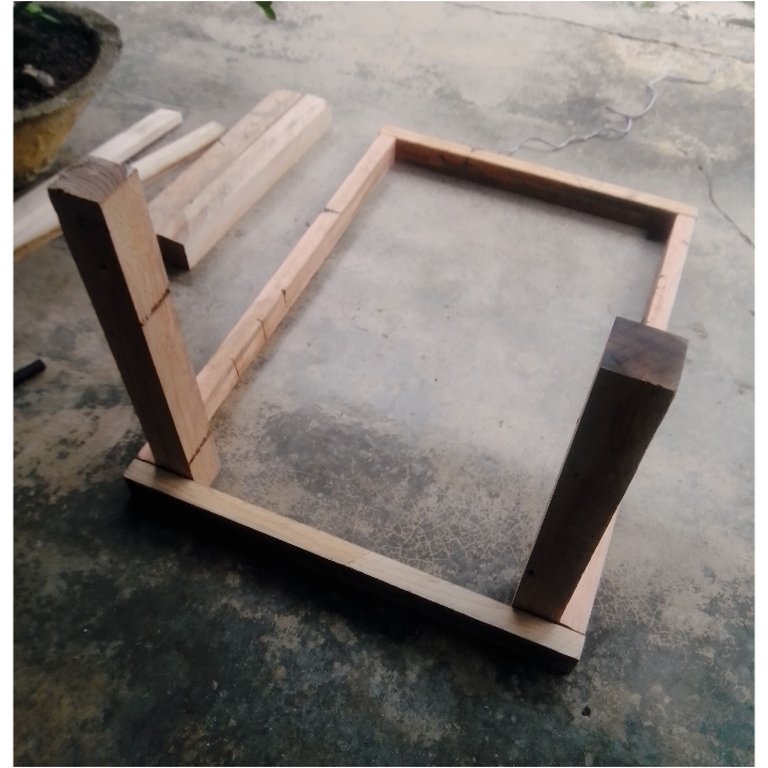
Una vez teniendo las dos piezas en su conjunto, claveteamos los travesaños superiores laterales, es una manera muy práctica, puesto que si hacemos el marco superior y después clavamos las patas nos sería muy limitado su buen clavado además de debilitar el marco clavado, de esta manera distribuimos de manera eficiente nuestra creación
Paso 8
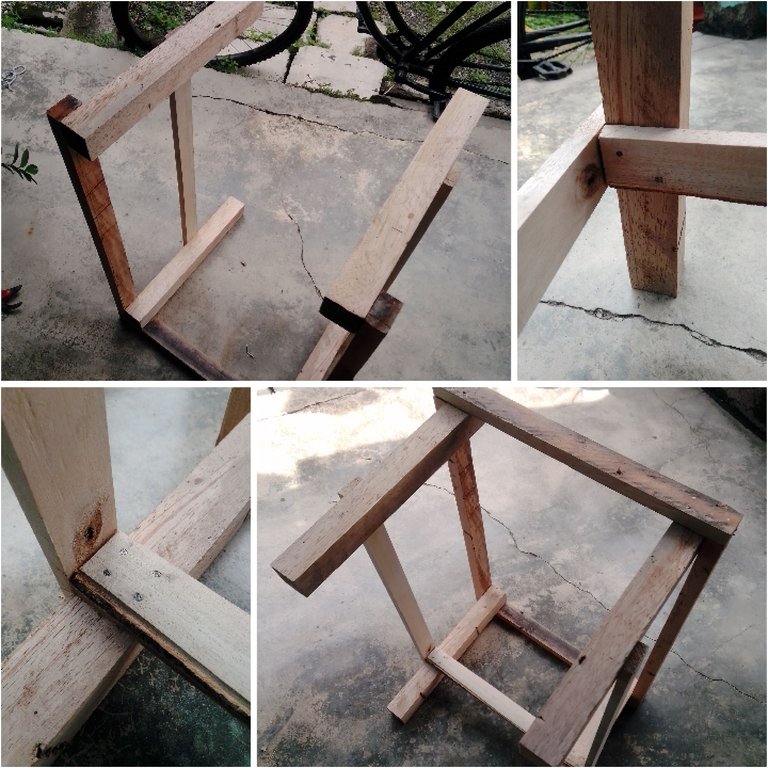
Luego de pegar los travesaños superiores, colocamos los inferiores laterales; está por la parte interna, ya que nos ayudaría el buen soporte de las patas a clavar sin ningún inconveniente.
Paso 9
Para ubicar la tabla superior marcamos el ancho y largo de la mesa, para que nos queden con todo los márgenes iguales le coloco en cada esquina unos clavos que me servirán de tope.
Paso 10
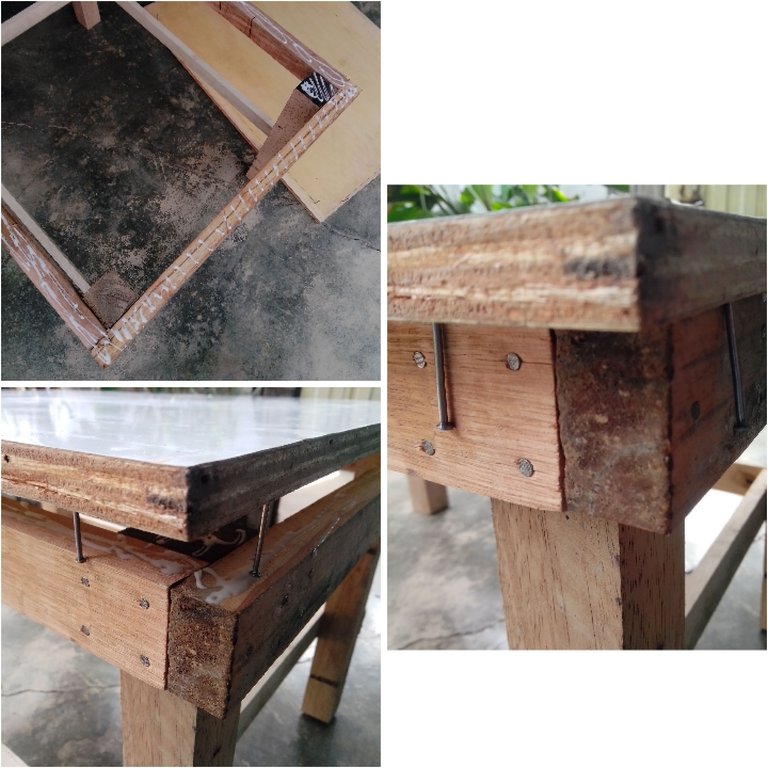
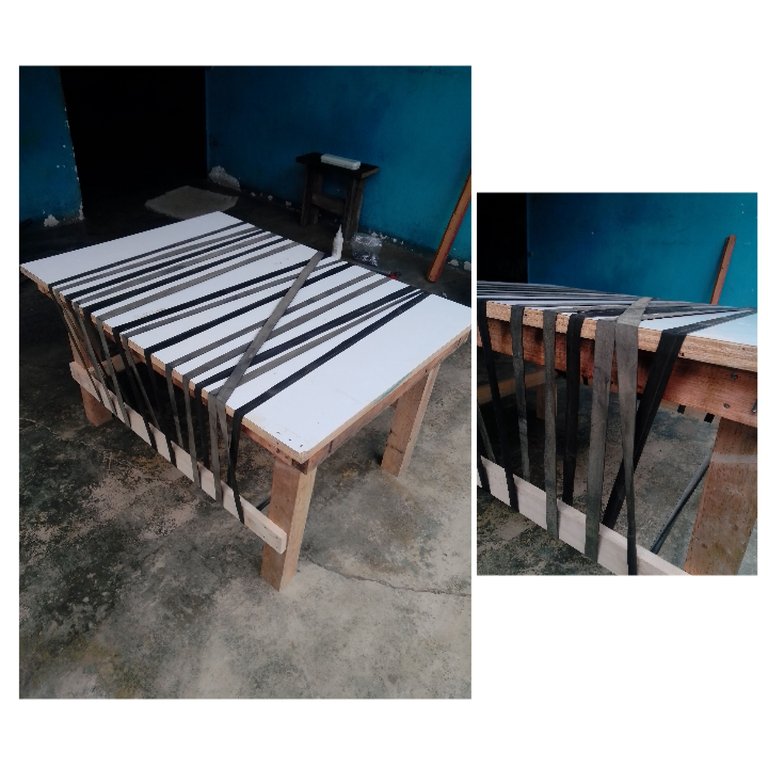
Encolamos y con una cabuya o tira elástica ejercemos presión por unas 6 horas, ya luego podemos colocarle por la parte interna unos pies de amigo de ½ pulgada para reforzar.
Paso 11
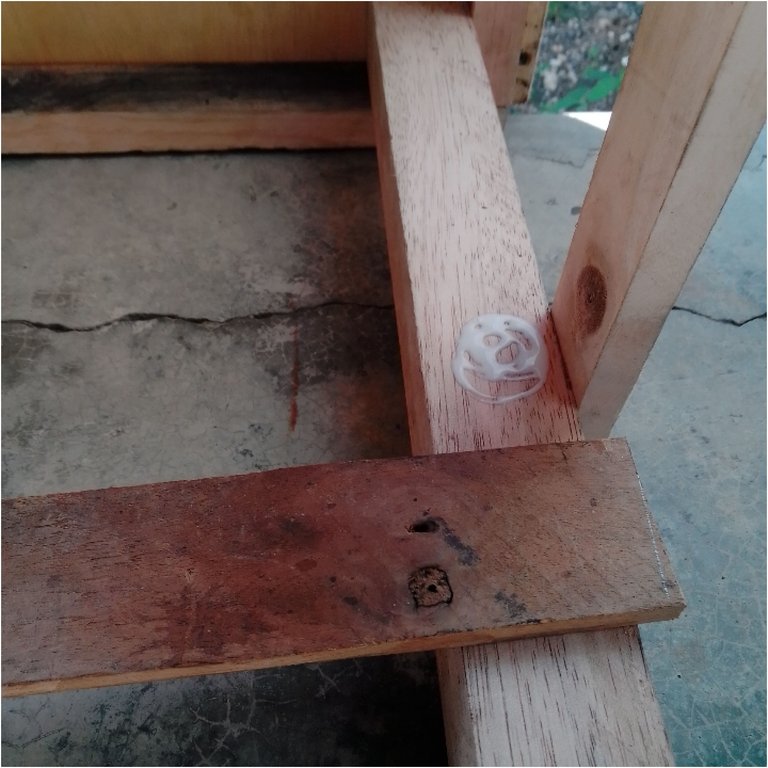
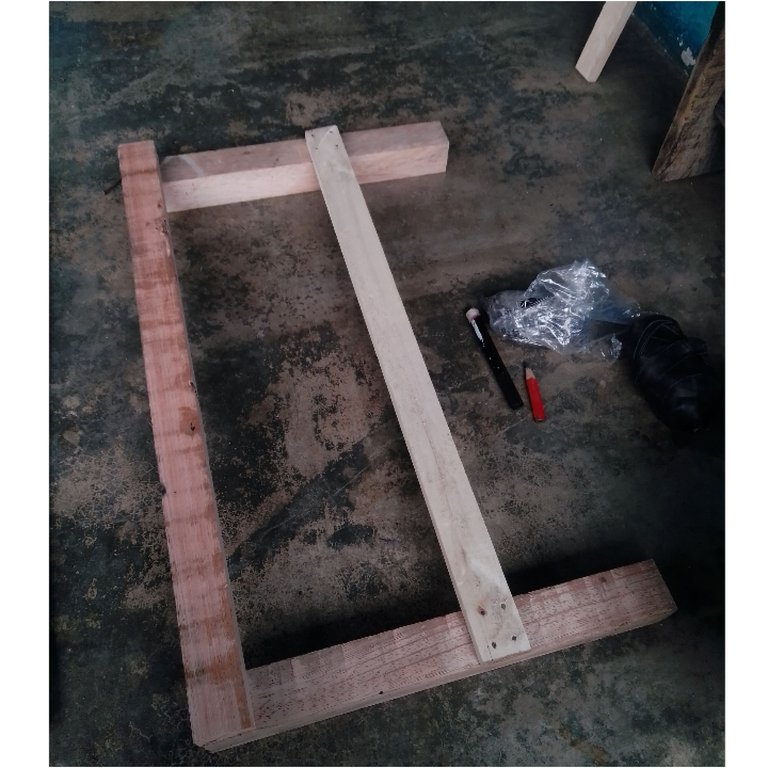
Cuando registré el paso 8, no contaba con el otro travesaño inferior, así que no quería culminar sin este registro, para que así tenga mucha más coherencia. Lo ideal sería hacerlo antes de encolar la tapa de la mesa.
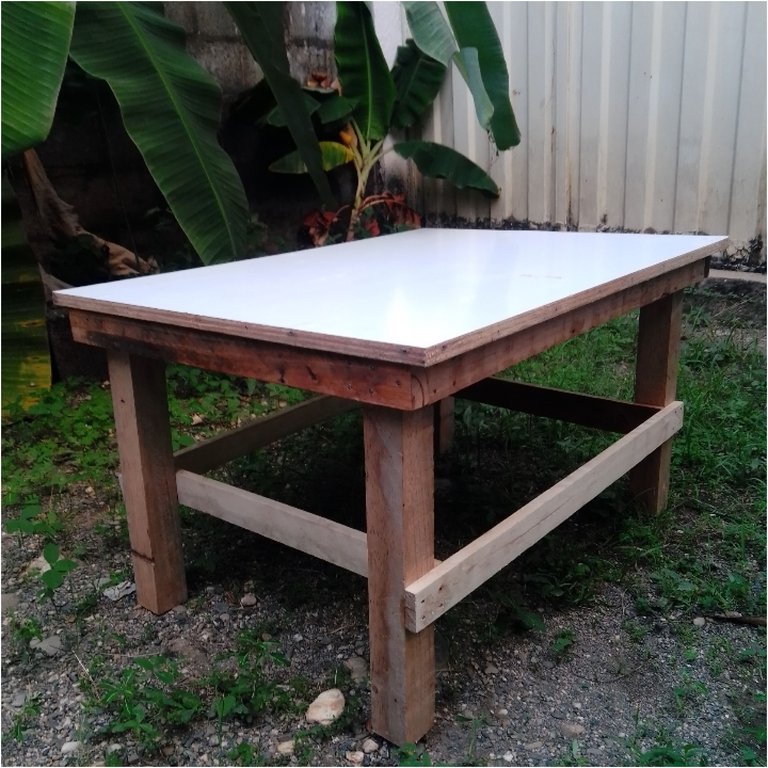
De esta manera construí y materialice este proyecto que aún no ha culminado, ya que como les comente tiene dos partes, donde finalizaremos en la construcción de los taburetes junto al barnizado, pero claro ya podemos tomar él te y café mientras planeamos la continuación del proceso así que a buscar más clavos y afilar el serrucho porque el siguiente será totalmente a mano.
Me despido y espero que sea de provecho este contenido, muchas gracias por leer, si tienen alguna sugerencia o duda estoy atento a los comentarios y si desean hacer algún pedido o adquirir algún trabajo de los que hago pueden contactarme, hasta una próxima publicación.
- Fotografías tomadas desde mi celular
- texto traducido en deelp
- Edición de imágenes en canva
English
A salute to all those creators who with their hands transform, restore and create different spaces, either through wood, masonry and different aspects of manual trades; in short, we are all happy creators of this creative gift.
For the last two months and a few days I have been visiting my partner's homeland, as her parents live in another state of the country, so every time we come to visit, the stay is longer and the months of unexpected carpentry, it turns out that my father-in-law has been saving me some wood that he could get to create something later, so with few tools, since I was retired from my atelier I set out to design a small table and some armchairs, these are moments where I rectify the will, the ability and dexterity because although in my atelier I do not have many tools if they facilitate the work, but at the same time with few you can achieve the proposed project.
The content that I project in hive is linked to the art of lutherie, sculpture, restoration and carpentry as well as the creation of tools, that is to say it is an atelier integrated in wood and its uses as a creative resource, so this time I will share with you how to carry out a small project applying traditional carpentry, the post will be divided into two parts in the present we will assemble the table and in the second I will be finishing the armchair with the varnished pieces so prepare the nails and hammer.
Tools and materials
- Hammer.
- 1 1⁄2⁄2" nails.
- Carpenter's glue.
- Saws (optional for this stage of the project).
Step 1
I always comment the essential of a sketch in a project, since the idea in our head is abstract and if it is not expressed in a drawing can be lost in the imagination, besides it is a way to develop the project from thought to reality, usually I do them on paper, but as I have been practicing digital modeling I took advantage of these woods to think a table according to the materials available, I made it in a program called sketshup 2015 a bit of the past, but it is the one that allows me to my
my mini laptop.
Step 2
Here I present the materials that I have to carry out the first part, we have a plywood with a white formica lining, a quarter of melina wood and others of lesser thickness that will serve for the crossbeams, with the wood that will serve as upper support, (plywood) I design the sketch, since I design from these wood, since I am recycling pieces of found pieces.
Step 3
As we can notice, the woods multiplied, well, actually, luckily I had the opportunity to use a table saw around here, although at first I thought about opening the wood with a handsaw. Can it be done? Of course with a good saw, it doesn't take much time as long as it has a good edge, but if you have the opportunity to go to a carpentry shop and ask them to cut the perfect wood you save a bit of time and if you get or buy wood with similar dimensions much better with the saw if we can count the dimensions of the crosspieces, as it is always good to get the wood with a 3 cm margin.
Step 4
I always present the wood to observe its future development, also because I measure the divisions where I will nail later, the plan that we draw is a guide and accepts margin of error, because sometimes the cuts are not so precise and we must alter a few millimetres 1 cm at most, not always, but as long as it does not alter its structure everything will go favourably.
Step 5
Let's start by nailing the lower front cross member, put glue and nail. Be careful not to nail too much to the edge so as not to open the wood, in my case I like to start this way, it is up to the taste of each creator from bottom to top, because a house is not built from top to bottom.
Step 6
We continue with the previous piece and this time with the upper crossbar, we repeat the process and remember to put glue on it because we make sure that in the future it will not be wobbly.
Repeat steps 5 and 6 with the other two legs.
Step 7
Once we have the two pieces together, we nail the upper side crosspieces, it is a very practical way, since if we make the upper frame and then nail the legs we would be very limited its good nailing in addition to weaken the nailed frame, in this way we distribute efficiently our creation.
Step 8
After gluing the upper crossbeams, we place the lower side ones; this is on the inside, as it would help us the good support of the legs to nail without any inconvenience.
Step 9
To place the top board we mark the width and length of the table, so that we have equal margins I place some nails in each corner that will serve as a stop.
Step 10
We glue and with a cabuya or elastic strip we exert pressure for about 6 hours, and then we can place on the inside a few feet of ½ inch friend to reinforce.
Step 11
When I recorded step 8, I didn't have the other lower crossbeam, so I didn't want to finish without it, to make it more coherent. Ideally, this should be done before gluing the table top.
In this way I built and materialized this project that has not finished yet, because as I told you it has two parts, where we will finish the construction of the armchairs together with the varnishing, but of course we can have tea and coffee while we plan the continuation of the process so let's look for more nails and sharpen the saw because the next one will be totally by hand.
I say goodbye and I hope this content is of benefit, thank you very much for reading, if you have any suggestions or questions I am attentive to the comments and if you wish to place an order or purchase any of the work I do can contact me, until a future publication.
- Photographs taken from my mobile phone
- Text translated in deelp
- Image editing in canva
Posted Using InLeo Alpha
Te quedo muy bien elaborada, a pesar de no tener tus herramientas, hiciste un trabajo admirable, tu suegro estará bien animado esperando los taburetes para empezar a jugar cartas y domino.🤗😄
Saludos @lauracraft, por supuesto obtuvimos muy buen resultado, se hizo con la intención de tomar cafe y filosofar, aunque bueno de pronto una jugada de domino quizás ! Gracias por comentar y apreciar el contenido, bendiciones...
Saludos amigo, estoy encantada, te quedo maravillosa, felicidades, espero que la disfruten mucho en el café,filosofía y demás.🤗😀
Nice work. Weldone
Saludos!!
Muchas gracias!
Congratulations @torre-alba! You have completed the following achievement on the Hive blockchain And have been rewarded with New badge(s)
Your next target is to reach 5000 upvotes.
You can view your badges on your board and compare yourself to others in the Ranking
If you no longer want to receive notifications, reply to this comment with the word
STOPI really appreciate the fact of restoring and recycling things, extending the useful life of objects and leaving them beautiful, it is a great art first to be able to do it and second to identify the opportunity in addition to generating good material to share around here, you just have to know how to identify those opportunities.
Wait for a good sunny day to varnish because if there is humidity it will delay your plans.
Saludos @nitsuga12 por supuesto, es filtrar lo que podemos encontrar tal como comentas, hay muchos que hacen pocos que restauran y reparan, pero considero que es una forma de aprender y comprender el arte y los errores del otro, es un poco filosófico...
En cuanto al sol en donde me encuentro nos acompaña siempre, por suerte la humedad relativa no cambia mucho aunque en trabajos delicados como la lutheria me ha llevado días en esperar un 55 o 45% para encolar, solo tenemos invierno y verano, un invierno con un rato despejado y luego lluvia...
Que tengas días productivo