🇪🇸
🇬🇧
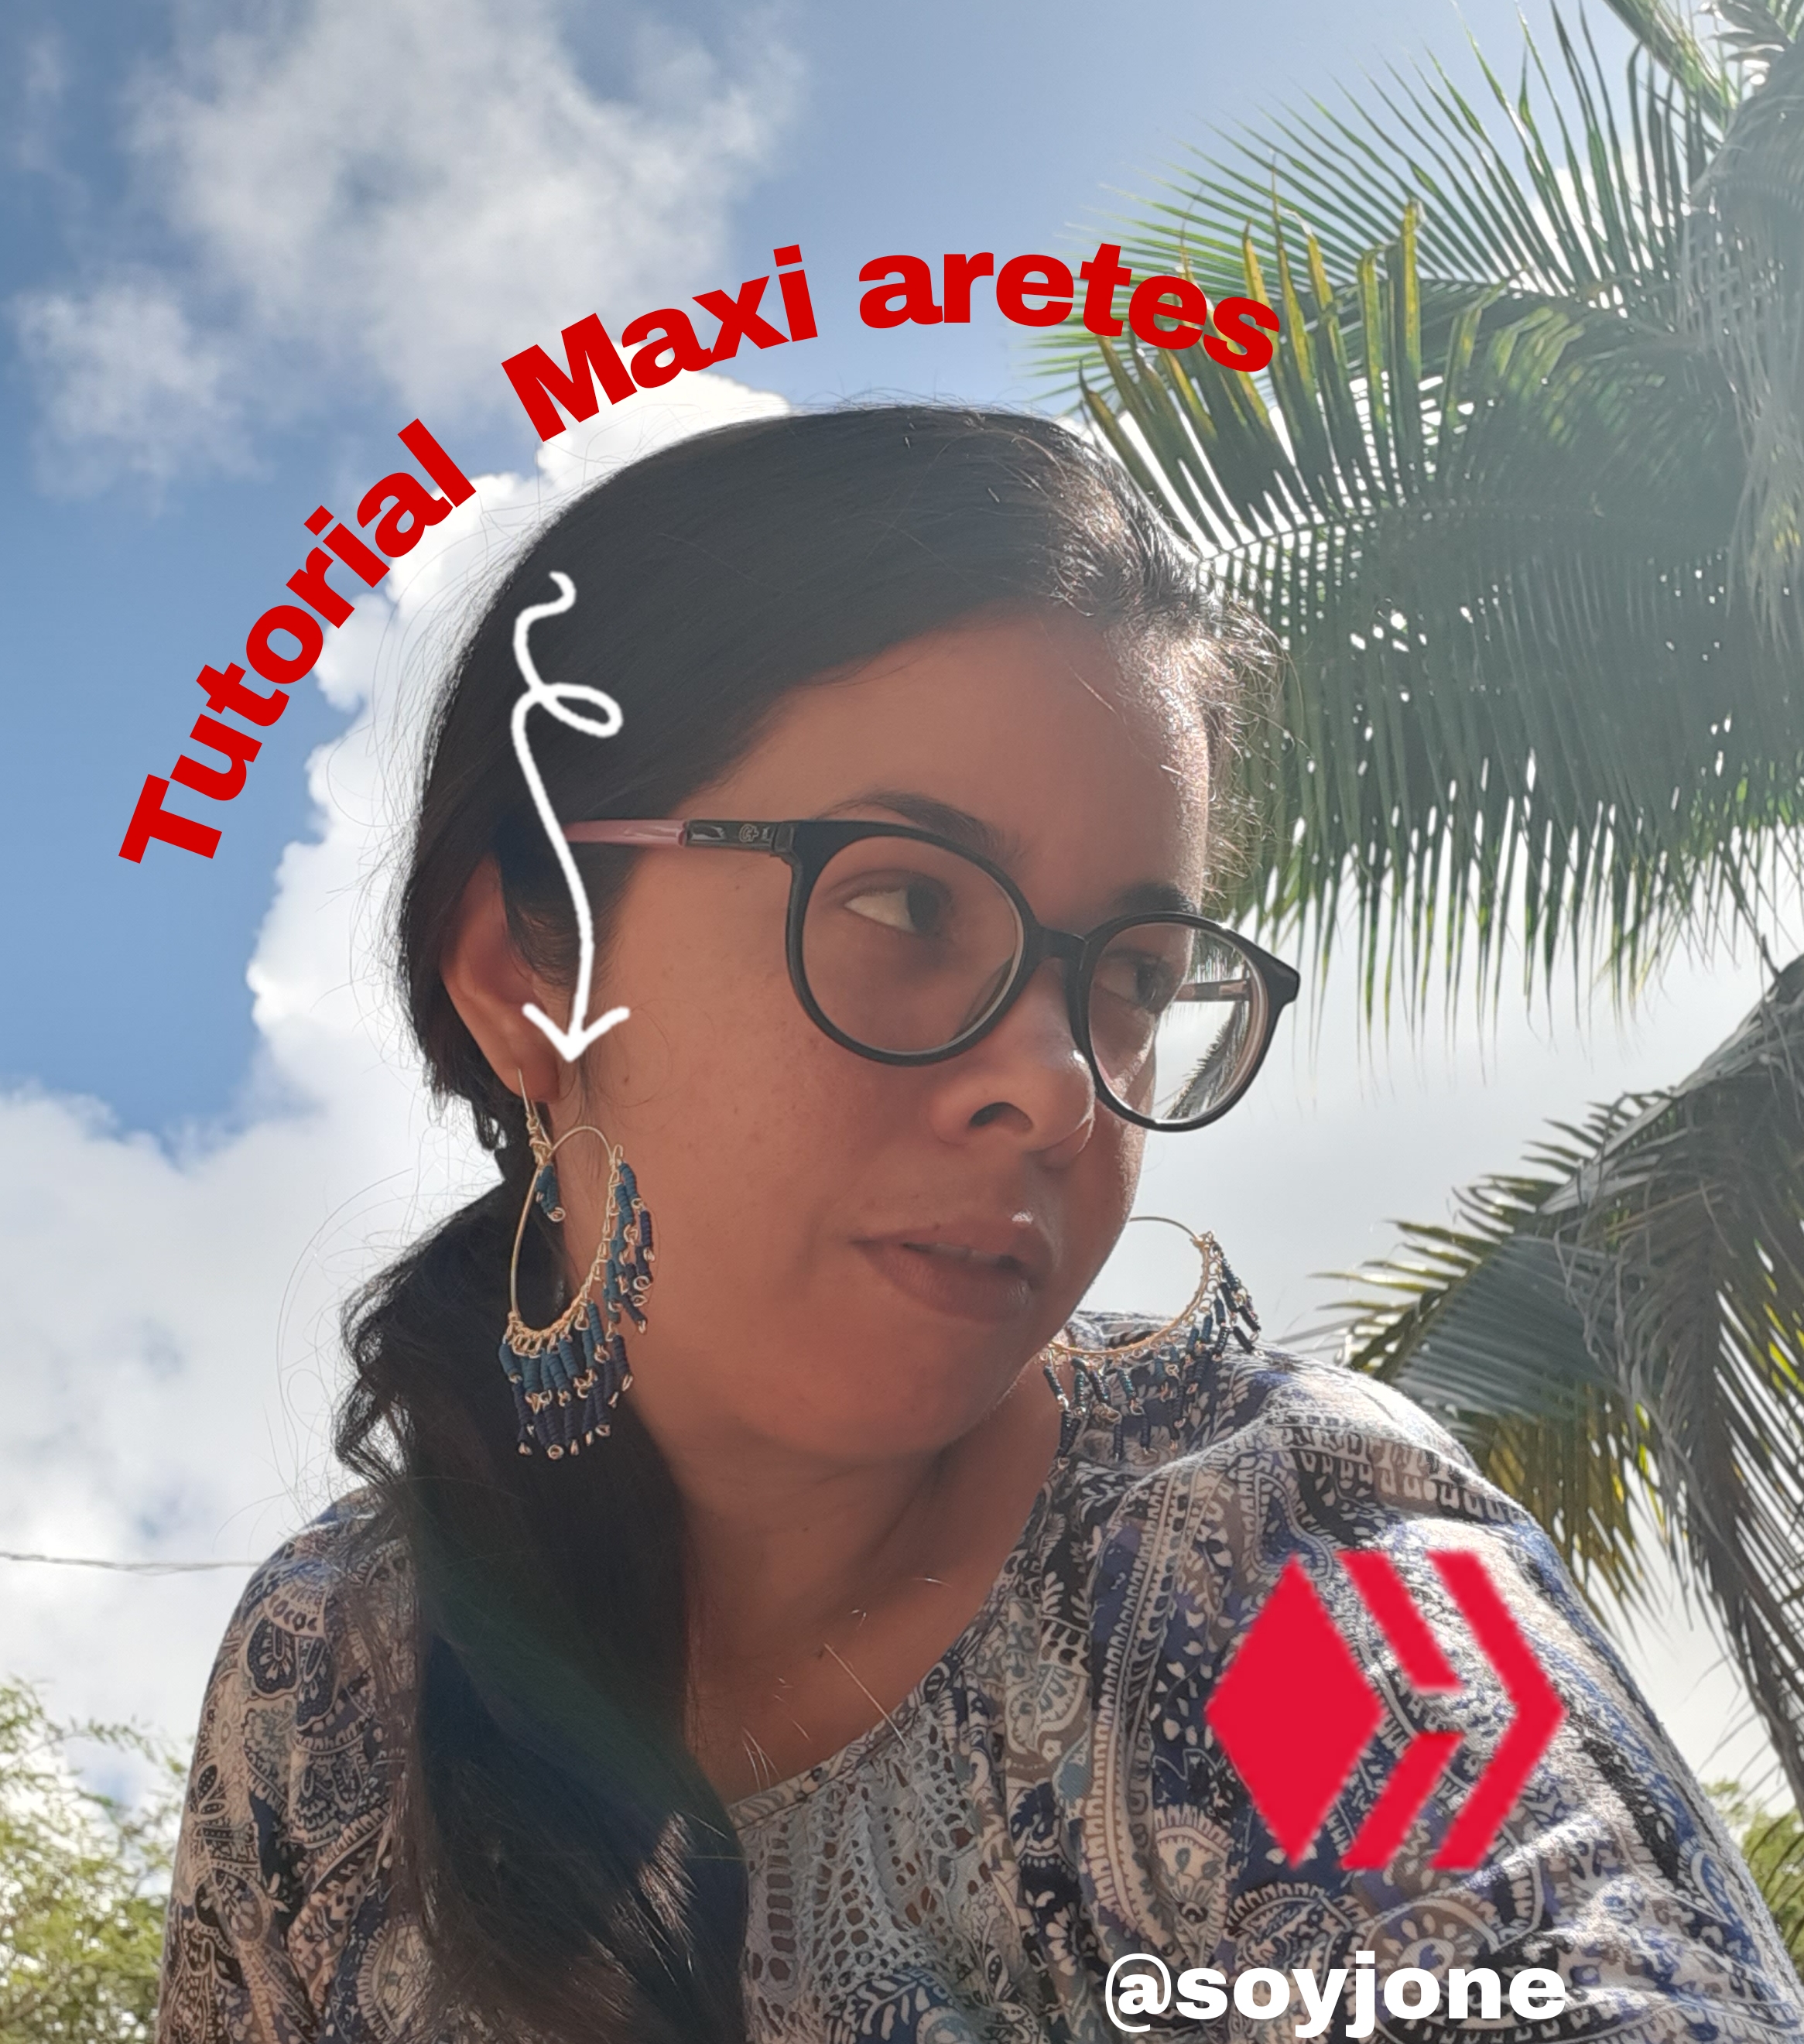
Greetings to all the friends of this community, today I want to share with you the procedure of some maxi earrings so that all those girls who like to make their accessories take note or be inspired.
🇪🇸
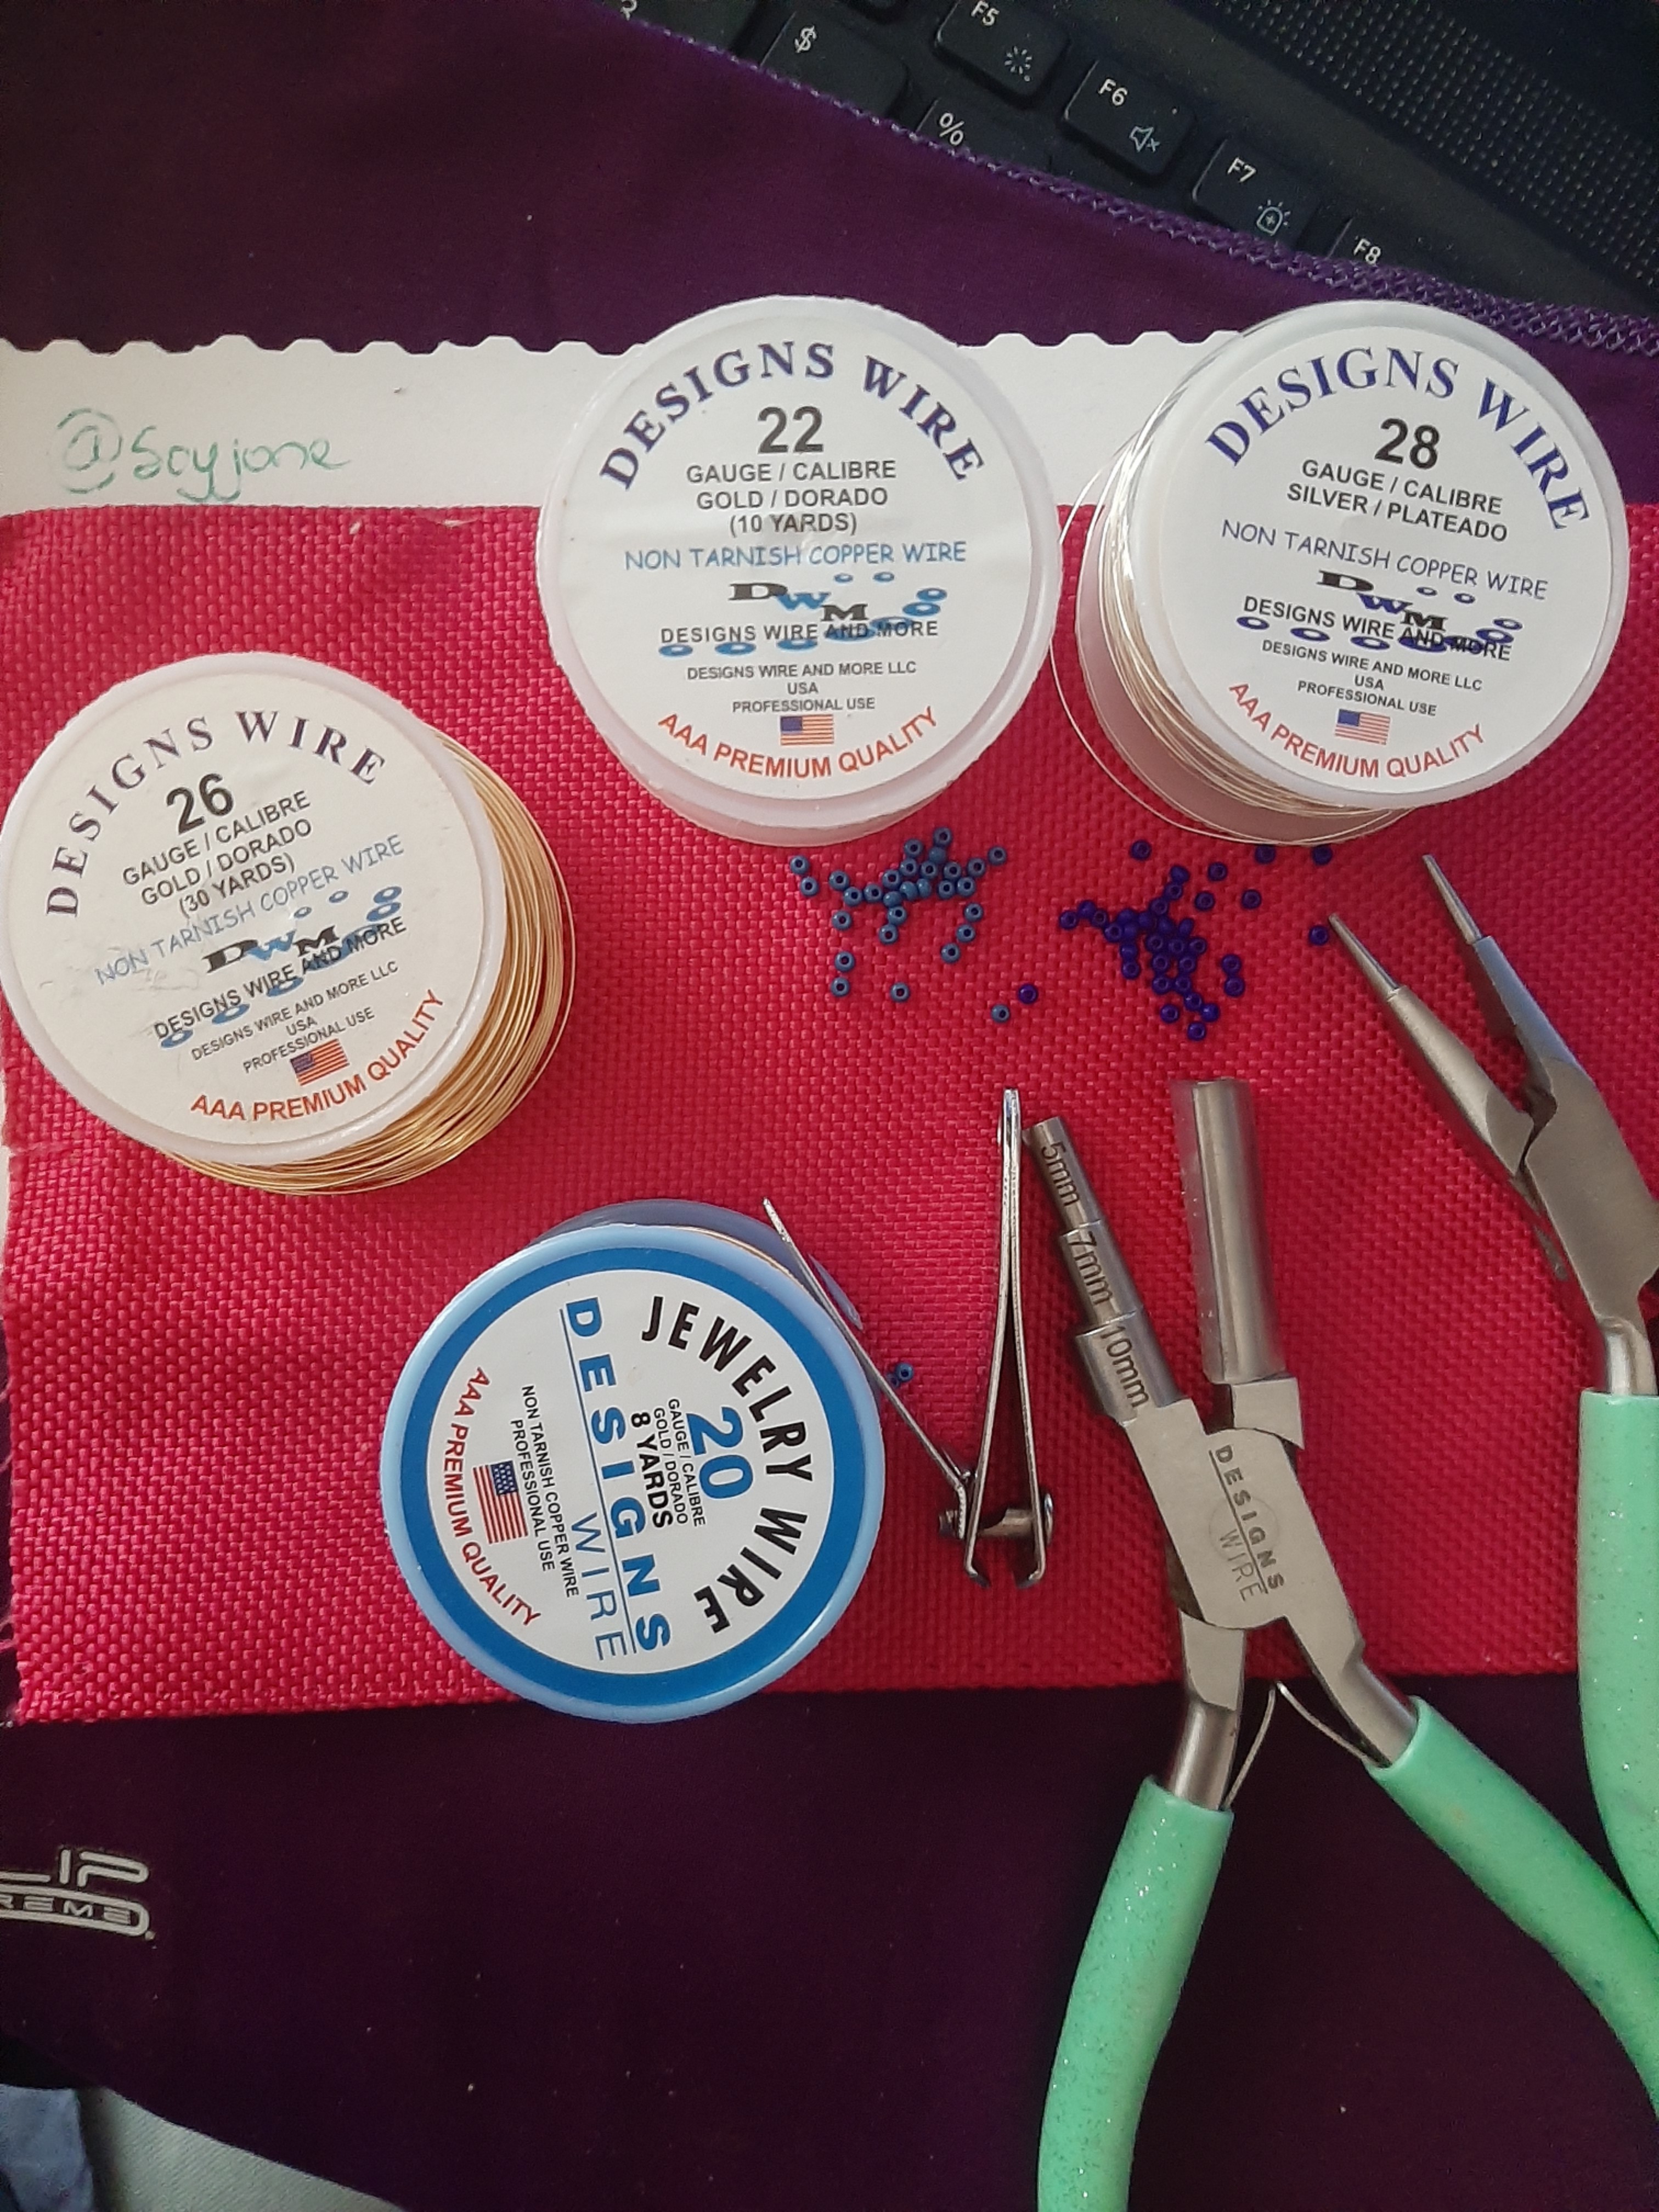
MATERIALES:
- Alambre para bisuteria nro 20
- Alambre para bisuteria nro 22
- Alambre para bisuteria nro 26
- Mostacilla del color de tu preferencia
- Mandril de madera
- Pinzas
- Cortauñas
🇬🇧
MATERIALS:
- Wire for jewelry No. 20
- Wire for jewelry No. 22
- Wire for jewelry No. 26
- Mostacilla of the color of your preference
wooden chuck - Tweezers
- Nail clipper
🇪🇸
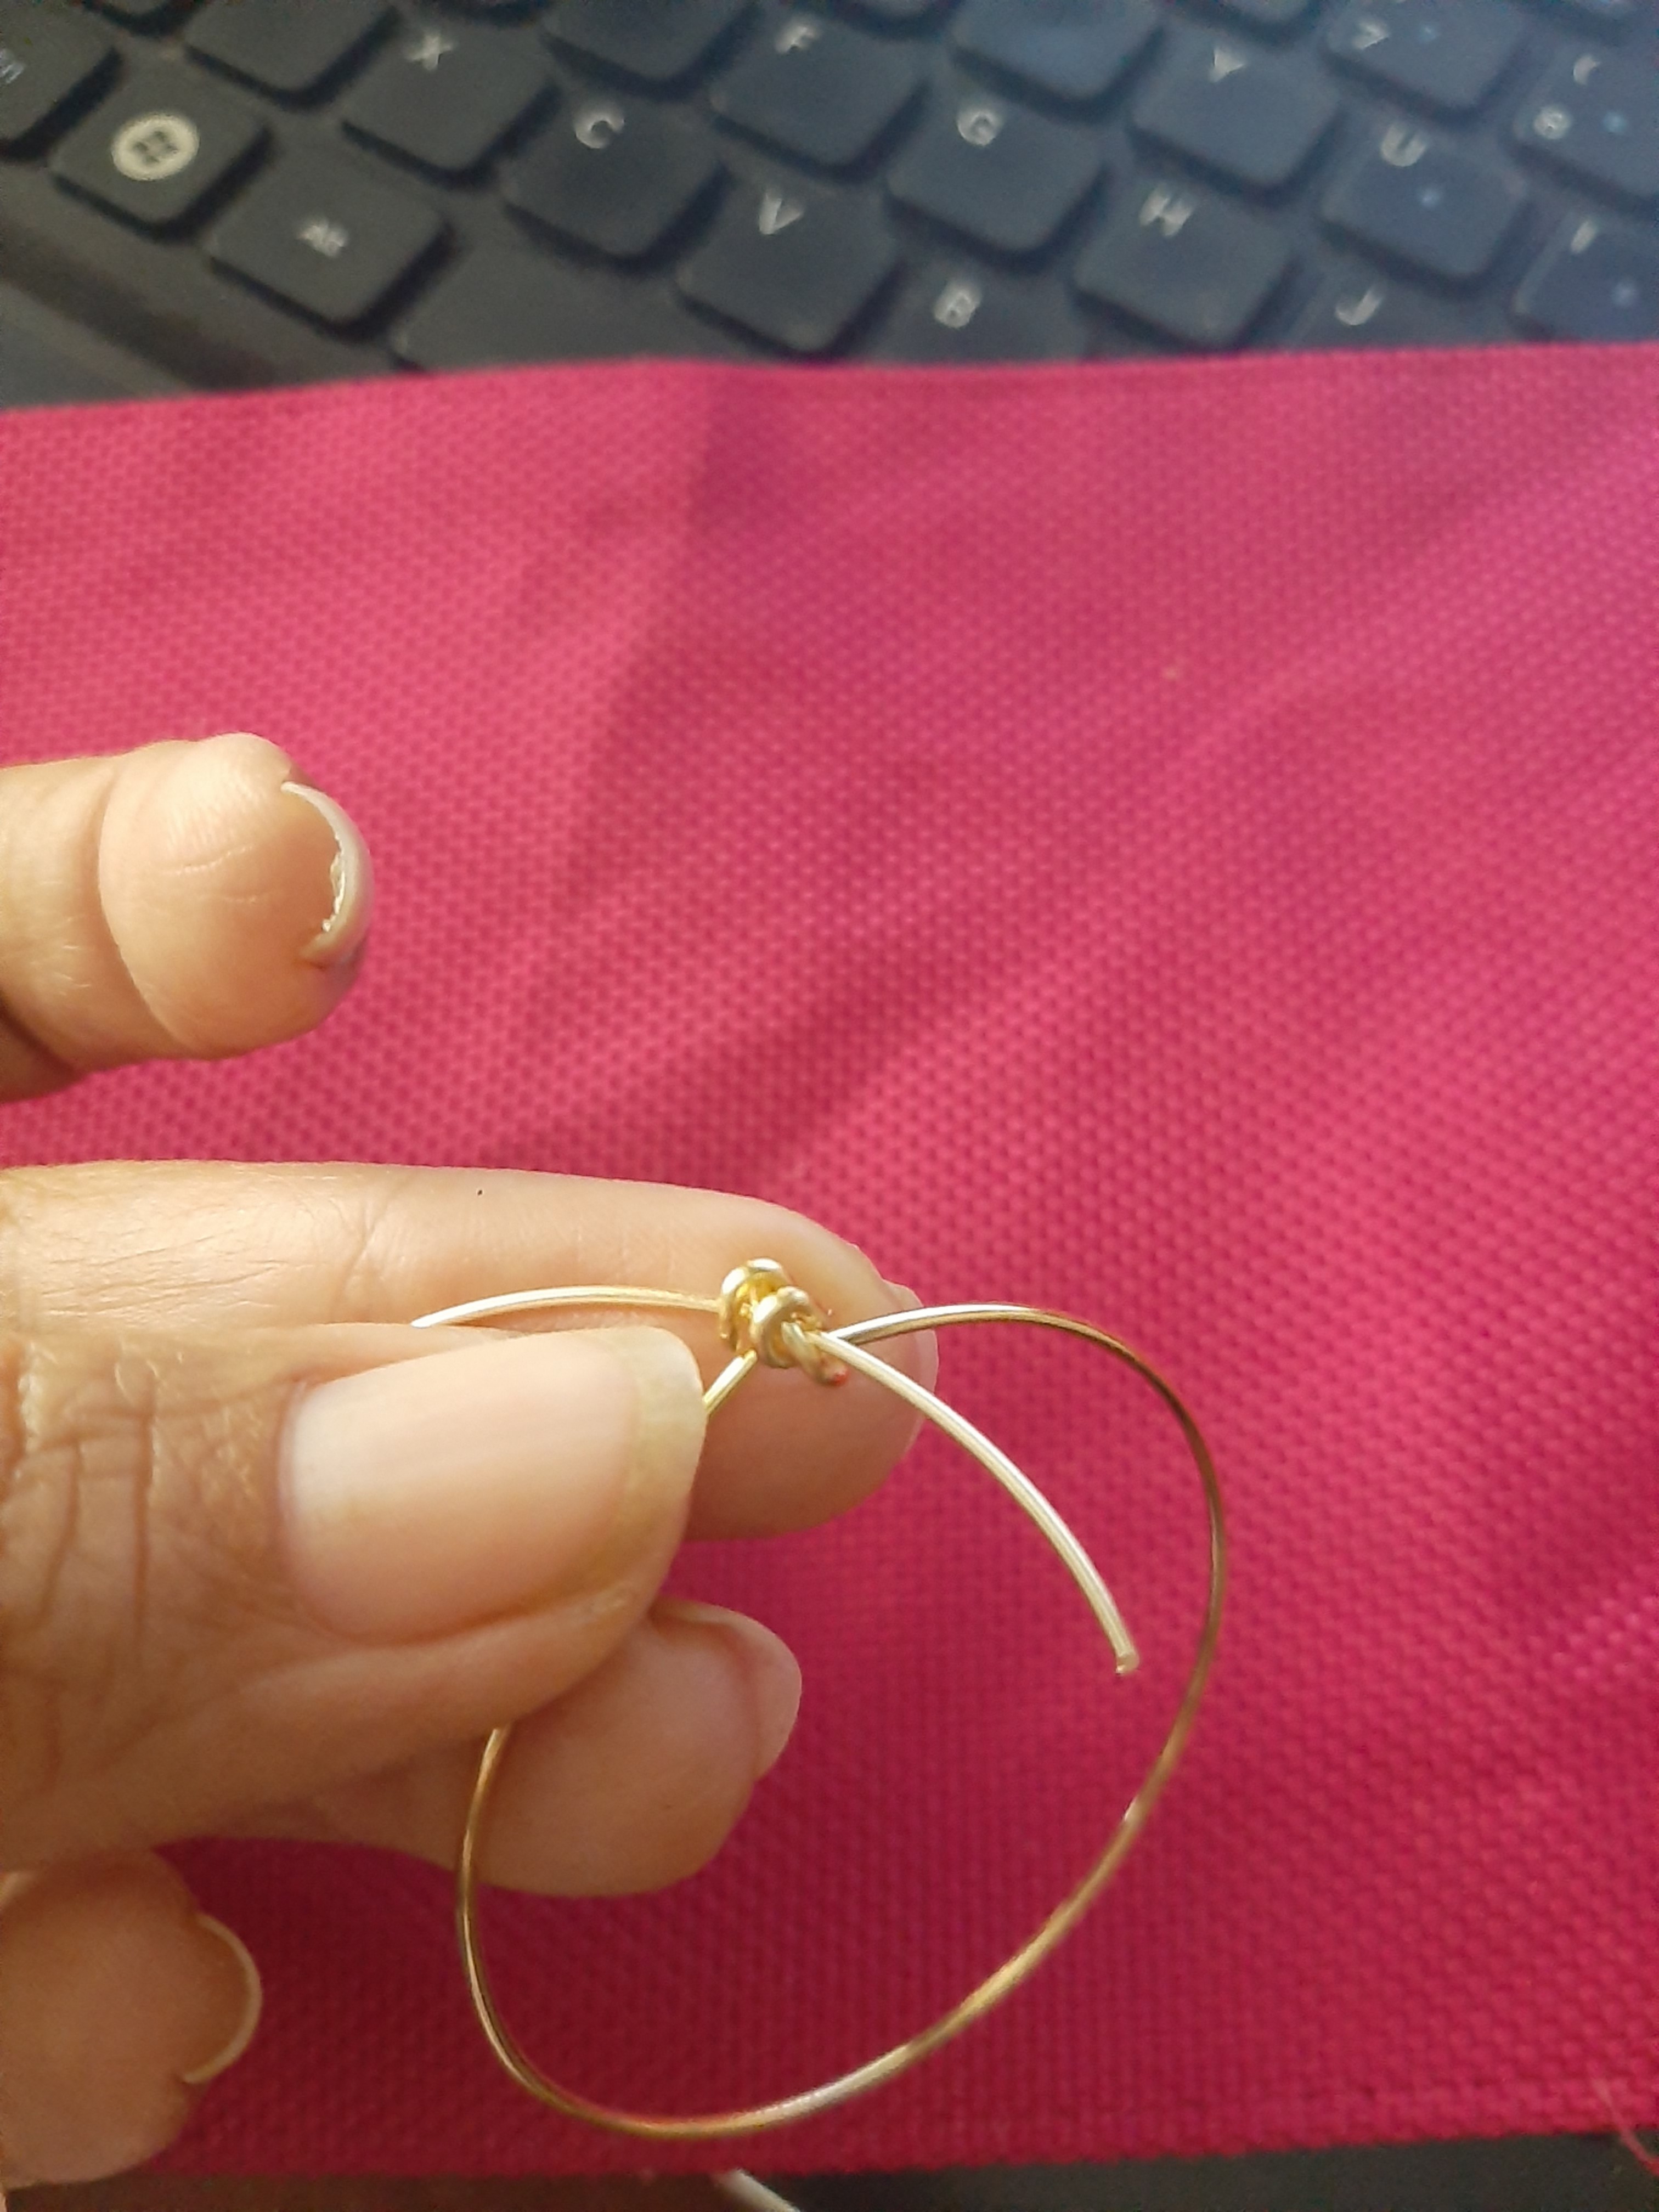
Paso 1
Pará la base de los zarcillos se trabajó con alambre nro 20 y con un mandril de madera procedes a elaborar la argolla, puedes trabajar con el diámetro que más te guste, realizamos un arito de cada lado de la argolla grande.
🇬🇧
Step 1
For the base of the tendrils, we worked with wire number 20 and with a wooden mandrel we proceed to make the ring, you can work with the diameter that you like the most, we make a ring on each side of the large ring.
🇪🇸
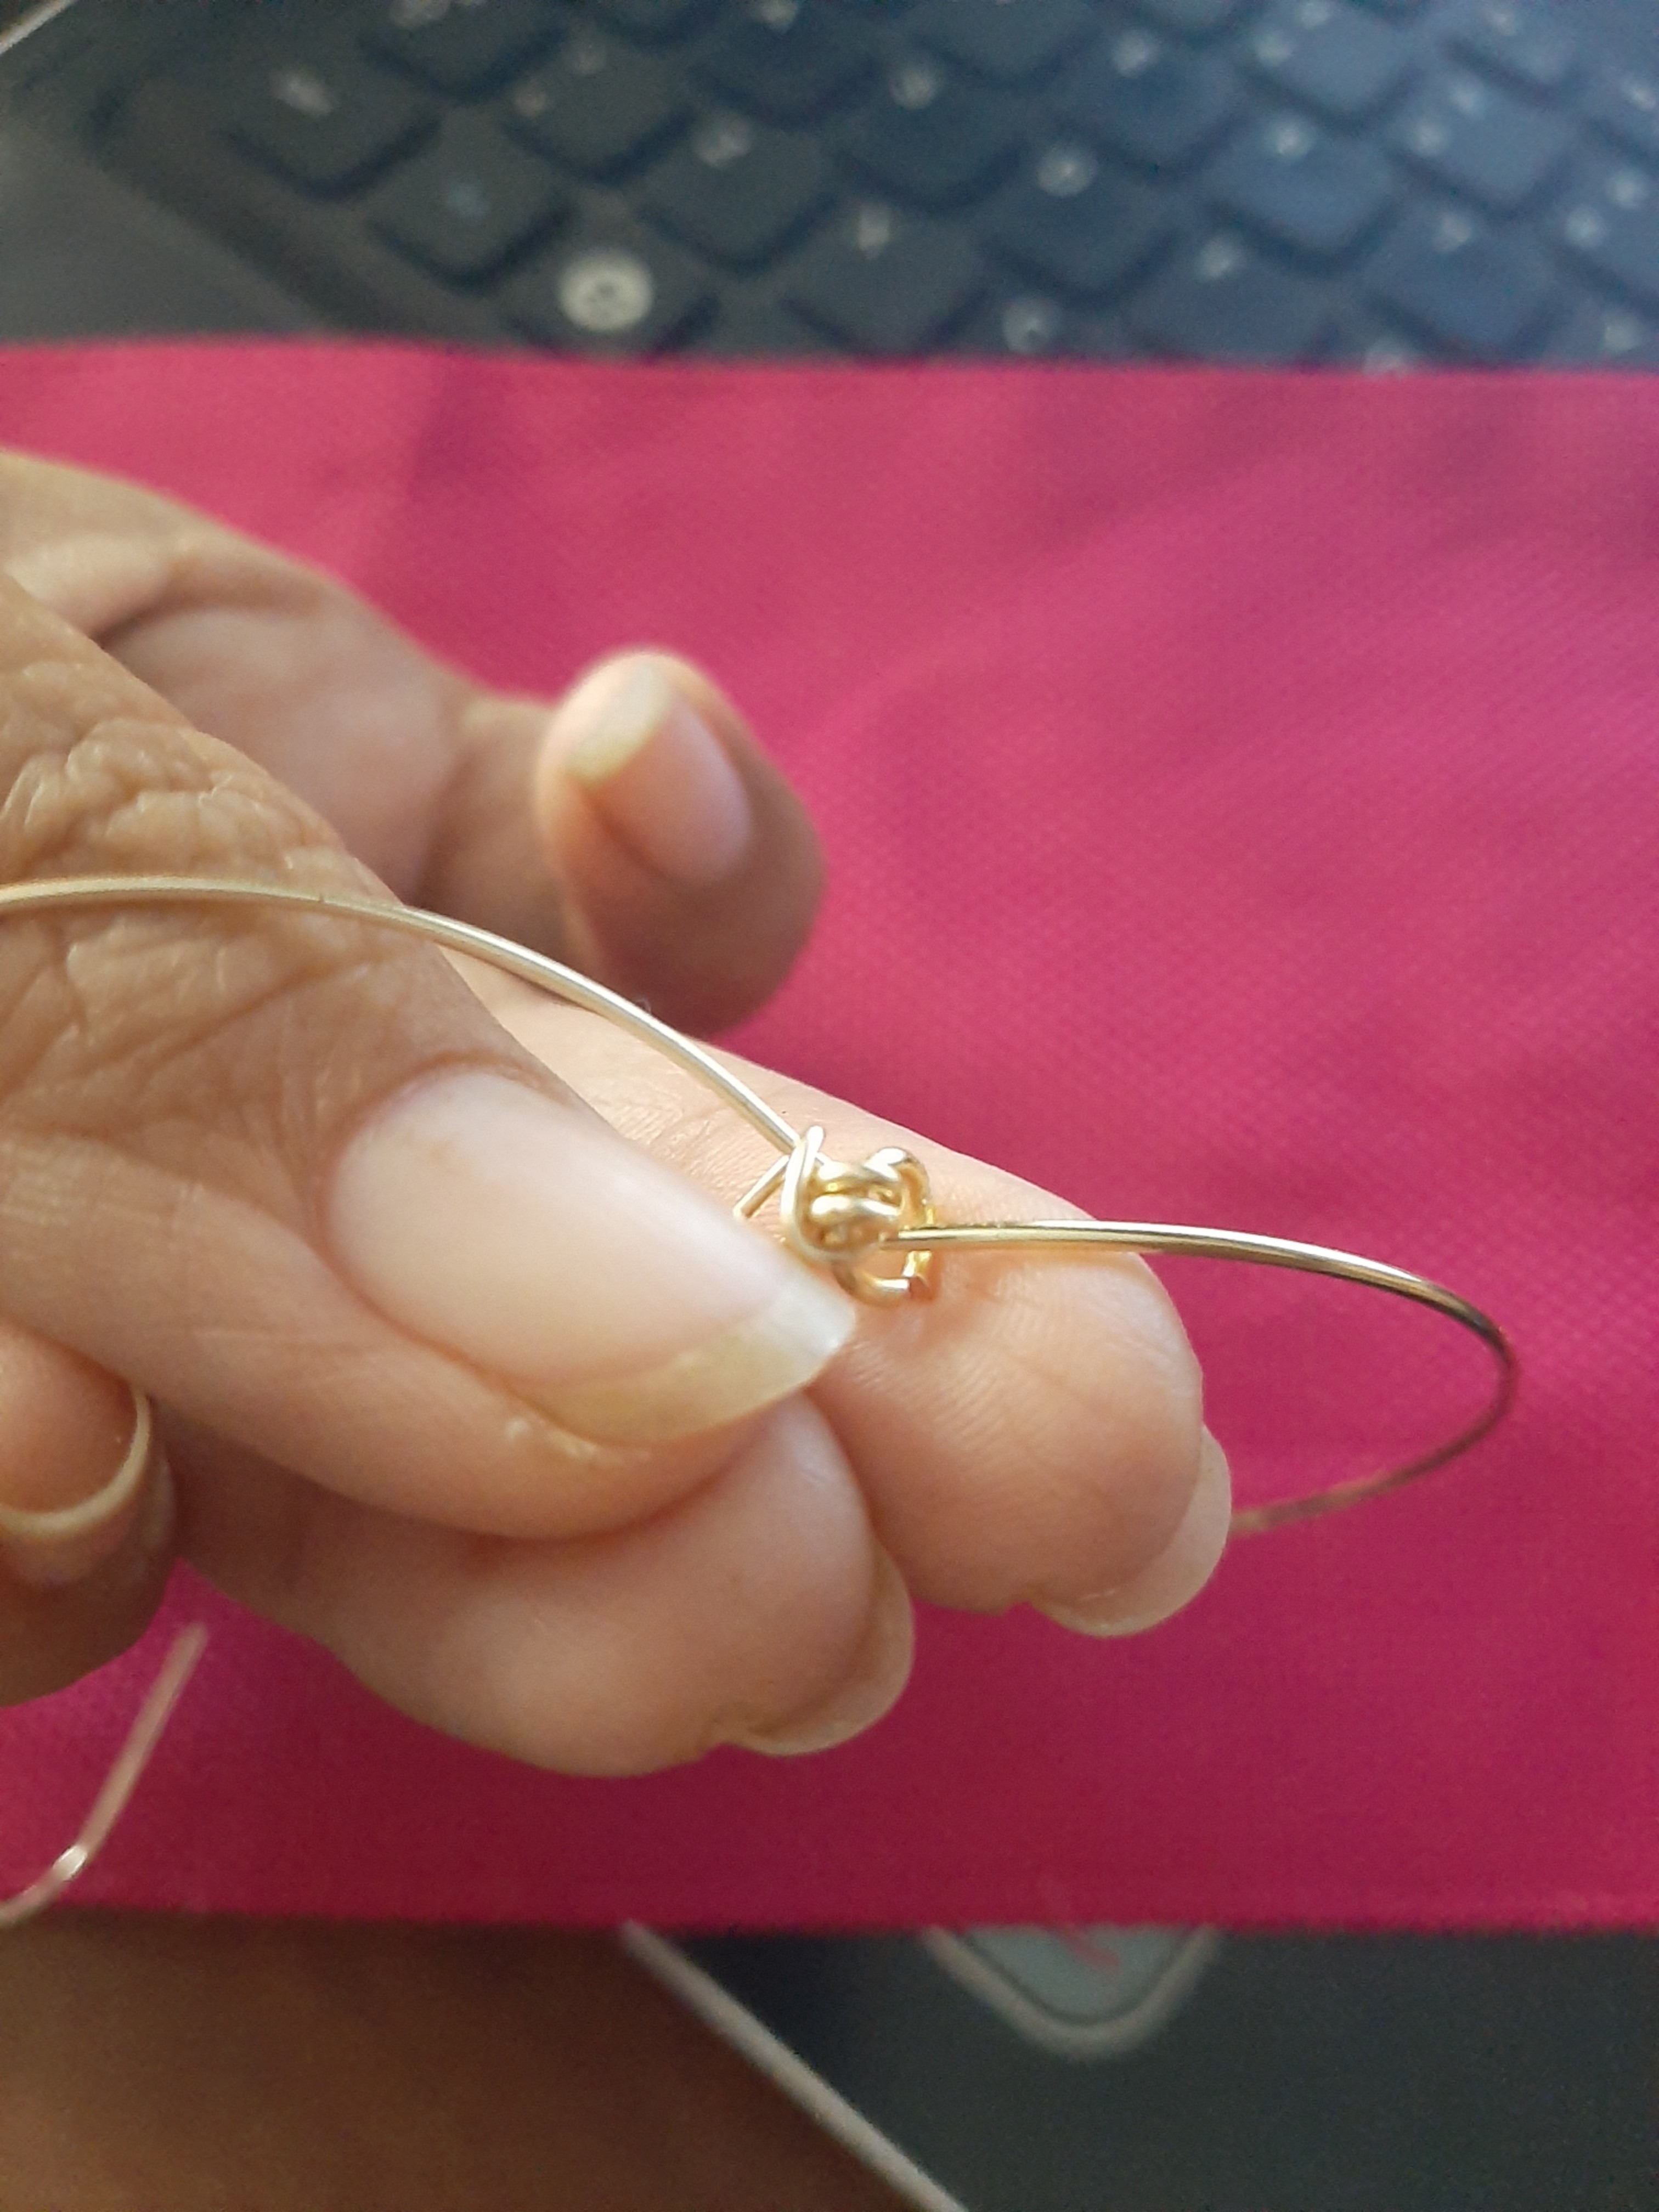
Paso 2
Seguidamente se elabora un pequeño aro para unir la argolla grande.
🇬🇧
Step 2
Next, a small ring is made to join the large ring.
🇪🇸
Paso 3
Posteriormente, se elabora un conector. para unir la argolla grande del anzuelo, este se elabora con alambre nro 20.
🇬🇧
Step 3
Subsequently, a connector is made to join the large ring of the hook, this is made with wire No. 20.
🇪🇸
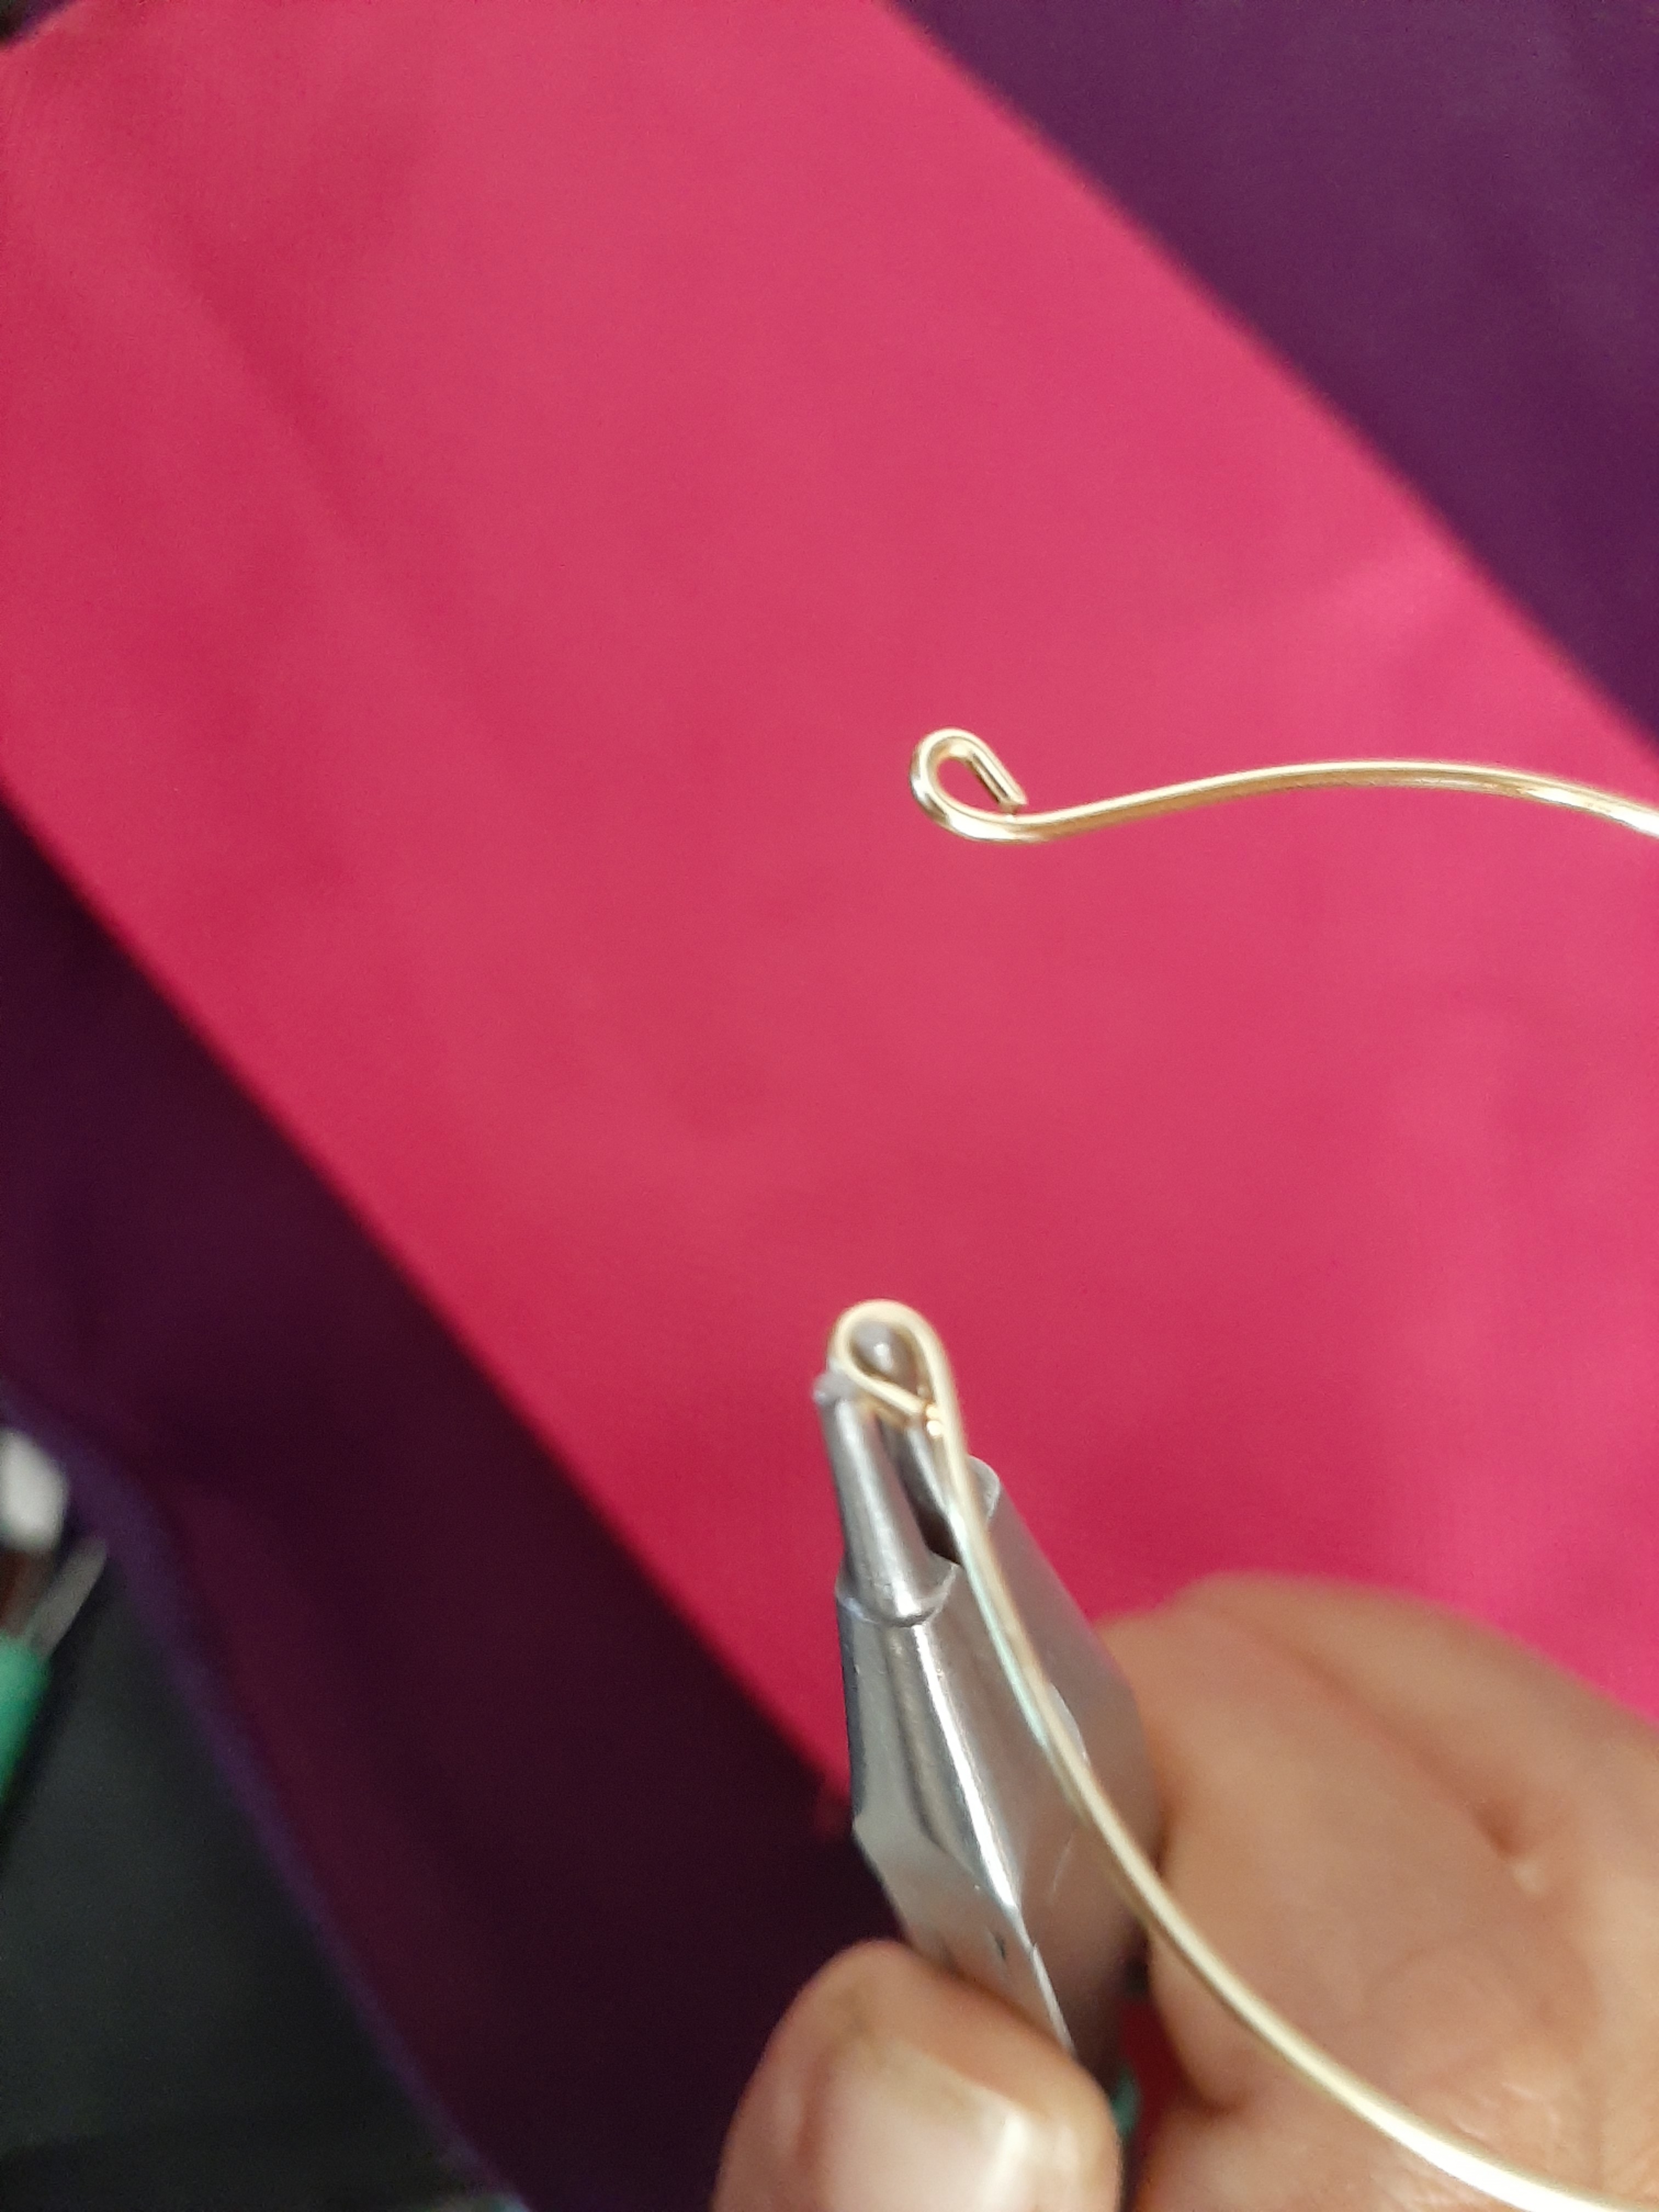
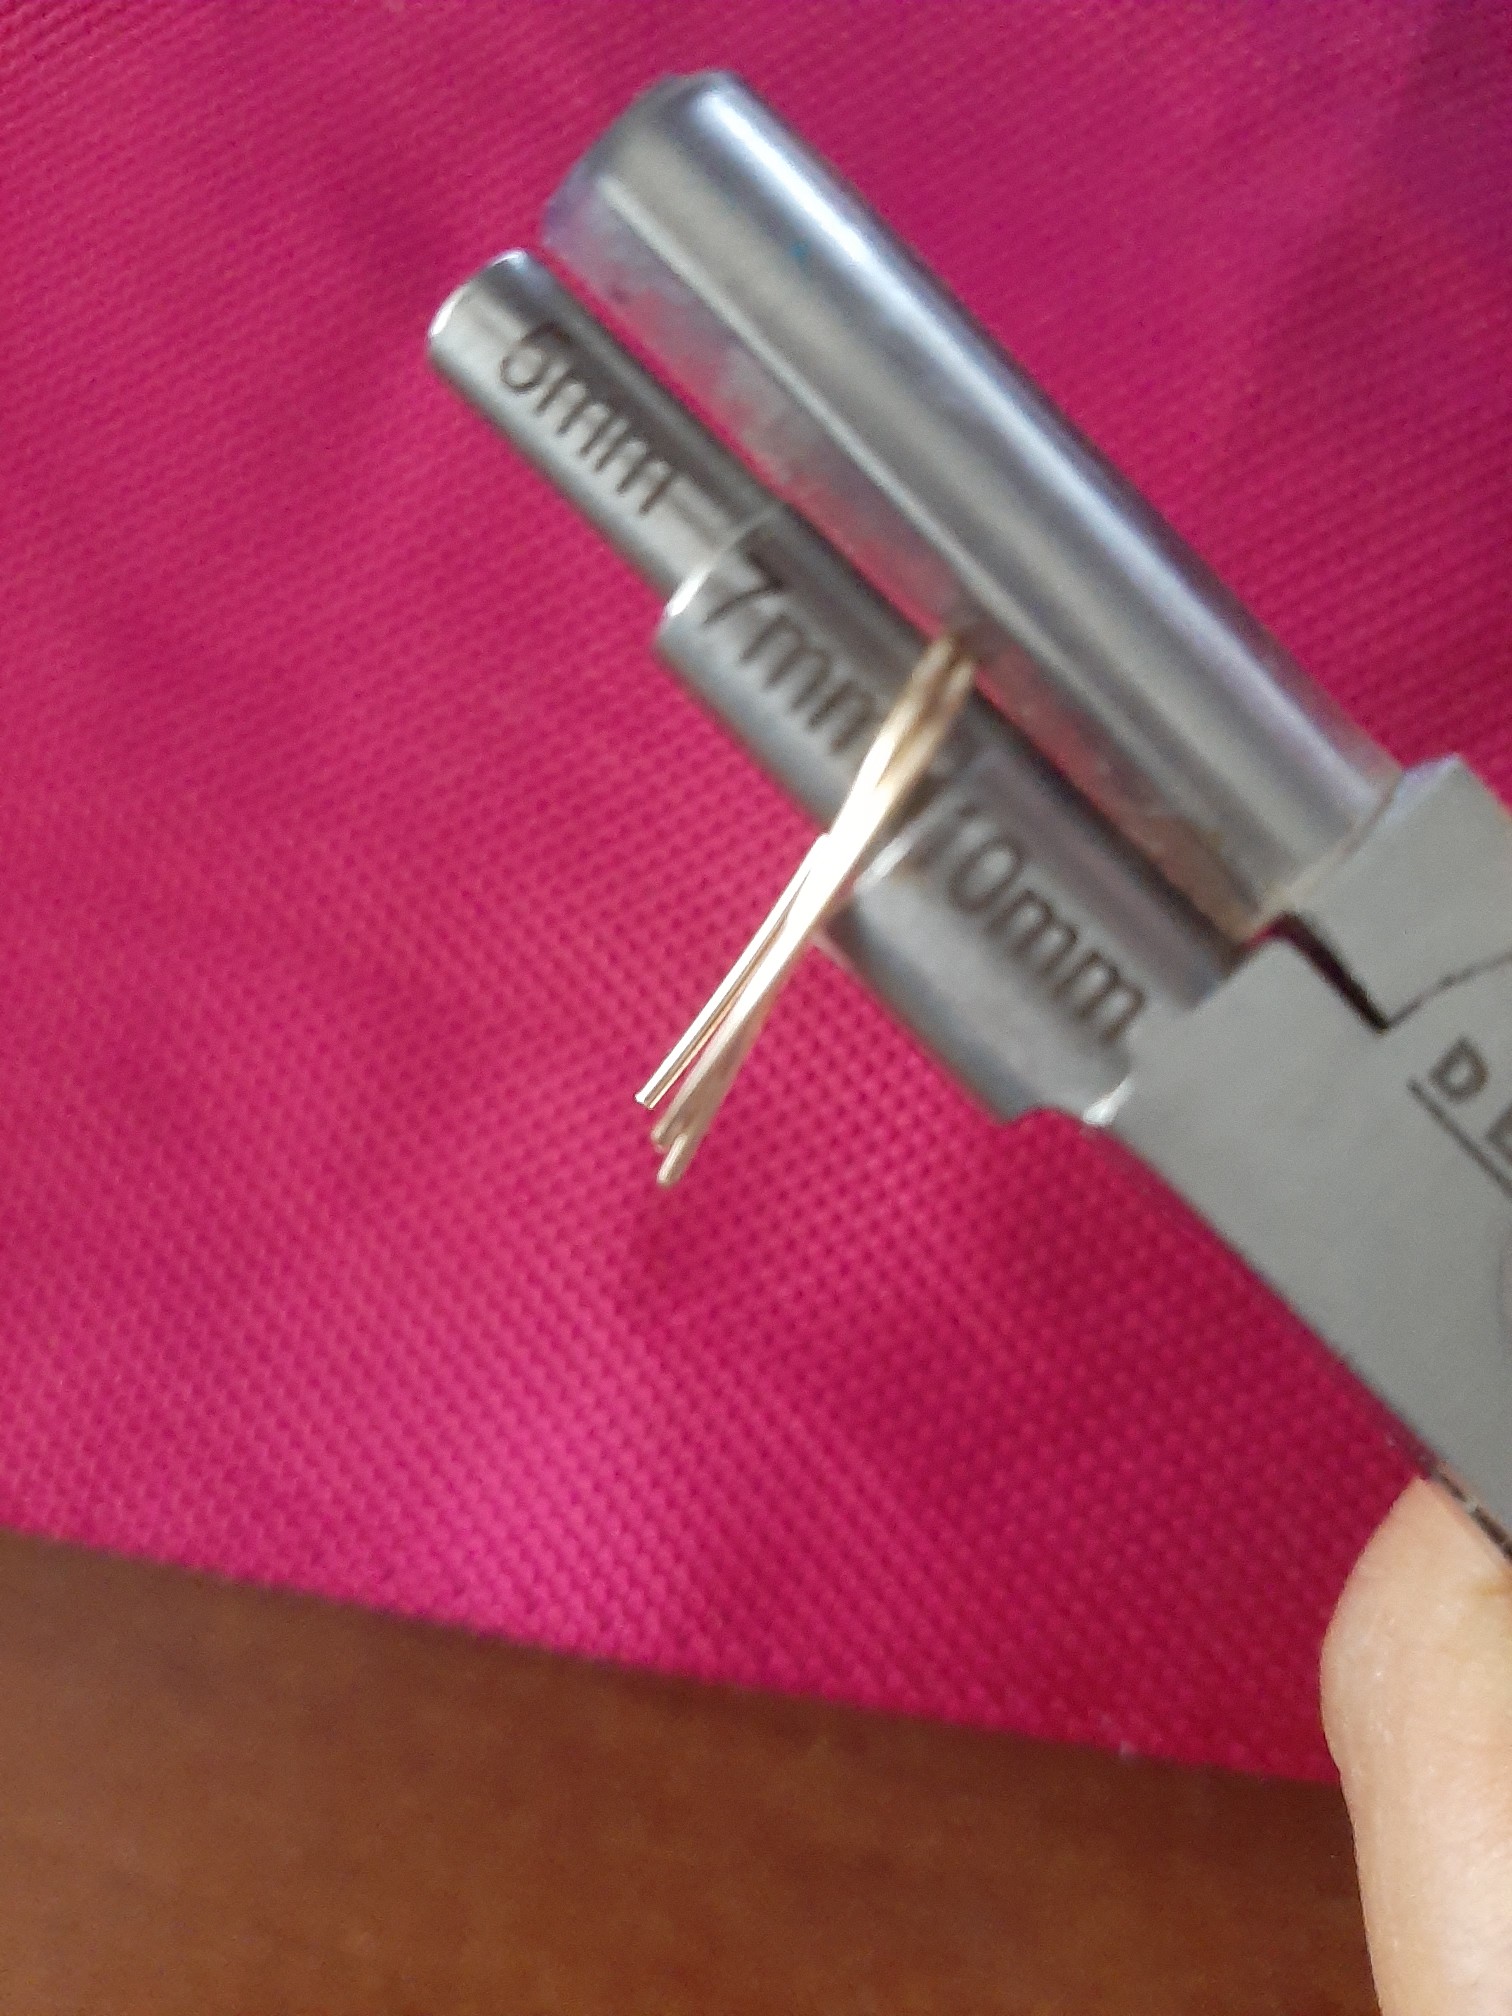
Paso 4
Para finalizar se elabora el anzuelo con alambre nro 20, y la Pinza mandril con la medida de 7 mm.
🇬🇧
Step 4
To finish, the hook is made with wire No. 20, and the Mandrel Clamp with the measure of 7 mm
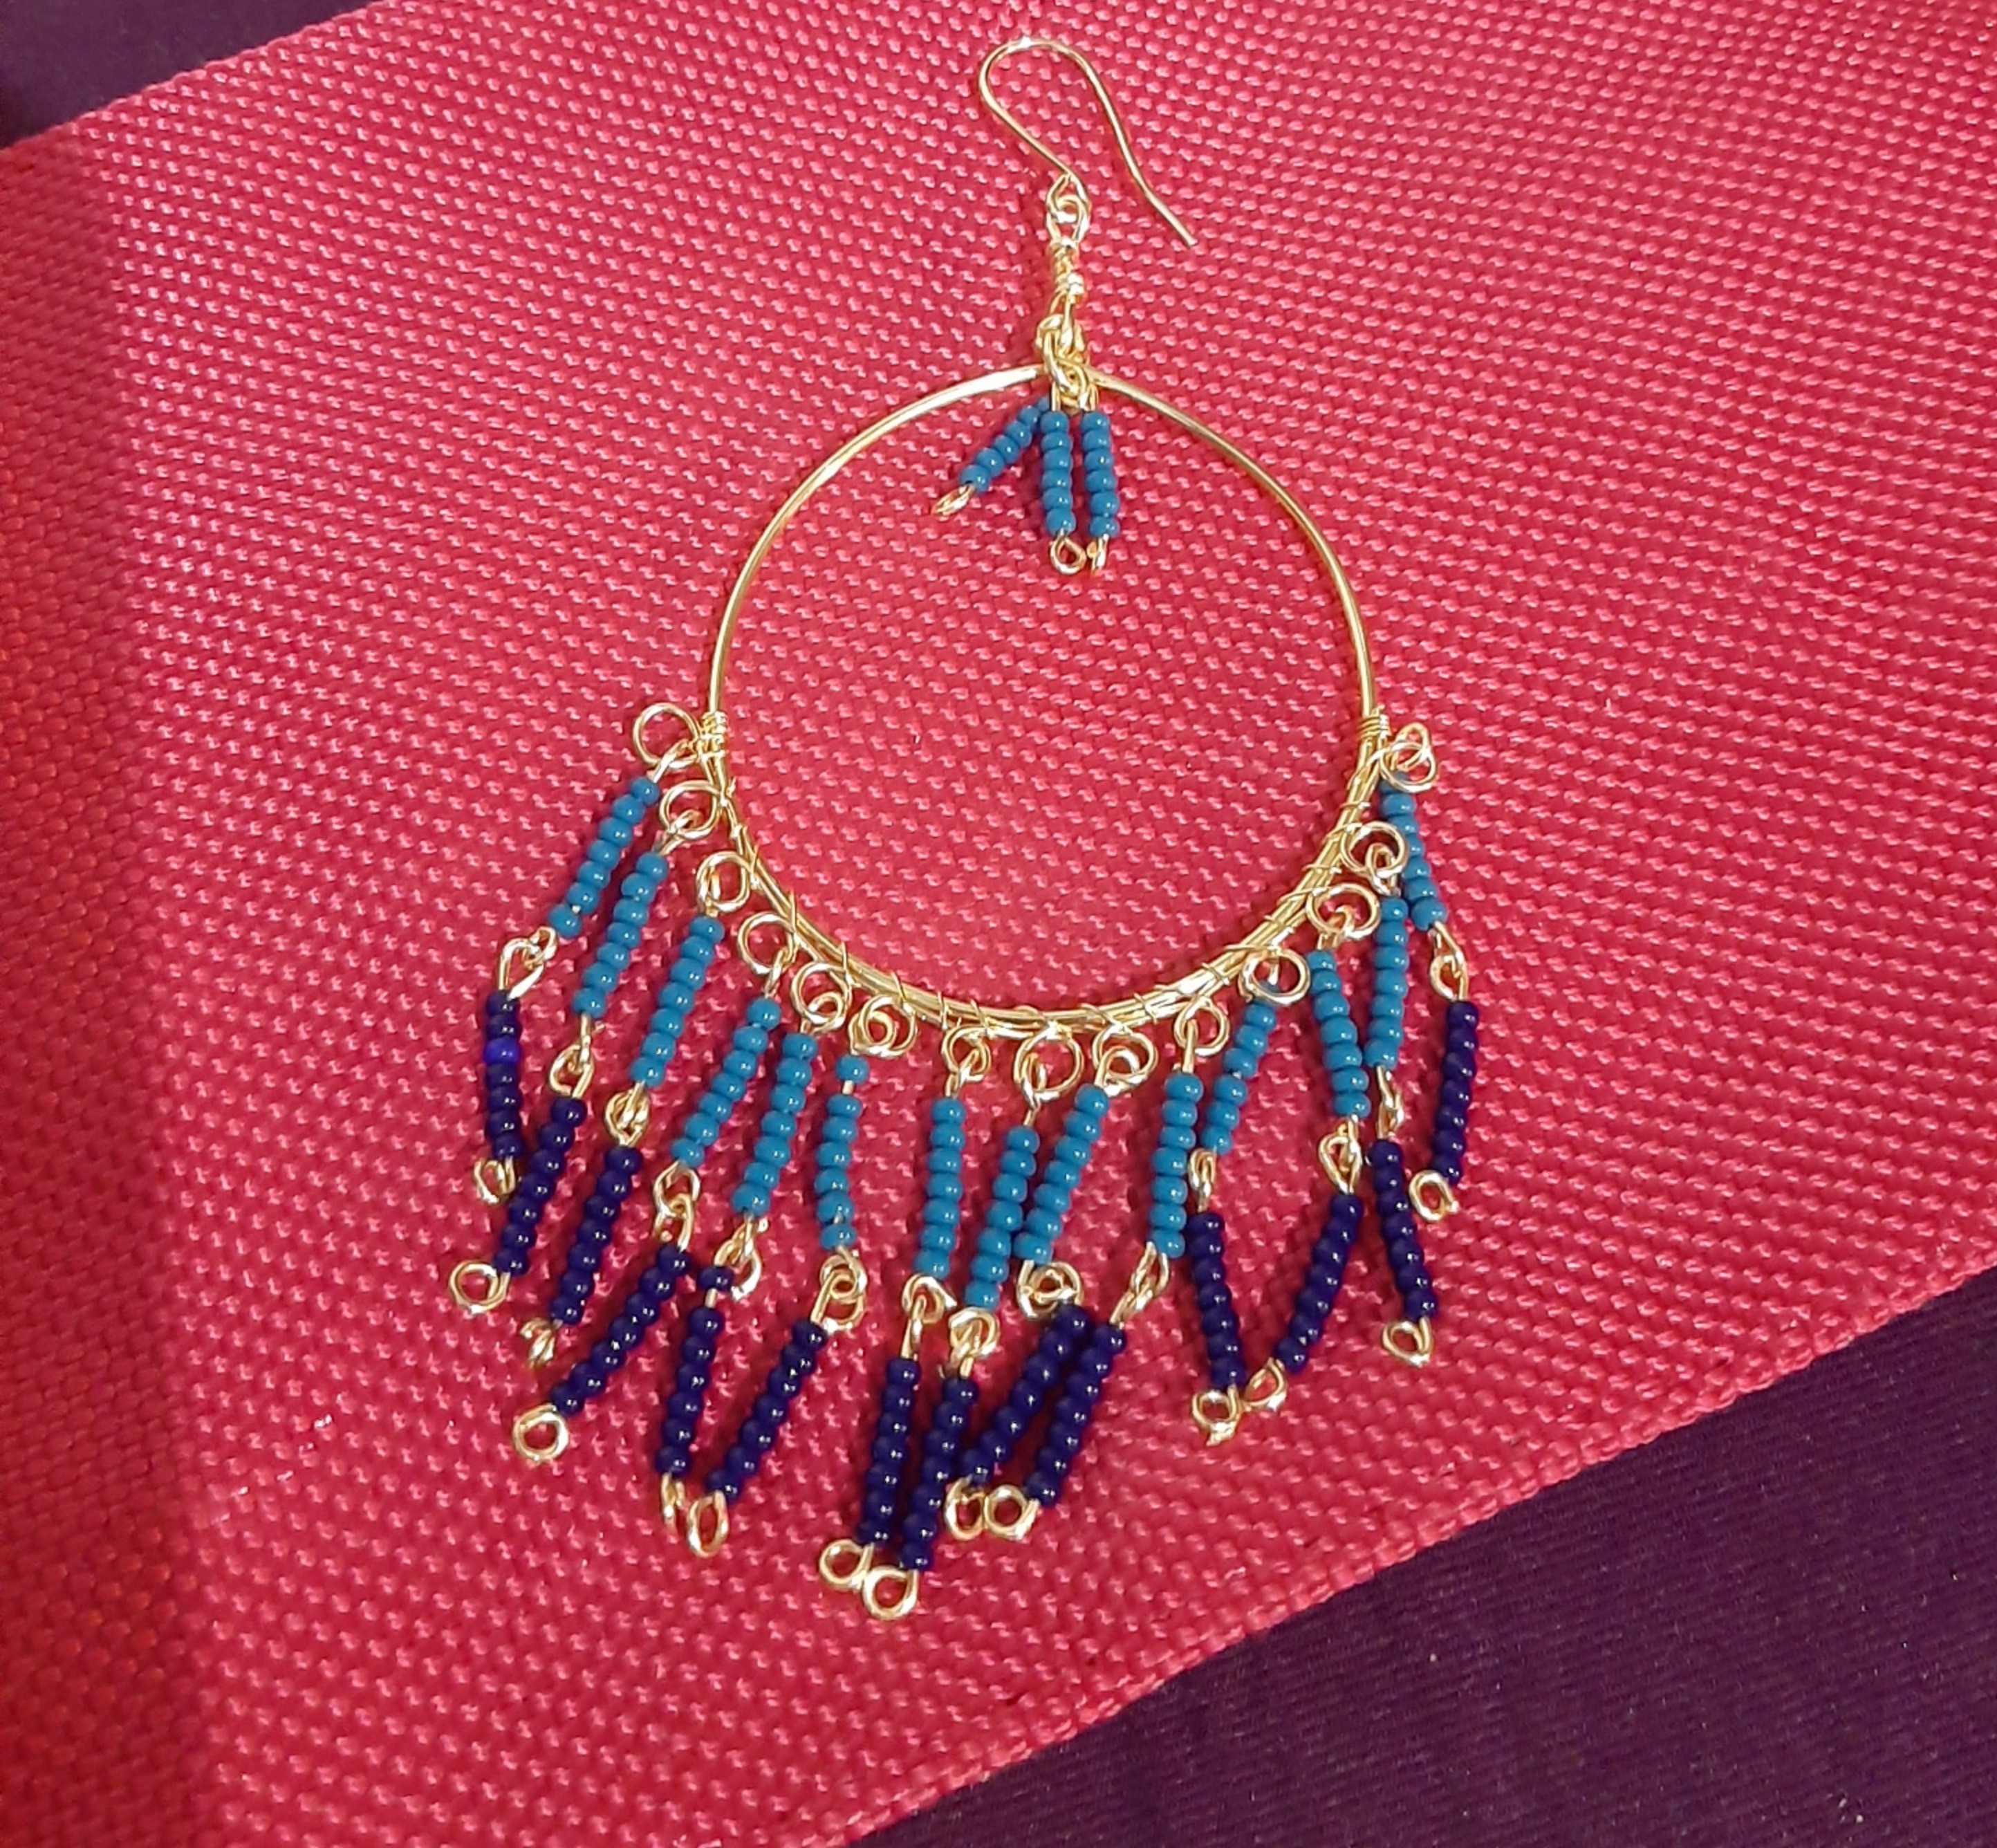
🇪🇸Decoración
🇬🇧Decor
🇪🇸
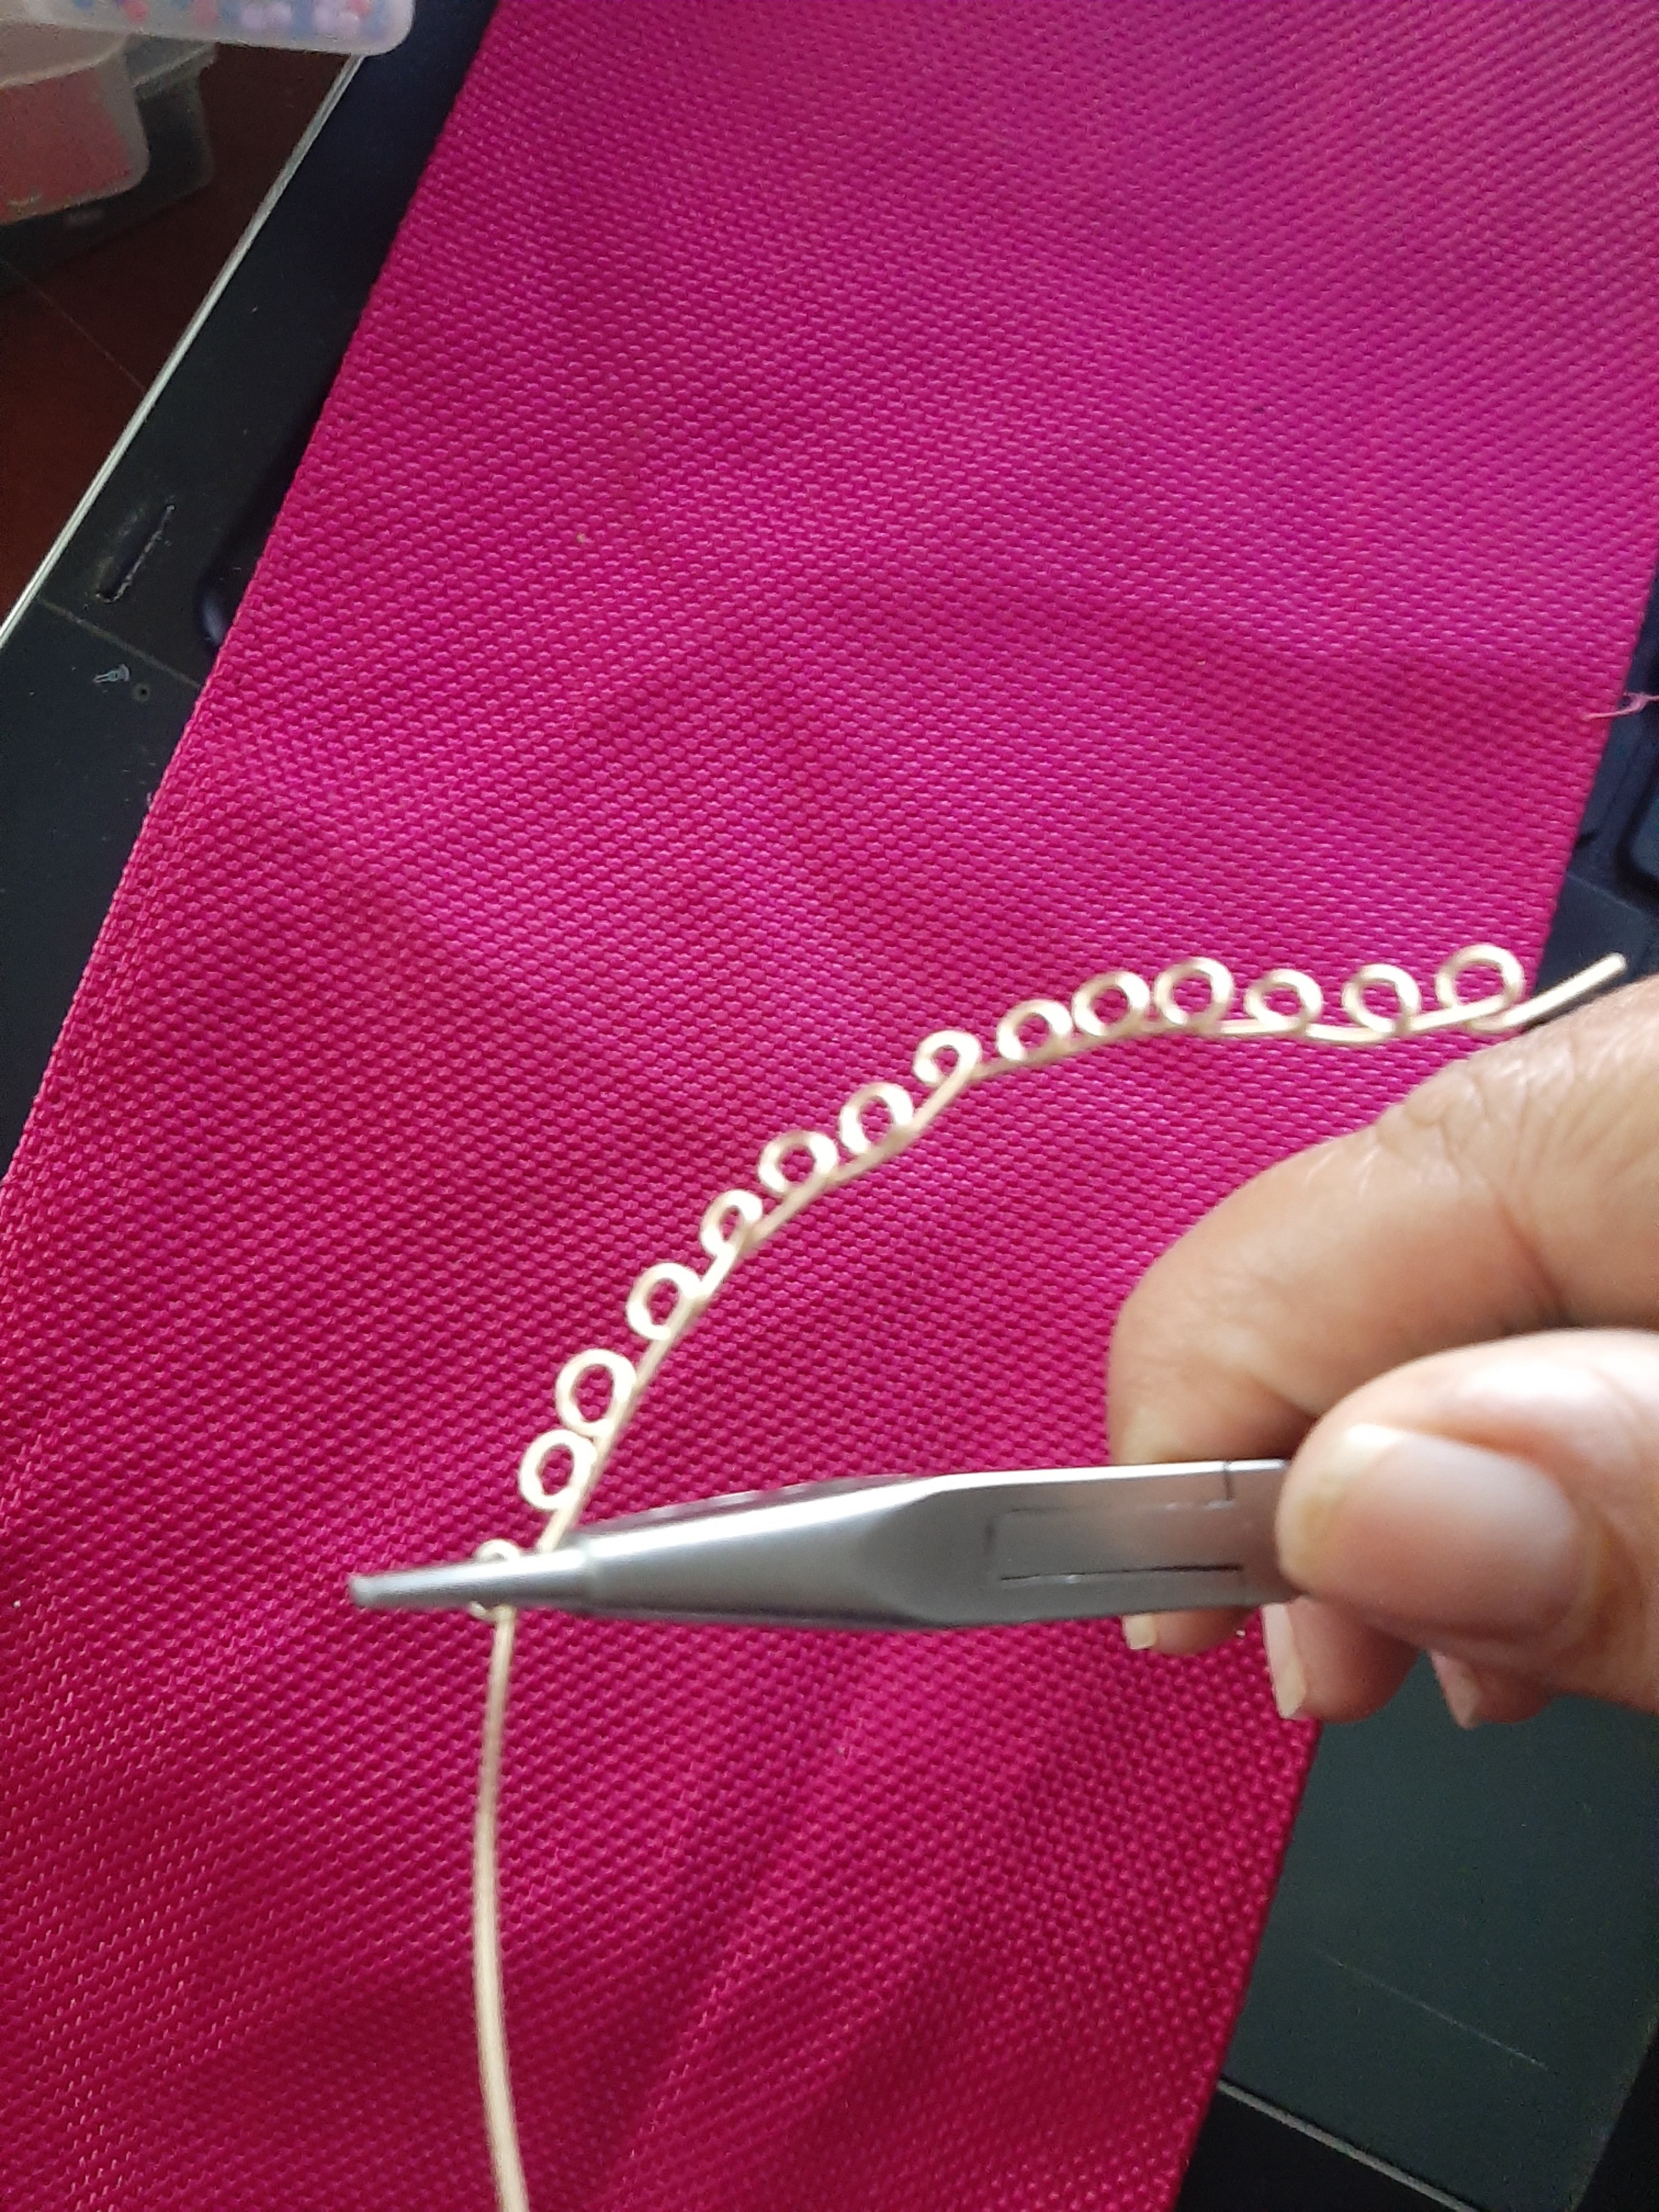
Paso 1
se elaboraron una fila de 14 bucles
🇬🇧
Step 1
a row of 14 loops was made
🇪🇸
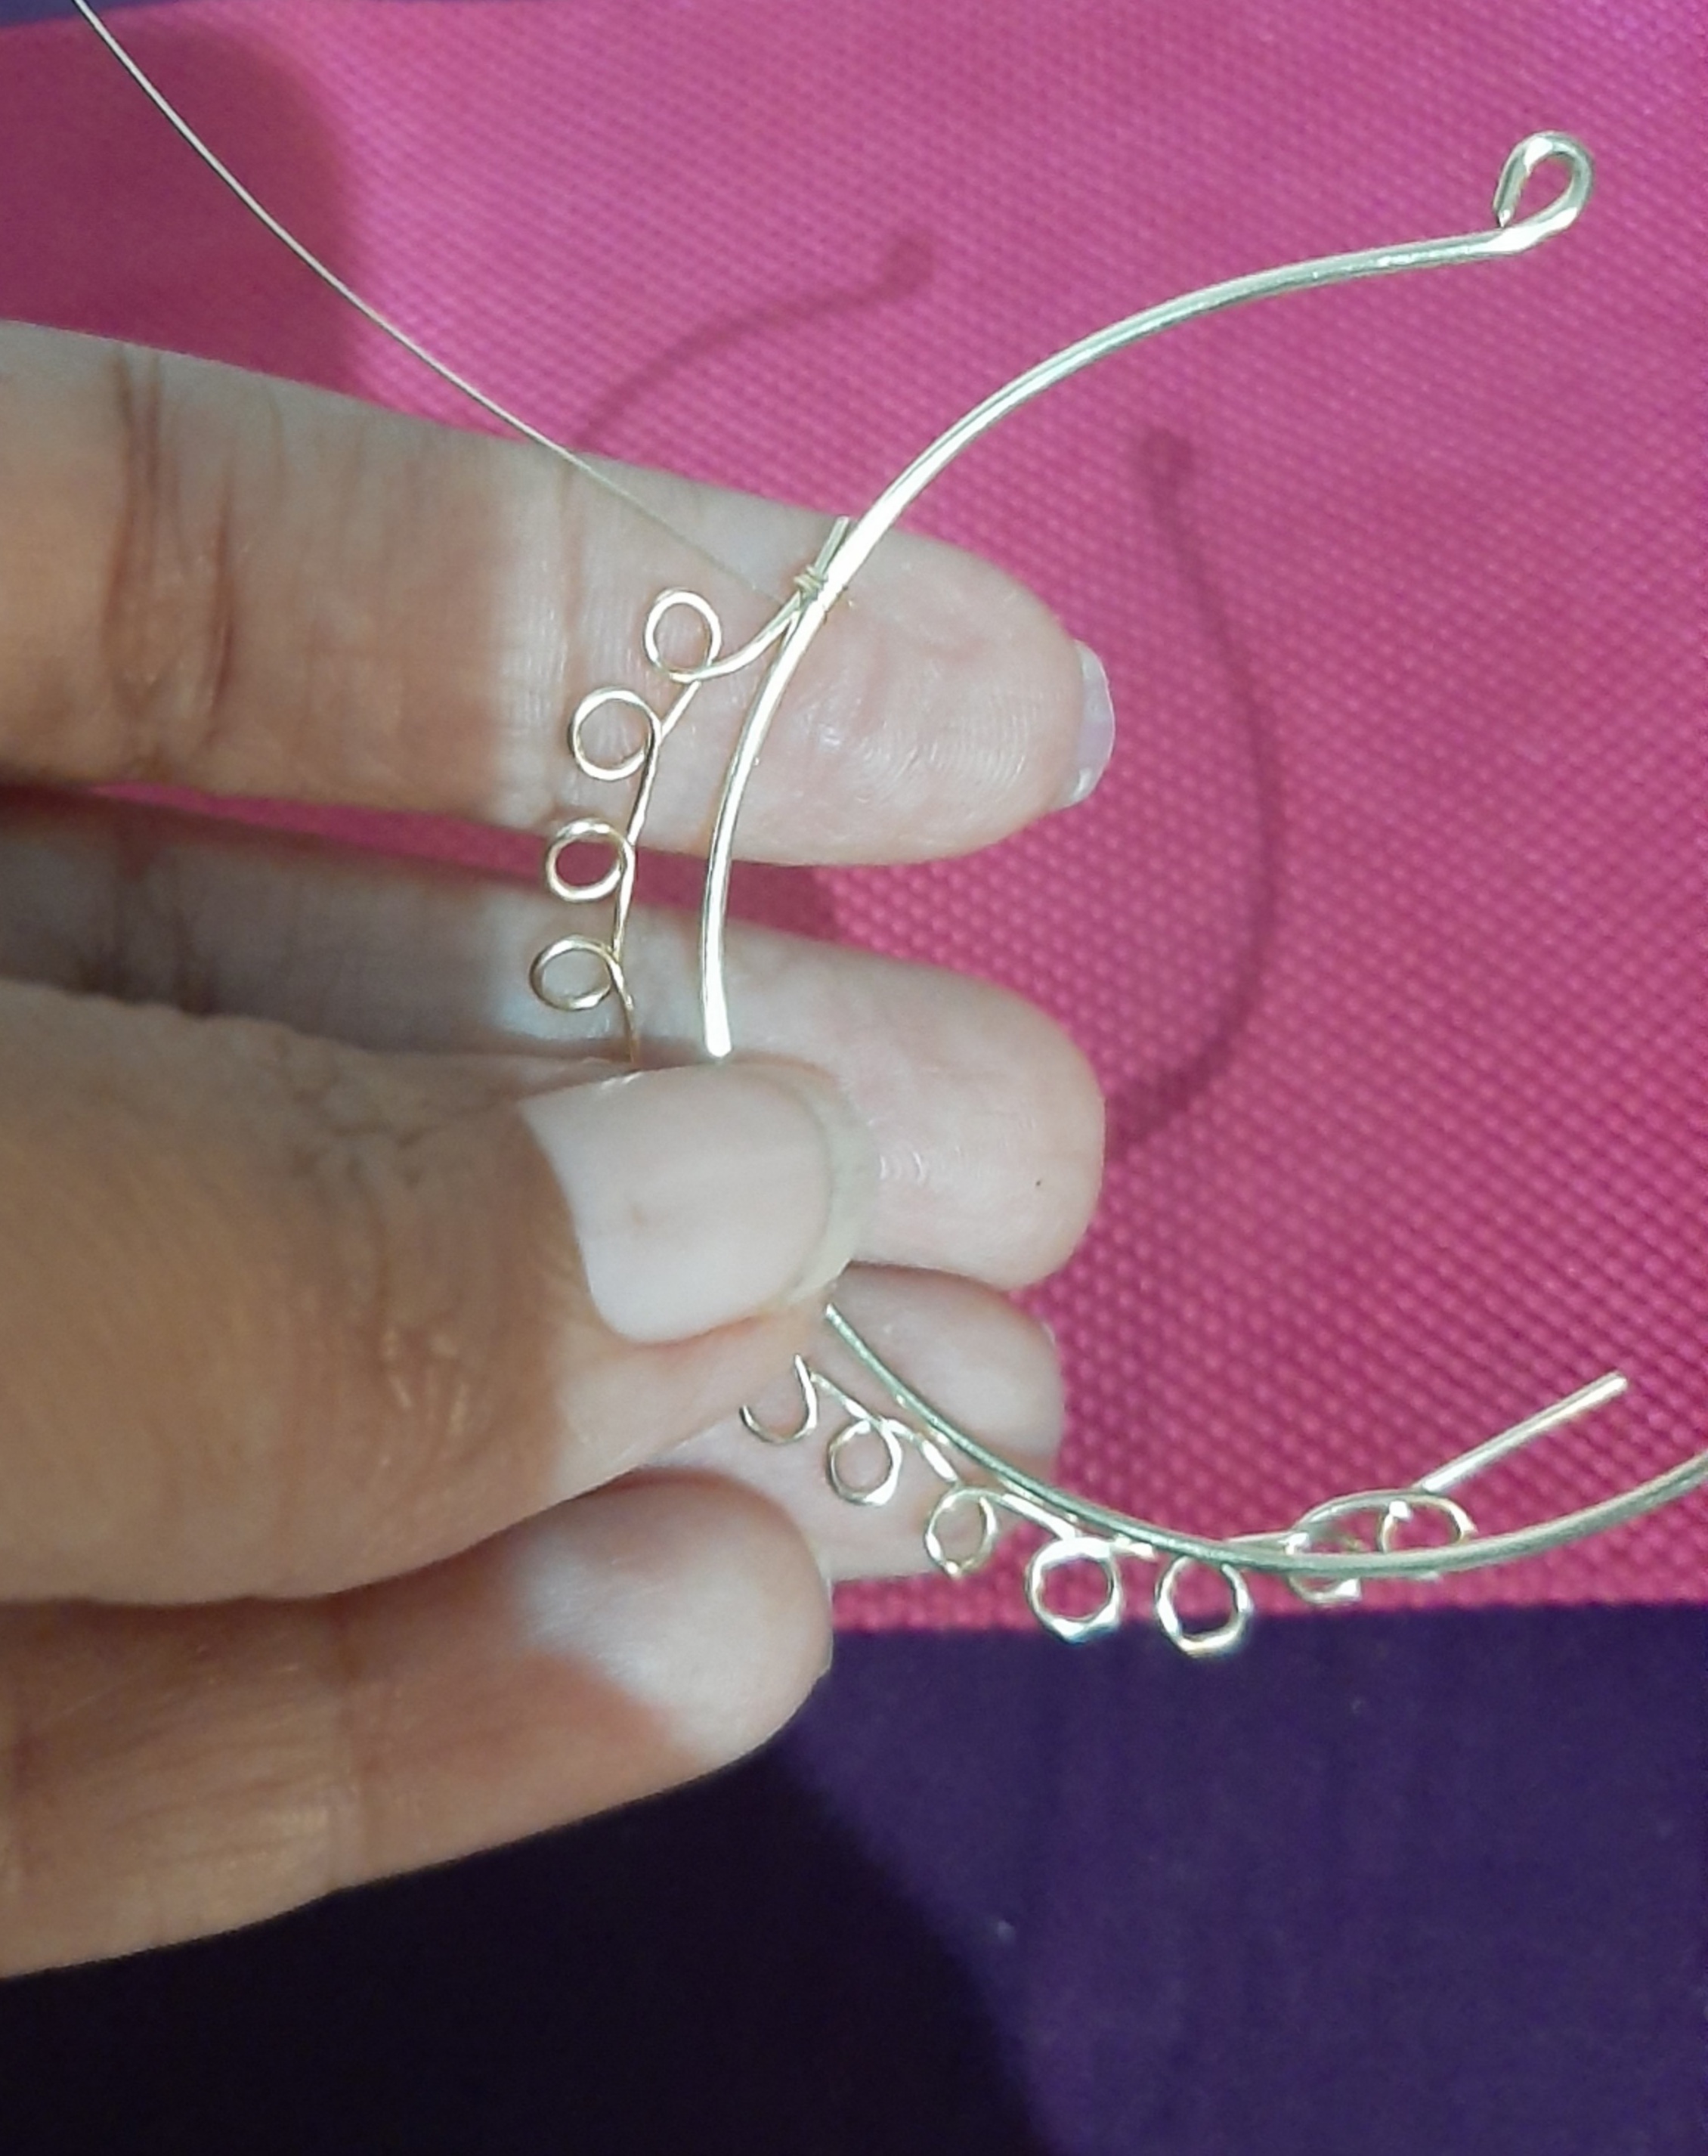
Paso 2
Se une la fila de bucles a la argolla base con alambre nro 28
🇬🇧
Step 2
The row of loops is attached to the base ring with wire number 28
🇪🇸
Paso 3
Se elaboran 14 tiras de Alambre con 7 Mostacilla de color azul rey y 14 tiras de Alambre con 7 mostacillas color azul oscuro.
🇬🇧
Step 3
14 wire strips are made with 7 royal blue colored beads and 14 wire strips with 7 dark blue colored beads.
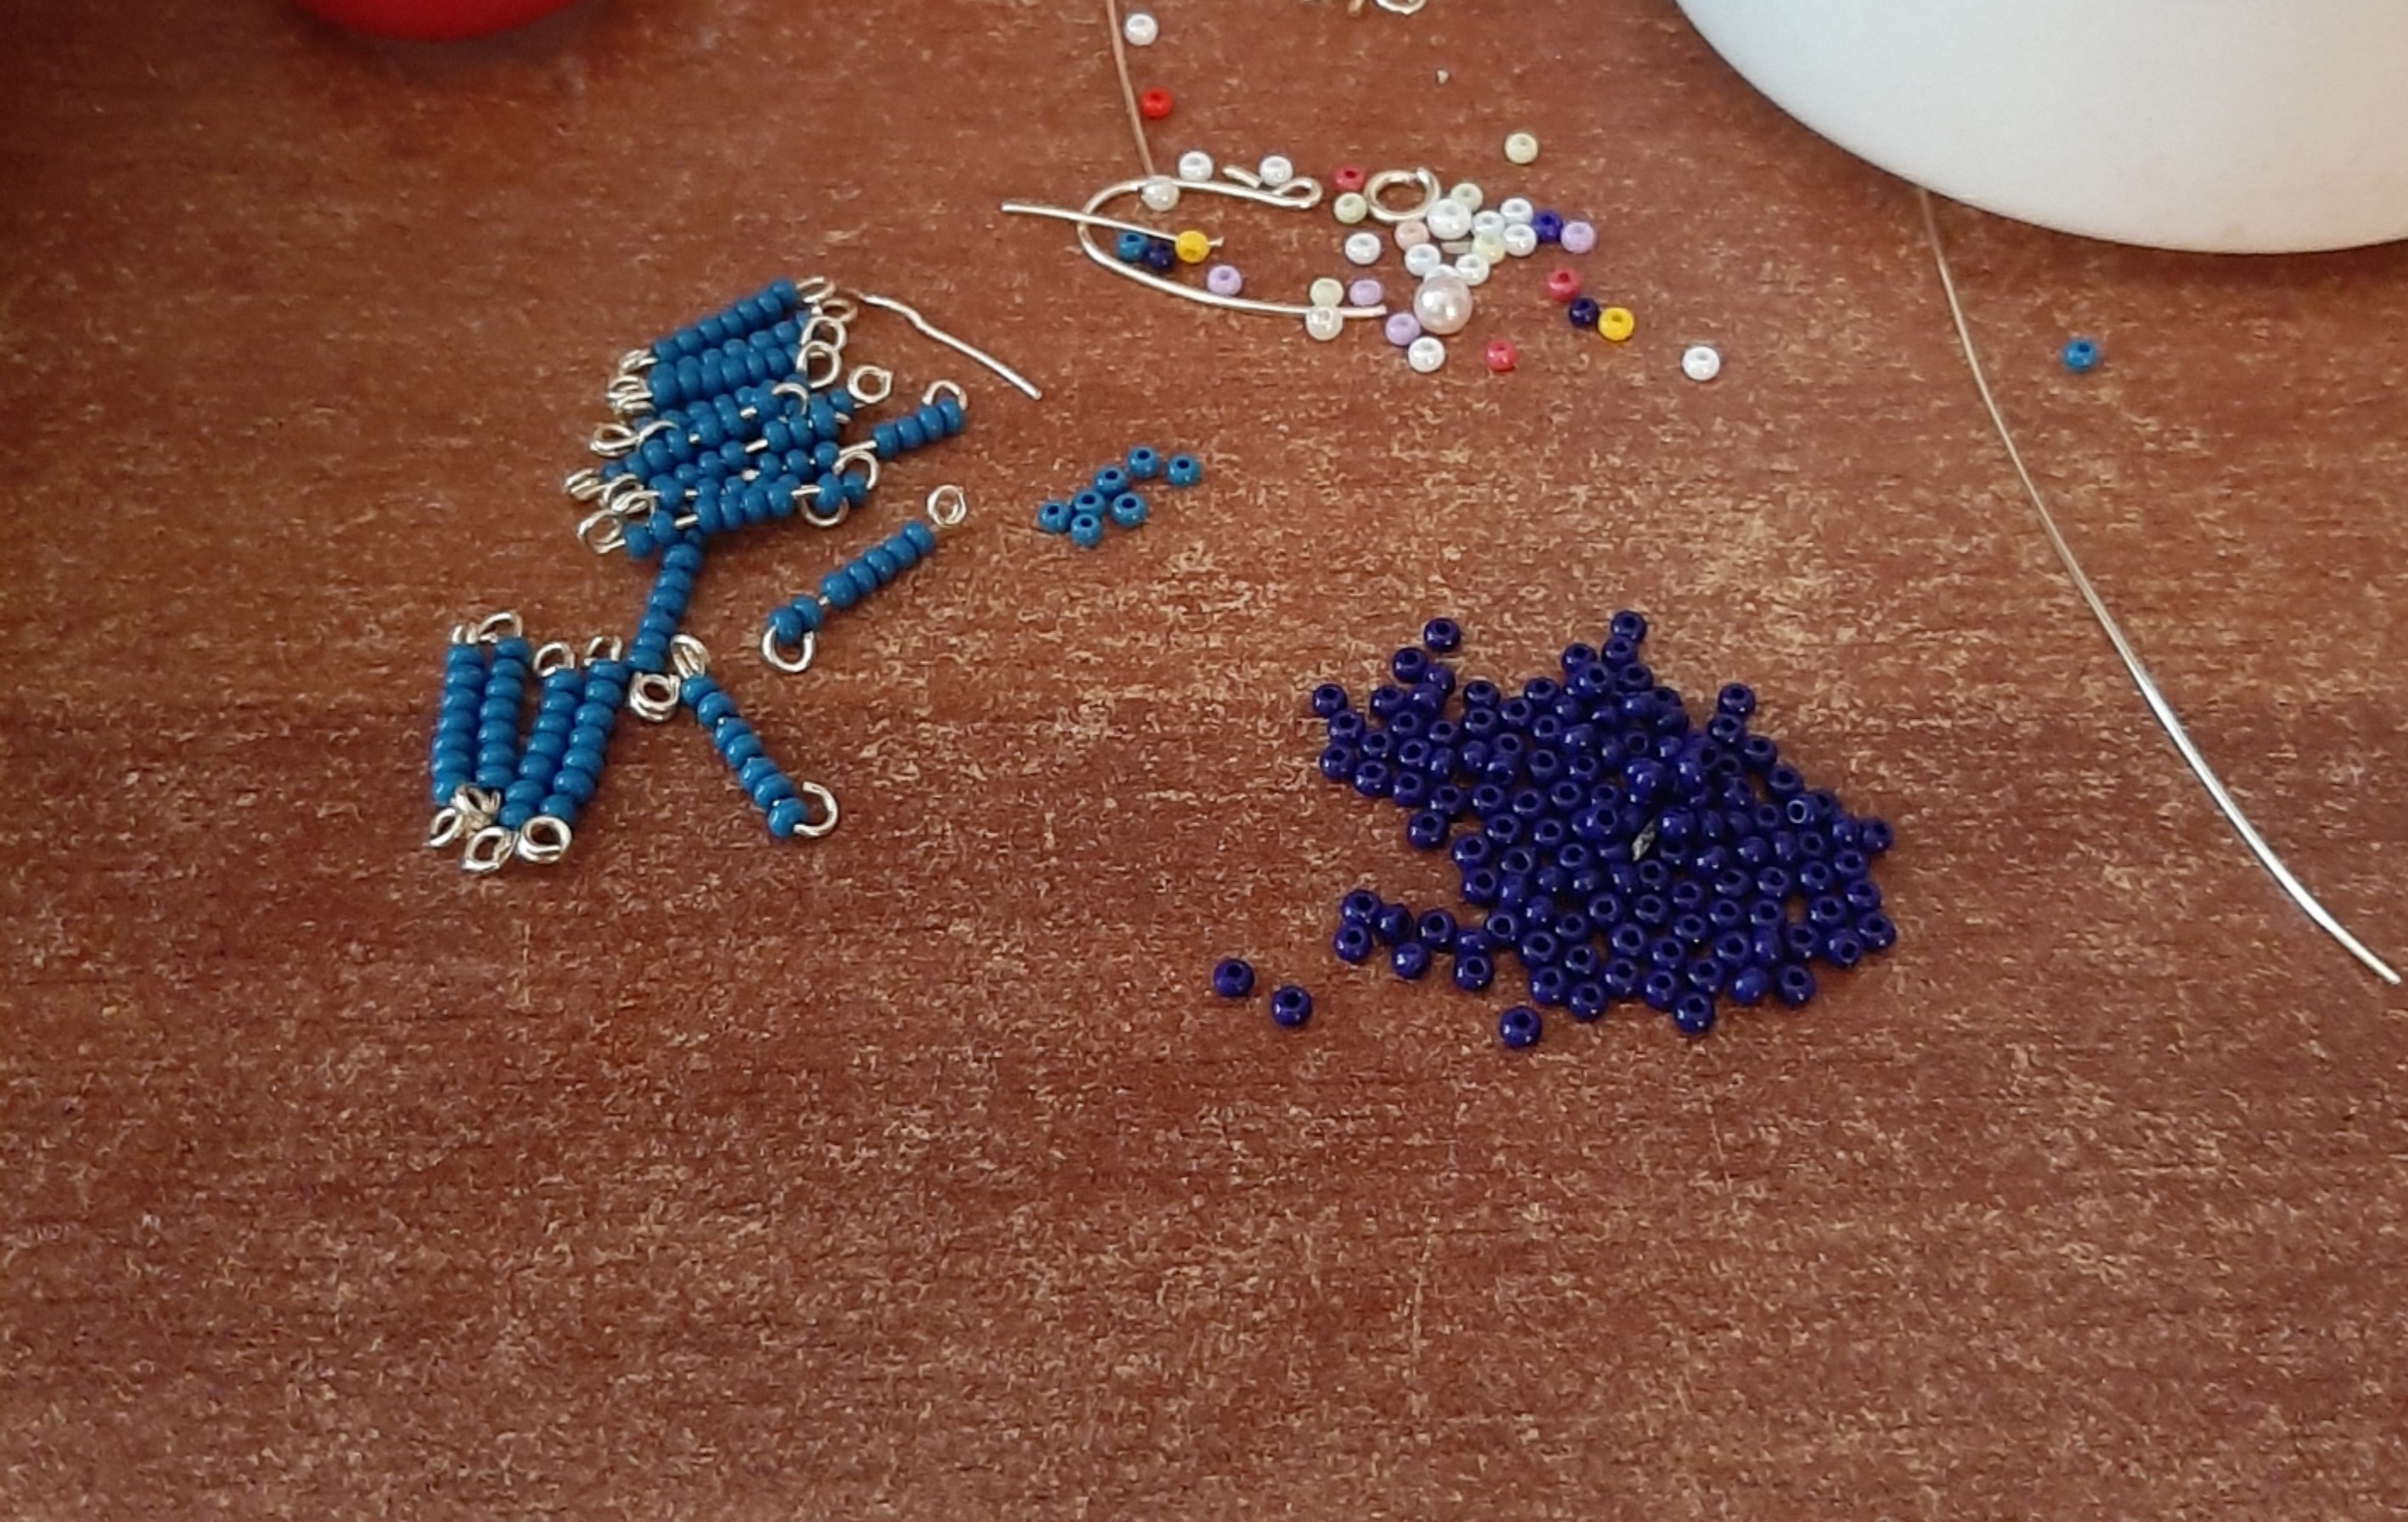
🇪🇸
Paso 4
Estas tiras se unen cada una a la tira de bucles.
En la parte de arriba del aro base se decoran con tres tiras de 7 mostacillas del color de tu preferencia, en mi caso utilice azul más claro.
Y listo amigos, queda como resultado este hermoso diseño.
🇬🇧
Step 4
These strips are each attached to the strip of loops.
At the top of the base ring, decorate with three strips of 7 beads of the color of your choice, in my case I used a lighter blue.
And ready friends, this beautiful design is the result.
🇪🇸
Gracias por interesarte en leer mis lineas.
Todas las fotos son de mi autoria, tomadas con tlf Samsung A50 y el texto traducido en google
🇬🇧
Thank you for your interest in reading my lines.
All photos are my author's, taken with Samsung A50 tlf and the text translated in Google
Muchas Bendiciones para todos. 🙏
Many Blessings to all.🙏

Congratulations @soyjone! You have completed the following achievement on the Hive blockchain and have been rewarded with new badge(s):
Your next target is to reach 100 upvotes.
You can view your badges on your board and compare yourself to others in the Ranking
If you no longer want to receive notifications, reply to this comment with the word
STOPTo support your work, I also upvoted your post!
Check out the last post from @hivebuzz:
Support the HiveBuzz project. Vote for our proposal!
Muy lindos y originales para deslumbrar, cada paso correctamente explicado me agrado, gracias por compartir.
Gracias por tu Visita, saludos
Gracias por tu linda visita
Me encanto leer tu post amiga!
Bien explicado el paso a paso!
Saludos!