English
Image's Source - Fuente de la Imagen
Greetings, I share my best wishes, with the firm desire that you are the best possible in the situation in which you find yourself. And as I always say, if you are in a difficult situation, rest assured that it will happen, and when that situation happens, it will give you the experience to better overcome what you will face next.
I have been a bit complicated to work in the workshop, with my mobility problems. Luckily I can still use my right arm without problems, that's enough to get by.
An acquaintance was working with a couple led bulbs, but he didn't have much luck. So he left them for me to recycle.
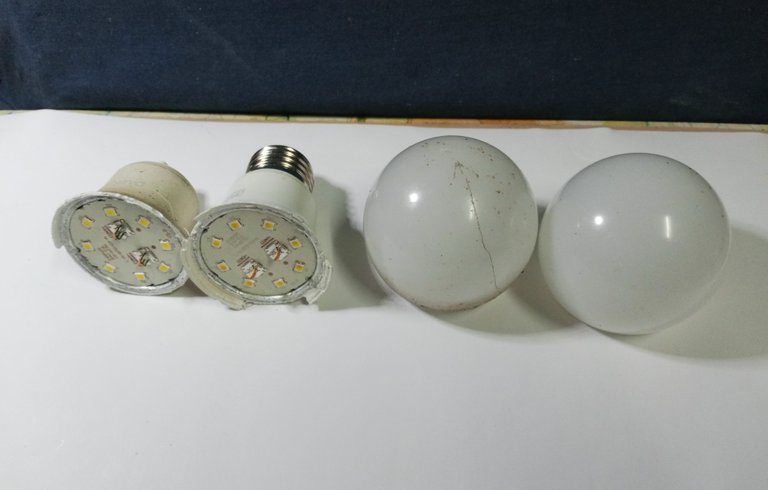
I tested the state of the leds, when I check and find that a bulb has more than two damaged leds, it is not worth repairing, and they go to component recycling.
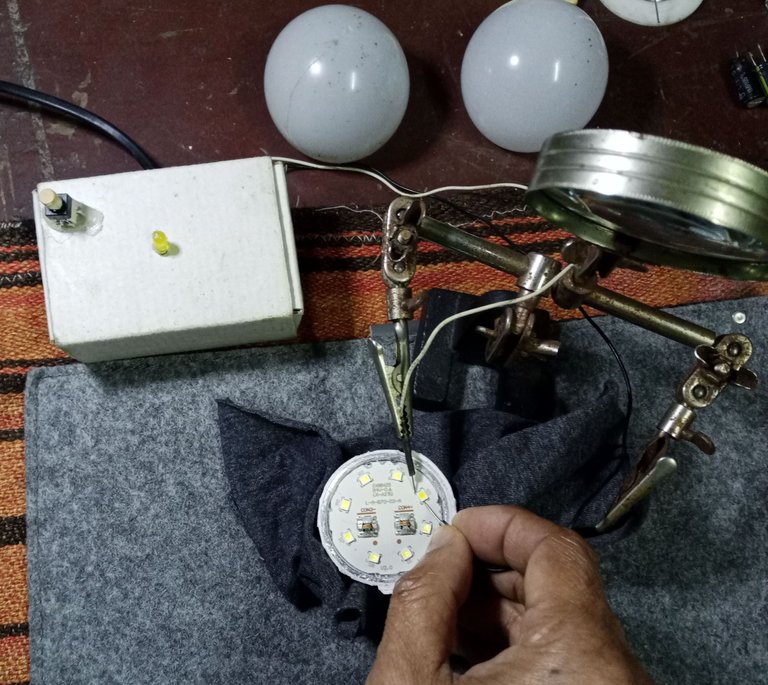
And they were in good condition in the electronic part, I only had to repair a couple of minor faults.
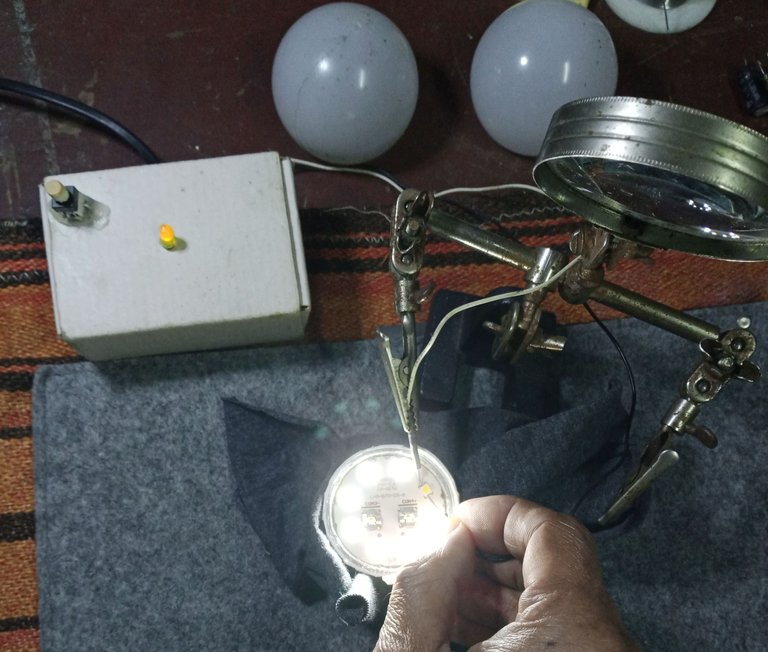
What I could not recover was the casing of the light bulb, so I took advantage of it for a project that I had pending.
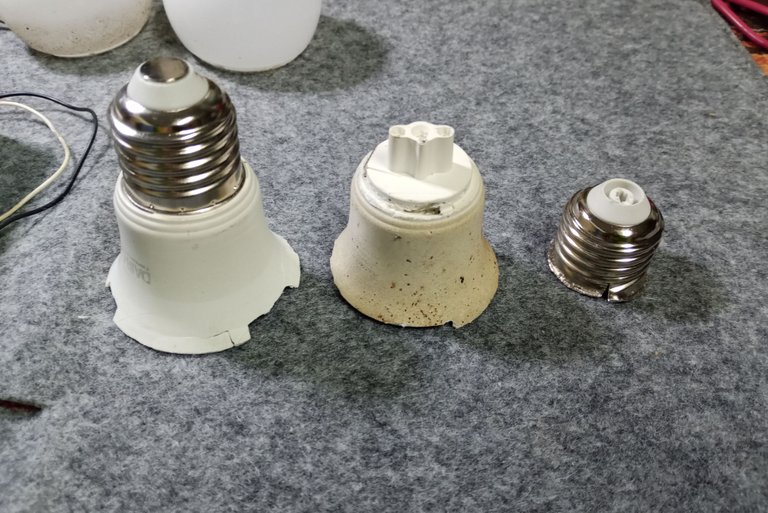
I wanted to make a new lamp for my desk with an aluminum heatsink, similar to the light bulb that I had published a short time ago, but carefully reviewing the way in which the light bulb circuit was assembled, I decided to change the idea a bit.
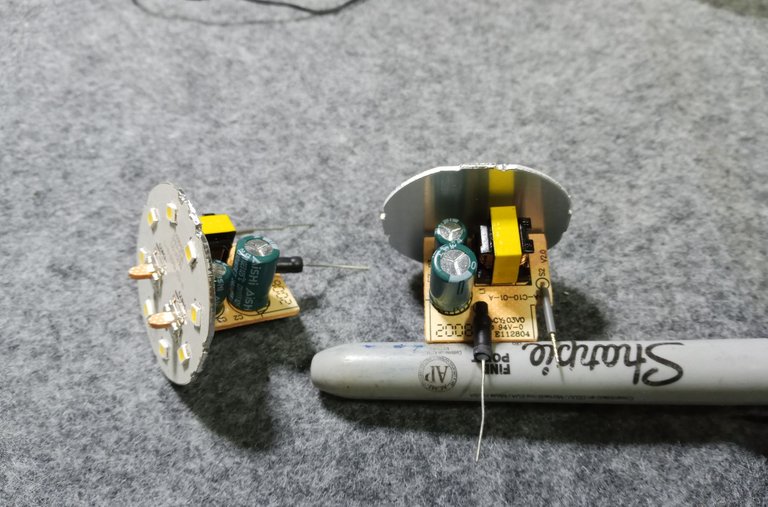
The problem with LED bulbs is that they are configured to work at the limit of their capacity, so their useful life is significantly reduced. You can improve their duration by reducing the intensity at which they work, but you also reduce the luminescence or shine. Or you can improve the ability to dissipate the heat that occurs when working, the latter is the option that I usually prefer.
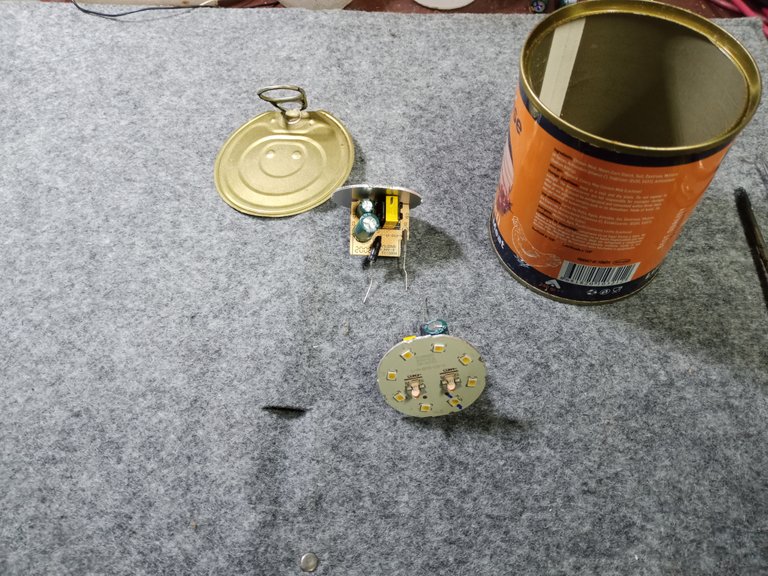
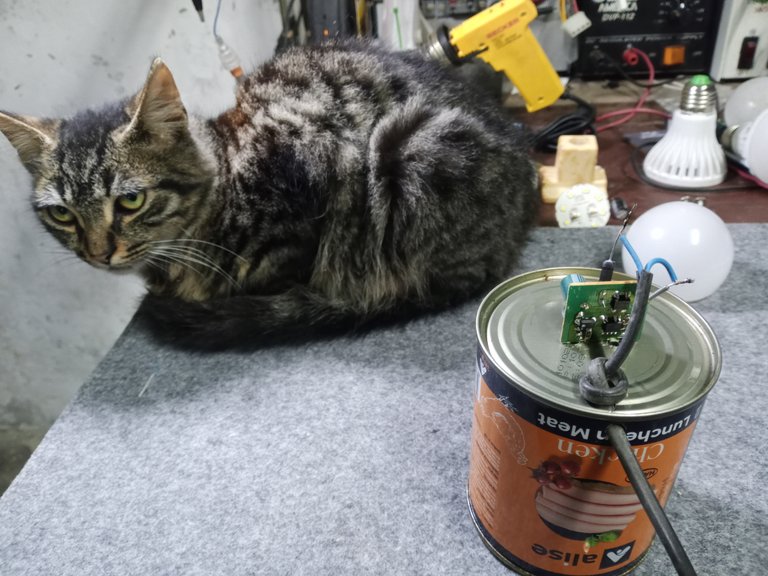
Definitely, the original light bulb casing cannot be recovered, so for my desk lamp I will use a can of meat as a chassis, I am going to take advantage of the surface of the can as a heat sink for the heat generated by the leds, this is much more surface to dissipate temperature, than the one that the factory light bulb brings. Which would increase its useful life.
First we corrected the failure of the bulb, since it is a bulb with a switched source it works differently than a bulb with a capacitor source.
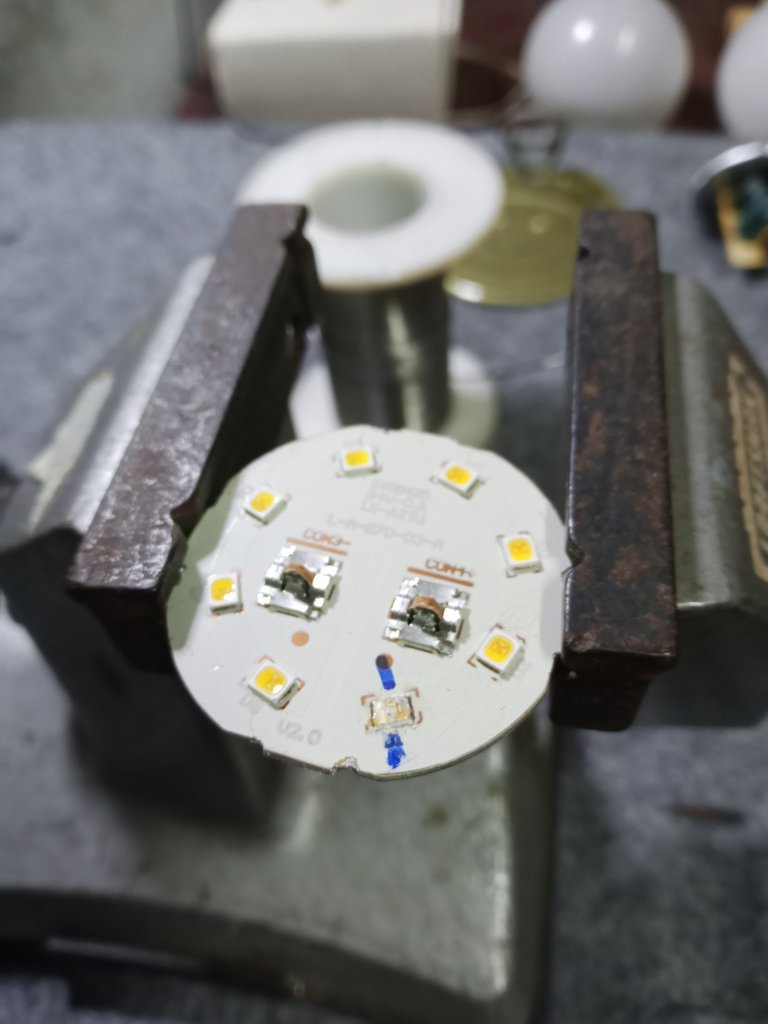
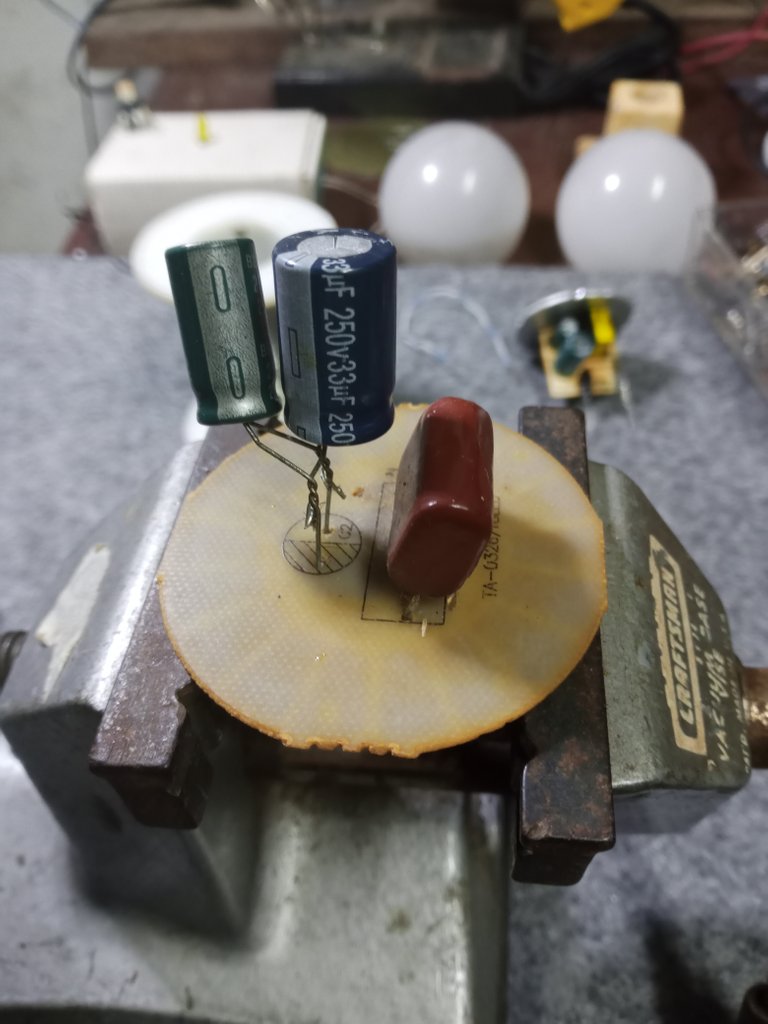
The source with capacitors is the simplest, and is easily recognized. But the damaged led, in these cases, must be replaced by a 2 Watt resistor, or by another led, a bridge cannot be made between contacts. If you bridge between the contacts, you burn all the remaining leds.
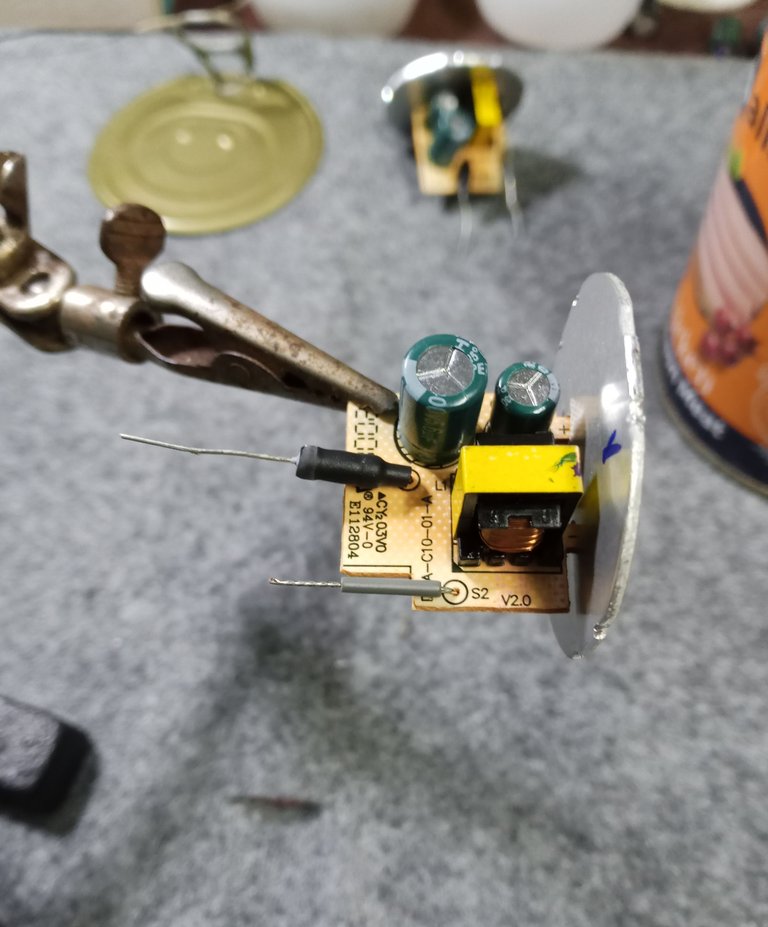
If it is a switched source, you can recognize it by the high frequency transformer, and because it is a more complex circuit, in these cases the repair is easier, you can simply bridge or short-circuit the contacts of the damaged led, or replace the led with another .
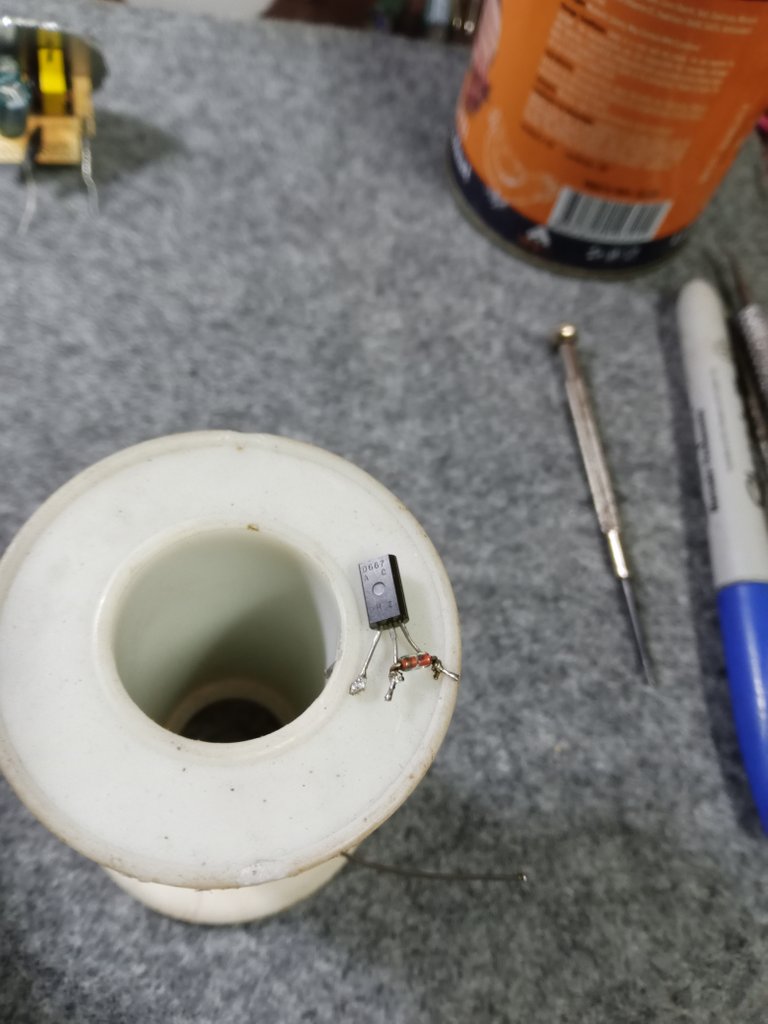
A solution that works for any of the cases, regardless of the working voltage or if it is a switched or capacitor source, is the one that I usually use for minor repairs in LED televisions, an NPN transistor coupled to a 5 volt zenner diode.
Well, the source and led plate assembly is pressure-assembled without welding, so disassembly and assembly is very simple, I just take care to add thermal paste on the plate that acts as a heatsink for the bulb so that it makes good contact with the surface of the can.
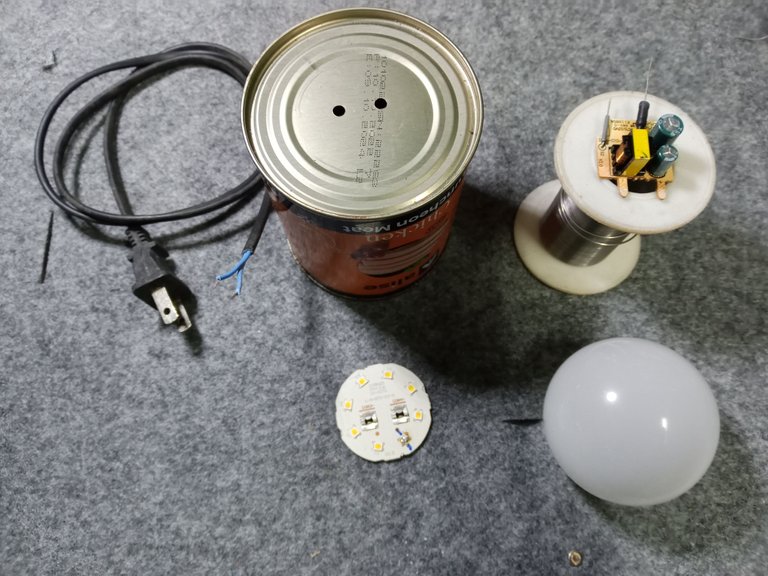
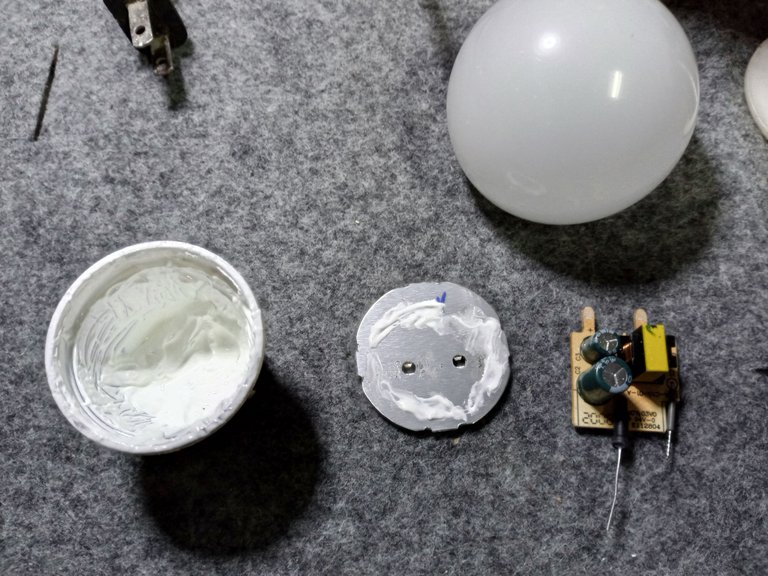
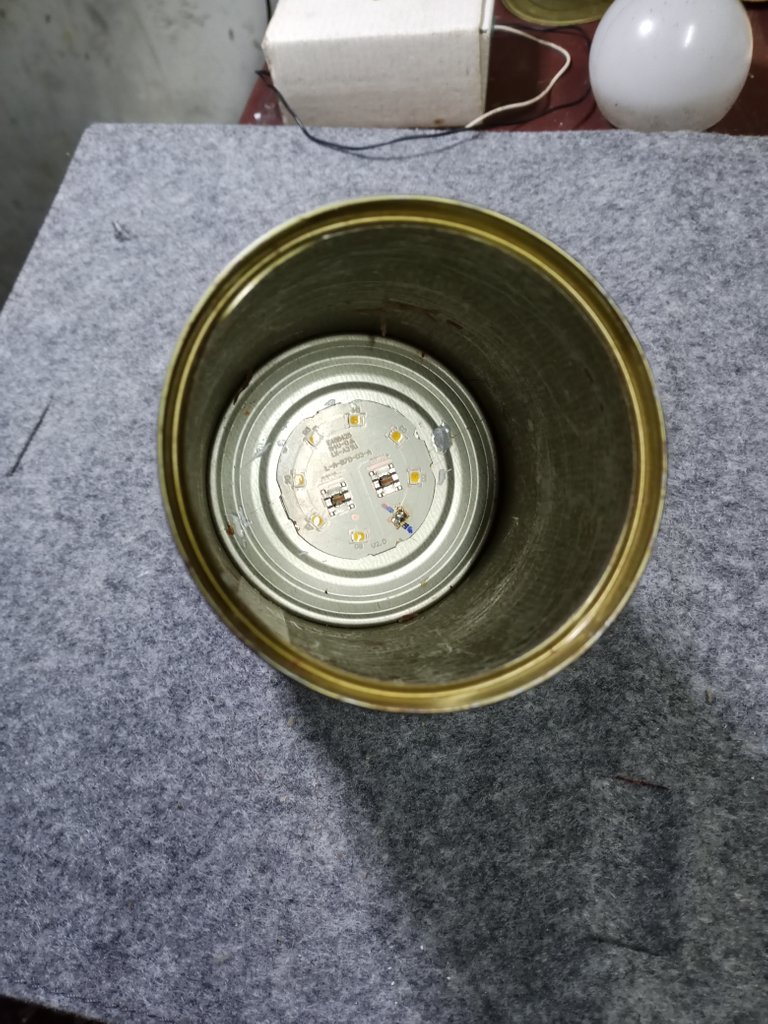
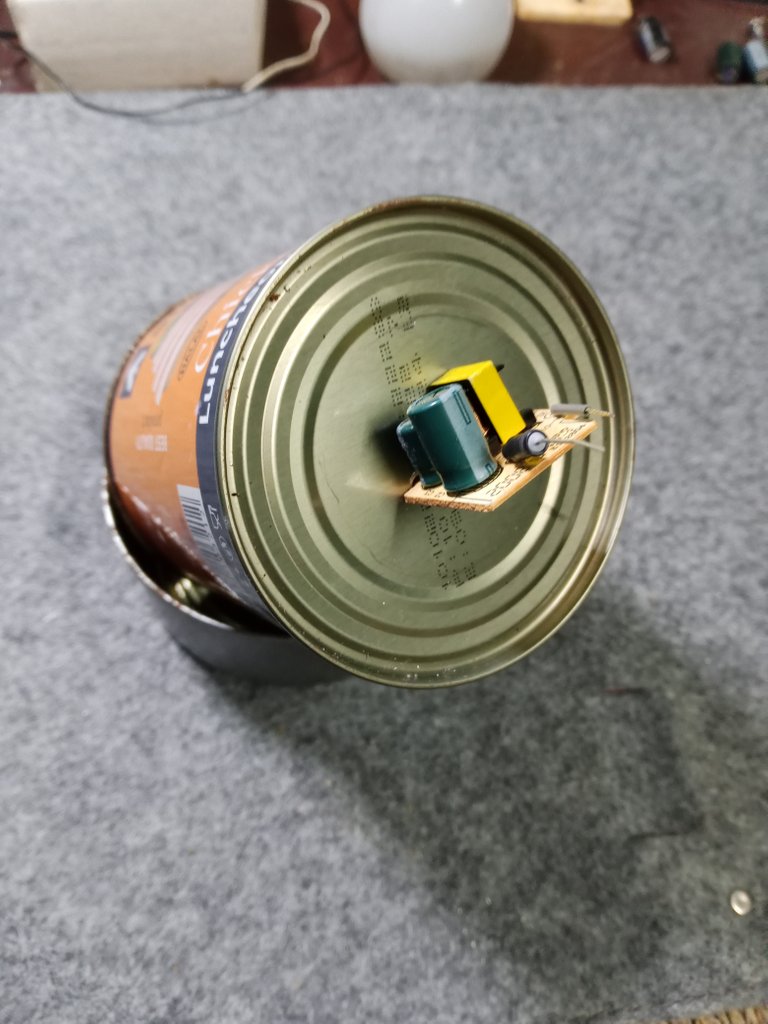
I try the step that I am putting together, and I am adding the other elements of the lamp.
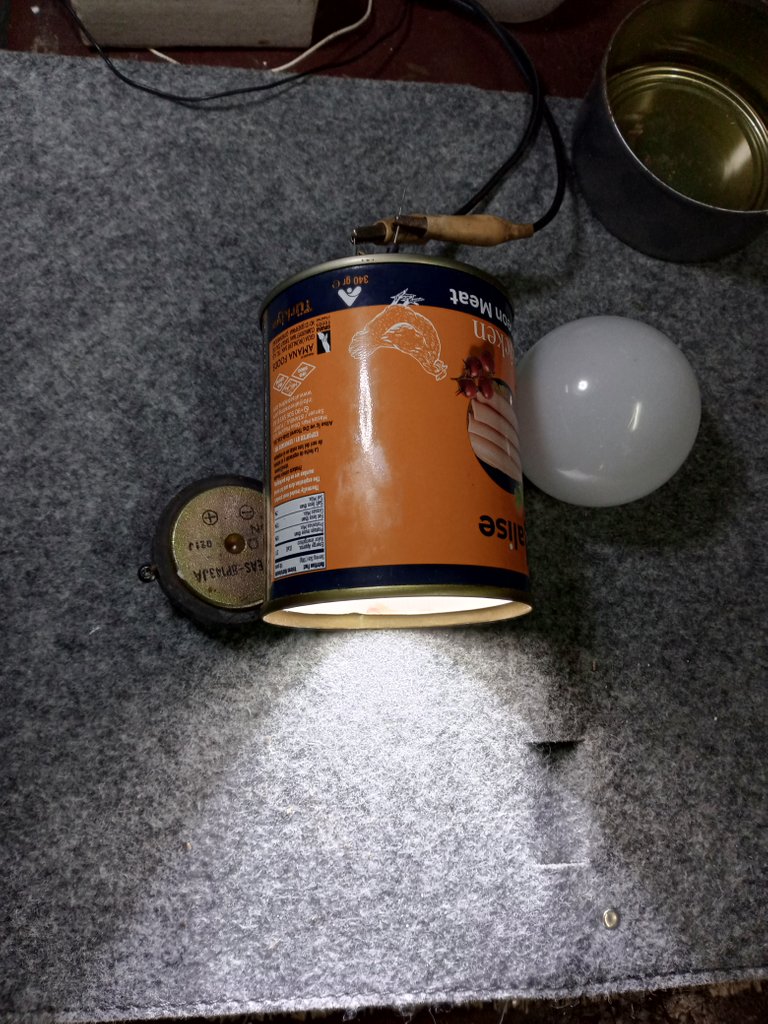
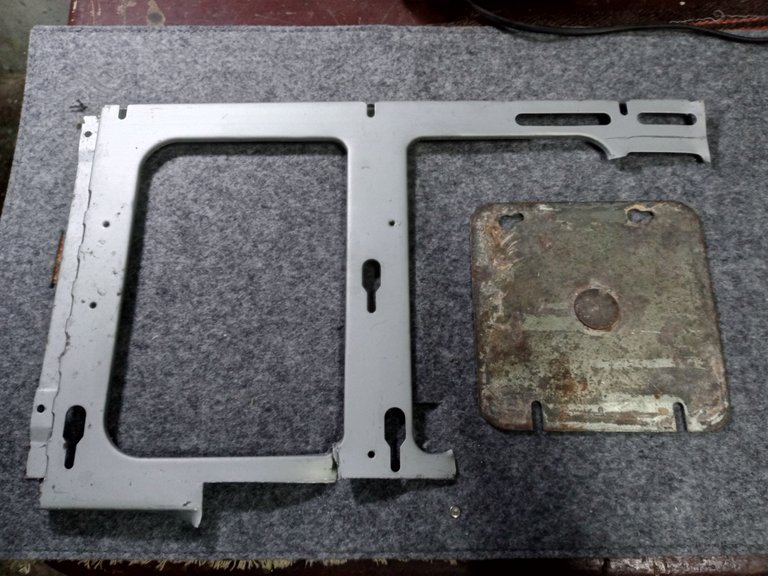
For the base and support, I use part of a computer case and a 4” x 4” electrical box cover.
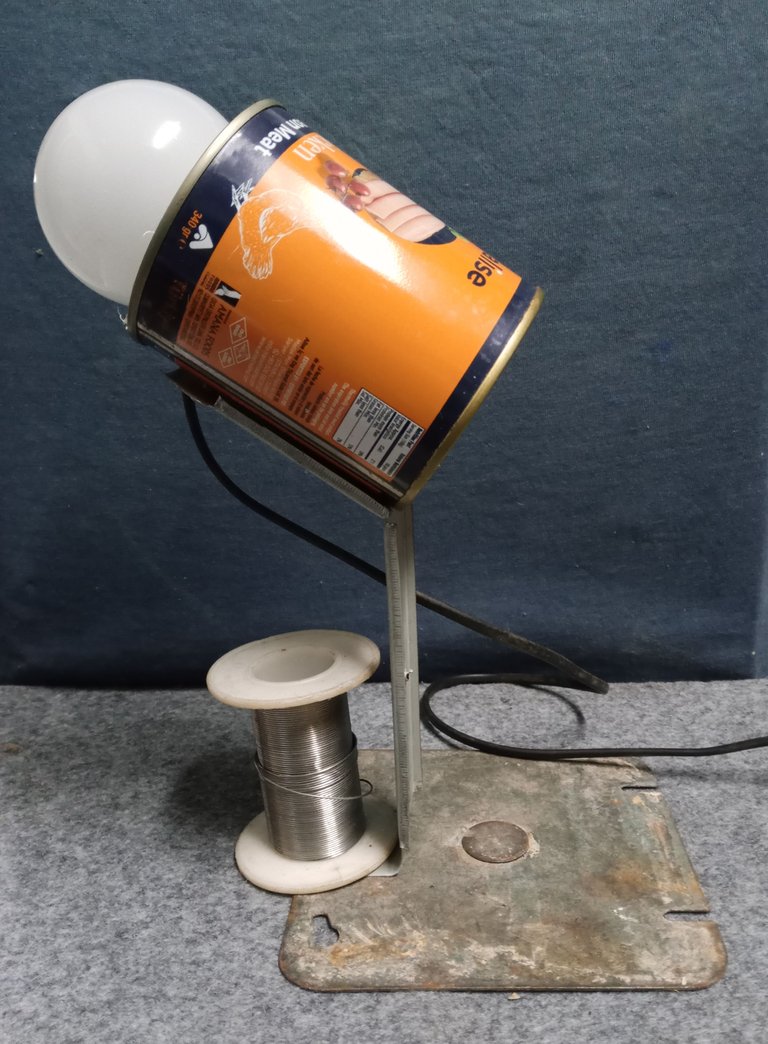
I cover the electronic circuit with the diffuser of the light bulb to avoid an accident if someone trips over the lamp and I pre-assemble the lamp assembly.
I didn't have paint to finish the job, but I did have quite a lot of gift-wrapping paper, I was inspired a bit by one of @ysamarynordaz's latest works, so I took advantage of it to finish the lamp. I don't get to look so good, but I'm satisfied.
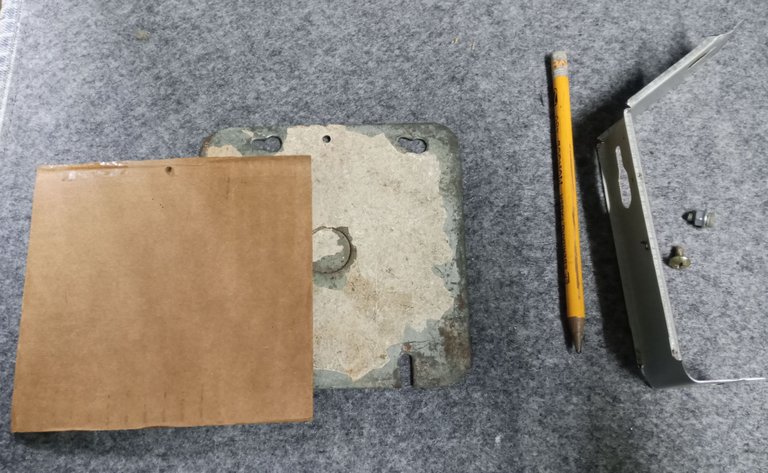
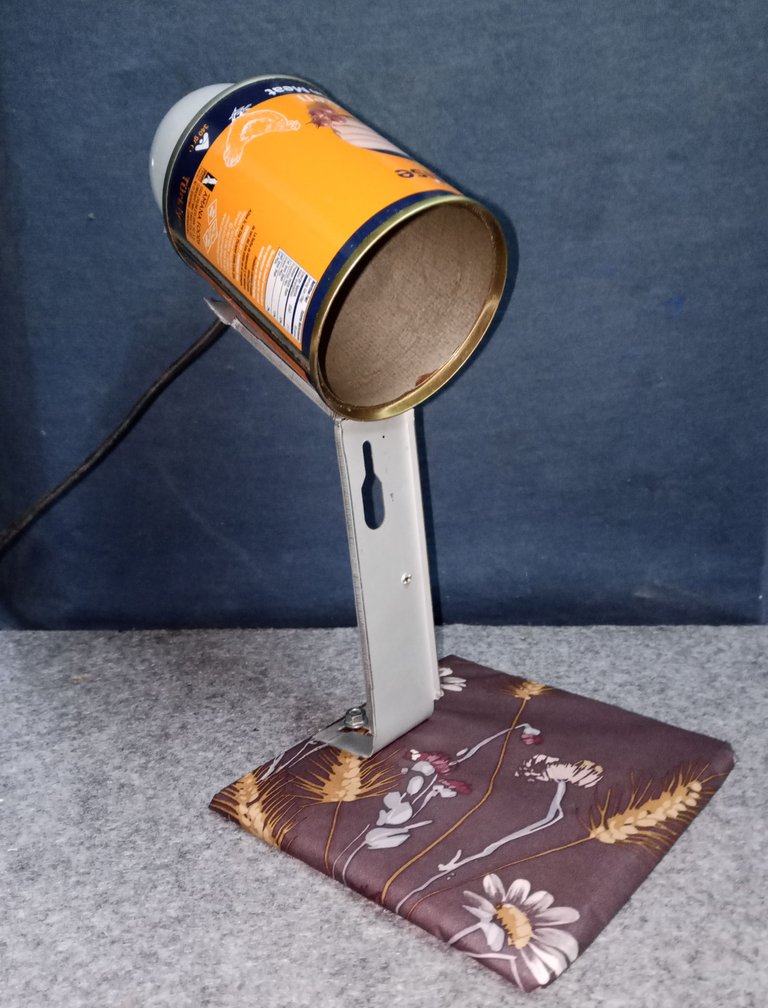
Well, it's another finished project, I like how it turned out, it's a good lamp to work on my desk.
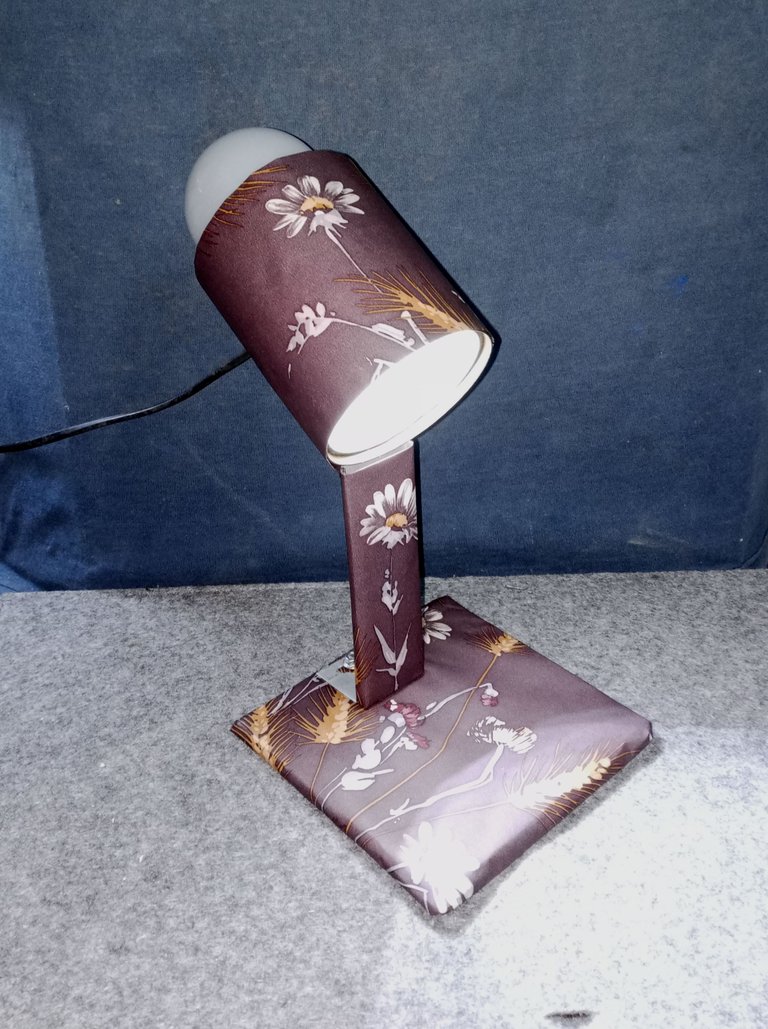
Thank you very much for stopping by and reading.
The post itself is not a tutorial, I am just sharing some of my workshop work. If you are going to do any electrical work, you should be trained at least at the basic level. Let's avoid accidents or damage to any device.
Have an excellent week.
Peace

I have used Google translate for the English language.
The images unless otherwise indicated are screenshots from my workshop.
Español

Image's Source - Fuente de la Imagen
Saludos, les comparto mis mejores deseos, con el firme anhelo que estén lo mejor posible en la situación en que se encuentren. Y como siempre digo, si están en una situación difícil, tengan la seguridad que pasara, y al pasar esa situación, les dará la experiencia para superar mejor lo próximo a que se enfrenten.
He estado un poco complicado para trabajar en el taller, con mis problemas de movilidad. Por suerte aún puedo usar sin problemas mi brazo derecho, eso es bastante para ir tirando.
Un conocido estuvo trabajando con un par bombillos led, pero no tuvo mucha suerte. Así que me los dejo para que los reciclara.

Probé el estado de los leds, cuando reviso y encuentro que algún bombillo tiene más de dos leds dañados, no vale la pena repararlo, y pasan al reciclaje de componentes.

Y estaban en buenas condiciones en la parte electrónica, solo debía reparar un par de fallas menores.

Lo que no podía recuperar era la carcasa del bombillo, así que los aproveche para un proyecto que tenía pendiente.

Quería hacer una lámpara nueva para mi escritorio con un disipador de aluminio, semejante al bombillo que había publicado ya hace poco tiempo, pero revisando con cuidado la forma en que estaba armado el circuito del bombillo, opte por cambiar un poco la idea.

El problema con los bombillos led es que están configurados para trabajar al límite de su capacidad, por lo que su vida útil se reduce notablemente. Puedes mejorar su duración, reduciendo la intensidad en la que trabajan, pero así también reduces la luminiscencia o el brillo. O puedes mejorar la capacidad de disipar el calor que se produce al trabajar, esta última es la opción que suelo preferir.
Definitivamente, la carcasa de bombillo original no puede ser recuperada, así que para mi lámpara de escritorio usaré una lata de carne como chasis, voy a aprovechar la superficie de la lata como disipador para el calor que generan los leds, esto es mucha más superficie para disipar temperatura, que la que trae el bombillo de fábrica. Lo que aumentaría su vida útil.

Primero corregimos la falla del bombillo, como es un bombillo con fuente conmutada se trabaja diferente a un bombillo con fuente de capacitores.

La fuente con capacitores es la más simple, y se reconoce con facilidad. Pero el led dañado, en esos casos, se tiene que reemplazar por una resistencia de 2 Watts, o por otro led, no puede hacerse un puente entre contactos. Si haces puente entre los contactos, quemas todos los leds restantes.

Si es una fuente conmutada, lo reconoces por el transformador de alta frecuencia, y porque es un circuito de mayor complejidad, en estos casos la reparación es más sencilla, simplemente puedes puentear o cortocircuitar los contactos del led dañado, o reemplazar el led por otro.

Una solución que sirve para cualquiera de los casos, indistintamente del voltaje de trabajo o si es fuente conmutada o de condensadores, es la que suelo emplear para reparaciones menores en los televisores de led, un transistor NPN acoplado a un diodo zenner de 5 volts.

Bien, el conjunto fuente y placa de leds, está armado a presión sin soldaduras, por lo que el desmontaje y el montaje es muy sencillo, solo tengo cuidado de agregar pasta térmica en la placa que hace de disipador del bombillo para que haga buen contacto con la superficie de la lata.


Pruebo al paso que voy armando, y voy agregando los demás elementos de la lámpara.


Para la base y el soporte, uso parte de un case de computador y una tapa de 4” x 4” de cajetín eléctrico.

Cubro el circuito electrónico con el difusor del bombillo para evitar que haya algún accidente si alguien tropieza con la lámpara y hago un armado previo del conjunto de la lámpara.

No tenía pintura para hacer el acabado del trabajo, pero si papel de envolver regalos en bastante cantidad, me inspire un poco en uno de los últimos trabajos de @ysamarynordaz, entonces lo aproveche para hacer la terminación de la lámpara. No llego a quedar tan bien, pero estoy conforme.


Bien, es otro proyecto terminado, me gusta como quedo, es una buena lámpara para trabajar en mi escritorio.

Muchas gracias por pasar y leerme.
La publicación en sí no es un tutorial, solo comparto parte de mi trabajo de taller. Si vas a hacer algún trabajo de electricidad, debes capacitarse por lo menos al nivel básico. Evitemos accidentes o que se pueda dañar algún artefacto.
Que tengan una excelente semana.
Paz

He usado el traductor de Google para el idioma inglés.
Las imágenes a menos que se indique lo contrario son capturas de mi taller.
Vamooos siempre en contra de la obsolescencia programa, a seguir salvando recursos y porque no admitirlo ahorrando un poco. Me paso de arreglar la primera bombilla con dos leds quemados y es increíble como pierde potencia de iluminación, ahora tengo una aqui al lado demi PC esperando a que la repare.
Si, después de dos led dañado no vale mucho la pena hacer la reparación. A menos que le coloque por lo menos un LED de repuesto.
Si colocas un mejor disipador o bajas la intensidad de la corriente, aumentas la vida del bombillo.
Yo prefiero mejorar el disipador, así no pierdo brillo del bombillo.
Muchas gracias por pasar a ver la publicación y dejar su comentario.
Qué gran invento y cuánta maña te das para realizar esos artefactos. Muy bueno! Un abrazo!
Muchas gracias por pasar y dejar su comentario, es algo que aprecio.
Que tenga usted un buen día.
Hola @soltecno, me encantó su publicación y me siento muy feliz de que algunos de mis trabajos le haya servido de inspiración para terminar la parte estética de su lámpara, la cual quedó muy genial. Gracias, Gracias, Gracias.
Su trabajo tiene por mucho mejor presentación final. Así que tome el atrevimiento de inspirarme para terminar mi lámpara. Celebro que le gustará.
Yay! 🤗
Your content has been boosted with Ecency Points, by @soltecno.
Use Ecency daily to boost your growth on platform!
Support Ecency
Vote for new Proposal
Delegate HP and earn more
Me encanta el proyecto, pero sobre todo la foto con la gata :)
Stay !ALIVE
!LOLZ
!GIF Good Job!
!MEME
!PGM
!LUV
!CTP
Via Tenor
BUY AND STAKE THE PGM TO SEND A LOT OF TOKENS!
The tokens that the command sends are: 0.1 PGM-0.1 LVL-0.1 THGAMING-0.05 DEC-15 SBT-1 STARBITS-[0.00000001 BTC (SWAP.BTC) only if you have 2500 PGM in stake or more ]
5000 PGM IN STAKE = 2x rewards!
Discord
Support the curation account @ pgm-curator with a delegation 10 HP - 50 HP - 100 HP - 500 HP - 1000 HP
Get potential votes from @ pgm-curator by paying in PGM, here is a guide
I'm a bot, if you want a hand ask @ zottone444
Credit: arthursiq5
Earn Crypto for your Memes @ HiveMe.me!
@soltecno! You Are Alive so I just staked 0.1 $ALIVE to your account on behalf of @pedrobrito2004. (5/10)
The tip has been paid for by the We Are Alive Tribe through the earnings on @alive.chat, feel free to swing by our daily chat any time you want.

La gata estaba molesta porque no le estaba acariciando las orejas.
Muchas gracias por ayudarme con la edición.
The rewards earned on this comment will go directly to the people( @pedrobrito2004 ) sharing the post on Twitter as long as they are registered with @poshtoken. Sign up at https://hiveposh.com.
Me dejas siempre sin palabras!!!
¡ERES UN GENIO!
Aprecio mucho que le guste y comente. Me anima a seguir trabajando.
Muchas gracias.