💚🌻☘️💐⭐🌈❤️☀️
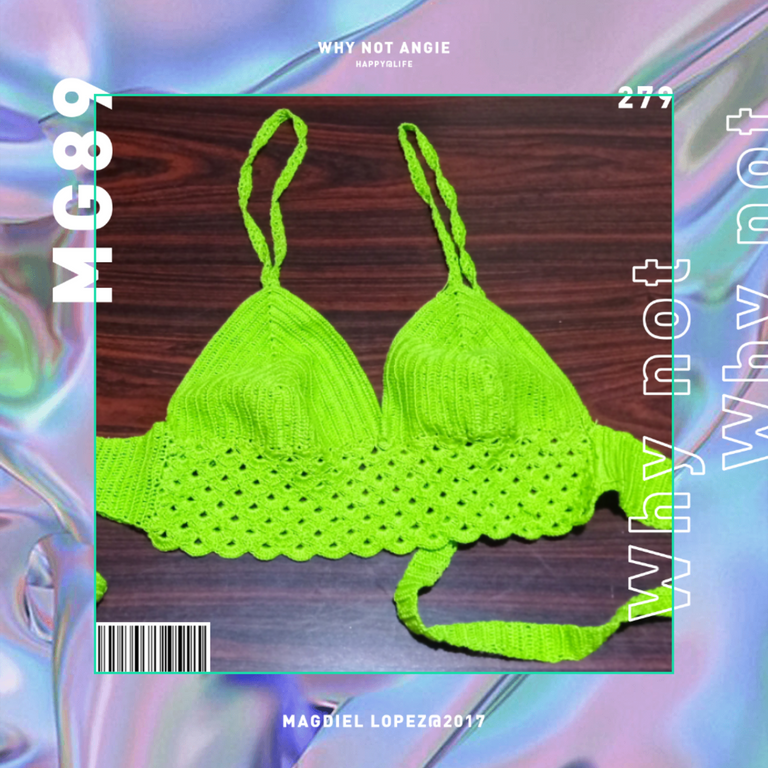
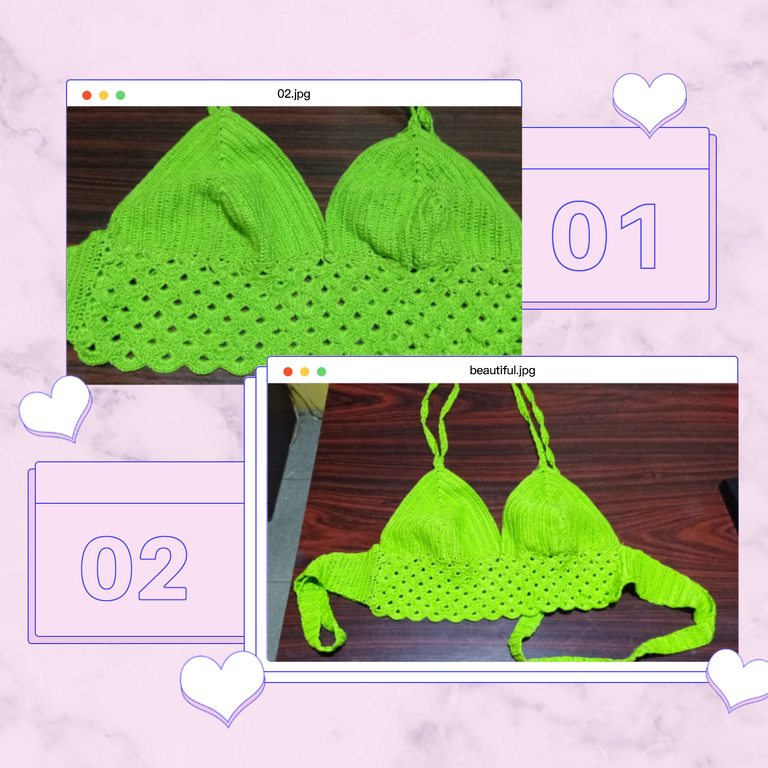
Hola amigos de Hive, espero que estén todos muy bien. Hoy les traigo un tejido hermoso de crop top, tejido en hilo de algodón, copa talla M, ideal para jovencitas; se puede llevar a la playa, usar con jeans o colocarle una chaqueta encima, es casual y vistoso. El tejido de la franja es abanico, anudado al cuello y a la espalda.

Materiales:Hilo de algodón verde manzanaGancho croquet de 2,5 mm1 separador
⭐💐💚🌻🌈🌅🌄🌿
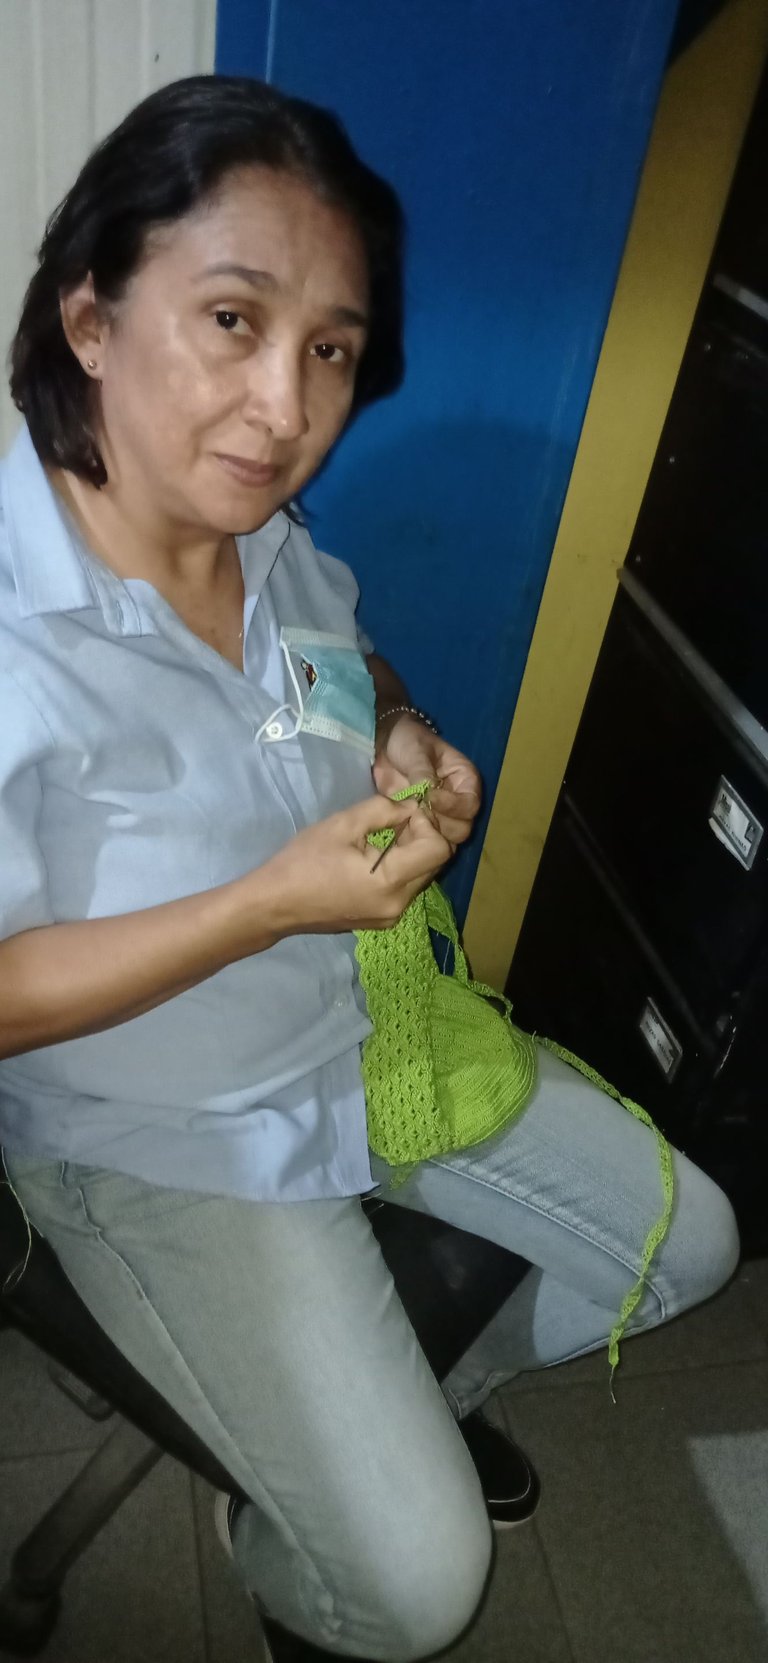
Comienzo:Todas las tallas comienzan de la misma manera, realizamos el nudo deslizado y realizamos cadenas. La cantidad de cadenetas depende de la medida que vamos a hacer. Voy a hacer una talla M y debe medir 7 cm para la talla M, hacemos la tira de cadenas, la sujetamos y medimos los 7cm. Comenzamos tejer con puntos básicos, sujetamos la última y hacemos una cadena al aire para tomar altura y en ésta en la cadeneta número 18, o sea en la segunda desde el croquet, insertamos el gancho y vamos a comenzar a tener puntos bajos. En los puntos bajos quedan dos aros, los atravieso los dos y continúo tejiendo un punto bajo sobre cada cadeneta que acabé de realizar. . Continuamos tejiendo puntos bajos hasta llegar a la primera cadeneta que hice, y cuando estemos llegando al final tejemos la última cadeneta disponible. Ahora lo que hacemos es aumentar para comenzar a tejer . La copa la comenzamos a tejer girando y aumentando tres puntos bajos, seguido sin hacer separación, colocamos el marcador en el segundo, el punto del centro. Una vez que tengamos nuestro aumento listo vamos a comenzar a tejer puntos bajos. El primer punto bajo de la vuelta de regreso va a comenzar allí mismo, o sea en el mismo agujero. En esta primera vuelta es donde el primer agujero va a tener cinco puntos bajos seguidos, del resto solo van a hacer tres puntos bajos. Para comenzar a tejer de ese lado, la colita de hebra que queda la vamos ocultando a medida que vamos tejiendo. Seguimos tejiendo puntos bajos hasta que lleguemos al final y tejemos el último agujero disponible. Para comenzar la otra vuelta y las siguientes que vienen de aquí en adelante, lo que vamos a hacer es repetir una y otra vez, tejemos una cadena, giramos nuestro tejido y nos devolvemos exactamente igual en puntos bajos. donde tenemos el marcador. Para hacer los puntos bajos, metemos en el primer agujero esta cadena que hicimos fue simplemente para tomar altura, no la vamos a contar como un punto. comenzamos a tejer un punto bajo en cada agujero. Seguimos tejiendo hasta donde tenemos el marcador, quitamos el marcador y antes de hacer el aumento tenemos 19 puntos bajos. A medida que vayamos avanzando en cada vuelta vamos aumentando un punto bajo de cada lado antes de los 3 puntos del aumento. hacemos el aumento, el patrón siempre va a ser el mismo para todas las tallas, nos aseguramos de hacer el punto completo y allí dentro del agujero tejemos 3 puntos bajos, todo dentro del mismo punto. Colocamos el marcador porque los puntos se nos esconden, y seguimos sucesivamente. La copa tomará una forma cóncava y quedará apretadito. La medida será aplanándola entre 14 y 14,5 cm de ancho y largo entre 15 y 15,5 cm.. Una vez la copa lista, y donde terminamos el último punto bajo, comenzamos con el primer punto alto, para ese punto tejemos dos cadenas, giramos, enlazamos y ya tejemos en punto de por medio, comencemos la primera puntada en el tercero. Se hace una cadena de separación, enlazo y tejemos en medio punto alto. Se van a ir creando una especie de cuadritos hasta llegar al centro. Cuando estemos llegando al centro quitamos el marcador y enlazamos, tejiendo medio punto alto y medio puto alto mas, y giramos colocando el marcador, repetimos el patrón hasta llegar al final de esa vuelta. Para hacer el acabado final a esa copa tejemos una cadena, giramos el tejido y tejemos puntos bajos en cada uno de los agujeros hasta llegar al final, dejando una hebra larga que va a servir de unión de las dos copas.
💚🌻☘️⭐
Para la parte de arriba, tomamos hebra más o menos 2 metros, lo doblamos por la mitad y con un croquet , buscamos el centro de la copa, insertamos el croquet ahí e insertamos la hebra, pasamos la hebra, volvemos al centro, pasamos la hebra y ajustamos, para hacer cadenetas, continuamos tejiendo cadenas hasta tener una tira de 50 o 55 cm y cuanto estemos llegando al final, cortamos las dos hebras un poco largas y ajustamos. Una vez tengamos nuestra copa lista, hacemos otra copa exactamente igual, con la misma cantidad de vueltas y la misma cantidad de tiras de cadenas.
Unimos las dos copas soltando la hebra suelta de una de las copas y unimos con una sola cadeneta, sacando el croquet en el último punto de la copa y unimos, simulando una cadena.
Ahora vamos a comenzar a tejer la parte de abajo. La hebra que teníamos bien larga, la soltamos como hicimos en el centro, tejemos cadenas hasta completar 15 cm, contamos las cadenas a medida que vayamos tejiendo, al final medimos 15 cm (30 cadenas). Hacemos lo mismo con la copa del otro lado con la misma cantidad de cadenas.
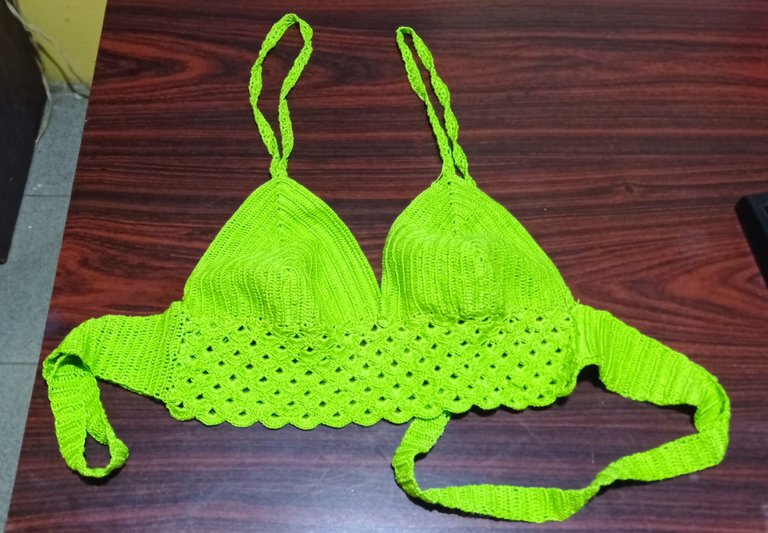
Tomamos hebra y buscamos el último punto disponible, atravesamos el hilo, hacemos una cadena para ajustar bien, no la contamos como tal y ahora vamos a tejer la misma cantidad de cadenas que hicimos del otro lado de la copa. Una vez que la tengamos listas, vamos a girar nuestro tejido. Ahora hacemos una cadena al aire y nos vamos a regresar en puntos bajos, por la parte de atrás de la cadena, seguimos tejiendo por debajo de la copa en puntos bajos por cada agujero que se vaya presentando. hasta llegar al final de las cadenetas, y así a todo lo largo del top.

Las fotos fueron tomadas con la cámara de mi teléfono Redmi Note 8 y editadas con el programa PhotoGrip.
Me encantó el resultado, tengo tiempito sin tejer, pero de verdad me gustaría intentarlo. No se si me pase por alto algo, pero no veo un aproximado de cuanto hilo utilizó , me gustaria saber 👉🏼👈🏼..
Esta muy hermoso. Gran trabajo! ❤️✨
Hola gracias! Gasté un rollo
Felicidades amiga te quedó fabuloso y sobretodo me encanta el color,que es mi favorito. Gracias por publicar saludos 🙏😸
Gracias! Un abrazo
Esto es hermoso! me encanta..
Thank you for sharing this amazing post on HIVE!
Your content got selected by our fellow curator @semarekha & you just received a little thank you via an upvote from our non-profit curation initiative!
You will be featured in one of our recurring curation compilations and on our pinterest boards! Both are aiming to offer you a stage to widen your audience within and outside of the DIY scene of hive.
Join the official DIYHub community on HIVE and show us more of your amazing work and feel free to connect with us and other DIYers via our discord server: https://discord.gg/mY5uCfQ !
If you want to support our goal to motivate other DIY/art/music/homesteading/... creators just delegate to us and earn 100% of your curation rewards!
Stay creative & hive on!
Congratulations @rocio03! You have completed the following achievement on the Hive blockchain and have been rewarded with new badge(s):
Your next target is to reach 1750 upvotes.
You can view your badges on your board and compare yourself to others in the Ranking
If you no longer want to receive notifications, reply to this comment with the word
STOPSupport the HiveBuzz project. Vote for our proposal!
Muy muy hermoso @rocio03 !!!❤😊
¡Está divino! Es muy bonito y tiene un color bastante resaltante. Me gusta la manera tan detallada en la que explica, saludos.✨💚