La personalización es algo que está marcando tendencia hace años, y cada día va tomando más terreno, desde prendas de vestir, accesorios, y pare de contar, y por supuesto los cuadernos de nuestros chicos no escapan de ello, aunque en cierto modo en cuanto a los cuadernos se podía escoger el forro, las etiquetas escolares, y hacerlos nuestros, hoy día podemos usar una gran cantidad de herramientas para tener cuadernos 100% personalizados.
En mi caso, soy mami de @elmundodemiri y siempre he tenido especial cuidado con sus cuadernos, y los de su hermano, sobre todo con lo que aquí llamamos la "Portada interna" que son dibujos que se elaboran en la primera hoja del cuaderno donde se indica la materia a la que pertenece, pero hace un año noté que la personalización ha ido mucho más lejos, al punto de crear cubiertas externas para los cuadernos 100% personalizadas, y por supuesto, no podía dejar de probar esta novedad, sobre todo ahora que es el último año Miranda en primaria, y quería que fuese realmente especial. En cuanto a Matías... pues, ya tiene 14 y por supuesto no quiere nada de eso 😢
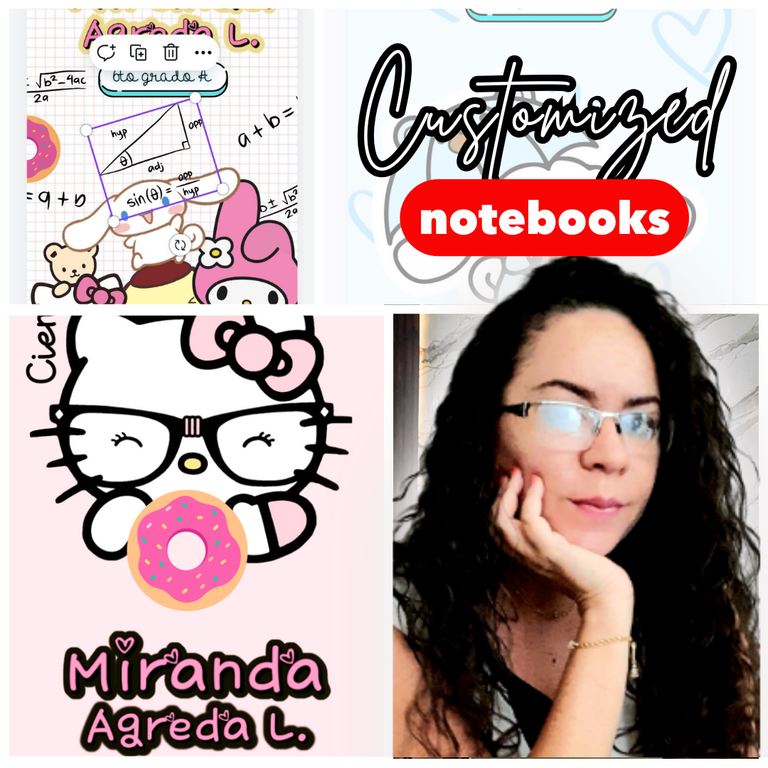
Estas cubiertas en la isla están bastante costosas, por ejemplo, cada libreta tiene un costo de 6 $, lo que multiplicado por 5 que son las que necesita, se traduce en 30 $, así que es algo bastante costoso, pero investigando por ahí, descubrí que podía hacerlas por mi cuenta, ya que solo necesito papel fotográfico autoadhesivo y mucha creatividad para crear cada diseño, por lo que decidí iniciar esta aventura, comenzando por los diseños, que tendrían como temática a Hello Kitty y algunos de sus amigos, lo que parece ser tendencia ahora, ya que sus amigas también lo están usando.
Buscando ideas
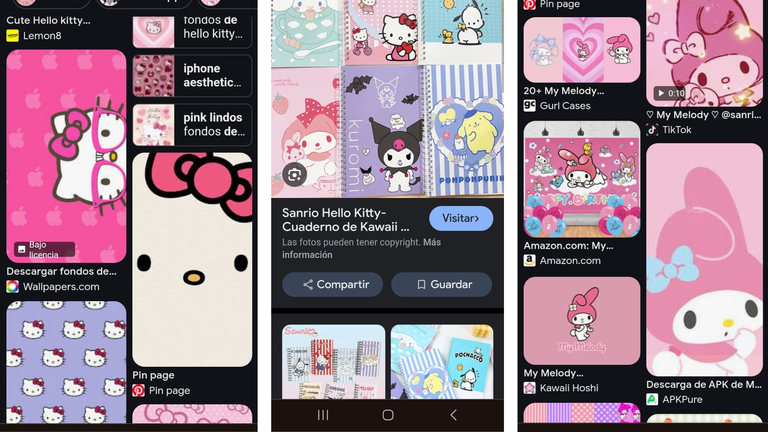
Así que ya con eso en mente me senté con ella y mi celular a buscar ideas en la web, mirando distintos modelos de cuadernos para luego hacer las composiciones que van a ver más abajo.
Esta parte es la que más me gusta de todo el proceso, porque es cuando mi creatividad se desata y comienzo a visualizar cómo quiero que se vea lo que haré, y una vez listo ese paso comienza la búsqueda de todas las imágenes que necesitaré para armar el diseño al gusto de Miranda, quien últimamente se ha vuelto fan de los colores pasteles, así que el fondo definitivamente tendría que ser en tonos pasteles, rosa, azul y amarillo, que son sus favoritos.
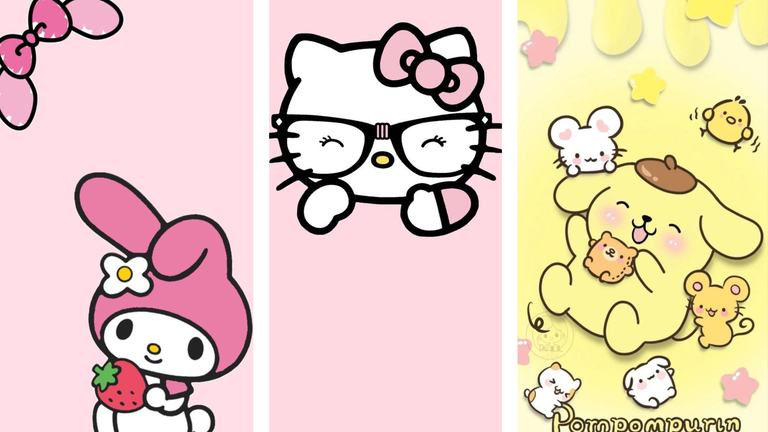
En su caso, ella decidió usar varios personajes: Hello Kitty, Pompom Purin, My melody y Cinnamoroll, que justamente tienen esos colores, así que con esa paleta se trabajaría, por lo que estuve buscando algunos fondos con los personajes, encontrando unos ya casi listos para su uso, y otros los hice prácticamente desde cero, tomando como referencia otros diseños.
Miranda ama las cosas sencillas (no salió a su mamá), así que no quería nada con muchos detallitos, y en colores pasteles, que era lo más importante, y por supuesto, que fuese de Hello Kitty, pero había un detalle que a ella no le importaba, pero a mí sí, y es que su morral tiene como temática principal, las donas, así que me empeñé en incorporar donas en el diseño, y paso a mostrarles algunas de las composiciones que hicimos en Canva.
Diseños con fondo de base
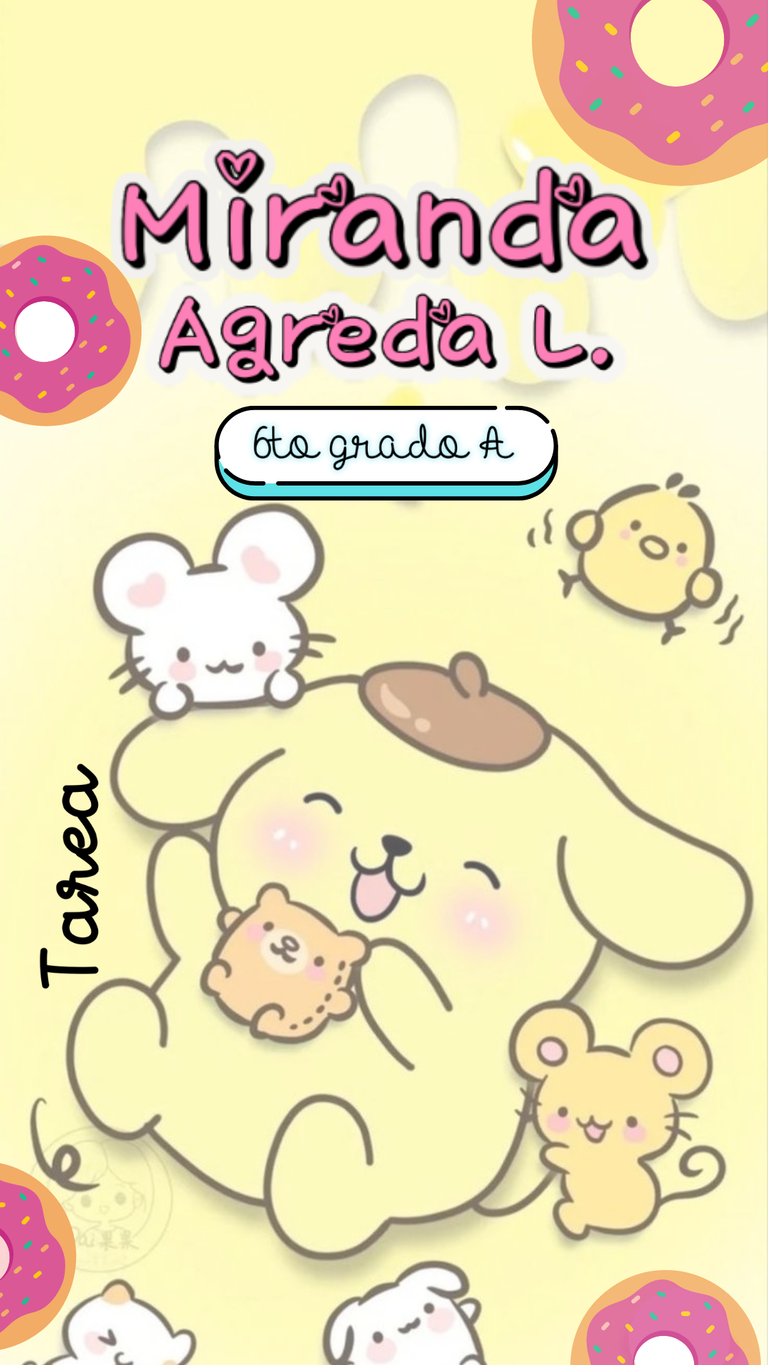
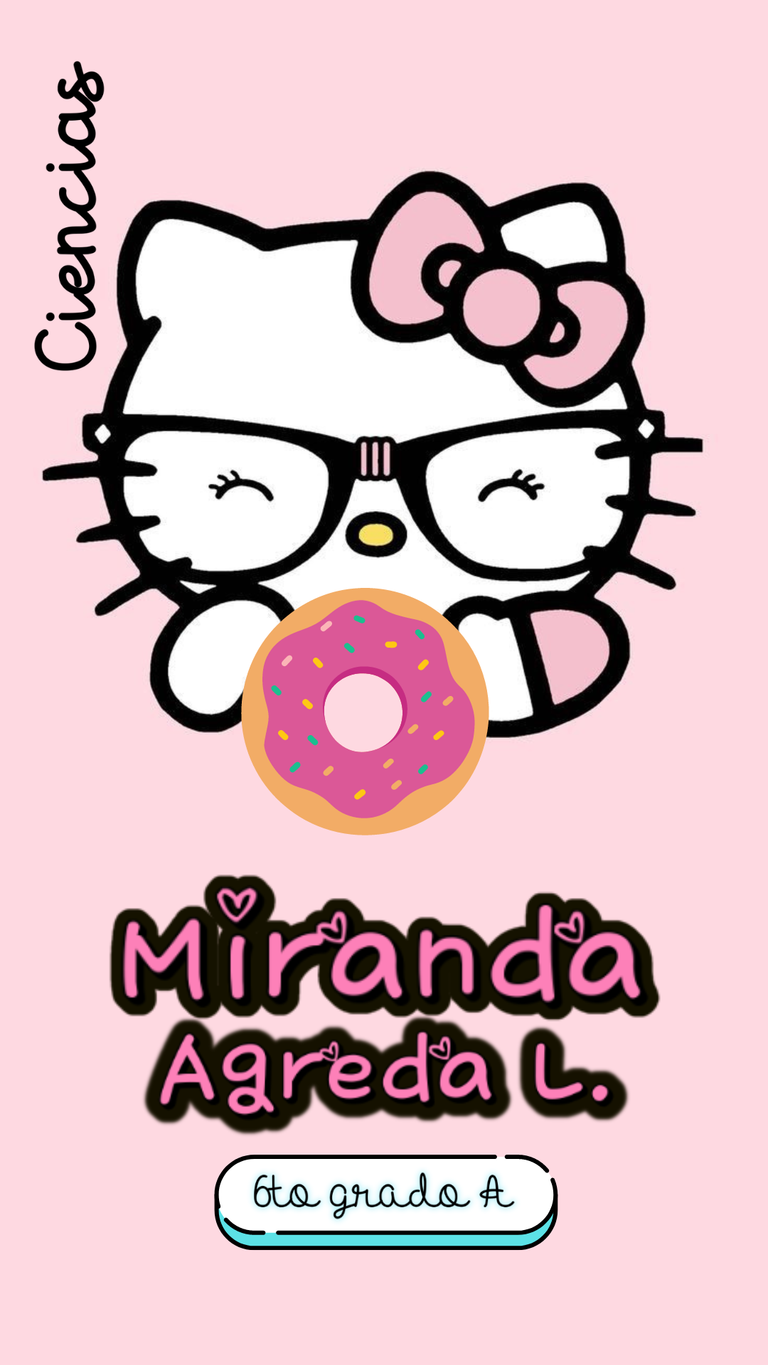
Hello Kitty, My Melody y Pompom Purin
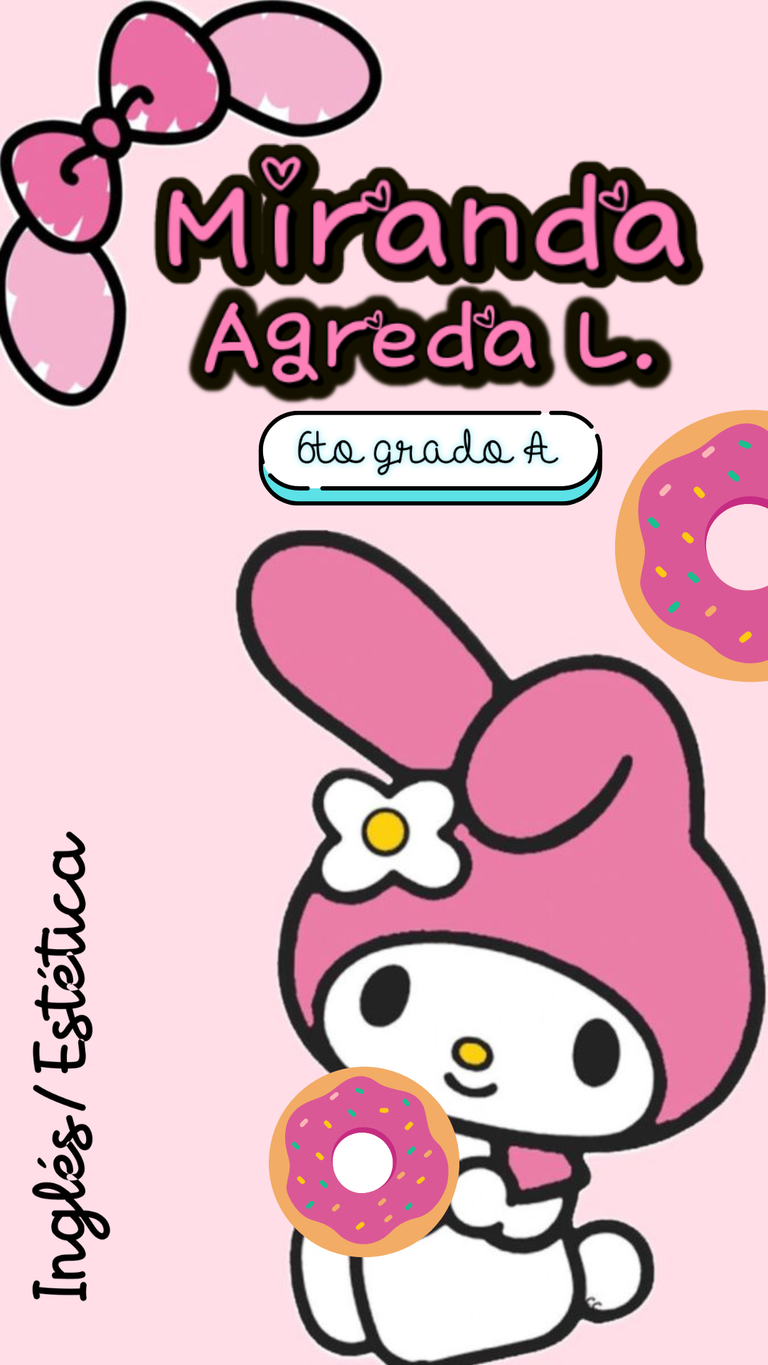
Estas fueron las cubiertas más sencillas, porque encontré los fondos prácticamente listos, así que solo tenía que incorporar la dona, el nombre, grado, la asignatura para la que sería cada cuaderno, y ubicarlos en donde me pareciera más conveniente, pero tenía que hacer las letras, y aunque Canva ofrece muchísimas opciones, quise usar la fuente de Hello Kitty.
Así que ubiqué un generador de texto con las distintas fuentes de Hello Kitty, Miranda escogió su favorita, así como el efecto para crear su nombre y hacerlo resaltar, y luego en Canva le puse un borde según el color de cada fondo.
Para la identificación del grado y sección que cursa, usamos la misma fuente, pero sin ningún efecto, y la ubiqué sobre una etiqueta que encontré entre los muchos elementos que ofrece Canva. Para el nombre de la asignatura, usamos la misma fuente, sin nada de efecto, y sin colocarle ningún fondo, pues la idea era no sobrecargar la cubierta.
Una vez tenía todas las piezas listas, ubiqué todo en su lugar, y como les dije tenía que incorporar las donas, así que lo hice donde creí se verían bien, y repetí este mismo proceso con los tres diseños.

Diseños desde cero
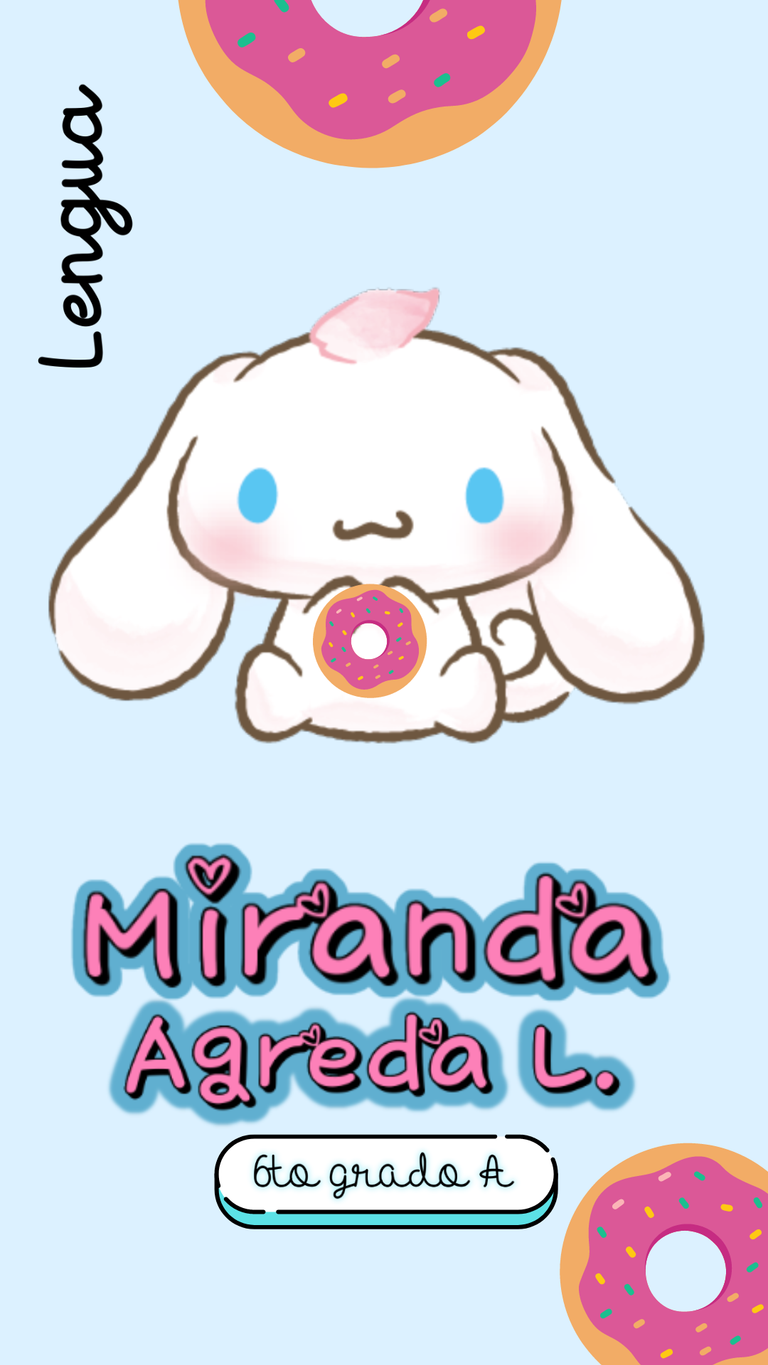
Cinnamoroll
Este personaje se relaciona mucho con el azul cielo, así que comencé cambiando el fondo blanco por un azul pastel muy lindo, seguidamente ubiqué el nombre, al que como ven, le cambié el borde por un tono azul un poco más intenso para generar contraste.
En cuatro al personaje descargué varios en formato PNG (sin fondo), y Miri escogió su favorito, incorporamos las donas y los demás elementos y estuvo lista la cubierta.

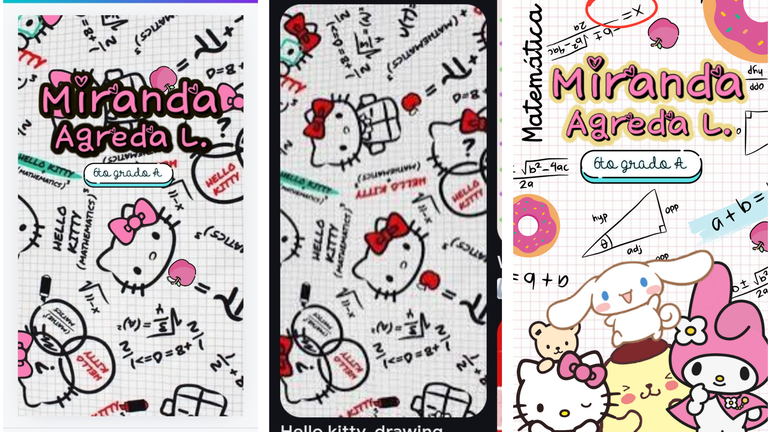
Kitty y sus amigos
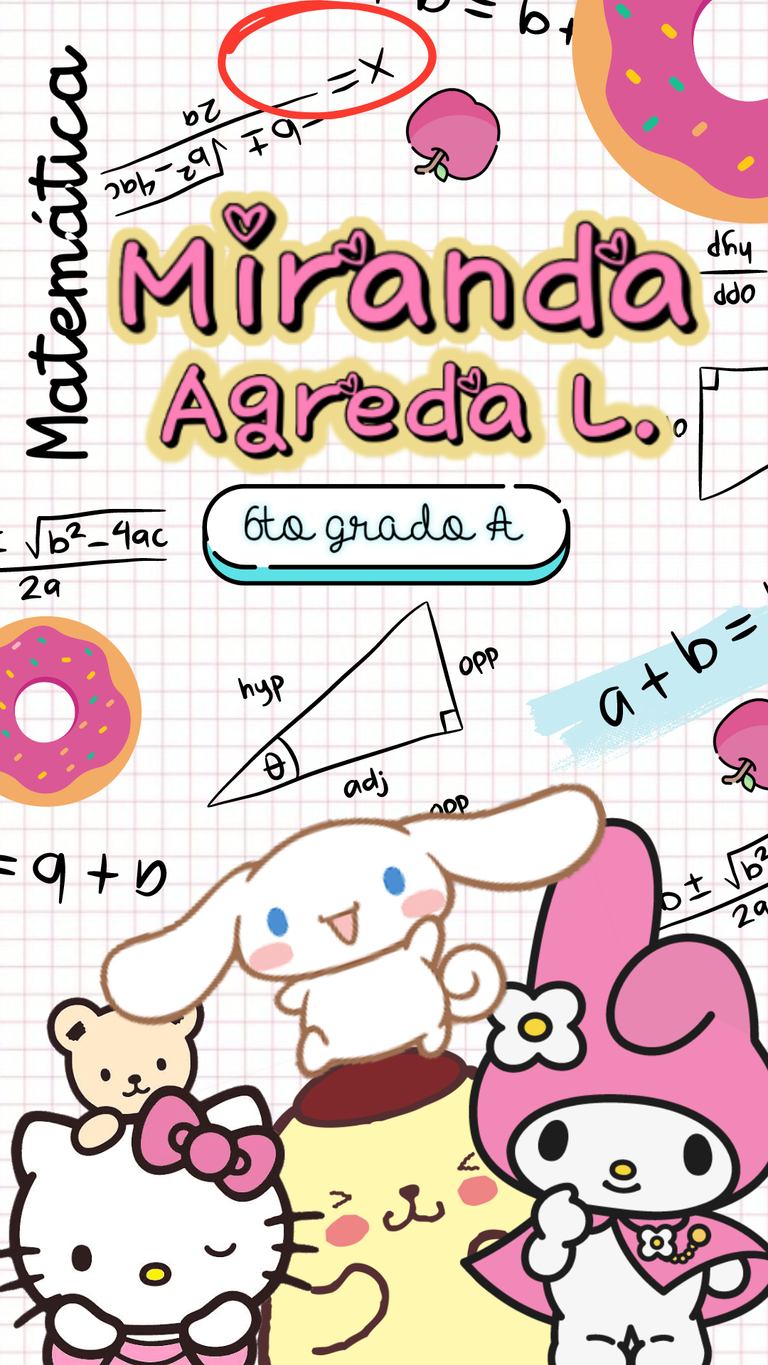
Para el cuaderno de matemática, había encontrado un fondo que nos gustó muchísimo a las dos, pero era con el color rojo de la Hello Kitty original y no nos servía porque Miranda quería tonos pasteles, y aunque traté de adaptarlo, no quedé conforme con el resultado, así que decidí hacerlo desde cero.
En principio necesitaba una cuadrícula, y decidí usar una en tono rosa, seguidamente utilicé imágenes en formato PNG, de los personajes que se usaron en los otros cuadernos, y realicé una composición muy linda, para luego agregar el resto de los detalles, pero como me había gustado un montón las imágenes relativas a las matemáticas que tenía el fondo original, busqué algunos elementos en Canva y los agregué, así como unas manzanas rosas, y otros pequeños detalles que la hicieron ver hermosa. Y demás está decir que Miranda está enamorada de sus cubiertas.
No les diré que es súper fácil de hacer, y mucho menos si trabajas desde el celular, pero la verdad disfruté tanto el proceso, que hasta lo hice dos veces, ya que gracias a la indecisión que me caracteriza, hice las cinco portadas dos veces, pero los últimos diseños le gustaron más a Miranda, así que son los que utilizaremos para realizar las impresiones, y ya les estaré mostrando otro día el resultado final.

Personalization is something that has been a trend for years, and every day is taking more ground, from clothing, accessories, and stop counting, and of course the notebooks of our children do not escape from it, although in a way in terms of notebooks we could choose the lining, school labels, and make them our own, today we can use a lot of tools to have 100% personalized notebooks.
In my case, I am mommy of @elmundodemiri and I have always taken special care with her notebooks, and those of her brother, especially with what we call here the "Internal cover" which are drawings that are made on the first page of the notebook where the subject to which it belongs is indicated, but a year ago I noticed that personalization has gone much further, to the point of creating external covers for the notebooks 100% personalized, and of course, I could not stop trying this novelty, especially now that it is the last Miranda year in primary school, and I wanted it to be really special. As for Matias... well, he's already 14 and of course he doesn't want any of that 😢.
These covers on the island are quite expensive, for example, each notebook has a cost of $ 6, which multiplied by 5 that are the ones you need, translates into $ 30, so it is something quite expensive, but researching around, I discovered that I could make them on my own, since I only need self-adhesive photo paper and a lot of creativity to create each design, so I decided to start this adventure, starting with the designs, which would have Hello Kitty and some of her friends as a theme, which seems to be a trend now, since her friends are also using it.
So with that in mind I sat down with her and my cell phone to look for ideas on the web, looking at different models of notebooks to then make the compositions that you are going to see below.
This part is what I like the most of the whole process, because it is when my creativity is unleashed and I start to visualize how I want what I will do to look like, and once that step is done, the search for all the images I will need to assemble the design to Miranda's taste begins, who lately has become a fan of pastel colors, so the background would definitely have to be in pastel shades, pink, blue and yellow, which are her favorites.
In her case, she decided to use several characters: Hello Kitty, Pompom Purin, My melody and Cinnamoroll, which just have those colors, so with that palette would work, so I was looking for some backgrounds with the characters, finding some almost ready to use, and others I made them practically from scratch, taking as reference other designs.
Miranda loves simple things (she didn't go out to her mom), so she didn't want anything with lots of details, and in pastel colors, which was the most important thing, and of course, that it was Hello Kitty, but there was a detail that she didn't care about, but I did, and that is that her backpack has as main theme, donuts, so I insisted on incorporating donuts in the design, and I'll show you some of the compositions we did in Canva.
Designs with base background
Hello Kitty, My Melody and Pompom Purin
These were the easiest covers, because I found the backgrounds practically ready, so I only had to incorporate the donut, the name, grade, the subject for which each notebook would be, and place them where it seemed most convenient, but I had to make the letters, and although Canva offers many, many options, I wanted to use the Hello Kitty font.
So I located a text generator with the different Hello Kitty fonts, Miranda chose her favorite, as well as the effect to create her name and make it stand out, and then in Canva I put a border according to the color of each background.
For the identification of the grade and section she is in, we used the same font, but without any effect, and I placed it on a label that I found among the many elements that Canva offers. For the name of the subject, we used the same font, without any effect, and without placing any background, because the idea was not to overload the cover.
Once I had all the pieces ready, I placed everything in its place, and as I told you I had to incorporate the donuts, so I did it where I thought they would look good, and I repeated this same process with the three designs.
Designs from scratch
Cinnamoroll
This character is very much related to the sky blue, so I started by changing the white background for a very nice pastel blue, then I placed the name, which as you can see, I changed the border for a blue tone a little more intense to generate contrast.
As for the character, I downloaded several in PNG format (without background), and Miri chose her favorite, we incorporated the donuts and other elements and the cover was ready.
Kitty and her friends
For the math notebook, I had found a background that we both liked very much, but it was the original Hello Kitty's red color and it didn't work for us because Miranda wanted pastel tones, and although I tried to adapt it, I wasn't satisfied with the result, so I decided to make it from scratch.
At first I needed a grid, and I decided to use a pink one, then I used PNG images of the characters that were used in the other notebooks, and I made a very nice composition, and then I added the rest of the details, but as I liked a lot the images related to mathematics that the original background had, I looked for some elements in Canva and added them, as well as some pink apples, and other small details that made it look beautiful. And needless to say, Miranda is in love with her covers.
I won't tell you that it's super easy to do, and much less if you work from your cell phone, but I really enjoyed the process so much that I even did it twice, thanks to the indecision that characterizes me, I did the five covers twice, but Miranda liked the last designs the most, so they are the ones we will use to make the prints, and I'll show you the final result another day.

Hiciste un trabajo hermoso para tu niña. Y cuéntanos cuál es el generador de texto que usaste? Quedó todo muy hermoso
Gracias amiga, quedamos más que contentas. Aquí te dejo el generador de texto qué usé.
Ya lo dejé en el post porque lo había olvidado!
Abrazos
Me encantaron estos diseños, están preciosos, muy tiernos.
Gracias amiga, ahora debo imprimir y forrar. A Miri le encantaron
Dios mio pero que paciencia tiene esta mamá jaja😍😍 te quedaron hermosos ambos diseños amiii, pero tambien me quedo con la eleccion de Miri
Jeje estaba ayer loca con eso, más entusiasmada que Miranda jaja. Me gustó cómo quedaron, ahora espero poder pegar todo bien jaja
hermoso, donde se pueden realizar esas impresiones en la isla? para forra los cuadernos? e visto que esta muy de moda, pero aun no averiguo donde lo imprimen del mismo tamaño que los cuadernos?
Amiga copimax imprime en ese material, también Bakhos. Primera vez que invento esto así que espero que me quede bien jaja
Ha ok ok.. pero es muy costoso ??
La impresión puede estar en 2, pero haybuna chica qie hace eso y te los forra de una vez y cobra 6 por cuaderno.
Ha ok ok, bueno suerte con eso, déjame ver si hago lo mismo para el de mi hijo , esperare a ver tu resultado 😅
Jajajaja espero que salga bien, lo que puede fallar es el tamaño pero probaré en papel y sin color primero para asegurarme que este bien antes de imprimir en el material. Ya te contaré!
Ya quiero ver ese resultado cuando este impresoooo, el trabajo se ve realmente hermoso Rosita 😍
Gracias mi Vane, estoy ansiosa por las impresiones y eso, espero poder pegar todo bien y que le queden lindos sus cuadernos
Me encantan las ideas y el proceso Ami! De verdad que le pusieron mucha creatividad. Ya quiero ver el resultado final.💕
Gracias ami bella. Miranda feliz
Aww. Cute and lovely book covers, ma'am. Your daughter and her friends will be very happy to go through this session with these lovely piece you created. The best part? You saved money. Great job.
Thanks for the support
Que lindos todos los diseños amiga, son las animaciones que le gustan a mi Dari también, menos mal que no me pide que le personalice los cuadernos así, jejeje, ella hace sus propios dibujos, y como le encanta dibujar le quedan bien bonitos, pero realmente es un toque especial, y ahora que sabes cómo hacerlos, puedes ahorrar, porque están bien caritos por otro lado, y es que las mamás tratamos de buscarle solución a las cosas, y si es resolviendo nosotras mismas, pues se hace. Seguramente Miranda estará feliz con el resultado,y yo, ya quiero ver cómo quedaron los cuadernos 🤗🤗🤗
@tipu curate 8
Upvoted 👌 (Mana: 0/75) Liquid rewards.
Que bonito trabajo, está bien interesante, es un buen emprendimiento!
Ya me lo han dicho dos veces, lo del emprendimiento!! Lo voy a tomar en cuenta jeje
Gracias por pasar
Esta idea me me ha encantado ¡¡¡ ya todo tan moderno y hasta con tecnología puedes personalizar lo que quieras. Los colores e imágenes s que han hecho están preciosas. Un excelente trabajo de diseño y creatividad 😍 🫶