Hola querida colmena 🤗
Hello dear beehive 🤗
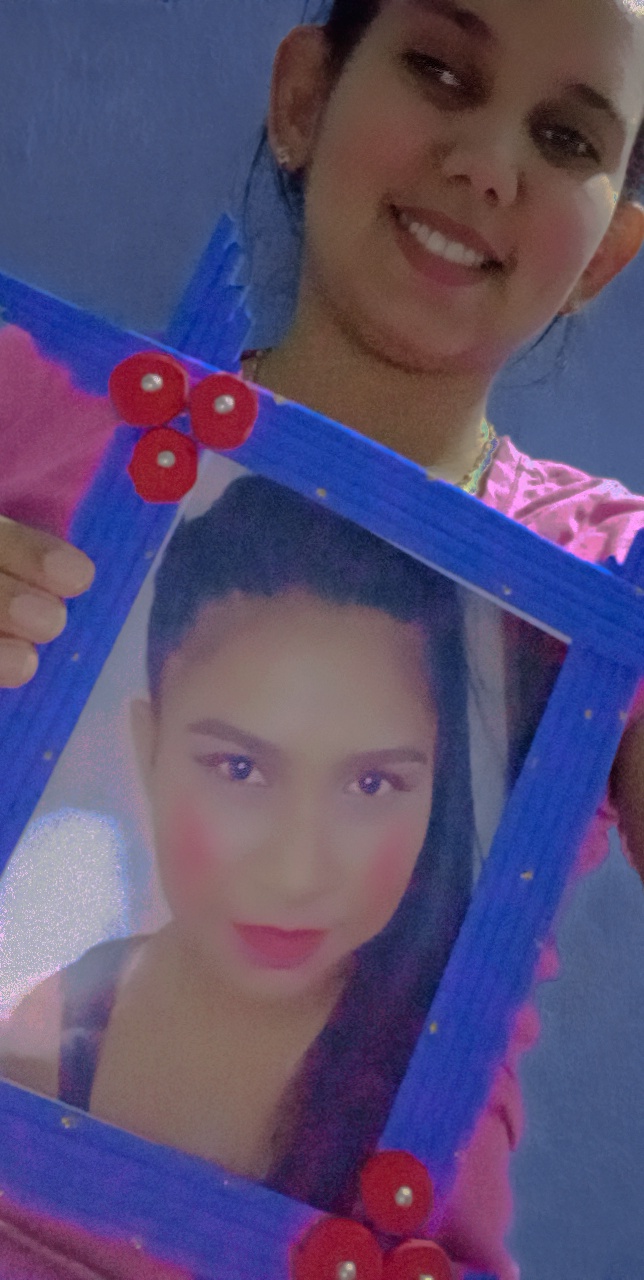
Hoy quiero presentarles una hermosa manualidad que he echo de obsequio para mi prima-ahijada por el dia de su cumple.
Today I want to present you a beautiful craft that I have made as a gift for my cousin-goddaughter for her birthday.
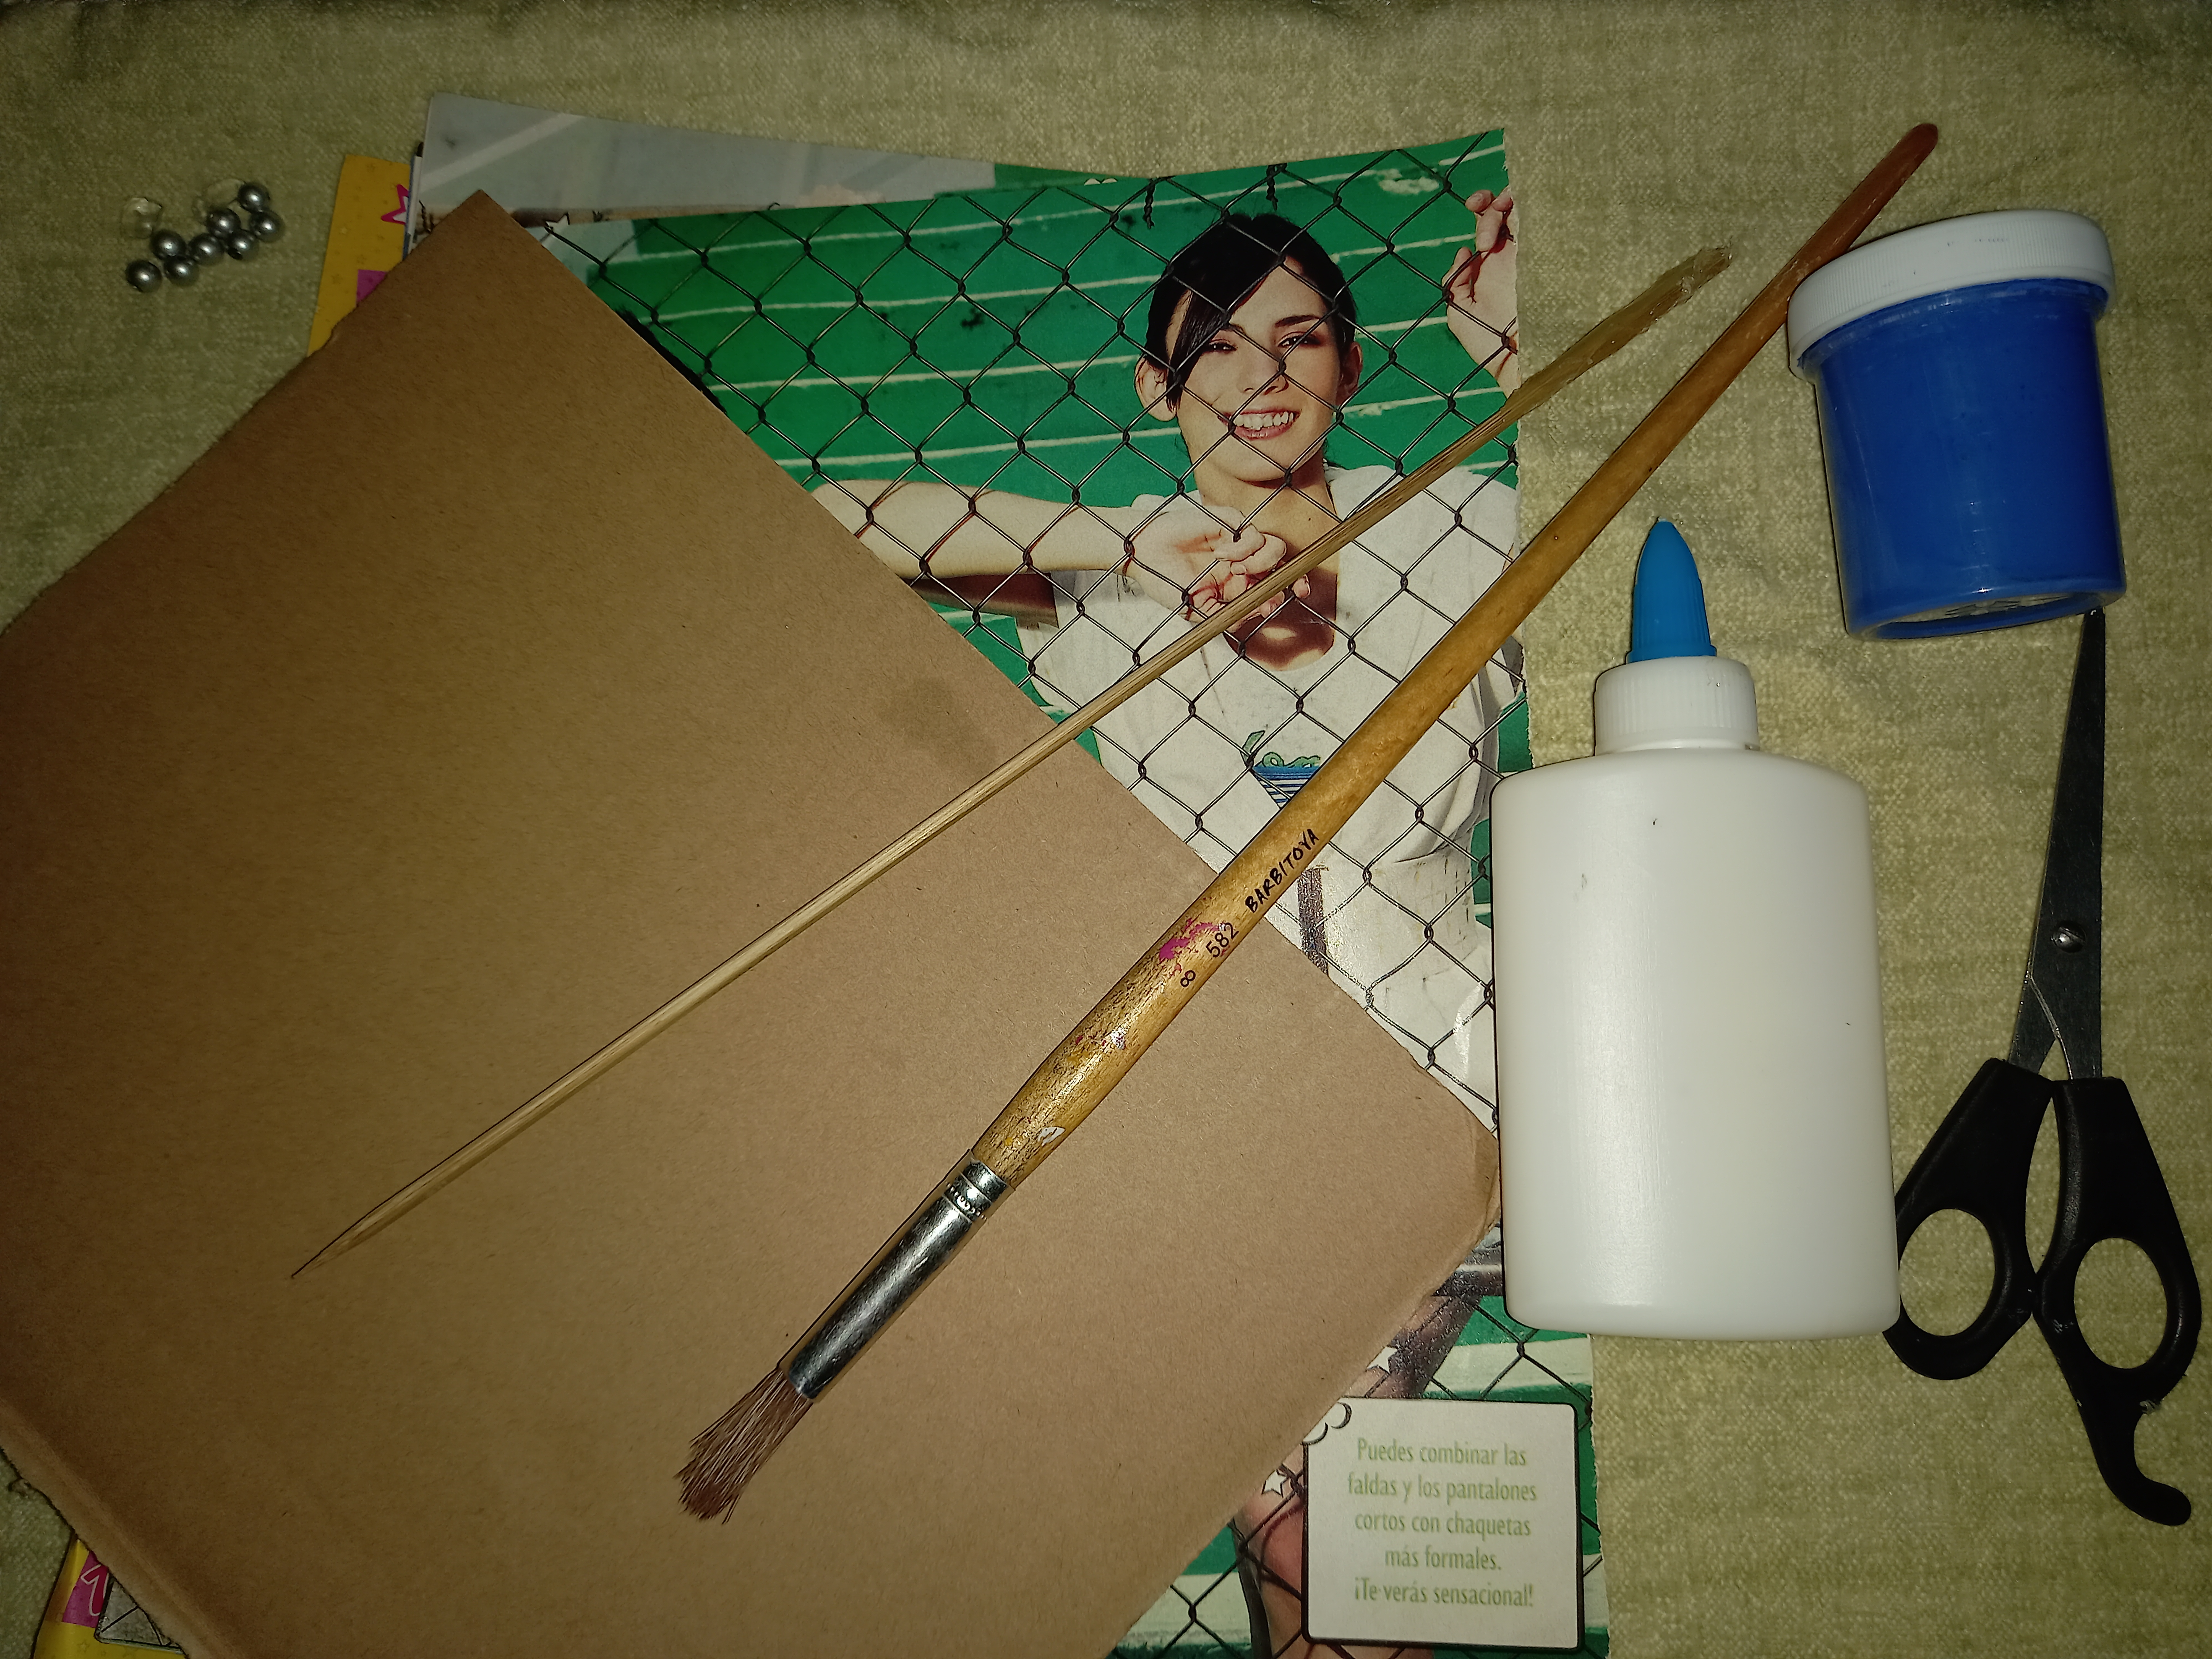
Los materiales que utilicé
◇ Papel de revista
◇ Pegamento Blanco
◇ Tijeras
◇ Cuencas decorativas
◇ Pintura al Frío
◇ Cartón
◇ Pincel
◇ Palito de altura
The materials I use ◇ Magazine paper ◇ White Glue ◇ Scissors ◇ Decorative basins ◇ Cold Painting ◇ Cardboard ◇ Brush ◇ Height stick
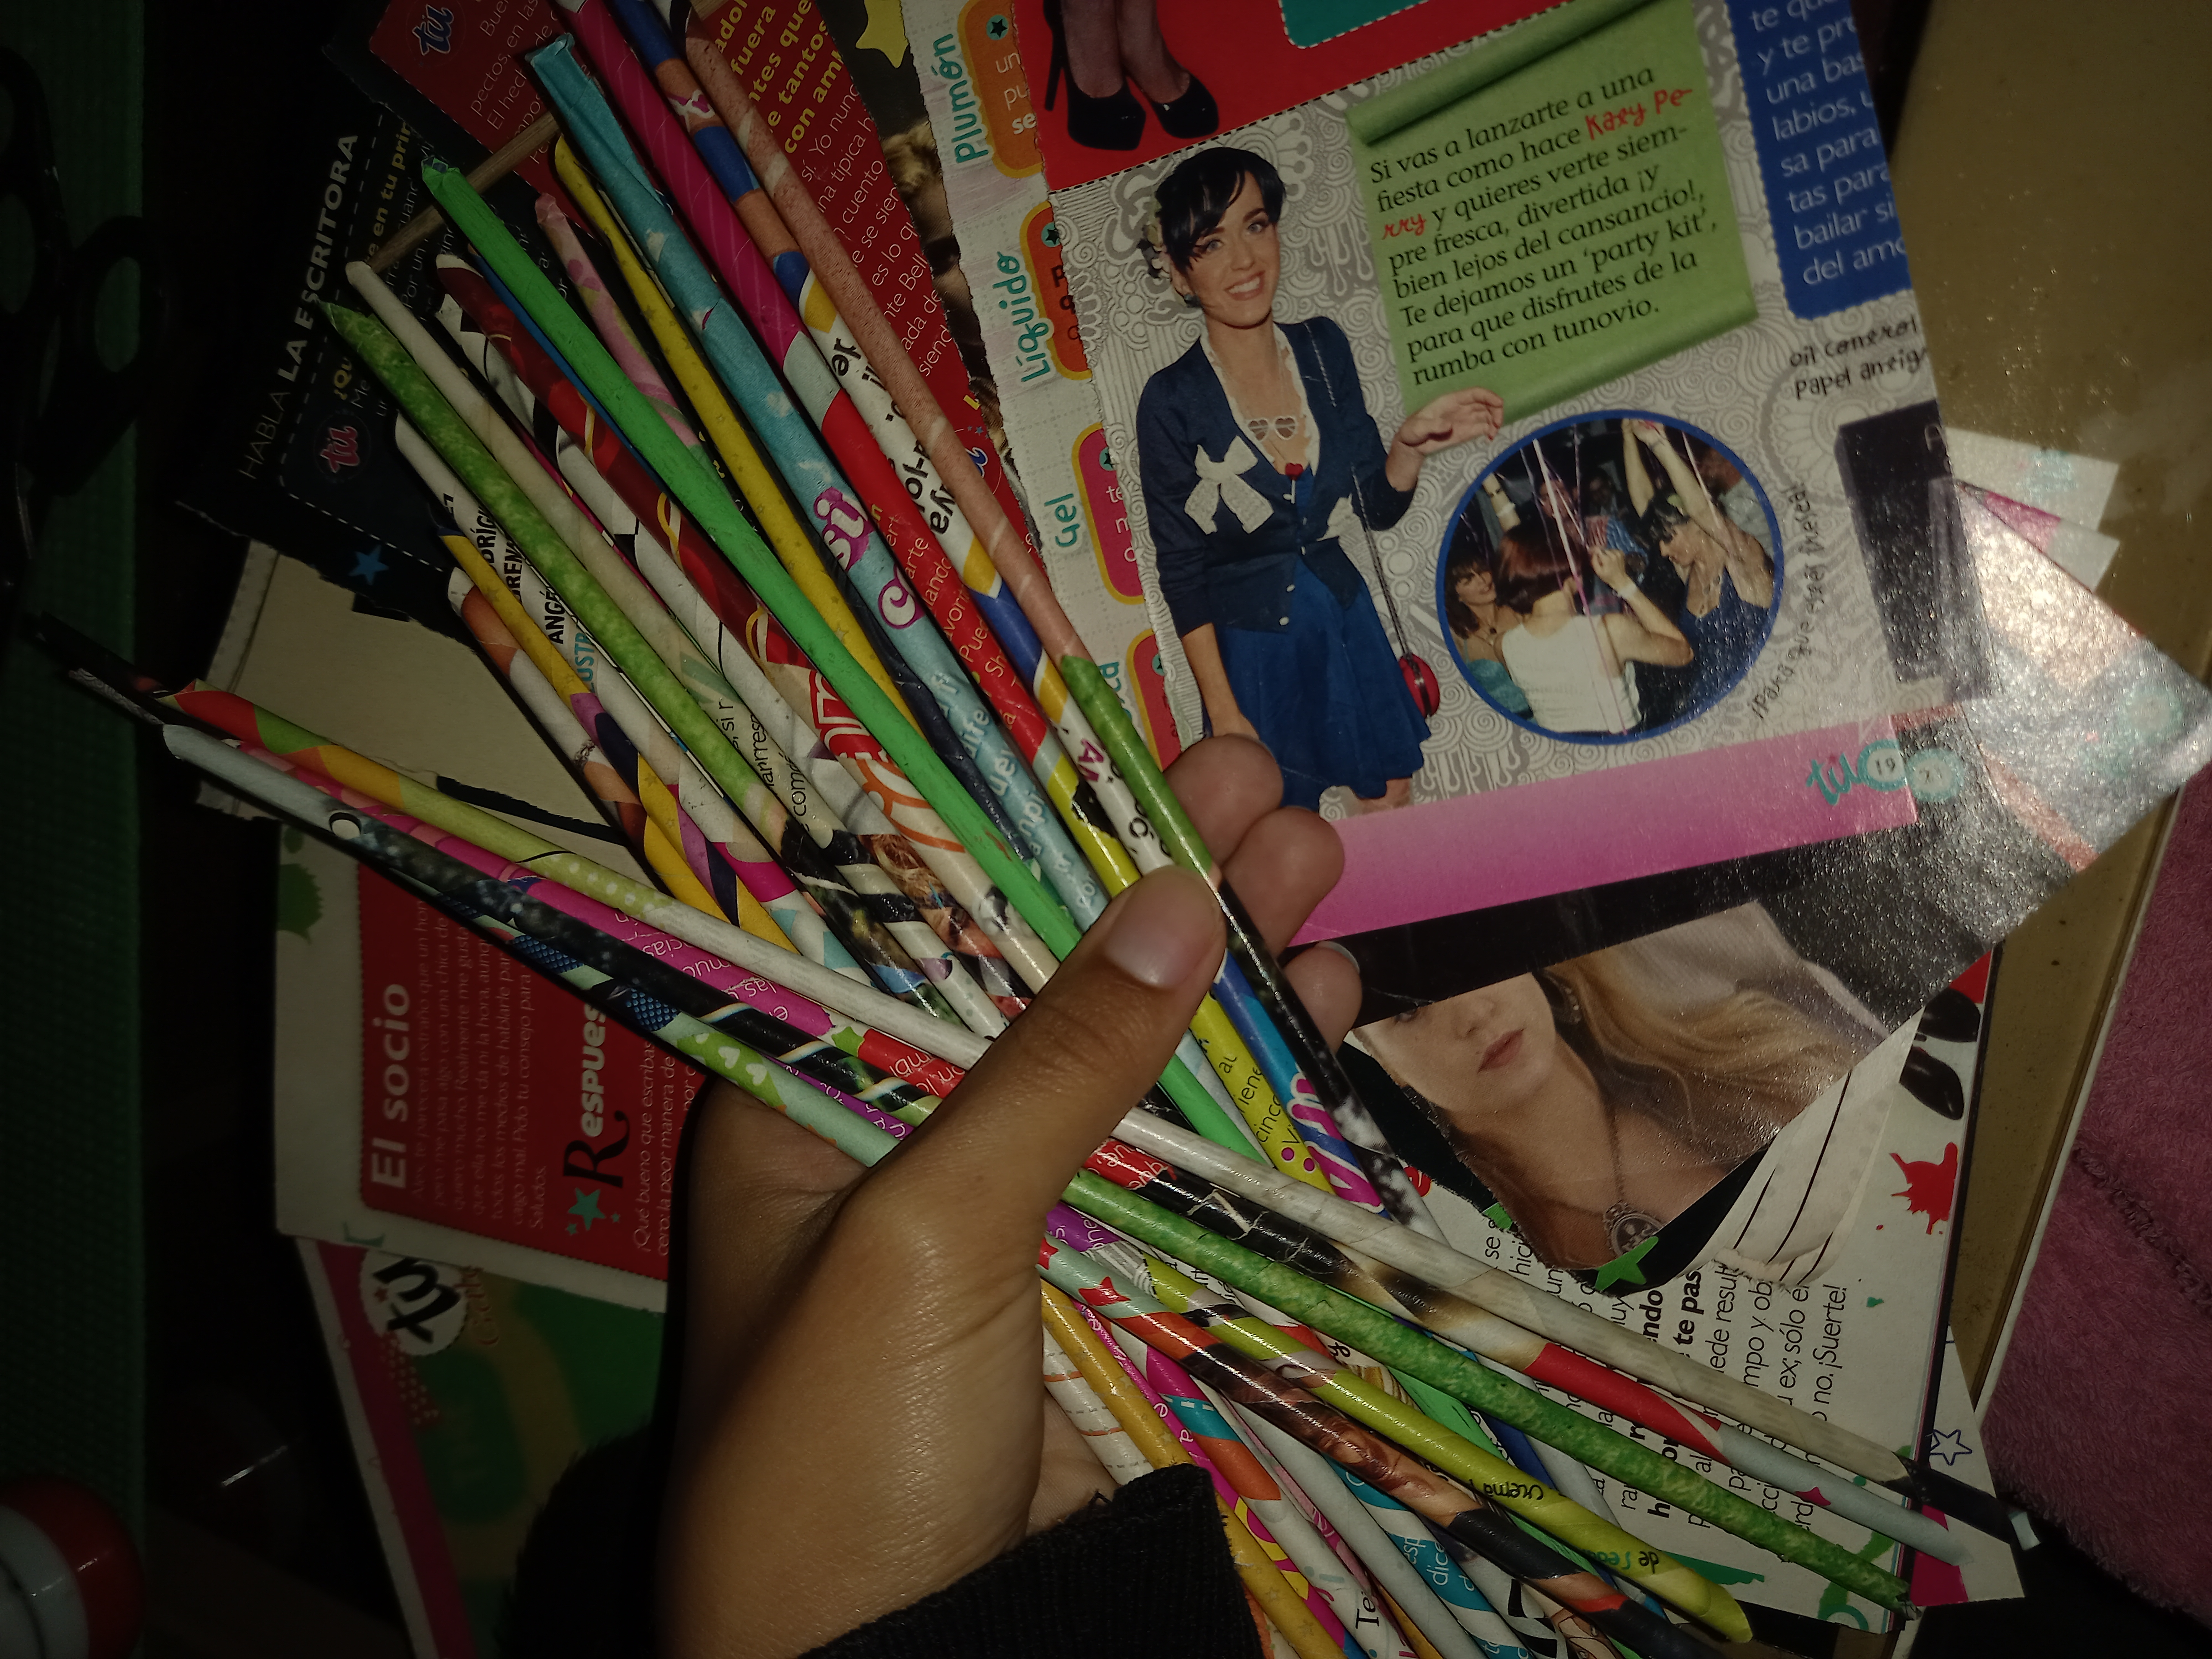
Paso 1
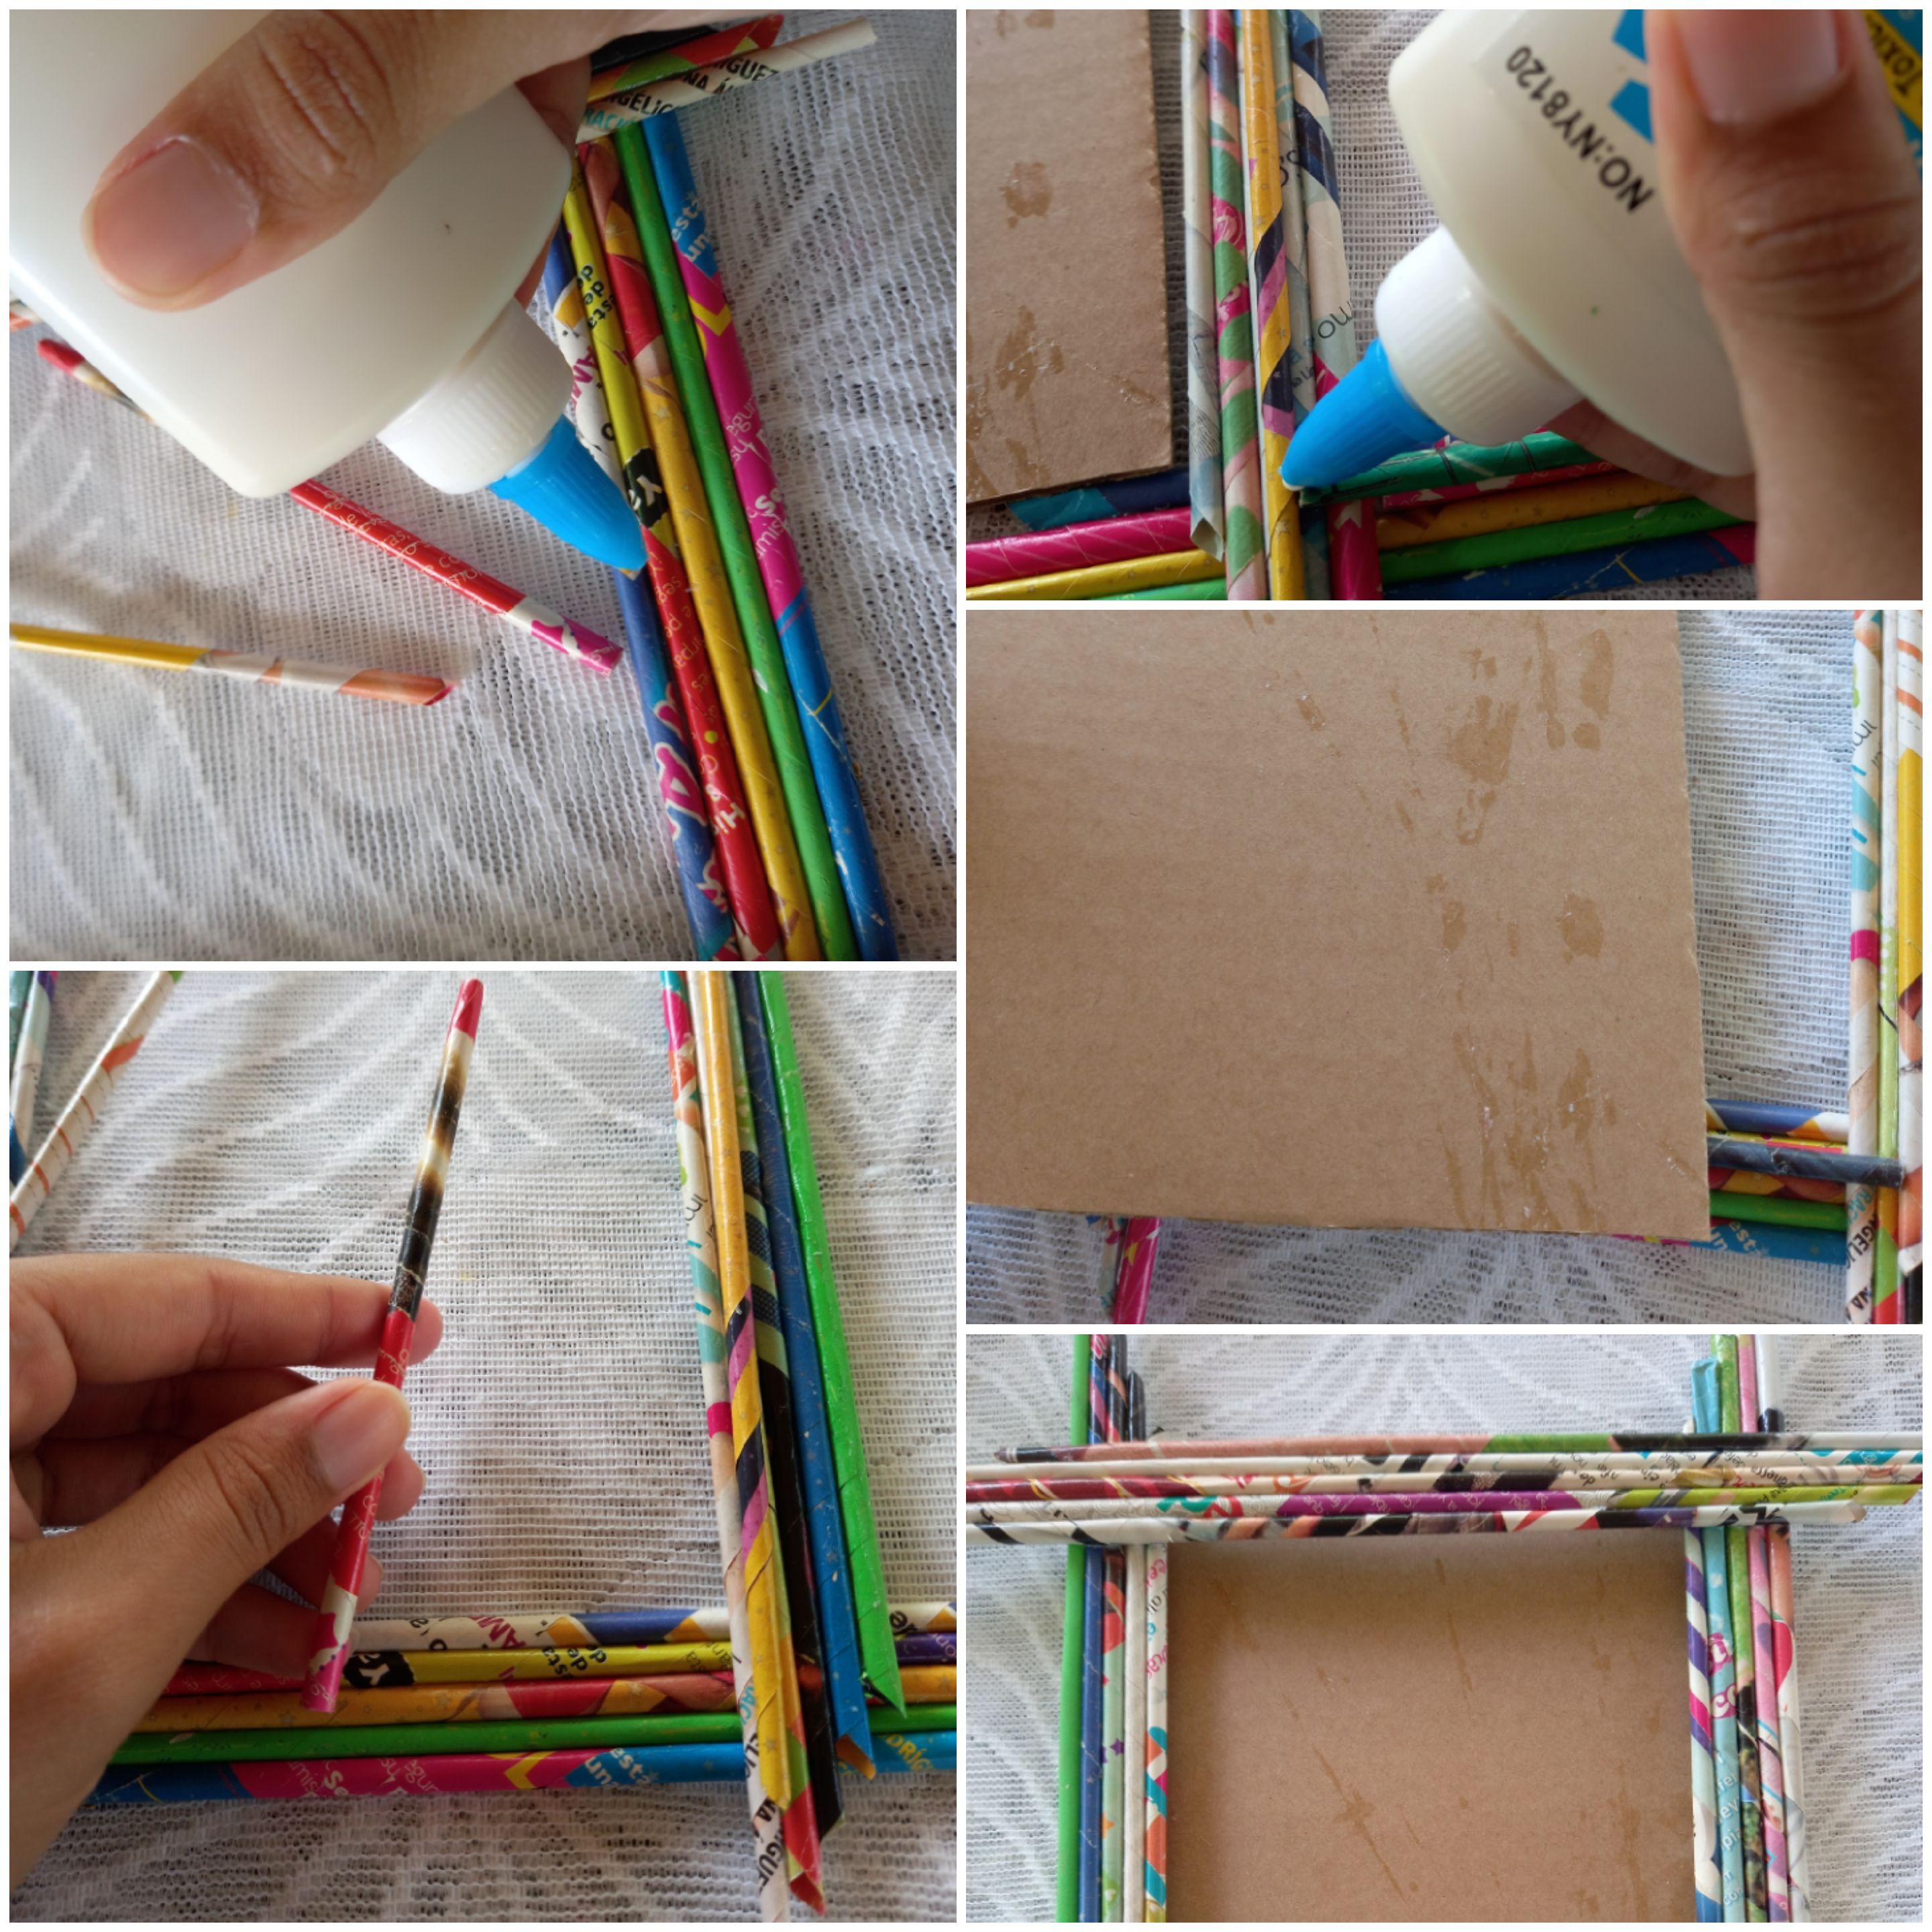
Con las hojas de las revistas comienzo haciendo palitos ayudandome con el palito de altura para que queden todos de la misma medida.
Step 1 With the sheets of the magazines I start making sticks helping myself with the height stick so that they are all the same size.


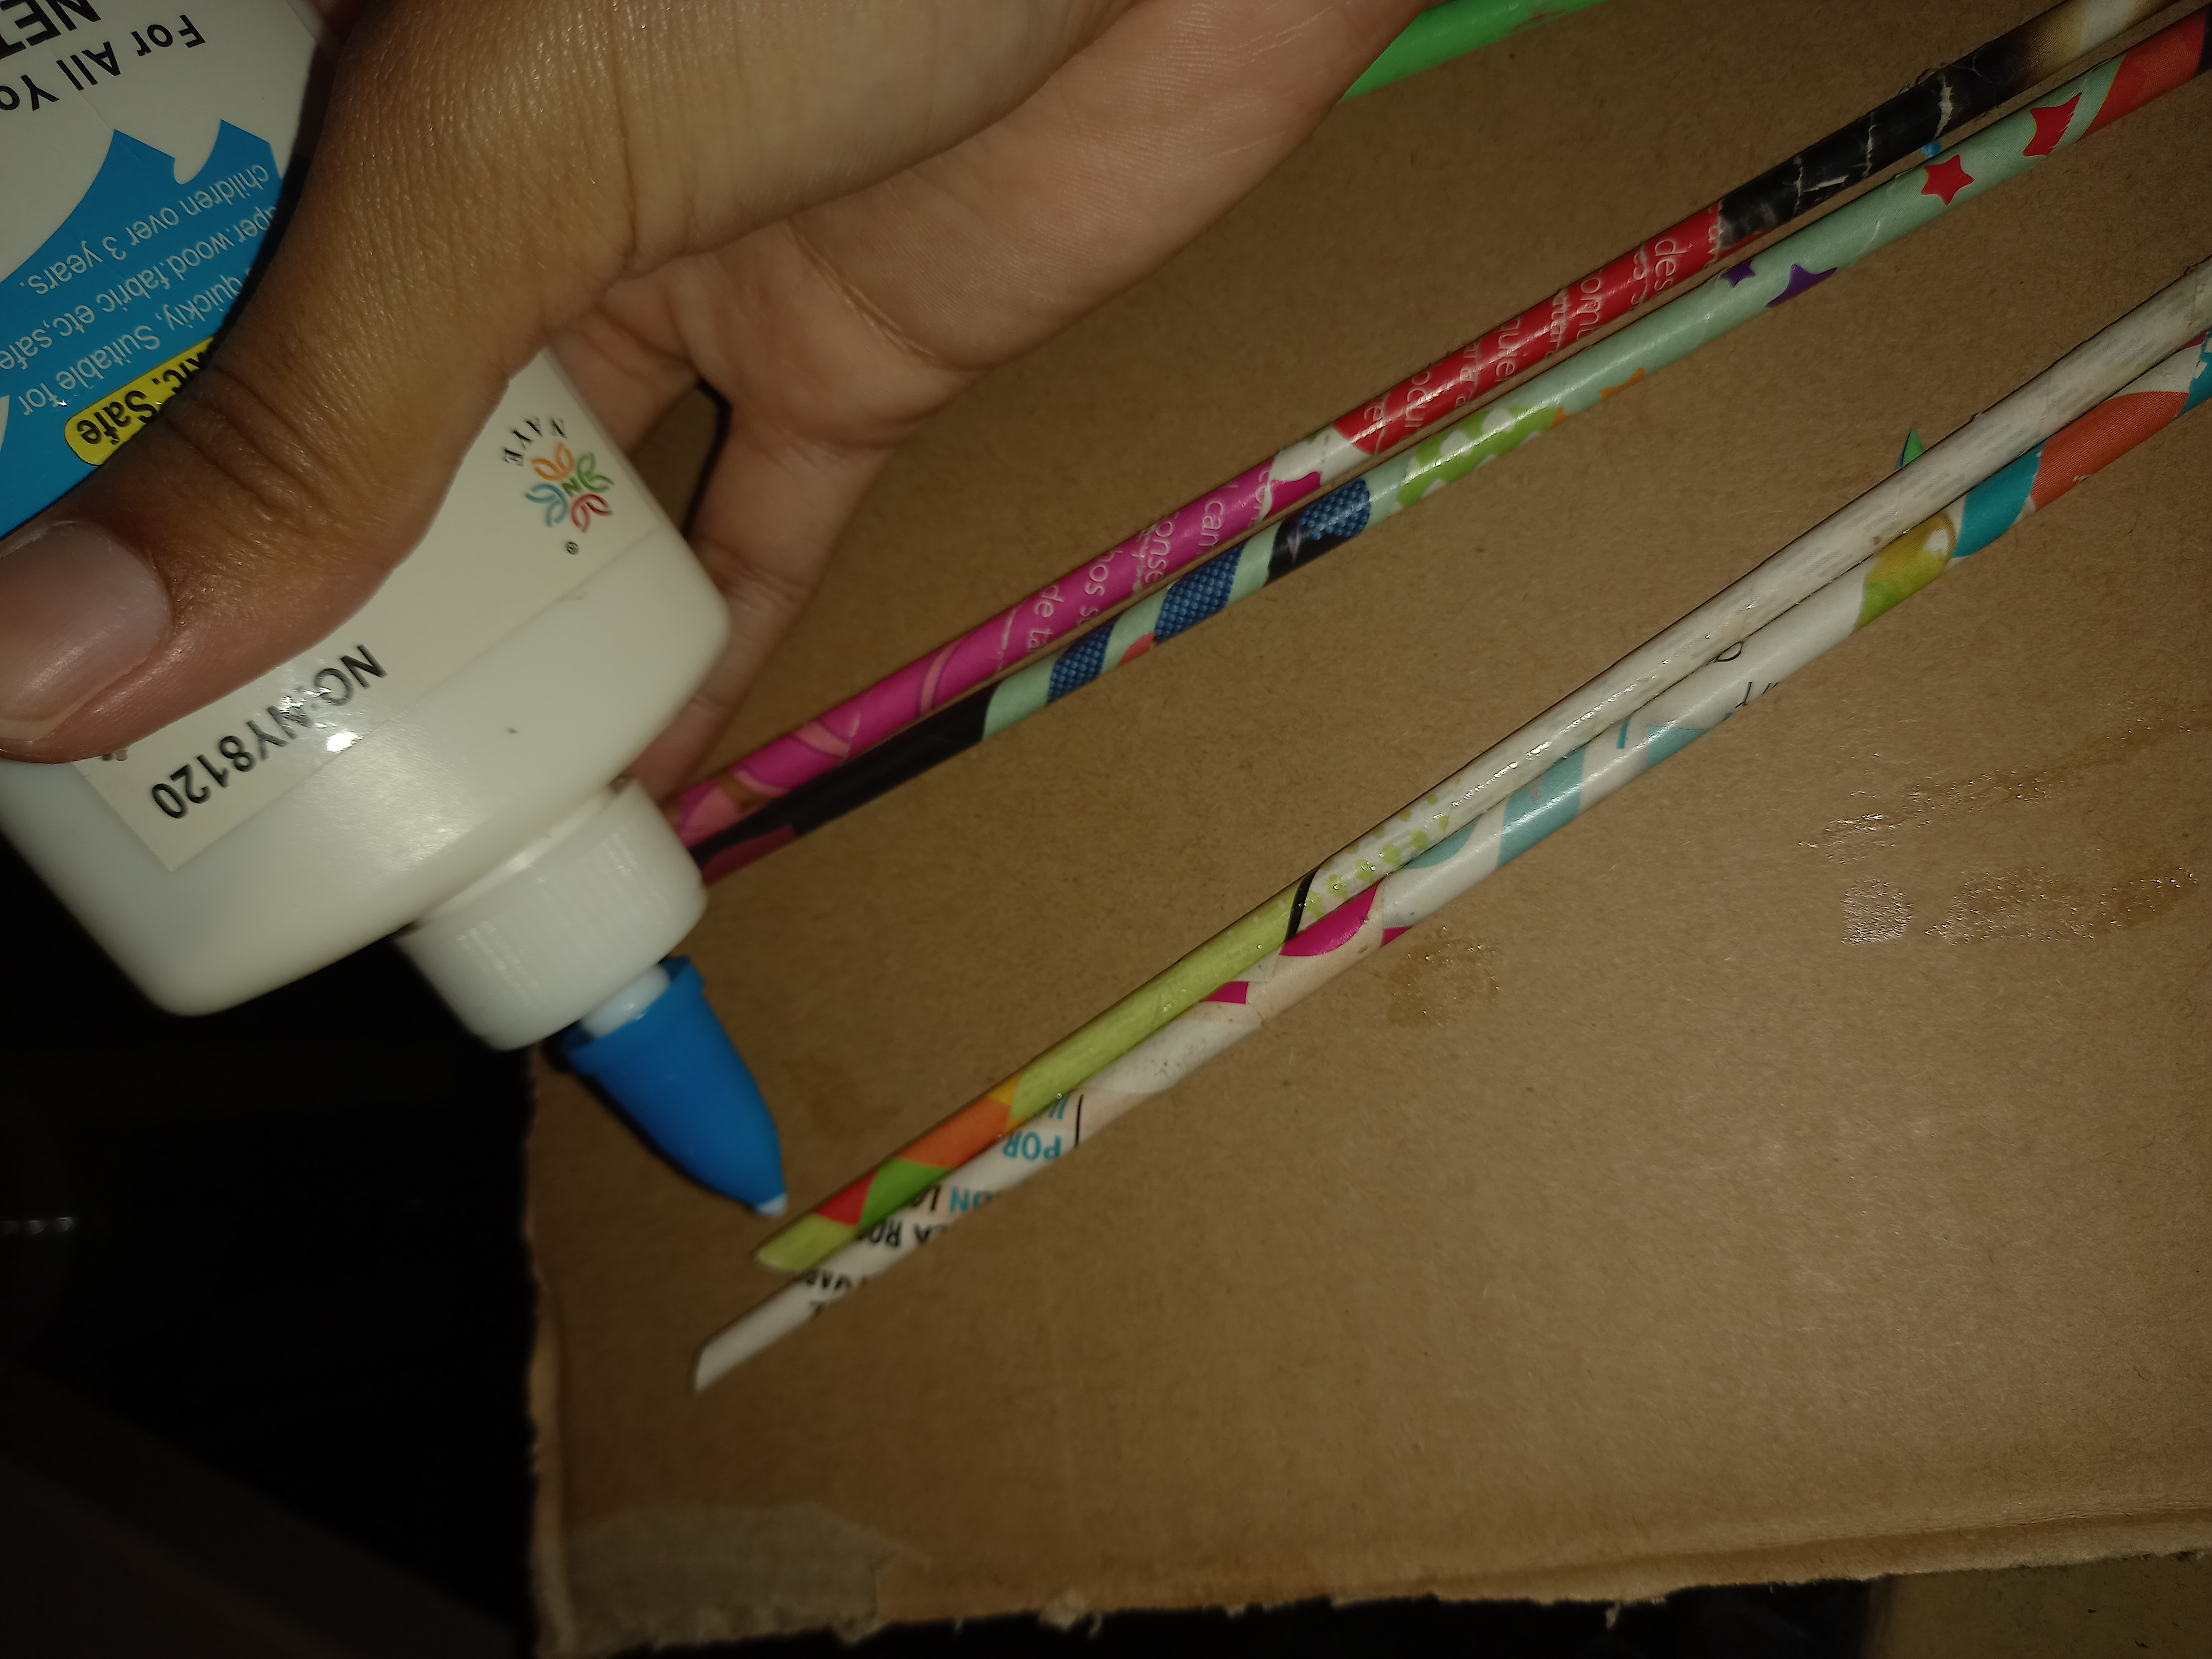
Paso 2
Una vez ya formados todos los palitos, procedemos a pegarlos tipo escalera para crear dicho efecto. Haremos 4 barras del mismo tamaño. Yo utilice una medida aproximada de 30cm cada palito para todos los lados.
Step 2 Once all the sticks are formed, we proceed to glue them ladder type to create this effect. We will make 4 bars of the same size. I used an approximate measurement of 30cm each stick for all sides.

Paso 3
Aquí buscamos la foto que vayamos a enmarcar para tomar las medidas exactas, fijamos el marco y pegamos.
Step 3 Here we look for the photo that we are going to frame to take the exact measures, set the frame and paste.

Paso 4
En la parte trasera del marco, pegamos unos palitos para darle una altura a la ranura donde se ira a introducir la foto y nuestra tapa, esta para que podamos sacar e introducir cualquier fotografía que queramos a futuro.
Step 4 At the back of the frame, we piggled sticks to give him a height to the slot where he will be introduced the photo and our lid, is so that we can take out and introduce any photograph that we want in the future.
Paso 5
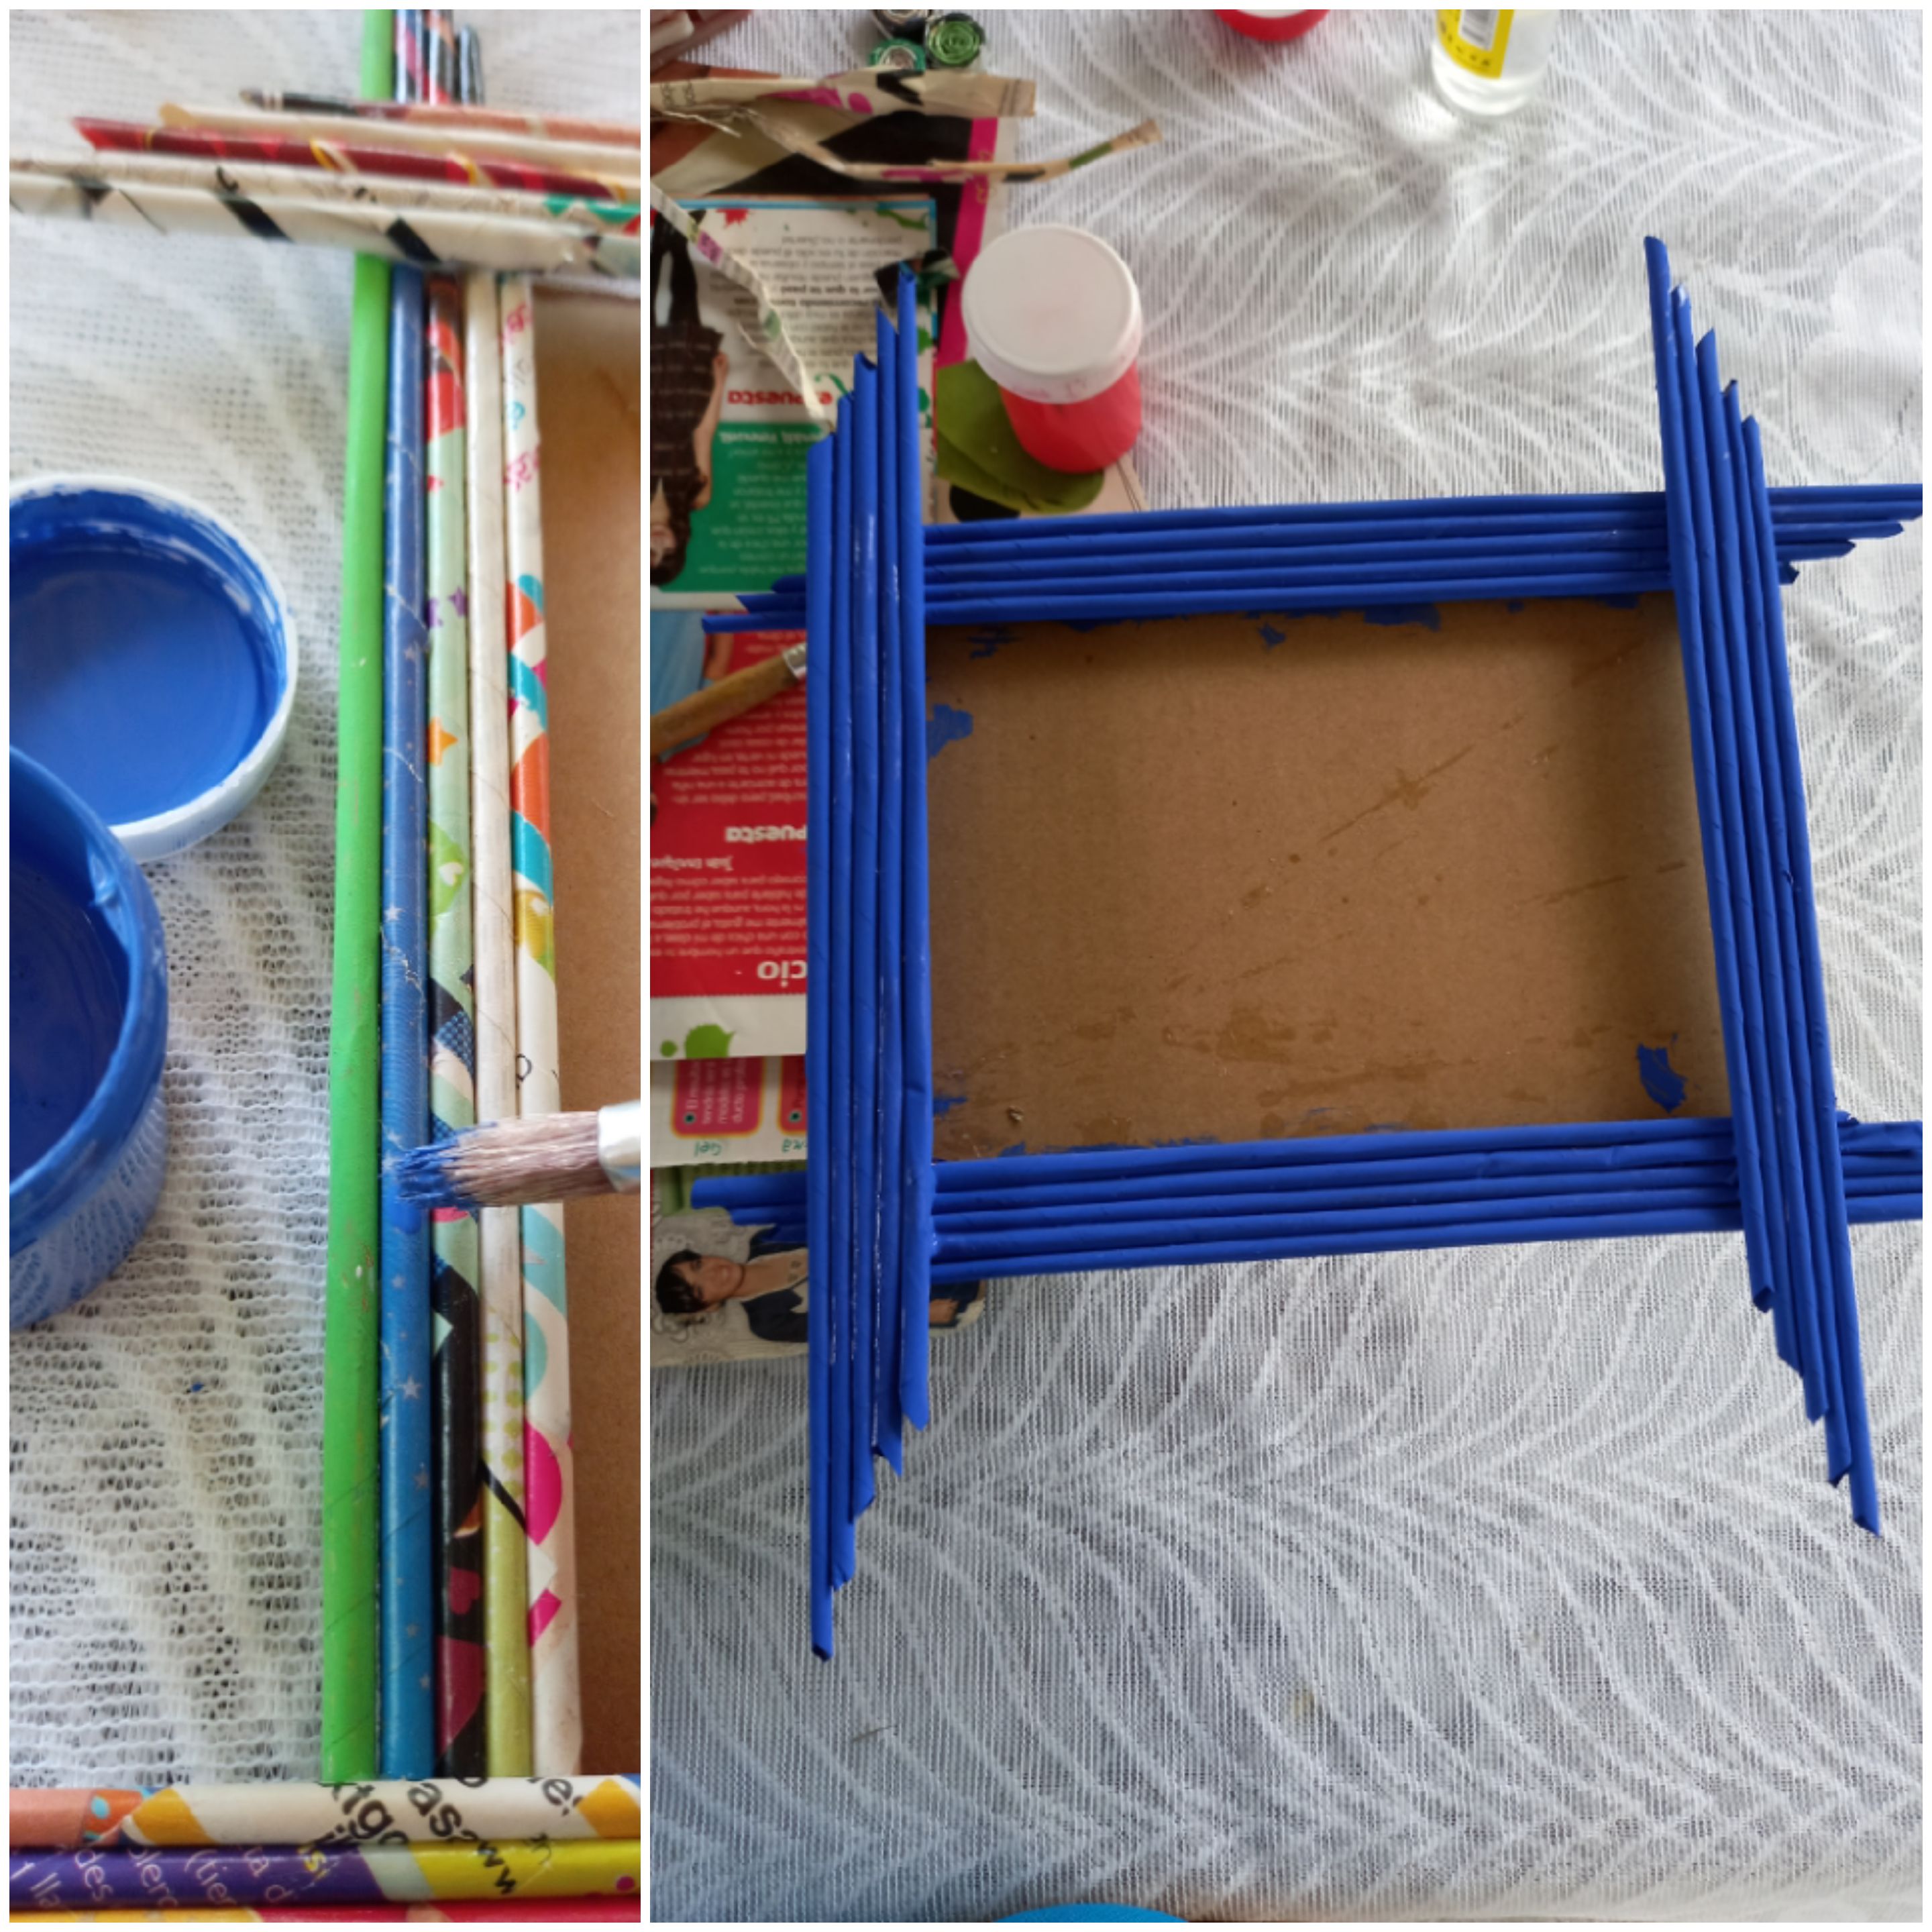
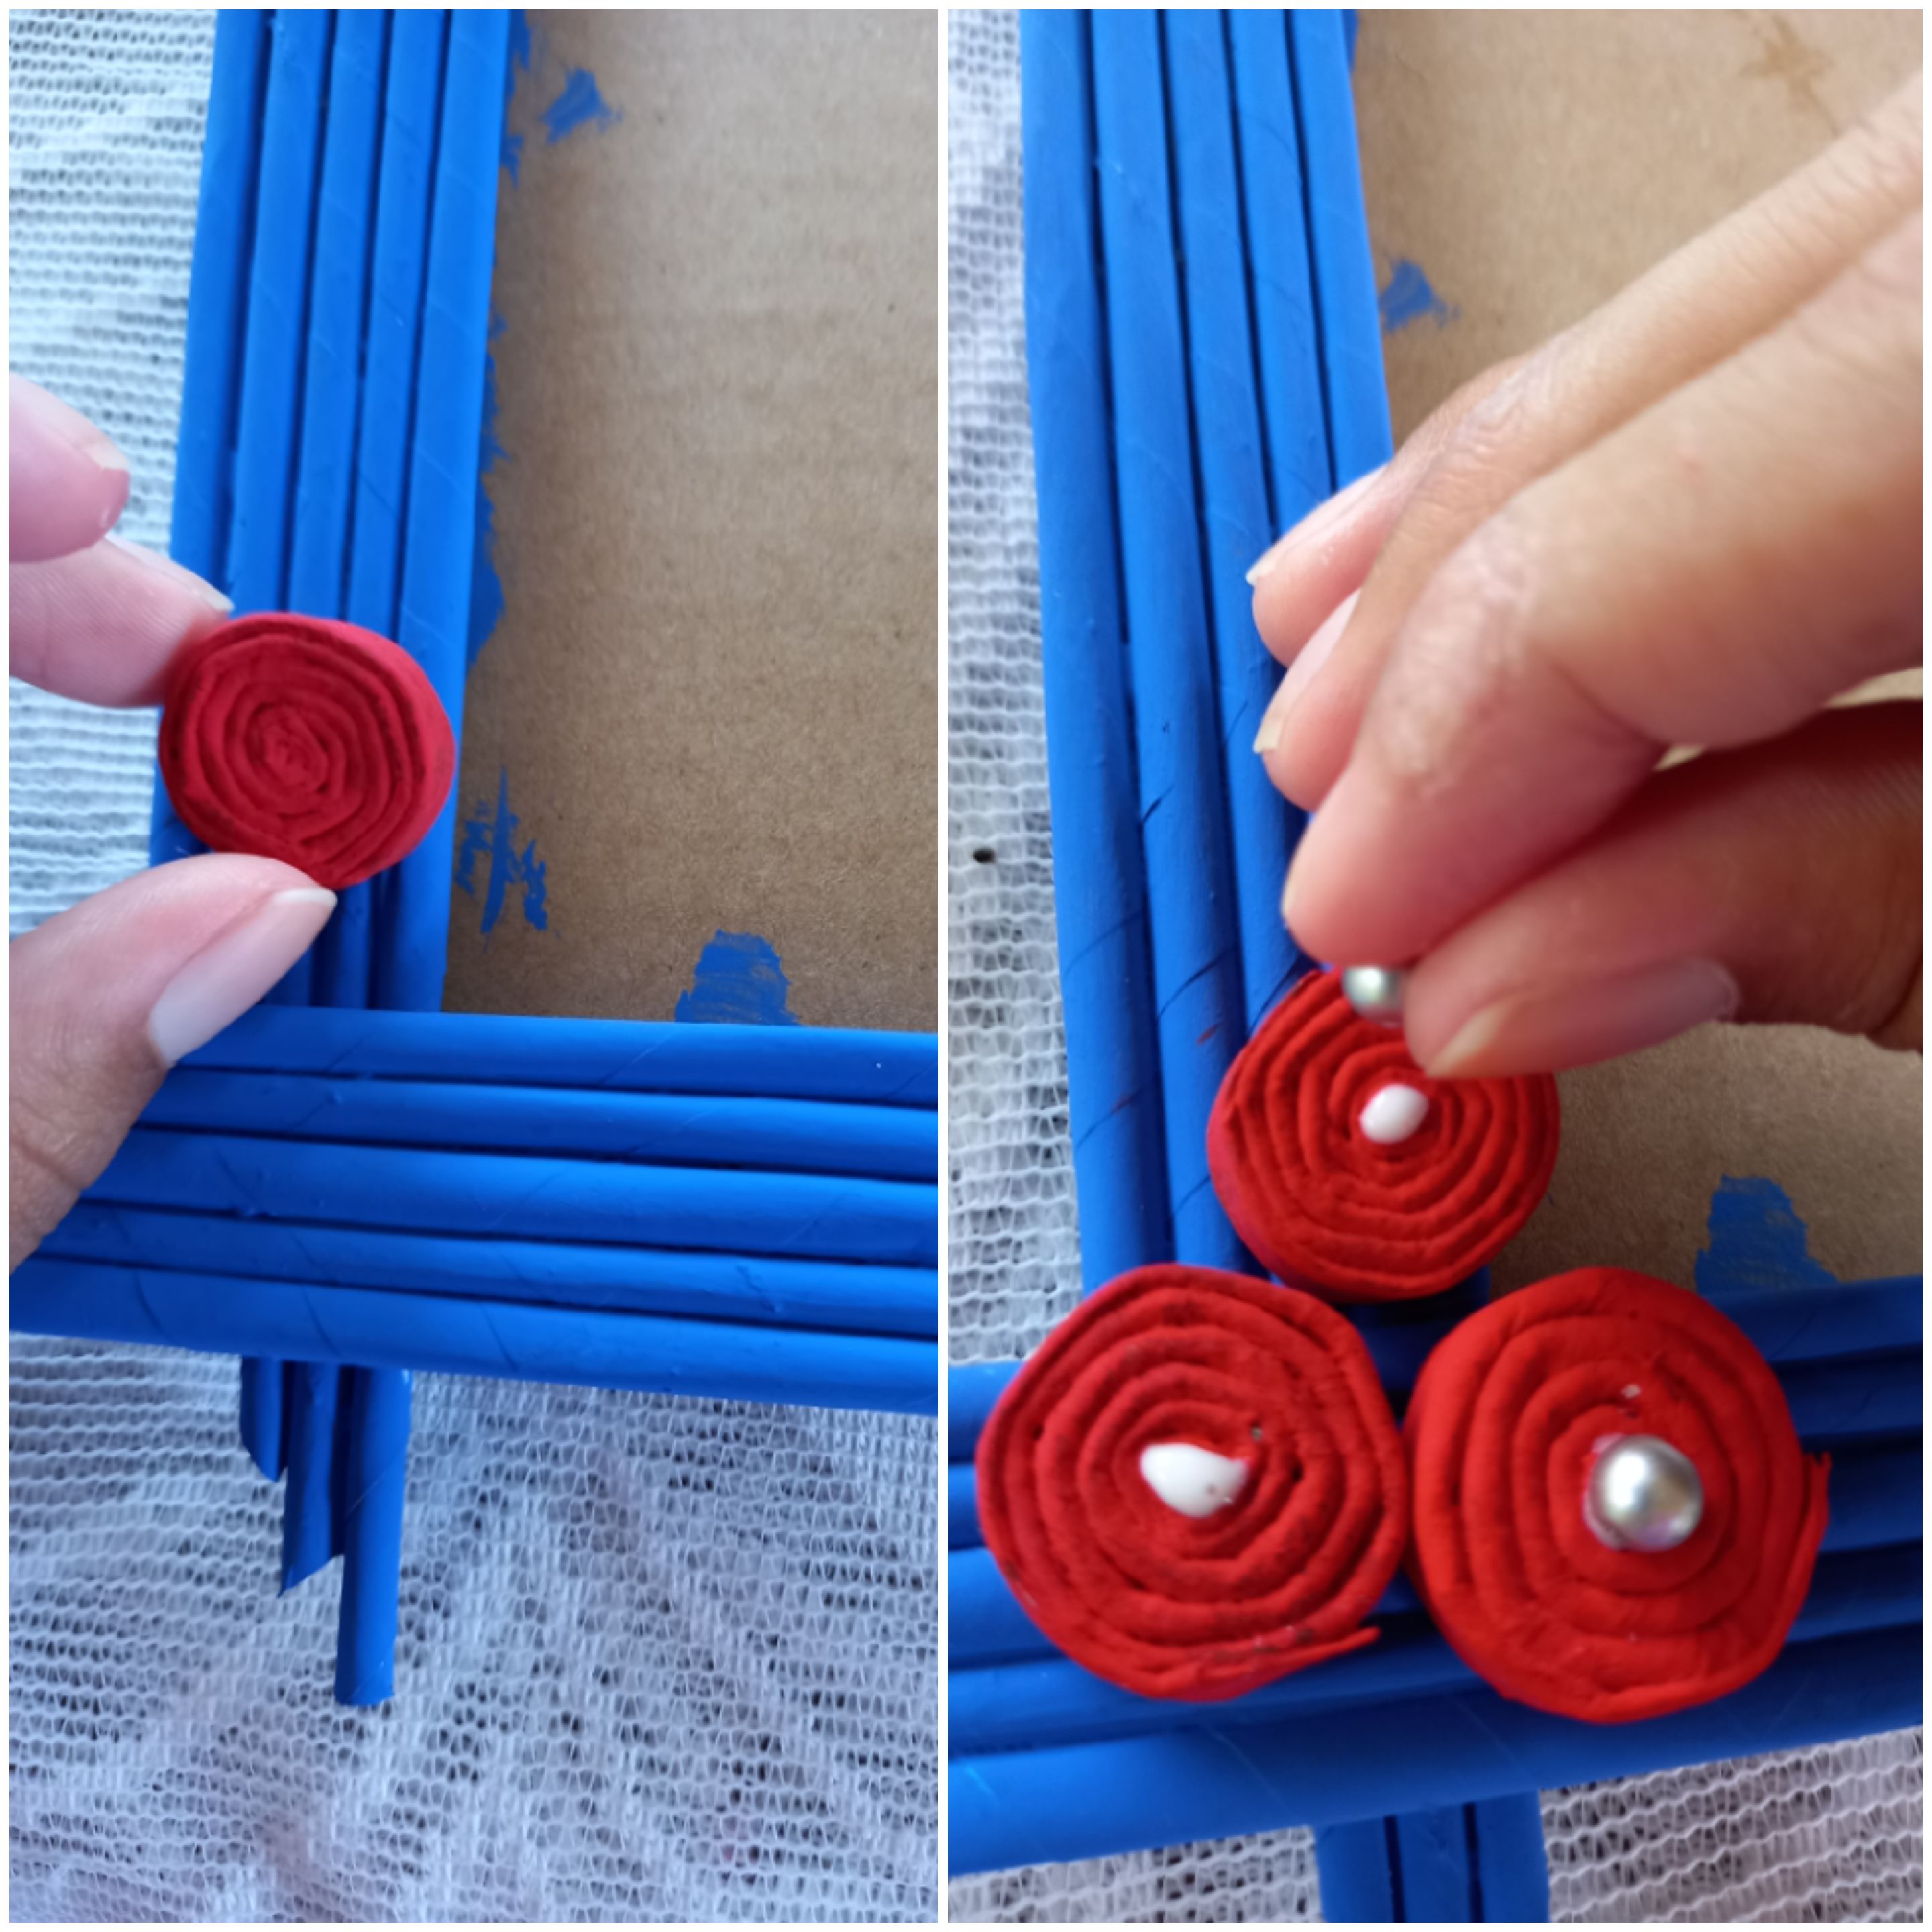
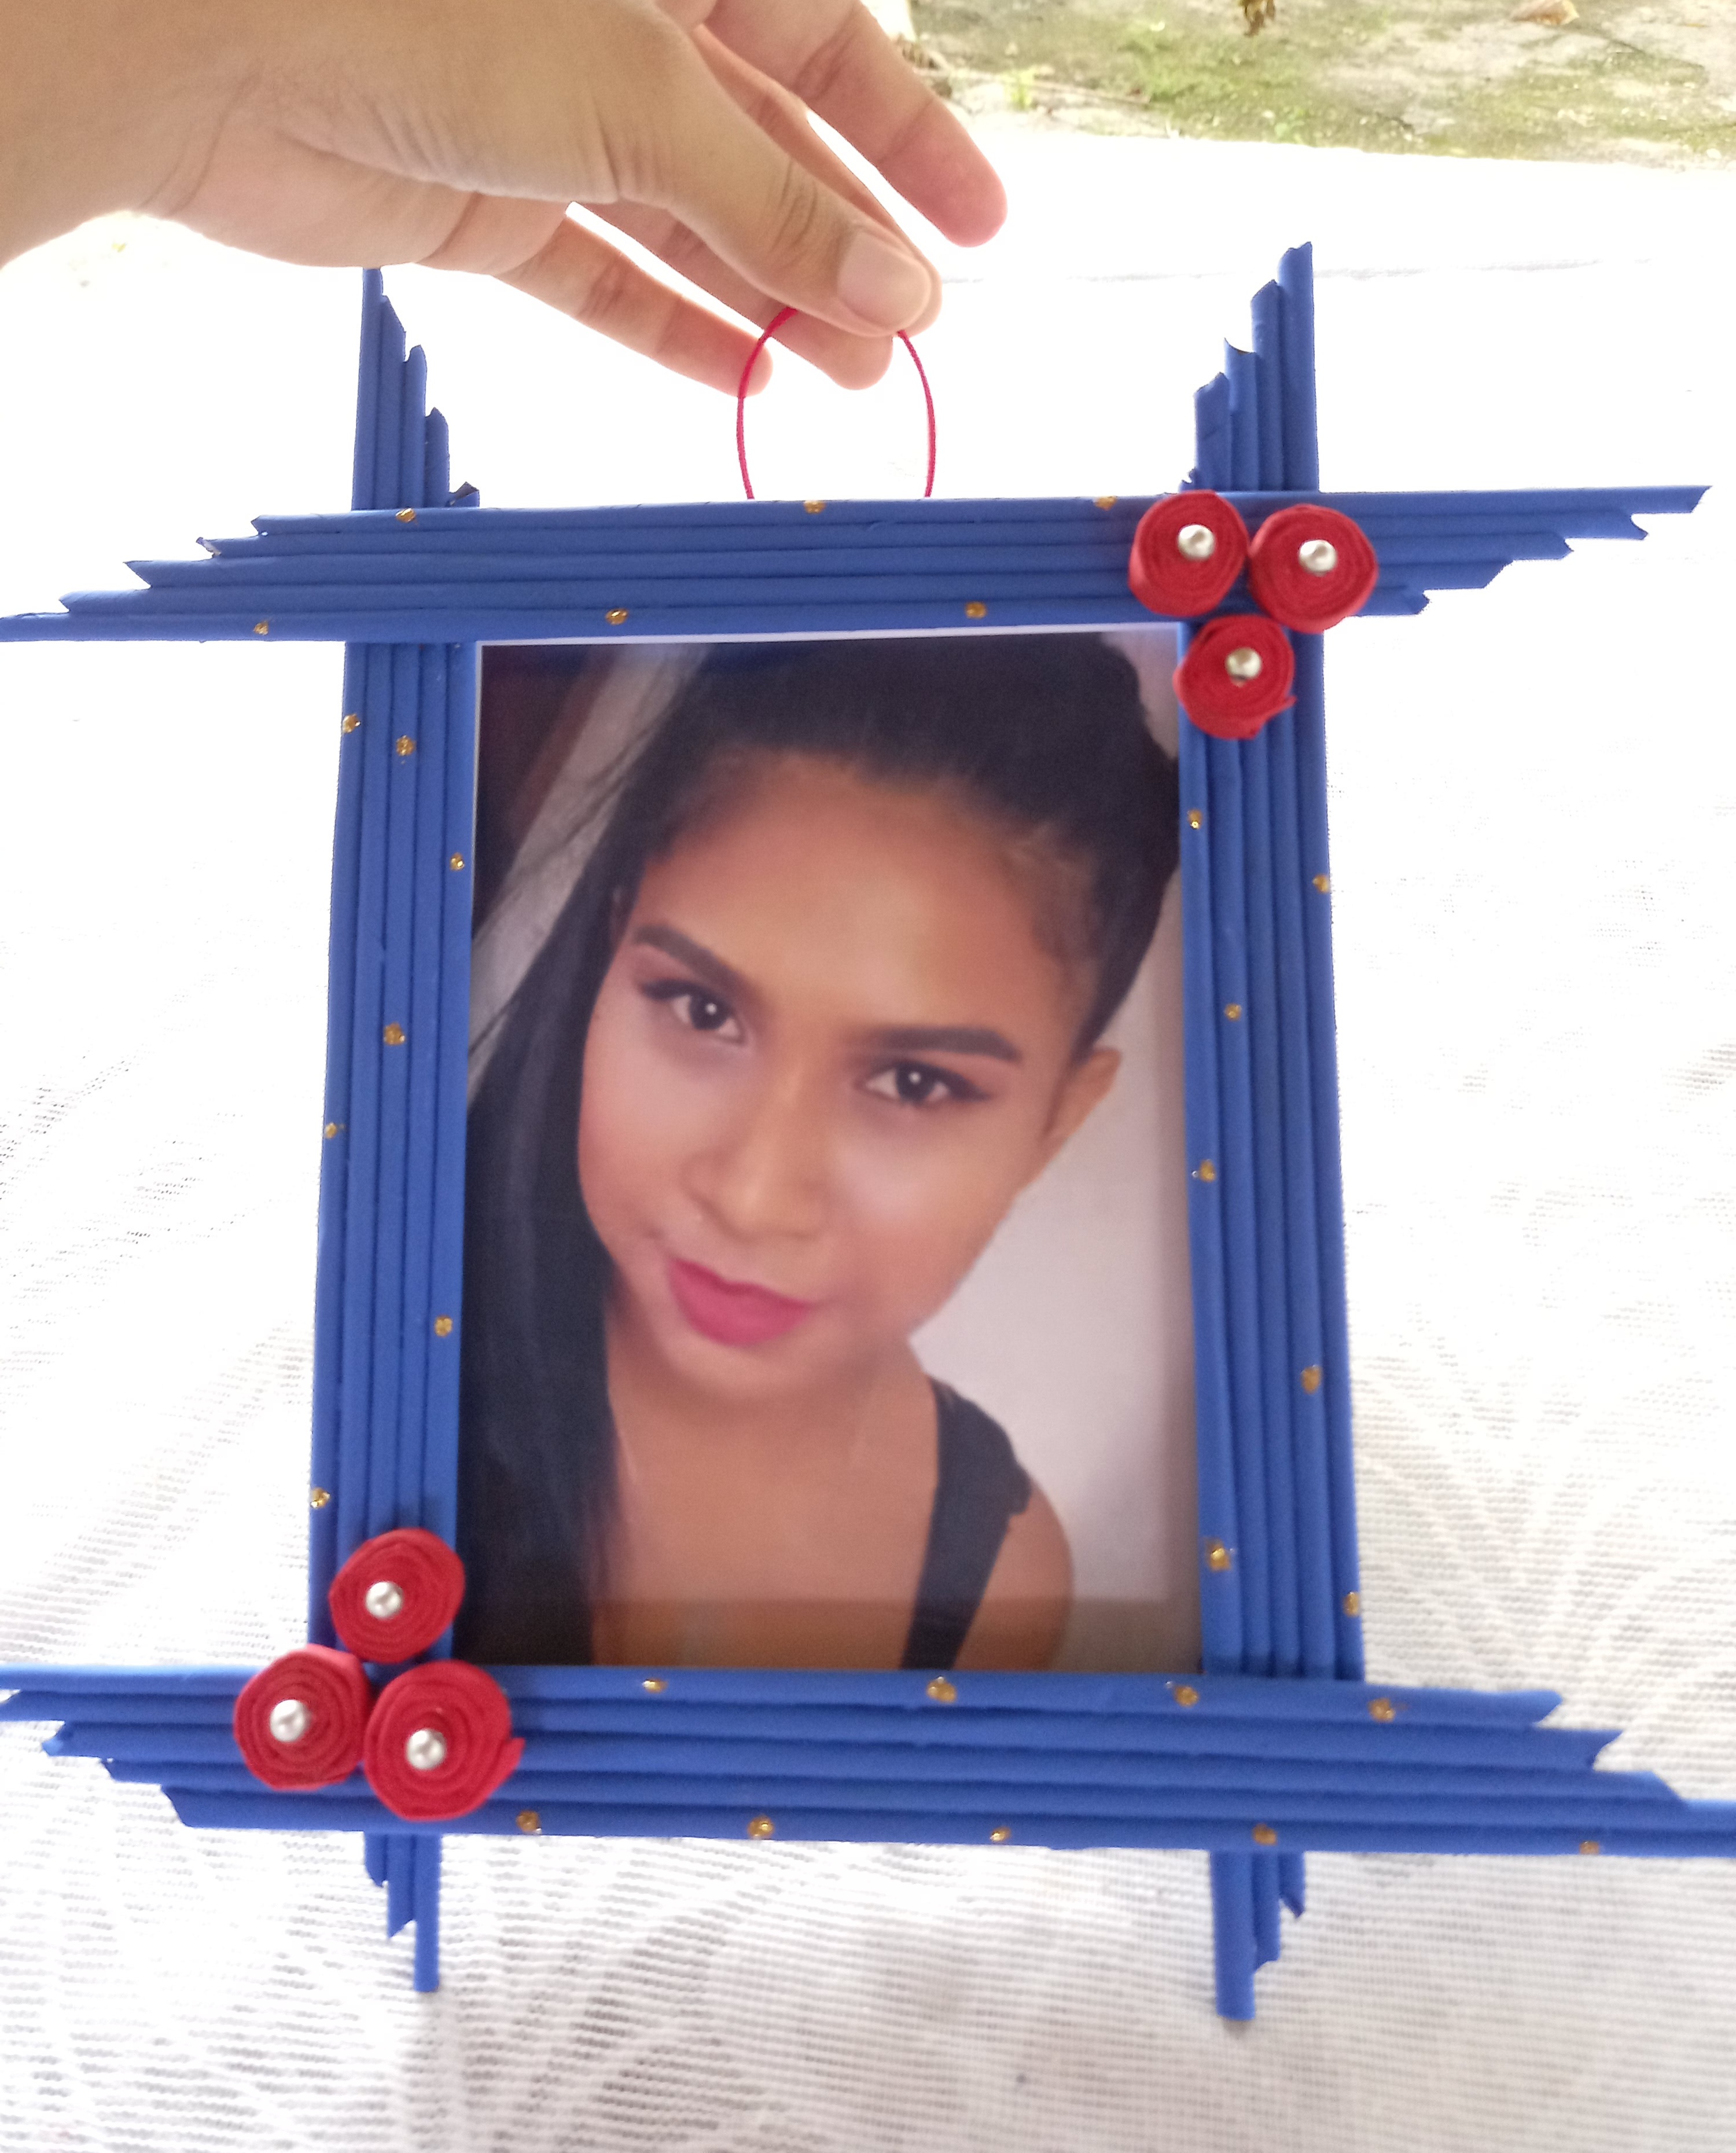
Ahora le damos vida con nuestra pintura, algunos detalles que agregué, utilizando los palitos de papel de revista hice unos espirales, los mismo que pinte de un color rojo, coloque mis cuencas de color plata en el centro de los espirales y agregué unos puntitos de color dorado para darle un toque mas llamativo.
Step 5 Now we bring it to life with our paint, some details that I added, using the same magazine paper sticks I made some spirals, the same ones that I painted a red color, put my silver colored basins in the center of the spirals and added some dots golden in color to give it a more striking touch.
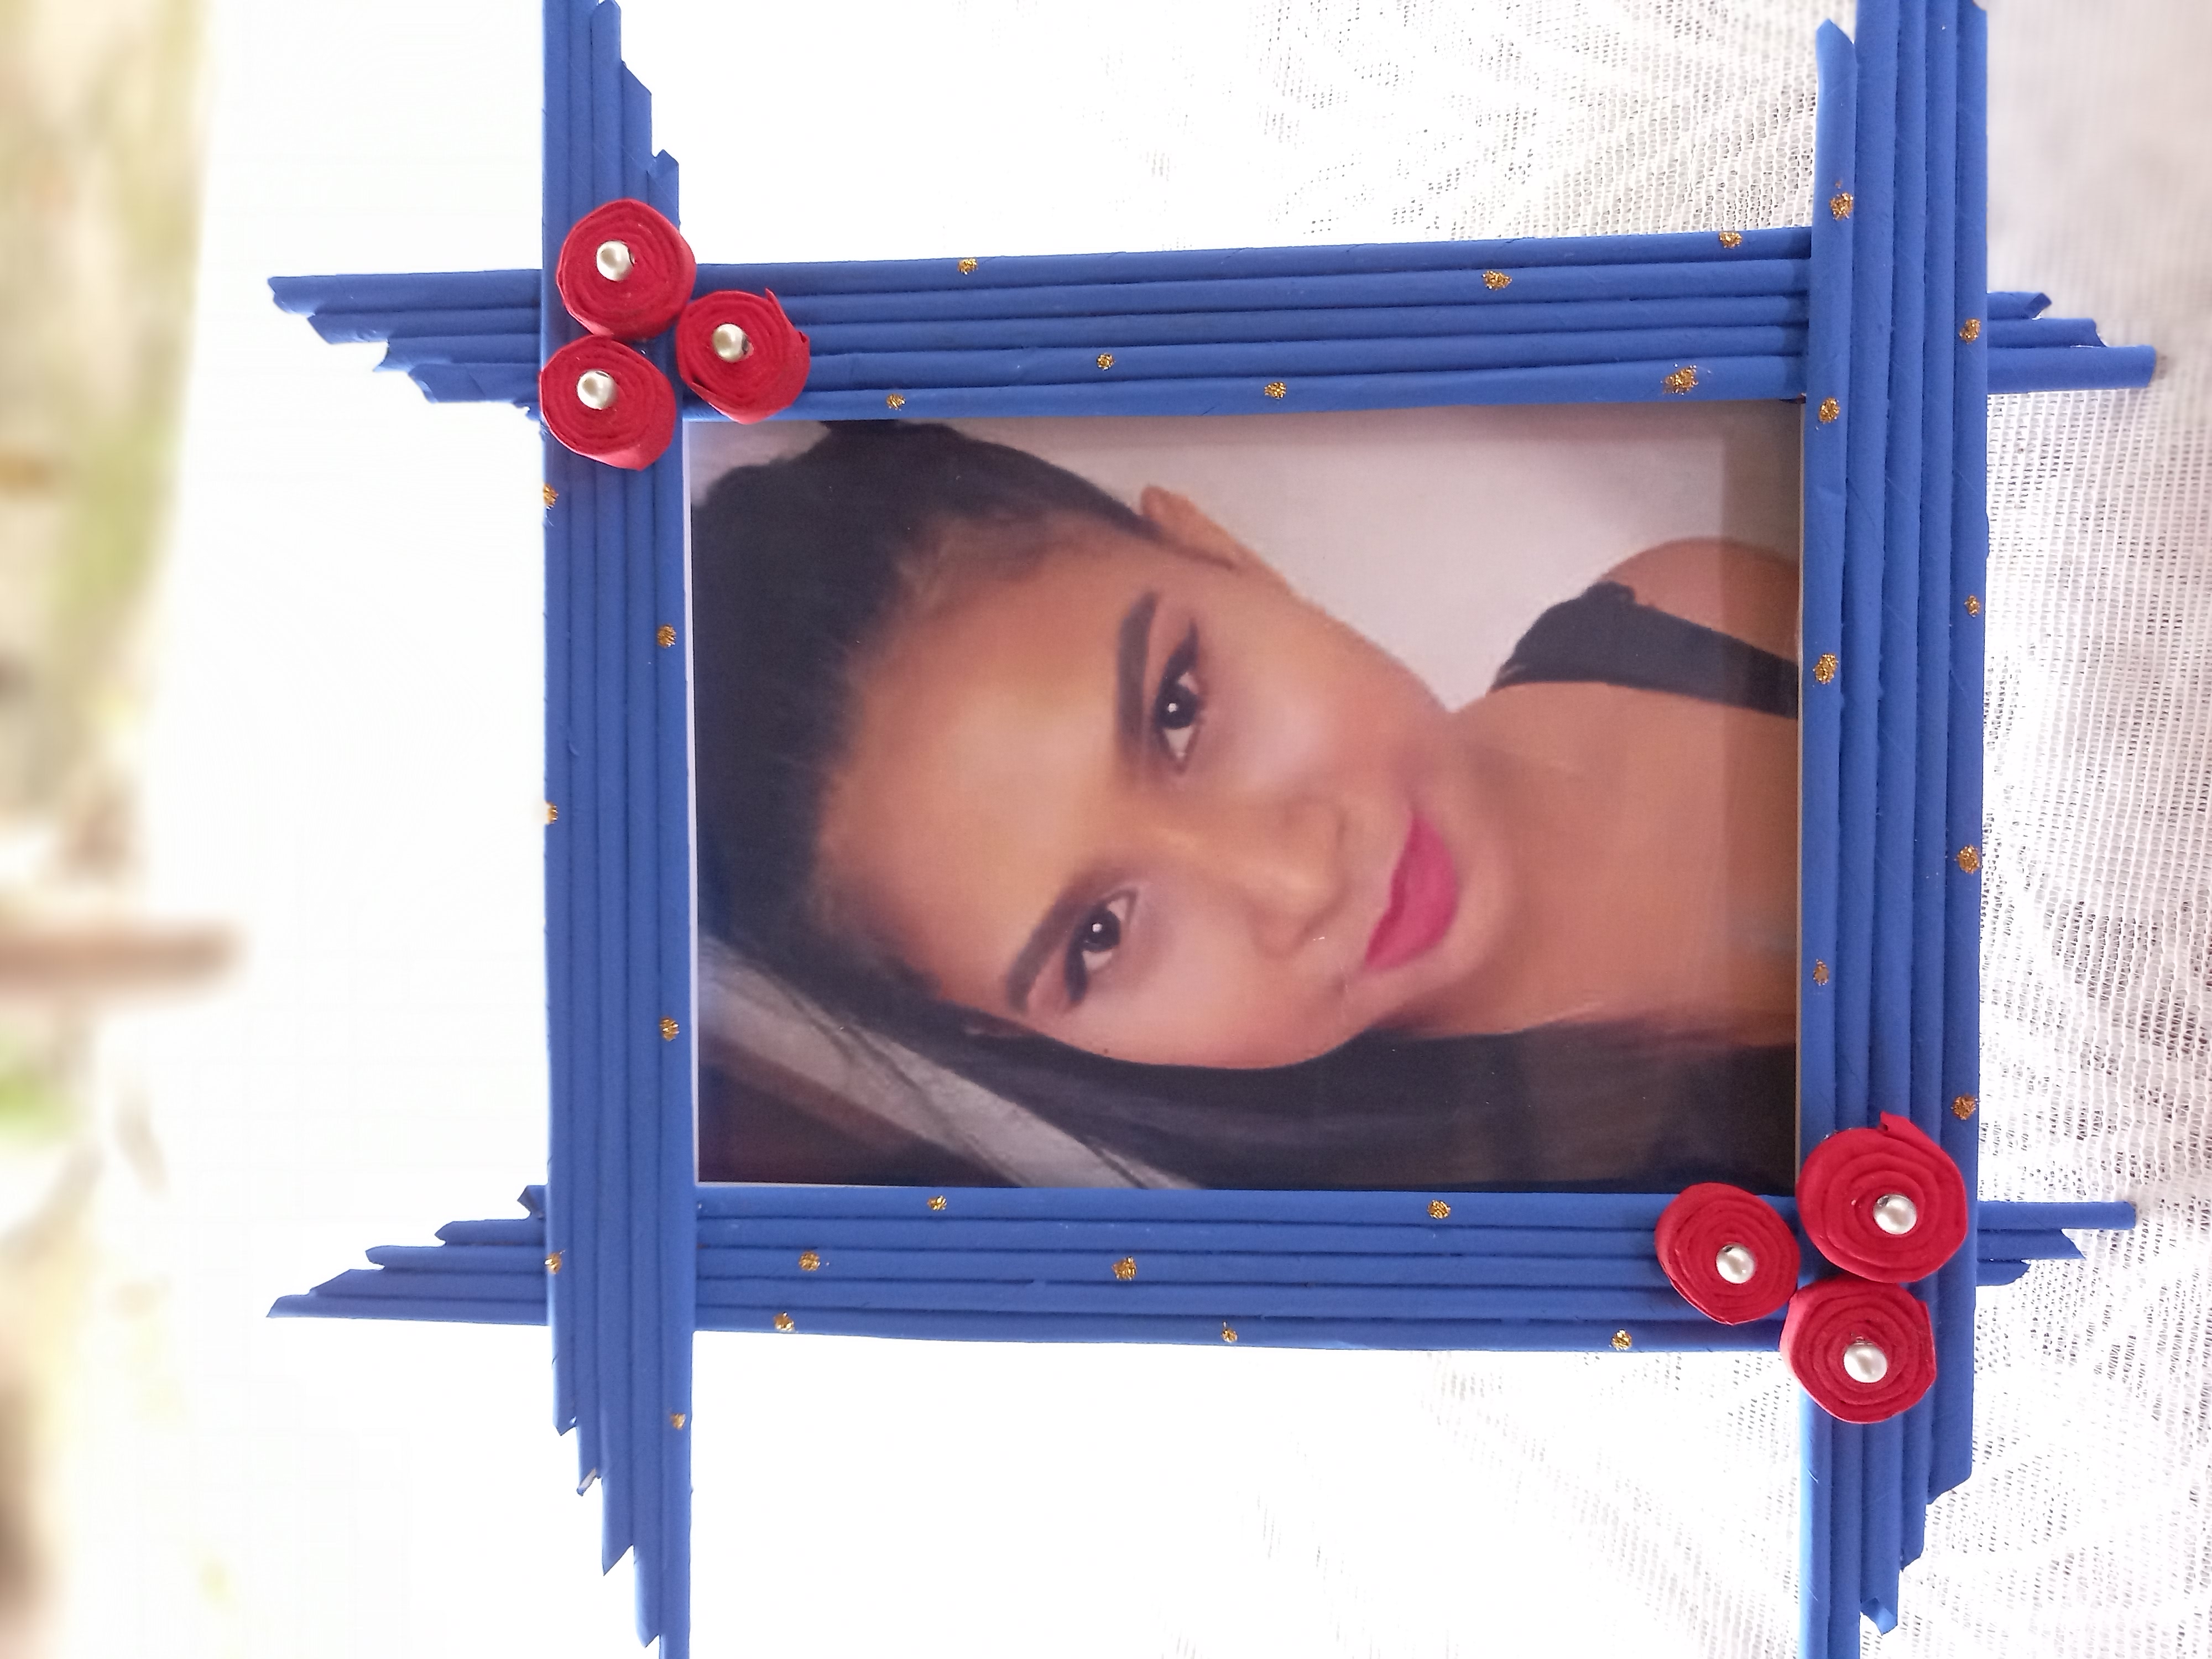
Ya finalizando nuestro marco le coloque una cuerdita para que nuestro marco sea guindado.
Y este fue el resultado.
Ending our framework, put a cord for our framework to be helped. And this was the result.

Esto es todo amigos, hasta un proximo post.
This is all friends, up to a next post.
Congratulations @ritacora! You have completed the following achievement on the Hive blockchain and have been rewarded with new badge(s) :
Your next payout target is 50 HP.
The unit is Hive Power equivalent because your rewards can be split into HP and HBD
You can view your badges on your board and compare yourself to others in the Ranking
If you no longer want to receive notifications, reply to this comment with the word
STOPCheck out the last post from @hivebuzz: