Hola mi bella familia creativa! 🌹
Feliz lunes, les deseo una semana llena de muchos éxitos, Dios los bendiga grandemente! 🤗 Hoy me hace feliz estar compartiendo con ustedes un nuevo proyecto creativo y por supuesto ver todas sus hermosas ideas que me llenan cada día de un nuevo aprendizaje.
Happy Monday, I wish you a week full of success, God bless you greatly! 🤗 Today I am happy to be sharing with you a new creative project and of course to see all your beautiful ideas that fill me every day with new learning.
Creo haberles comentado antes lo mucho que me encanta reciclar y por lo tanto es inevitable para mí ver algo tirado y no querer hacer algo nuevo con eso, bien sea botellas, papel, cartón, piedras o en este caso ramas secas, que diariamente veo caer de mi árbol de mango.
I think I have told you before how much I love recycling and therefore it is inevitable for me to see something thrown away and not want to do something new with it, be it bottles, paper, cardboard, stones or in this case dry branches, which I see falling daily. from my mango tree.
Y bueno si, se que han habido otras ocasiones en la que he compartido otras obras creativas con este material, pero es que la verdad no deja de fascinarme como quedan, y es que con un poco de imaginación podemos lograr grandes y sorprendestes cosas de la naturaleza.
And well yes, I know that there have been other occasions in which I have shared other creative works with this material, but the truth is that never ceases to fascinate me as they are, and that is that with a little imagination we can achieve great and surprising things of the nature.
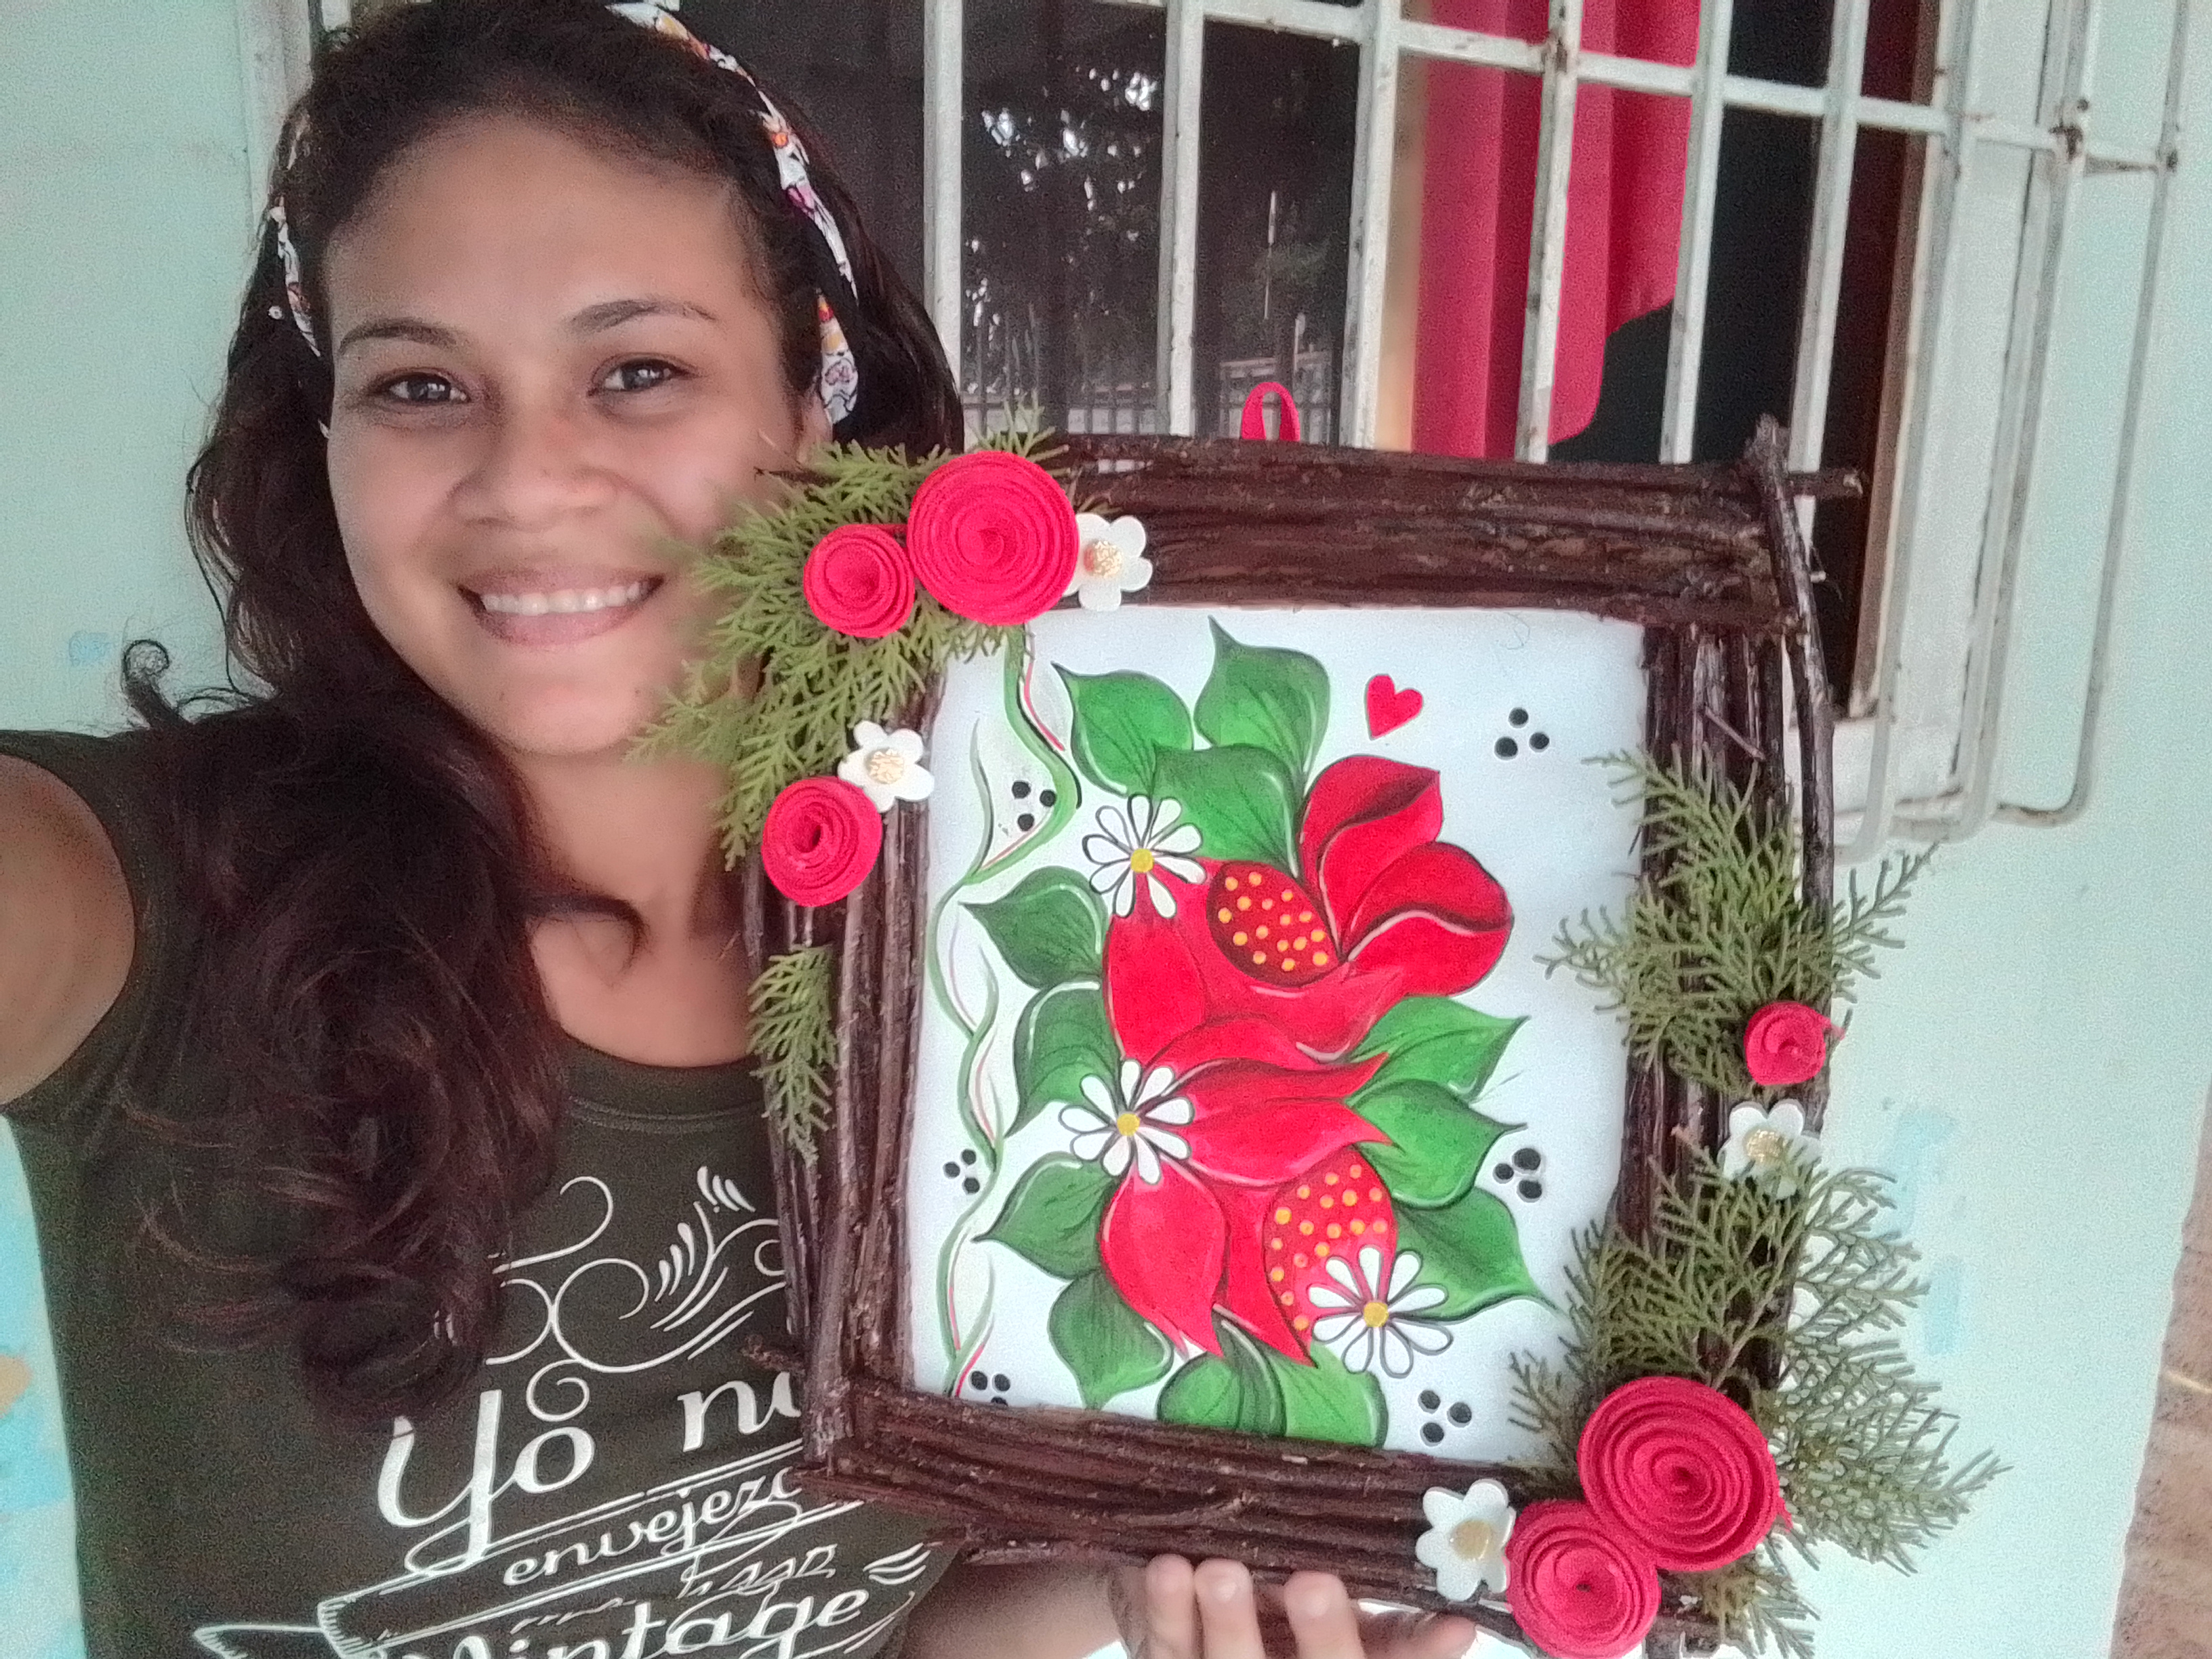
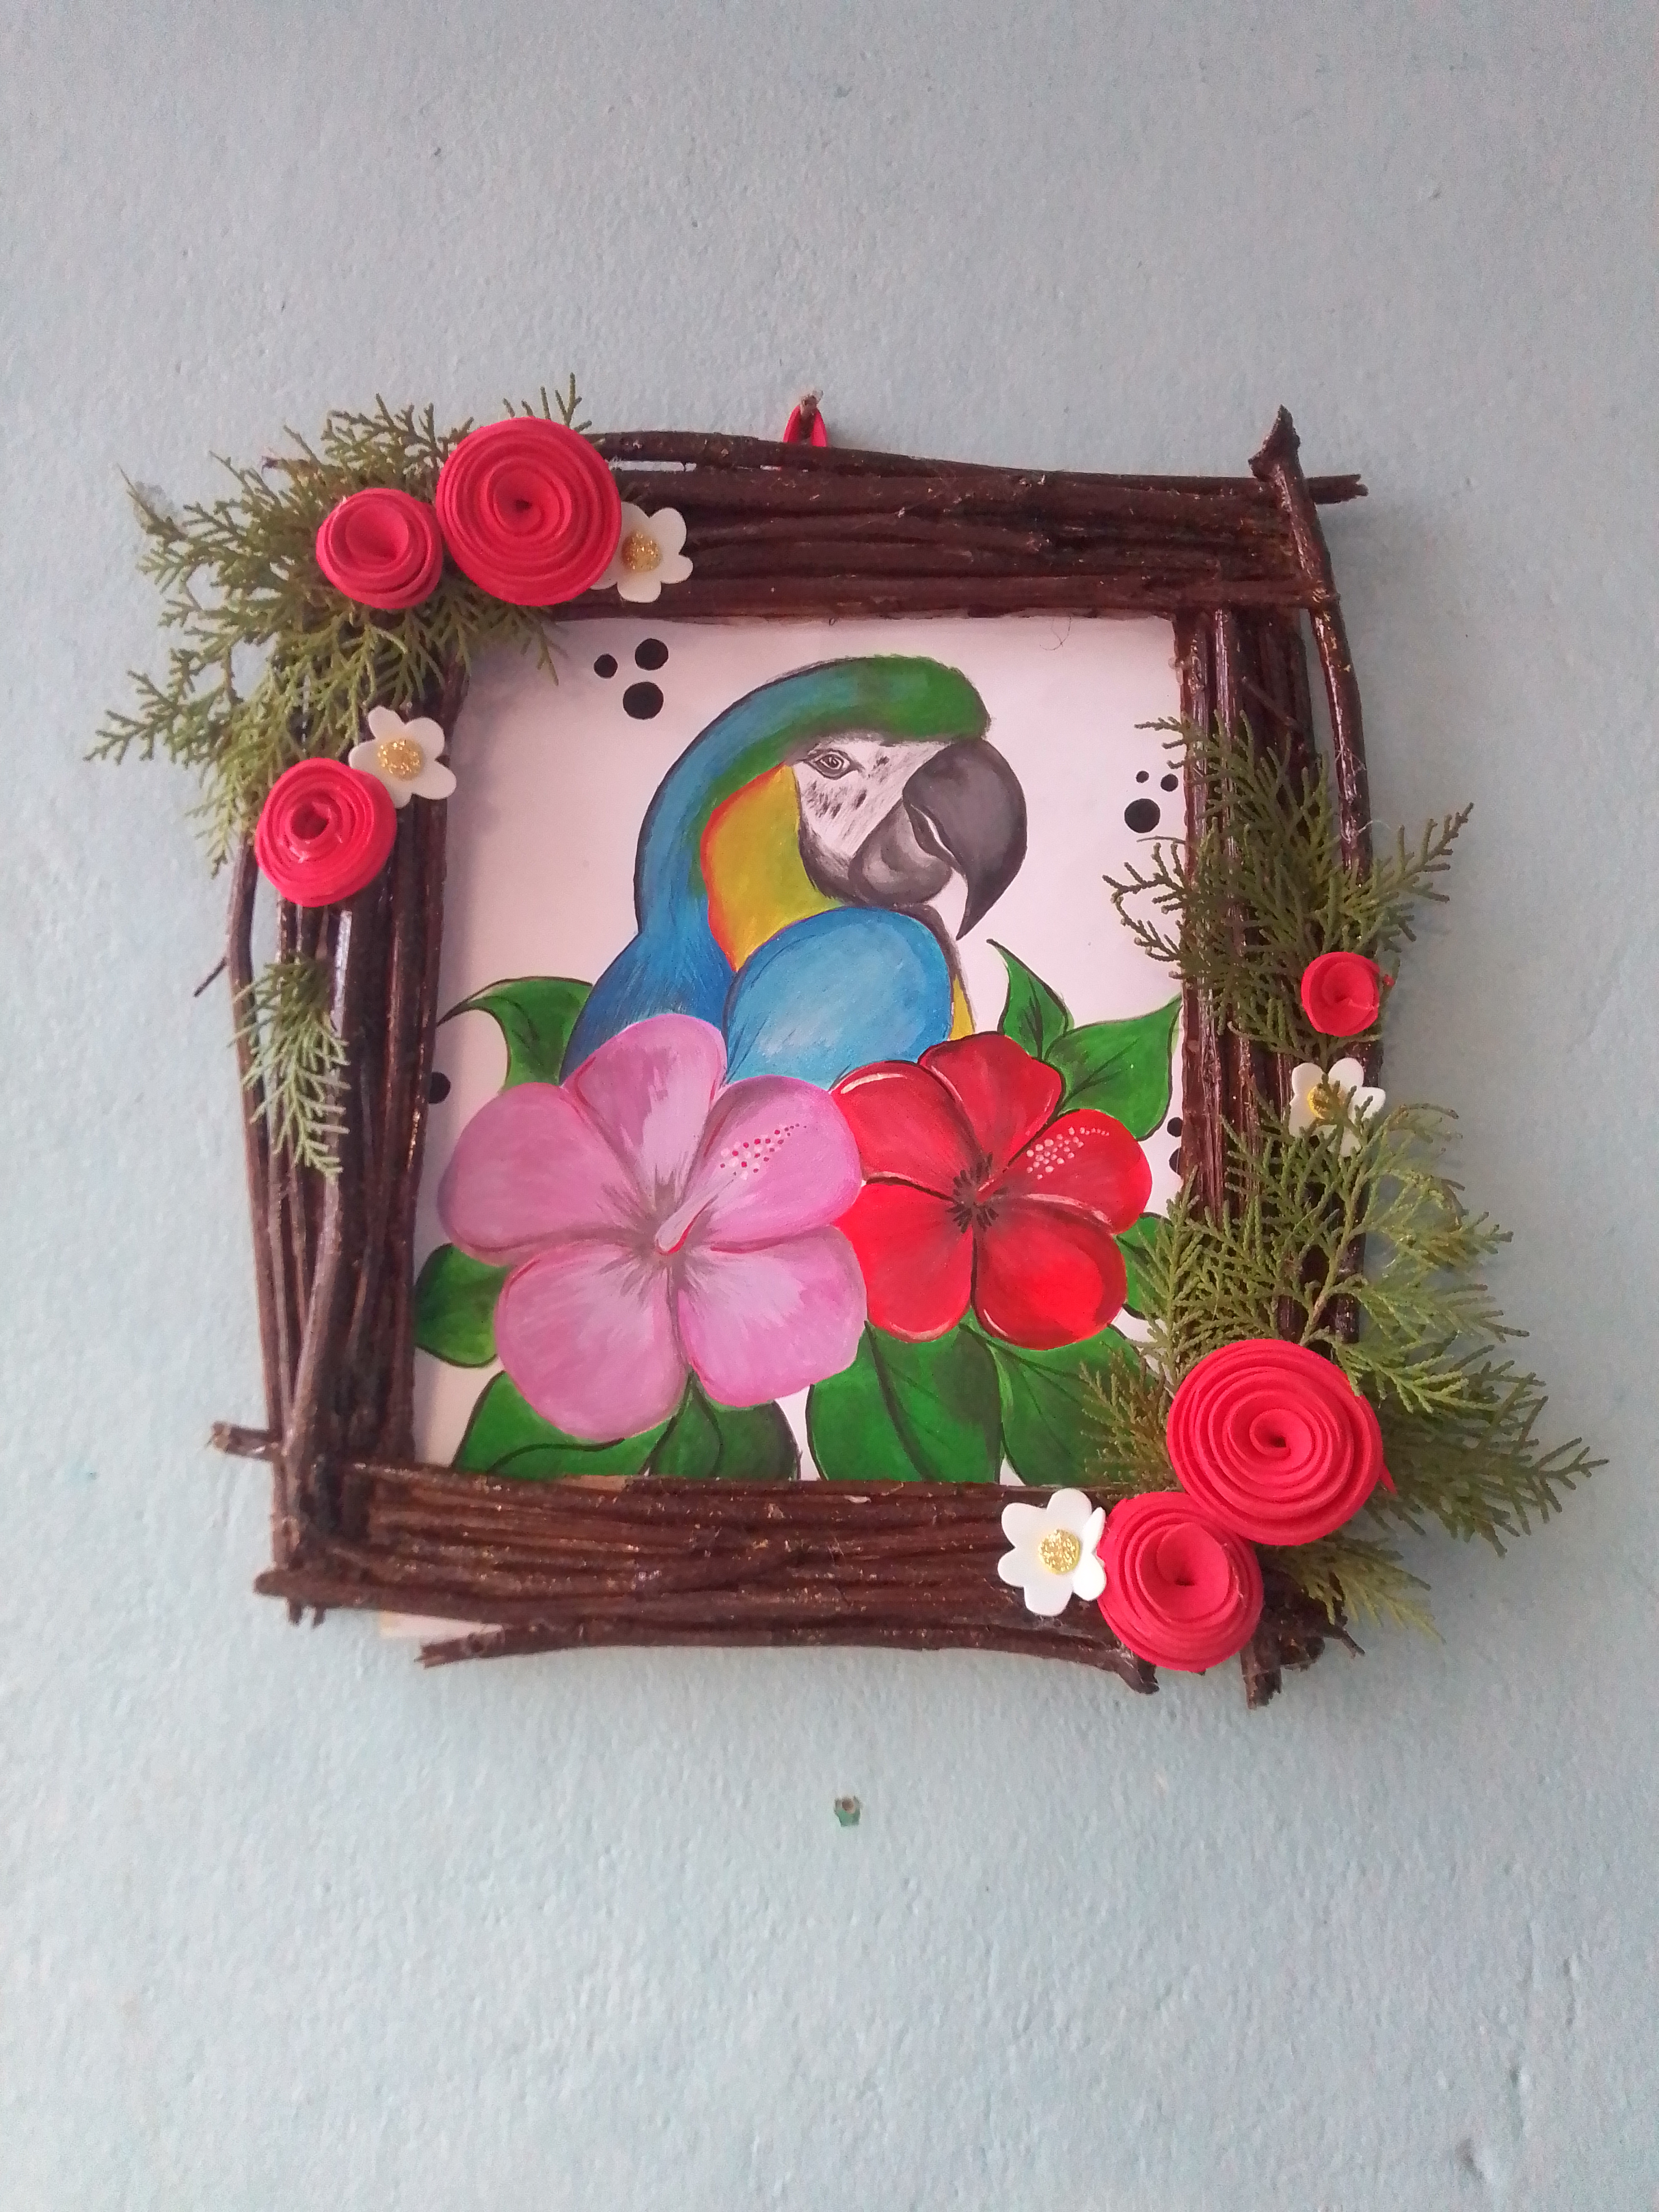
Entonces amigos hoy me encantaría enseñarte como hice este hermoso cuadro de ramas secas que sin duda llamará mucho la atención de tus visitas y que se verá espectacular en las paredes de tu hogar o de lugar de trabajo. También puede resultar un espectacular obsequio para un ser querido. Acompáñame a ver los pasos y el resultado de este lindo proyecto manual.
So friends, today I would love to show you how I made this beautiful painting of dry branches that will undoubtedly attract a lot of attention from your visitors and that will look spectacular on the walls of your home or workplace. It can also be a spectacular gift for a loved one. Join me to see the steps and the result of this beautiful manual project.
Materiales que necesitas:
- Ramas secas.
- Cartón.
- Tijeras.
- Foami rojo.
- Hojas de pino.
- Silicón.
- Pintura marrón.
- Pincel.
- Barniz.
Materials you need:
- Dry branches.
- Paperboard.
- Pair of scissors.
- Red foam.
- Pine leaves.
- Silicone.
- Brown paint.
- Brush.
- Varnish.

(PASO A PASO)
(STEP By STEP)
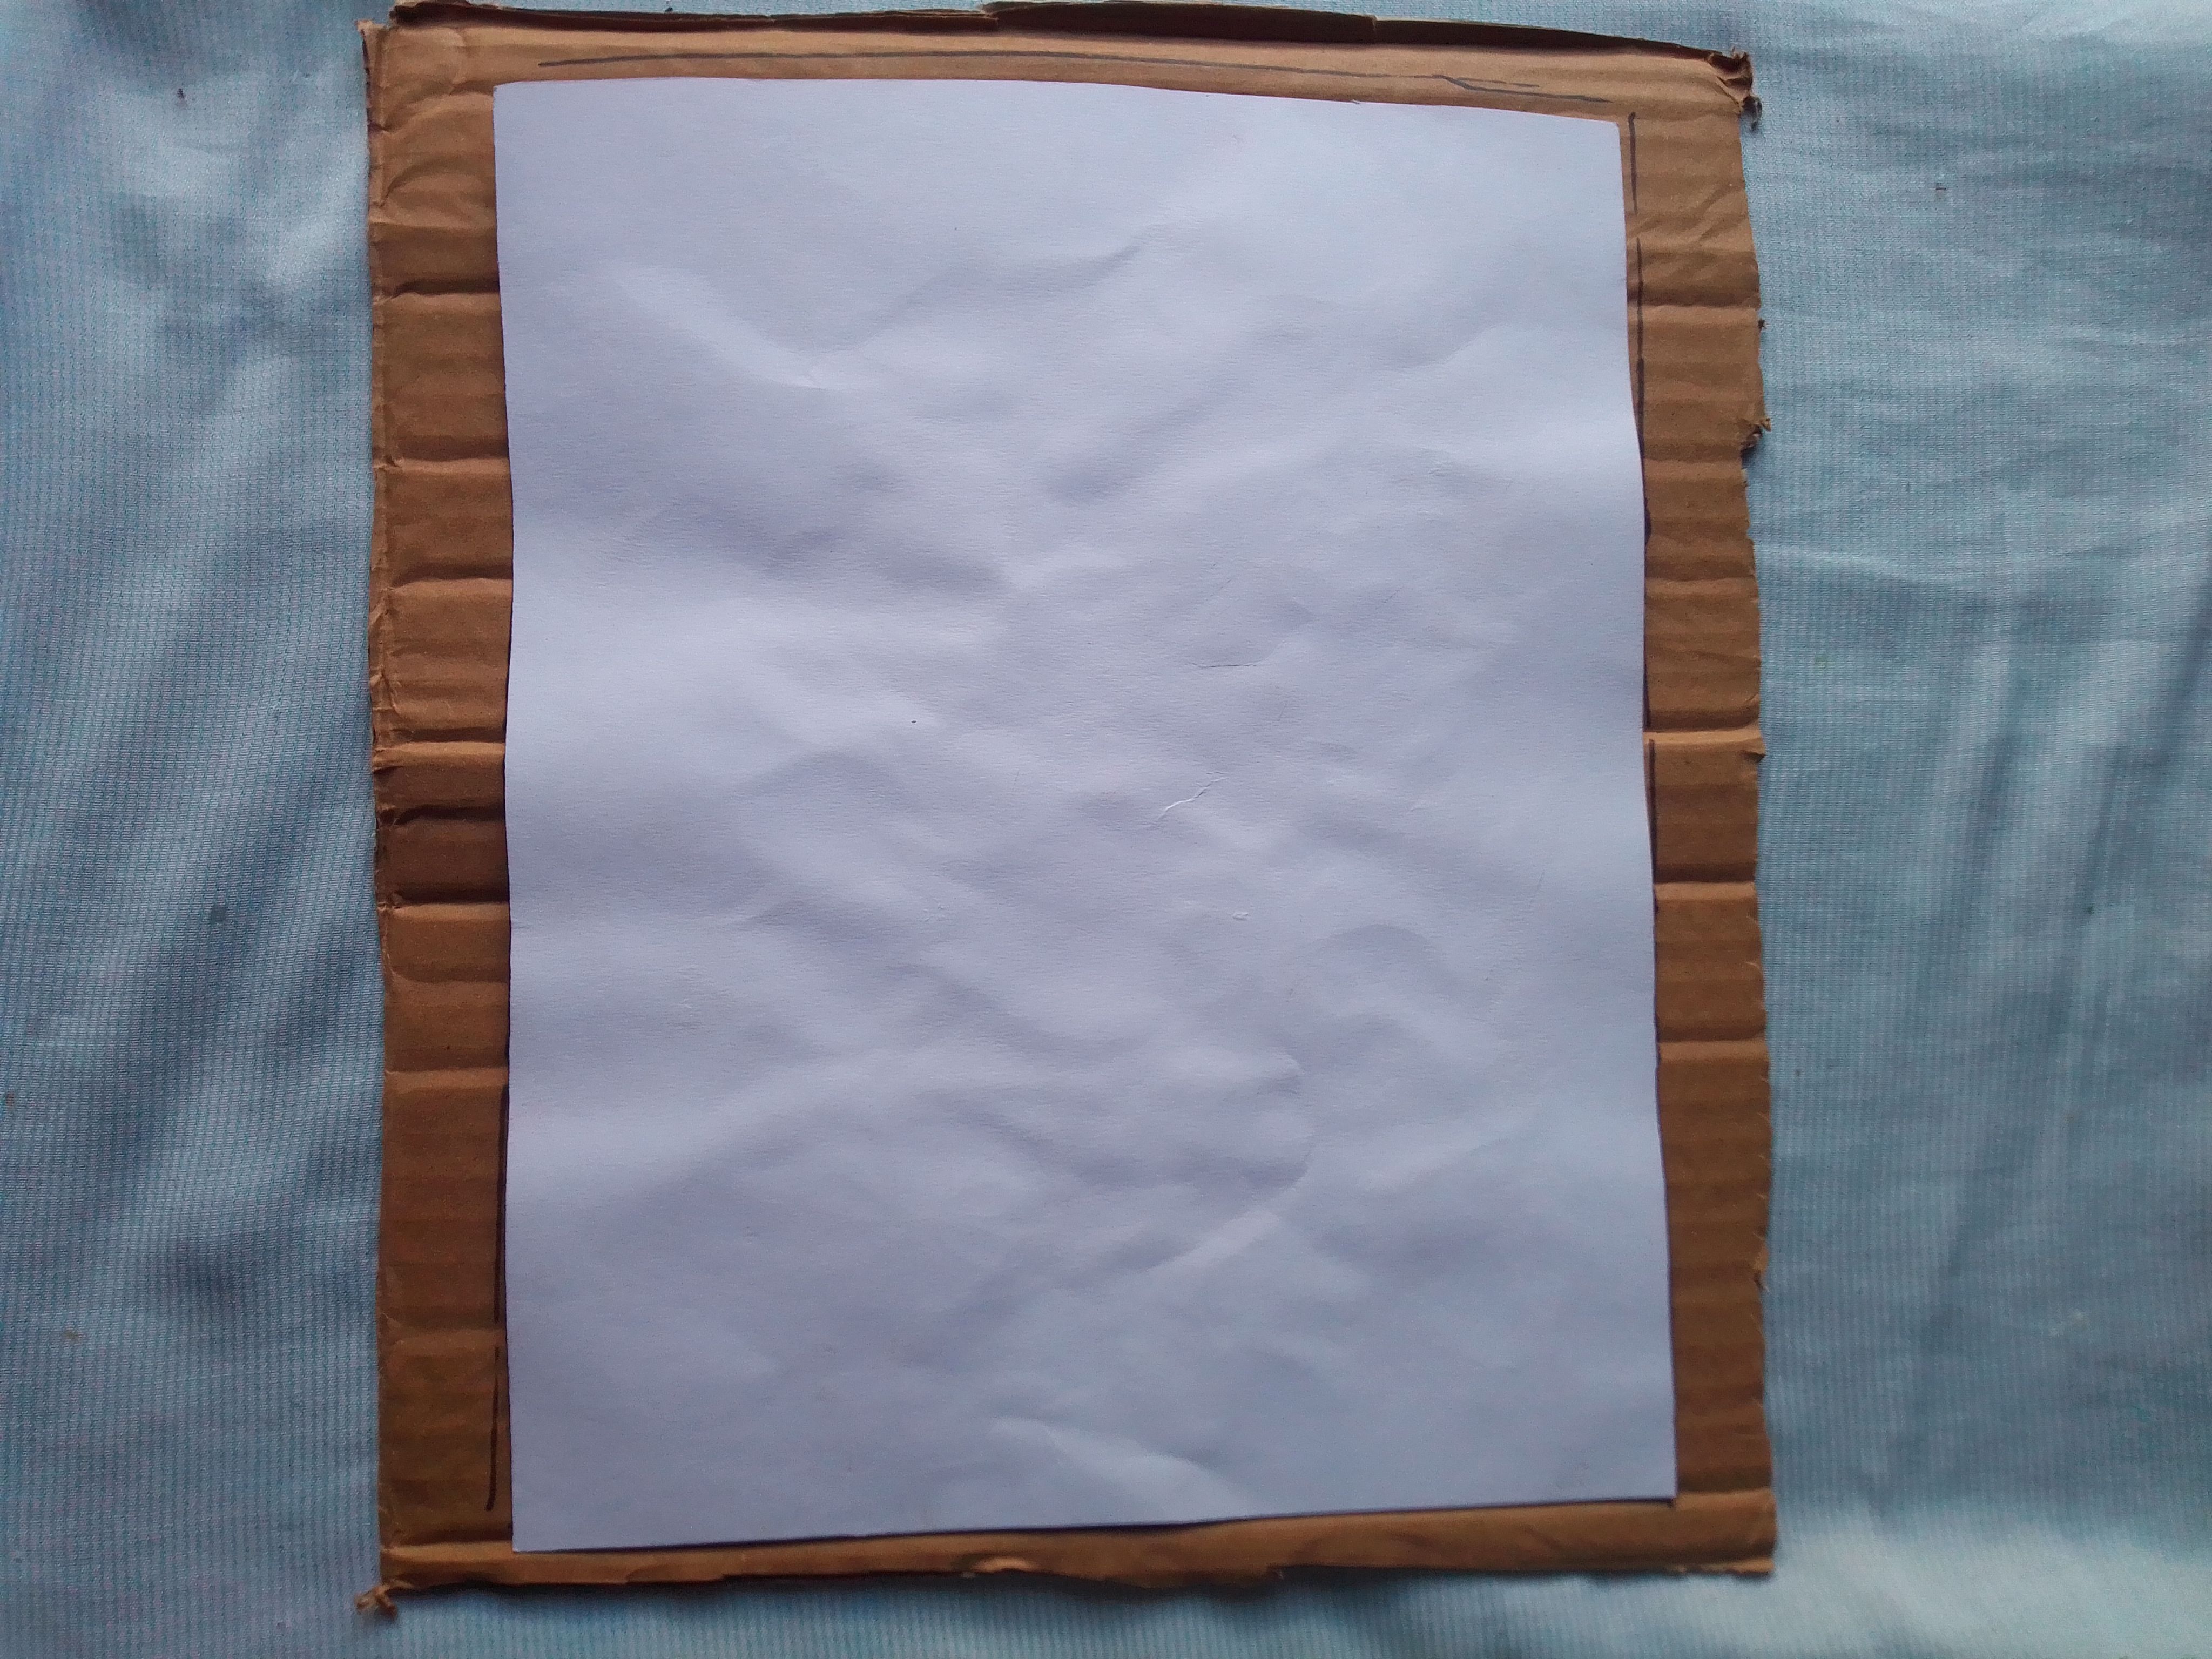
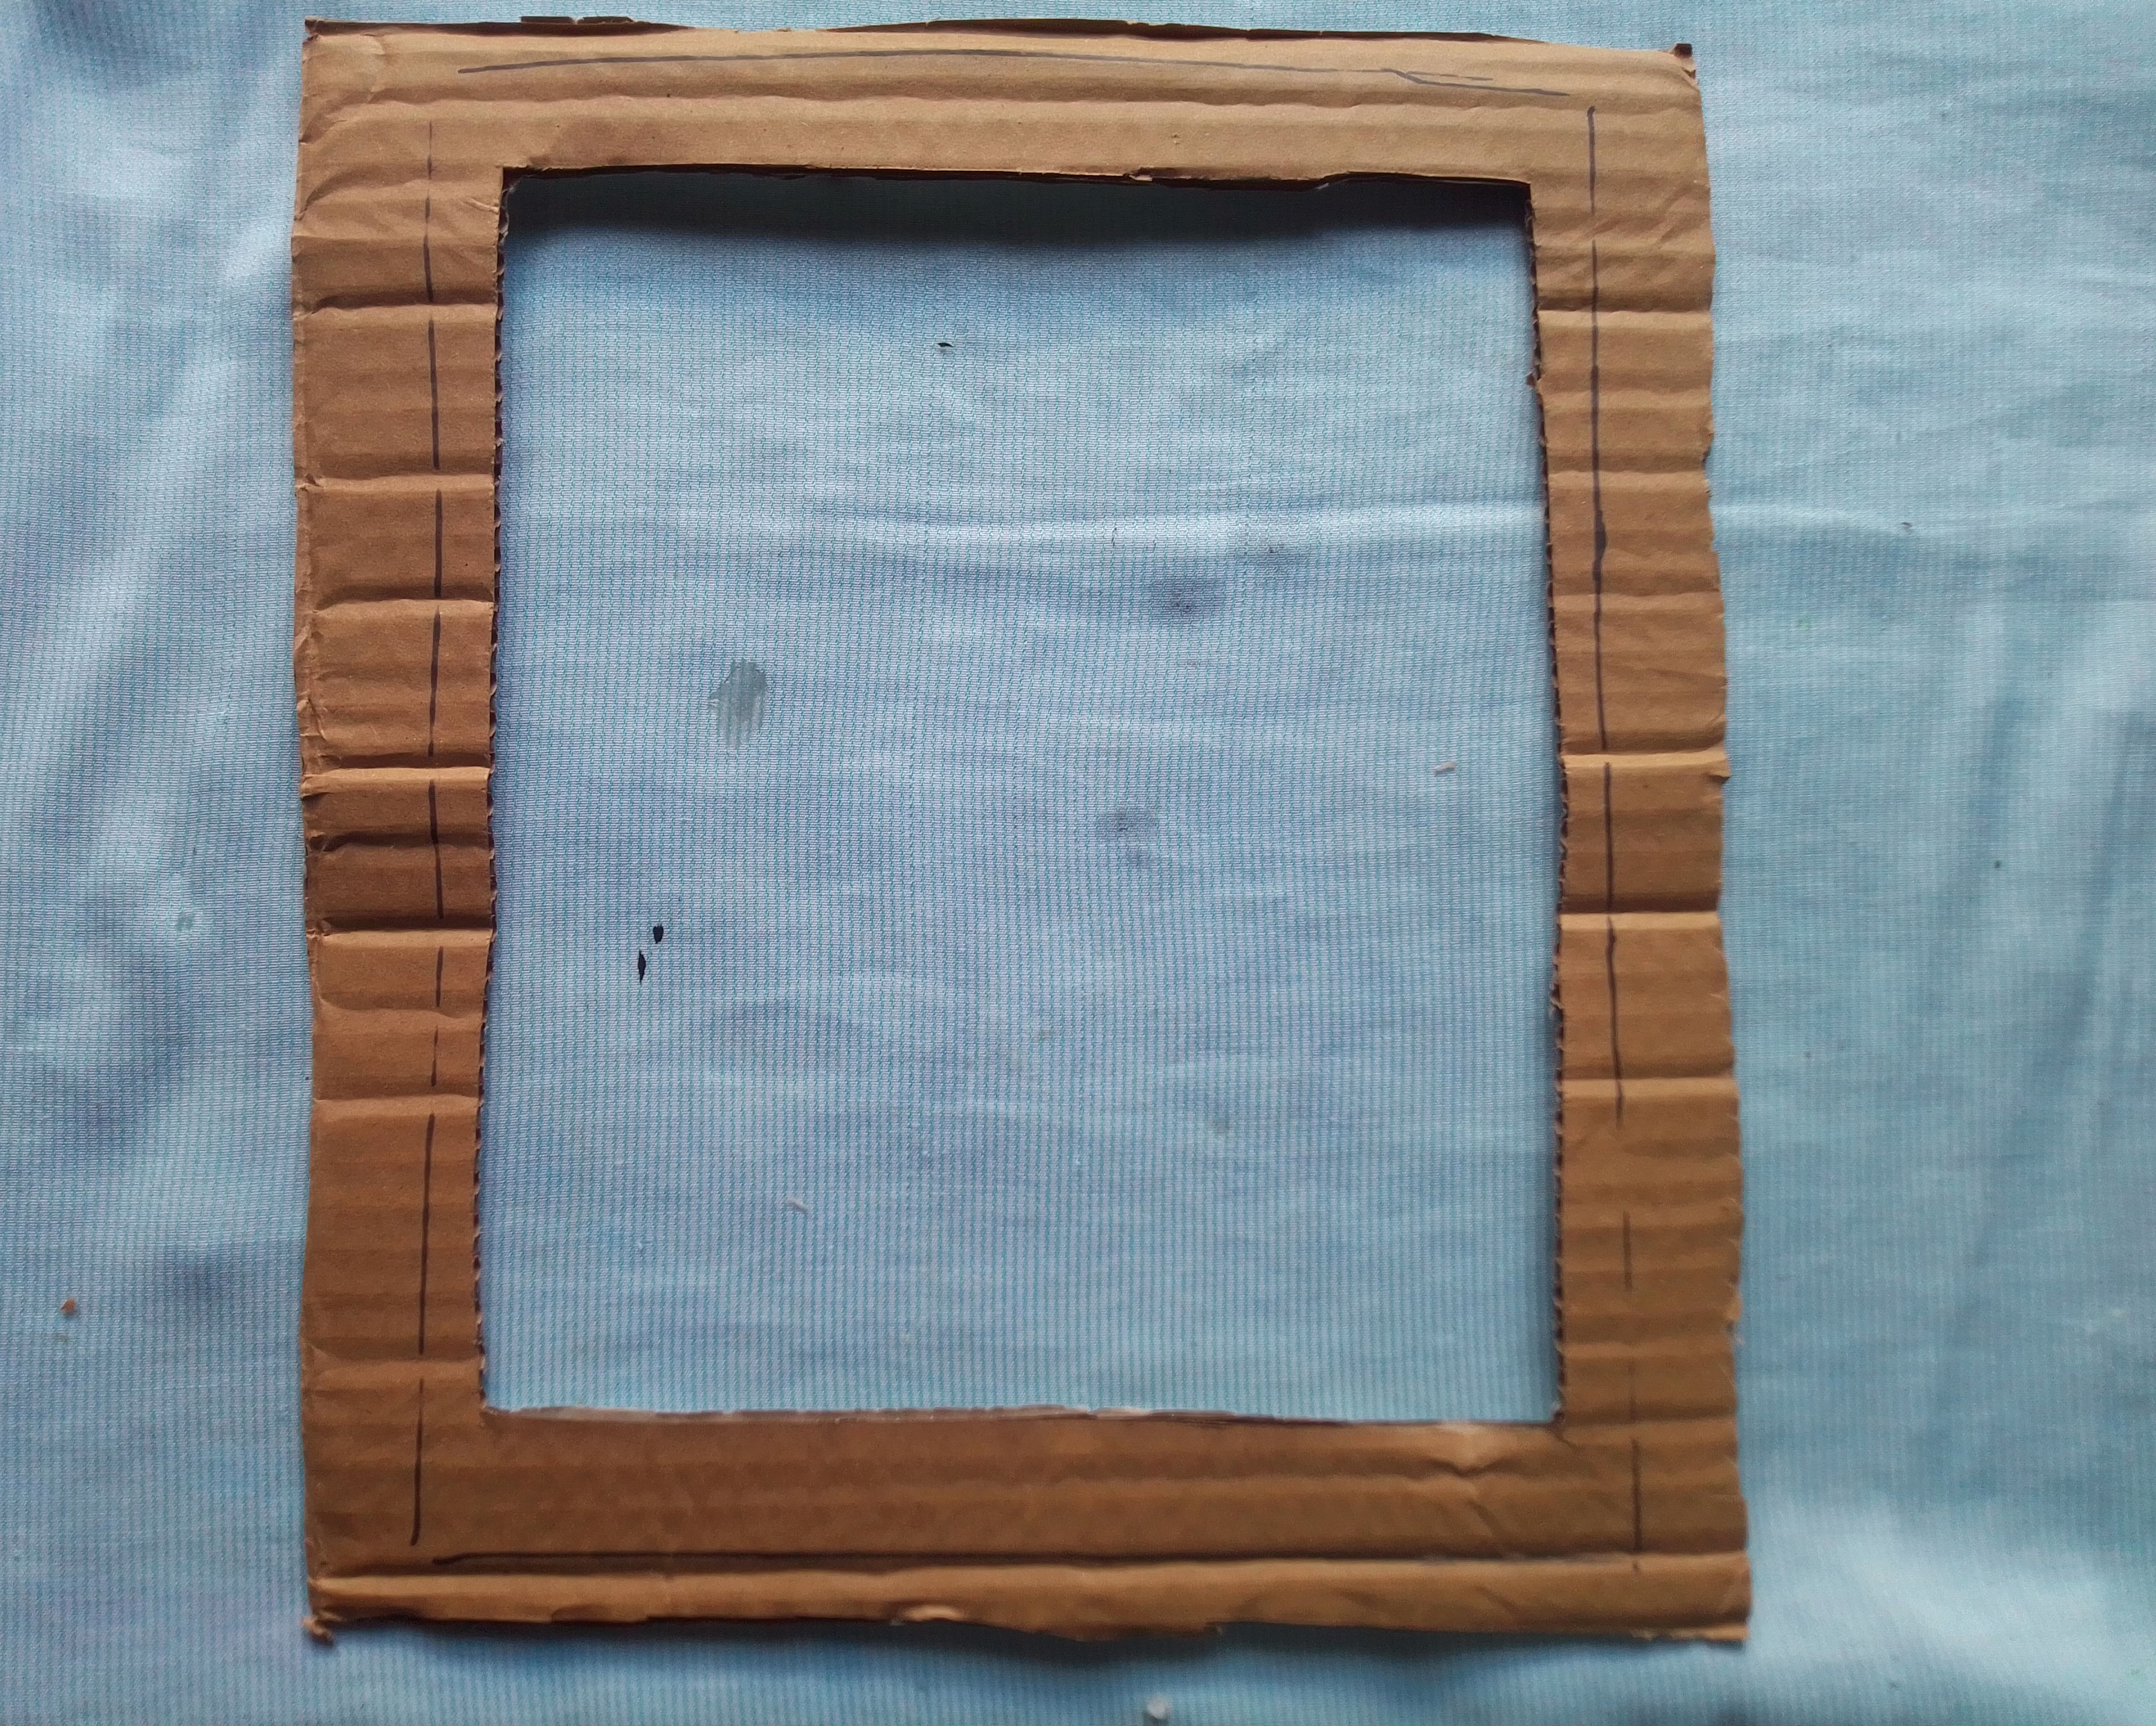
Paso 01
Como primer paso, tomamos un cartón grueso para hacer la base de nuestro marco, luego lo que hacemos será marcar las medidas de la fotografía o dibujo que irá en el centro; en mi caso fueron medidas de 27x20cm. Luego cortamos y retiramos el centro del cartón dejando el espacio hueco.
Step 01
As a first step, we take a thick cardboard to make the base of our frame, then what we do is mark the measurements of the photograph or drawing that will go in the center; in my case they were measurements of 27x20cm. Then we cut and remove the center of the cardboard leaving the hollow space.
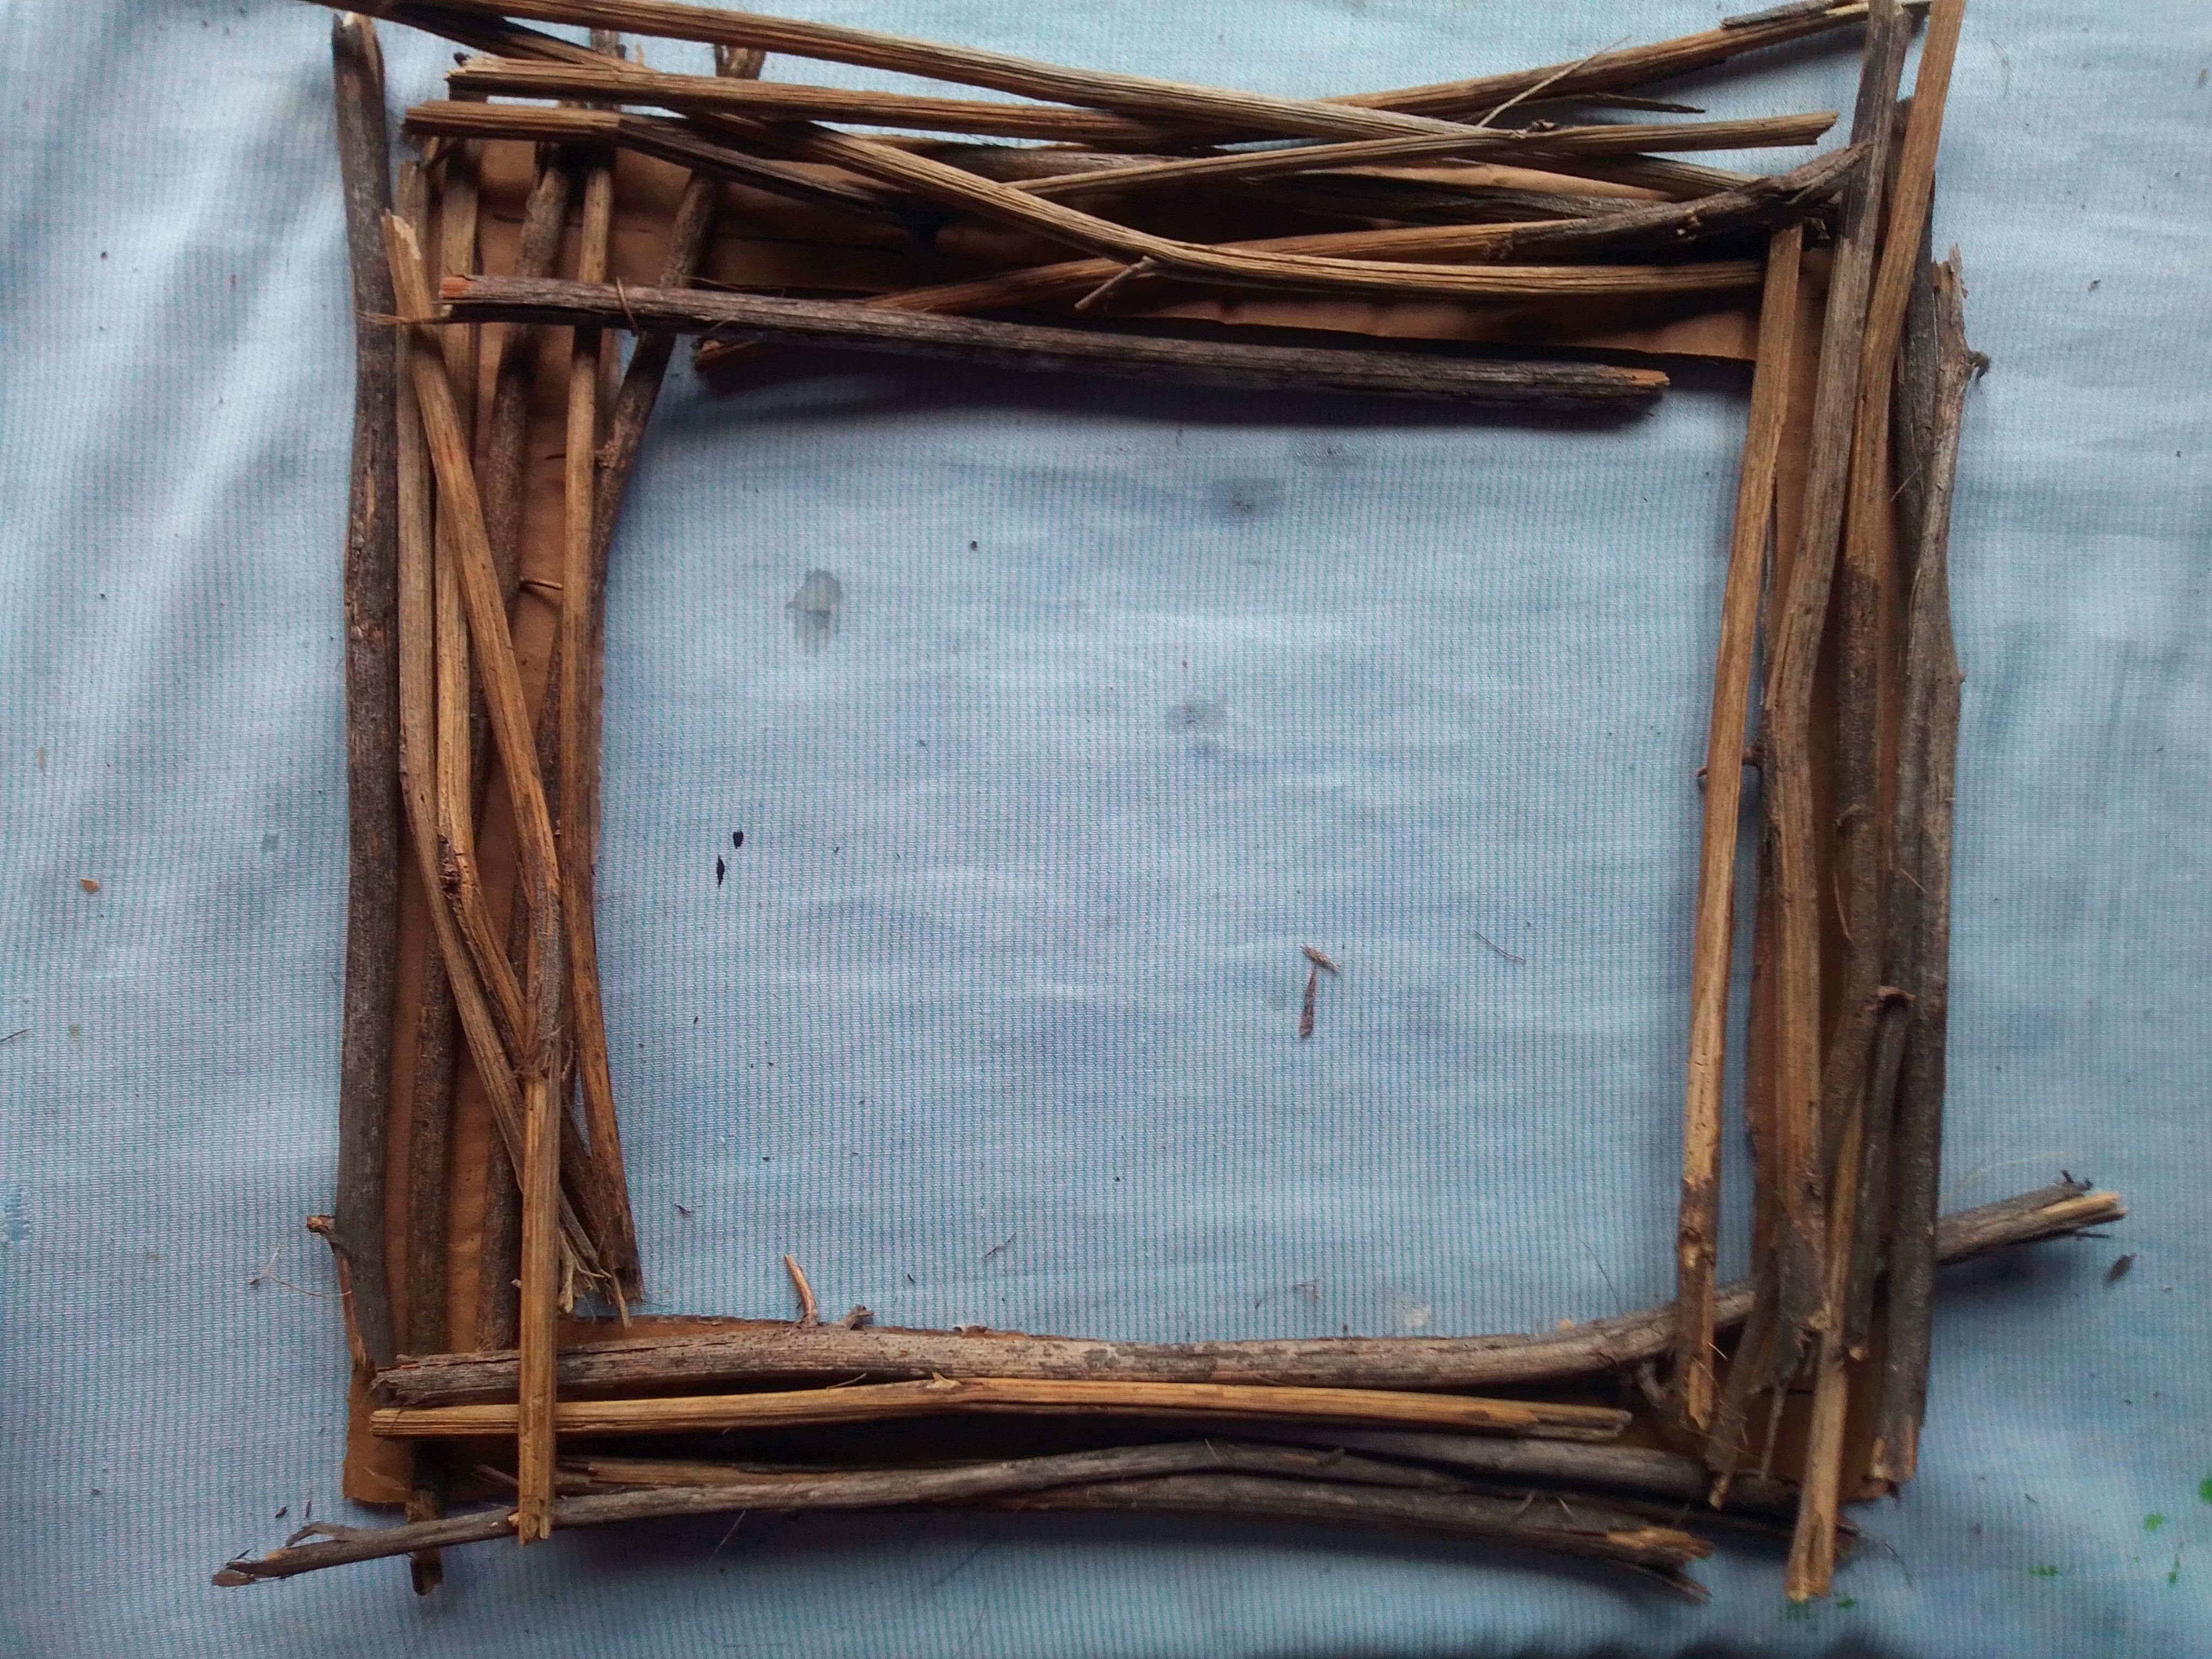
Paso 02.
Con nuestra base hecha, empezamos a colocar las ramas secas y la pegamos con silicón caliente cubriendo todo el cartón, pueden ser ramas torcidas o rectas no importa si sobresalen del cartón lo necesario es no dejes espacios y que quede bien cubierto para luzca los más natural posible.
Step 02.
With our base made, we begin to place the dry branches and glue it with hot silicone covering the entire cardboard, they can be crooked or straight branches, it does not matter if they protrude from the cardboard, what is necessary is not to leave spaces and that it is well covered to look as natural as possible.
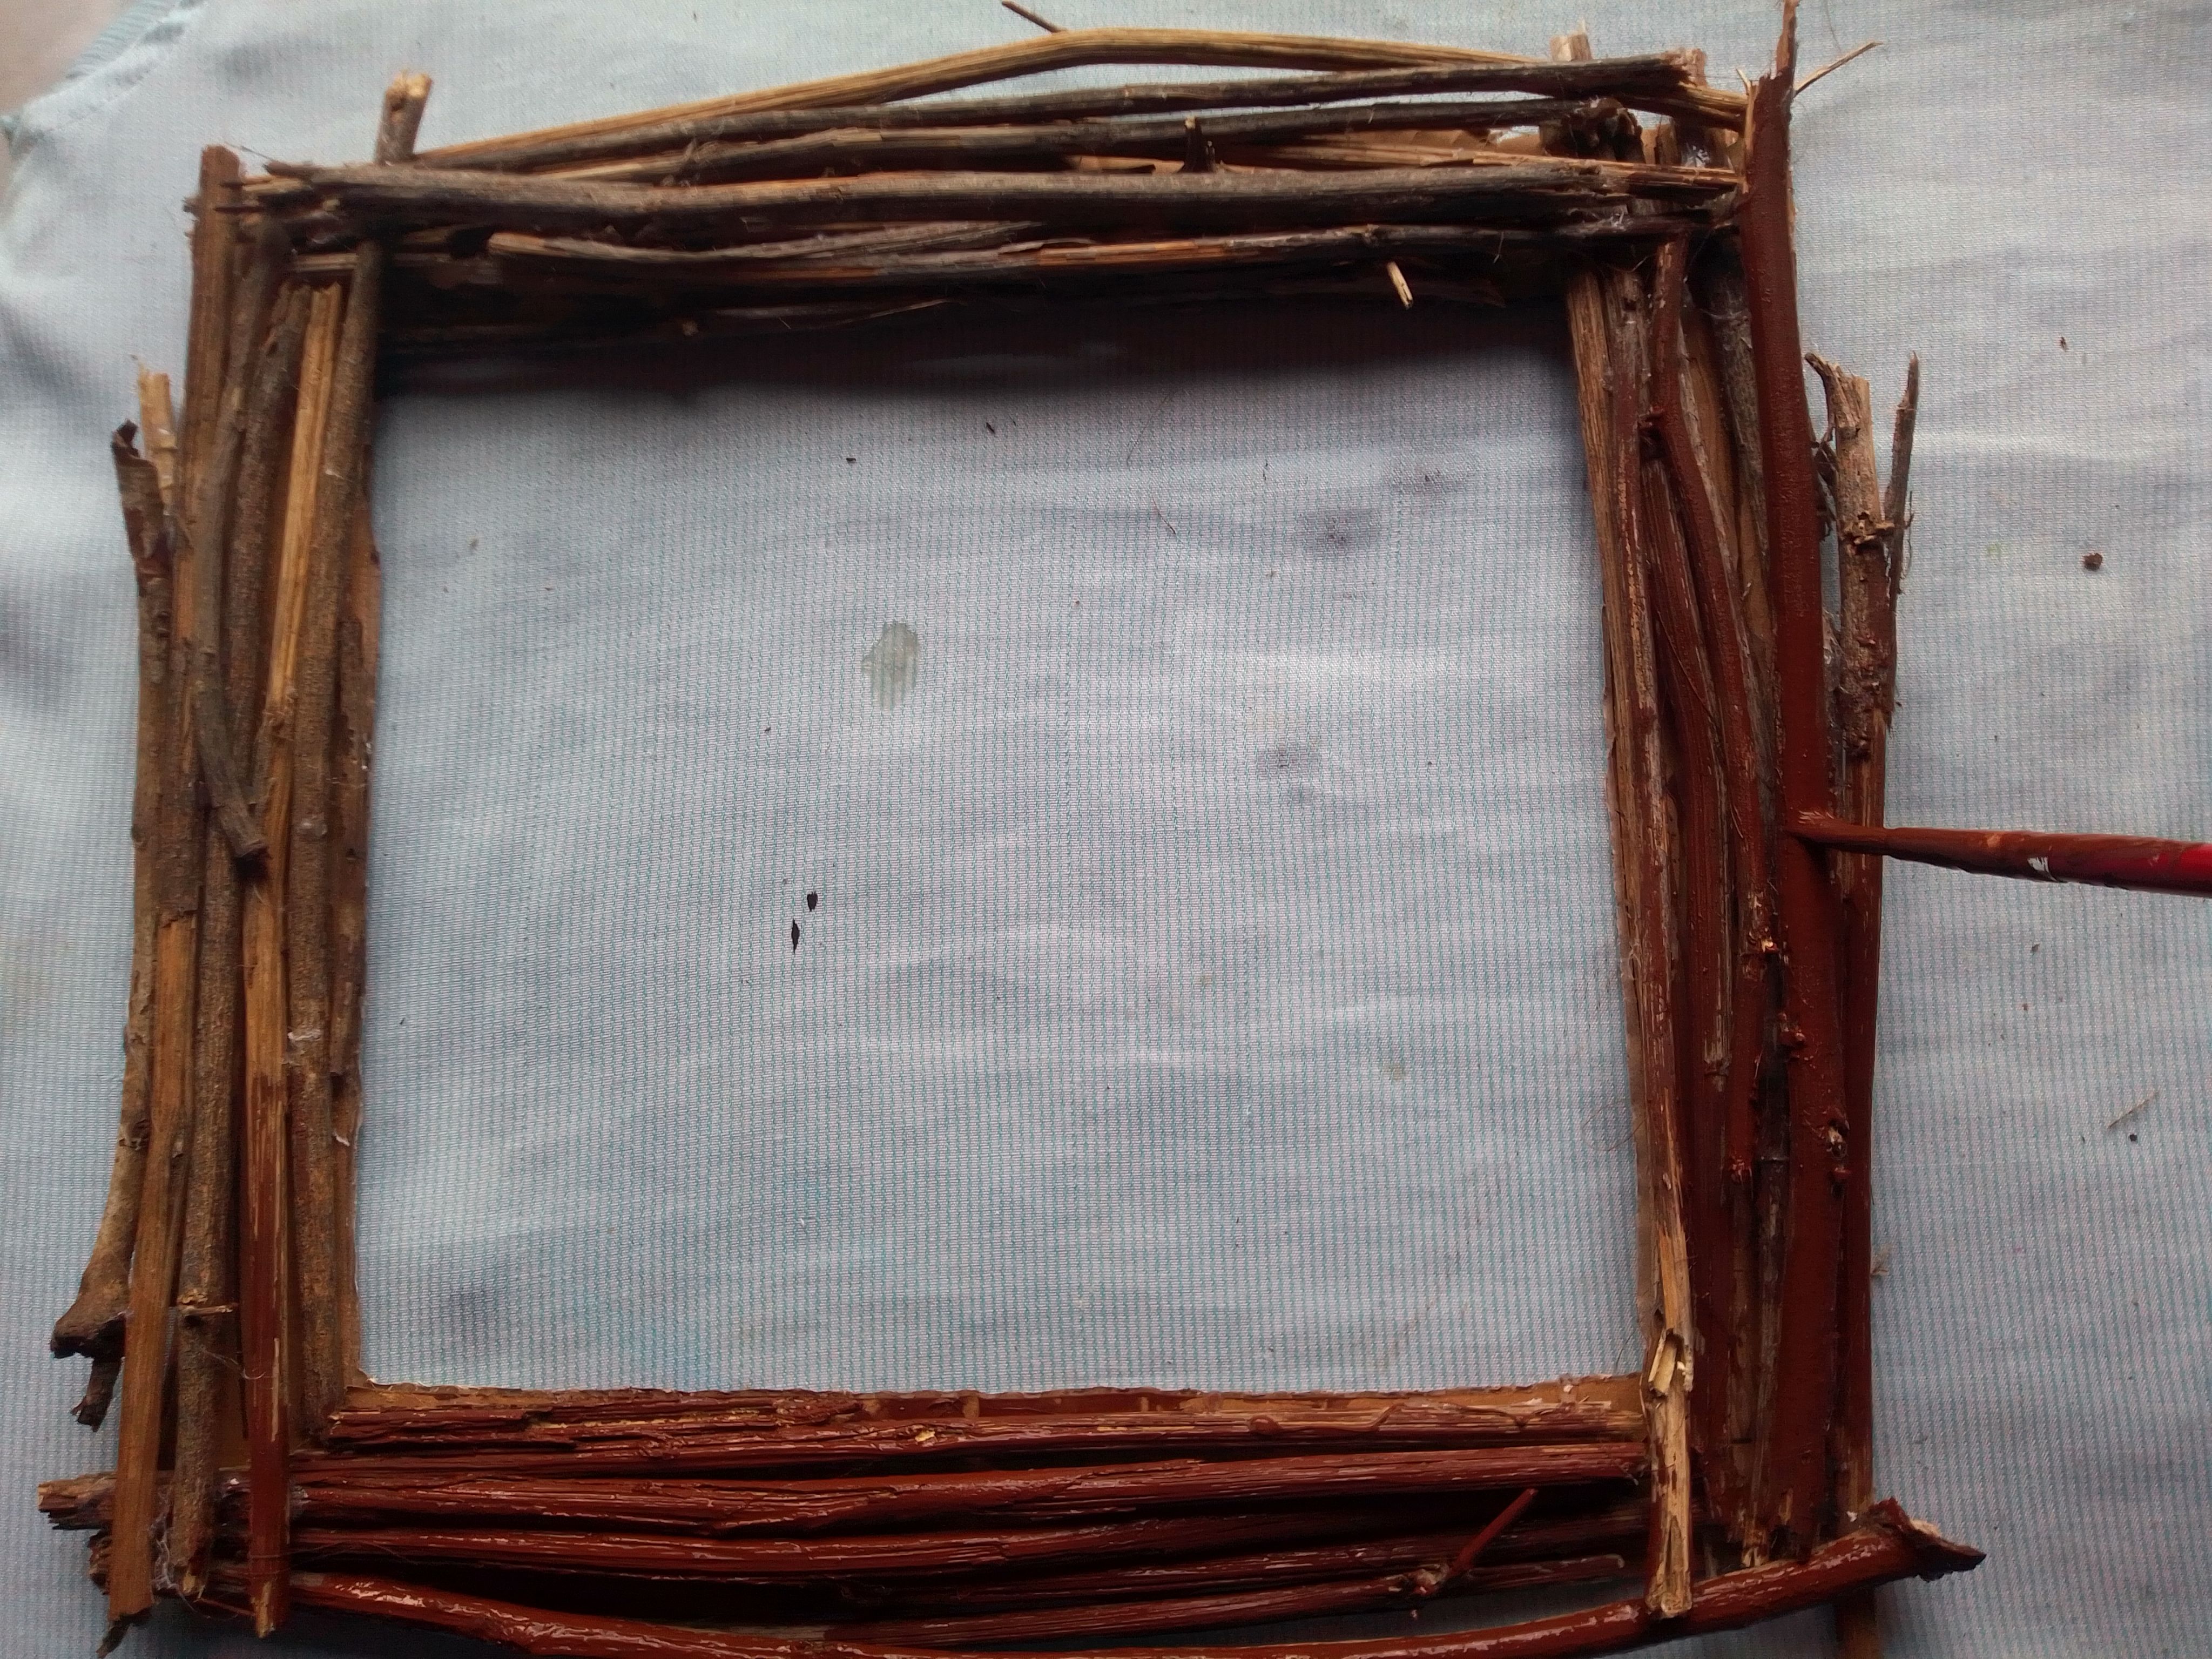
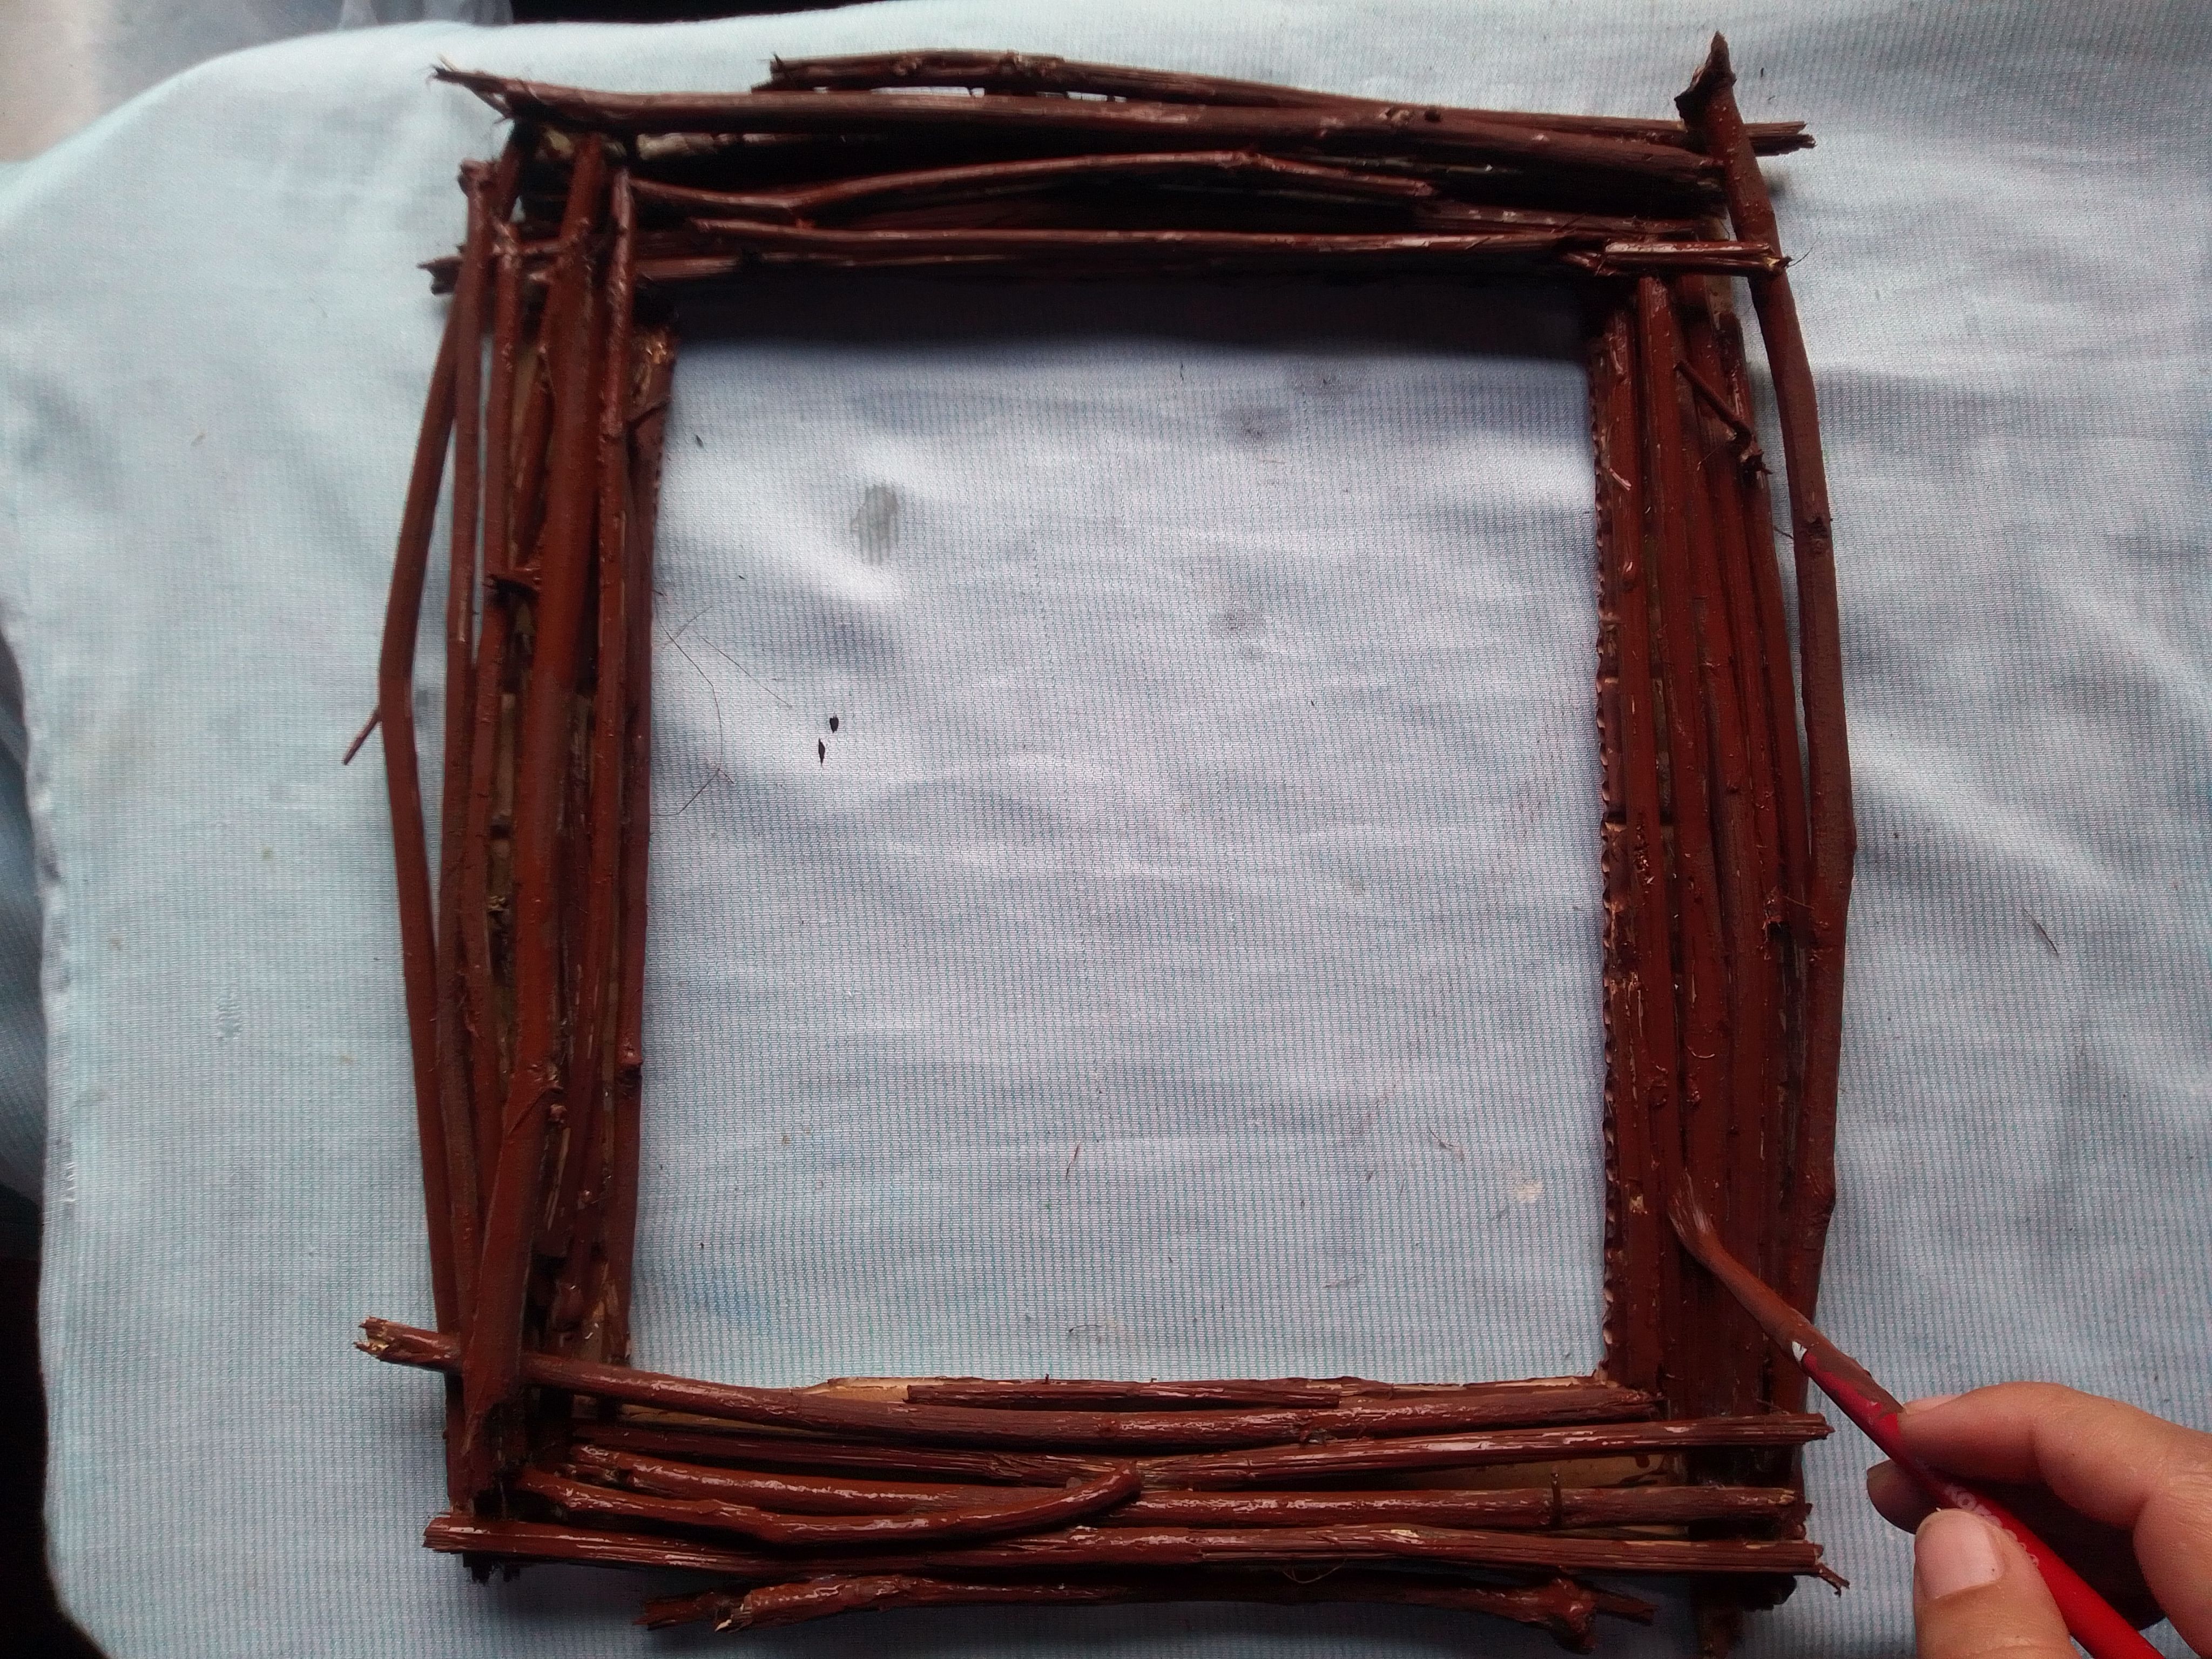
Paso 03.
Seguidamente con un pincel grueso y pintura marrón aplicamos varias capas de pintura sobre las ramas secas, podemos añadir un poco de agua a la pintura para un mejor manejo y una mejor absorción. Colocamos en el sol y dejamos secar muy bien.
Step 03.
Next, with a thick brush and brown paint, we apply several layers of paint on the dry branches, we can add a little water to the paint for better handling and better absorption. We place it in the sun and let it dry very well.
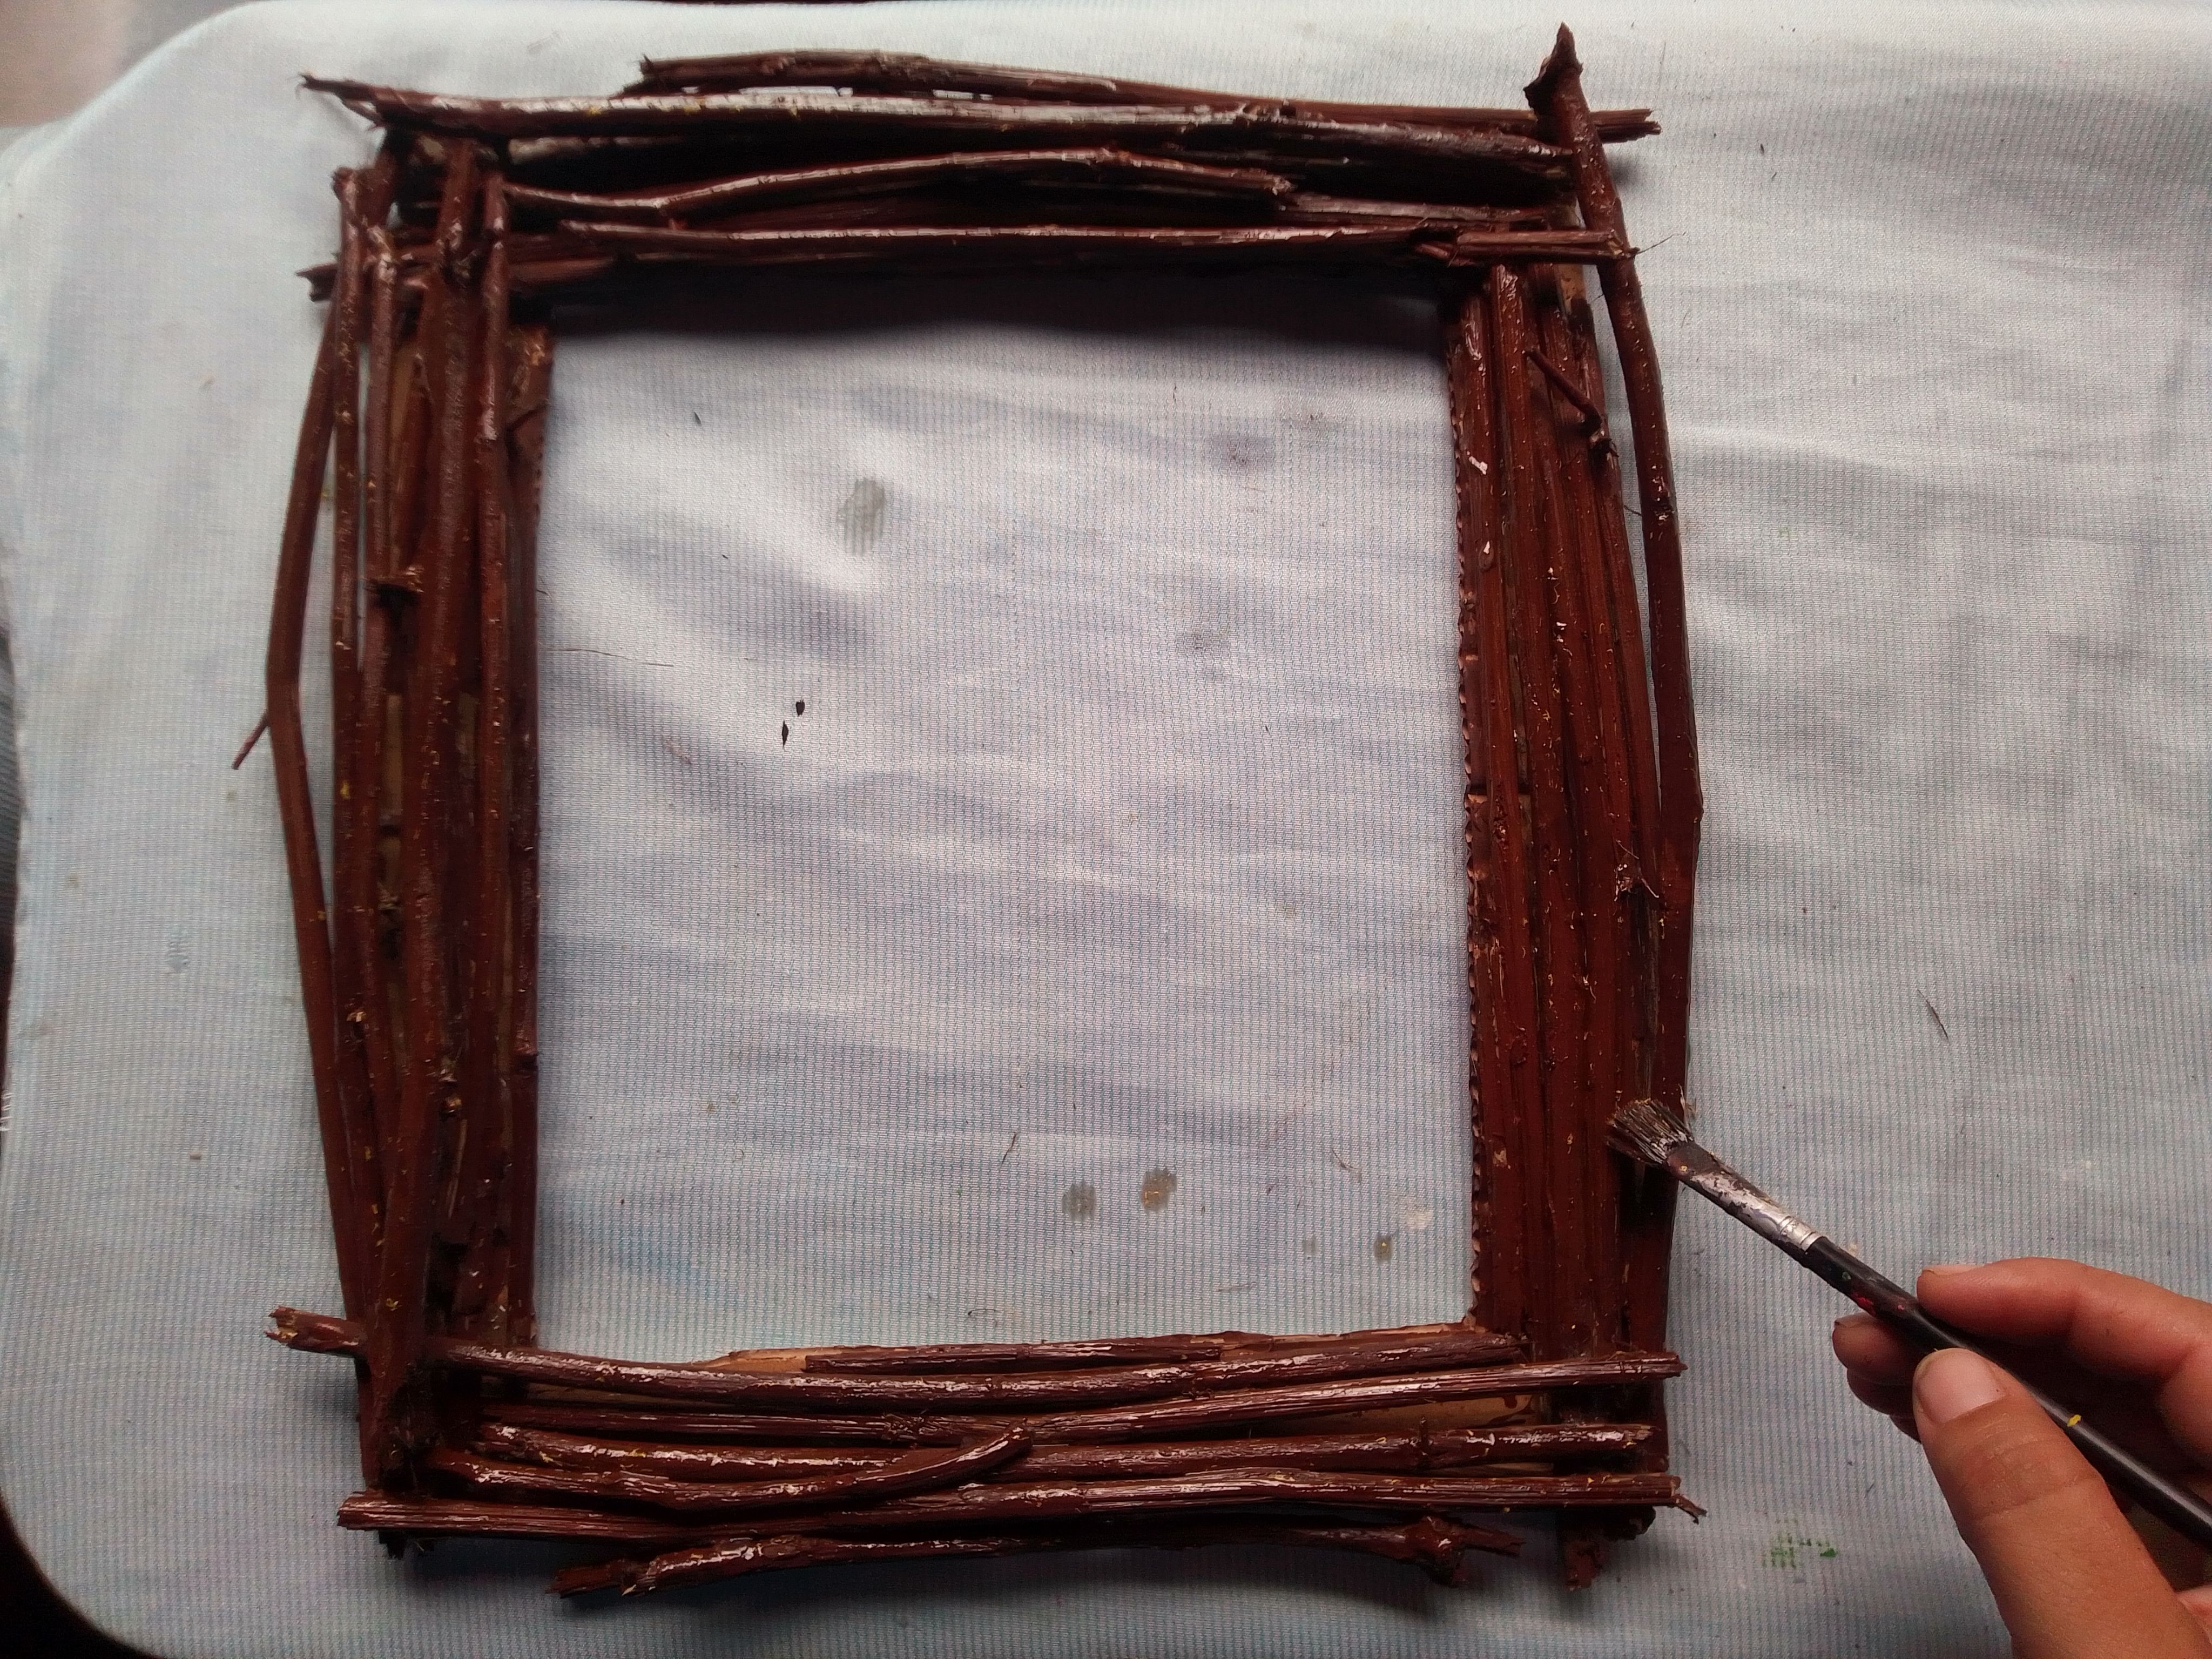
Paso 04.
Una vez la pintura marrón este seca, colocamos barniz para sellarla y darle ese toque de brillo a nuestro creativo trabajo de ramas secas. Deja secar en el sol una vez más.
Step 04.
Once the brown paint is dry, we apply varnish to seal it and give that touch of shine to our creative dry branches work. Let dry in the sun once more.

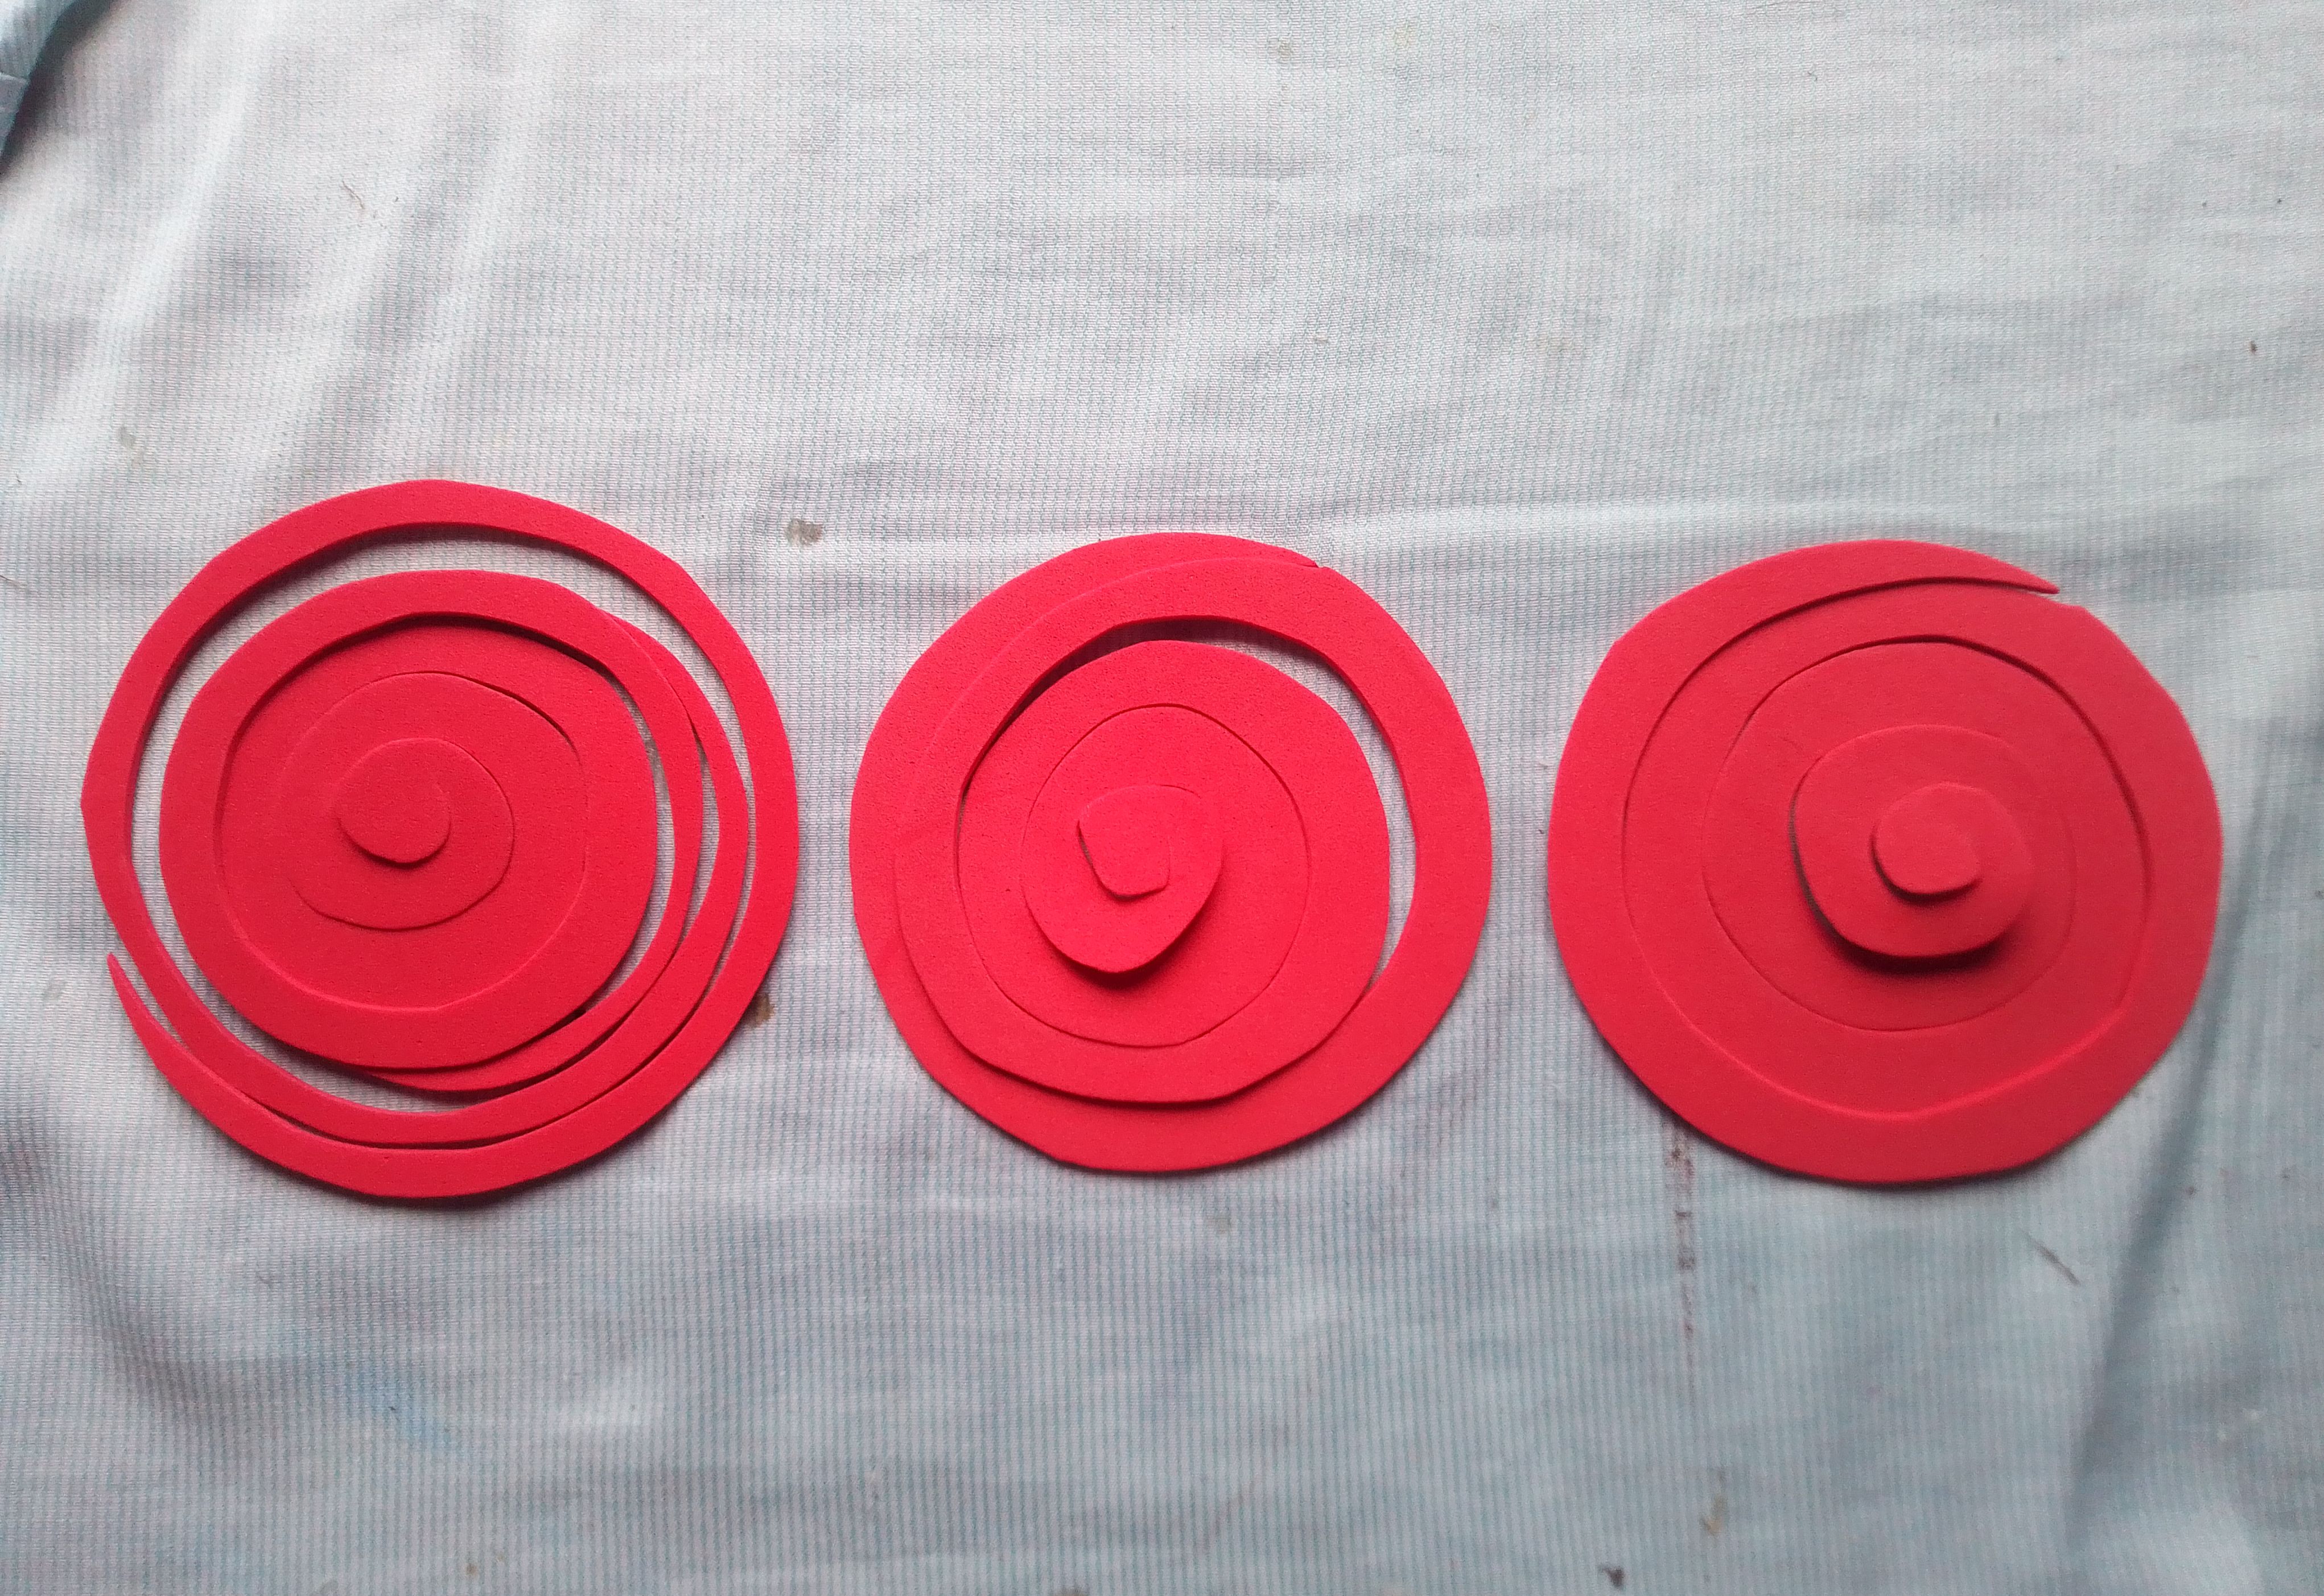
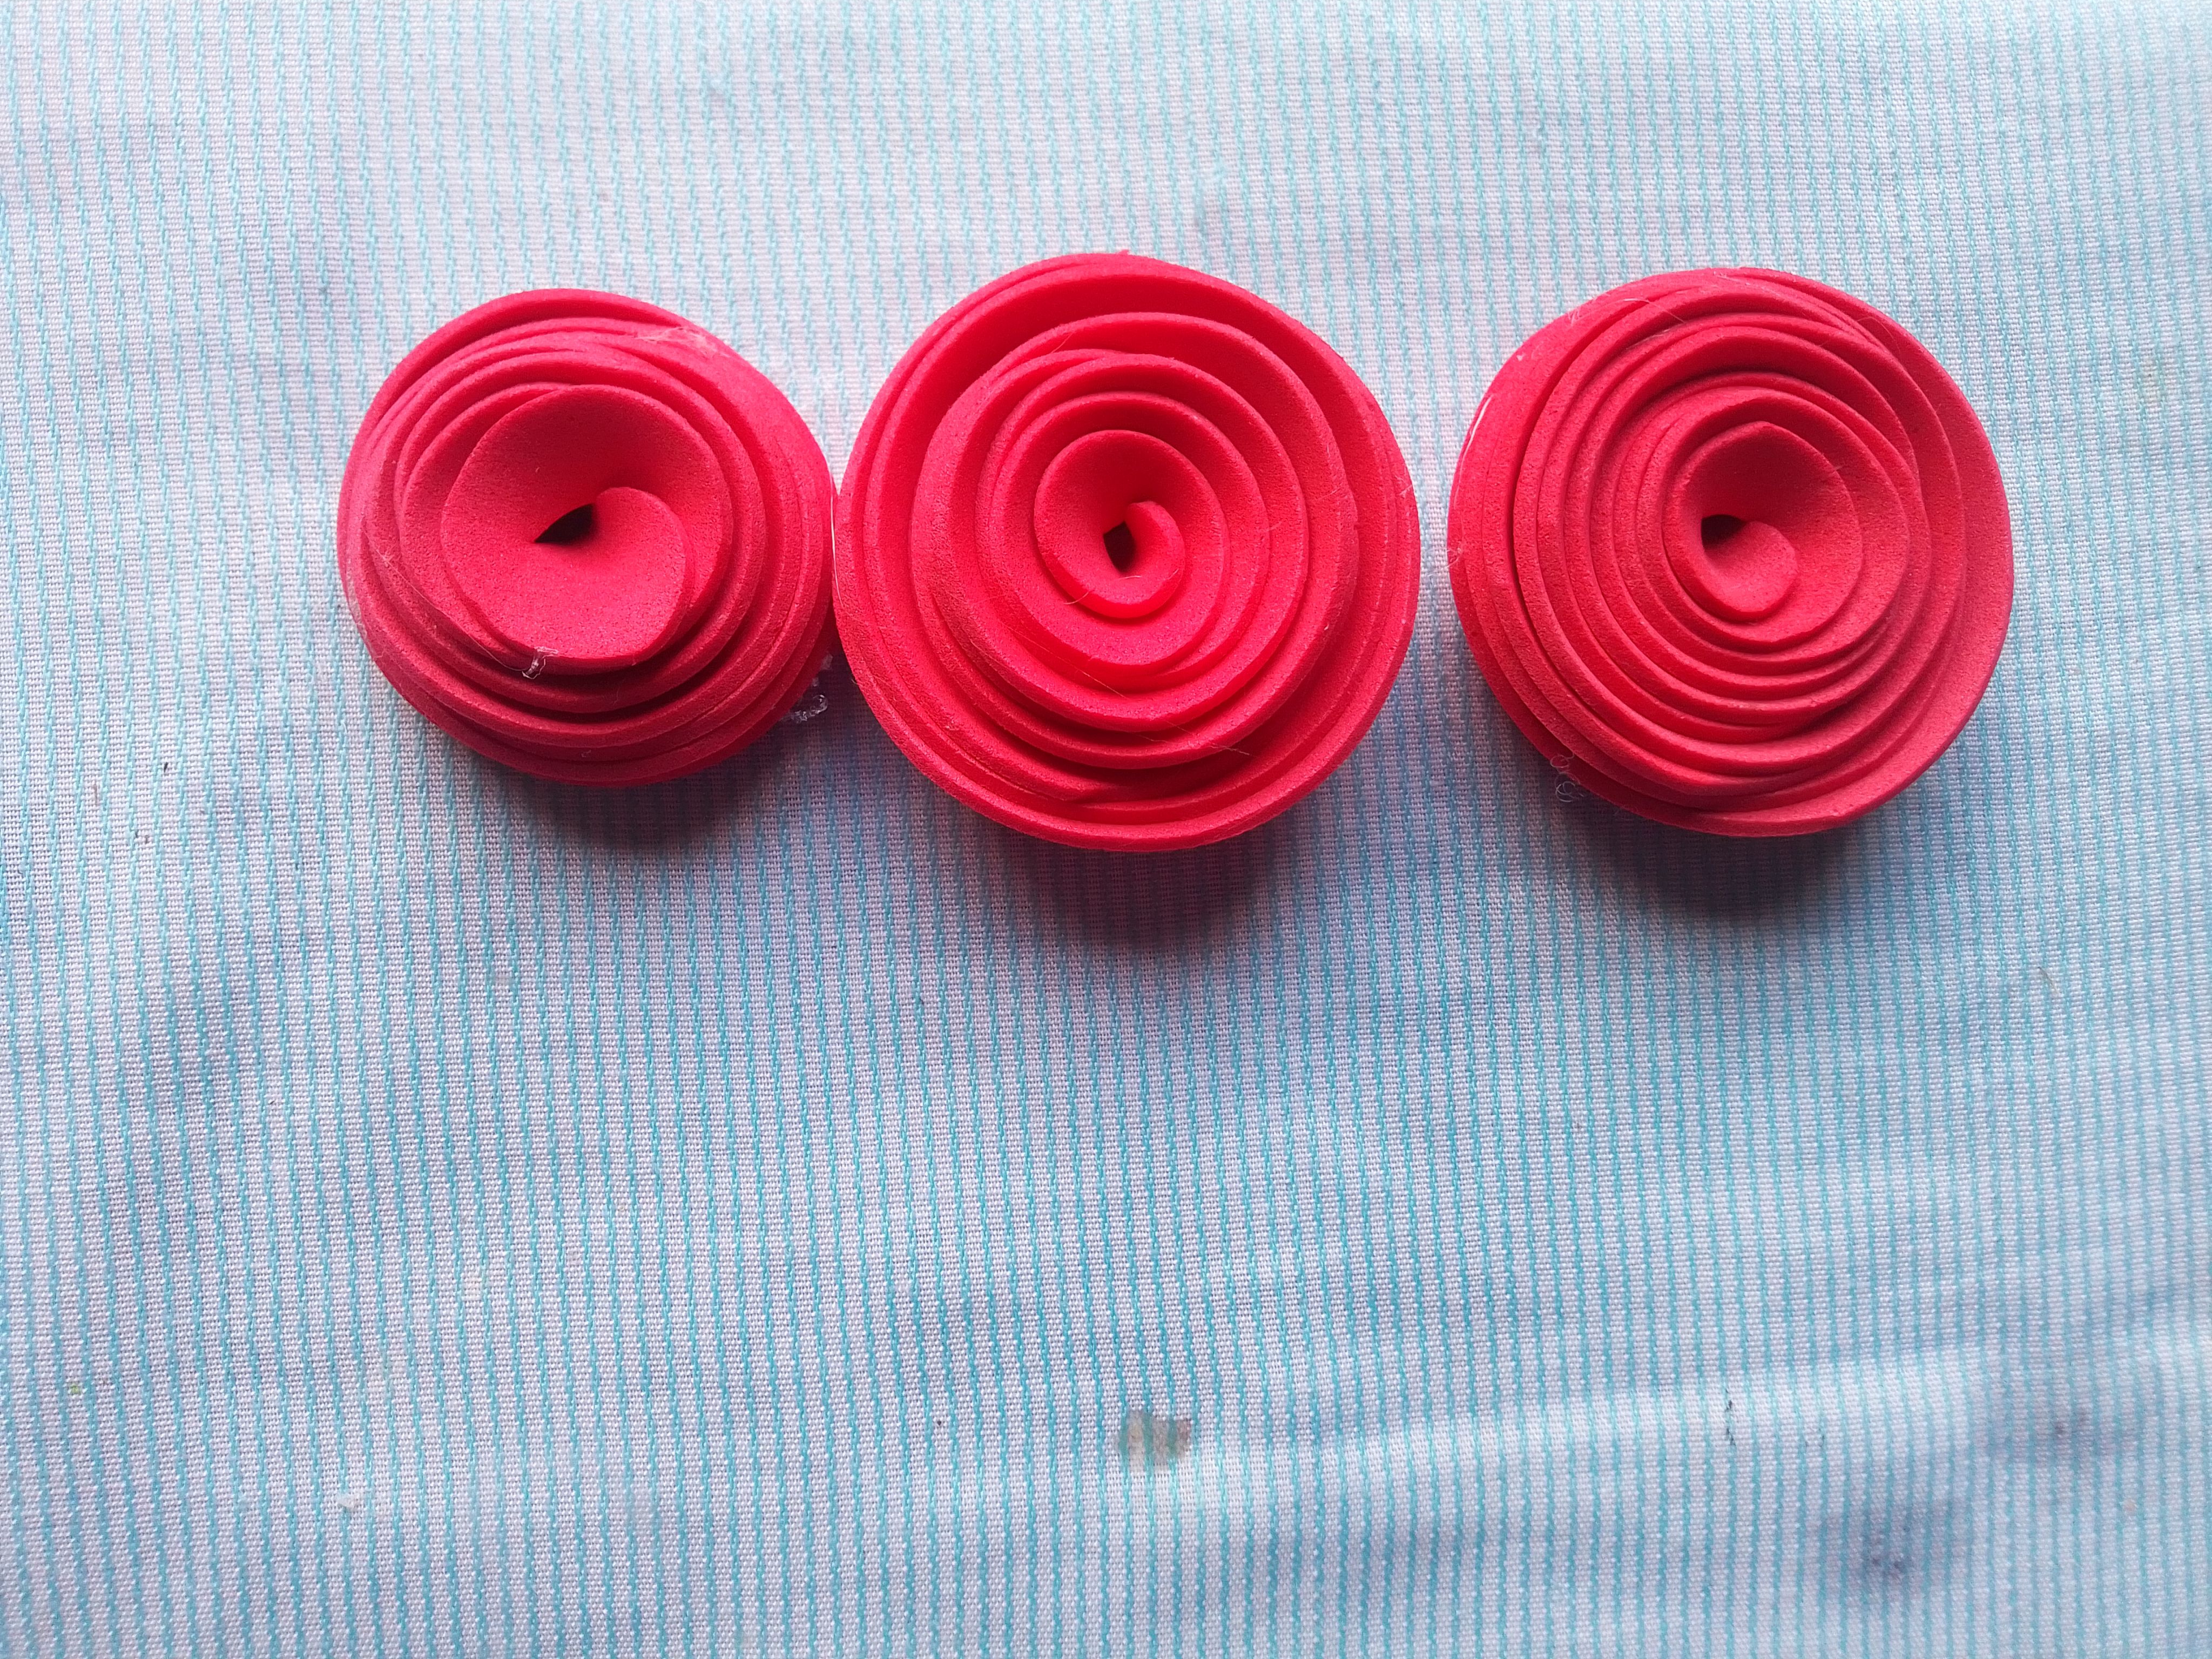
Paso 05.
Ahora decoramos este marco con unas lindas flores, y para esto utilizamos un objeto circular para trazar y luego cortar círculos de foami rojo. Estos mismo los cortamos en forma de espiral y enrrollamos empezando desde el centro fijando con silicon. Me encantan las rosas rojas por eso decidí que serían mi decoración, pero si deseas puedes crear otras flores de otros colores.
Step 05.
Now we decorate this frame with some pretty flowers, and for this we use a circular object to trace and then cut circles out of red foam. These same we cut them in the form of a spiral and roll up starting from the center fixing with silicone. I love red roses so I decided they would be my decoration, but if you want you can create other flowers of other colors.

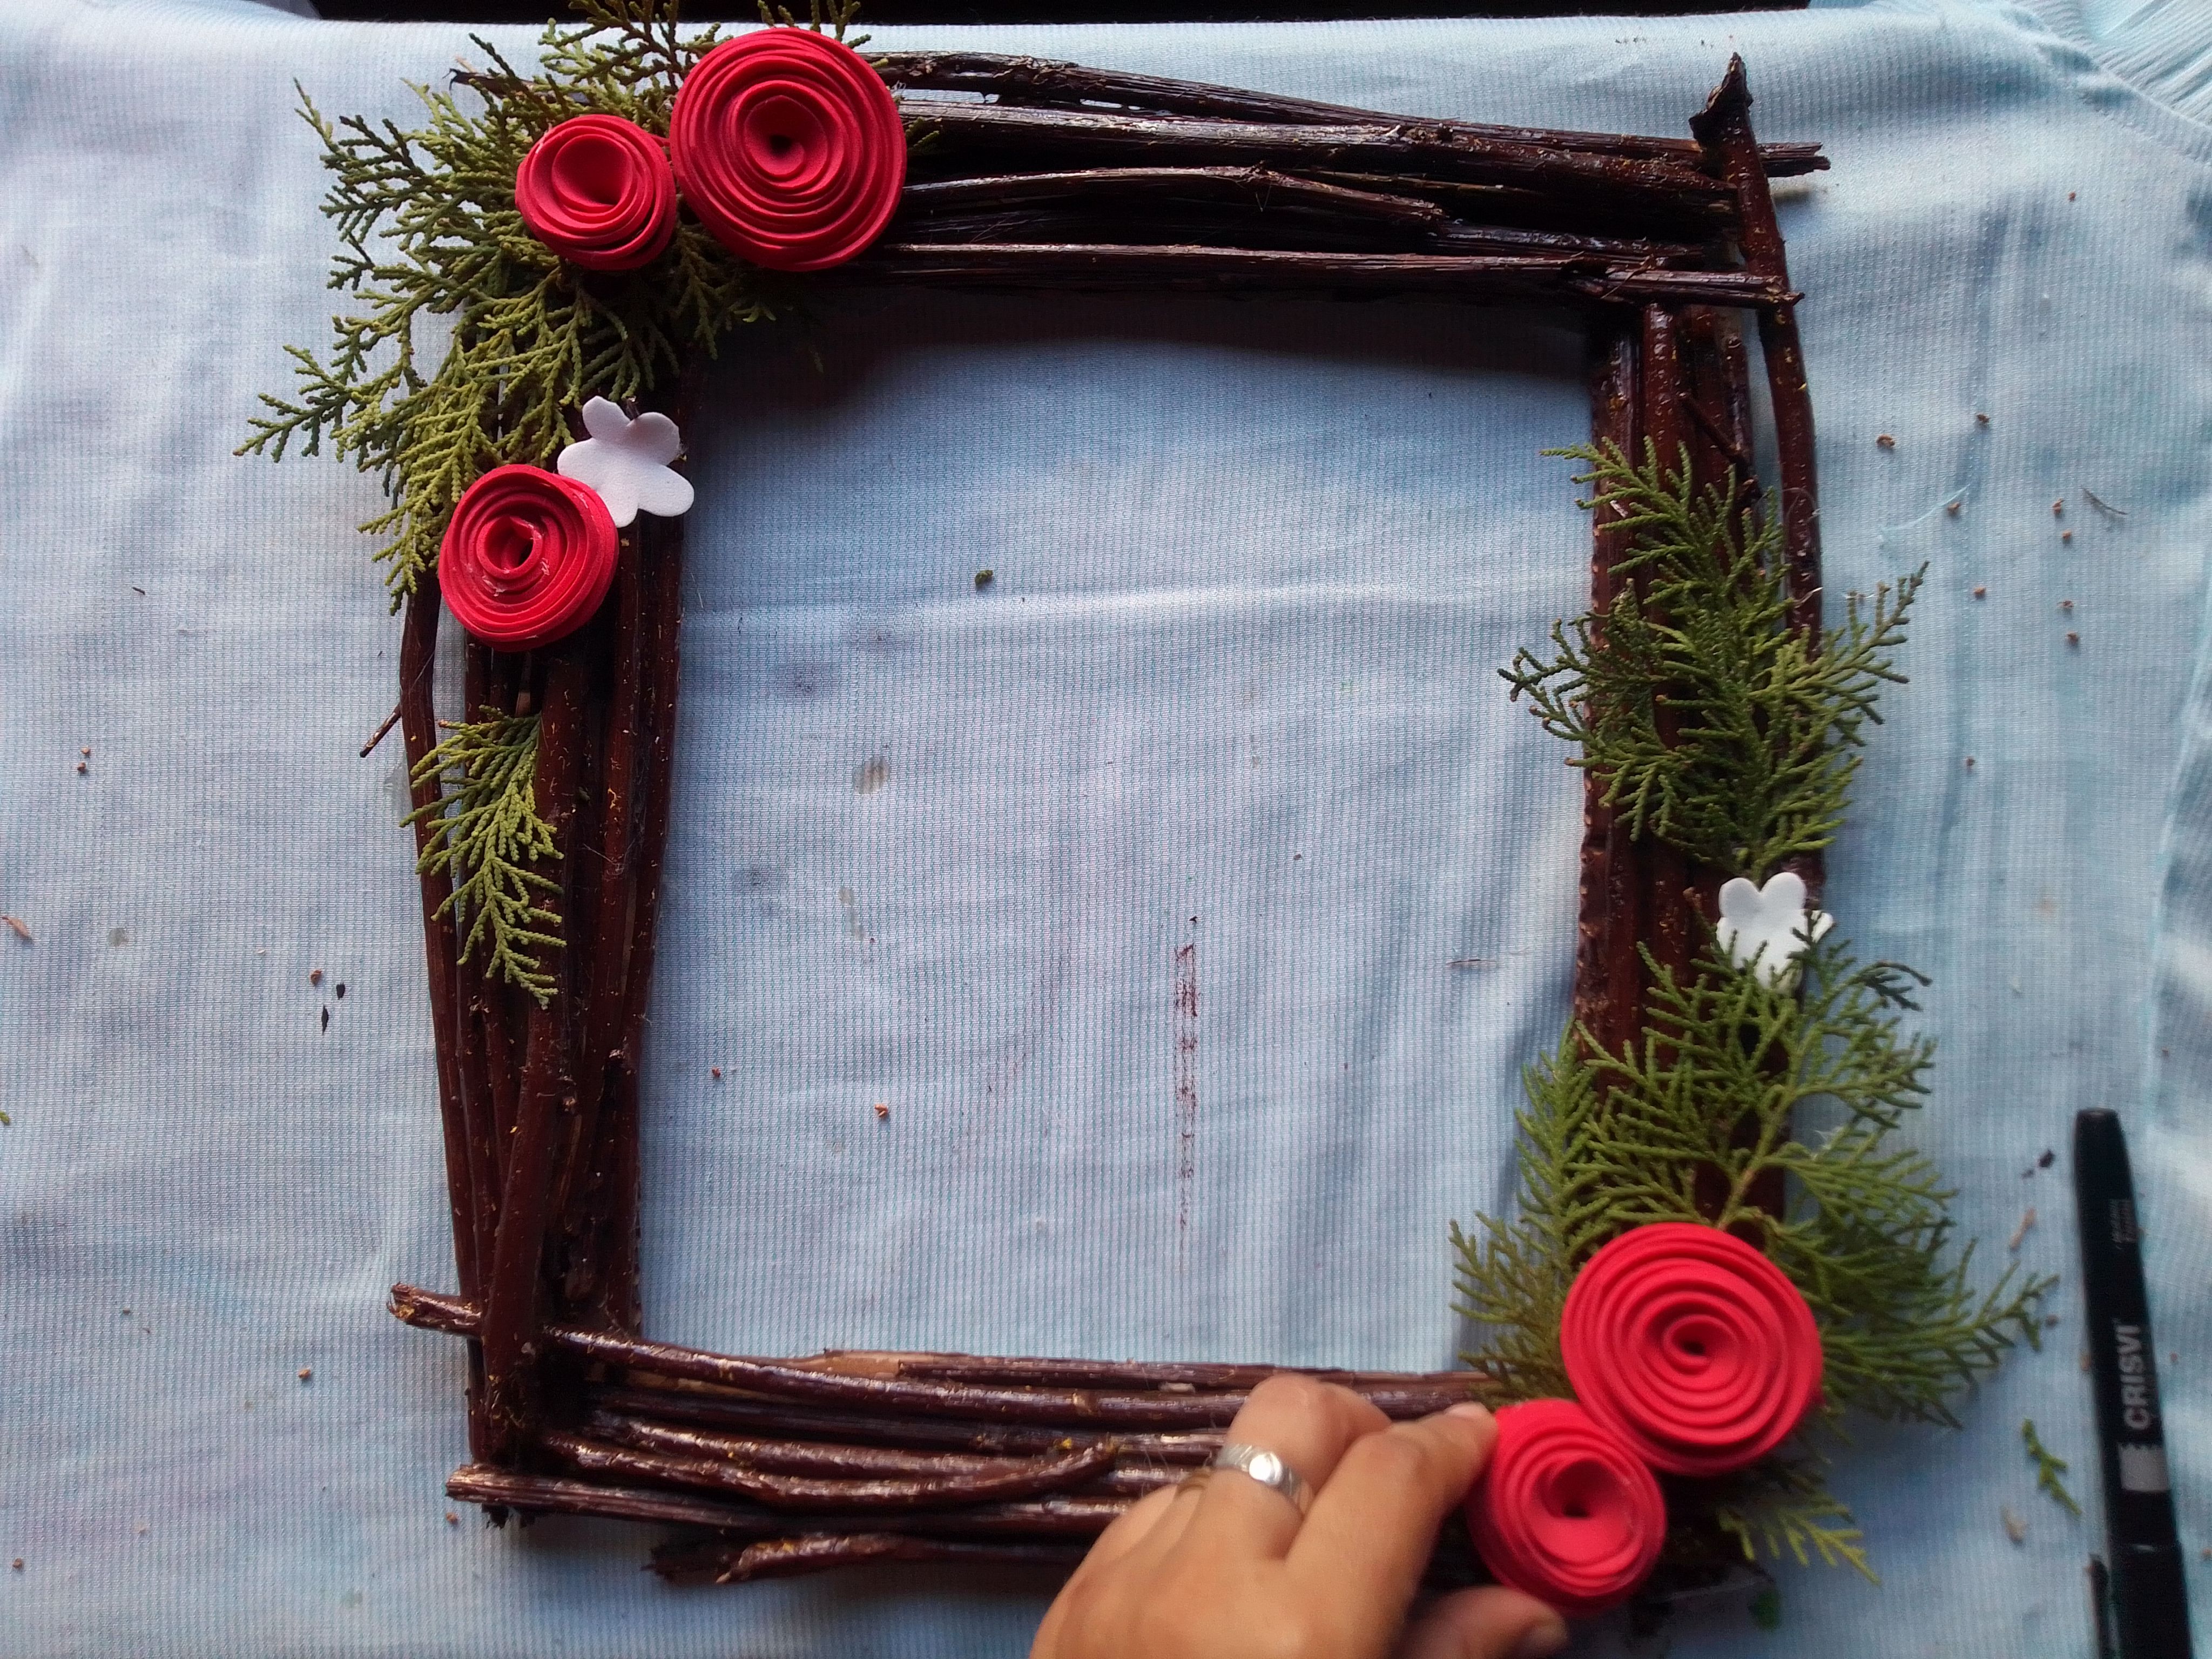
Paso 06
Las hojitas de pino suelen ser muy duraderas e ideal para este tipo de trabajos pues si le colocas un poco de pegamento blanco, ellas permanecerán con su forma natural por mucho tiempo; las tomamos y las pegamos en las esquinas del marco junto a las rosas rojas de foami.
Step 06
Pine leaves are usually very durable and ideal for this type of work because if you put a little white glue on them, they will remain in their natural shape for a long time; We take them and stick them in the corners of the frame next to the red foami roses.

Paso 07.
Acompañamos de unas pequeñas flores blancas, colocamos nuestra fotografía o dibujo y así culminamos esta linda y decorativa artesania.
Step 07.
Accompanied by some small white flowers, we place our photograph or drawing and thus we complete this beautiful and decorative craft.
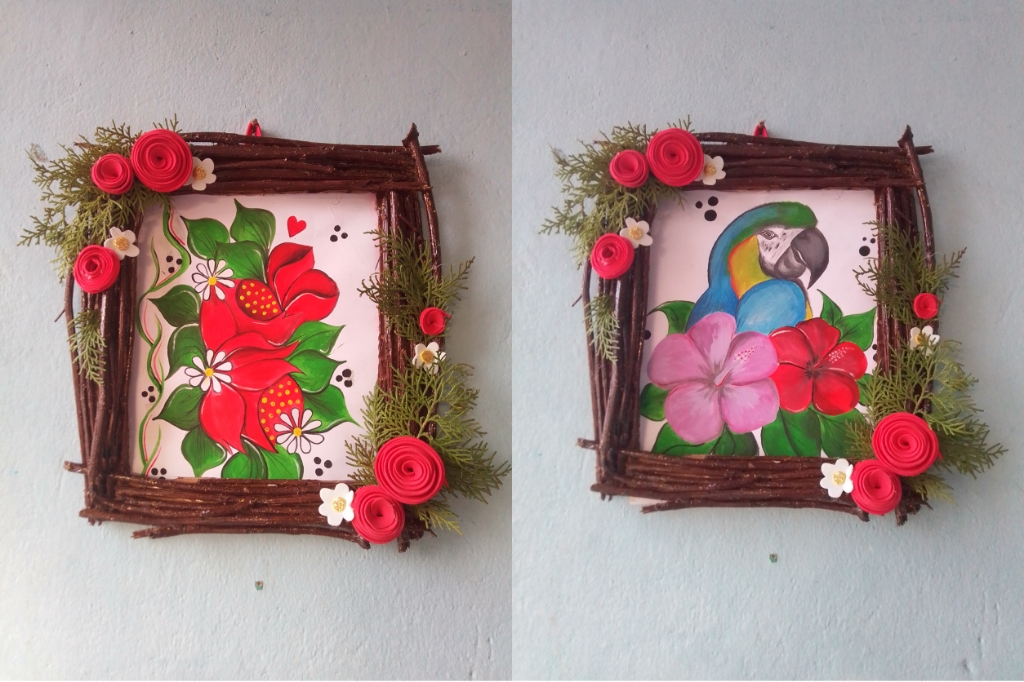
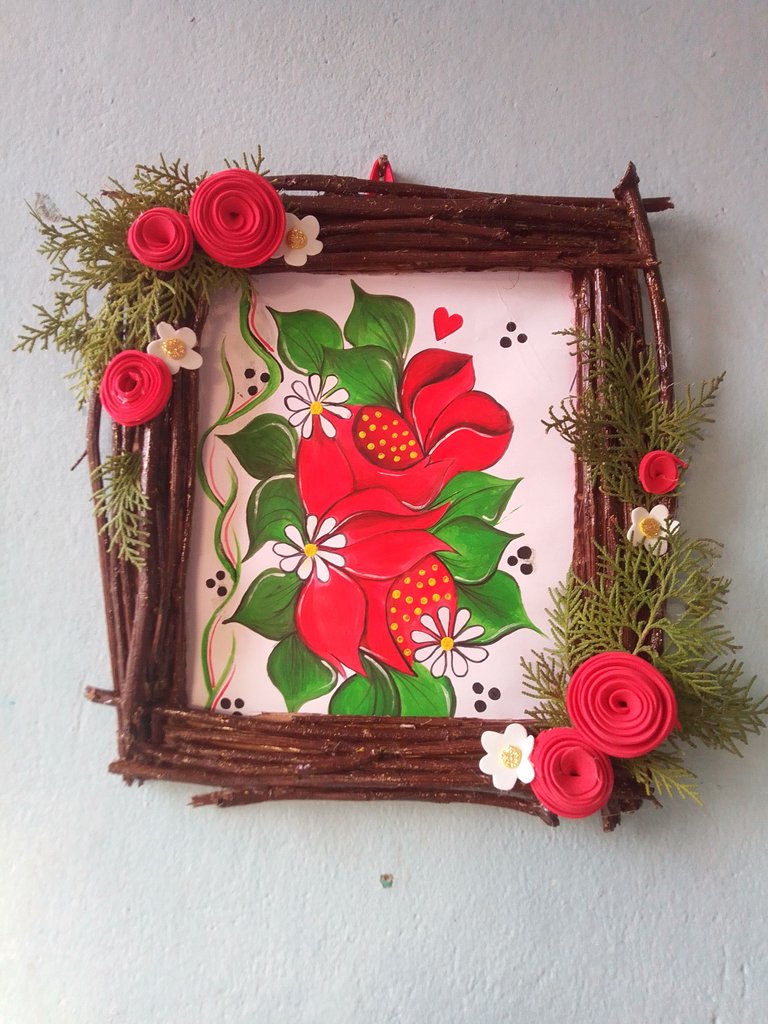
🌹 Resultado!🌹 🌹 Result!🌹
Me complace presentarles las fotografías del resultado final, espero se hayan divertido con cada paso y que hayan aprendido algo nuevo el día de hoy.
I am pleased to present you the photos of the final result, I hope you had fun with each step and learned something new today.
☺♥️Gracias por mirar a mirar hasta el final! ♥️
Me despido esperando que está idea sea de tu agrado, que tengas un hermoso día cargado de cosas lindas. Cuidense mucho, hasta la próxima idea! 🤗
I say goodbye hoping that this idea is to your liking, that you have a beautiful day full of beautiful things. Take care of yourselves, until the next idea! 🤗
As long as you carry a dream in your heart, you will never lose the meaning of life!!!😉
Como dice el circo de los valentinos....que bonitooooo!!!!
Jajajajajaja! Gracias! 👏😆😆
Muy original este cuadro amiga 🤩 gracias por compartir. 😊
Muchas gracias amiga, es un placer!