Un cordial saludo a todos los integrantes de esta hermosa comunidad de HIVE DIY espero y se encuentren bien con la bendición de Dios, hoy me encuentro con ustedes amigos para mostrarle la elaboración de un hermoso y carismático garfield esta muy fácil de hacer y bueno de niña me gustaba ver la comiquita de Garfield me hacía reír mucho y hacer esta manualidad me recordó esos tiempo cuando pasaba horas viendo la televisión y riéndome de las caricaturas ojalá amigas y sea de su agrado mi manualidad sin mas nada que decir les invito a ver el paso a paso
A warm greeting to all members of this beautiful community of HIVE DIY I hope you are well with God's blessing, today I am with you friends to show you the development of a beautiful and charismatic Garfield is very easy to do and well as a child I liked watching the Garfield cartoon made me laugh a lot and make this craft reminded me of those times when I spent hours watching TV and laughing at the cartoons hopefully friends and is to your liking my craft without anything else to say I invite you to see the step by step
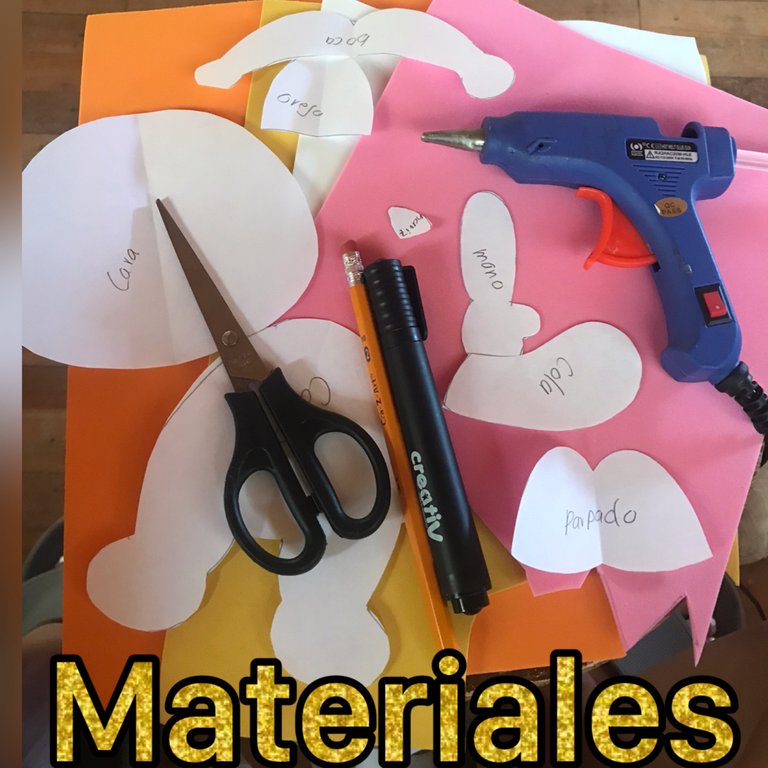
MATERIALES A UTILIZAR
• foami naranja, amarillo, blanco y rosado
• tijera
• lápiz
• marcador negro
• pistola de silicon
• patrones del garfield
MATERIALS TO BE USED
- orange, yellow, white and pink foami
- scissors
- pencil
- black marker
- silicone gun
- garfield patterns
AHORA SI AMIGOS MANOS A LA OBRA
NOW IF FRIENDS, LET'S GET TO WORK
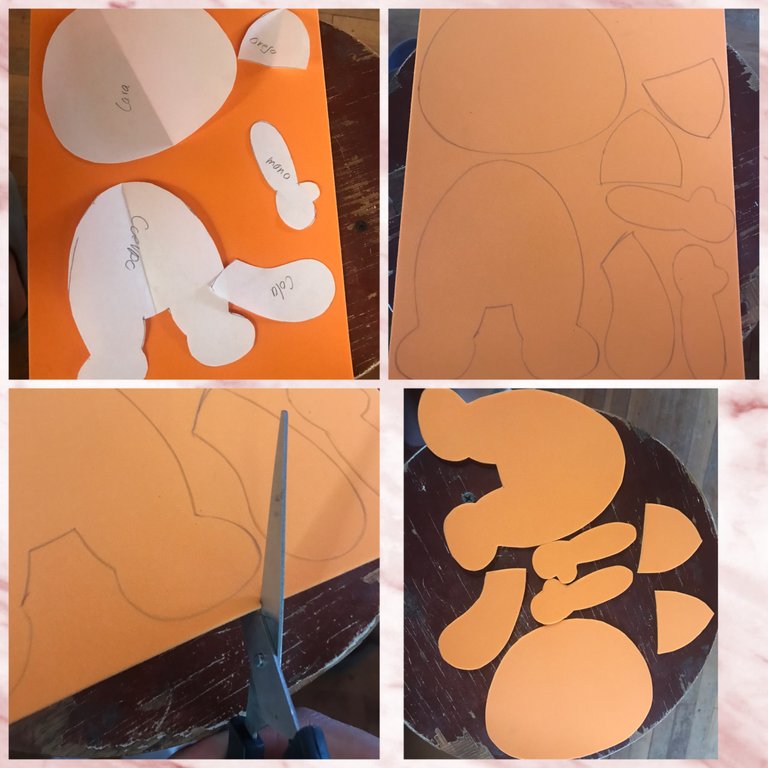
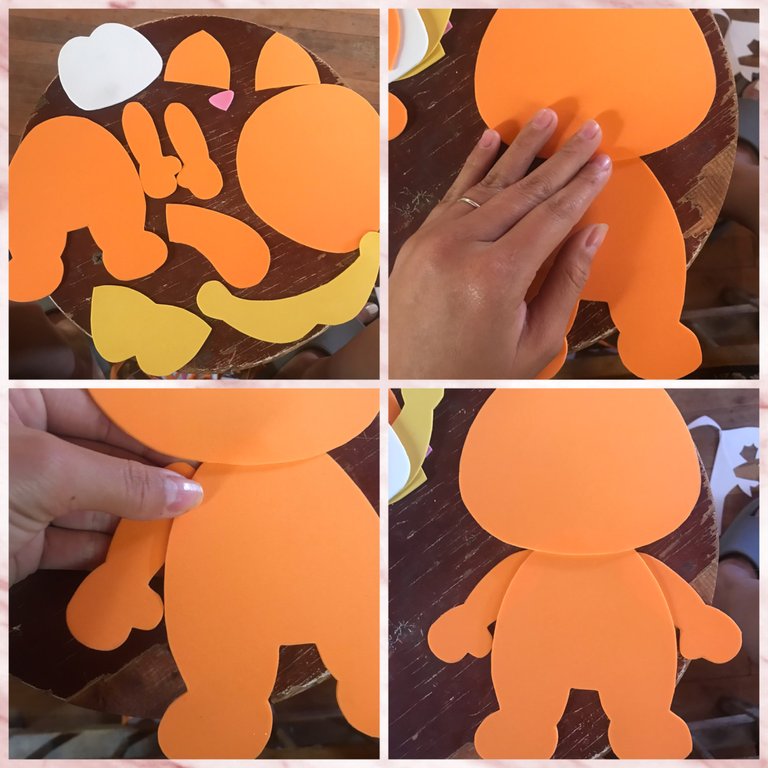
Primero marcamos y recortamos en el foami naranja el cuerpo, cabeza, los brazos, las orejas y la cola
First we mark and cut out the body, head, arms, ears and tail on the orange foami
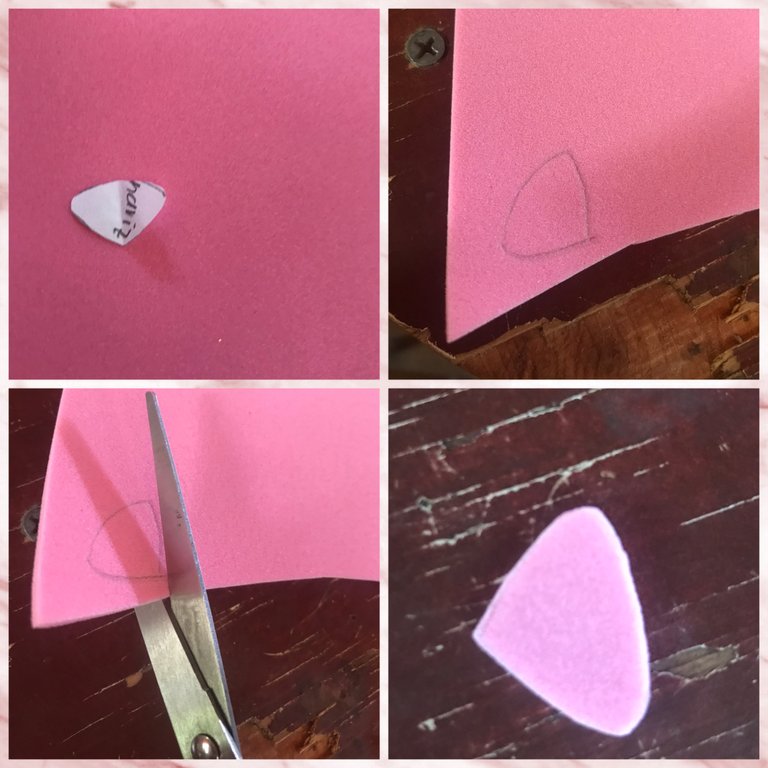
Marcamos y recortamos en el foami rosando la nariz del garfield
We mark and cut out the Garfield's nose on the pink foami
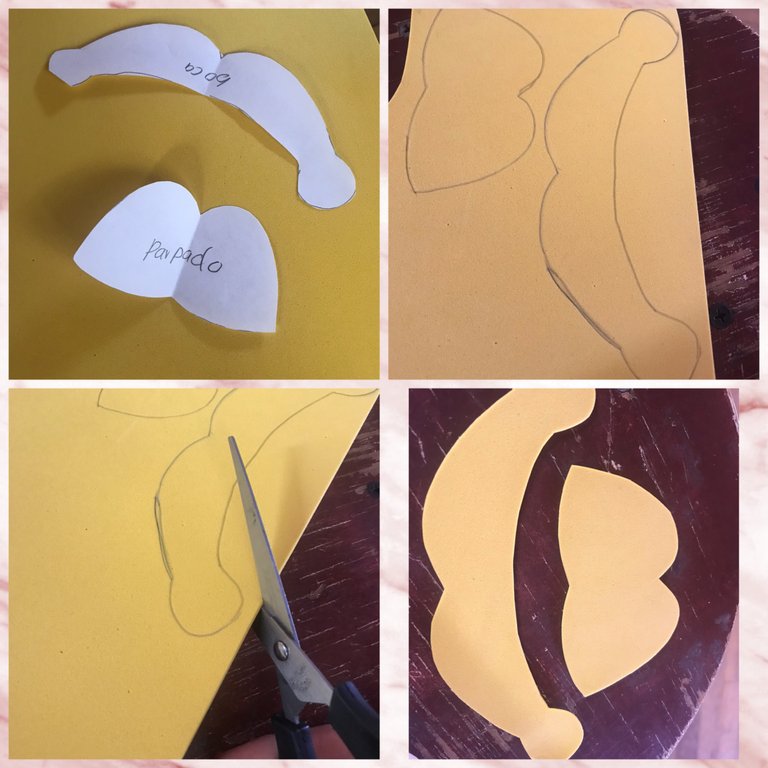
Marcamos y recortamos en el foami amarillo el párpado de los ojos y la boca
We mark and cut out the eyelids of the eyes and the mouth on the yellow foami
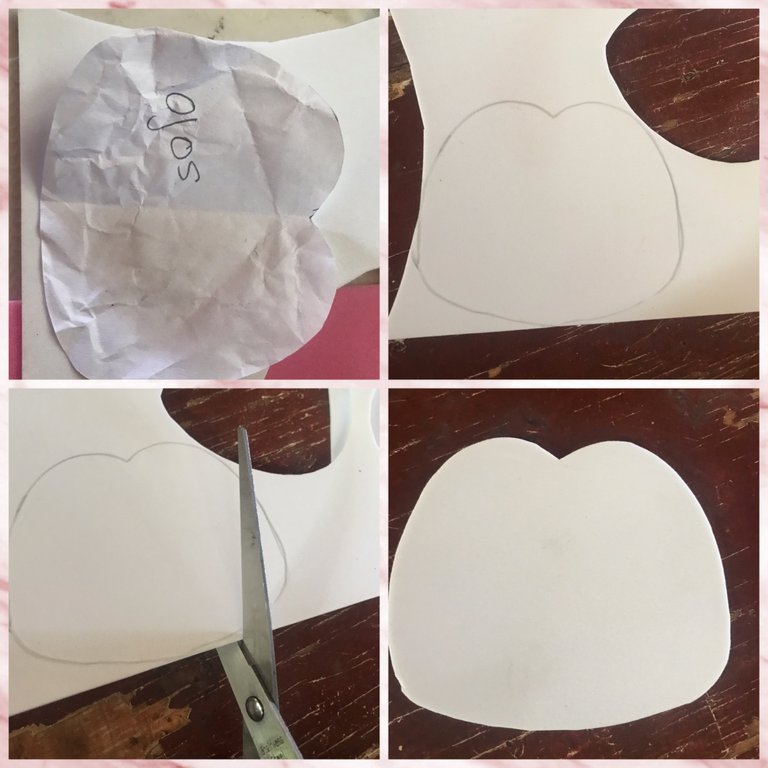
Marcamos y recortamos en el foami blanco los ojos del garfield
We mark and cut out the Garfield's eyes on the white foami
Ya que estén cortados todos los patrones empezamos a pegar la cabeza del cuerpo y luego pegaremos los brazos al cuerpo del garfield
Once all the patterns are cut, we start gluing the head to the body and then we glue the arms to the garfield body
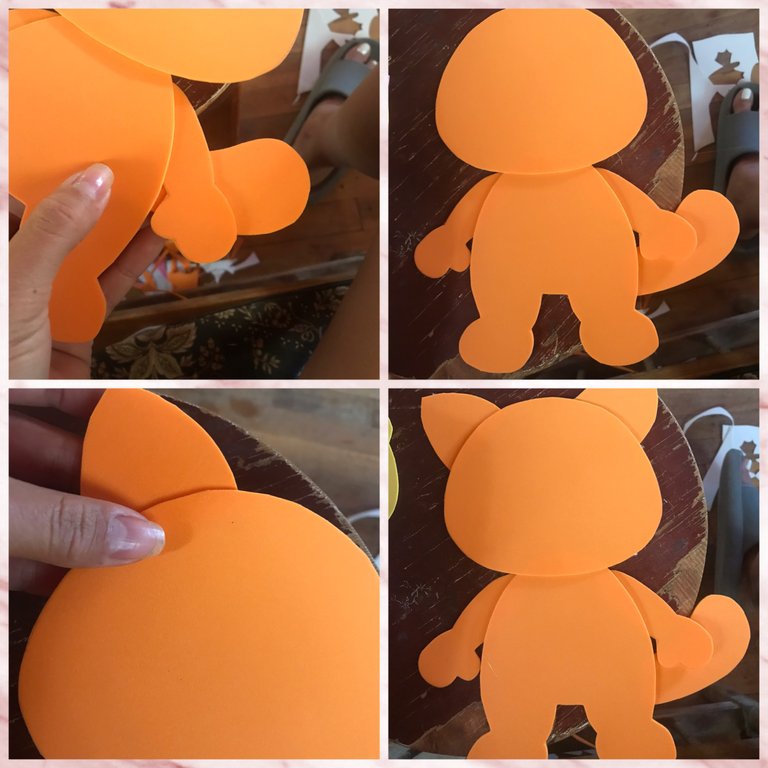
Pegaremos la cola a el cuerpo y después pegaremos las orejas en la cabeza
Glue the tail to the body and then glue the ears to the head
Pegaremos los ojos en la cara y después arriba de los ojos pegaremos el párpado
We will glue the eyes to the face and then above the eyes we will glue the eyelid
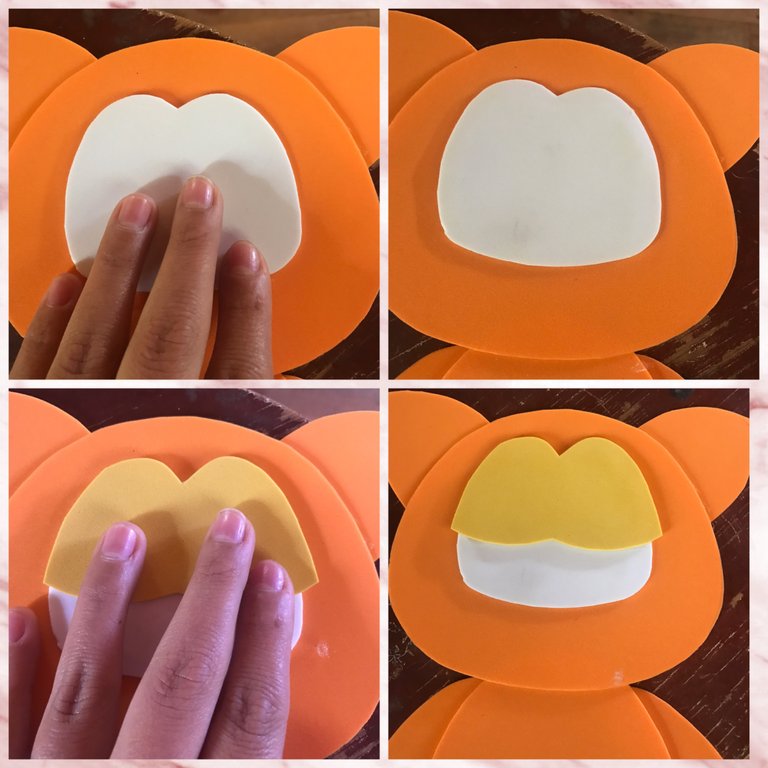
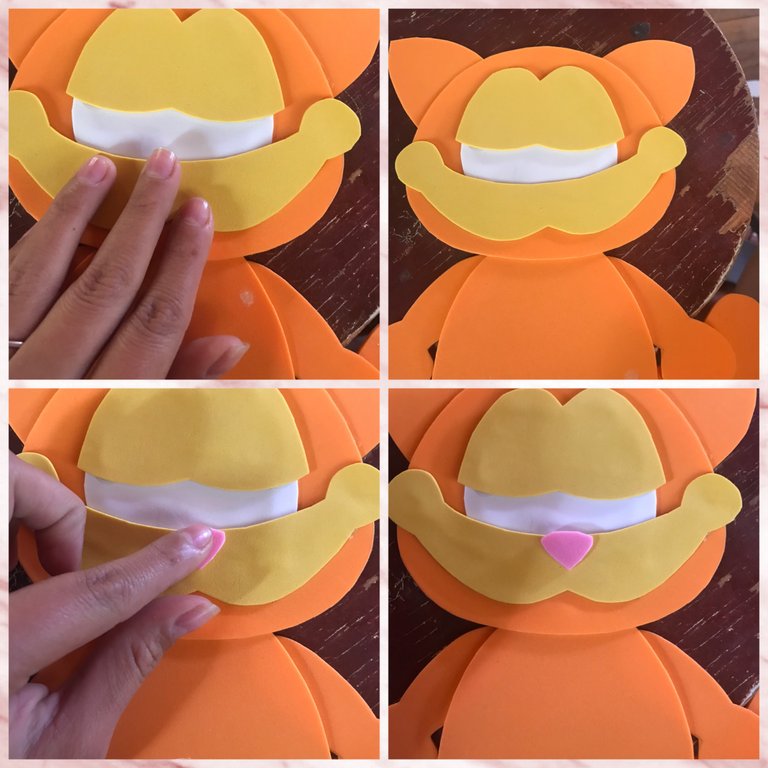
Pegaremos la boca en la cara y después pegaremos la nariz
We will glue the mouth on the face and then glue the nose
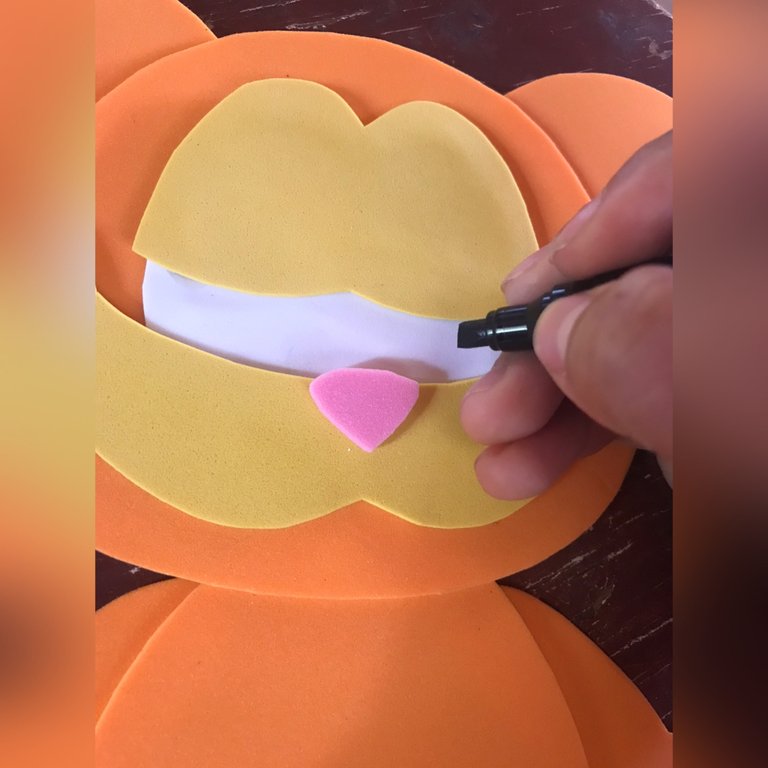
Para finalizar con el marcador negro aremos los ojos del garfield y le daremos los últimos retoques al garfield
Finally, with the black marker we will make the garfield's eyes and give the final touches to the garfield
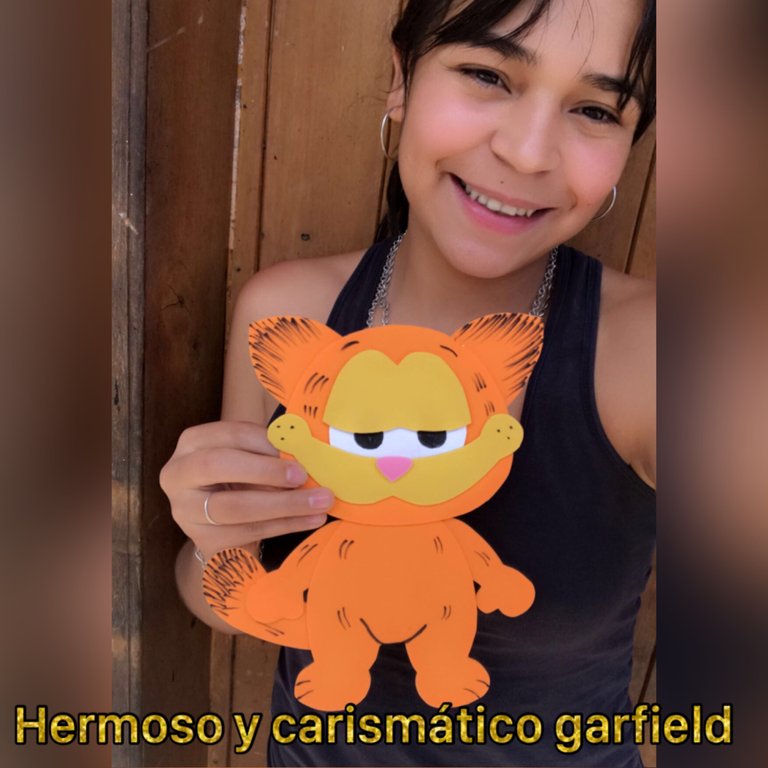
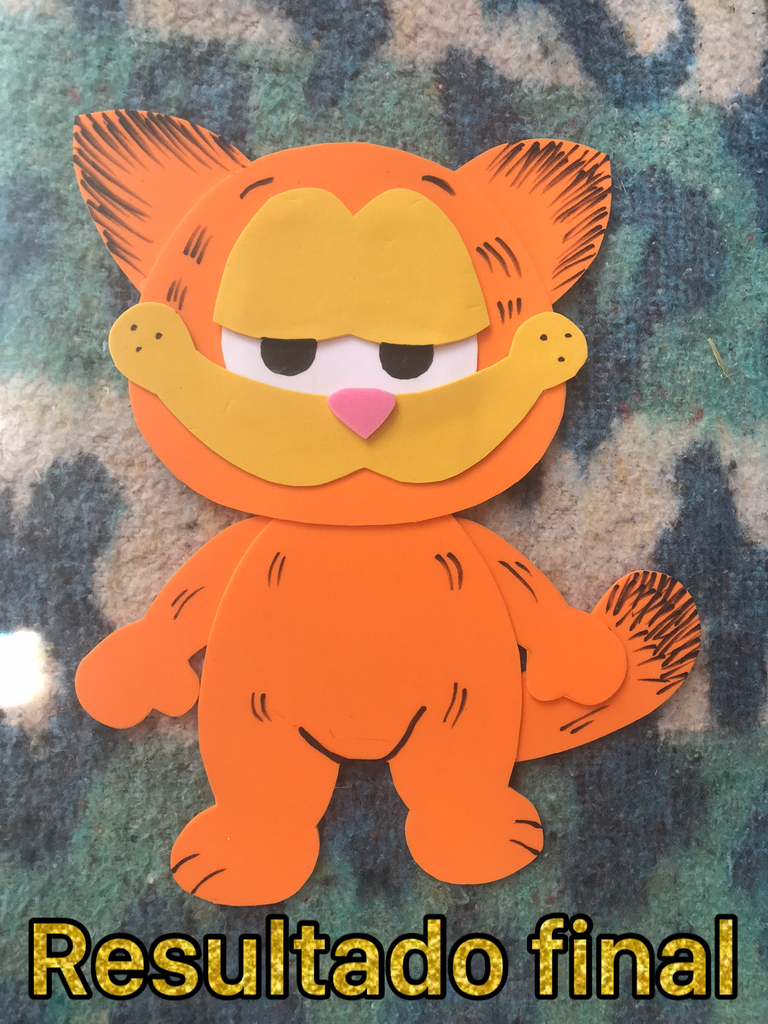
RESULTADO FINAL
FINAL RESULT
ESPERO Y LES HALLA GUSTADO MI TRABAJO AMIGOS QUE DIOS LOS BENDIGA SIEMPRE HASTA LA PRÓXIMA OPORTUNIDAD
I HOPE YOU LIKED MY WORK MY FRIENDS, MAY GOD BLESS YOU ALWAYS UNTIL THE NEXT OPPORTUNITY
It looks so cute. Good to see how you made this. Nice work! Thanks!
Muy bonito el Garfield. Gracias por compartir tu diseño.
Me alegra que te halla gustado amigo ☺️
Te quedo muy bonito el gardfiel, hiciera uno, pero soy demasiado flojo para esas cosas.
Saludos.
Jejeje, pero esta bien facil de hacer amigo anímate
A mi me encanta hacer figuritas con plantillas, hice un zorro (el del principito) pero con tela y cocido a mano con hilo normal y retazos de ropa, también hice un osito de felpa. Nunca he trabajado con foami de esa manera pero tu explicasión lo hace ver tan sencillo para que los demás se animen, muchas gracias por compartir
Bueno la verdad es que la tela conmigo no va jeje siento que no le sé dar forma pero con el foami se me hace más fácil todo y la verdad es que el foami solo es de cortar bien la tijera para que se pueda ver un acabado mejor ☺️