(ENG)
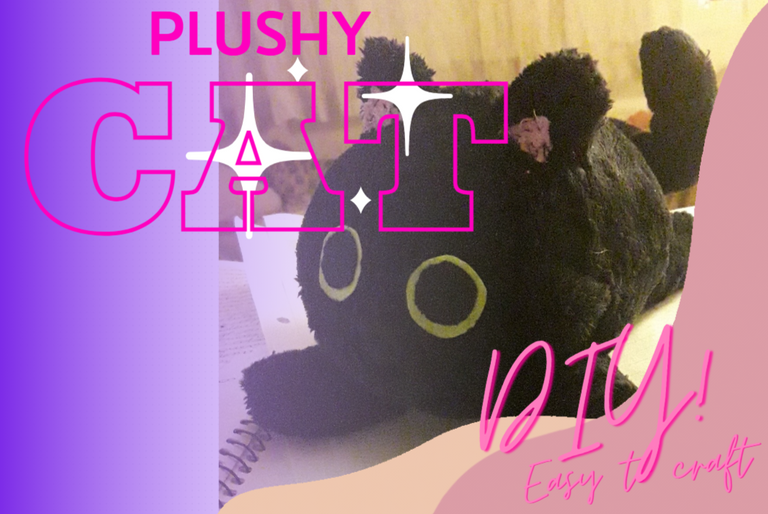
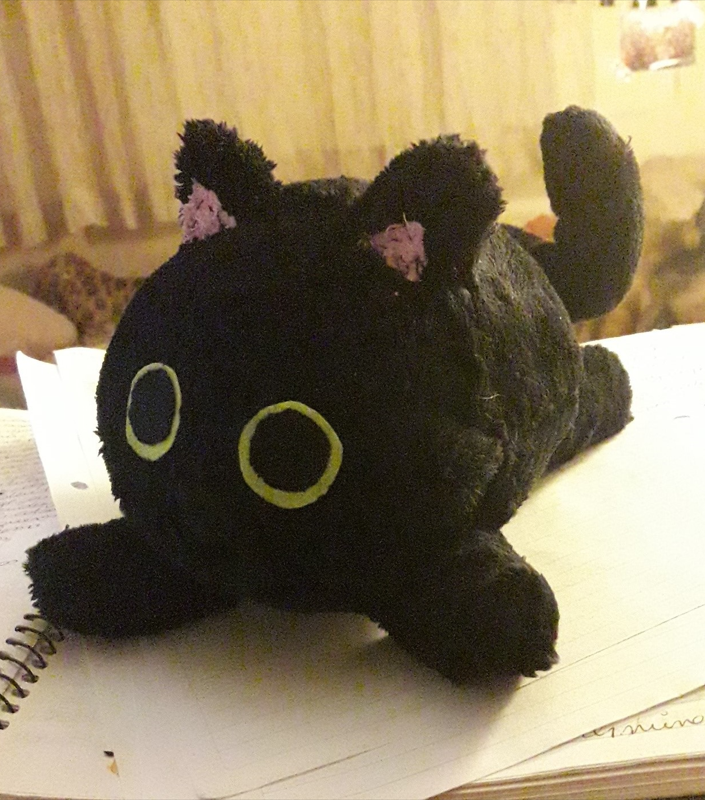
Hello people! This is my first post in this community, I had a "last minute gift" to give to a friend and I wanted to share the process of this cute black cat.
(ESP)
¡Hola gente! Este es mi primer post dentro de esta comunidad, tuve un “regalo de ultimo minuto” para hacerle a una amiga y quería compartir el proceso de este lindo gatito negro.
(ENG)
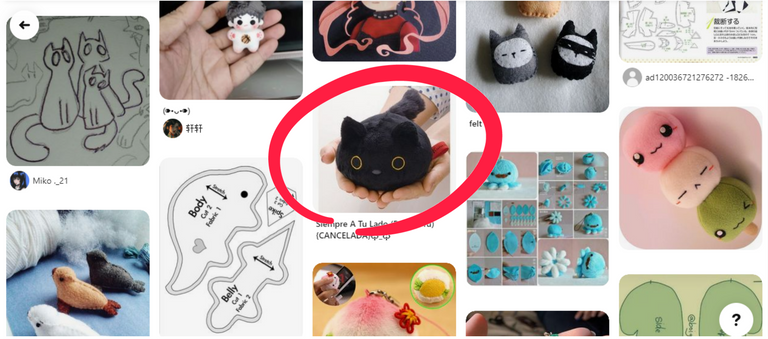
It turns out that with the end of the year and all the commotion that comes with celebrations, a birthday is a little hard to remember. So during the dawn of the same day as her birthday, I started looking for inspiration or some ideas, and once I found this example on Pinterest, I got to action so I wouldn't leave her with nothing on her special day.
(ESP)
Resulta que con fin de año y todos los alborotos que conllevan las celebraciones, un cumpleaños está un poco difícil de recordar. Así que durante la madrugada del mismo día en que cumplía años, comencé a buscar inspiración o alguna idea, y una vez encontré en Pinterest este ejemplo, me puse manos a la obra para no dejarle sin nada en su día especial.
(ENG)
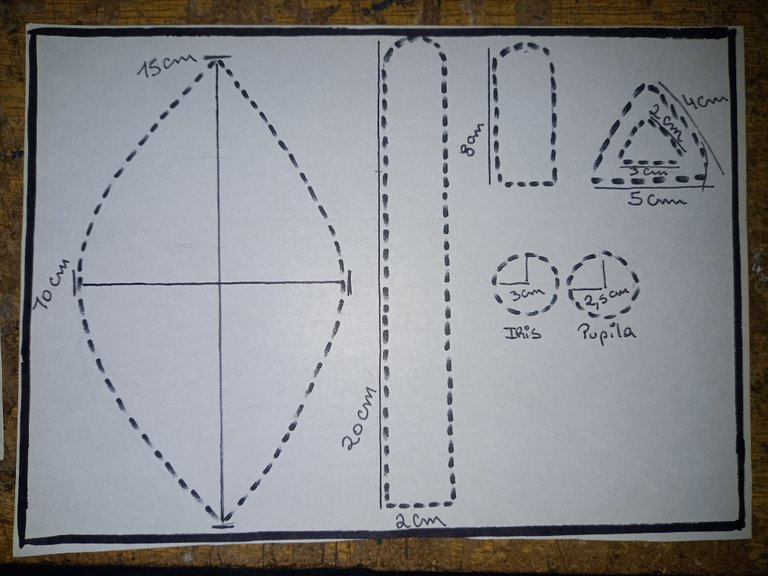
I want to clarify that I don't use patterns, I know it's not the right thing to do, but for sewing I always base my measures on the moment and perspective. I made the mold after I created this plush animal, so that I could have an adequate sample of the process.
Without any more, here we go.
(ESP)
Quiero aclarar que yo no uso moldes, sé que no es lo adecuado, pero para coser siempre me baso en medidas sobre el momento y perspectiva. El molde que les dejo lo hice después de haber creado este peluche, para poder tener una muestra adecuada del proceso.
Sin mas, allá vamos.
🌼🦆🌼
Materials/Materiales:
(ENG)
-Needle and thread.
-Black plush fabric, also called plush fabric.
-Pink plush fabric.
-Lime green and black fabric (the black can be replaced by black buttons).
-Thin wire of the bijouterie type.
(ESP)
-Aguja e hilo.
-Tela negra de felpa, también llamada tela peluche.
-Tela rosa de felpa.
-Tela verde lima y negra (puede reemplazarse la negra por botones negros)
-un alambre fino del tipo bijouterie.
(ENG)
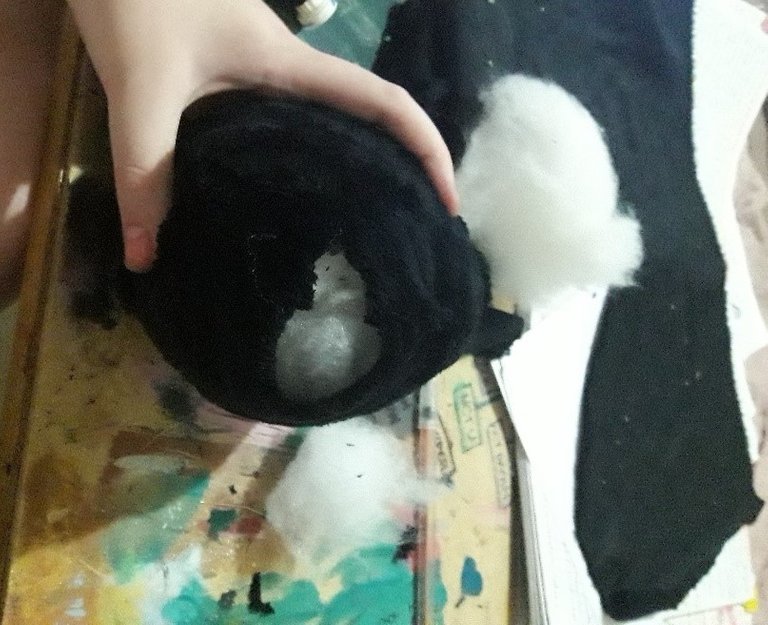
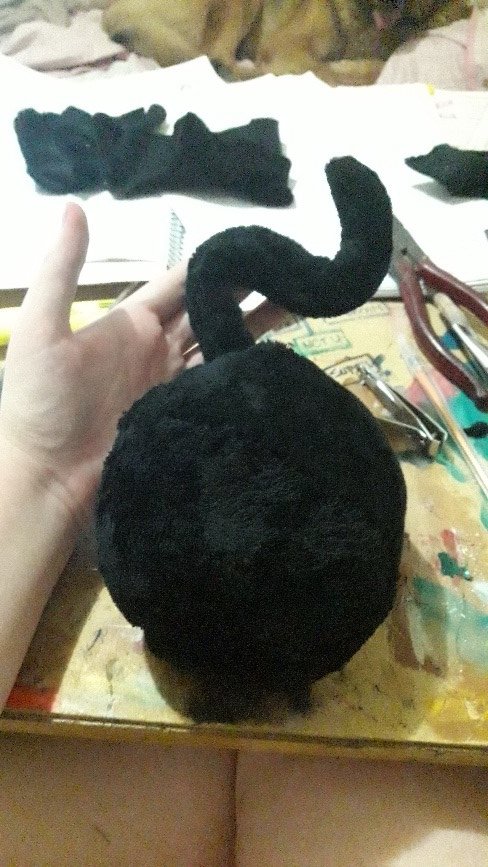
First we are going to have the cuts corresponding to the body of the animal, specifically 4 pieces since I wanted to give it the "chubby" or rounded appearance. Once these main pieces are together, we proceed to inflate with synthetic cotton polyester stuffing. Leaving a hole in the back for when we join the tail.
(ESP)
Primero vamos a tener los cortes correspondientes al cuerpo del animal, en especifico 4 piezas ya que quería darle la apariencia “chubby” o redondete. Una vez juntas estas piezas principales, procedemos a inflar con relleno sintético de poliéster de algodón. Dejando un hueco en la parte posterior para cuando unamos la cola.
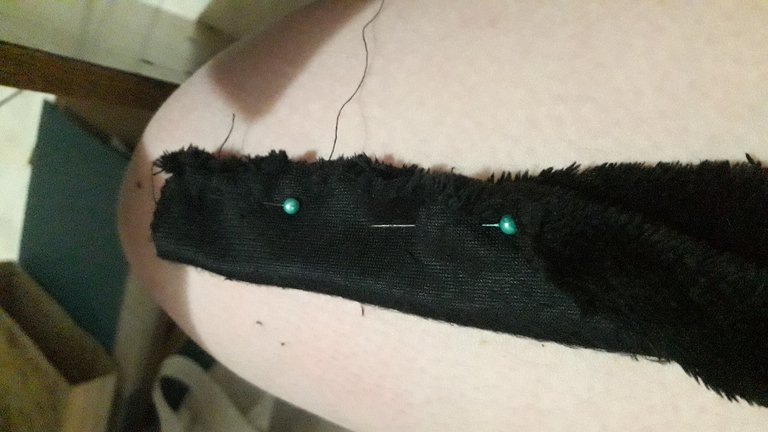
(ENG)
The tail corresponds of two long pieces, this can be of your choice, we join them together and fill them again with the cotton. Before joining, we insert a thin wire almost the length of the tail, this so that once it is attached to the body, we can bend it and make it more lively.
(ESP)
La cola corresponde a dos tiras largas, esto puede varias a su elección, las unimos y vamos rellenando nuevamente con el algodón. Antes de unir, insertamos un alambre fino casi del largo de la cola, esto para que una vez quede unida al cuerpo, podamos doblarla y que quede de una forma más animada.
(ENG)
We close the hole in the body by joining the tail, once everything is integrated, we wave the tail of the cat as we like.
(ESP)
Pasamos a cerrar el hueco del cuerpo uniendo la cola, una vez quedado todo integrado, ondeamos la cola del gato a nuestro gusto.
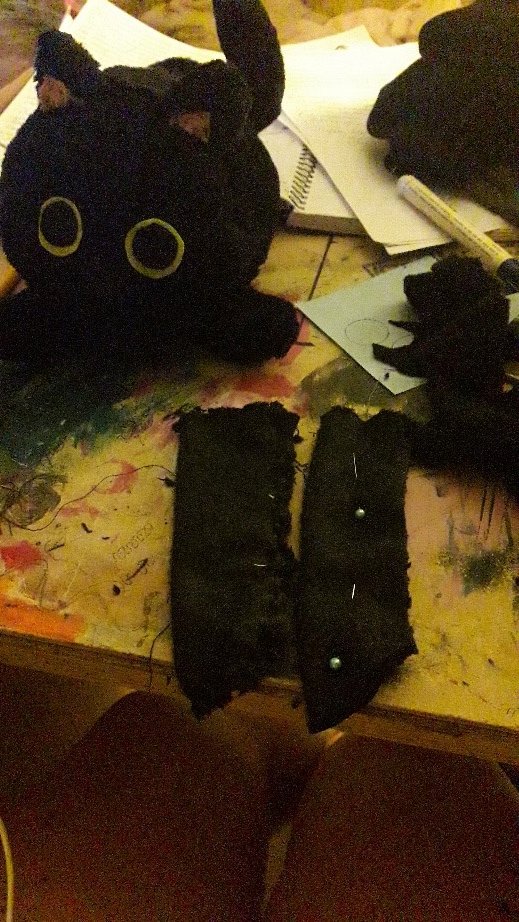
(ENG)
We continue with the ears, proceeding to cut 4 sides and joining in pairs on both sides, and leaving the base open, depending on the thickness of the fabric, confirmed if the ears should be filled or already with the seam are quite thick.
(ESP)
Continuamos con las orejas, procediendo a cortar 4 lados y uniendo en pares a ambos lados, y dejando la base abierta, depende del grosos de la tela, confirmados si las orejas se deben rellenar o ya con la costura quedan bastante gruesas.
(ENG)
We cut two smaller pieces of pink fabric and sew them on the side that will be the front of the ears. Now we can attach them to the cat's head.
(ESP)
Cortamos dos trozos de tela rosa en menor medida y las cosemos en el lado que será el frente de las orejitas. Ahora podemos unirlas a la cabeza del gato.
(ENG)
For the eyes I used two pairs of circles, green ones for the iris, and smaller black ones for the pupils, you can replace the latter with black buttons. In this case, we join the pupils on the iris and adhere them to the cat's face.
(ESP)
Para los ojos yo usé dos pares de círculos, unos de color verdes para el iris, y unos más pequeños en color negro para las pupilas, pueden reemplazar este último por botones negros. En este caso, unimos las pupilas sobre el iris y las adherimos a la cara del gato.
(ENG)
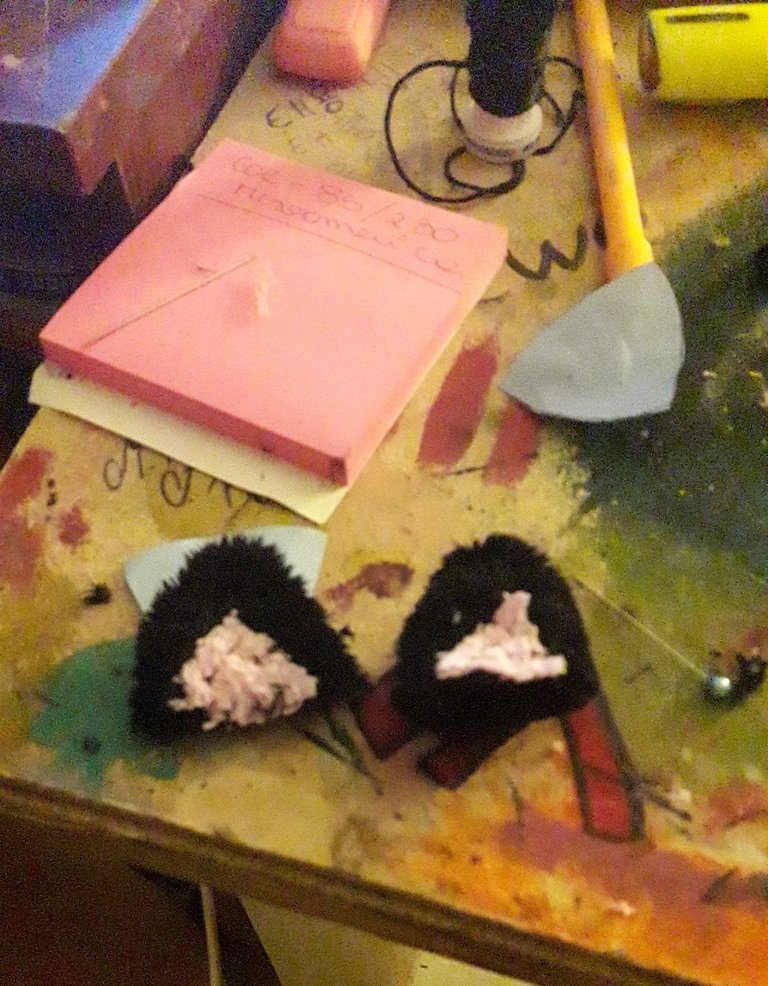
Now we need 8 sides for the paws, so we have 4 pairs. The process is the same as with the tail, only in a much smaller size. We leave a little space without stuffing so we can sew each paw to the body.
(ESP)
Ahora vamos a necesitar 8 lados para las patas, así tenemos 4 pares. El proceso es igual que con la cola, solo que en una medida mucho menor. Dejamos un pequeño espacio sin relleno para poder coser cada pata al cuerpo.
(ENG)
In the mold it has the same size for the 4 paws, but I made the back paws in this size, and the front ones I made them slightly smaller.
(ESP)
En el molde tienen la misma medida para las 4 patas, pero yo hice las patas posteriores en esta medida, y las delanteras las hice ligeramente más pequeñas.
(ENG)
Then, having finally joined each leg together, we will have completed our fluffy round feline.
(ESP)
Entonces, teniendo finalmente cada pata unida, habremos completado nuestro felino redondete.
(ENG)
About the rush of making the gift, I thought it was a beautiful idea, very sweet and to make a gesture to anyone, so I invite you to try it.
(ESP)
Sobre el apuro de hacer el regalo, me pareció una idea preciosa, muy tierna y para darle el gesto a cualquier persona, así que les invito a probarlo.
(ENG)
I hope you liked this tutorial, I apologize in advance for any mistake, because I repeat I don't use patterns and I sketched this one just a few minutes after finishing the plush. But I still thank you for supporting it, and invite you to comment what you think.
(ESP)
Espero que les haya gustado este tutorial, me disculpo de ante mano ante cualquier error, ya que repito yo no uso moldes y este me lo boceteé apenas unos minutos después de terminado el peluche. Pero aún así les agradezco que lo apoyen, y animen a comentar qué les parece.
🦆🌼 I'm Orikkot, and I'll say goodbye until new invention, greetings!🌼🦆
🦆🌼 Yo soy Orikkot, y me despido hasta nuevo invento. ¡Saludos! 🌼🦆
Dear @orikkot,
Our previous proposal expired end of December and the Hivebuzz project is not funded anymore. May we ask you to review and support our new proposal (https://peakd.com/me/proposals/248)?
Thank you for your help!
Congratulations @orikkot! You have completed the following achievement on the Hive blockchain And have been rewarded with New badge(s)
Your next target is to reach 2000 upvotes.
You can view your badges on your board and compare yourself to others in the Ranking
If you no longer want to receive notifications, reply to this comment with the word
STOPCheck out our last posts:
Support the HiveBuzz project. Vote for our proposal!