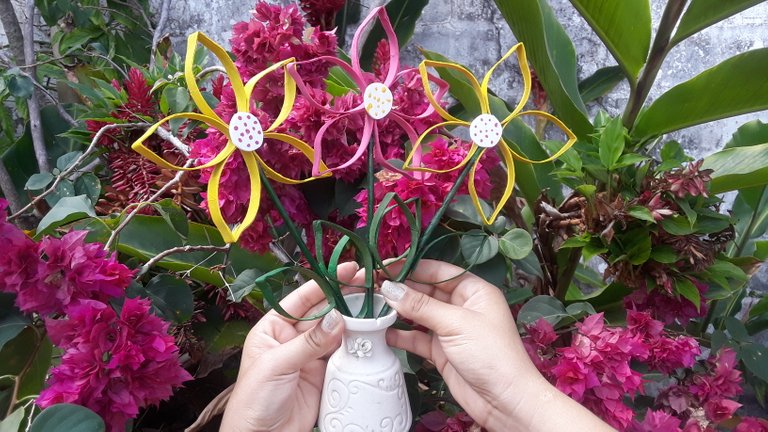
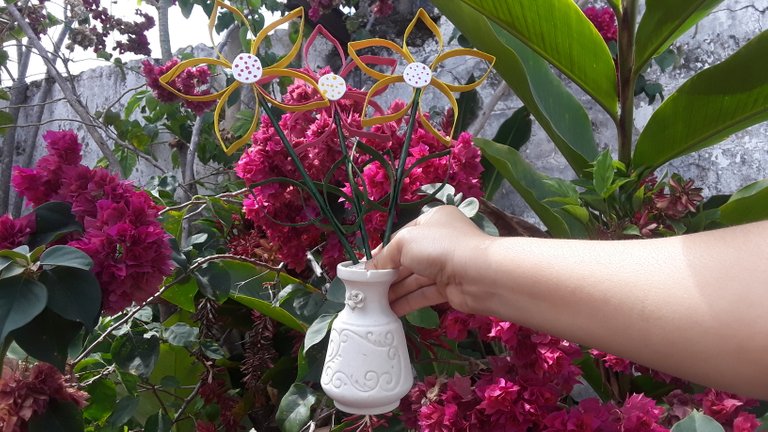
¡Hola estupenda comunidad de Hive Diy! Espero se encuentren de maravilla, el día de hoy quiero compartir con ustedes estas hermosas flores que he decidido hacer con mucho cariño para ustedes ya que se acerca el día de del amor y de la amistar y a veces vemos tantas cosas preciosas y no sabemos que obsequiar, yo quiero invitarte a que intentes en casa estas lindas flores que también puedes acompañarlo con cualquier tipo de arreglo. Espero disfrutes de este post.
Hello awesome Hive Diy community! I hope you are having a great time, today I want to share with you these beautiful flowers that I have decided to make with love for you since the day of love and friendship is approaching and sometimes we see so many precious things and we do not know what to give , I want to invite you to try these beautiful flowers at home that you can also accompany with any type of arrangement. I hope you enjoy this post.

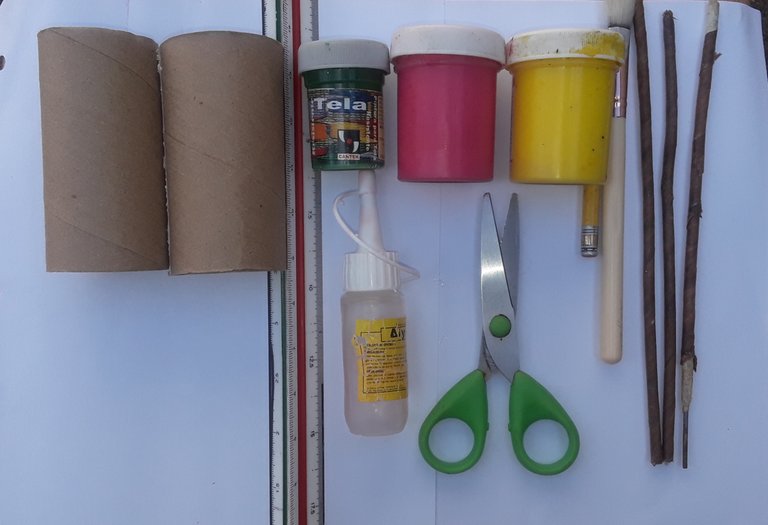
| MATERIALES |
|---|
| 2 Tubos de papel de baño |
| Pintura rosada |
| Pintura amarilla |
| Pintura verde |
| Tijera |
| Silicón liquido |
| Regla de 30 cm |
| Lápiz |
| Pincel |
| 3 Alambres forrados |
| MATERIALS |
|---|
| 2 toilet paper tubes |
| Pink paint |
| Yellow paint |
| Green paint |
| scissors |
| Liquid silicone |
| 30cm ruler |
| Pencil |
| brush |
| 3 Sheathed Wires |

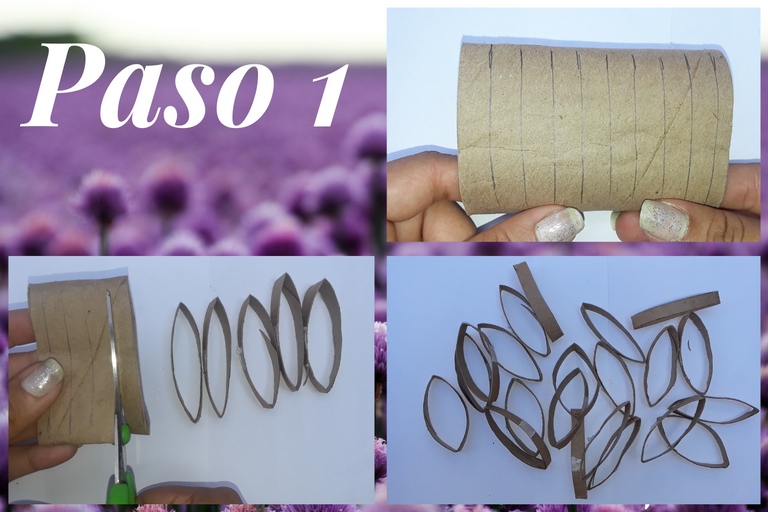
PASO 1
Para empezar, lo primero que haremos será aplastar nuestro tubo de papel para mas facilidad a la hora de medir, mediremos 1 cm de ancho y con ayuda de nuestra tijera cortaremos cuidadosamente esas marcas de lápiz para obtener nuestros pétalos.
STEP 1
To begin with, the first thing we will do is flatten our paper tube to make it easier when measuring, we will measure 1 cm wide and with the help of our scissors we will carefully cut those pencil marks to obtain our petals.

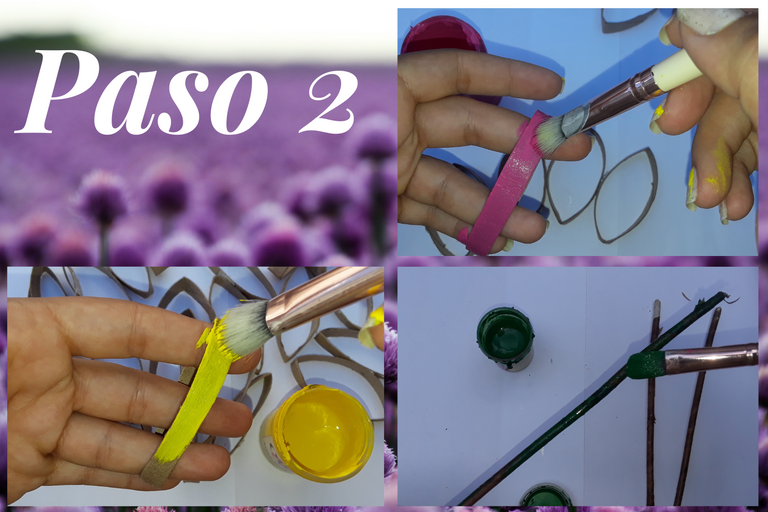
PASO 2
Una vez que tengamos las tiras del tubo de papel, lo siguiente será pintar los pétalos, en esta ocasión yo estaré pintando 10 pétalos de color amarillo y 5 pétalos de color rosado, los alambres que ya tenemos forrados, ahora los pintare de color verde.
STEP 2
Once we have the strips of the paper tube, the next thing will be to paint the petals, this time I will be painting 10 petals yellow and 5 petals pink, the wires that we already have lined, now I will paint them green.

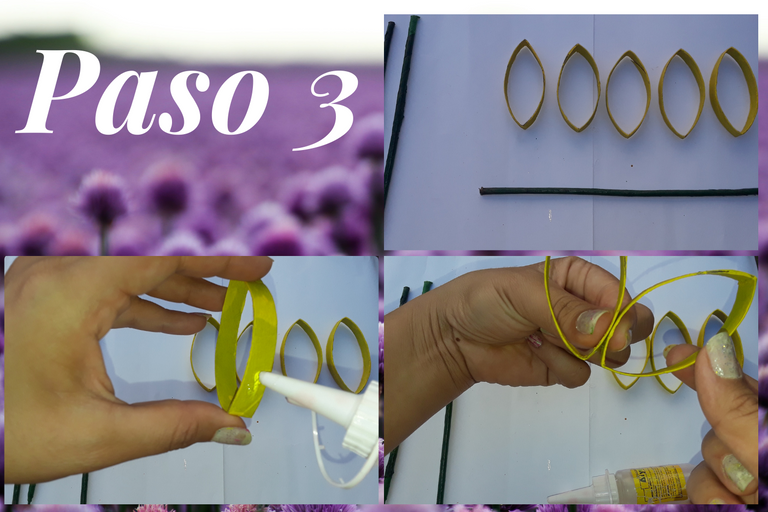
Ya he finalizado con las pinturas, he dejado secar completamente nuestros pétalos y lo siguiente que hare será pegar cada uno de nuestros pétalos dándole forma de flor de esta manera.
I have already finished with the paintings, I have let our petals dry completely and the next thing I will do is glue each of our petals giving it the shape of a flower in this way.

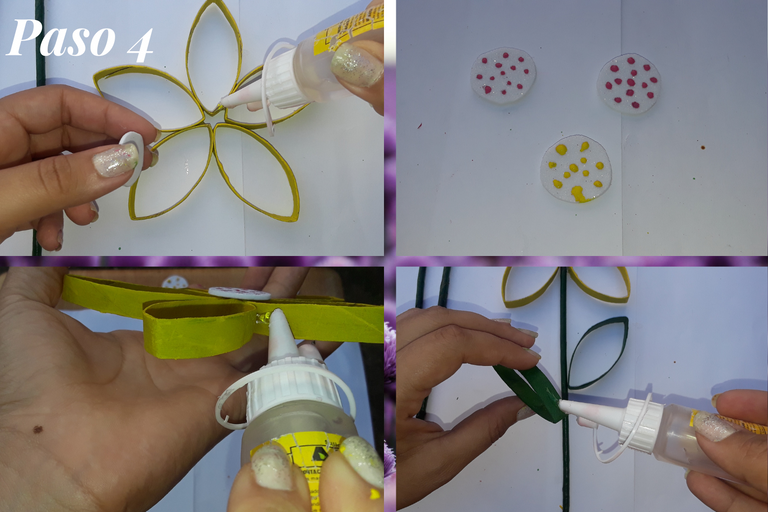
Para nuestro cuarto paso he cortado unos trozos de foami blanco y lo he cortado en 2.5 cm por 2.5 cm y le hare unos puntos con pintura rosa y amarillo, en la parte baja de nuestra flor colocaremos unas gotas de silicón para pegar el alambre que hemos pintado de color verde y de los lados le pegaremos las hojas.
For our fourth step I have cut some pieces of white foami and I have cut it in 2.5 cm by 2.5 cm and I will make some dots with pink and yellow paint, in the lower part of our flower we will place a few drops of silicone to glue the wire that we have painted green and from the sides we will glue the leaves.

RESULTS
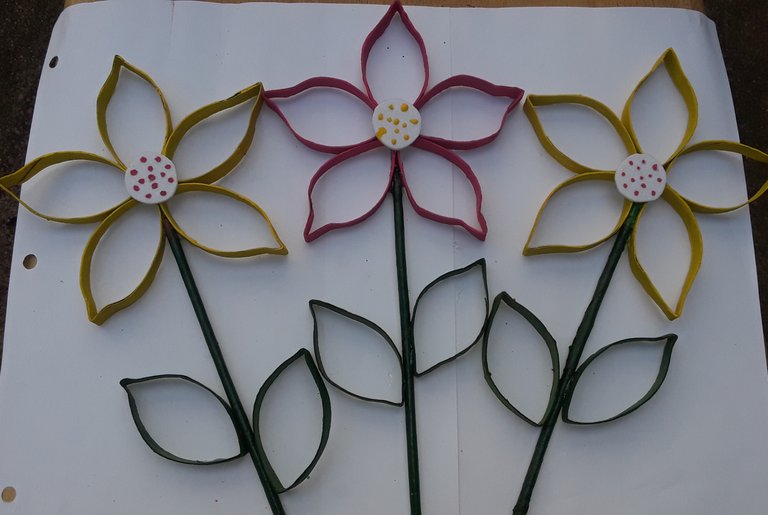
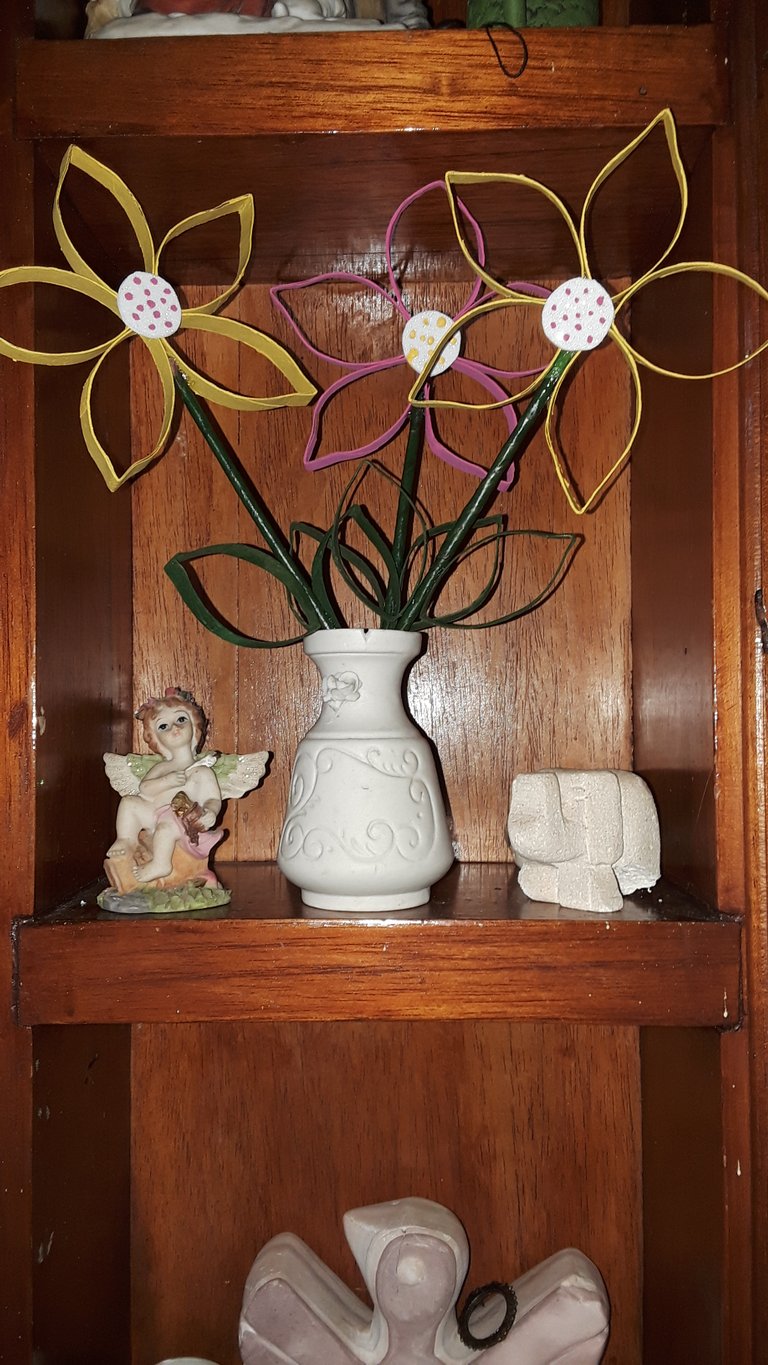

Fotos tomadas desde mi celular: Sansung J7 Prime
Fotos editadas por mi desde: Canva
Traducido con www.DeepL.com/Translator (versión gratuita)
Nos vemos en mi próxima publicación.
¡Tengan una feliz semana!
Photos taken from my Sansung J7 Prime.
Photos edited by me from Canva
Translated with www.DeepL.com/Translator (free version).
¡have a happy week!
La presentación de tu proyecto es muy linda, te felicito por ello.
Aprovecho para invitarte a nuestro Discord de la comunidad y solicites tu rol: https://discord.gg/tYENgKmTHA
Me alegra muchísimo que le haya gustado, gracias a usted por tomarse su tiempo y leer mi post. Gracias por esa grandiosa invitación
I never thought I could do something like this with discarded things. Beautiful design. Fits