
Para este proyecto me inspiré en un video visto en Pinterest, elaborado por BFFA, donde se muestra una técnica diferente para la creación de la flor.
A partir de esa referencia, adapté el diseño y realicé cambios en la elaboración de la flor. El proyecto que comparto a continuación está completamente elaborado por mí.
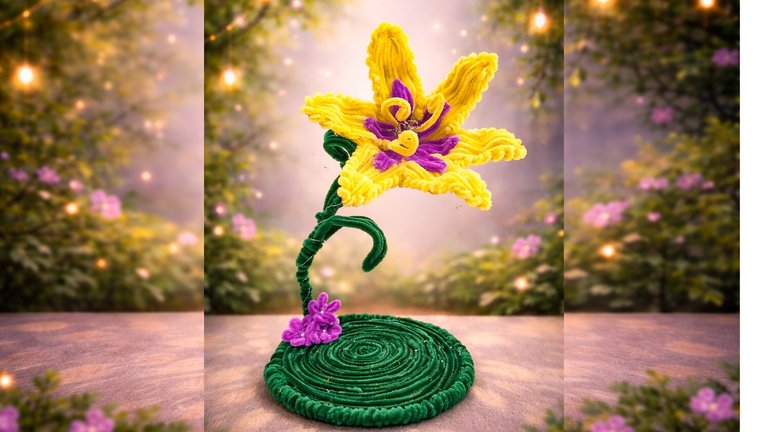
For this project, I was inspired by a video seen on Pinterest, created by BFFA, which shows a different technique for making the flower.
Based on that reference, I adapted the design and made changes to the flower-making process. The project I share below is completely made by me.


Limpiapipas
Amarillos: 33
Verdes: 43
Morados: 7
Cinta floral
1 barra de silicona (27 cm)
4 m de alambre galvanizado (también se conoce como alambre floral o alambre de manualidades)
Pinzas
Luces de hadas (LED)
1 palillo de brocheta
Tijeras
|Pipe cleaners
Yellow: 33
Green: 43
Purple: 7
Floral tape
1 hot glue stick (27 cm)
4 m of galvanized wire (also known as floral wire or craft wire)
Pliers
Fairy lights (LED)
1 wooden skewer
Scissors
 |  |  |
|---|---|---|
 |  |  |
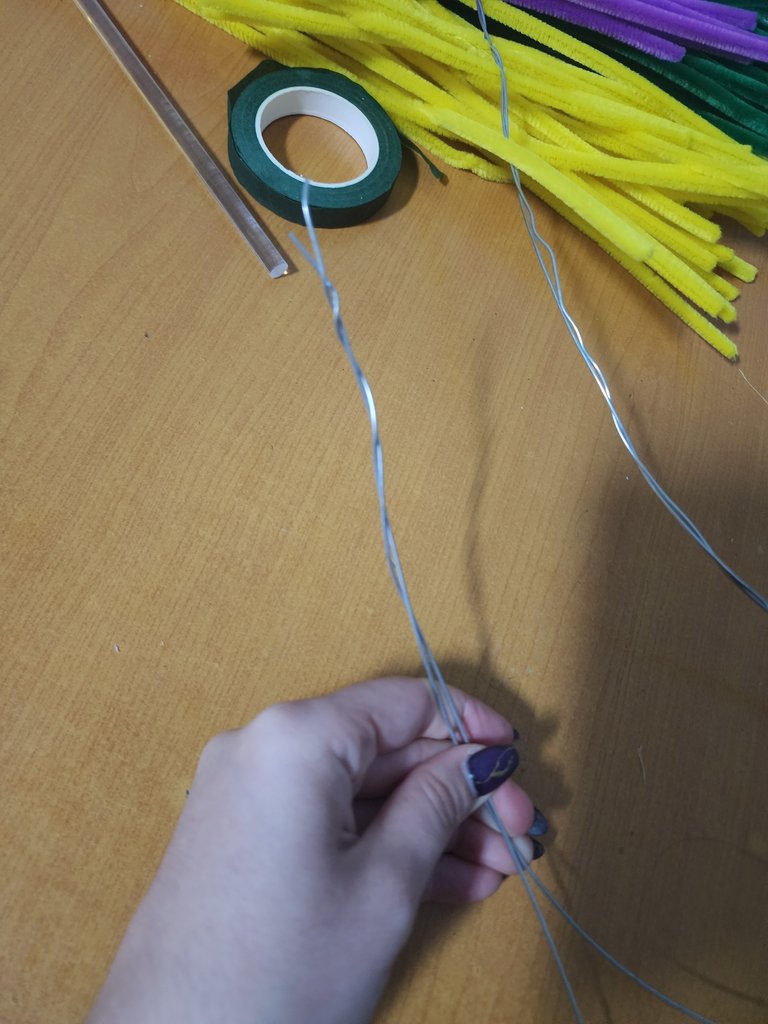
- Tomamos 2 piezas de alambre galvanizado de 1 metro cada una y las enrollamos entre sí hasta formar una sola pieza más firme.
- Repetimos el mismo procedimiento con las otras 2 piezas restantes.
- Unimos y enrollamos las 4 piezas juntas para darle mayor resistencia y estabilidad a la estructura.
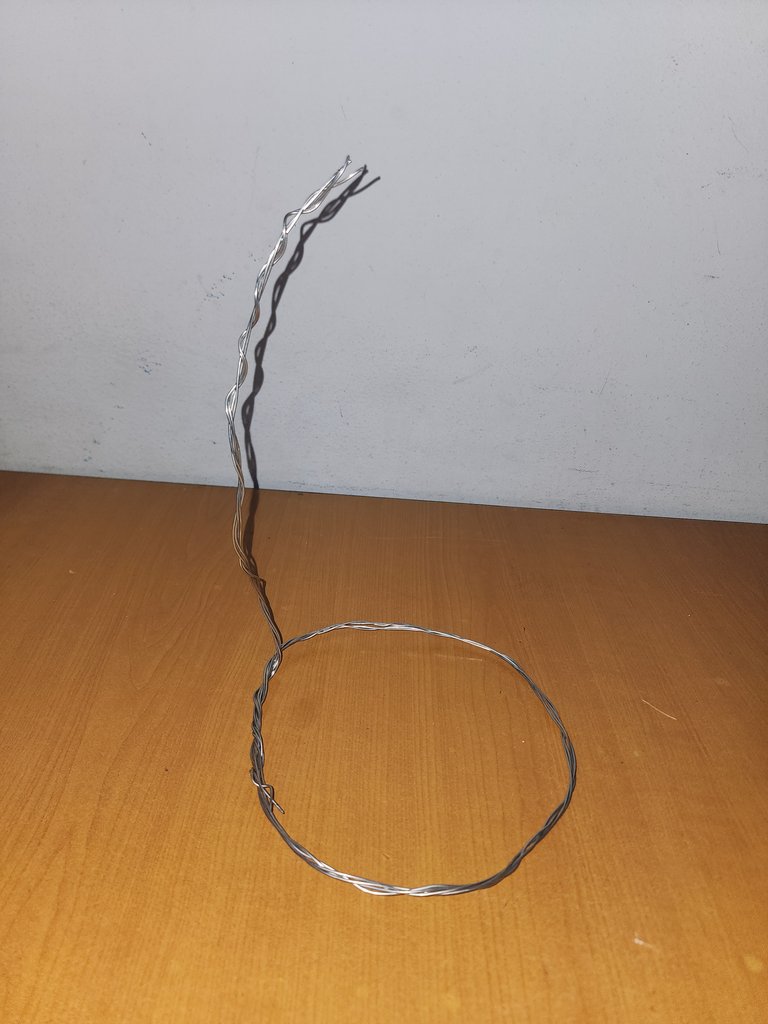
- Con las 4 piezas bien unidas, moldeamos la base formando un círculo y dejamos una parte hacia arriba, que será el tallo, tal como se muestra en las imágenes.
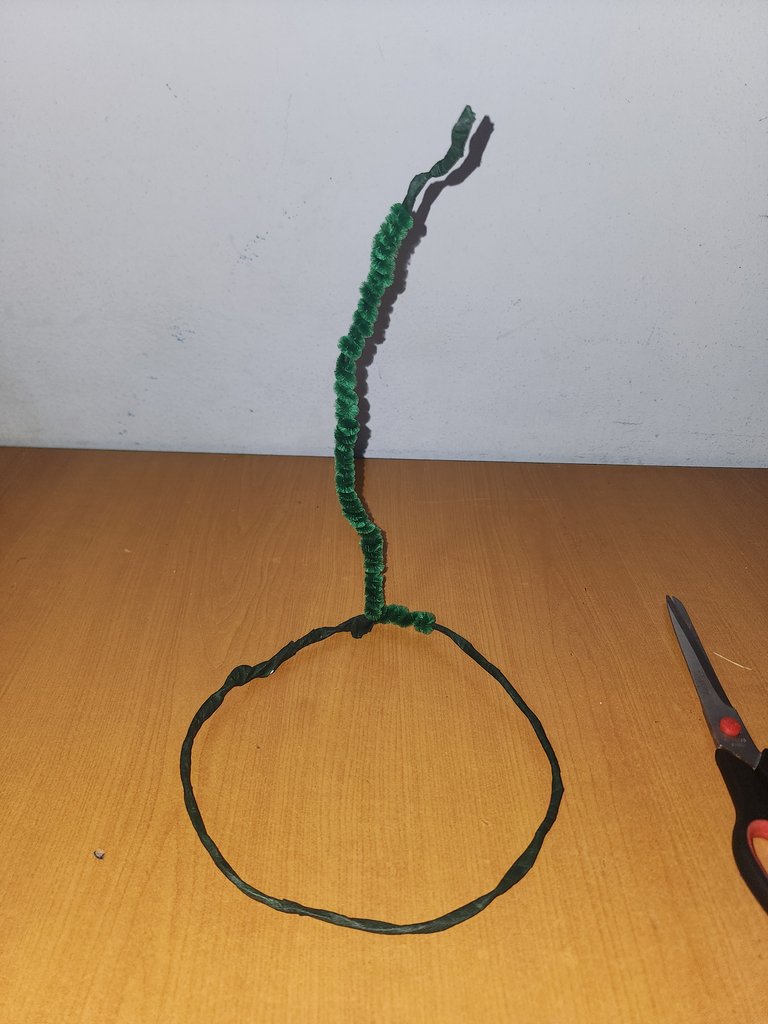
- Cubrimos completamente la estructura con cinta floral verde, enrollándola firmemente para que quede bien ajustada y cubra toda la base.
- Comenzamos a colocar los limpiapipas verdes, empezando desde la parte superior del tallo y dejando aproximadamente 5 cm sin cubrir en la parte superior.
- Enrollamos cada limpiapipa cuidadosamente, procurando que no queden espacios entre uno y otro, hasta cubrir completamente la base, exceptuando los 5 cm superiores.
- Take 2 pieces of galvanized wire, each 1 meter long, and twist them together until they form a single, stronger piece.
- Repeat the same process with the other 2 remaining pieces.
- Join and twist the 4 pieces together to provide greater strength and stability to the structure.
- Once the 4 pieces are firmly joined, shape the base into a circular form and leave one section pointing upward, which will become the stem, as shown in the images.
- Completely cover the structure with green floral tape, wrapping it tightly so it stays well secured and covers the entire base.
- Start adding the green pipe cleaners, beginning from the upper part of the stem and leaving approximately 5 cm uncovered at the top.
- Wrap each pipe cleaner carefully, making sure there are no gaps between them, until the entire base is covered, except for the upper 5 cm.
 |  |  |
|---|---|---|
|  |  |
- Para los pétalos grandes, tomamos 4 limpiapipas amarillos y los alineamos correctamente.
- Colocamos los dedos en el centro de los limpiapipas; con una mano sujetamos y con la otra damos dos vueltas en la misma dirección, asegurando bien el centro.
- Luego doblamos el conjunto de manera que todos los extremos queden juntos, simulando la forma básica de un pétalo.
- En la parte superior del pétalo, moldeamos con los dedos para crear un borde ligeramente ondulado o punteado.
- En la parte inferior, tomamos bien cerca de las puntas; seleccionamos una de ellas y enrollamos firmemente.
- Repetimos el enrollado con el resto de las puntas, siempre en la misma dirección y asegurándonos de que quede bien apretado.
- De esta forma obtenemos un pétalo completo. Repetimos todo el proceso hasta crear 6 pétalos en total.
- Para esta parte del proyecto utilicé 24 limpiapipas amarillos.
- For the large petals, take 4 yellow pipe cleaners and align them properly.
- Place your fingers in the center of the pipe cleaners; hold them with one hand and, with the other, twist twice in the same direction, securing the center well.
- Then fold the set so that all the ends come together, forming the basic shape of a petal.
- At the top part of the petal, shape it with your fingers to create a slightly wavy or scalloped edge.
- At the bottom part, hold close to the tips, choose one of them and wrap it tightly.
- Repeat the wrapping with the remaining tips, always in the same direction and making sure it is well tightened.
- This forms one complete petal. Repeat the entire process to create 6 petals in total.
- For this part of the project, I used 24 yellow pipe cleaners.
 |  |
|---|---|
 | 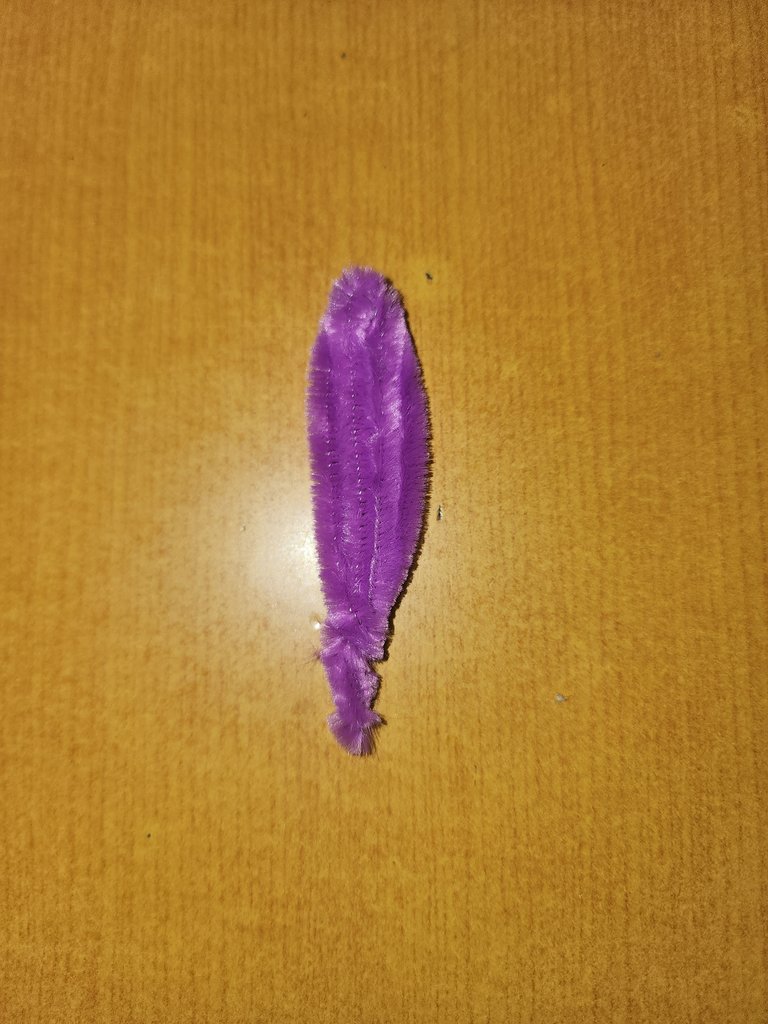 |
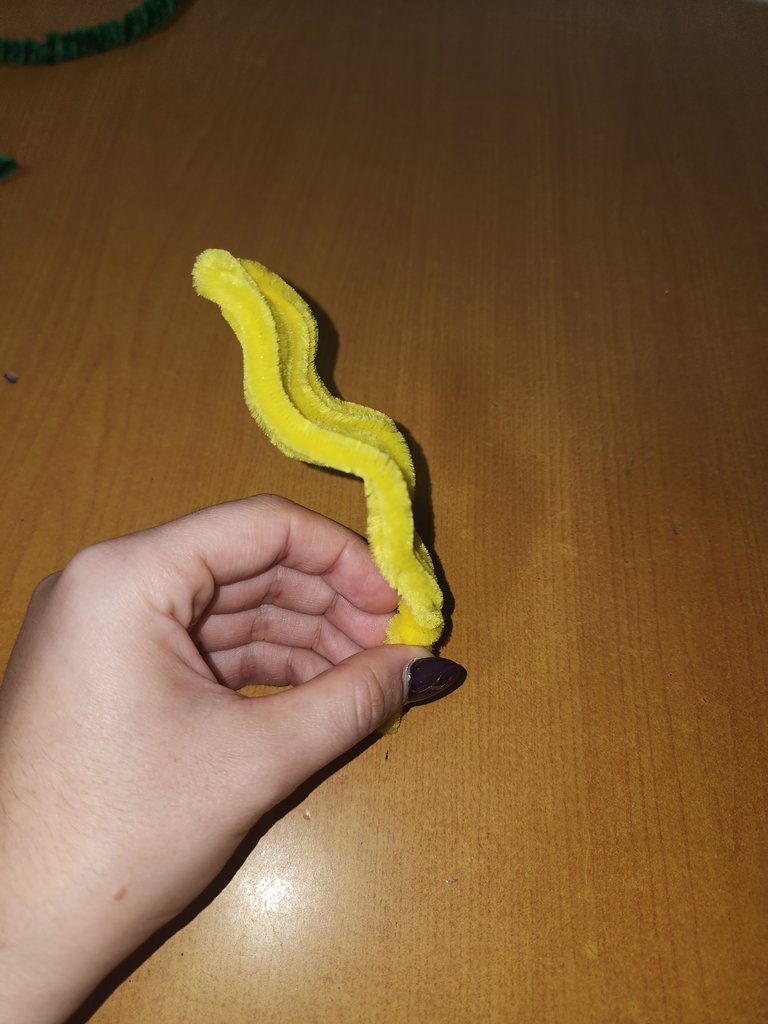
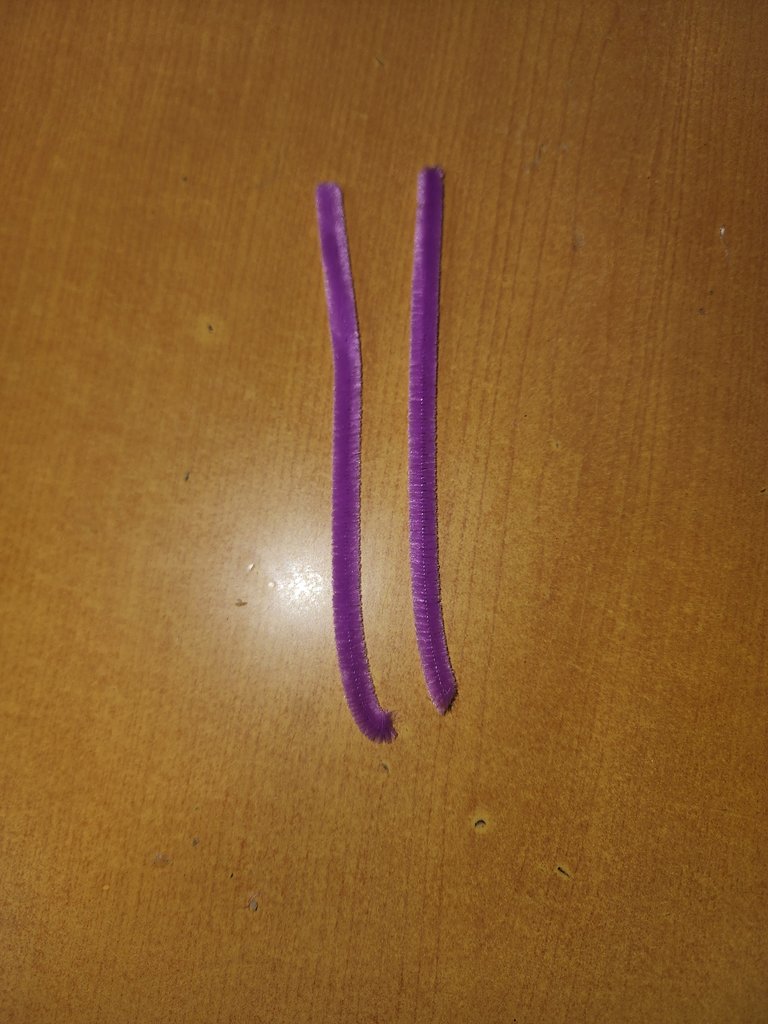
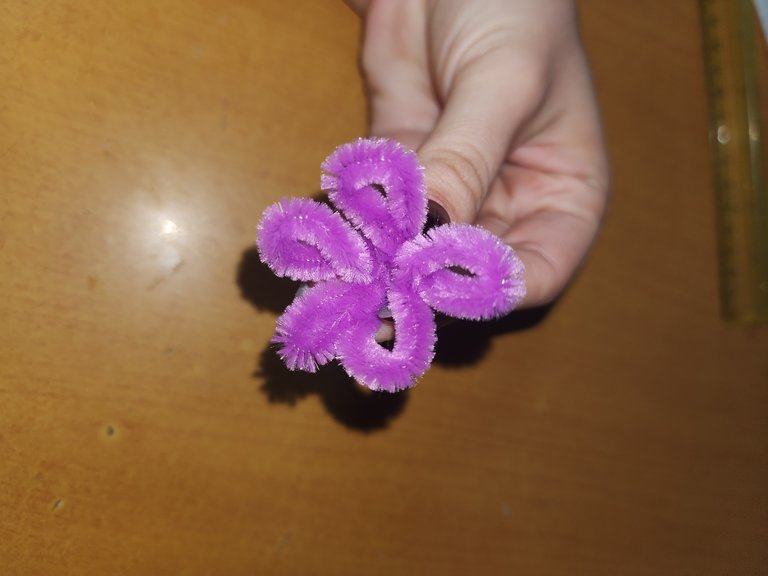
- Para los pétalos pequeños, tomamos 1 limpiapipas morado y lo cortamos por la mitad.
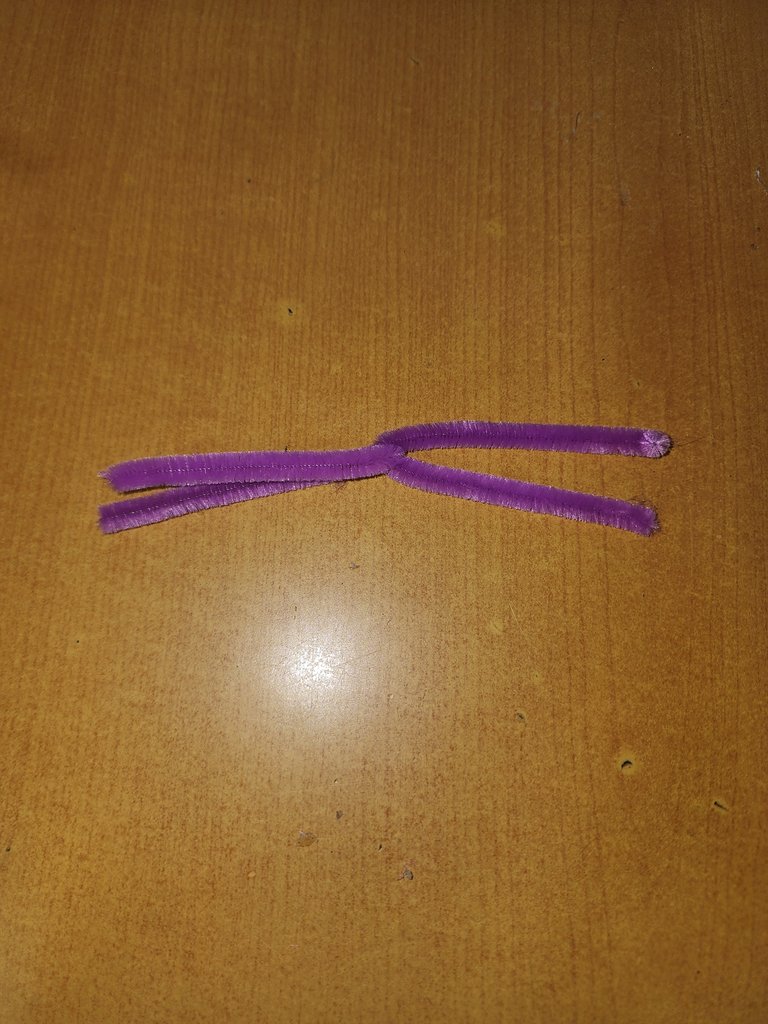
- Colocamos los dedos en el centro del limpiapipas y damos dos vueltas en la misma dirección, igual que en los pétalos grandes.
- Doblamos el limpiapipas y alineamos todas las puntas, formando la base del pétalo.
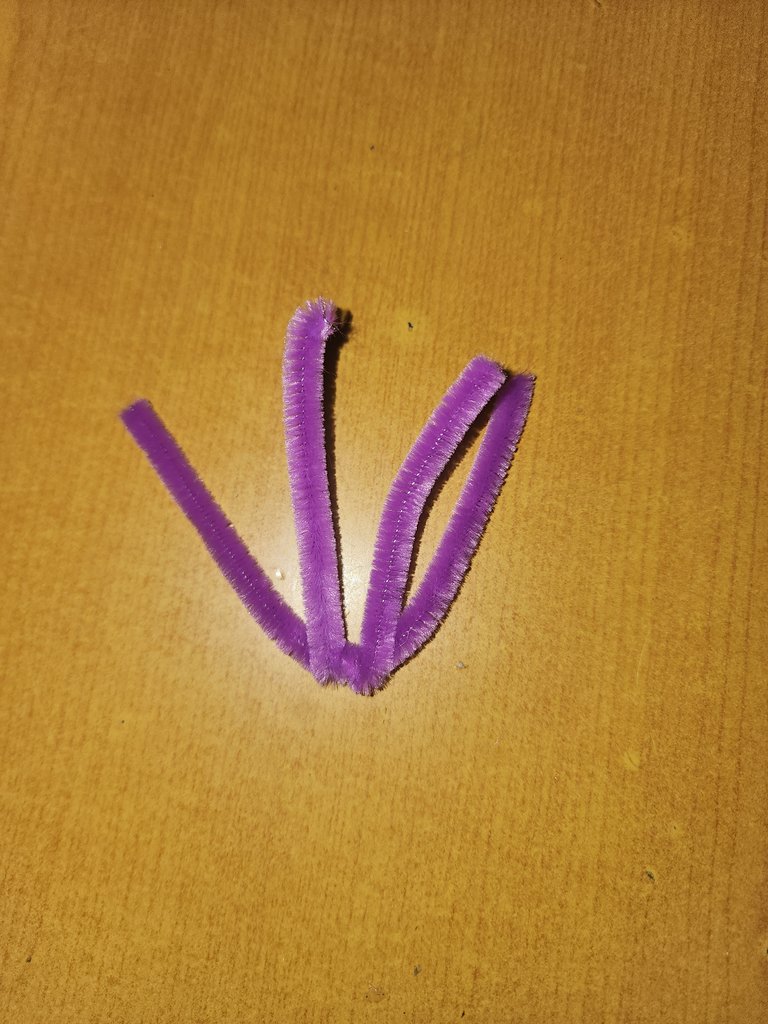
- En la parte inferior, tomamos una de las puntas y la enrollamos firmemente para asegurar la forma.
- Luego envolvemos las otras puntas, siempre en la misma dirección y bien ajustadas.
- En la parte superior, moldeamos con los dedos para crear un borde ligeramente punteado.
- De esta manera obtenemos un pétalo pequeño. Repetimos el procedimiento hasta crear 6 pétalos pequeños en total.
- Este proceso es similar al de los pétalos grandes, variando únicamente el tamaño y la cantidad de material utilizado.
- For the small petals, take 1 purple pipe cleaner and cut it in half.
- Place your fingers in the center and twist twice in the same direction, just as we did with the large petals.
- Fold the pipe cleaner and align all the ends, forming the base of the petal.
- At the bottom, choose one end and wrap it firmly to secure the shape.
- Then wrap the remaining ends, always in the same direction and tightly.
- At the top, shape it with your fingers to create a slightly pointed or scalloped edge.
- This completes one small petal. Repeat the process until you have 6 small petals in total.
- This process is similar to the one used for the large petals, with the only difference being the size and amount of material used.
 |  |  |
|---|---|---|
 |  |  |
- Para crear el centro de la flor, tomamos 2 limpiapipas amarillos y los cortamos por la mitad. De estas piezas utilizaremos 3 partes.
- En las ¾ partes inferiores de cada limpiapipa realizamos pequeños cortes con las tijeras, de manera que queden más finos, simulando los filamentos del centro de la flor.
- Luego redondeamos las puntas con los dedos y moldeamos hasta imitar el centro de una flor 🌼.
- A continuación, pegamos los pétalos morados a los pétalos amarillos. Para ello, colocamos silicona caliente en una cara del pétalo morado y pegamos su punta en el centro del pétalo amarillo. Repetimos este paso con todos los pétalos morados.
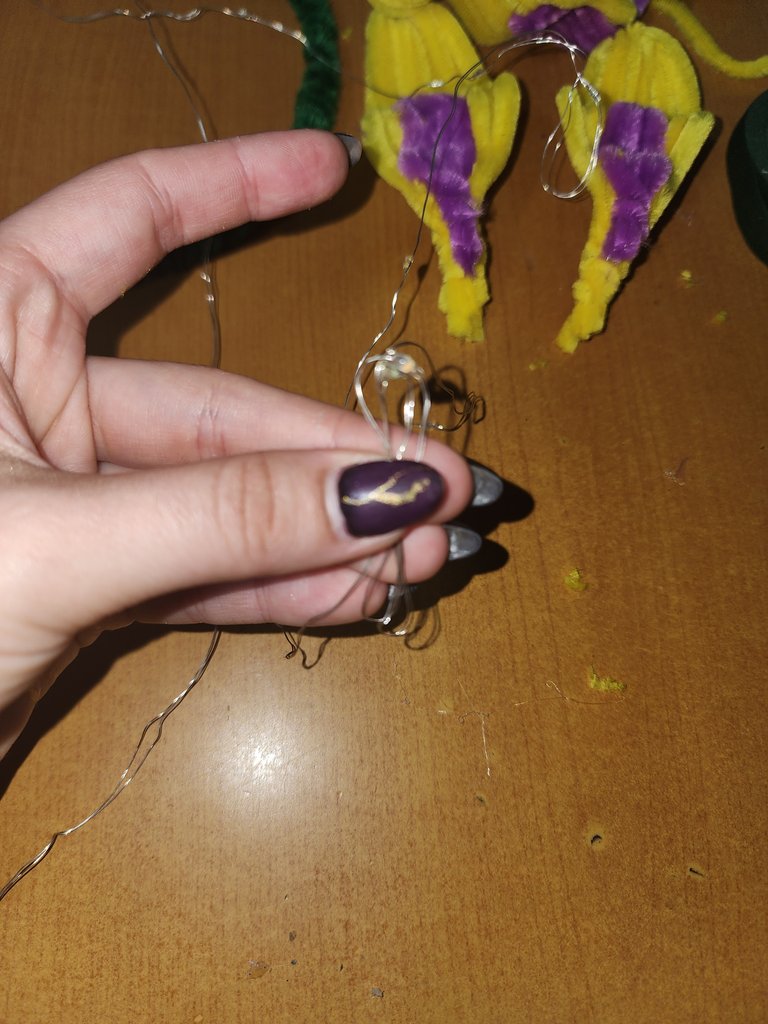
- Para crear la parte iluminada de la flor, tomamos las luces de hadas de 2 metros y dejamos aproximadamente 2 cm libres al inicio.
- El resto de las luces las doblamos cuidadosamente, procurando que todas las bombillas queden orientadas hacia la parte superior.
- Con los 2 cm que dejamos libres, amarramos las luces para mantenerlas agrupadas.
- Cuando tengamos aproximadamente 40 cm de luces, colocamos esta parte en la base del centro de la flor.
- En la parte superior, sujetamos las luces dobladas con una porción de limpiapipa amarillo, dejando 40 cm restantes.
- Estos 40 cm restantes los enrollamos alrededor del tallo, logrando que la parte de las baterías quede en la base, la cual terminaremos más adelante.
- To create the flower center, take 2 yellow pipe cleaners and cut them in half. From these pieces, we will use 3 sections.
- On the lower ¾ of each pipe cleaner, make small cuts with scissors so they become thinner, simulating the filaments of the flower center.
- Then round the tips with your fingers and shape them to imitate the center of a flower 🌼.
- Next, attach the purple petals to the yellow petals. To do this, apply hot glue to one side of a purple petal and glue its tip to the center of a yellow petal. Repeat this step with all the purple petals.
- To create the illuminated part of the flower, take the >2-meter fairy lights and leave approximately 2 cm free at the beginning.
- Carefully fold the remaining lights, making sure all the bulbs are facing upward.
- Using the 2 cm left free, tie the lights to keep them grouped together.
- When you have approximately 40 cm of lights, place this section at the base of the flower center.
- At the top, secure the folded lights with a piece of yellow pipe cleaner, leaving 40 cm remaining.
- Wrap these remaining 40 cm around the stem, ensuring that the battery pack stays at the base, which will be finished later.
 |  |
|---|---|
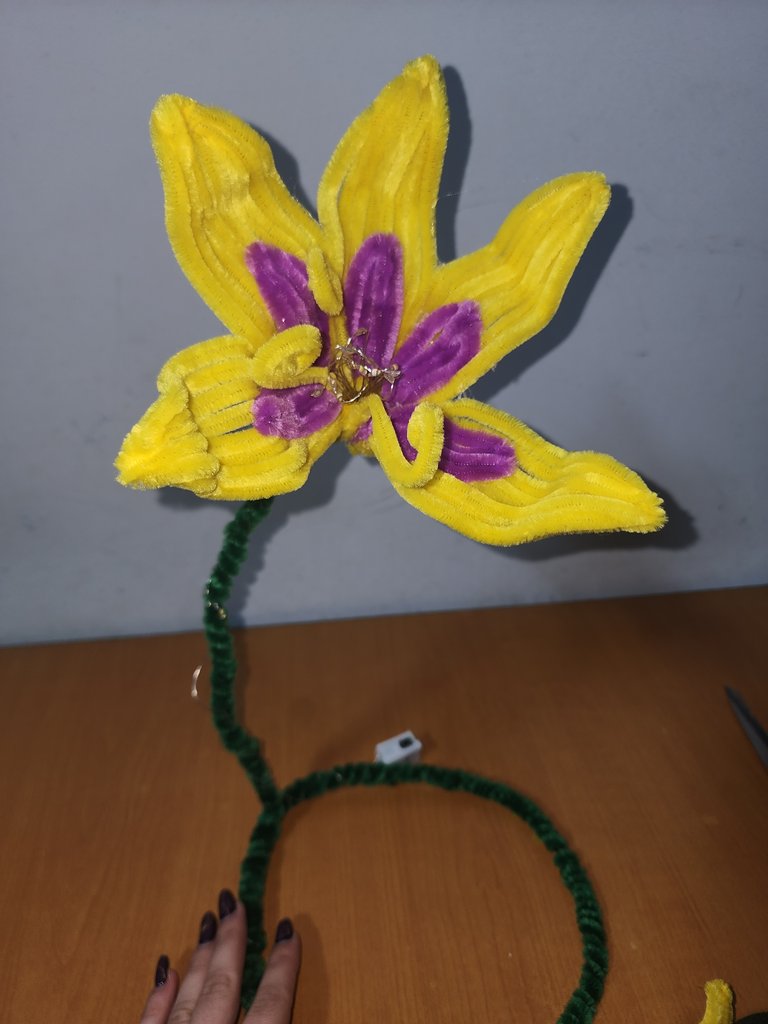 |  |
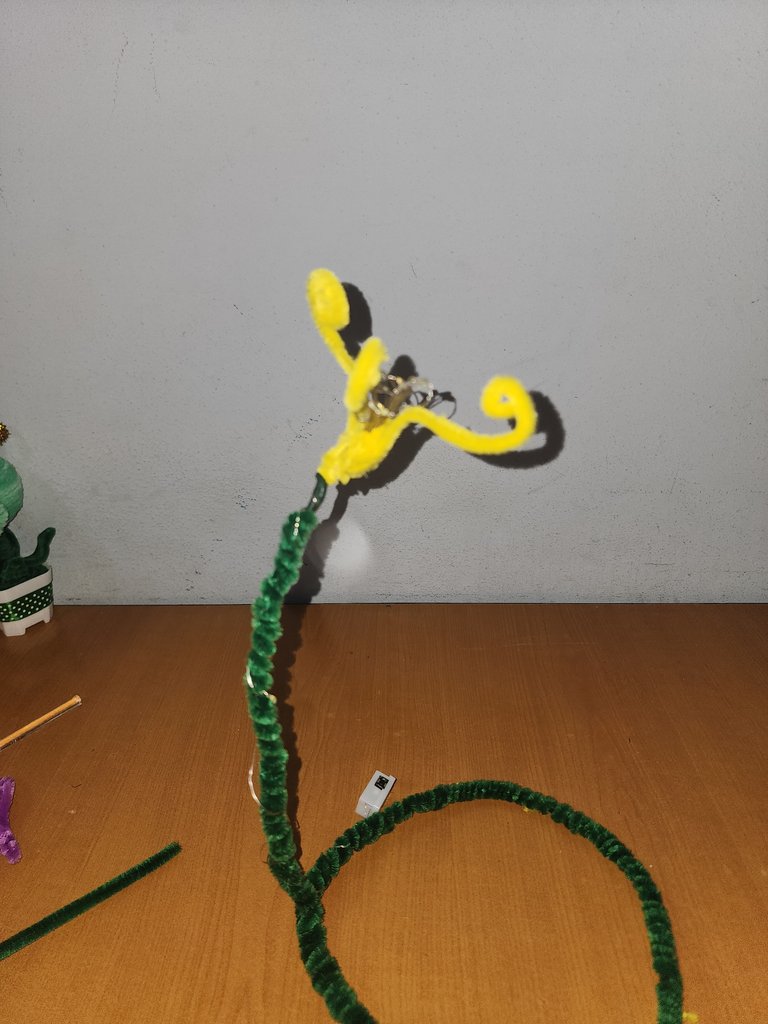
- En este paso tomamos los 3 filamentos amarillos y los pegamos por la parte que no está redondeada.
- Colocamos silicona caliente en la parte interior y los pegamos a la zona de las luces que habíamos preparado anteriormente, presionando durante unos segundos hasta que el pegamento seque.
- Repetimos este procedimiento con los dos filamentos restantes, colocándolos de forma equilibrada alrededor del centro.
- Luego tomamos 5 pétalos amarillos grandes y los vamos pegando uno a uno. Aplicamos silicona caliente en la parte inferior de aproximadamente ¼ del pétalo y lo unimos al siguiente pétalo.
- Entre cada pétalo aplicamos un poco de silicona y presionamos unos segundos hasta que seque, formando así el conjunto de 5 pétalos unidos.
- Una vez unidos, colocamos silicona caliente en la parte inferior del conjunto de pétalos y lo pegamos a la base, donde se encuentran las luces y los filamentos colocados anteriormente.
- Después de fijar bien el conjunto, colocamos el último pétalo, pegándolo de la misma forma que los anteriores, para completar la flor.
- In this step, take the 3 yellow filaments and glue them by the non-rounded end.
- Apply hot glue to the inner part and attach them to the fairy lights section prepared earlier, pressing for a few seconds until the glue dries.
- Repeat this process with the two remaining filaments, placing them in a balanced arrangement around the center.
- Next, take 5 large yellow petals and glue them one by one. Apply hot glue to the lower part of approximately ¼ of each petal and attach it to the next petal.
- Between each petal, apply a small amount of hot glue and press for a few seconds until dry, forming a set of 5 joined petals.
- Once assembled, apply hot glue to the bottom of the petal set and attach it to the base, where the lights and filaments were previously placed.
- After securing the set, attach the last petal, gluing it in the same way as the previous ones, to complete the flower.
 |  |
|---|---|
 |  |
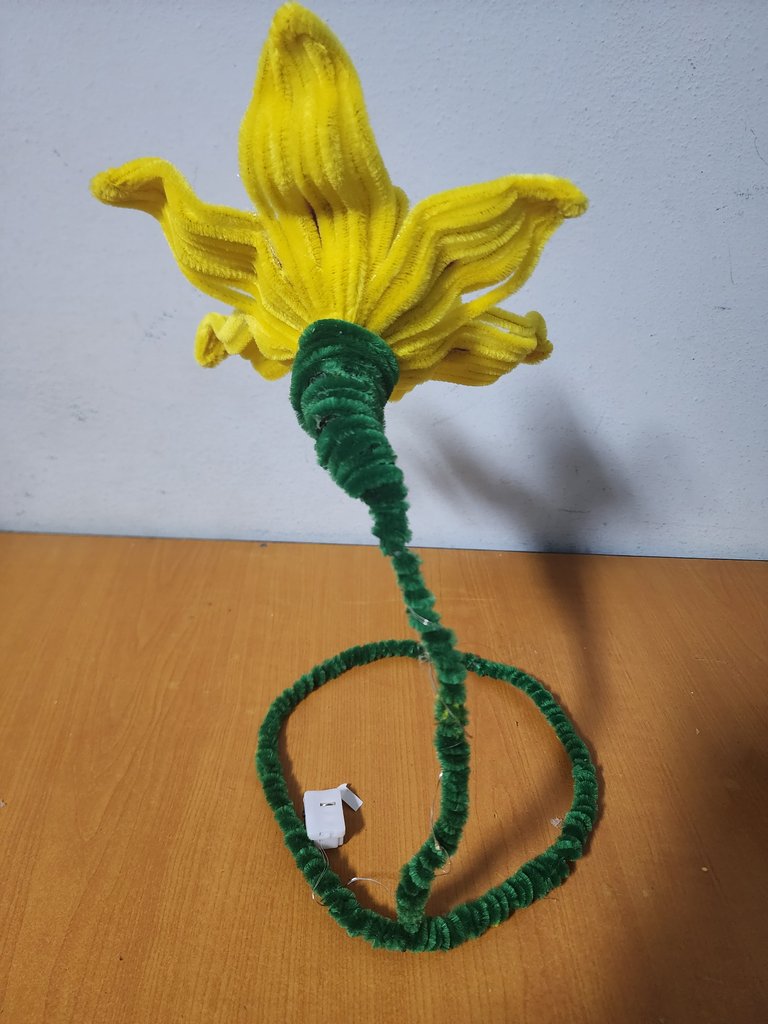
En la parte donde se une la base de la flor con el tallo, cubrimos toda esa zona con cinta floral de color verde.
Ajustamos bien la cinta, cubriendo la parte inferior de los pétalos y la parte superior de la base, presionando firmemente para que no se despegue.
Si deseamos reforzar esta unión, al finalizar la última vuelta de cinta podemos aplicar un poco de silicona caliente.
A continuación, cubrimos esta misma zona con limpiapipas verdes, pegándolos con silicona caliente hasta cubrir completamente la cinta floral e igualar el acabado con el resto del tallo y la base.
Para las hojas, utilizamos 3 limpiapipas verdes por cada hoja, y las moldeamos de la misma forma que hicimos con los pétalos grandes.
Una vez listas, pegamos las hojas al tallo con silicona caliente. En la zona donde se unen, cubrimos la base con un limpiapipas completo o medio limpiapipas, según sea necesario, para un mejor acabado.
Finalmente, enrollamos los 40 cm restantes de las luces alrededor del tallo y dejamos la parte de las baterías para colocarla en la base.
- At the point where the flower connects to the base, cover the entire area with green floral tape.
- Wrap the tape tightly, covering the lower part of the petals and the upper part of the base, pressing firmly so the tape does not loosen.
- If extra reinforcement is needed, apply a small amount of hot glue at the end of the last wrap.
- Next, cover this same section with green pipe cleaners, attaching them with hot glue until the floral tape is fully covered and the finish matches the rest of the stem and base.
- To create the leaves, use 3 green pipe cleaners for each leaf, shaping them in the same way as the large petals.
- Once ready, glue the leaves to the stem using hot glue. Cover the attachment point with one full pipe cleaner or half a pipe cleaner, depending on what is needed, for a clean finish.
- Finally, wrap the remaining 40 cm of fairy lights around the stem, leaving the battery pack to be placed inside the base.
 |  |  |
|---|---|---|
 |  |  |
- Para la base utilizaremos aproximadamente 15 limpiapipas verdes, aunque la cantidad puede variar según el tamaño deseado.
Opcional: También se puede usar cartón o cartulina del tamaño del círculo inferior, pero en este diseño la base se realizó solo con limpiapipas. - Tomamos un limpiapipa y comenzamos a enrollarlo sobre sí mismo, formando un pequeño círculo en espiral.
- Aplicamos silicona caliente y continuamos enrollando el limpiapipa, repitiendo el proceso hasta ir agrandando el círculo.
- Seguimos añadiendo limpiapipas hasta cubrir completamente la base.
Si en algunas zonas se necesita más volumen, podemos cubrirlas sin necesidad de que quede perfectamente redondo, formando también semicírculos para reforzar la estructura. - Una vez lista la base, aplicamos silicona caliente en toda la parte inferior del círculo.
- Pegamos la base poco a poco, presionando bien hasta que quede completamente fija y estable.
- Finalmente, colocamos las luces en la base, asegurándolas bien y fijándolas al tallo, dejando el compartimento de las baterías integrado en la base.
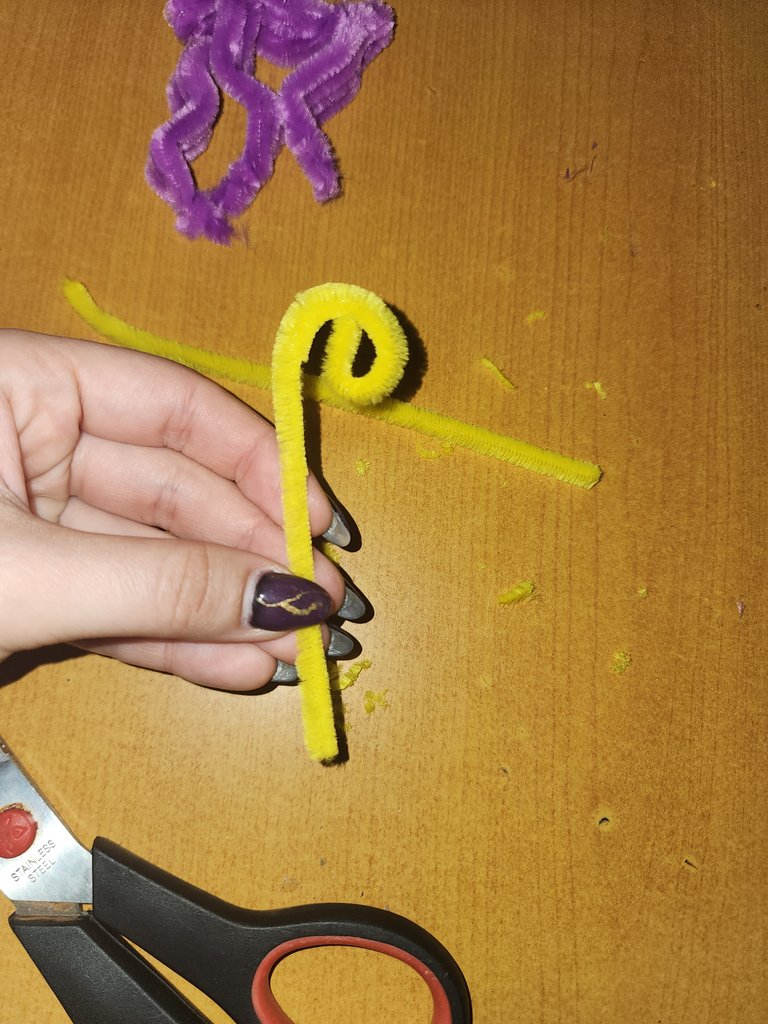
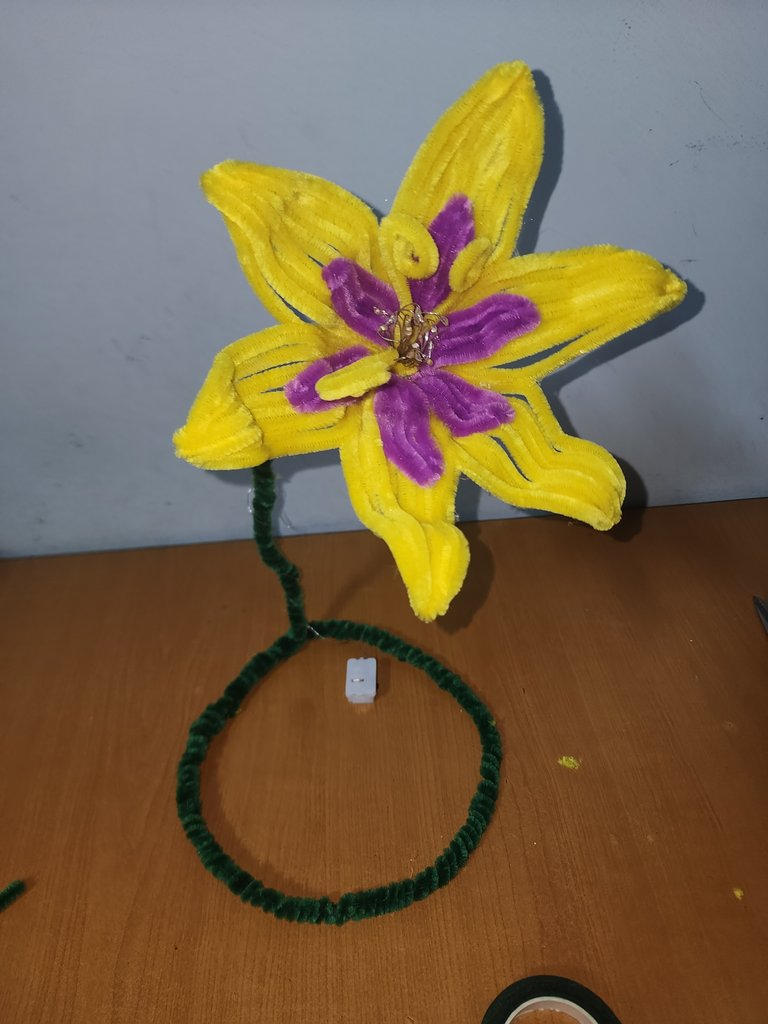
- Tomamos 6 limpiapipas amarillos para crear los detalles decorativos de los pétalos.
- Enrollamos cada limpiapipas alrededor de un palillo de brocheta, formando una espiral.
- Retiramos el limpiapipas del palillo y lo estiramos ligeramente para aflojar la forma.
- Luego lo doblamos por la mitad.
- Aplicamos un pequeño punto de silicona caliente en el doblez.
- Pegamos poco a poco este detalle en el borde de cada pétalo amarillo, siguiendo su contorno para darle más textura y realce.
- Utilizamos 1 limpiapipas por cada pétalo amarillo.
- To create the base, we will use approximately 15 green pipe cleaners, depending on the desired size.
Optional: You may also use cardboard or cardstock cut to the size of the bottom circle, but in this design the base is made only with pipe cleaners.- Take one pipe cleaner and start rolling it onto itself, forming a small spiral circle.
- Apply hot glue and continue rolling the pipe cleaner, repeating the process to gradually increase the size of the circle.
- Keep adding pipe cleaners until the entire base is covered.
If certain areas need more thickness, they can be reinforced without keeping a perfect circular shape, using semi-circular sections if needed.- Once the base is finished, apply hot glue to the entire bottom surface of the circle.
- Attach the base little by little, pressing firmly until it is fully secured and stable.
- Finally, place the fairy lights inside the base, securing them well and fixing them to the stem, leaving the battery pack integrated into the base.
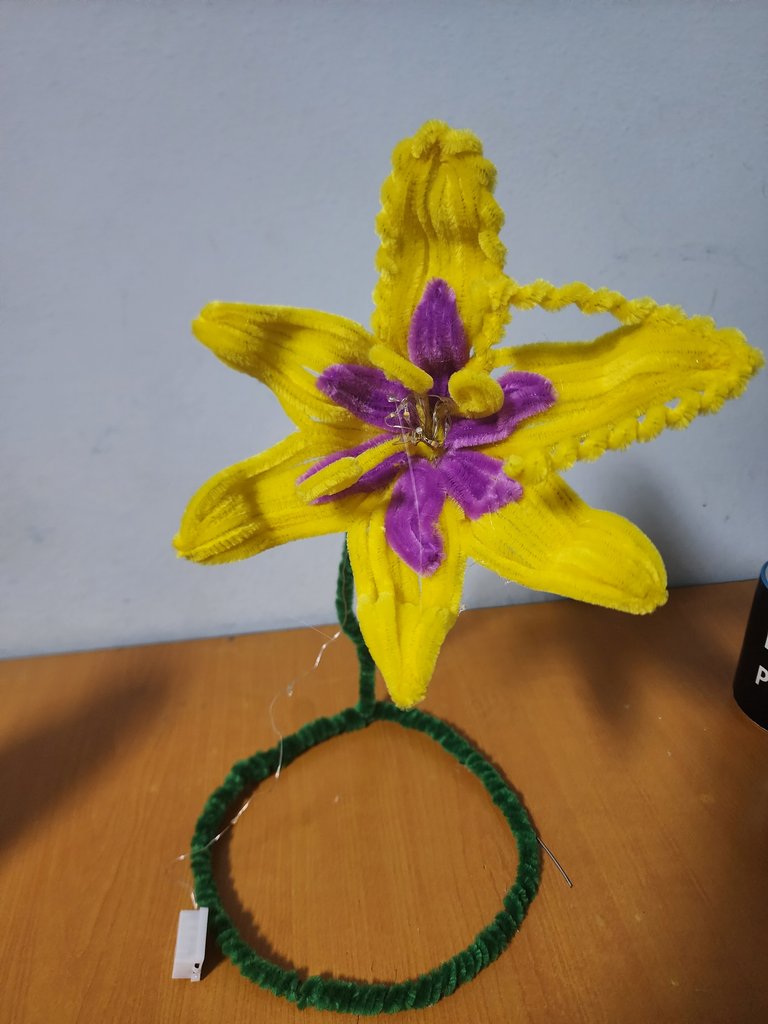
- Take 6 yellow pipe cleaners to create decorative details for the petal edges.
- Wrap each pipe cleaner around a wooden skewer to form a spiral.
- Remove the pipe cleaner from the skewer and gently stretch it a little to loosen the spiral.
- Then, fold it in half.
- Apply a small drop of hot glue on the fold.
- Gradually glue this detail along the edge of each yellow petal, following its contour to add more texture and dimension.
- Use 1 pipe cleaner per yellow petal.
 |  |  |
|---|
- Para cubrir la parte donde se encuentran las baterías de las luces, creamos pequeñas flores decorativas con limpiapipas morado.
- Tomamos 1 limpiapipas morado y lo doblamos aproximadamente cada 2 cm, formando una pequeña vueltecita que simula un pétalo.
- Damos dos vueltas para asegurar el pétalo y repetimos el proceso hasta completar la flor.
Utilizaremos un limpiapipas por cada flor. - Al terminar el último pétalo, lo pegamos al primero con silicona caliente, cerrando la flor.
- Moldeamos la flor con los dedos para darle una forma más natural.
- Pegamos la flor sobre la parte de las baterías, procurando no cubrir el interruptor, para que siga siendo funcional.
- Como detalle final, podemos colocar una perla en el centro de cada flor, pegándola con un punto de silicona caliente.
- To cover the battery pack of the fairy lights, we create small decorative flowers using purple pipe cleaners.
- Take 1 purple pipe cleaner and bend it approximately every 2 cm, forming a small loop to simulate a petal.
- Twist it twice to secure the petal and repeat the process until the flower is complete. Use one pipe cleaner per flower.
- Once the last petal is finished, glue it to the first petal with hot glue, closing the flower.
- Shape the flower with your fingers to give it a more natural look.
- Glue the flower onto the battery pack, making sure not to cover the switch, so it remains accessible.
- As a final detail, you may add a pearl to the center of each flower, securing it with a small drop of hot glue.

Este proyecto fue una experiencia creativa muy especial, donde la fantasía se transforma en una manualidad real, hecha completamente a mano. A través de materiales sencillos y técnicas accesibles, fue posible recrear una flor decorativa llena de color, detalles y luz, cuidando cada parte del proceso.
La elaboración paso a paso permitió adaptar el diseño original y aportar un toque personal, demostrando que con paciencia, creatividad y dedicación se pueden lograr piezas únicas. Sin duda, este tipo de proyectos invitan a seguir explorando nuevas ideas, experimentar con materiales y disfrutar del proceso creativo tanto como del resultado final.
This project was a very special creative experience, where fantasy is brought into reality through a completely handmade craft. Using simple materials and accessible techniques, it was possible to recreate a decorative flower full of color, detail, and light, paying attention to every step of the process.
The step-by-step approach allowed the original design to be adapted and personalized, showing that with patience, creativity, and dedication, unique pieces can be achieved. This type of project certainly encourages further exploration, experimentation with materials, and enjoyment of both the creative process and the final result.
Todas las imágenes fueron tomadas por mí con mi teléfono Samsung Galaxy S22.
All images were taken by me using my Samsung Galaxy S22.
Quedó hermosa, gracias por compartir ✨
Un placer compartirlo, encantada de que le guste. 🫶
Está muy lindo tu trabajo, bien explicado con un excelente paso a paso y resultado final.
!HUG
Muchas gracias 💕 Me alegra muchísimo saber que te gustó el paso a paso y el resultado final. Gracias por el apoyo 🤗.
!discovery
This post was shared and voted inside the discord by the curators team of discovery-it
Join our Community and follow our Curation Trail
Discovery-it is also a Witness, vote for us here
Delegate to us for passive income. Check our 80% fee-back Program
You made a very beautiful flower; excellent work, very delicate and well-crafted. Thank you for sharing your step-by-step instructions.
selected by @dayadam
Thank you so much for your kind words and for the support 🙏
I’m very happy to share my work with the community💛.
Un trabajo muy hermoso amiga
From Venezuela, our witness drives decentralization and the adoption of Web3 technology, creating opportunities for the local community and contributing to the global ecosystem. // Desde Venezuela, nuestro testigo impulsa la descentralización y la adopción de la tecnología Web3, generando oportunidades para la comunidad local y contribuyendo al ecosistema global.
Sigue, contacta y se parte del testigo en: // Follow, contact and be part of the witness in:
Muchisimas gracias 🫶.
Congratulations @onlyvick! You have completed the following achievement on the Hive blockchain And have been rewarded with New badge(s)
Your next target is to reach 700 upvotes.
You can view your badges on your board and compare yourself to others in the Ranking
If you no longer want to receive notifications, reply to this comment with the word
STOPQué bonita y llamativa queda la flor, es un proyecto muy original y que le encantará a cualquier niña. ¡Excelente trabajo!
Muchísimas gracias 🥰 Me alegra saber que te pareció original y llamativa. Gracias por tu lindo comentario.
Quedó preciosa y muy real 🤗.
Gracias 🥰.
Que preciosidad siempre quise hacer esta flor 😍🏵️gracias por el tutorial te quedó igualita a la de Rapunzel sobre todo en la oscuridad 🥰
Un placer , muchas gracias🥰.
Tanto la publicación como el trabajo estan muy bien realizados. Excelente trabajo
Un seludo😁
Gracias monada 🤗.