Buenas tardes, saluditos amigos Artesanos Creadores de esta valiosa comunidad @hivediy, espero que todos se encuentren gozando de perfecta salud, ya estamos a pocos días para ver partir al año 2023 y las gaitas, aguinaldos; y ese sabrosito ambiente navideño ya se siente; en la mayoría de los hogares se preparan para la celebración del nacimiento del niño Dios, siguiendo con la tradición de las fechas todos adornamos ese rinconcito de la casa colocando el nacimiento, poniendo un arbolito para colocar los regalos que después abrimos con alegría y entusiasmo.
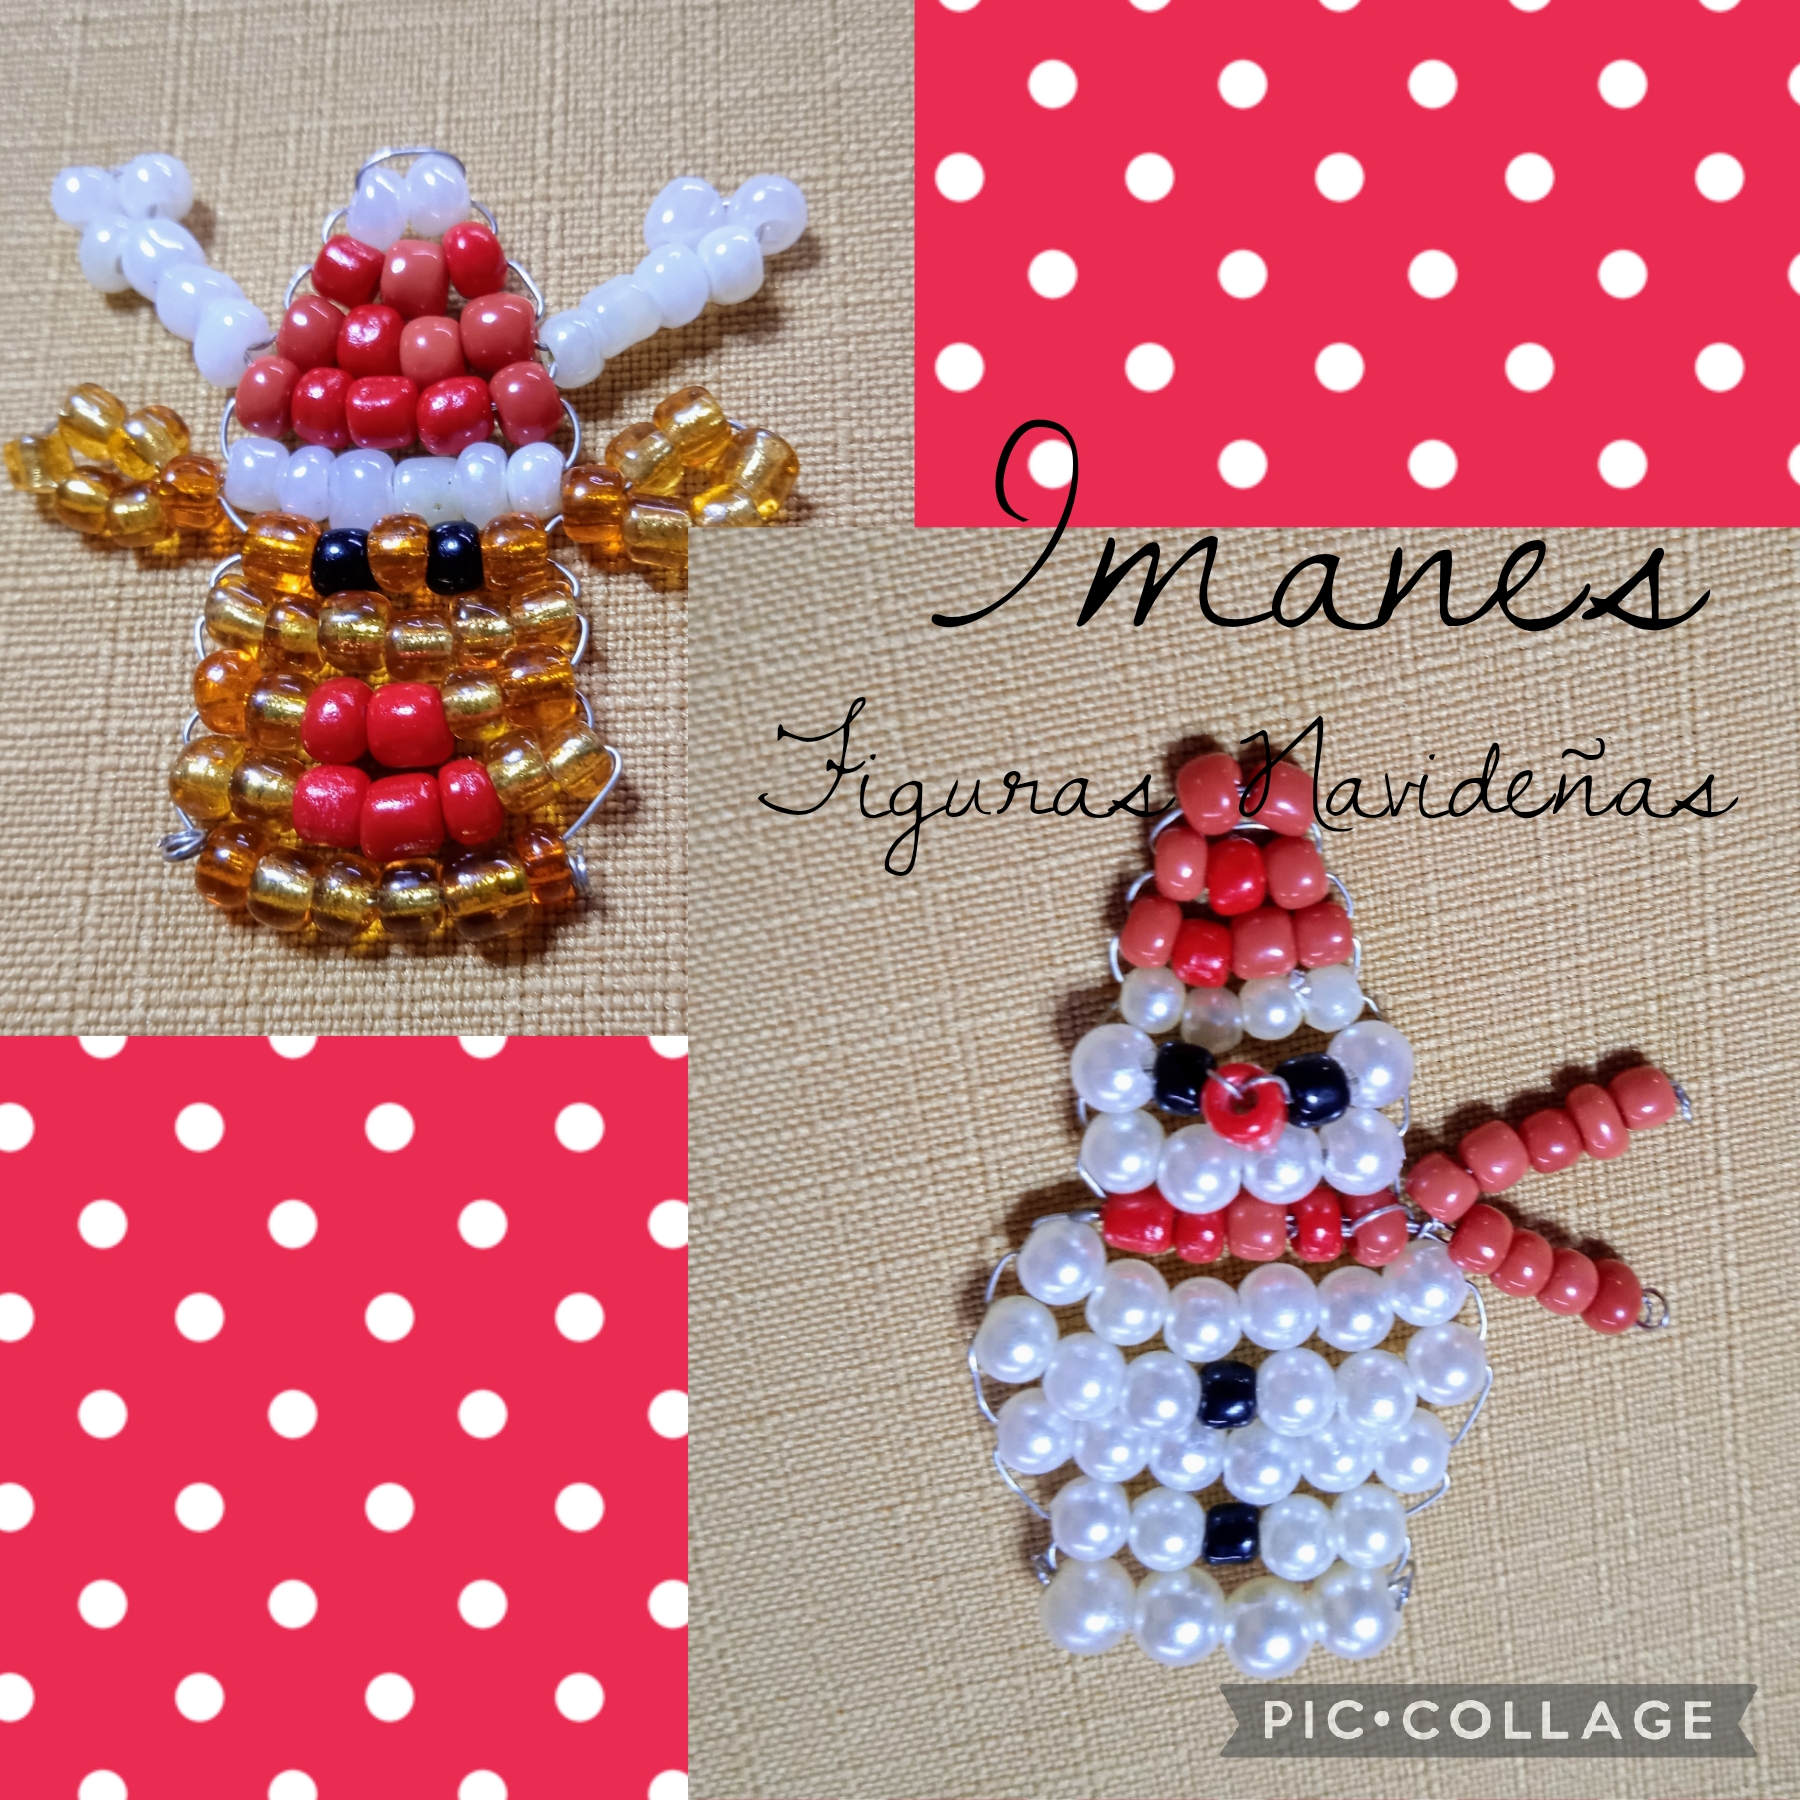
Hoy voy a compartir con ustedes la elaboración de dos figuras de las muchas con las que adornamos y que son símbolo de navidad; Un Reno y Un Muñeco de Nieve, estás las hice como imanes para usar en el refrigerador pero también sirven como colgante en la decoración del Arbolito, las hice con perlas y chaquiras y los invito a seguir leyendo el paso a paso para que vean como las hice:
Good afternoon, greetings friends Artisans Creators of this valuable community @hivediy, I hope you are all enjoying perfect health, we are now just a few days away from seeing the start of the year 2023 and the bagpipes, bonuses; and that tasty Christmas atmosphere is already felt; In most homes they prepare for the celebration of the birth of the child Jesus, following the tradition of the dates we all decorate that little corner of the house by placing the birth, putting up a tree to place the gifts that we later open with joy and enthusiasm.
Today I am going to share with you the making of two of the many figures with which we decorate and that are a symbol of Christmas; A Reindeer and a Snowman, I made these as magnets to use on the refrigerator but they also serve as a pendant in the decoration of the Little Tree, I made them with pearls and beads and I invite you to continue reading the step by step so you can see how the I did:
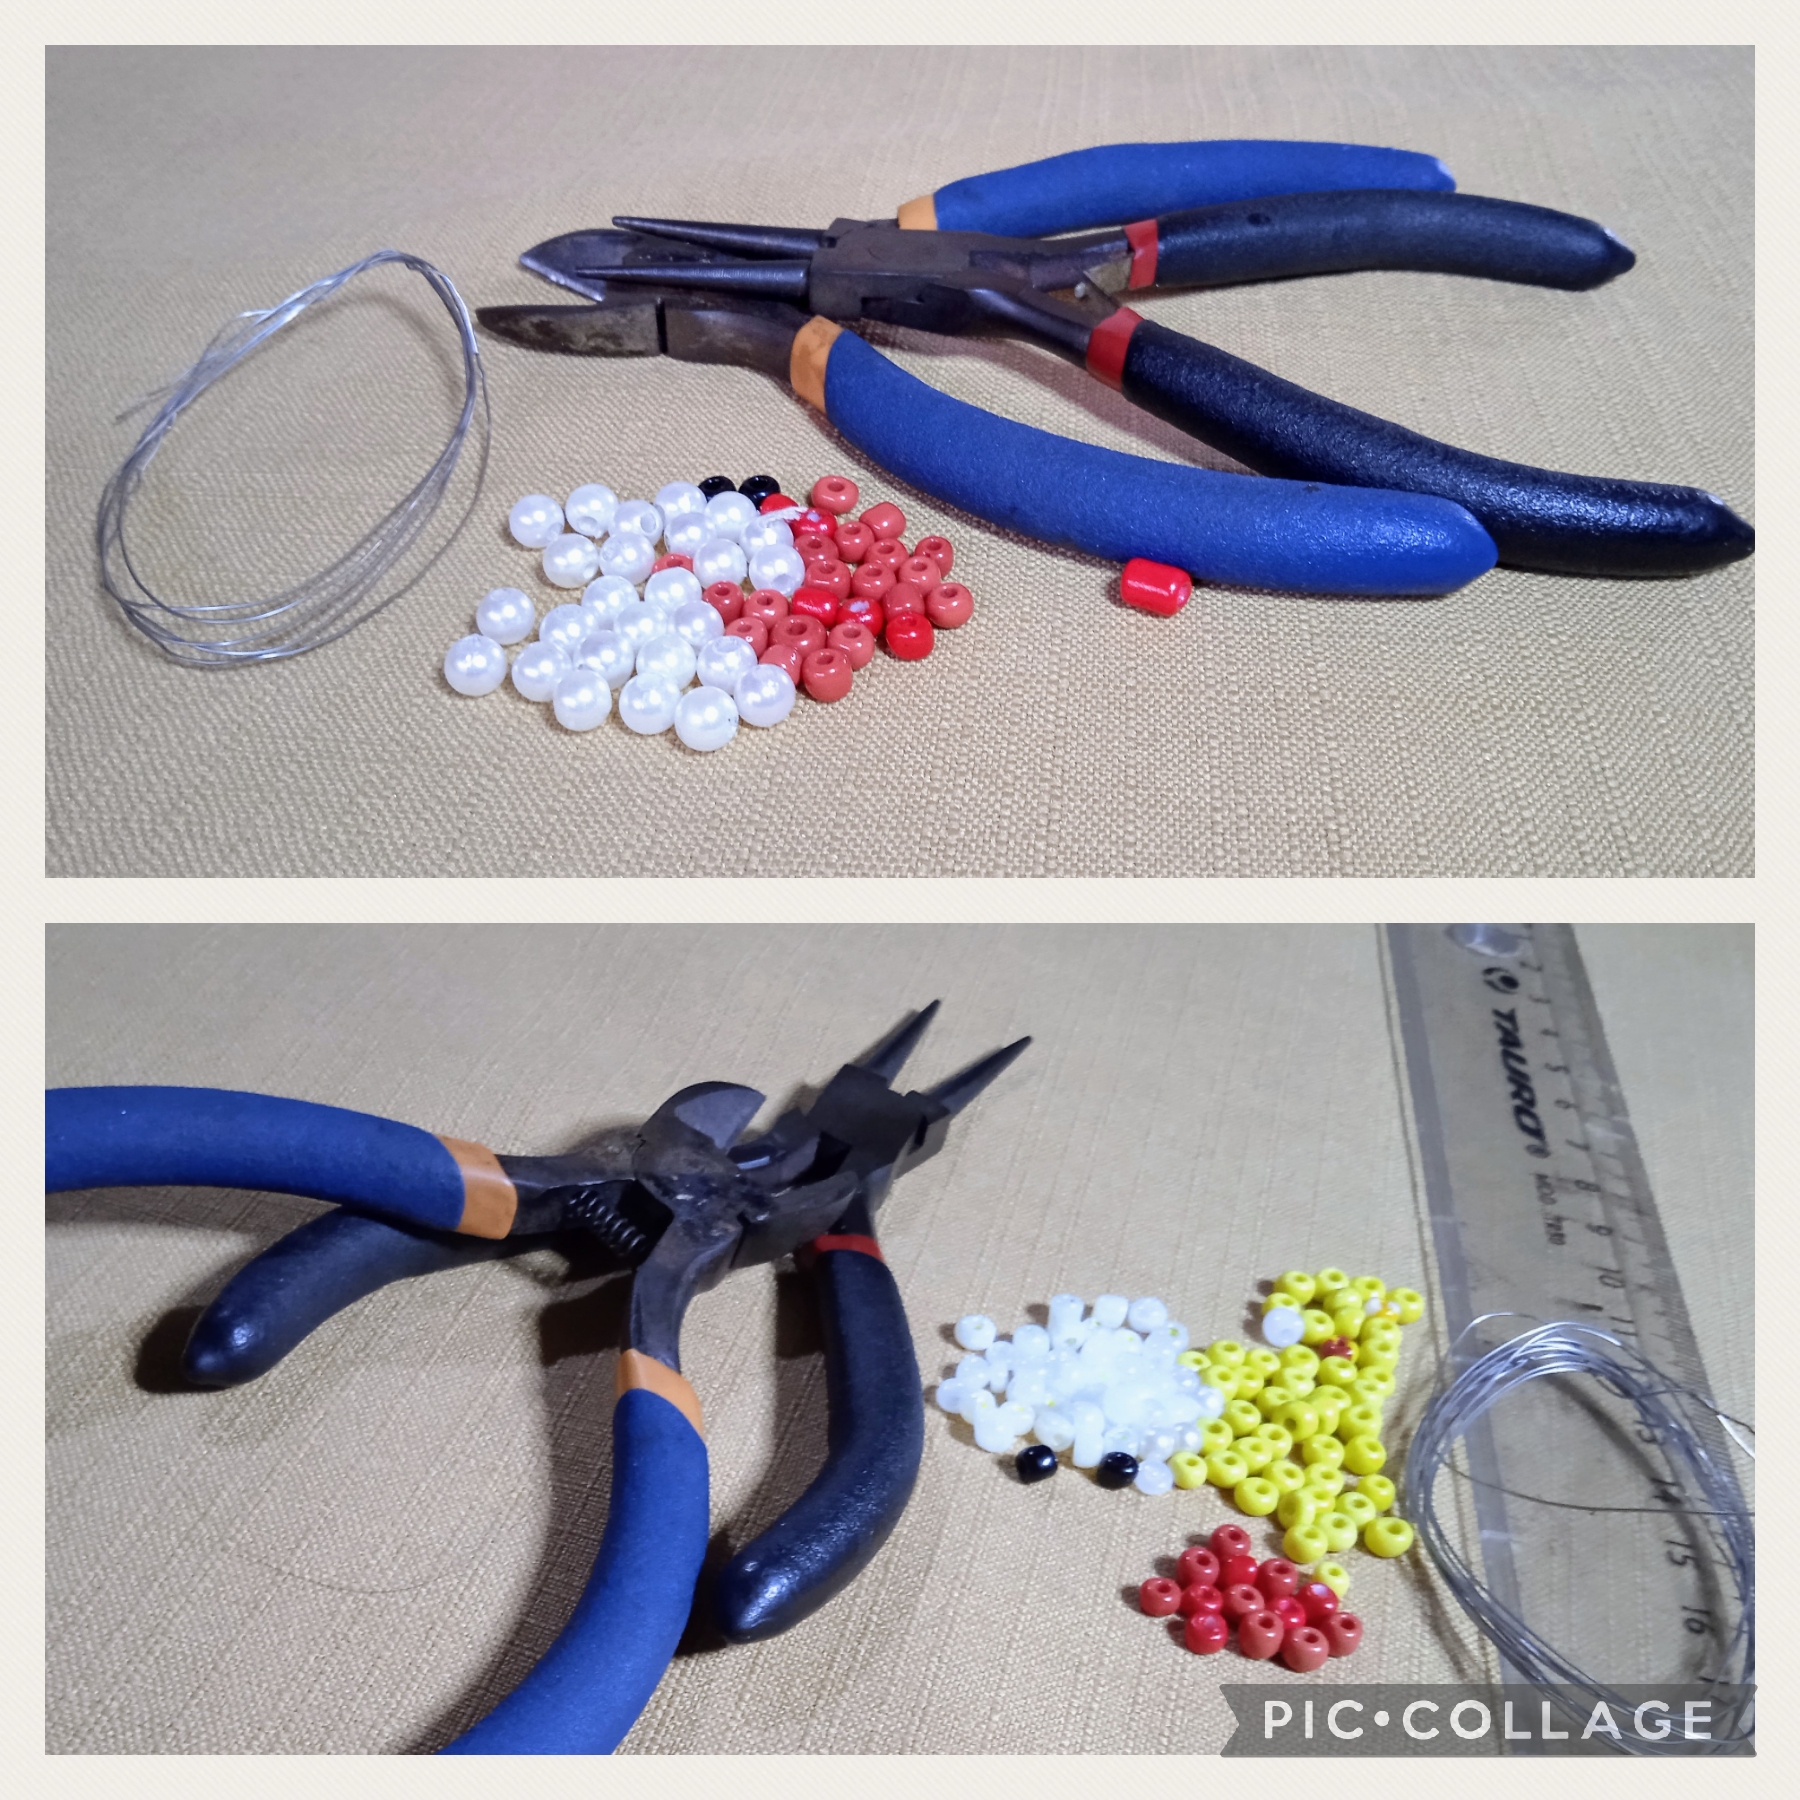
USÉ ESTOS MATERIALES PARA REALIZAR El RENO NAVIDEÑO:
✓ Mostacillas Blancas perladas.
✓ Mostacillas rojas.
✓ Mostacillas doradas.
✓ Mostacillas negras.
✓ Hilo de alpaca.
✓ Pinzas.
✓ Iman.
✓ Silicón.
I USED THESE MATERIALS TO MAKE THE CHRISTMAS REINDEER:
✓ Pearly white beads.
✓ Red beads.
✓ Golden beads.
✓ Black beads.
✓ Alpaca yarn.
✓ Tweezers.
✓ Magnet.
✓ Silicone.
PASOS QUÉ USÉ EN LA ELABORACIÓN:
PRIMER PASO:
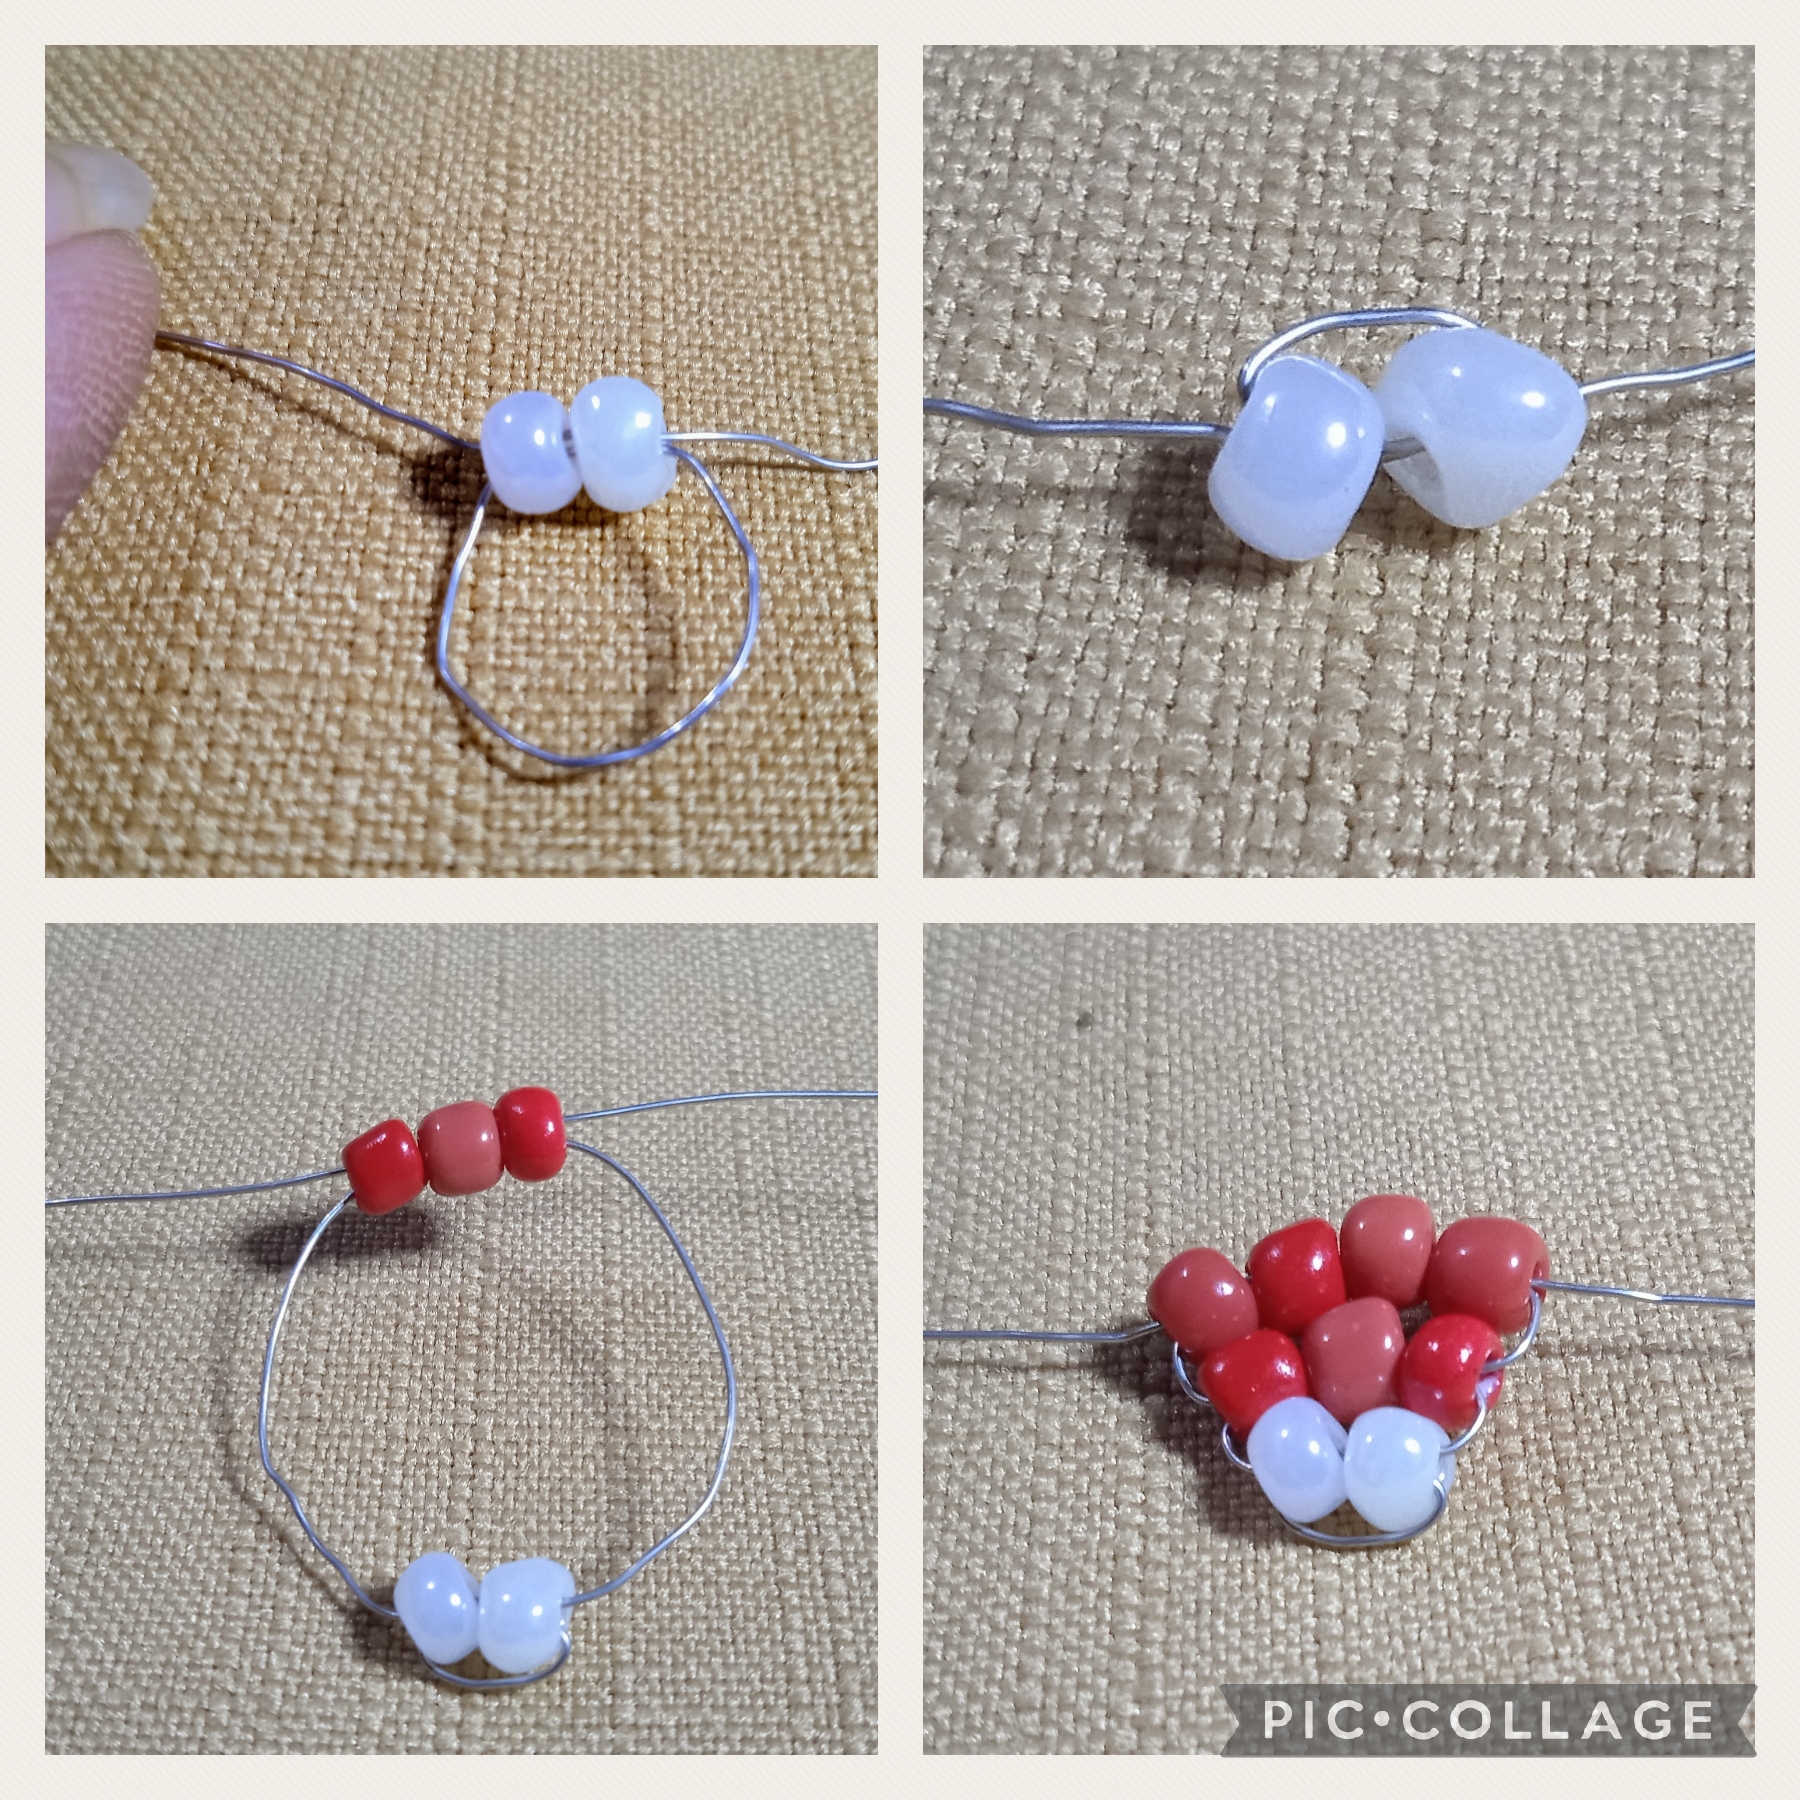
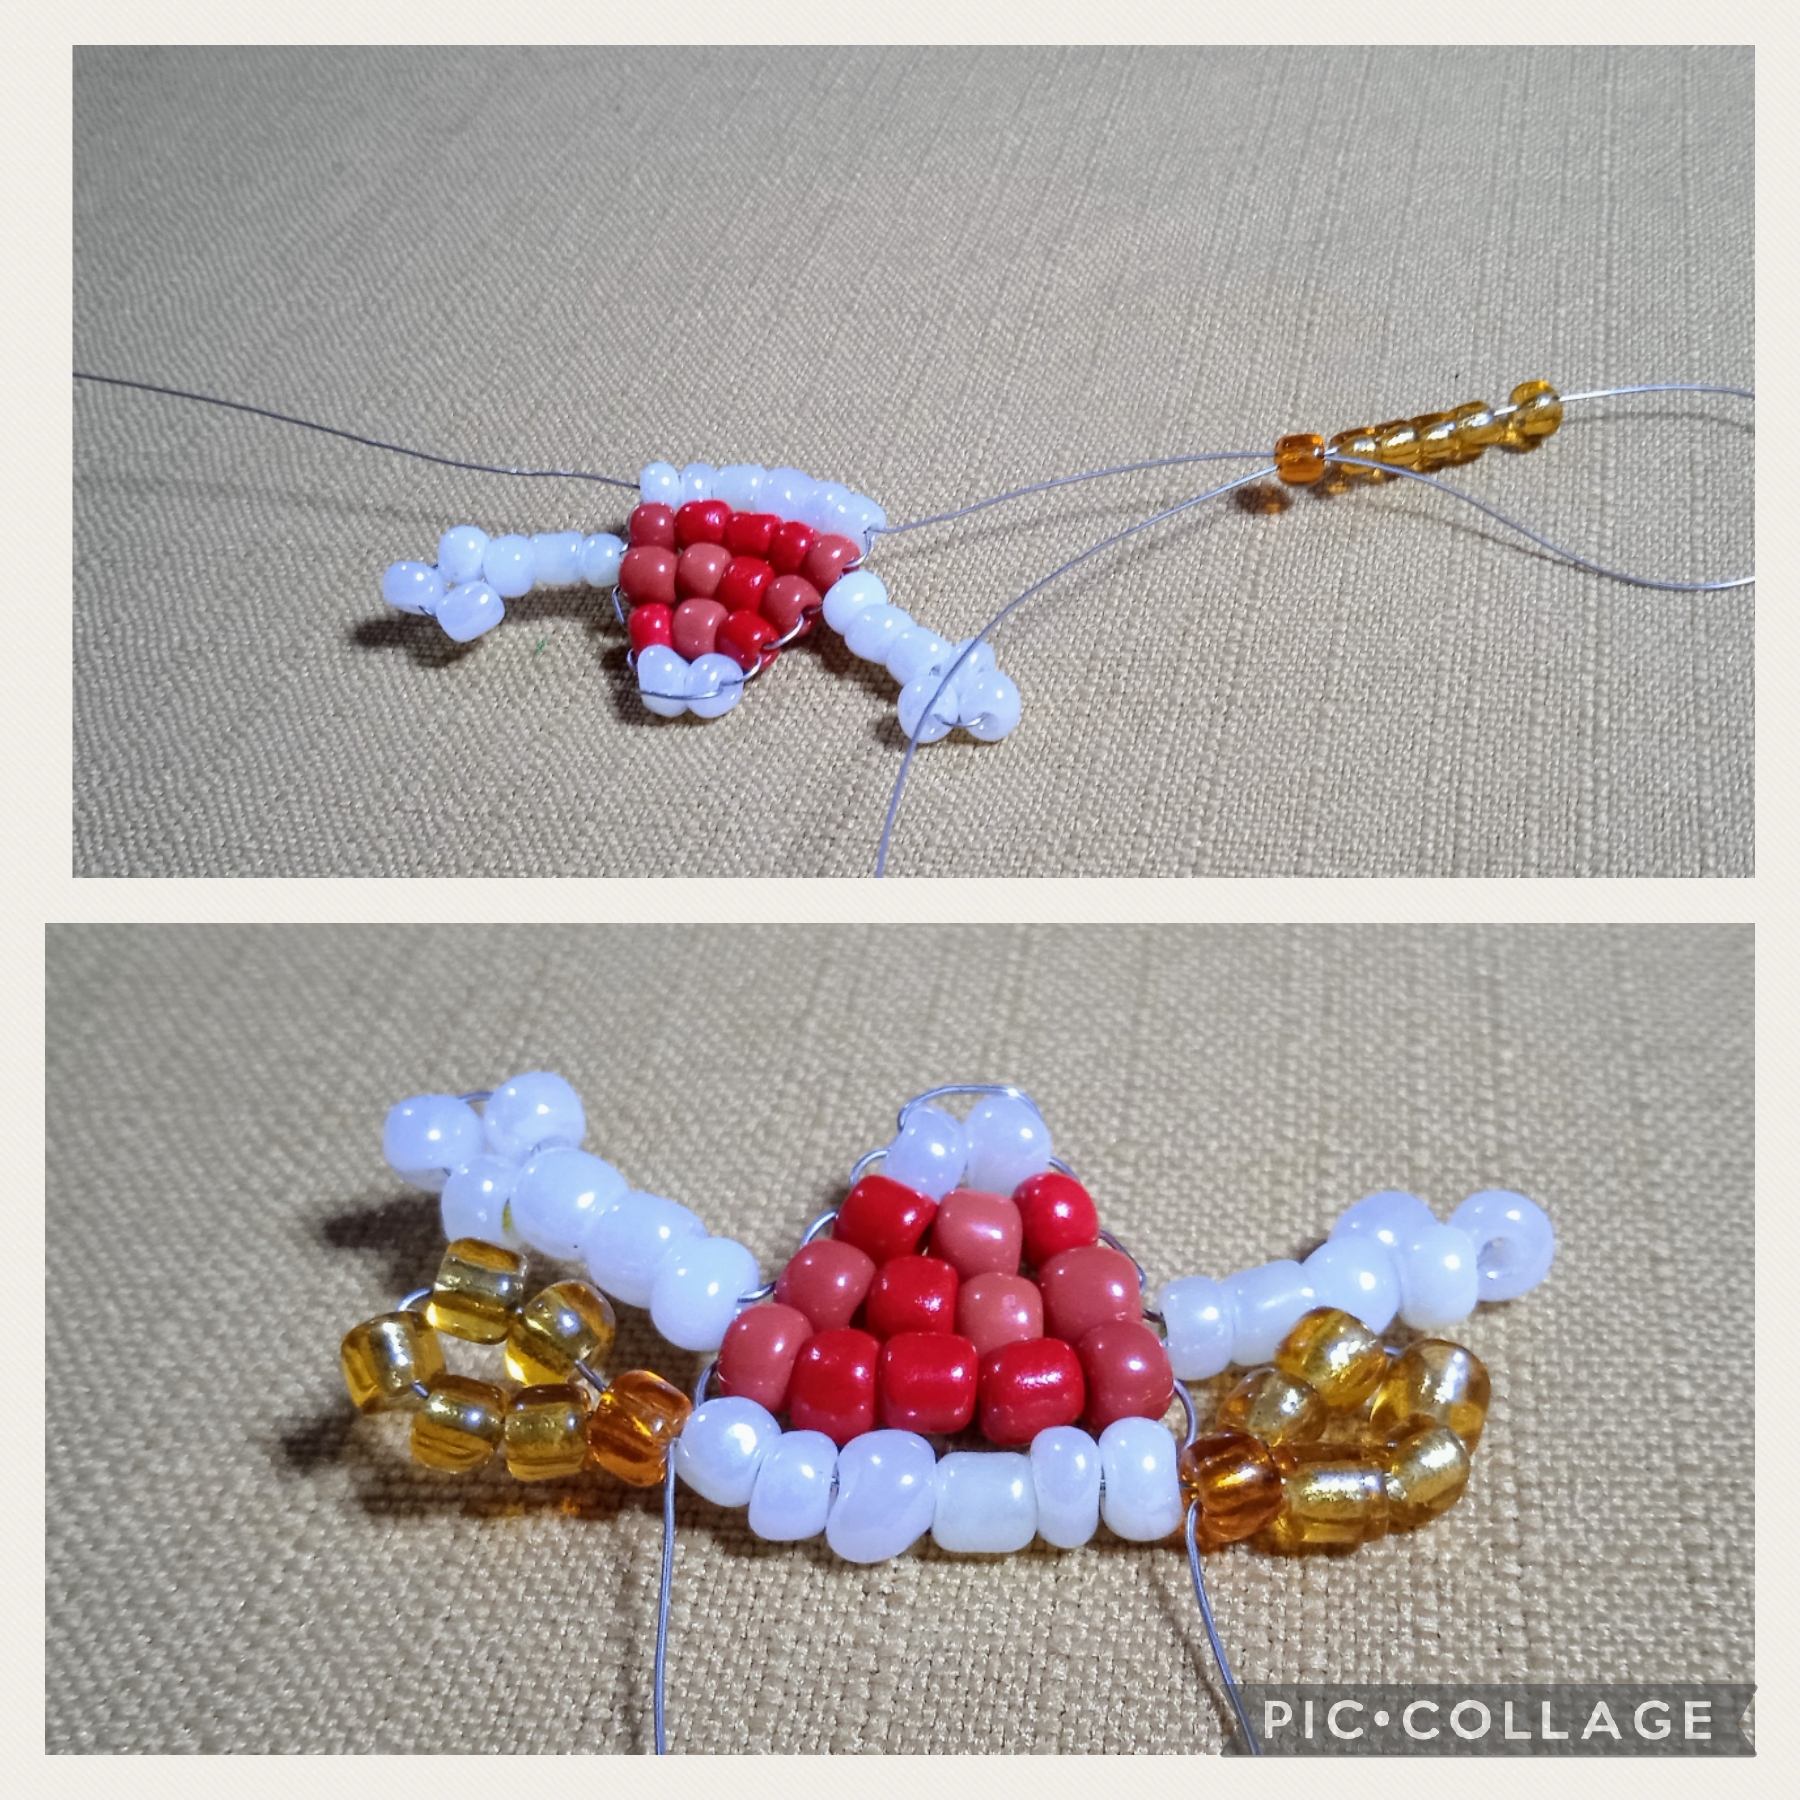
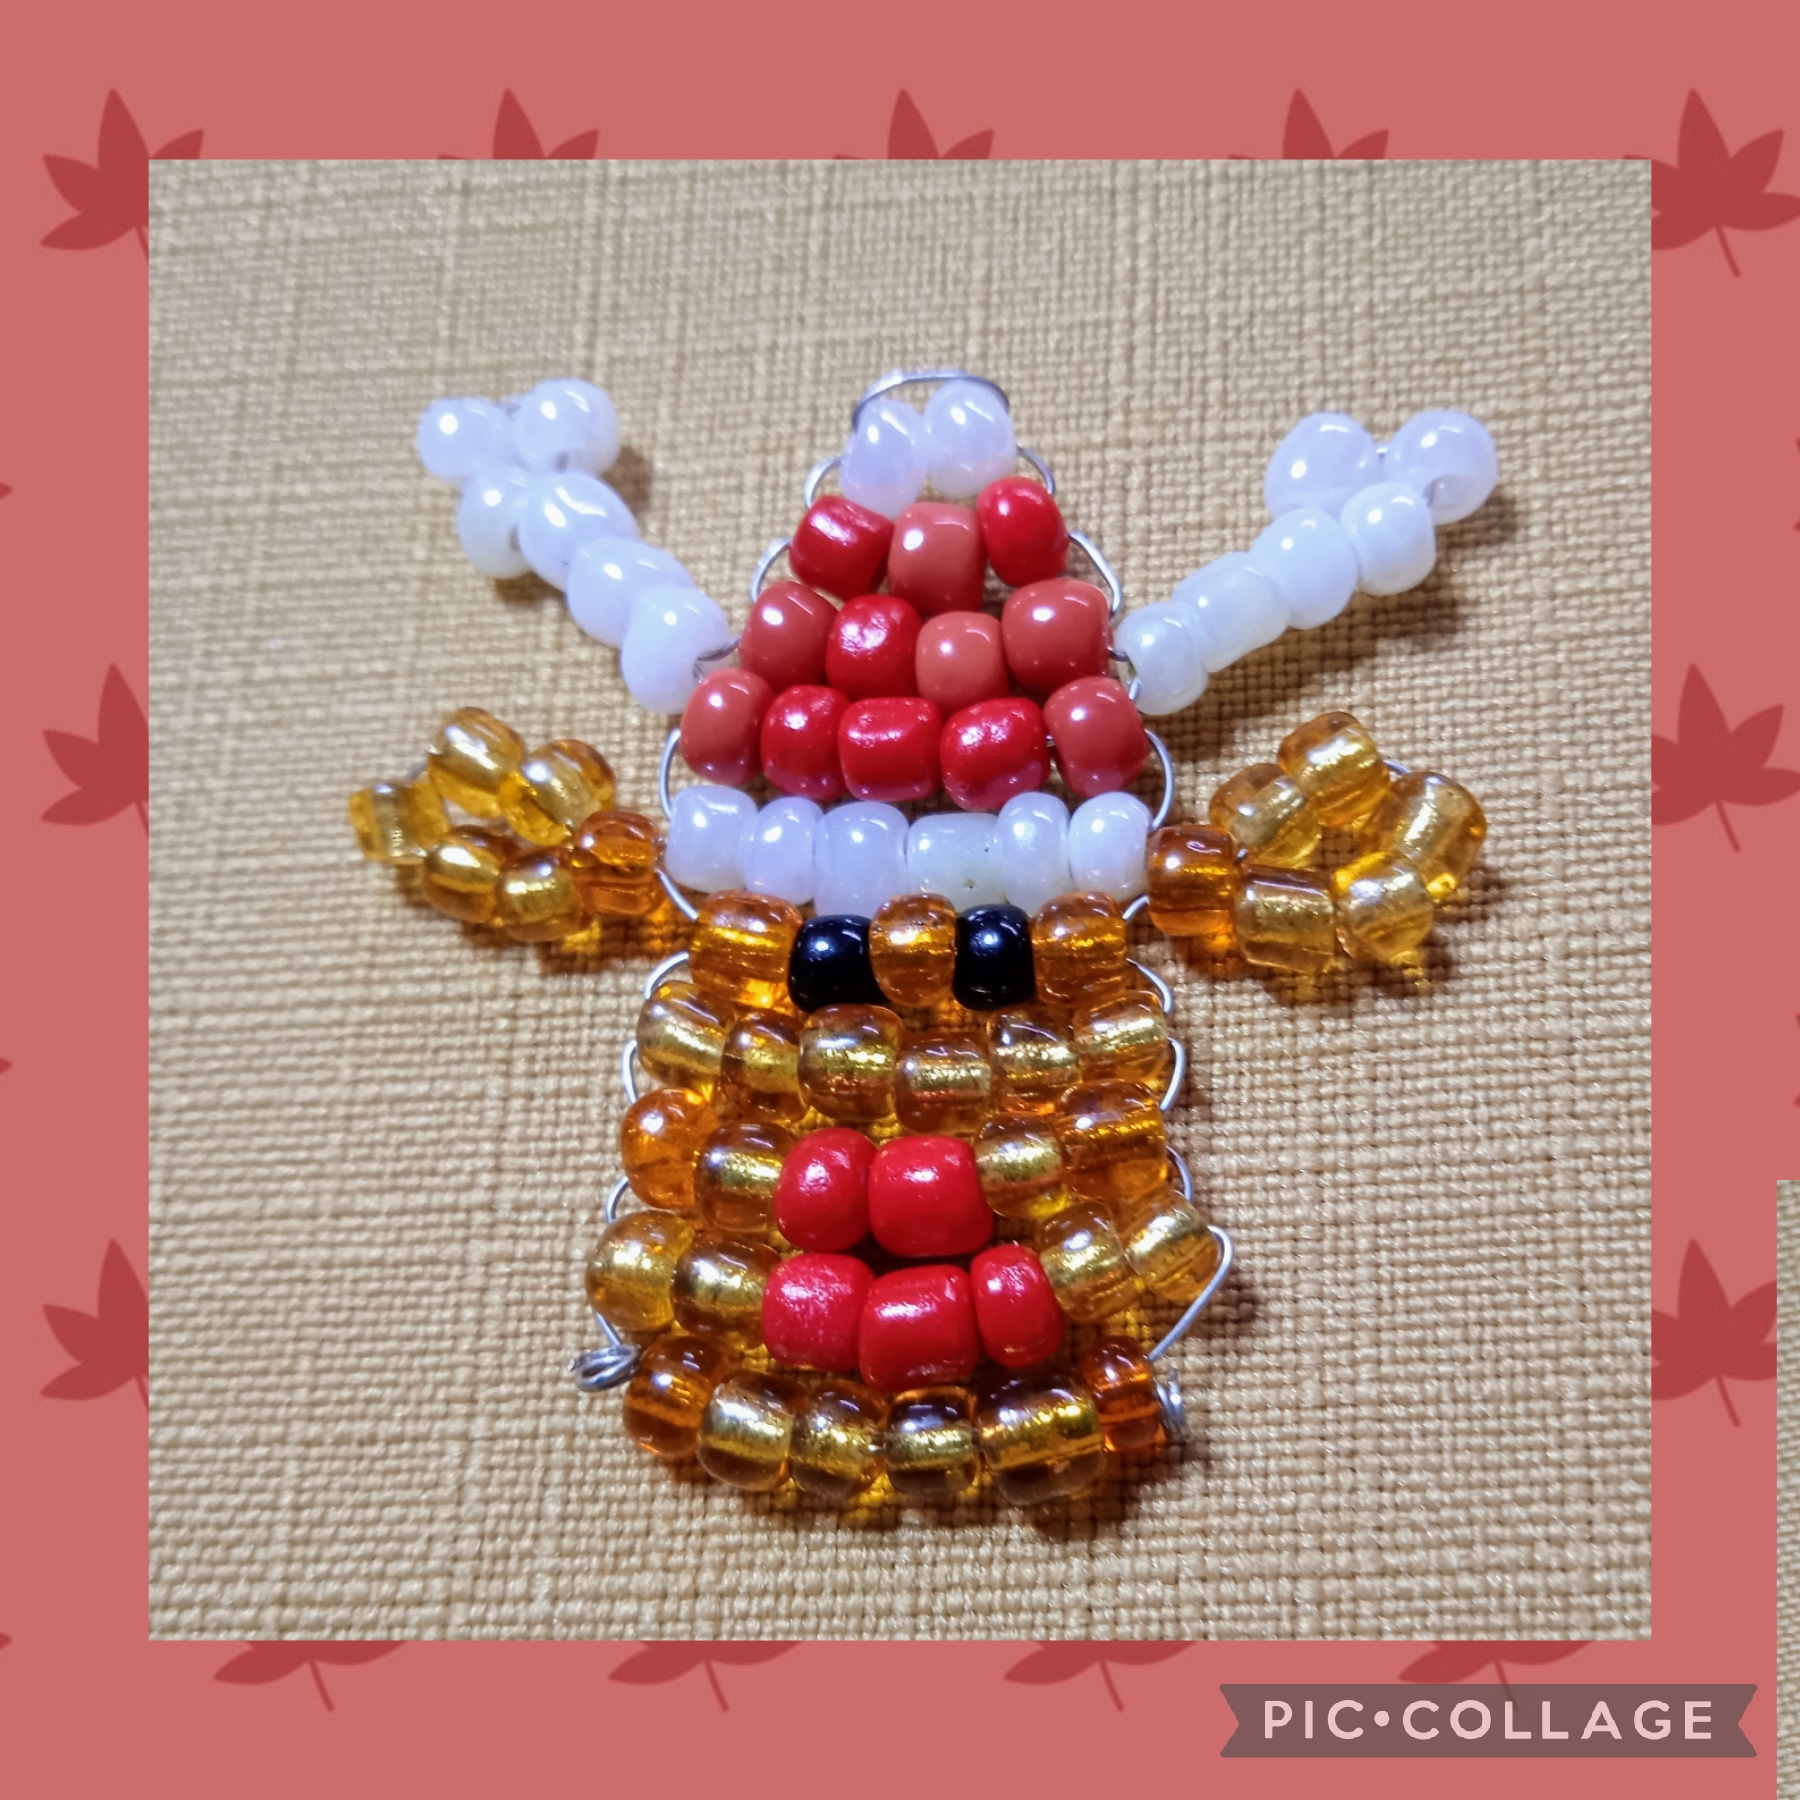
Voy a comenzar ocupando un hilo de alpaca de setenta centímetros, ahí voy a insertar por una punta dos mostacillas blancas perladas y las ruedo hasta la mitad del hilo, ahí las cruzo con el hilo de la otra punta las igualo para verificar la justa medida, continúo insertando tres mostacillas rojas por una de las puntas y cruzando la con la otra punta, para luego insertar y cruzar cuatro mostacillas rojas como muestra la imagen.
STEPS WHAT I USED IN PREPARATION:
FIRST STEP:
I am going to start using a seventy centimeter alpaca thread, there I am going to insert two pearly white beads at one end and I roll them up to the middle of the thread, there I cross them with the thread from the other end and I match them to verify the correct measurement, I continue by inserting three red beads through one of the ends and crossing it with the other end, and then inserting and crossing four red beads as shown in the image.
SEGUNDO PASO:
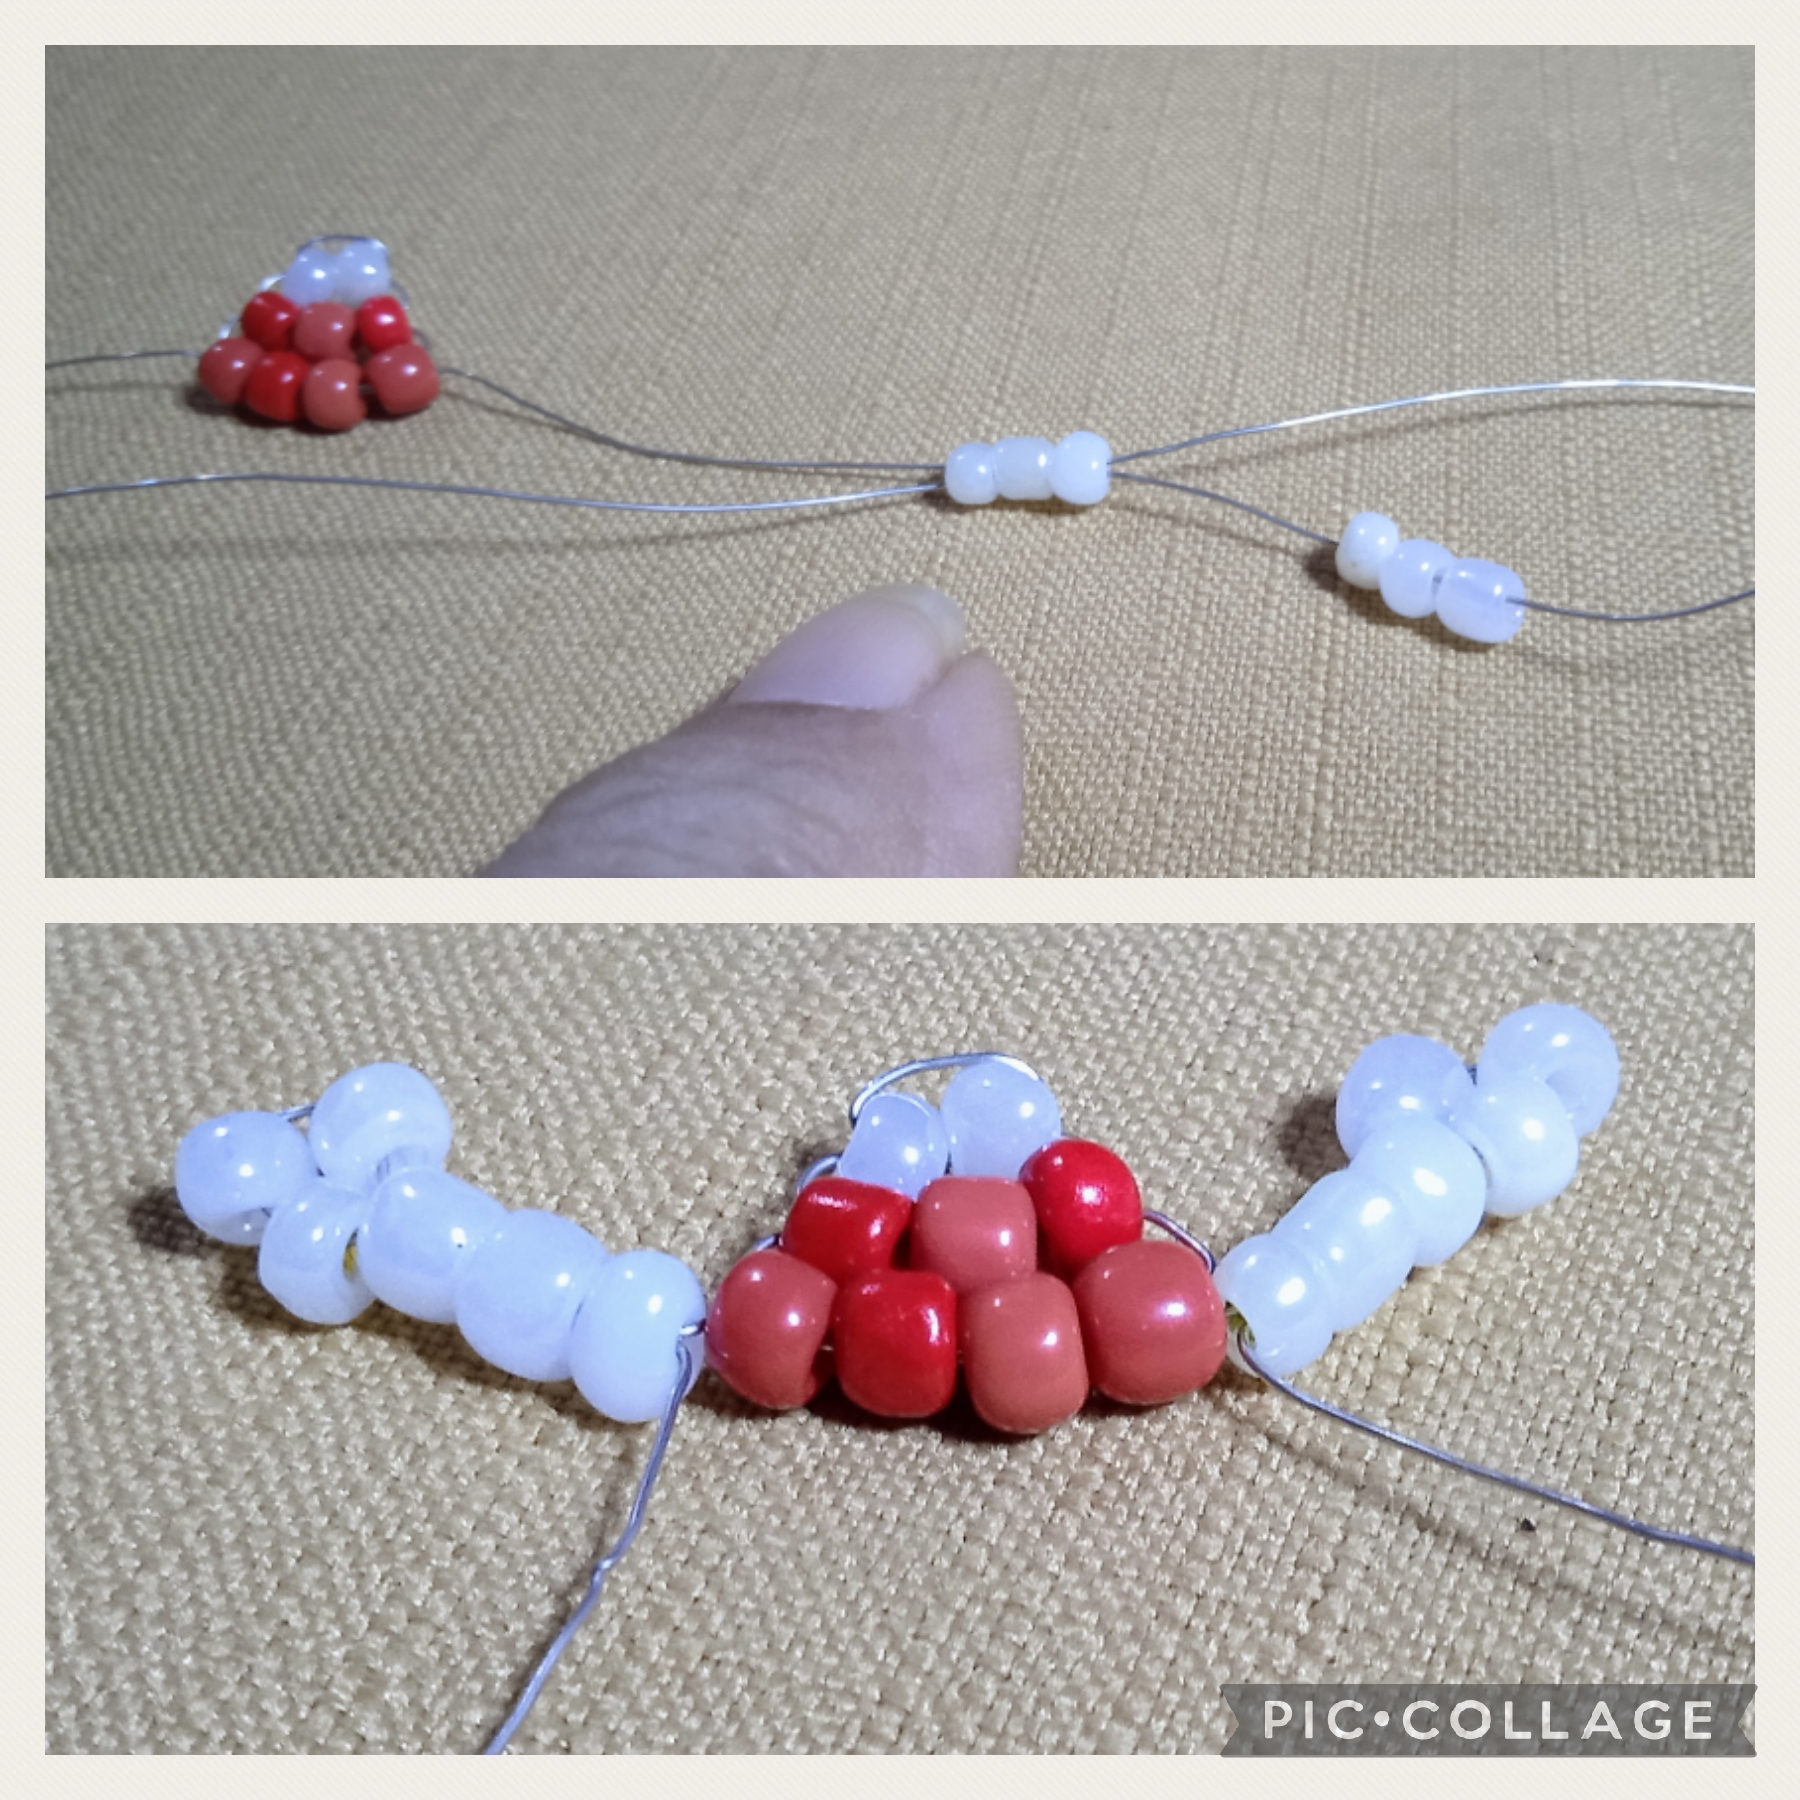
En este paso voy a realizar los cuernos y los realizó con hilos separados, en una punta inserto seis mostacillas blancas perladas, tomo la punta del hilo y dejo las primeras tres mostacillas sin trabajar inserto la alpaca por las siguientes tres mostacillas blancas y halo la punta lasta la mostacilla roja, realizó el mismo procedimiento del otro lado y ya están listos los cuernos.
SECOND STEP:
In this step I am going to make the horns and I made them with separate threads, at one end I insert six white pearl beads, I take the end of the thread and leave the first three beads unworked, I insert the alpaca through the next three white beads and pull the tip Finish the red bead, do the same procedure on the other side and the horns are ready.
TERCER PASO:
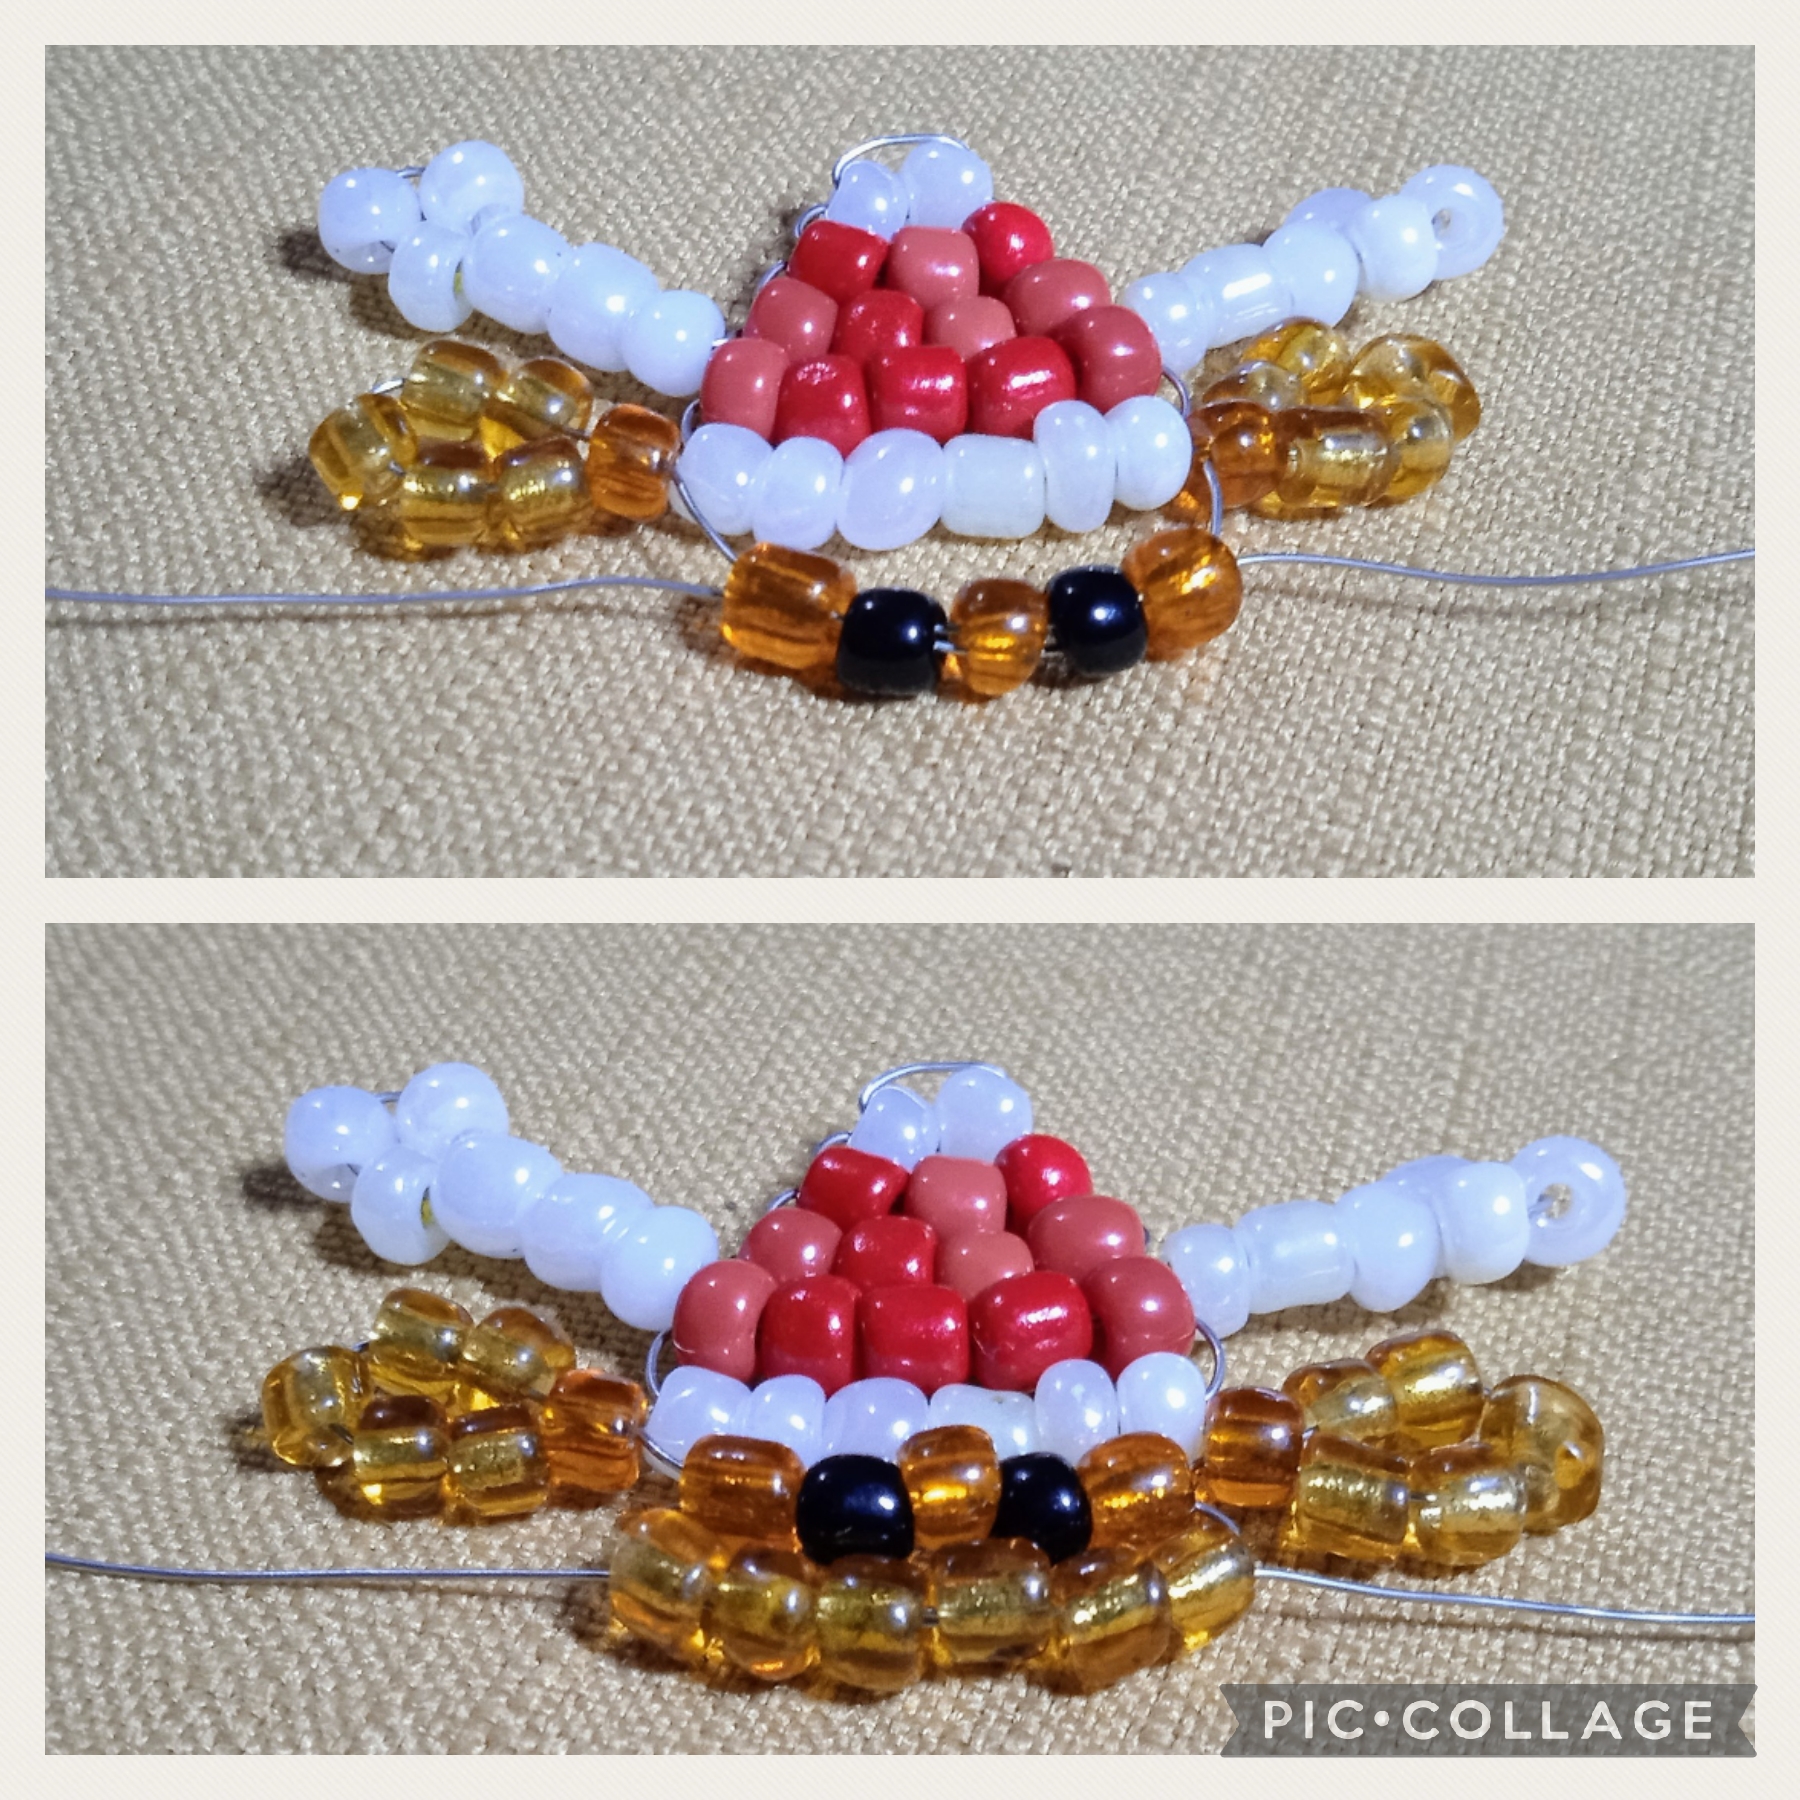
En este paso inserto por una punta cinco mostacillas rojas y las cruzo con la otra punta, luego hago una línea de seis mostacillas blancas perladas y paso a formar las orejas, también las hago con hebras separadas en una punta inserto seis chaquiras doradas y luego inserto la hebra por la última mostacilla y halo la punta hacia la cabeza, hago lo mismo del otro lado y paso a realizar los ojos en una punta coloco mostacilla dorada, mostacilla negra, mostacilla dorada, mostacilla negra.
THIRD STEP:
In this step I insert five red beads at one end and cross them with the other end, then I make a line of six pearly white beads and go on to form the ears, I also make them with separate strands at one end I insert six golden beads and then insert the strand through the last bead and I pull the tip towards the head, I do the same on the other side and I proceed to make the eyes on one end I place gold bead, black bead, gold bead, black bead.
CUARTO PASO:
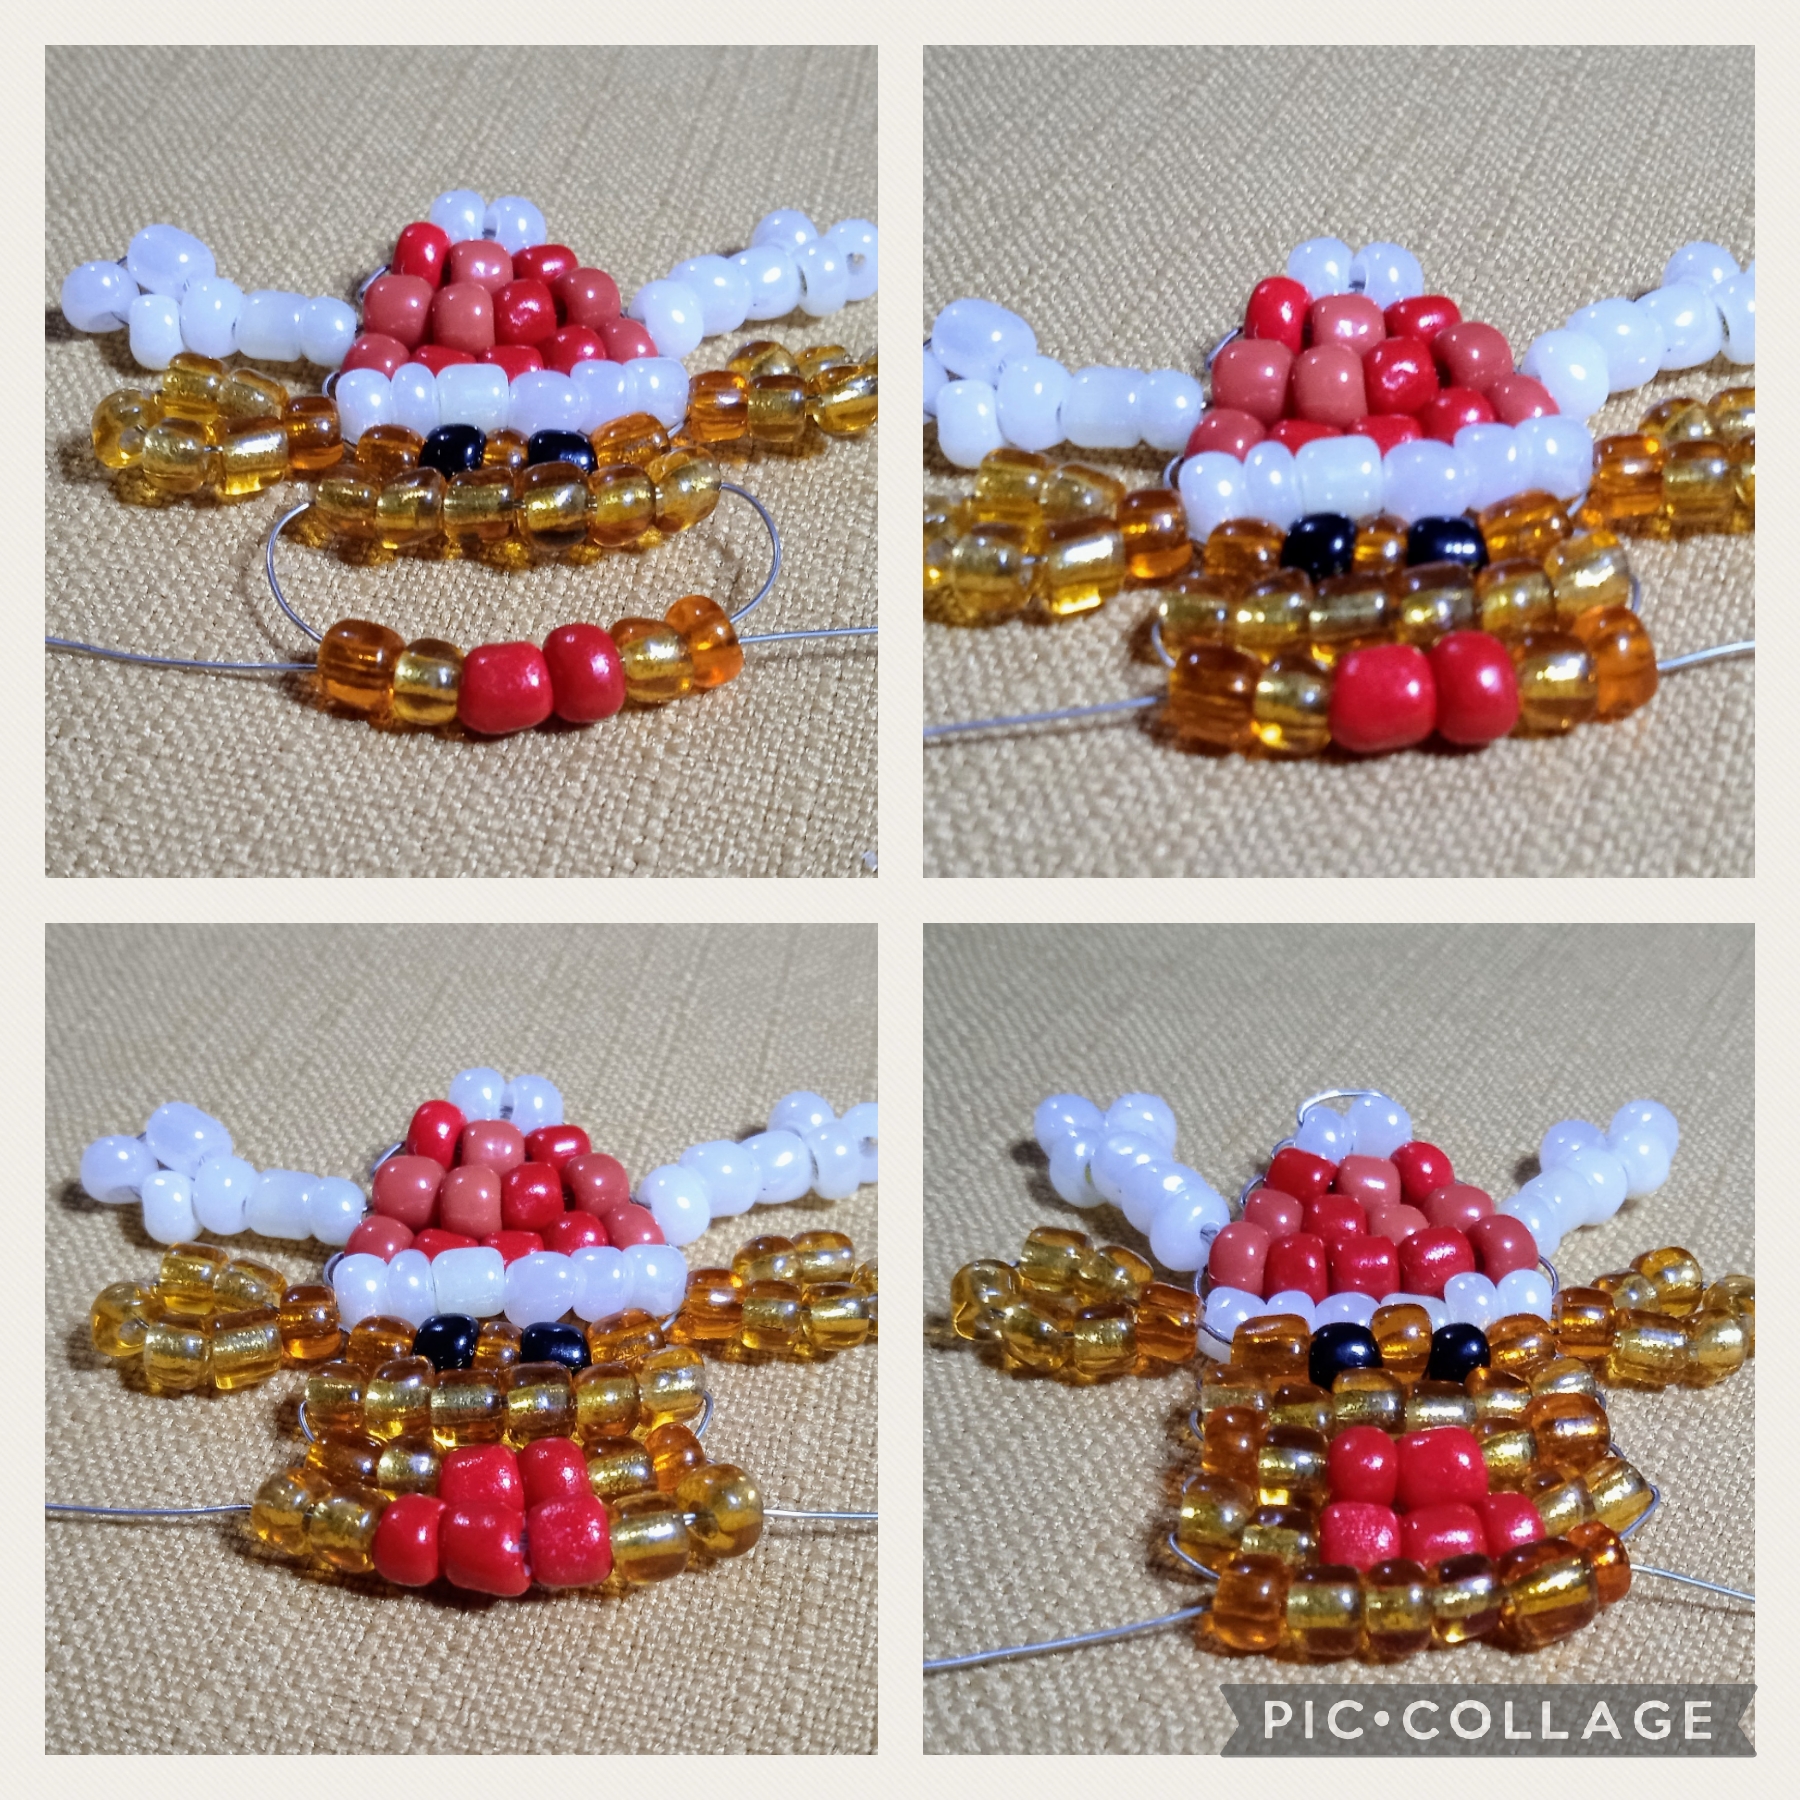
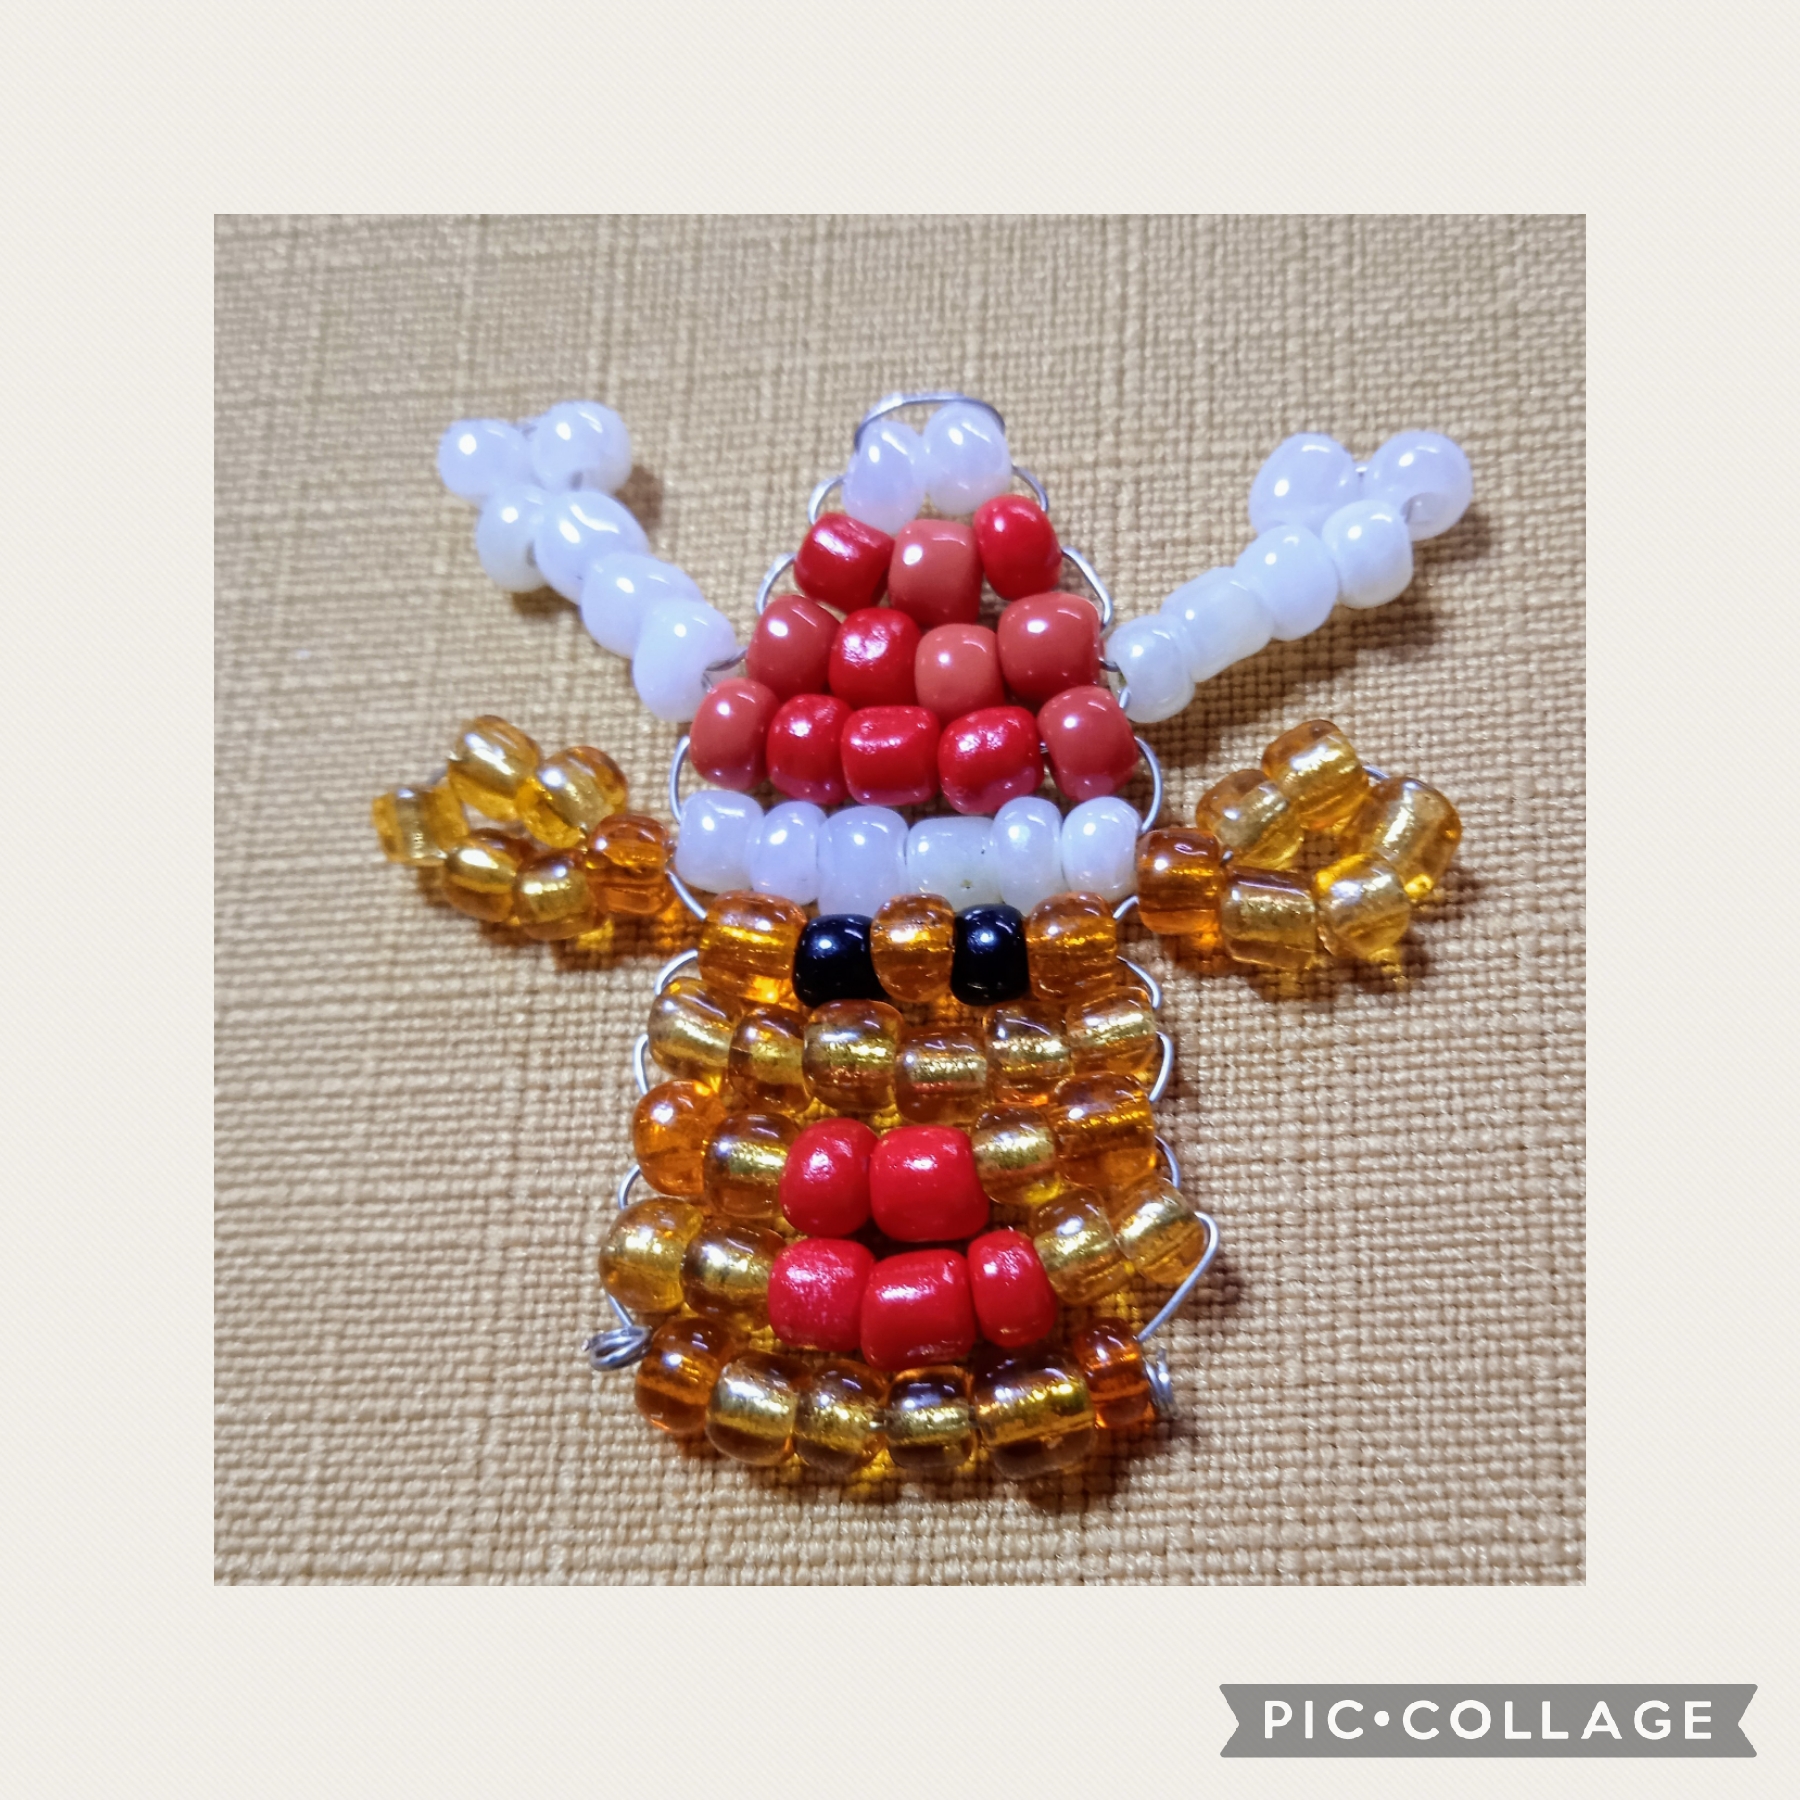
En este paso voy a elaborar el cuerpo, después de insertar seis mostacillas doradas y cruzarlas; inserto en una punta dos mostacillas doradas, dos mostacillas rojas, dos mostacillas doradas, las cruzo con la otra punta, hago otra línea de dos mostacillas doradas, tres rojas, dos doradas, para finalizar el Reno hago una última línea de seis mostacillas doradas las cruzo y con la pinza punta redonda hago un pequeño espiral en forma de argolla, lo aplanó con la pinza punta plana y corto el excedente para finalizar.
FOURTH STEP:
In this step I am going to make the body, after inserting six golden beads and crossing them; I insert two gold beads, two red beads, two gold beads into one end, I cross them with the other end, I make another line of two gold beads, three red, two gold, to finish the Reindeer I make a last line of six gold beads. I cross it and with the round tip pliers I make a small spiral in the shape of a ring, I flatten it with the flat tip pliers and cut off the excess to finish.
QUINTO PASO:
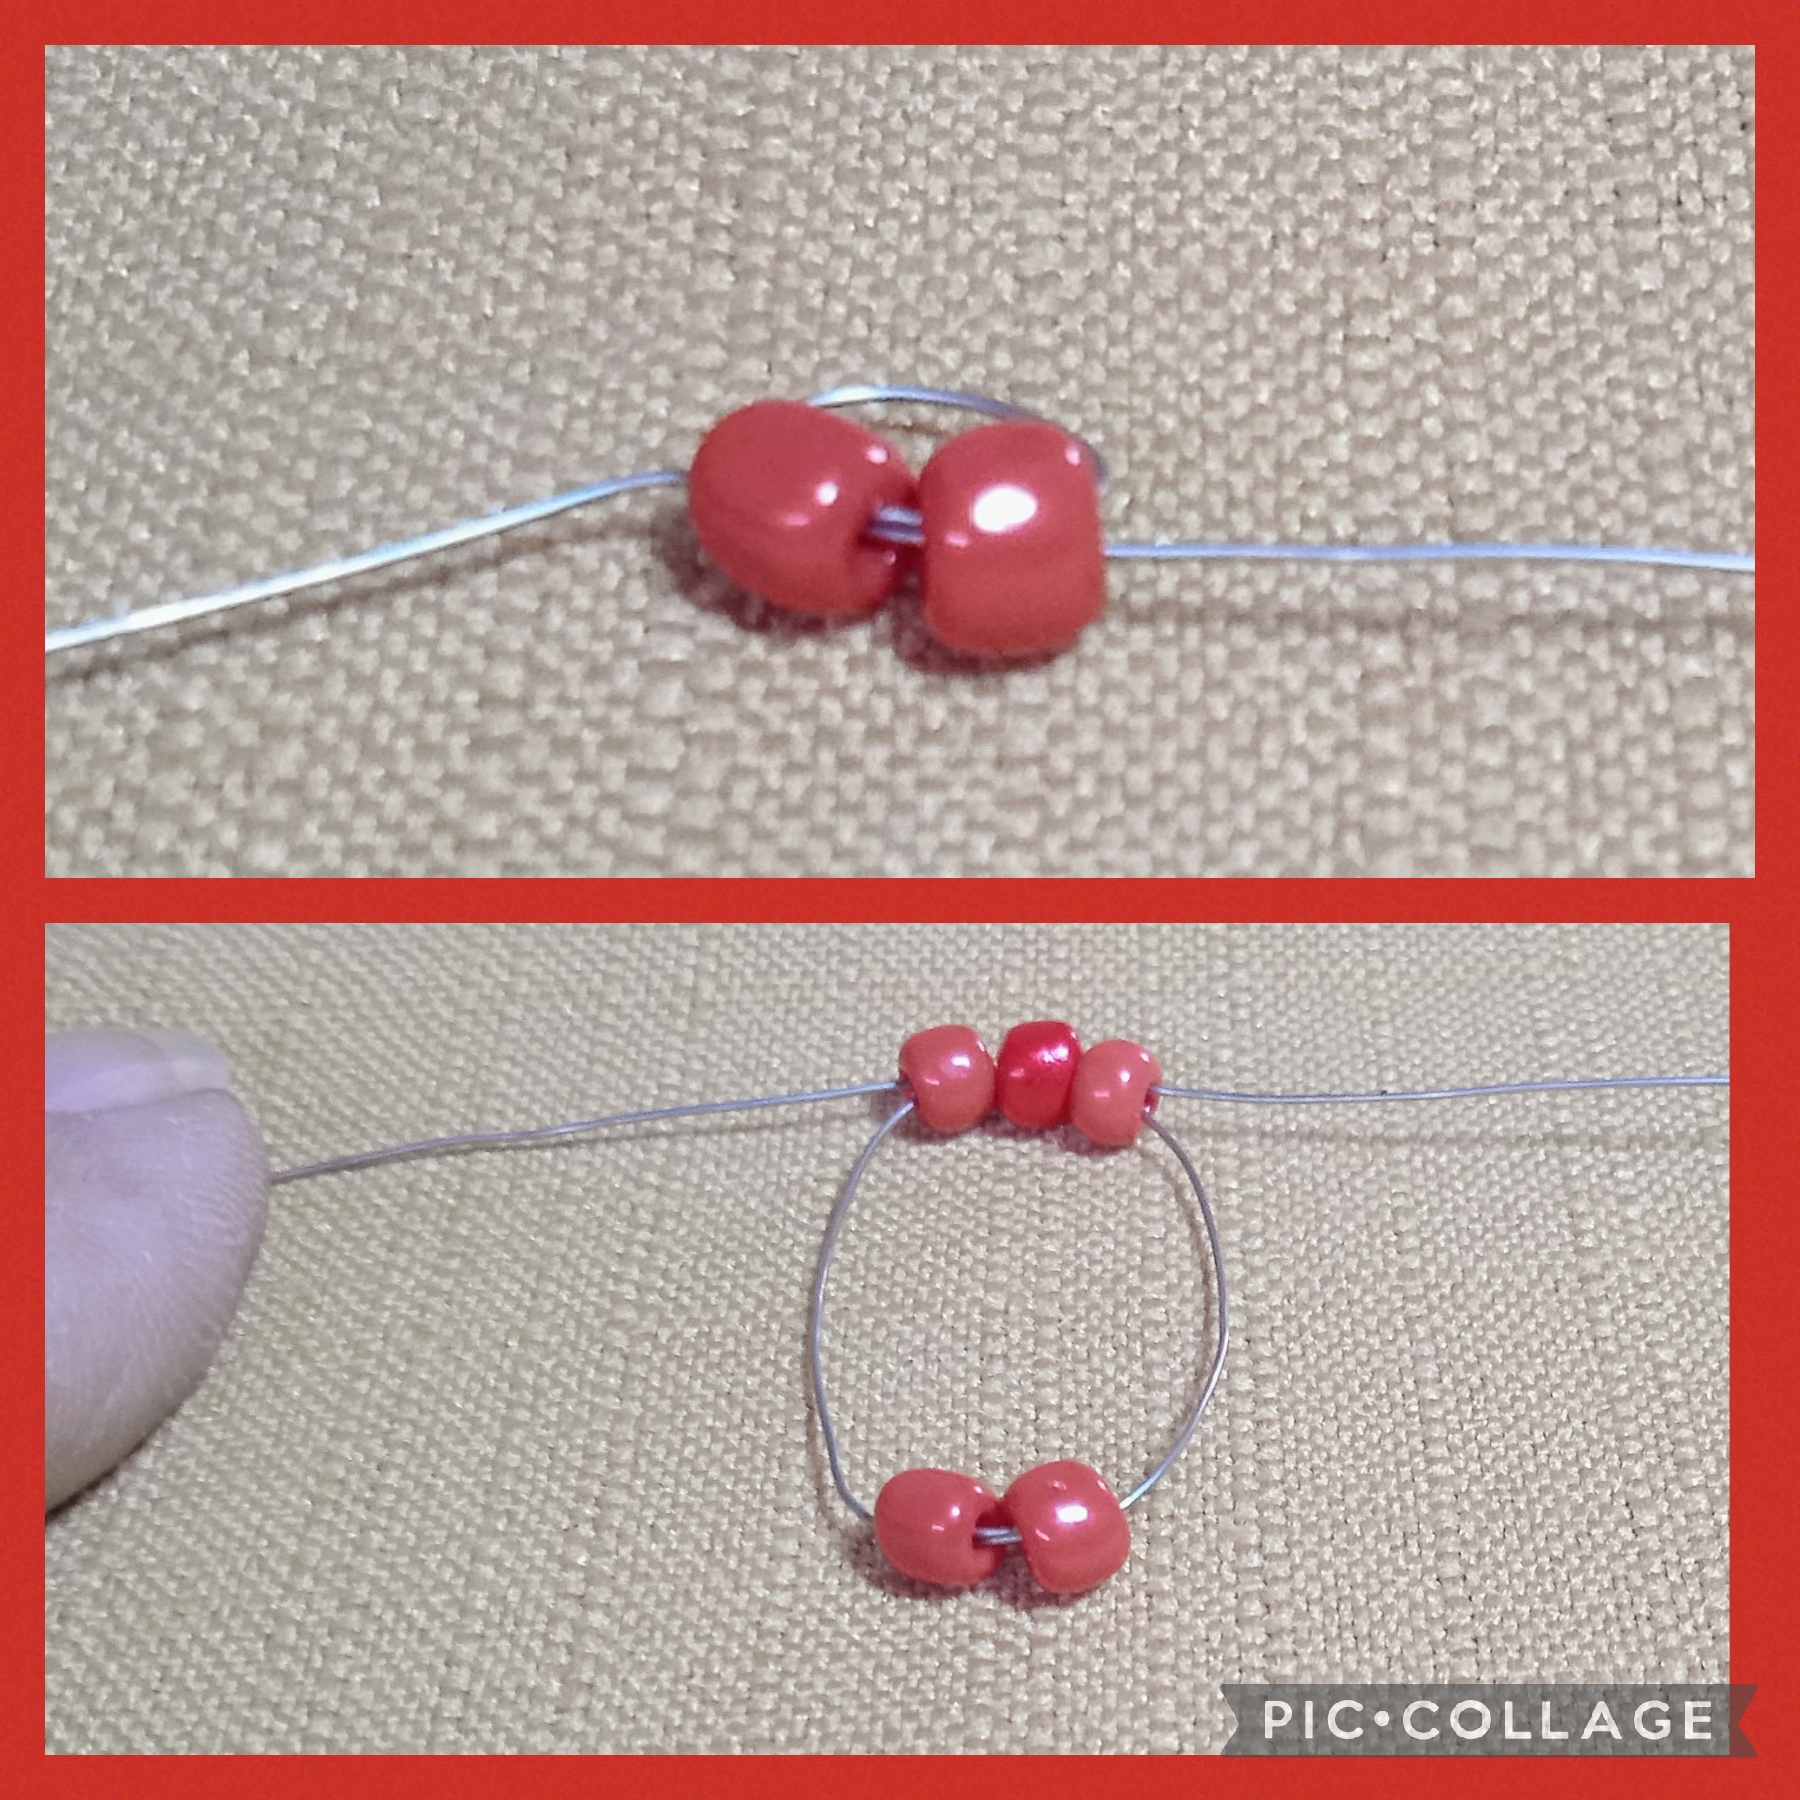
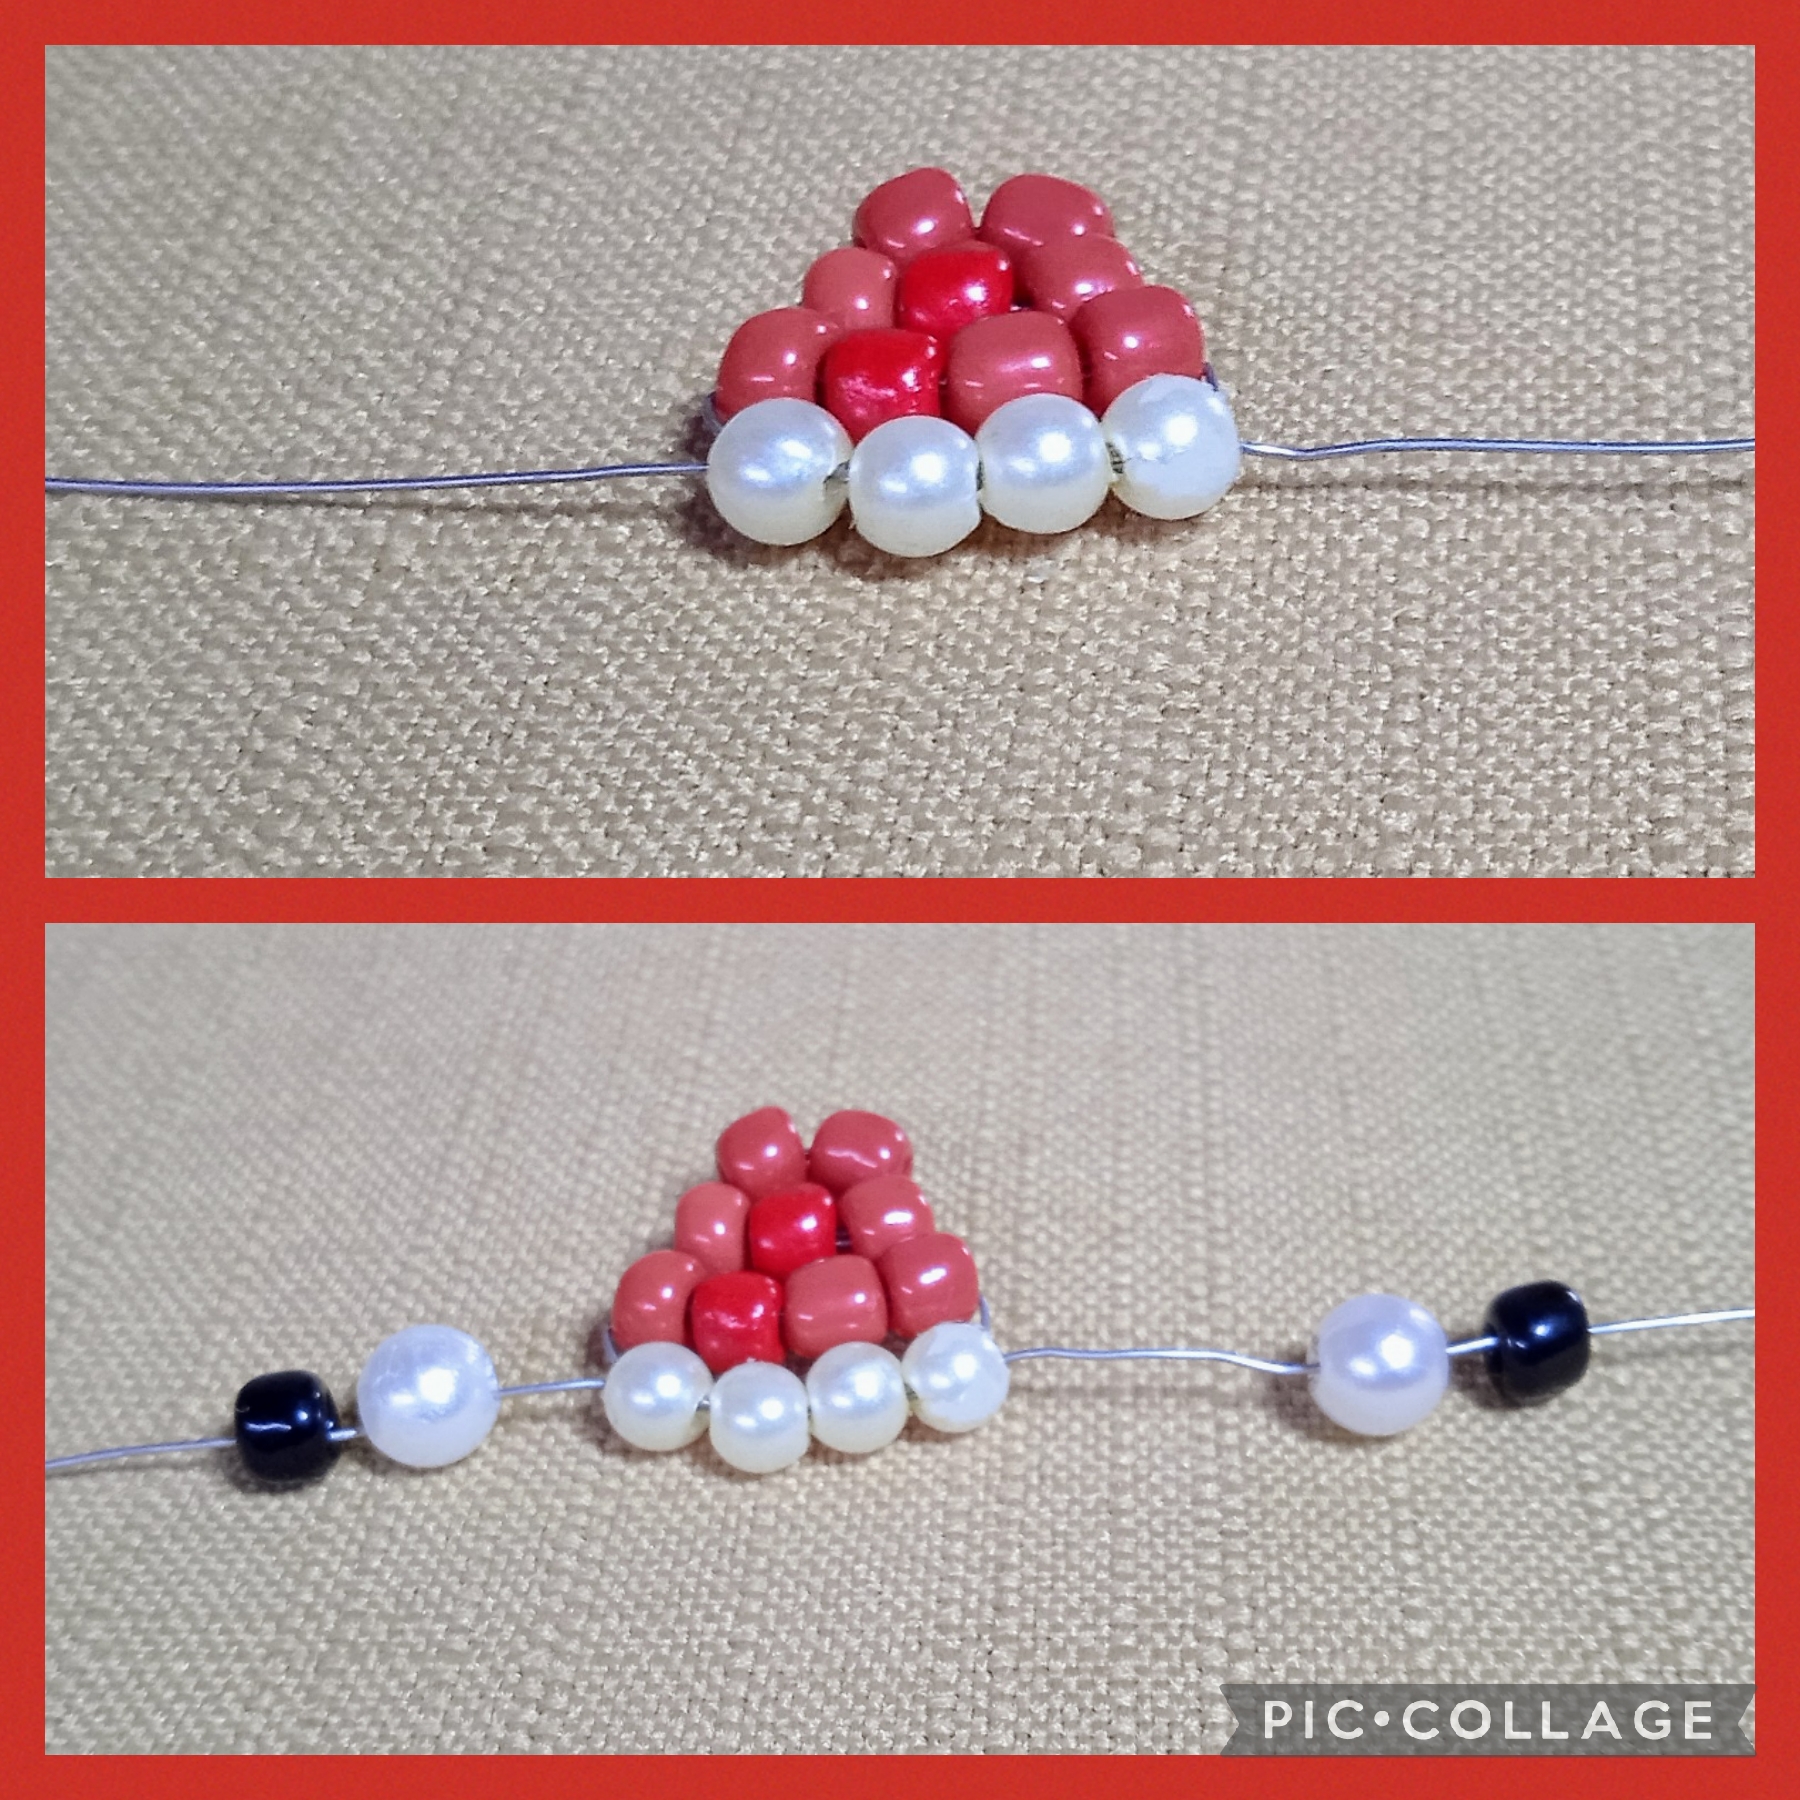
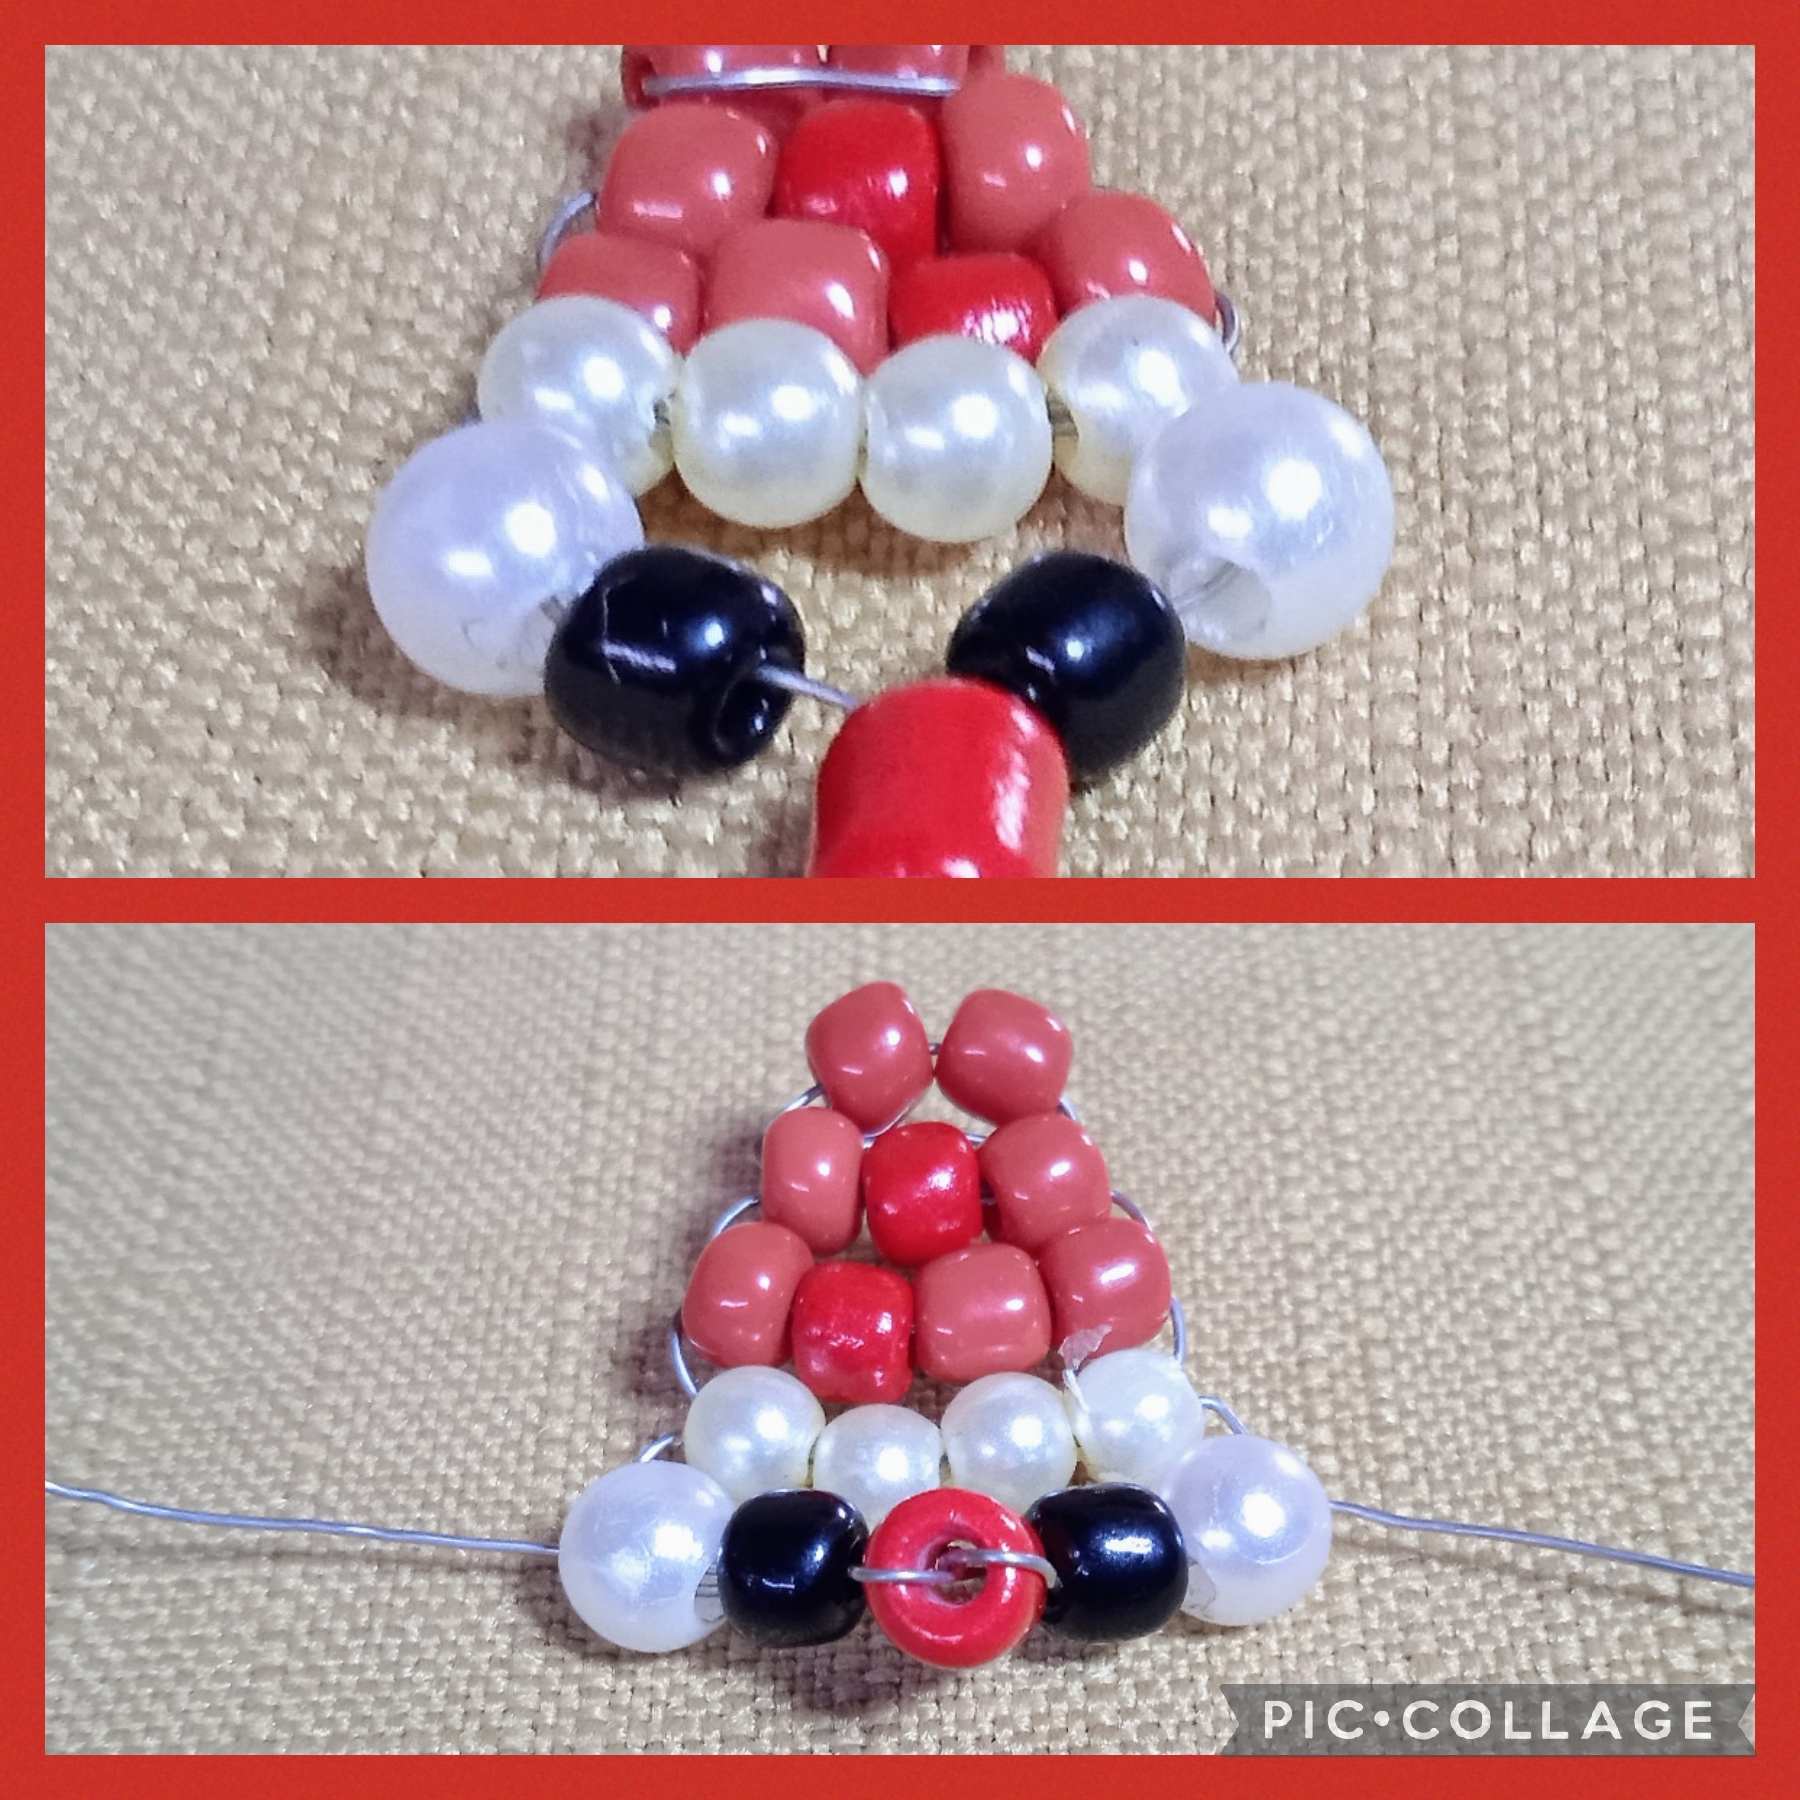
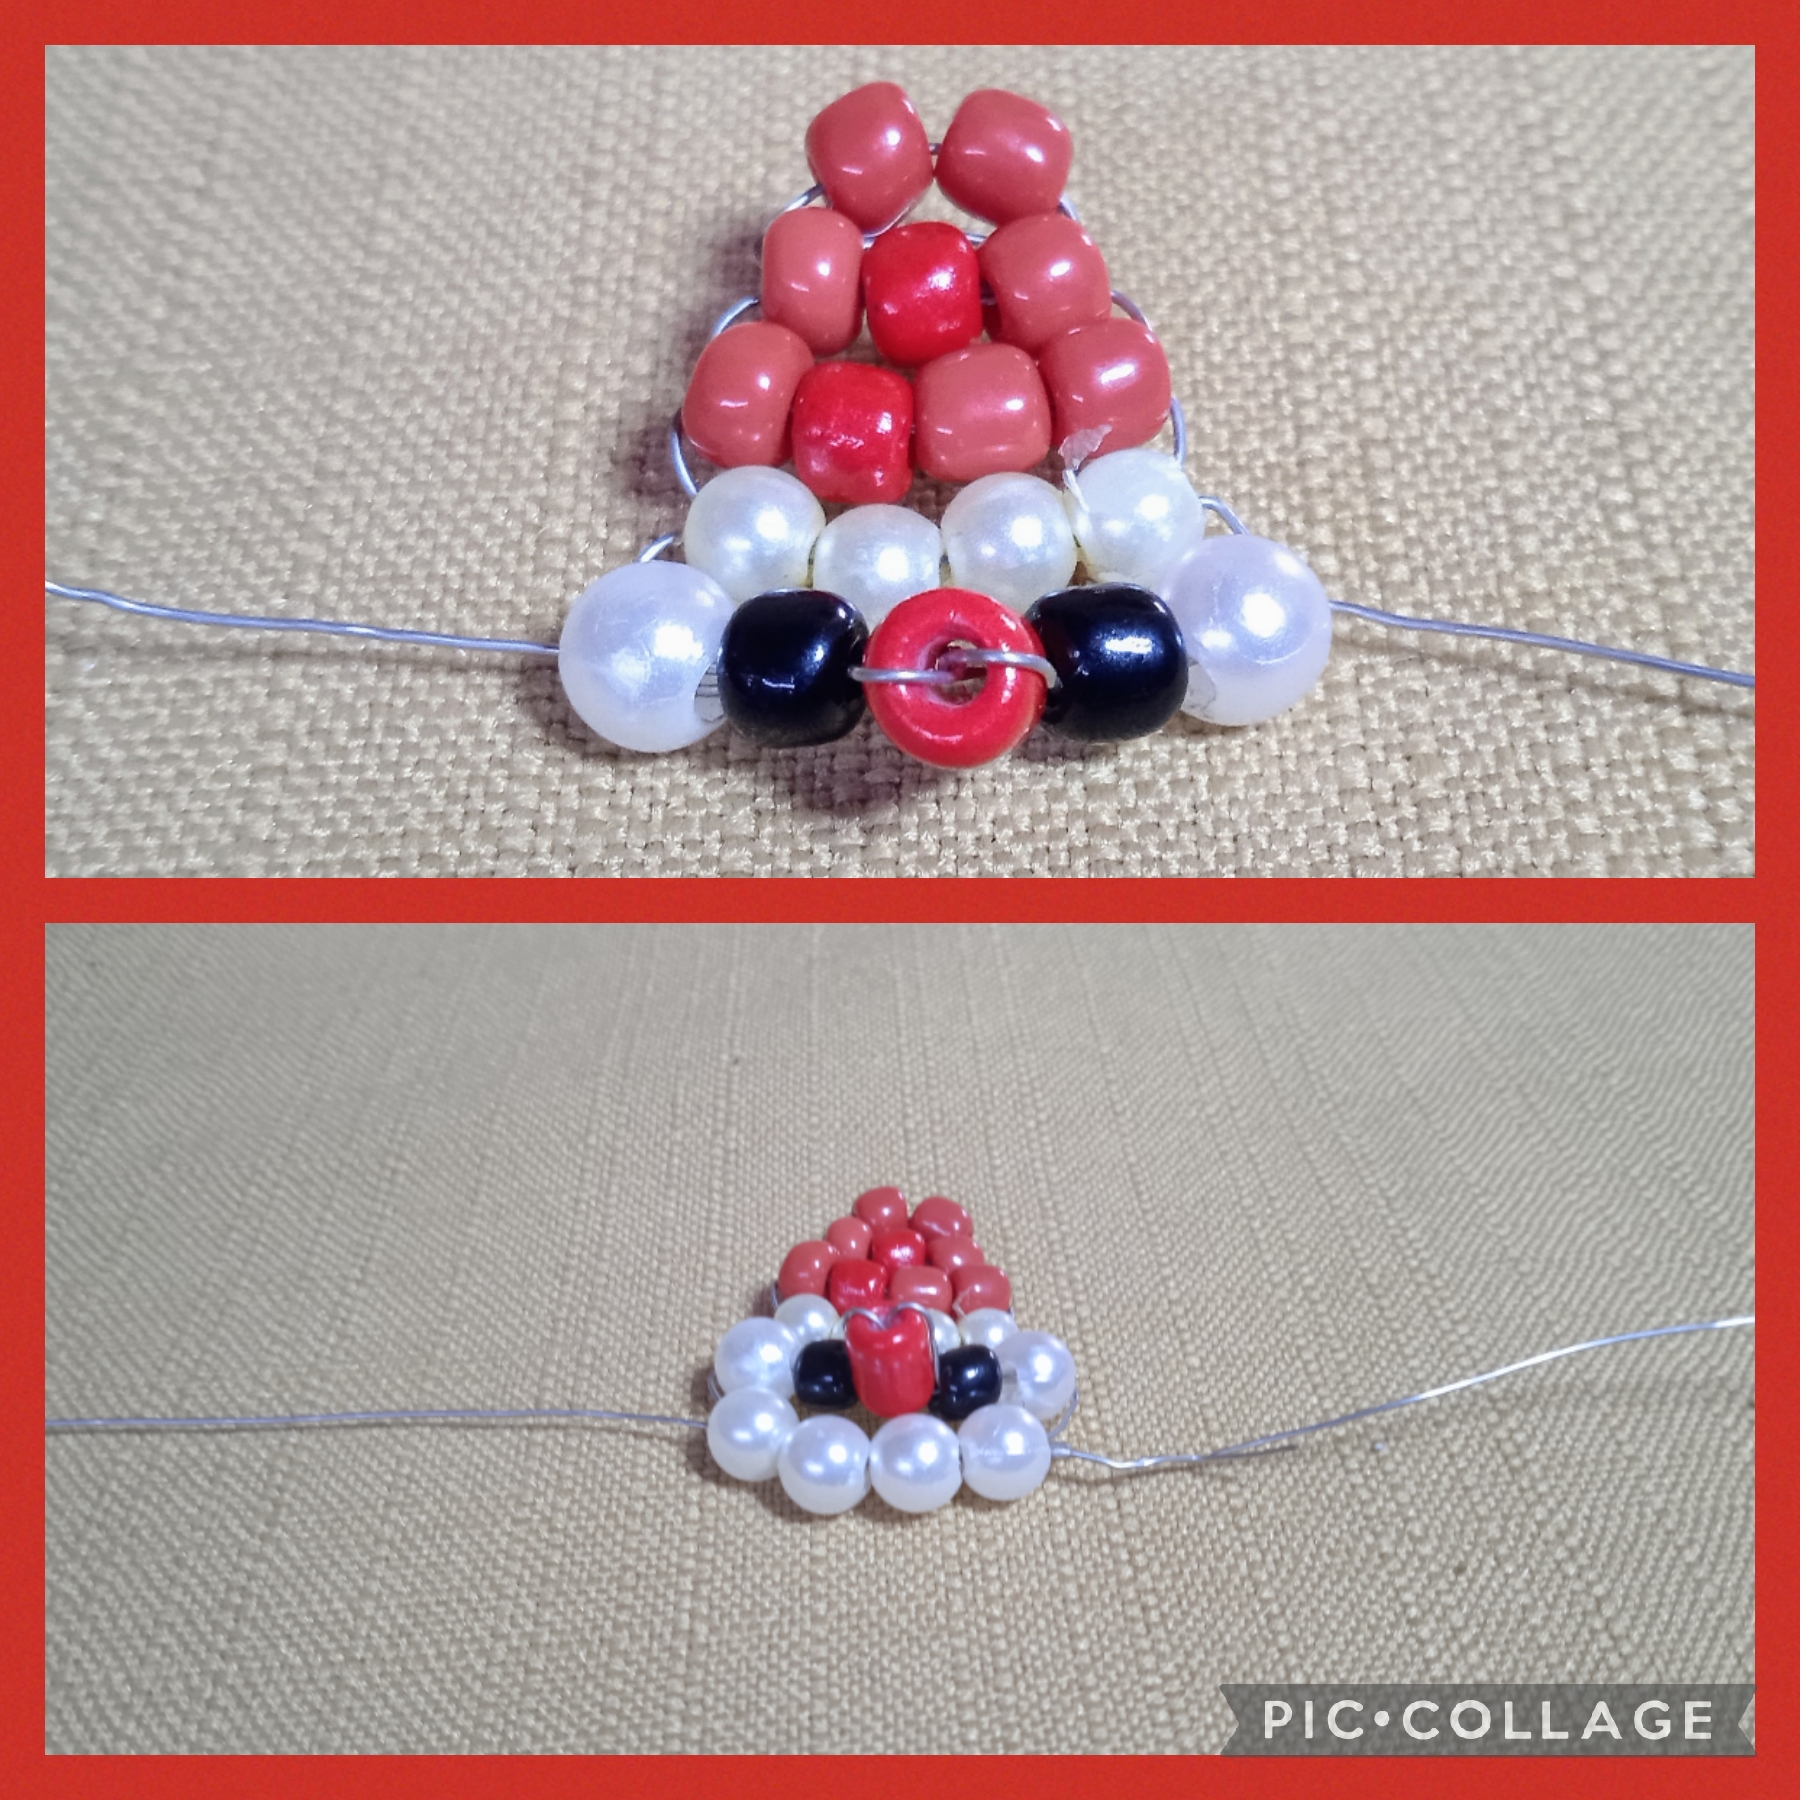
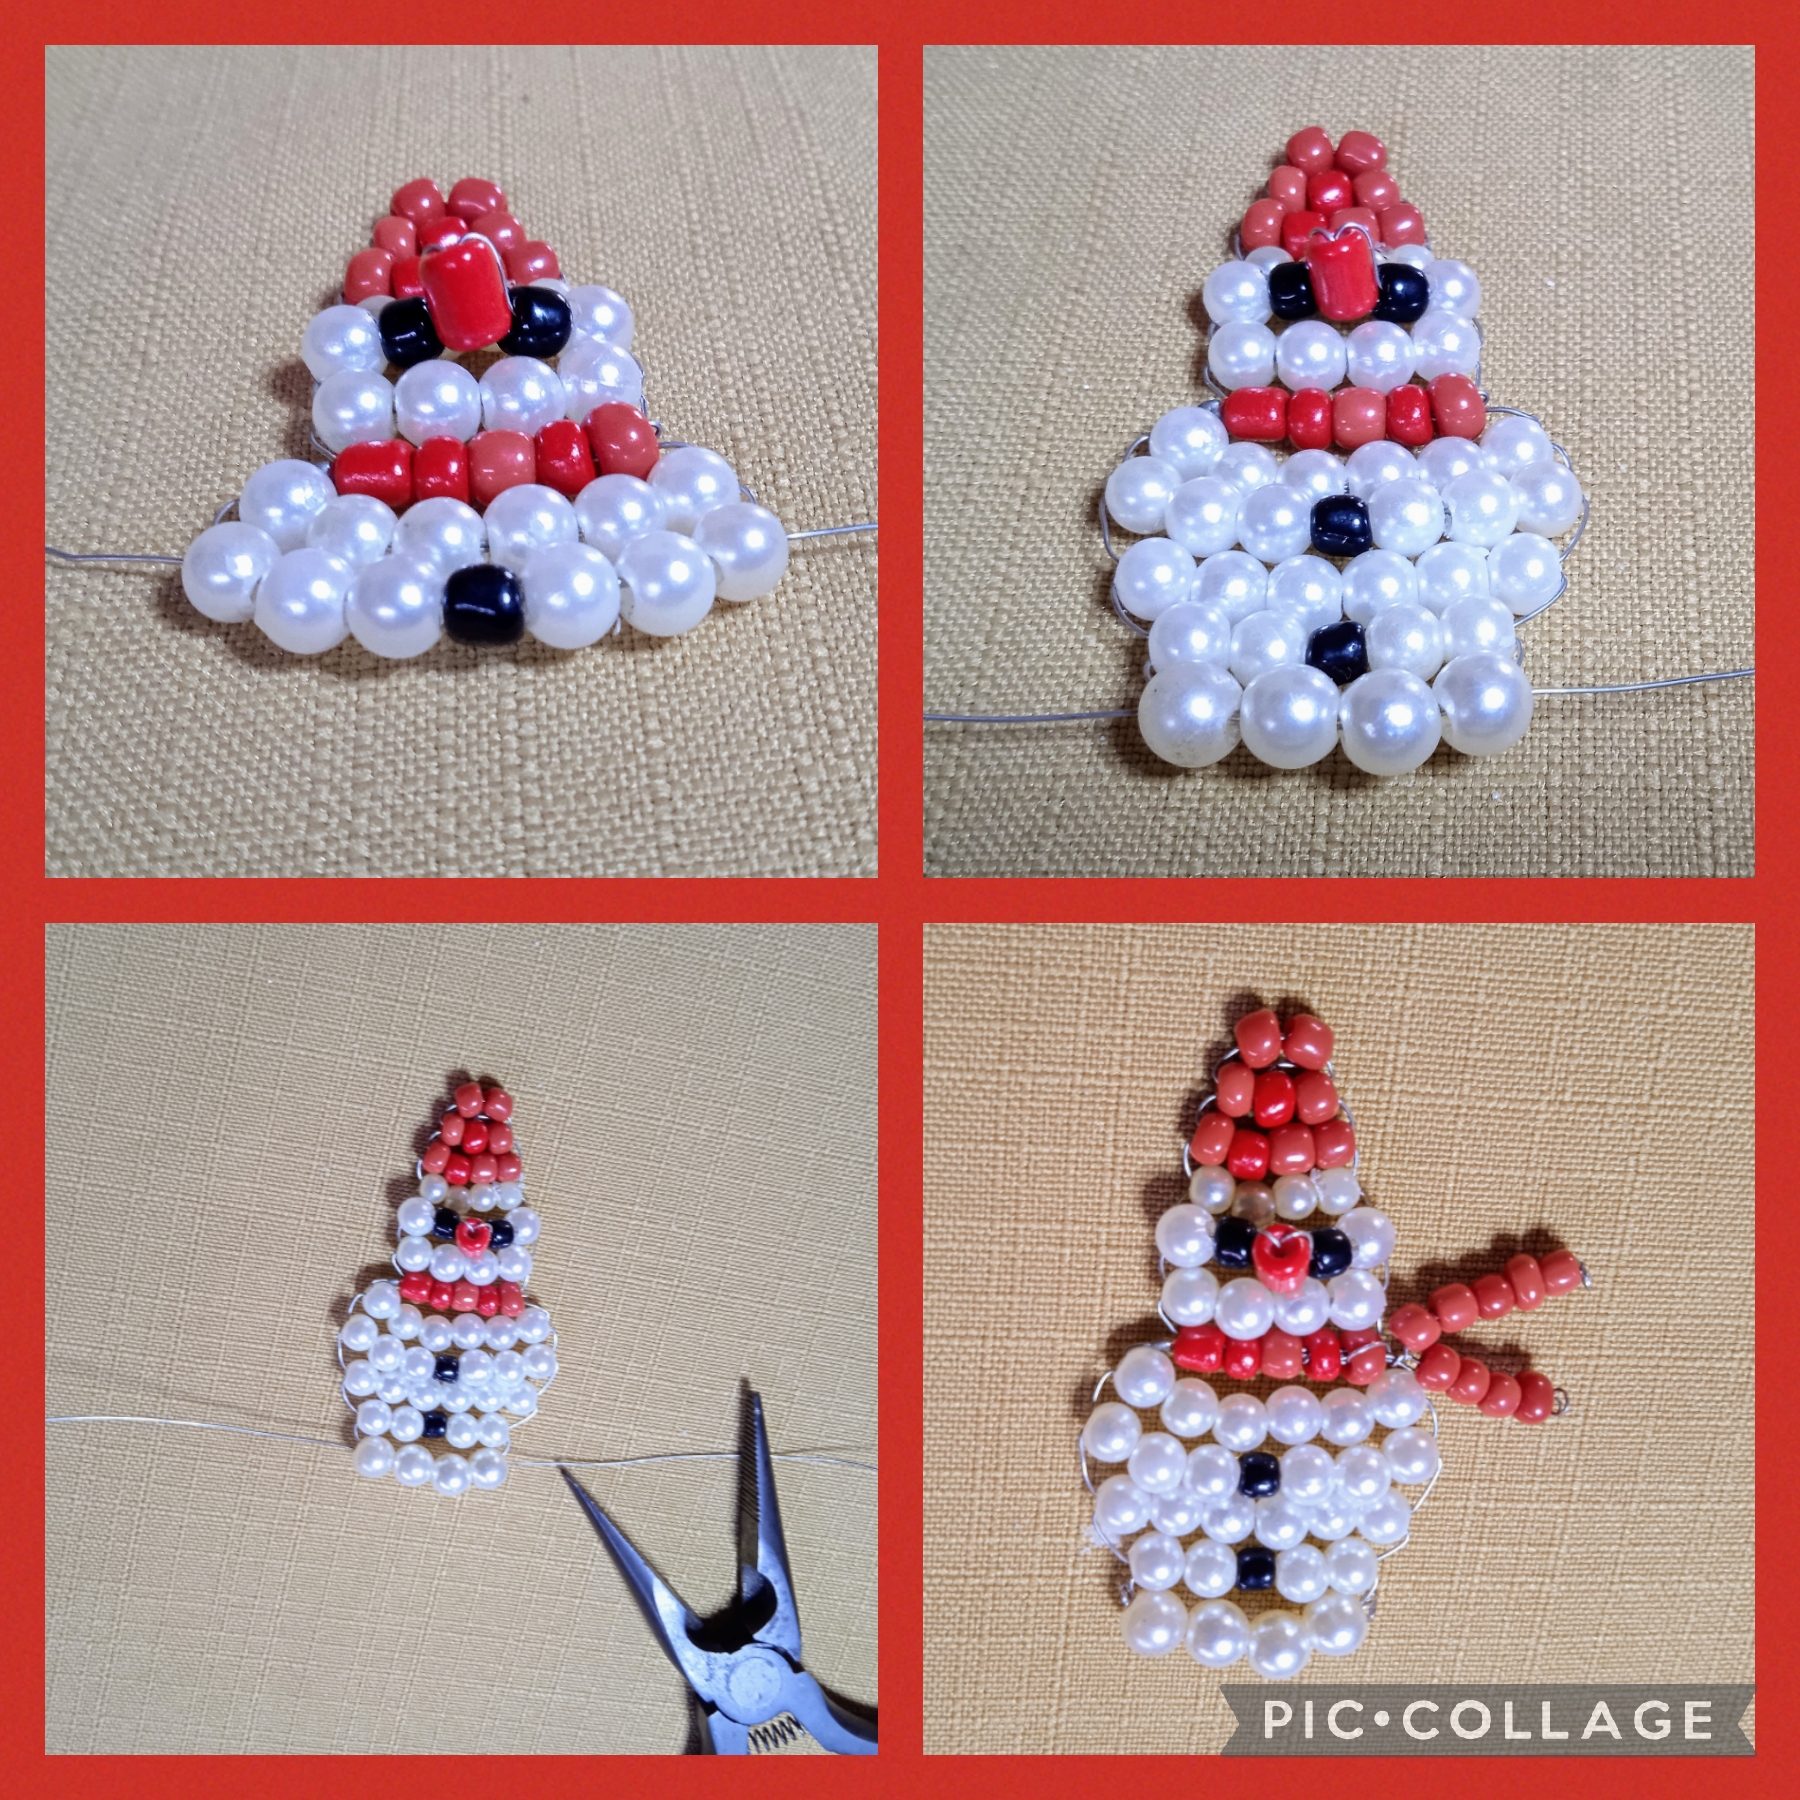
En este paso voy a elaborar un muñeco de nieve, usando la técnica que realicé para hacer el Reno, lo voy hacer con perlas número cuatro, número seis y mostacillas.
Aquí corto un hilo de alpaca de sesenta centímetros inserto dos mostacillas rojas en una punta y las cruzo con la otra punta, así hago una vuelta de tres y una de cuatro mostacillas rojas. Paso hacer una vuelta de cuatro perlas blancas número cuatro para empezar a formar la cara. Voy a poner los ojos y lo hago en hilos separados inserto una perla número seis una mostacilla negra en un hilo y hago lo mismo en el otro hilo, ahora uno los hilos, inserto una mostacilla roja cilíndrica para formar la nariz, abro de nuevo los hilos y los paso separados por la mostacilla negra y la perla, de nuevo tengo dos hilos en una punta inserto cuatro perlas número seis y ya formé la cara.
FIFTH STEP:
In this step I am going to make a snowman, using the technique that I did to make the Reindeer, I am going to make it with number four, number six and beads.
Here I cut a sixty centimeter alpaca thread, insert two red beads into one end and cross them with the other end, thus making a loop of three and one of four red beads. Step make a round of four number four white beads to start forming the face. I'm going to put the eyes and I do it on separate threads, I insert a number six bead, a black bead on one thread and I do the same on the other thread, now I join the threads, I insert a cylindrical red bead to form the nose, I open the eyes again. threads and I pass them separately through the black bead and the pearl, again I have two threads at one end, I insert four number six pearls and I already formed the face.
SEXTO PASO:
En este paso voy a formar el cuerpo inserto cinco mostacillas rojas para elaborar la bufanda y las cruzo en la siguiente vuelta inserto seis perlas número seis y las cruzo, en la próxima vuelta inserto tres perlas blancas una mostacilla negra tres perlas blancas, en la siguiente vuelta seis perlas blancas y las cruzo; para terminar inserto dos perlas blancas una mostacilla negra dos perlas blancas, en la última vuelta inserto cuatro perlas número ocho, las cruzo y uso la pinza para rematar con dos anillos triples que aplanó con la pinza plana.
En las cinco mostacillas rojas del cuello inserto en la primera mostacilla un alambre de doce centímetros de lado a lado, en una punta inserto cinco mostacillas rojas y en la otra cuatro mostacillas rojas, remato en cada punta con un anillo triple aplanó, corto el excedente y así termino el muñeco de nieve.
SIXTH STEP:
In this step I am going to form the body, I insert five red beads to make the scarf and I cross them, in the next round I insert six number six beads and cross them, in the next round I insert three white beads, one black bead, three white pearls, in the next one I turned six white pearls and crossed them; To finish I insert two white pearls, a black bead, two white pearls, on the last round I insert four number eight pearls, I cross them and use the clamp to finish with two triple rings that I flattened with the flat clamp.
In the five red beads of the neck I insert a wire measuring twelve centimeters from side to side in the first bead, at one end I insert five red beads and in the other four red beads, I finish off each end with a flattened triple ring, I cut off the excess and that's how the snowman ended.
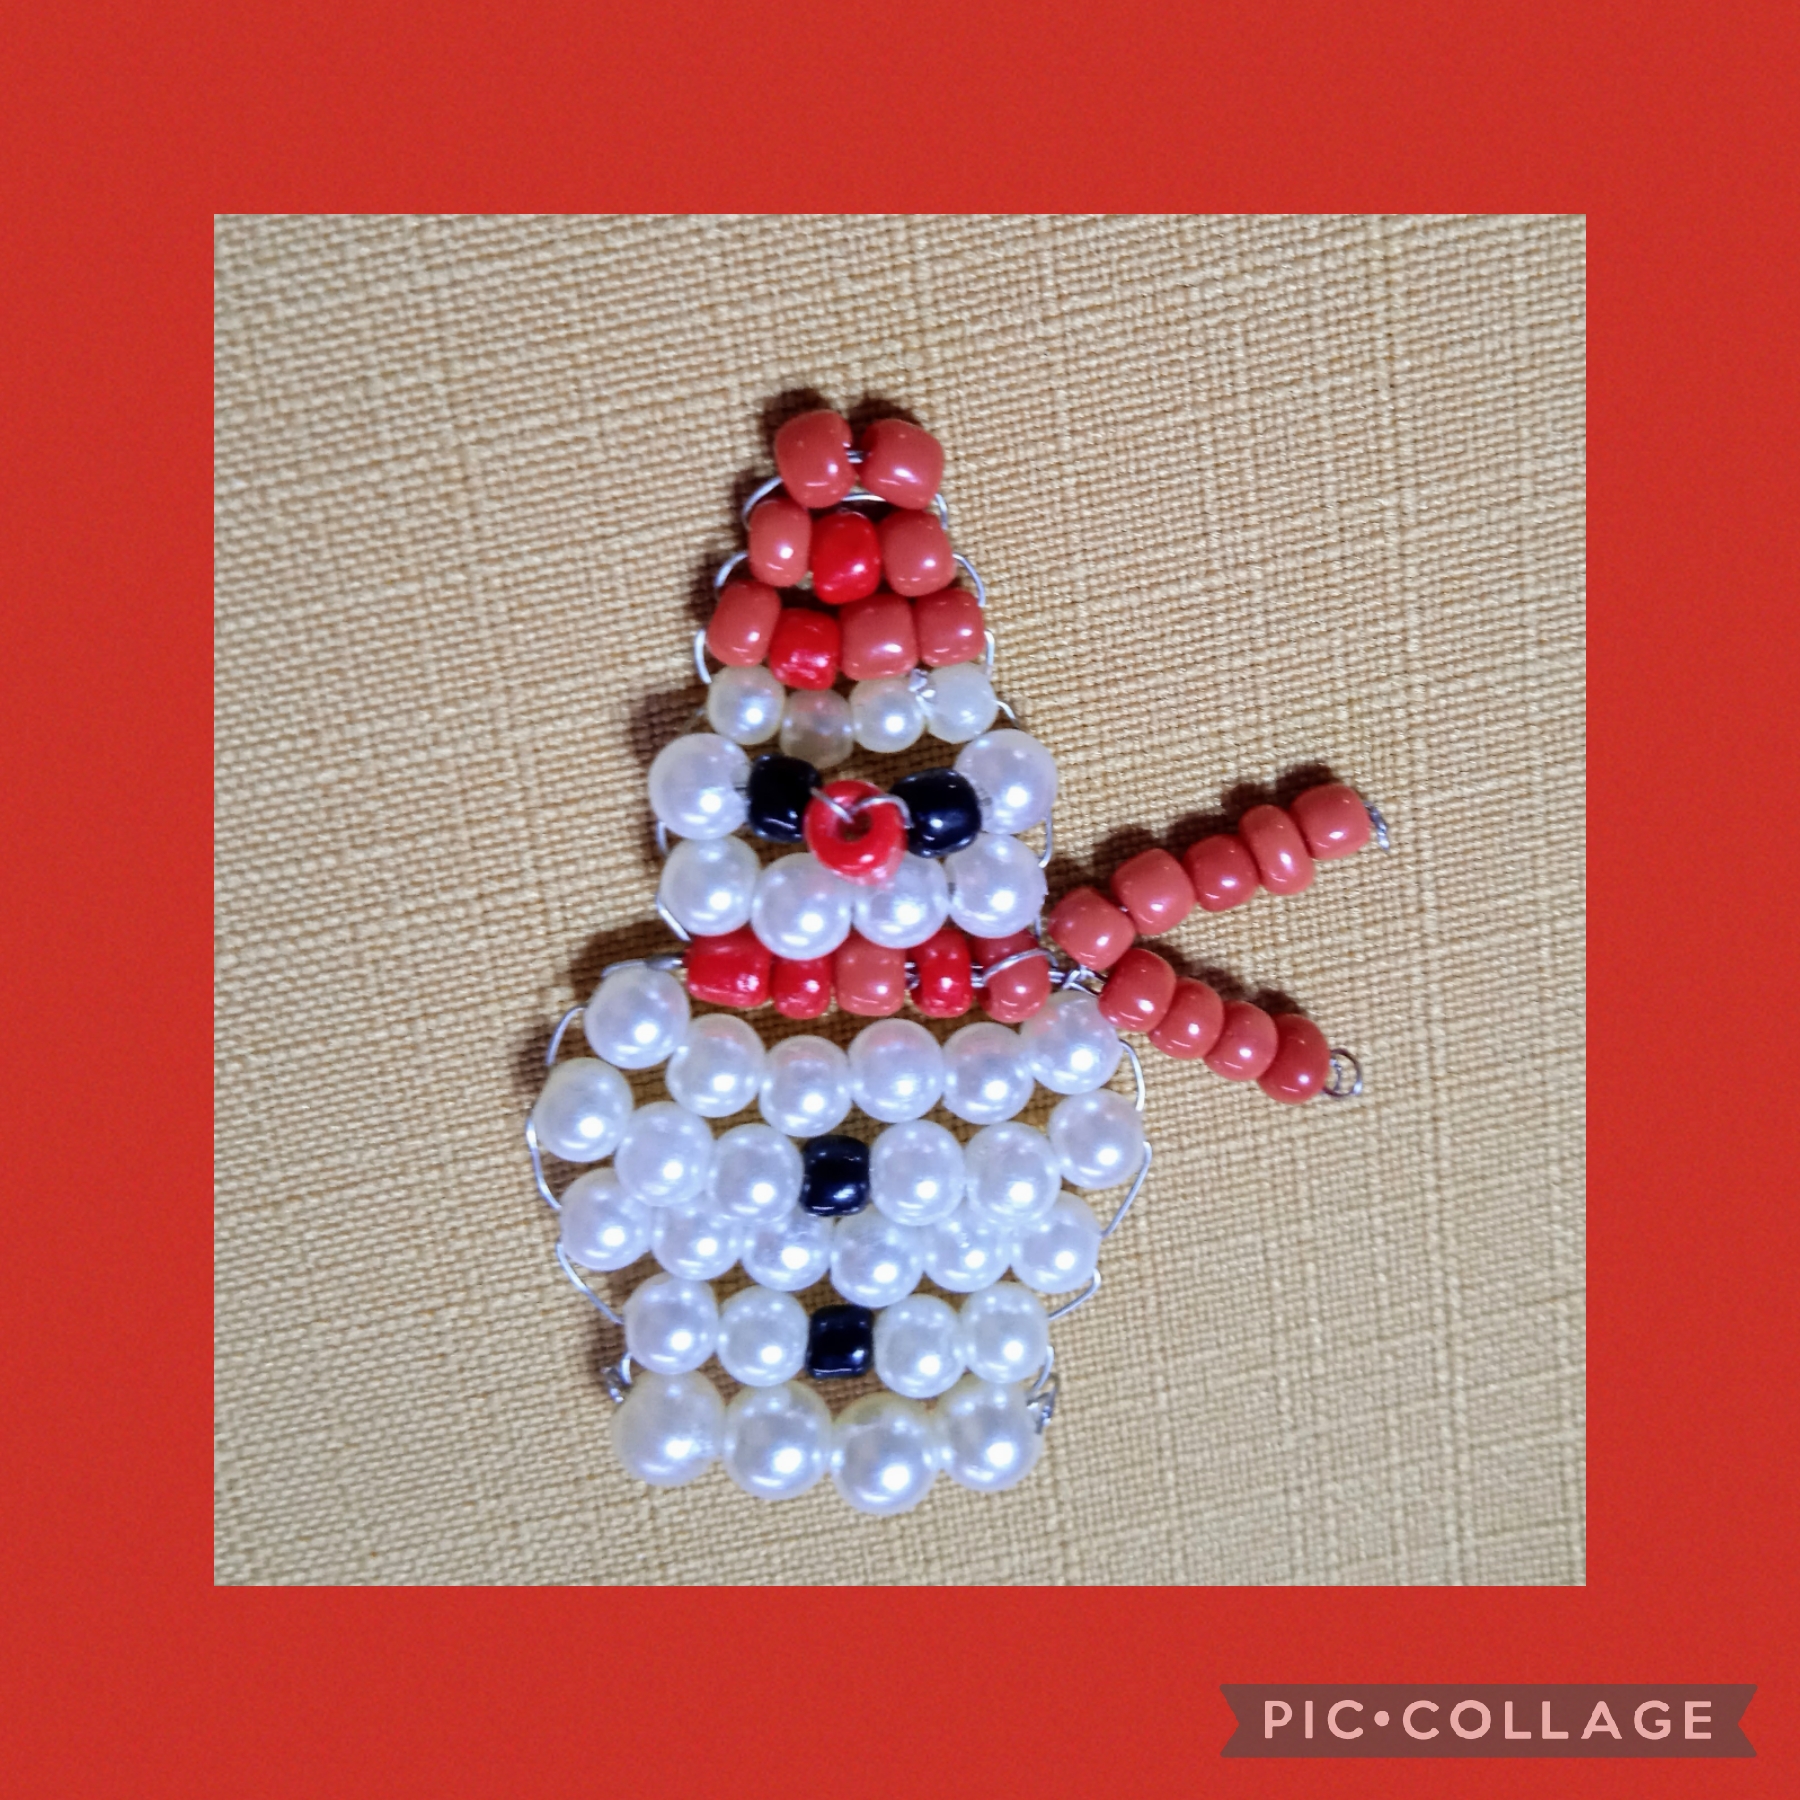
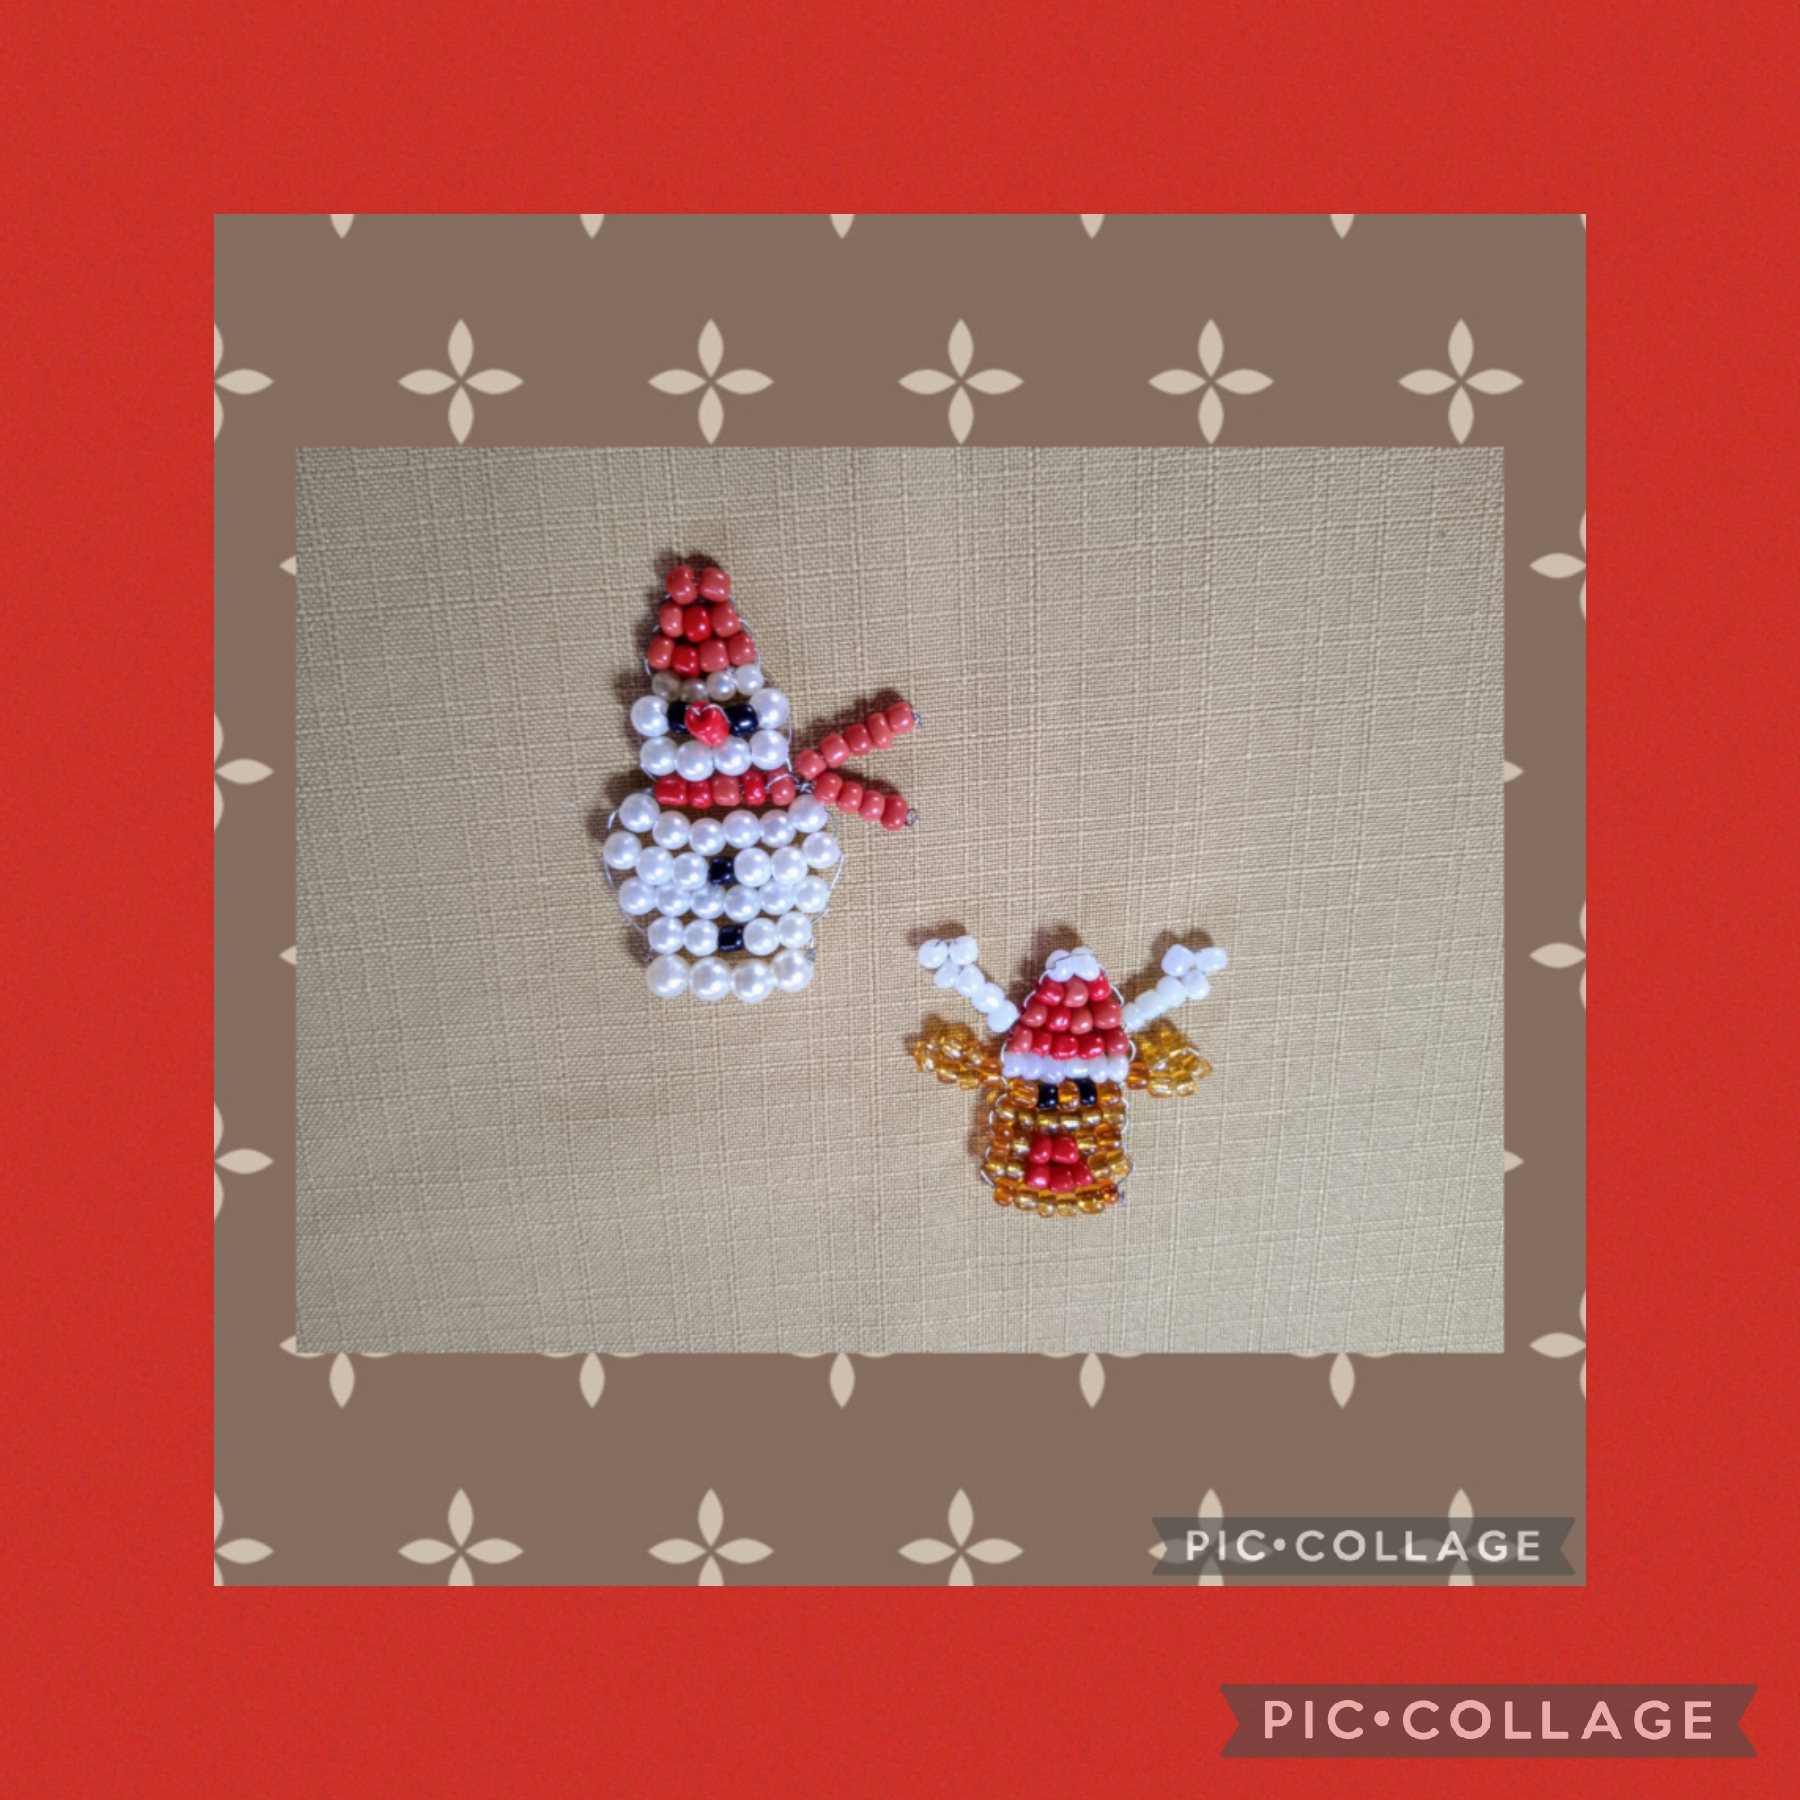
Artesanos Creadores del arte y las manualidades, este es el resultado final de mi proyecto creativo de hoy espero que les gusten y me apoyen con sus valiosos comentarios, gracias por leer y ver mis publicaciones, nos vemos en la próxima manualidad, bye bye.
Artisans Creators of art and crafts, this is the final result of my creative project today, I hope you like them and support me with your valuable comments, thank you for reading and watching my publications, see you in the next craft, bye bye.

Las imágenes y redacción de este tutorial son de mi propiedad, las fotos fueron tomadas con mi teléfono celular redmi 9 y las edité con una aplicación gratis del mismo.
Para traducir texto use Google traductor.
The images and writing in this tutorial are my property, the photos were taken with my Redmi 9 cell phone and I edited them with a free application.
To translate text use Google translator.

Hermoso ame este trabajo el reno me cautivó. Saludos mami 😍
🥰🥰🥰
aha the craft is beautiful thanks for sharing the detailed steps.
I love those comments, they flatter me, thank you Diyhub.//
Wow que bonito y elaborado trabajo 😍 me encanto el muñequito de nieve, se ve super tierno ❤️ lo haces ver tan facil pero estoy segura que a mi me saldria un muñeco de nieve diabolico jajaja
A casi nada de que finalice el año, me encanta ver estas cositas navideñas por todas partes ❤️ te quedaron hermosos ambos.
Si es muy fácil hacer este tipo trabajos, me gusta realizarlos sin aguja para simplificar el proceso, haz tu muñeco de nieve te va a quedar precioso! Gracias por la visita @elbuhito 🤗
!discovery 38
This post was shared and voted inside the discord by the curators team of discovery-it
Join our Community and follow our Curation Trail
Discovery-it is also a Witness, vote for us here
Delegate to us for passive income. Check our 80% fee-back Program
Pero que bellos están estos imanes. Quiero llenar mi nevera con ellos 😊
Gracias por compartir este tutorial. Me lo llevo.
!VSC
@chacald.dcymt has sent VSC to @nhaydu
This post was rewarded with 0.1 VSC to support your work.
Join our photography communityVisual Shots
Check here to view or trade VSC Tokens
Be part of our Curation Trail
@chacald.dcymt ha enviado VSC a @nhaydu
Éste post fue recompensado con 0.1 VSC para apoyar tu trabajo.
Únete a nuestra comunidad de fotografía Visual Shots
Consulte aquí para ver o intercambiar VSC Tokens
Se parte de nuestro Trail de Curación
Sabes que están a tu orden, aproveché la fecha y tengo una colección, me contenté mucho con tu visita, saluditos 😘
Gracias 😊...los amé
Saludos amiga, muy originales estos adornitos para nuestros árboles, me encantó, bendiciones.
Halagador comentario @rosmyplacen gracias por visitarme. 🌹
Muy tiernos y bellos!
Gracias amiga, feliz día, 🌹