
Hola amigos de HiveDIY, yo sé que la temporada fuerte de promociones y graduaciones ya pasó 😢 pero la verdad no tuve chance de montar el post. De igual manera les comparto este paso a paso para realizar los divertidos y extravagantes birretes personalizados de graduación 🎓.
Hi friends of HiveDIY, I know that the strong season of promotions and graduations is over 😢 but I really didn't have the chance to put the post together. Anyway I share with you this step by step to make the fun and extravagant personalized graduation caps 🎓.

- Cartón suave o cartulina
- Foamy
- 10mt de lentejuelas
- 2mt de Marabú (el peludito)
- Pega
- Silicón Caliente
- 1mt de cinta gruesa
- 1mt de cinta fina
- Soft cardboard or cardboard
- Foamy
- 10mt of sequins
- 2mt of Marabu (the furry one)
- Glue
- Hot Silicone
- 1mt of thick ribbon
- 1mt of thin ribbon
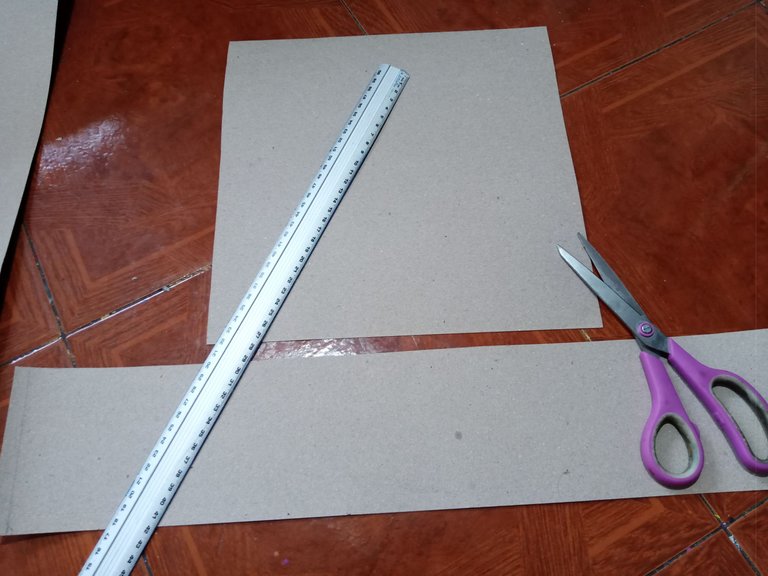
Recortamos dos formas en cartón
- Un rectángulo de 10cm de alto por aproximadamente 58cm de largo.
- Un cuadrado de 30x30cm o también dependiendo de la edad de la persona un par de centímetros menos, es decir, para un niño de preescolar este cuadrado puede ser de unos 27x27cm
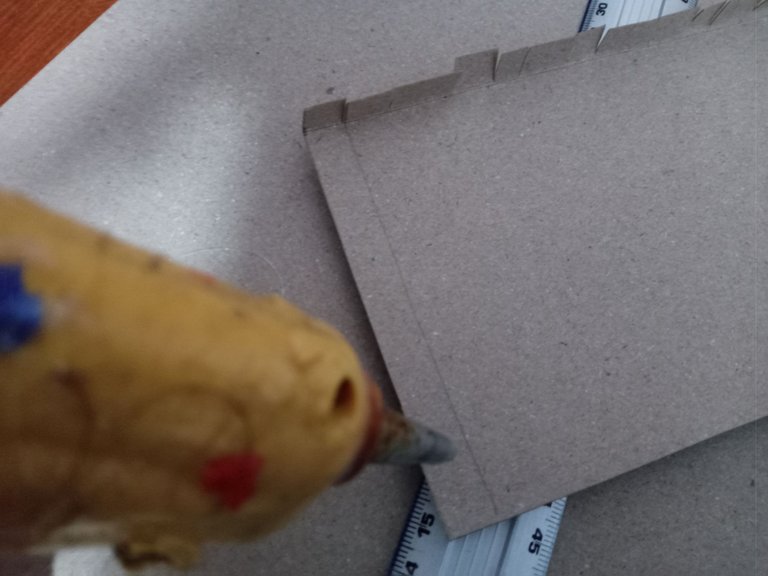
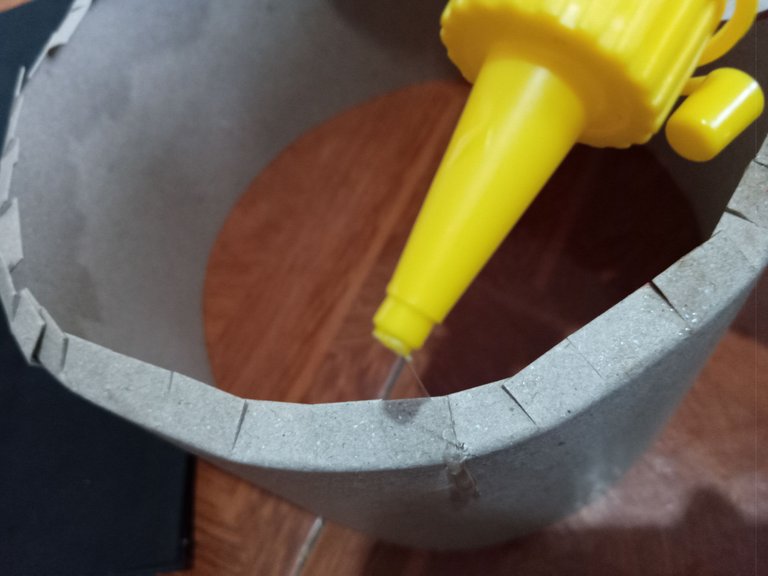
A la forma rectangular le vamos a recortar por la parte superior pestañas de 1cm y las doblamos hacía adentro.
We cut out two shapes in cardboard
- A rectangle of 10cm high by approximately 58cm long.
- A square of 30x30cm or also depending on the age of the person a couple of centimeters less, that is, for a preschooler this square can be about 27x27cm.

To the rectangular shape we will cut out tabs of 1cm at the top and fold them inwards.
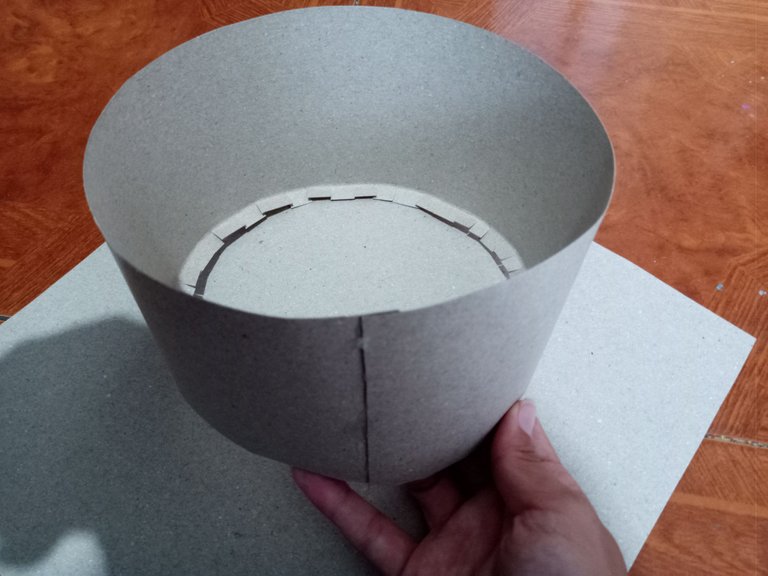
Al rectángulo, le vamos a colocar en uno de los extremos silicón y lo vamos a pegar a la altura necesaria para que le quede a la persona que lo va a usar, es decir, si el diámetro de la cabeza de la persona mide 56cm, pegamos nuestro rectángulo a los 56cm, siempre dejando un poquito de holgura.
We are going to put silicone on one of the ends of the rectangle and we are going to glue it at the necessary height to fit the person who is going to use it, that is, if the diameter of the person's head measures 56cm, we glue our rectangle at 56cm, always leaving a little bit of slack.
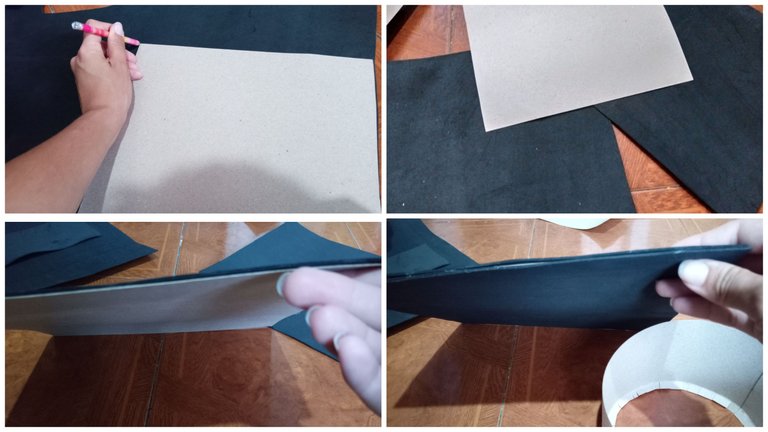
Vamos a colocar el cuadrado de cartón sobre nuestra lámina de foamy y vamos a marcar sobre esta la figura para luego quedarnos con dos cuadrados de foamy; estas vamos a pegarlas en ambas caras de nuestro cartón para que quede forrado, bonito y resistente.
We are going to place the cardboard square on our foamy sheet and we are going to mark the figure on it and then we will have two foamy squares; we are going to glue them on both sides of our cardboard so that it will be lined, nice and resistant.
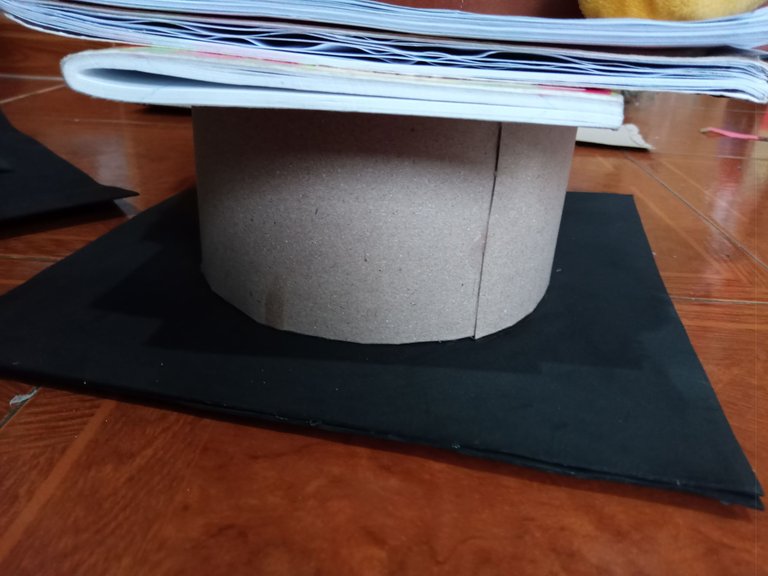
Pegamos el círculo de cartón sobre el cuadrado forrado en Foamy, preferiblemente agrégale un poco de peso arriba mientras se seca para que quede bien fijado.
Glue the cardboard circle on the square lined with Foamy, preferably adding a little weight on top while it dries so that it is well fixed.
Una vez seco ya podemos decorar
Once dry we can decorate
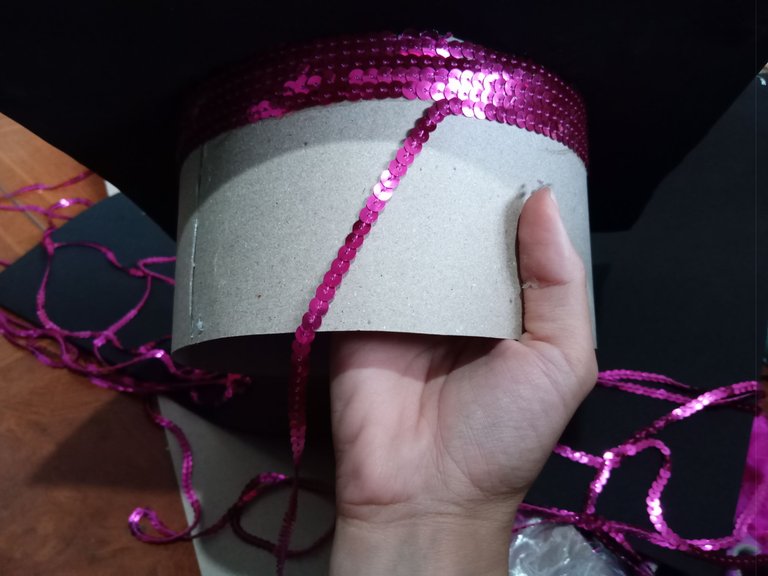
Cómo siempre cuando hablamos de manualidades, las formas para decorar algo son infinitas, pero sin duda en esta temporada lo más pedido fueron las lentejuelas.
Ellas se colocan fijando nuestra cinta de lentejuelas en la parte superior del birrete, se puede utilizar pega, silicón frío o caliente, yo en este caso prefiero la pega porque no seca tan rápido y me permite corregir cualquier error.
Una vez bien fijada comenzamos a pegar por todo alrededor del círculo de cartón, línea por línea sin dejar espacios en blanco, hasta llegar al final.
As always when we talk about crafts, the ways to decorate something are endless, but certainly this season the most requested were the sequins.

You can use glue, cold or hot silicone, in this case I prefer glue because it doesn't dry so fast and allows me to correct any mistake.

Once it is well fixed we start gluing all around the cardboard circle, line by line without leaving blank spaces, until we reach the end.
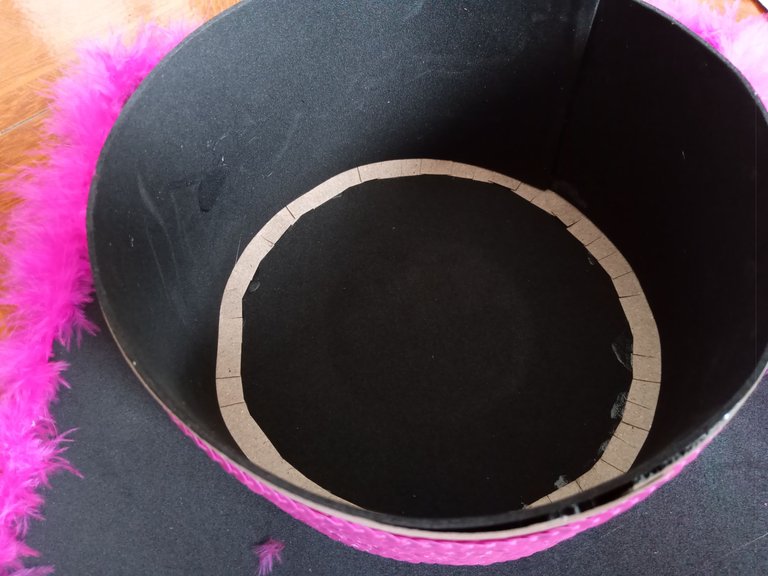
Ya armado y forrado con lentejuelas nuestro birrete, queda decorar los bordes a gusto con cinta o marabú, forrar por dentro con más foamy y colocar todos los detalles que querramos en foamy.
Once our biretta is assembled and lined with sequins, we can decorate the edges with ribbon or marabou, line the inside with more foamy and place all the details we want in foamy.
Espero que les sea de mucha utilidad este post y sepan sacarle provecho en la próxima temporada de promociones 🥳
I hope you find this post very useful and know how to make the most of it in the next promotions season 🥳

Thank you for sharing this amazing post on HIVE!
Your content got selected by our fellow curator @rezoanulvibes & you just received a little thank you via an upvote from our non-profit curation initiative!
You will be featured in one of our recurring curation compilations and on our pinterest boards! Both are aiming to offer you a stage to widen your audience within and outside of the DIY scene of hive.
Join the official DIYHub community on HIVE and show us more of your amazing work and feel free to connect with us and other DIYers via our discord server: https://discord.gg/mY5uCfQ !
If you want to support our goal to motivate other DIY/art/music/homesteading/... creators just delegate to us and earn 100% of your curation rewards!
Stay creative & hive on!
Hermoso amiga y muy bien explicado y elaborado felicidades
🌸🥰❤️👍😍😘☺️✨👍🥰💯💯🌹🌺🙌🎉🎉🌼💯🥰🥰❤️👍🤩🤩😍✨😘☺️☺️😘😘😘✨😍🤩🤩🥰🌸🌸🥰🌹🎉😘😘☺️👏✨👍❤️🥰🤗💯🌼🌹🌺🙌👏☺️😘✨🤩❤️🥰🌼🌺👏🌟🙌🌹
The rewards earned on this comment will go directly to the people sharing the post on Twitter as long as they are registered with @poshtoken. Sign up at https://hiveposh.com.
Muy bonito tu birrete! Esto esta a la moda actualmente, los graduandos en cualquier nivel se colocan un birrete de este tipo 👨🎓👩🎓y lo personalizan a su gusto. Buen tutorial =)
Excelente amiga te felicito,muy bien elaborado 🌹🌹🌹🌹
!discovery 25
This post was shared and voted inside the discord by the curators team of discovery-it
Join our community! hive-193212
Discovery-it is also a Witness, vote for us here
Delegate to us for passive income. Check our 80% fee-back Program
Congratulations @mxryp07! You have completed the following achievement on the Hive blockchain and have been rewarded with new badge(s):
Your next target is to reach 400 replies.
You can view your badges on your board and compare yourself to others in the Ranking
If you no longer want to receive notifications, reply to this comment with the word
STOPCheck out the last post from @hivebuzz:
Support the HiveBuzz project. Vote for our proposal!
¡Que hermoso trabajo! Lo mostraste tarde, pero seguro, a más de uno le servirá para el siguiente año, incluyendo me, gracias por compartir, un abrazo.✨💗