Hola amigos de Hive, gracias una vez mas a @gaboamc2393 por esta iniciativa.
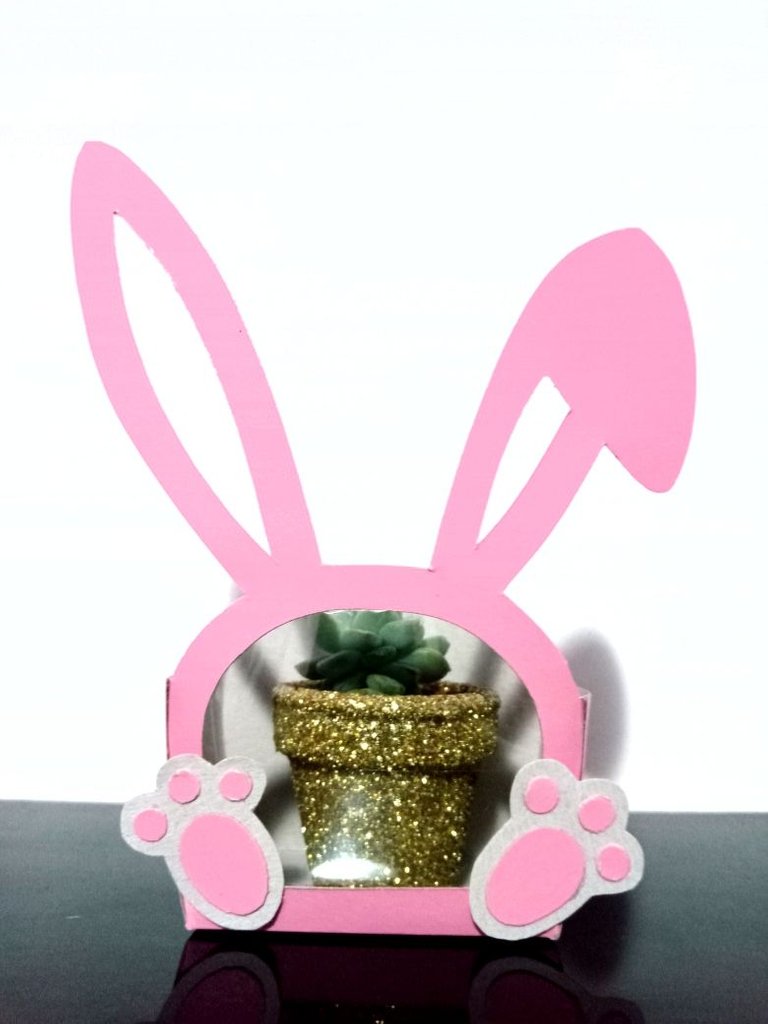
Les cuento que tengo algunos meses diseñando y elaborando cajitas para una amiga que vende arreglos de plantitas. Y como estamos en vísperas de Pascuas, me pidió una cajita que sirva para sus mini macetas y que sea alusiva a esta fecha.
Desde luego en internet hay cientos de ideas de cajitas con conejitos, pero yo necesitaba hacer algo que se adaptará a su producto.
Lo primero que siempre hago es preguntarle las medidas del producto que necesita envolver y de ahí, comienzo a realizar mi diseño.
Los materiales a utilizar son:
- Regla 📏
- Lápiz ✏️
- Papel 📄
- Cartulina del color de tu preferencia 📜
- Silicón (preferiblemente frío)
- Retazo de acetato
- Mucho amor al arte 🥰
Hello friends of Hive, thanks once again to @gaboamc2393 for this initiative.

I've been designing and making boxes for a friend of mine who sells plant arrangements for a few months. And as we are on the eve of Easter, she asked me for a little box that could be used for her mini pots and allusive to this date.

Of course there are hundreds of bunny box ideas on the internet, but I needed to make something that would fit her product.

The first thing I always do is ask her the measurements of the product she needs to wrap and from there, I start making my design.

The materials to use are:
- Ruler 📏
- Pencil ✏️
- Paper 📄
- Cardboard in the color of your choice 📜
- Silicone (preferably cold)
- Scrap of acetate
- Lots of love for art 🥰

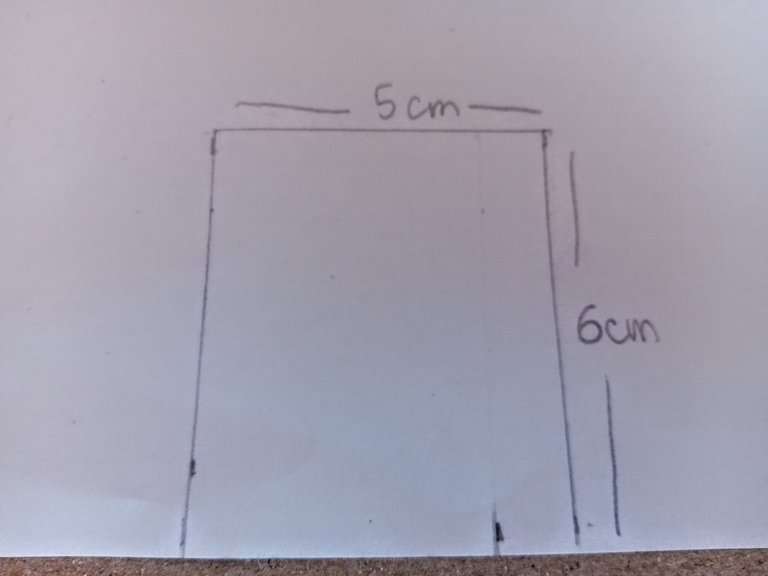
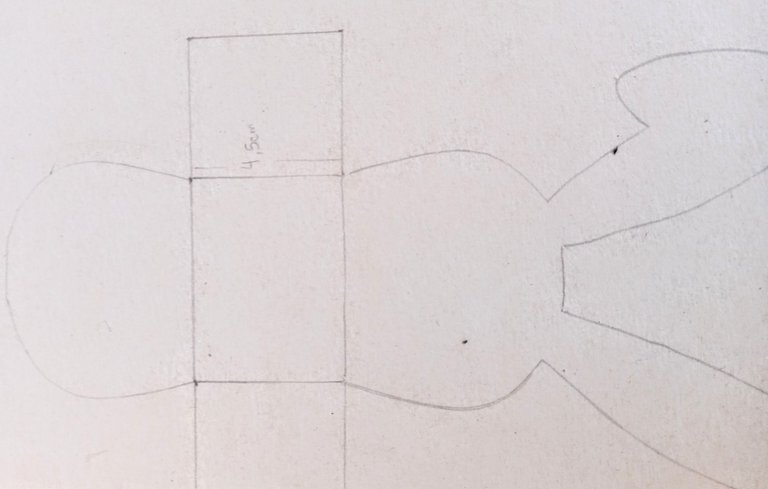
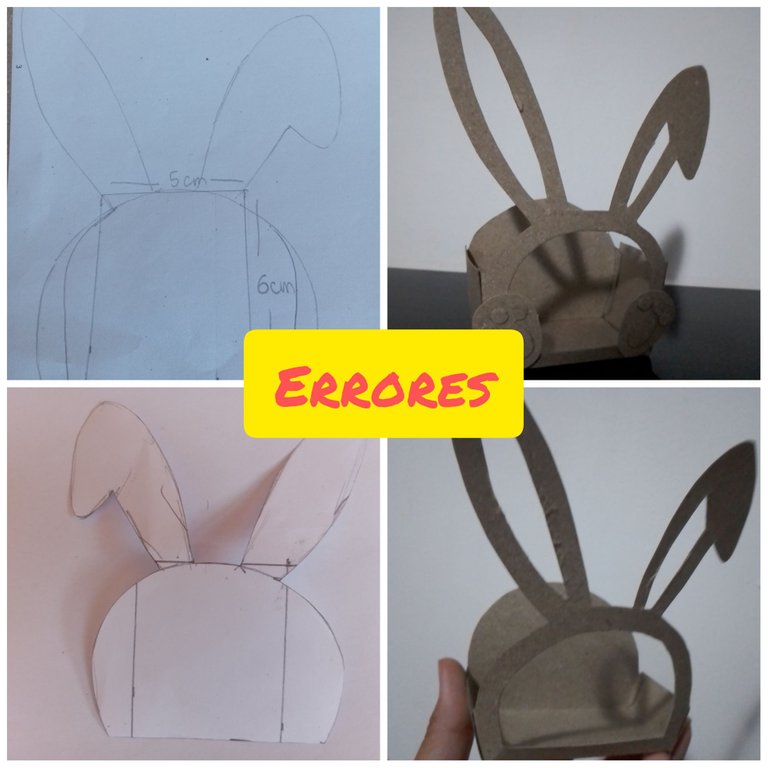
First I made a rectangle of 6cm x 4cm, which is the size of the pot, and around this rectangle I made the drawing of my bunny. I made several tests, first it was very wide, then crooked, very long ears and so I modified it until I got this nice silhouette.
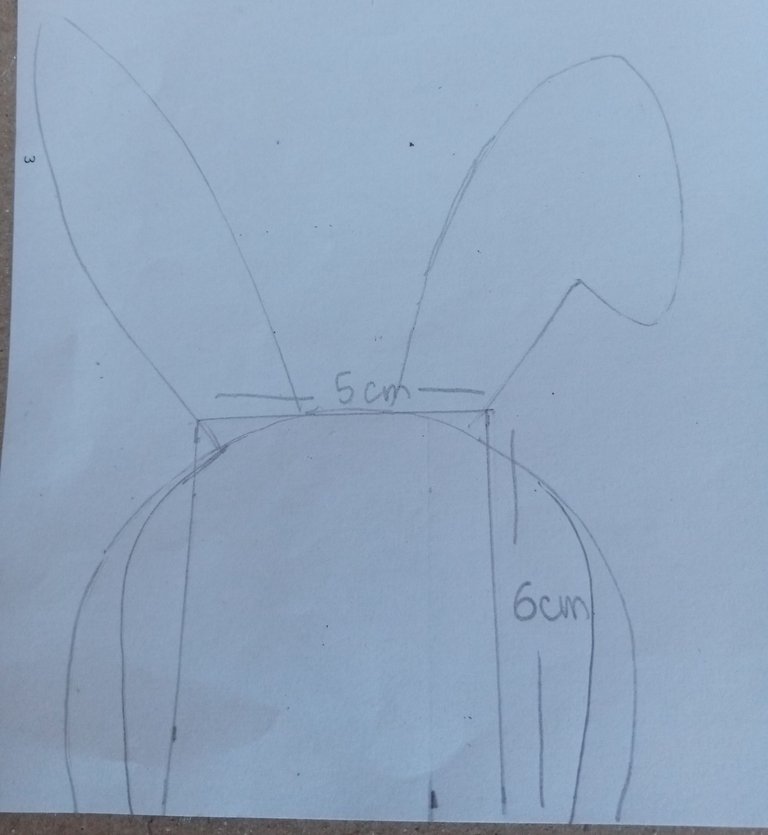
Then I copied the silhouette on the cardboard and traced a rectangle on the base with the width required, in this case 4.5cm (since the pot is 4cm wide). Always making sure to measure at both ends so that our shapes are as accurate as possible and fit perfectly when assembling.
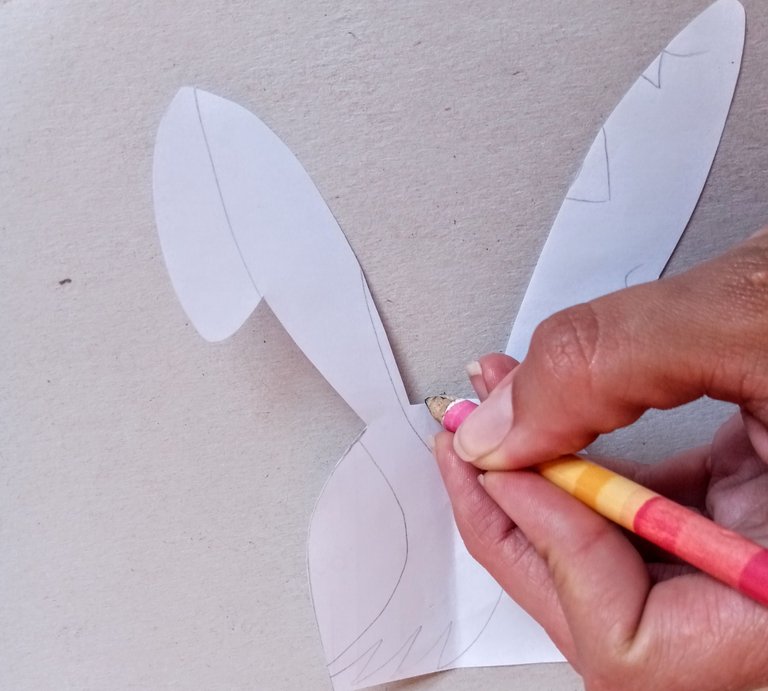
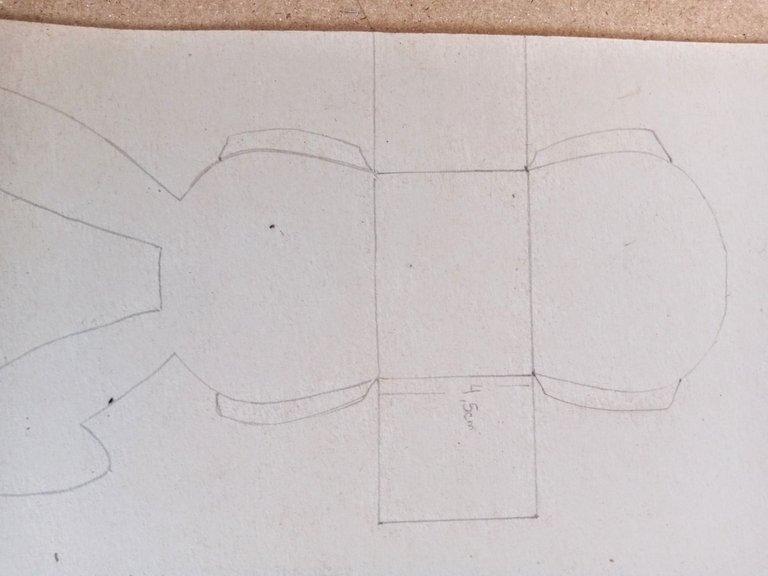
Al otro extremo volví a marcar la silueta, pero esta vez sin las orejas.
Marque las pestañas, que serán de 4 cm de alto para que nuestra macetica quede lo más segura posible. El primer intento no sé que me pasó que las hice de aproximadamente 1cm y cuando arme la cajita era evidente que no iba a servir.
Y algo que no se puede olvidar nunca y que es indispensable para poder cerrar las cajitas, es hacer dobleces en cada extremo de la caja del conejito, para poder pegarlo.
At the other end I marked the silhouette again, but this time without the ears.

Mark the tabs, which will be 4 cm high so that our potted plant will be as secure as possible. The first attempt, I don't know what happened to me, I made them about 1cm long and when I assembled the box it was obvious that it was not going to work.

And something that can never be forgotten and that is indispensable to be able to close the boxes, is to make folds in each end of the box of the bunny, to be able to glue it.
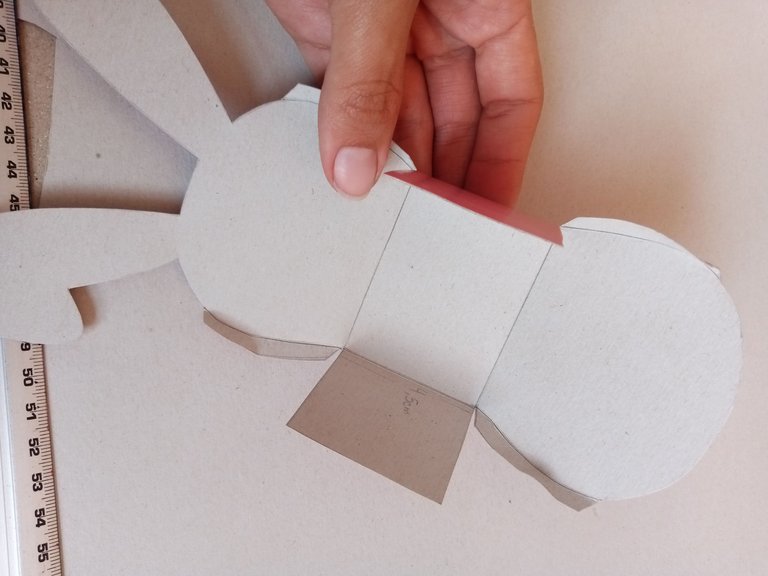
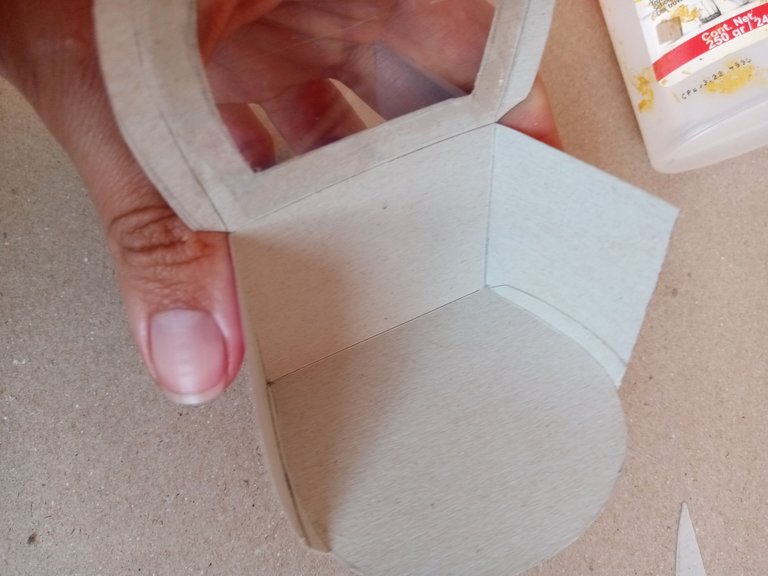
Once we have our mold, we decorate it, fold it and assemble the box.
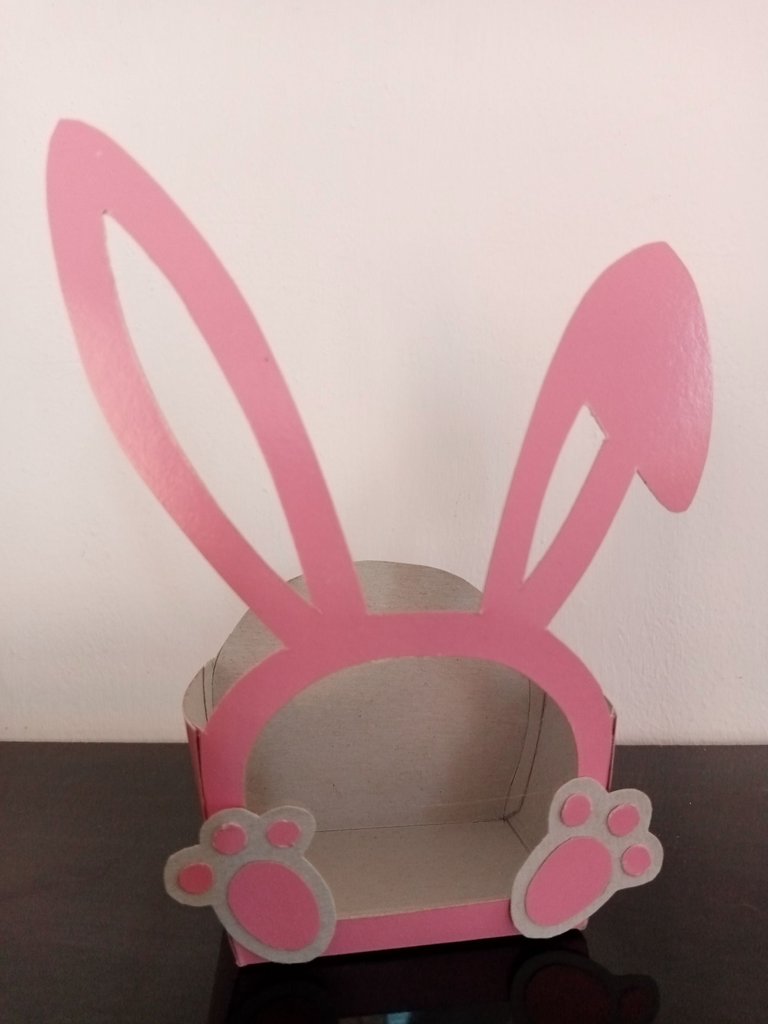
Los trabajos que hago para las maceticas siempre llevan transparencia para poder ver al interior, y esta vez no fue diferente.
Entonces como detalle corte el interior de las orejas para que se vea más bonito, recorte también el interior de lo que sería la carita y coloque la transparencia y finalmente las paticas.
The works I do for the pots always have transparency to be able to see inside, and this time was no different.

Then as a detail cut the inside of the ears to make it look nicer, cut also the inside of what would be the face and place the transparency and finally the paws.
Como les comenté está cajita llevo varios intentos.
El primer molde quedó torcida, más ancha de un lado que del otro, luego muy ancha, como es un detalle delicado y pequeño, había más caja que regalo jajaja, en otro intento las pestañas quedaron muy bajitas
Para estás cajitas use dos materiales diferentes ya que para las maceticas a mi clienta le gusta que sea en un material rústico como el cartón, pero para presentarla a ustedes preferí utilizar una cartulina rosada que es mucho más delicada👩🎨
As I told you this little box took several attempts.

The first mold was crooked, wider on one side than the other, then very wide, as it is a delicate and small detail, there was more box than gift hahaha, in another attempt the flanges were very low.

For these little boxes I used two different materials because my client likes to use a rustic material like cardboard for the flower pots, but to present it to you I preferred to use a pink cardboard which is much more delicate👩🎨
Invito a mi amiga @marian5pacheco
y a su gran creatividad a participar en este lindo concurso 👩🎨
I invite my friend @marian5pacheco
and her great creativity to participate in this beautiful contest 👩🎨
The rewards earned on this comment will go directly to the person sharing the post on Twitter as long as they are registered with @poshtoken. Sign up at https://hiveposh.com.
Bello esa cajita de conejito de pascua. Buen trabajo amiga y bendiciones
Muchas gracias 😊.. me alegra que te haya gustado .. ojalá sea de utilidad 🥰
A mí también me gusta hacer cajitas coquetas, pero a partir de material reciclado. Esta que hiciste me encantó jeje Felicidades!
Eso está muy bueno 😍 espero ver la versión con tu estilo ☺️
HOla Marianella, nos encantó tu plantilla, gracias por tu aporte, estuvo genial nos mostraras tus fails, de esa manera vemos que no fue fácil lograr tu idea al momento, amamos su decoración y el detalle de la transparencia, sin duda ha sido una idea genial. Gracia spor participar.
Muchas gracias a ustedes, esa es la idea de esta comunidad, aprender de todos y crear post que aporten ideas y soluciones a los demás 👩🎨✂️
estoy deacuerdo con equipodelta, la plantilla esta dificil pero tu te encargaste de hacernosla facil. me encantan los conejos son mi amor.
Agradecida por tu comentario. Espero que sea de utilidad , aunque sea te la autoregalas 😍 jejeje
Que hermosurita, te quedo muy cuchi. Bellos trabajo. Mucha suerte... Saludos.💖