Saludos amigos de HIVE DIY, espero que estéis muy bien y tengan un día lleno de energías para hacer todos sus proyectos. 🪡🧵❤️
Recién mi hija comenzó su primer año de bachillerato, algo completamente nuevo para ella y en la institución donde comenzó el uniforme de deportes es totalmente diferente al de la anterior institución así que fui a comprar la tela y me puse manos a la obra y aquí les comparto el proceso para hacer mono escolar y franela, acompáñame a realizar este lindo uniforme:
Greetings friends of HIVE DIY, I hope you are doing well and have a day full of energy to do all your projects.
My daughter just started her first year of high school, something completely new for her and in the institution where she started the sports uniform is totally different from the previous institution so I went to buy the fabric and got to work and here I share with you the process to make a school jumpsuit and flannel, join me to make this cute uniform:

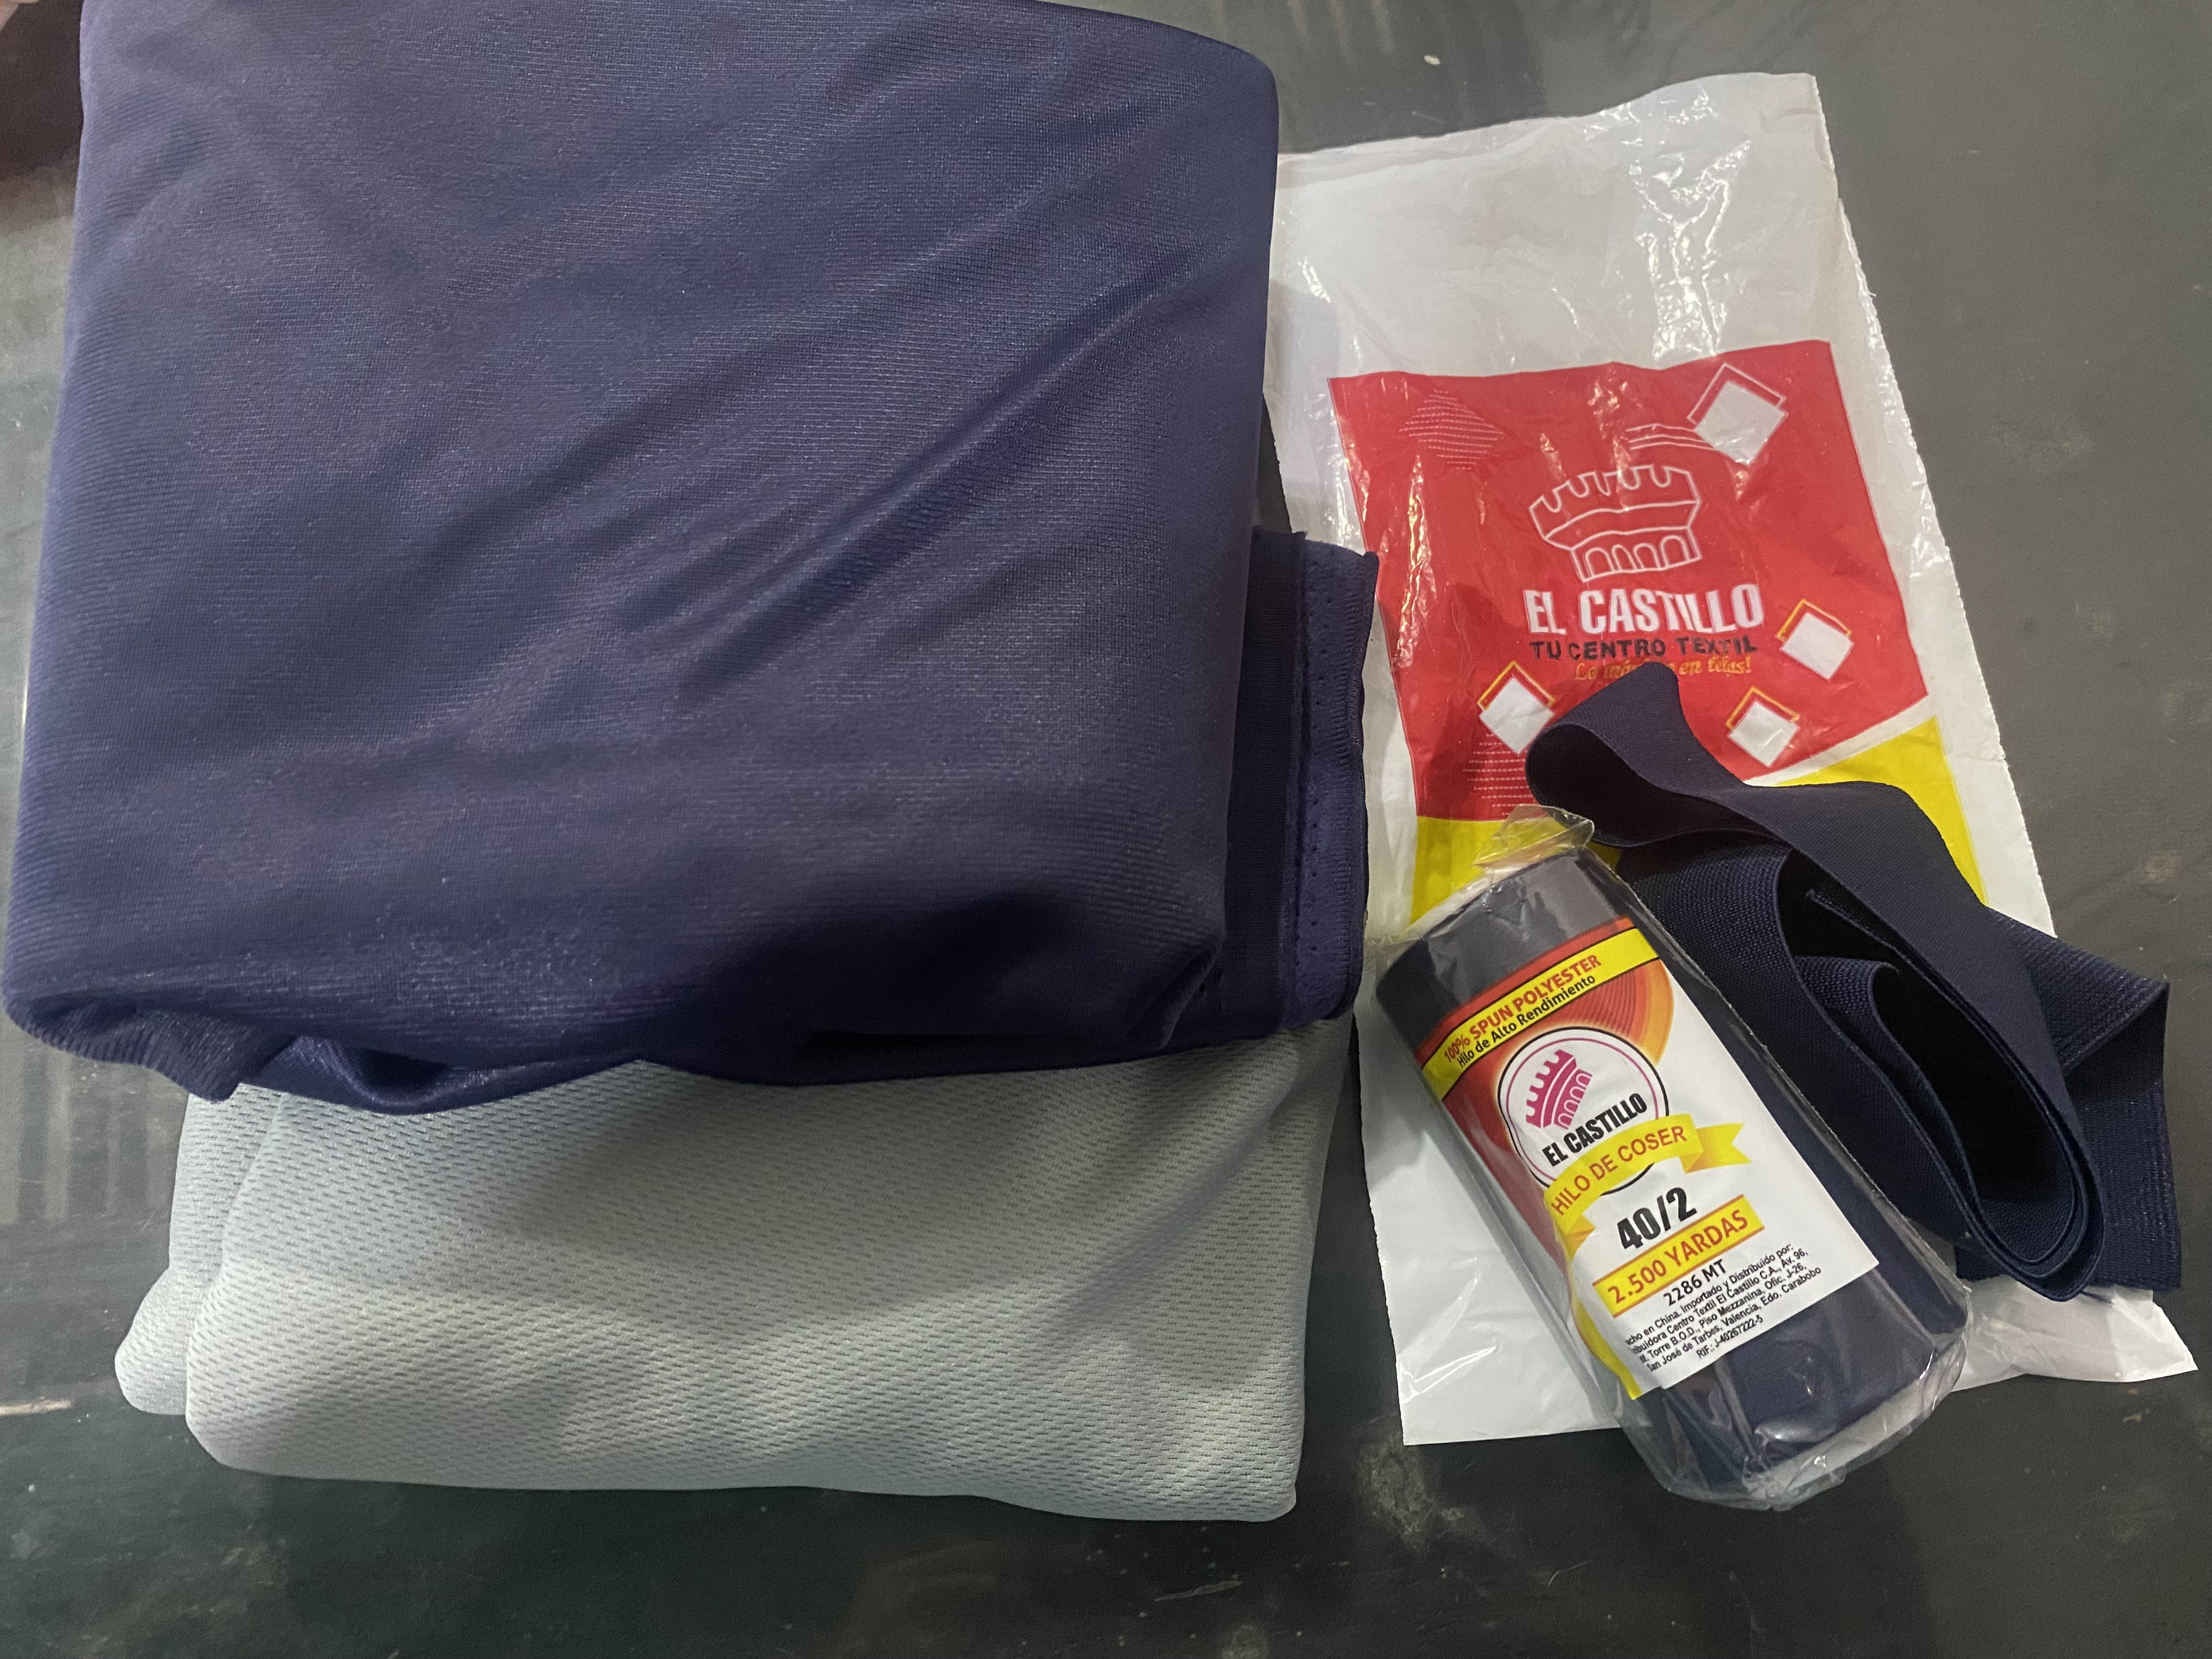
MATERIALES
MATERIALS
El uniforme reglamentario de esta institución es mono azul marino y franela gris con orillas azul marino, al principio estuve buscando precios de este Uniforme ya hecho y lo menos que lo había visto era $15, y no me gustaba la forma de los monos ya que son de corte bajo en la cintura y a mi hija no le gustan así, entonces decidí ir a la tienda de telas a ver si conseguía los mismos colores y texturas, por suerte logré conseguir las mismas telas de las que está hecha este Uniforme y pueden creer que entre la tela del mono, la de franela y el elástico gasté tan sólo 6$ , muchísimo menos de la mitad de lo que me costaba ya hecho y haciéndolo yo esta la ventaja de que queda al gusto de mi hija, para la confección de este uniforme vamos a necesitar los siguientes materiales:
- 1,5 m de tela para monos, en mi caso compre una llamada superpoly escolar, está tela está muy de moda en los monos escolares ya que es bastante resistente.
- 1 Metro de elástico de 4cm de ancho
- 1 m de tela atlética para la franela
- hilo azul oscuro
- máquina de coser
The standard uniform for this institution is a navy blue jumpsuit and grey flannel with navy blue trim. At first I was looking for prices for this ready-made uniform and the least I had seen was $15. I didn't like the shape of the overalls as they are low cut at the waist and my daughter doesn't like them like that, so I decided to go to the fabric store to see if I could get the same colours and textures. Luckily I managed to get the same fabrics that this uniform is made of and you can believe that between the overalls fabric, the flannel and the elastic I spent only $6, much less than half of what it cost me already made and making it myself has the advantage that it is to my daughter's taste. To make this uniform we will need the following materials:
- 1.5 m of overalls fabric. In my case I bought a so-called school superpoly fabric. This fabric is very fashionable in school overalls as it is quite resistant.
- 1 meter of 4cm wide elastic
- 1 m of athletic fabric for the flannel
- dark blue thread
- sewing machine
PASO A PASO PARA LA CONFECCIÓN DEL MONO
STEP BY STEP FOR MAKING THE OVERALL
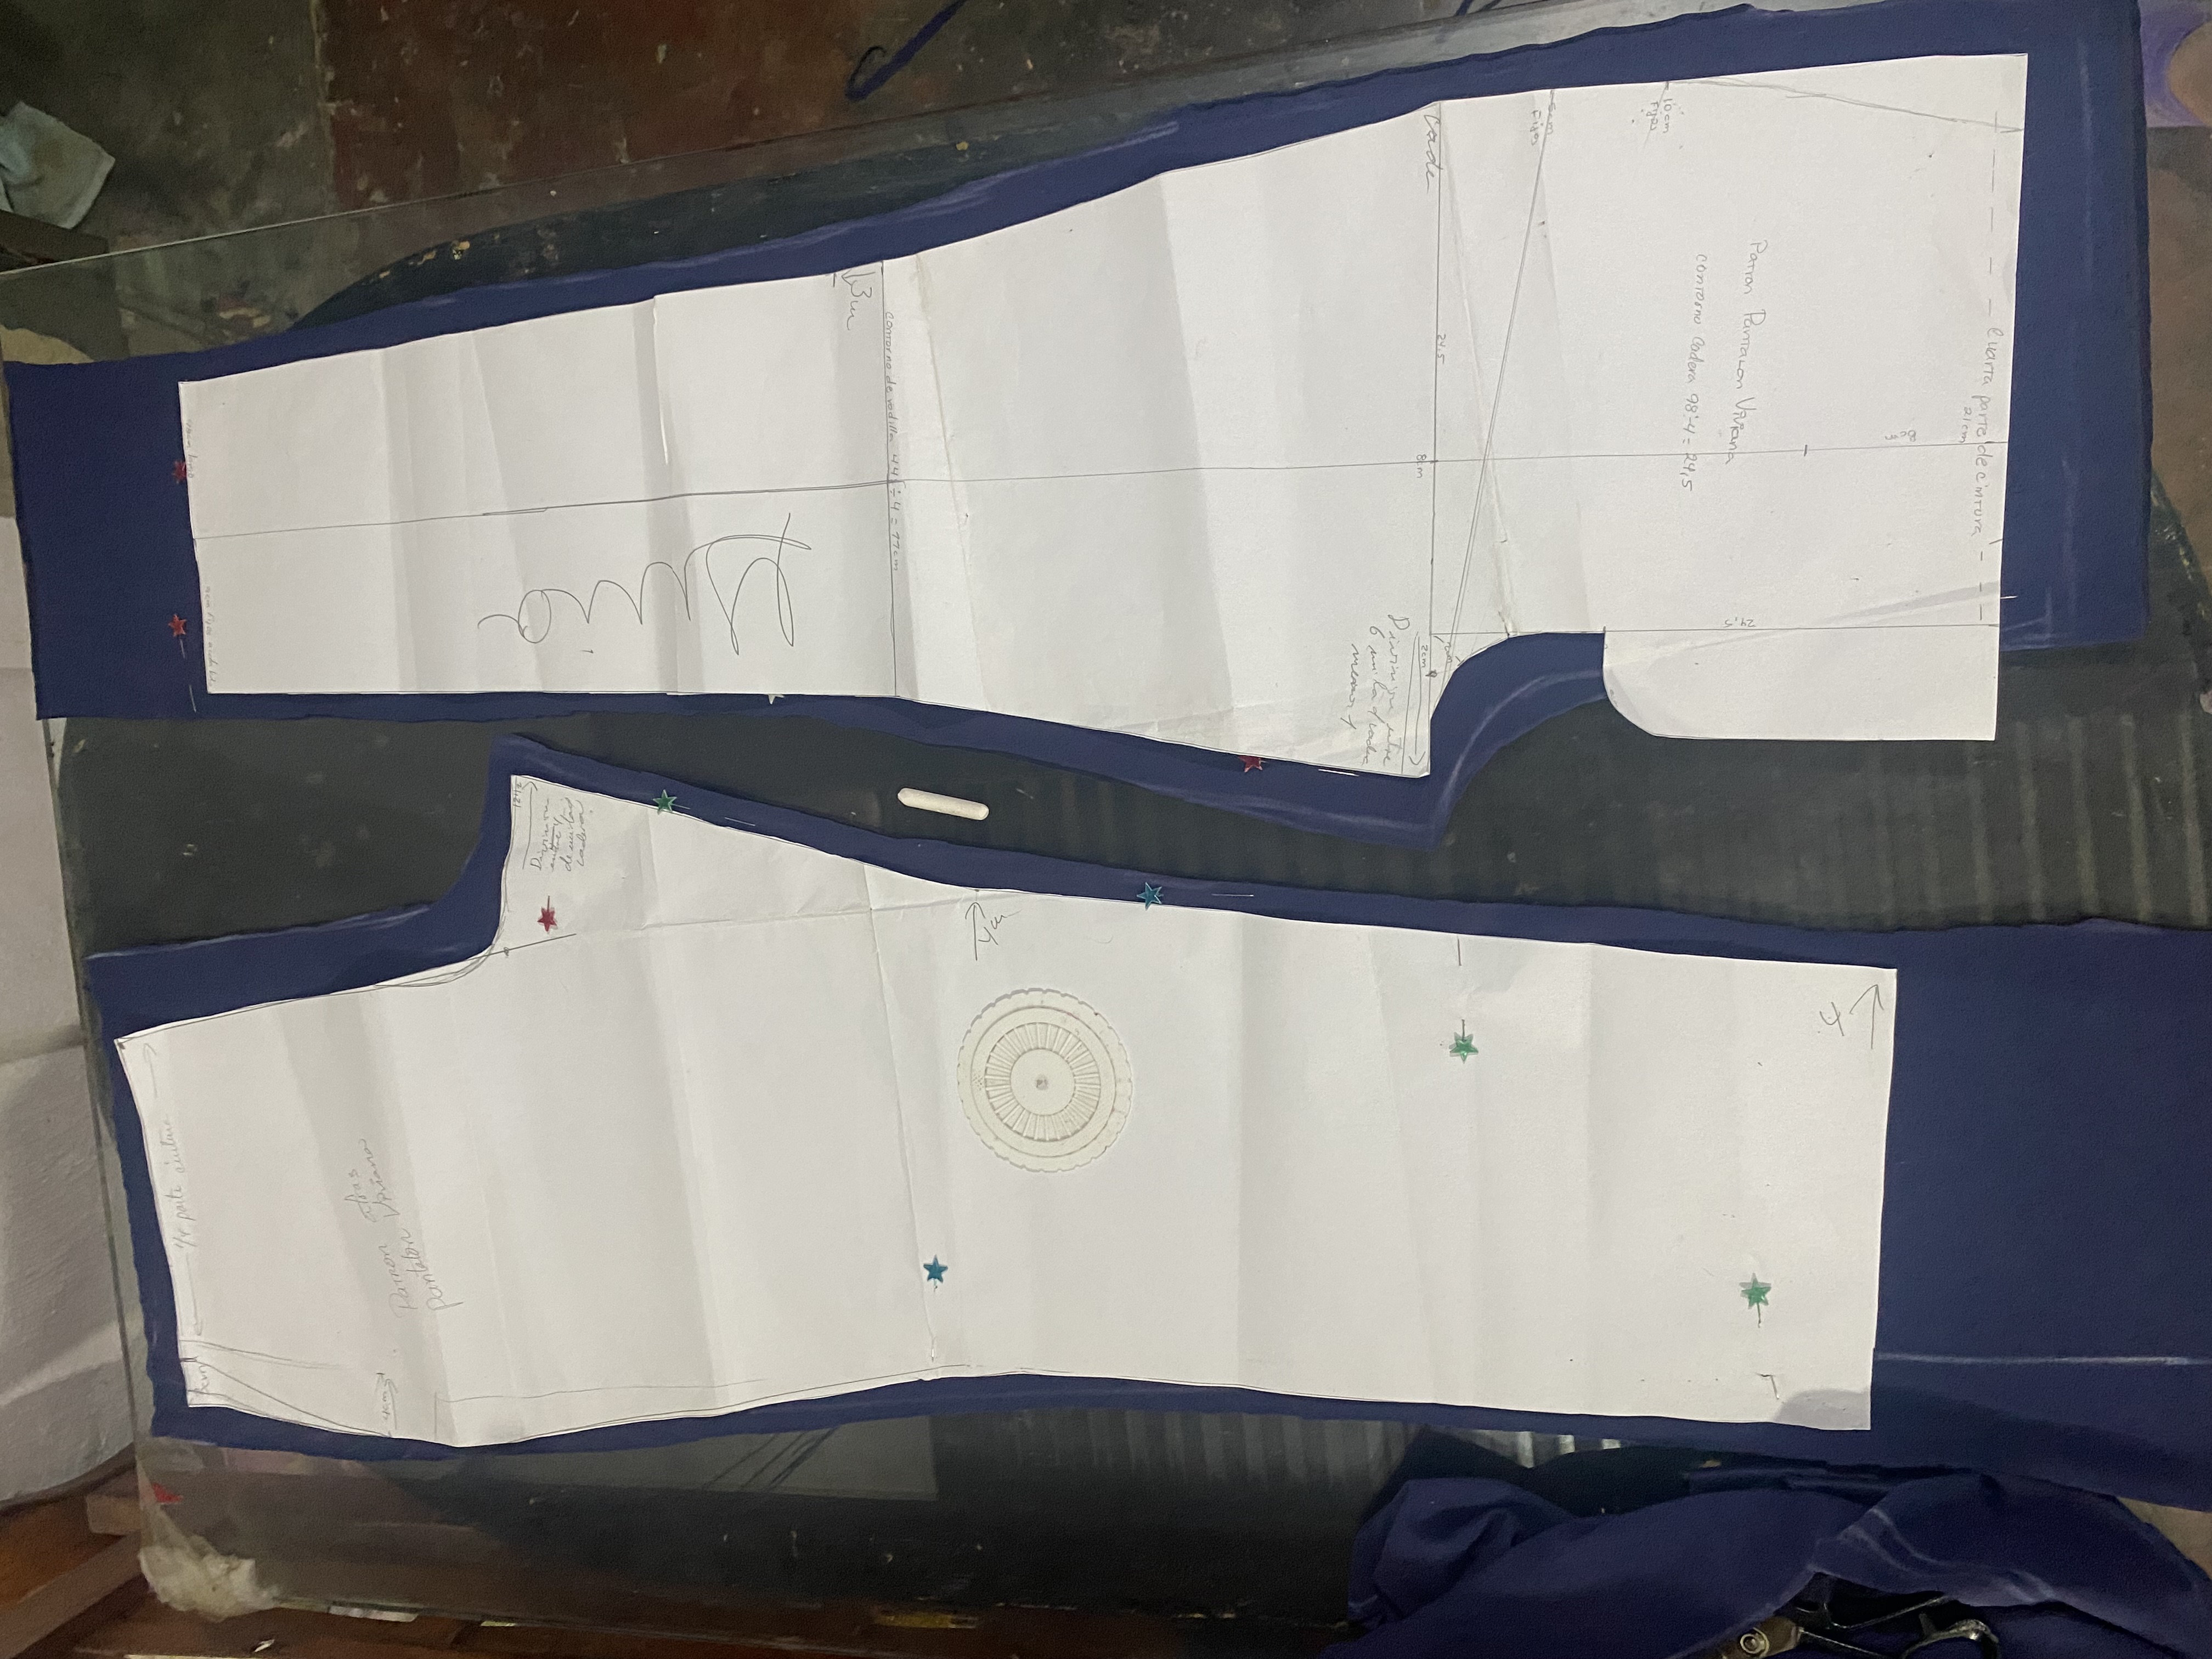
Para comenzar vamos a colocar la tela por el lado del revés, extendemos en una superficie plana, dibujaremos la parte delantera de nuestro mono, siempre me guío por una prenda de la persona a la cual le vaya a hacer la prenda nueva, en este caso busqué el mono viejo de Uniforme de mi hija y me guíe por este, haciendo algunos cambios, debo aumentarle un poco en el fundillo y en el largo de piernas ya que mi hija ha crecido un poco.
Seguido dibujaremos la parte trasera del mono, actualmente estoy haciendo un curso de patronaje, en éste me han enseñado cómo hacer el patrón para pantalón personalizado, ya tengo el patrón de mi hija, así que luego de dibujar la figura compare con los patrones y me daba casi igual sólo hice algunas modificaciones y luego corté las piezas para confeccionar este mono.
To start we are going to place the fabric on the wrong side, spread it out on a flat surface, draw the front of our jumpsuit, I always guide myself by a piece of clothing of the person for whom I am going to make the new garment, in this case I looked for my daughter's old Uniform jumpsuit and I guided myself by it, making some changes, I have to increase the hem a little and the length of the legs since my daughter has grown a little.
Next we will draw the back of the jumpsuit, I am currently taking a pattern making course, in this they have taught me how to make the pattern for personalized pants, I already have my daughter's pattern, so after drawing the figure I compared it with the patterns and it was almost the same to me, I just made some modifications and then I cut the pieces to make this jumpsuit.
 |  |
|---|---|
 |
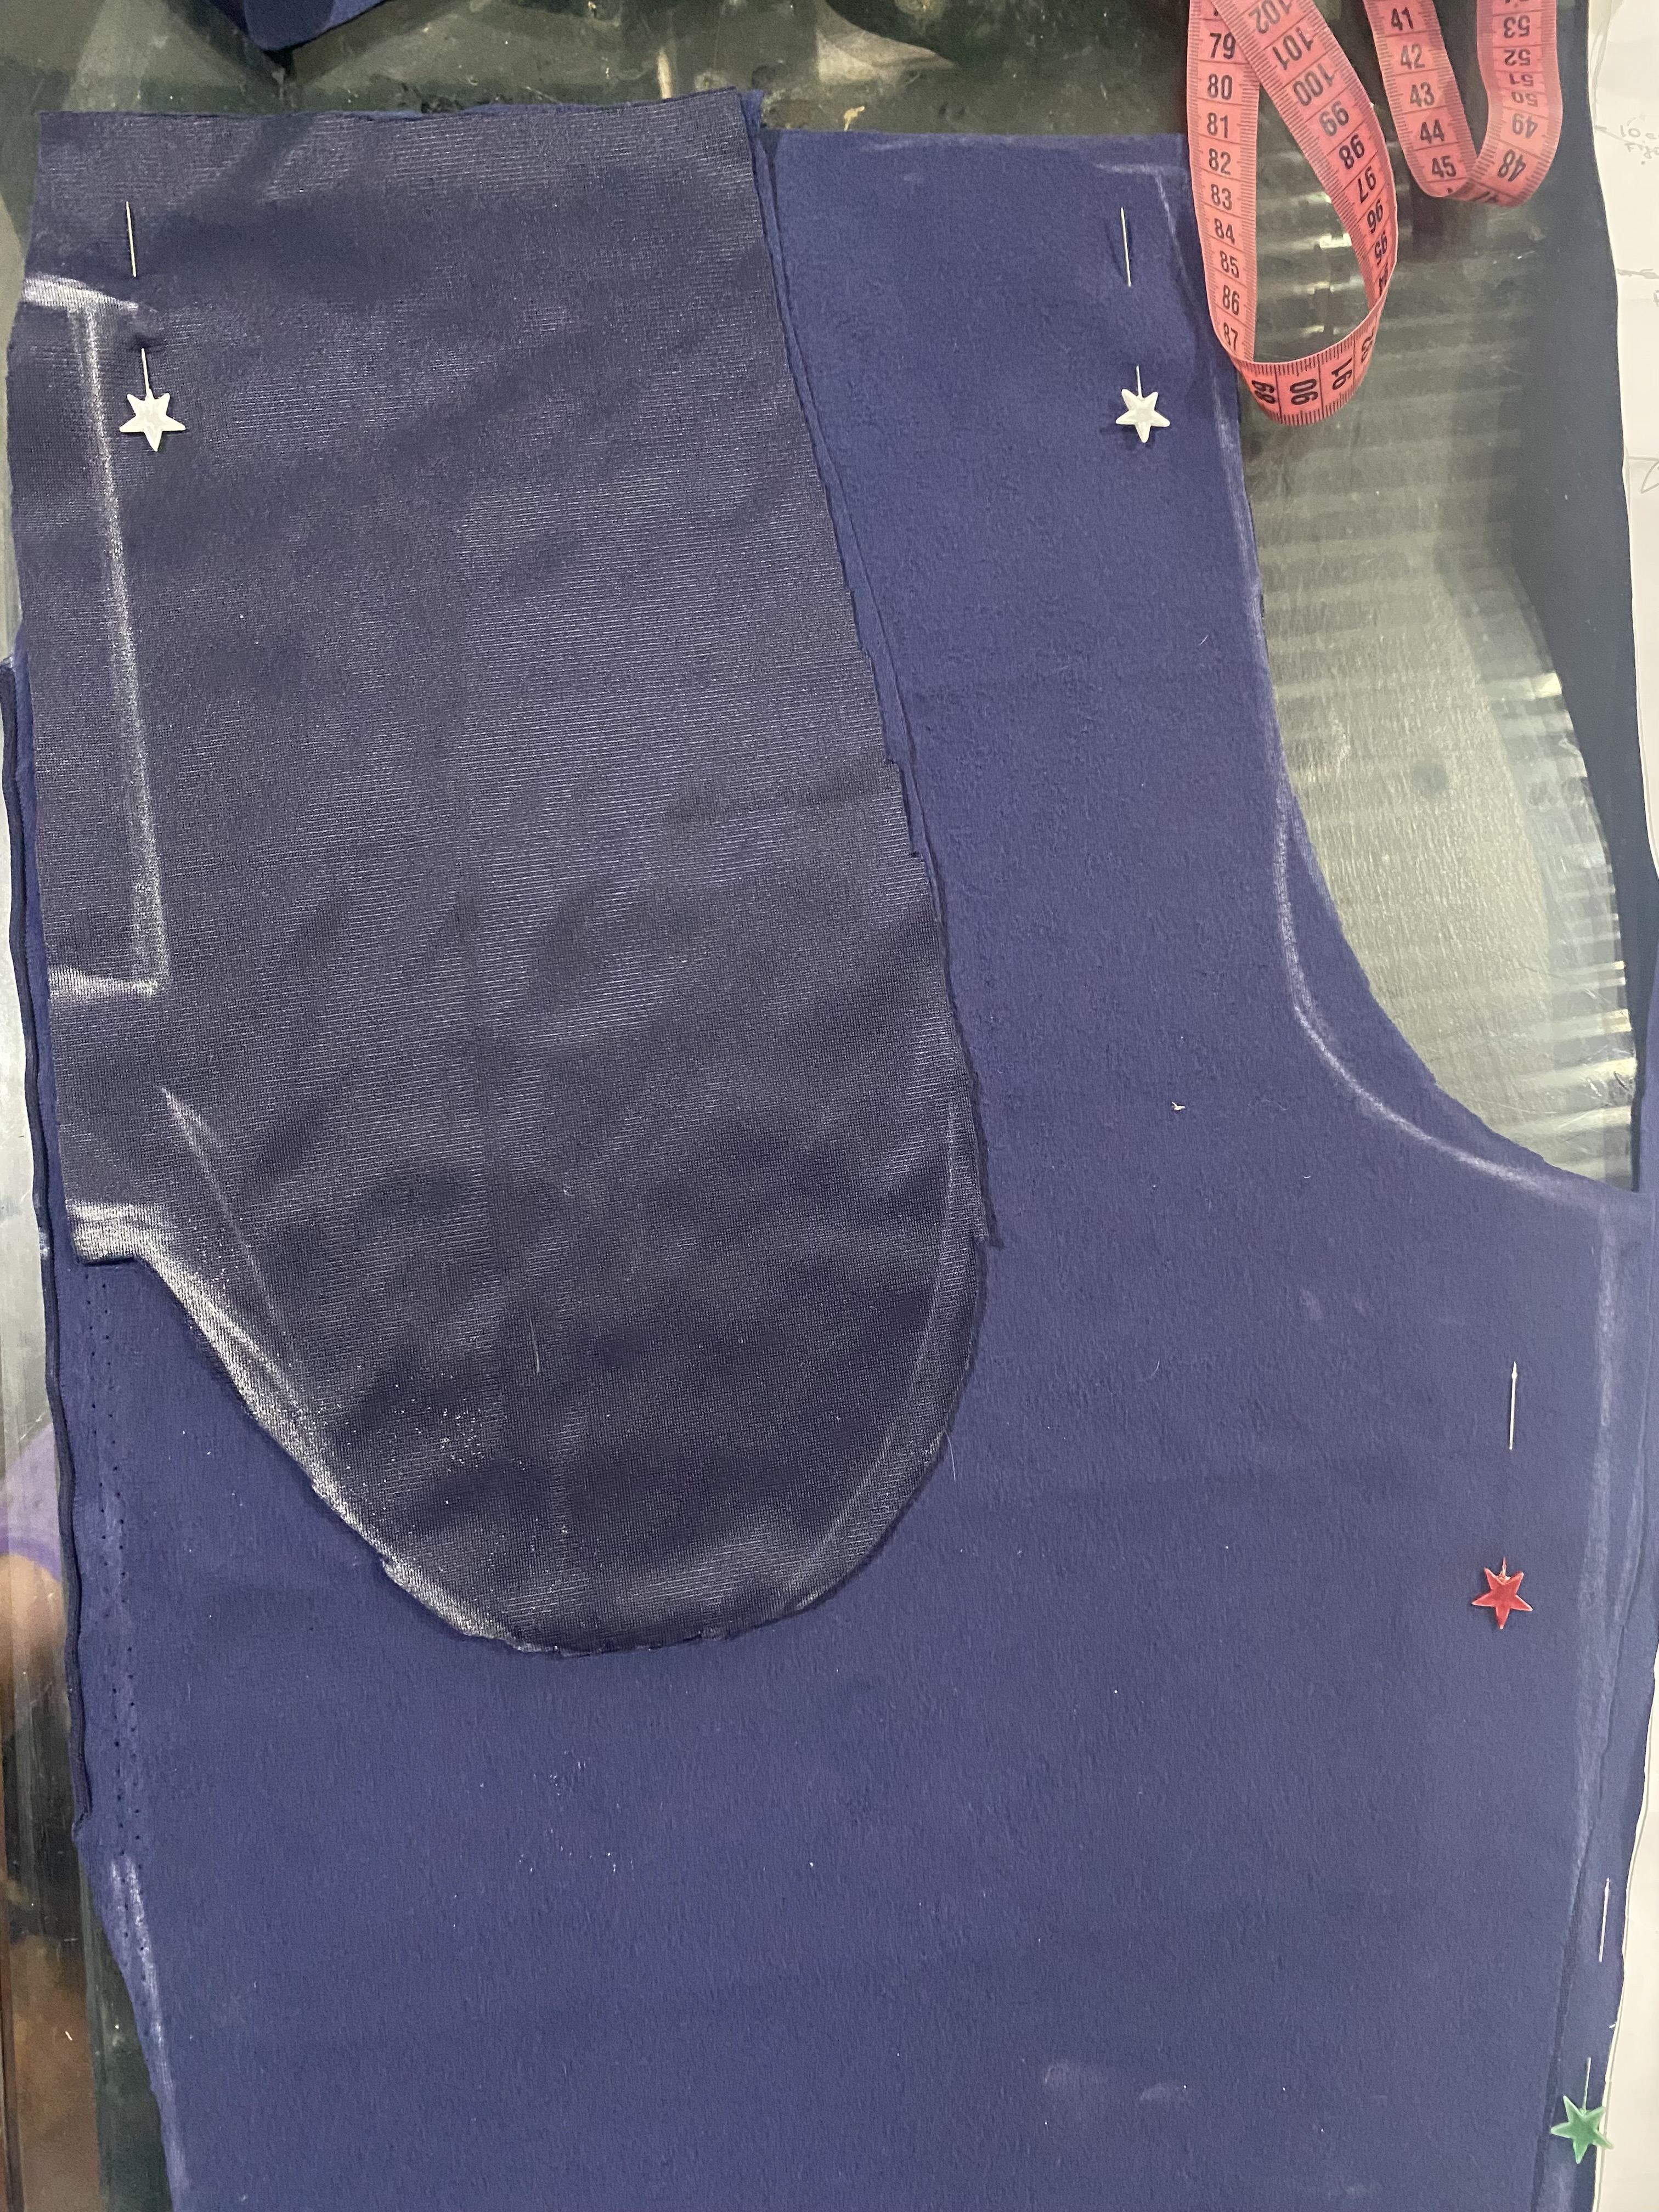
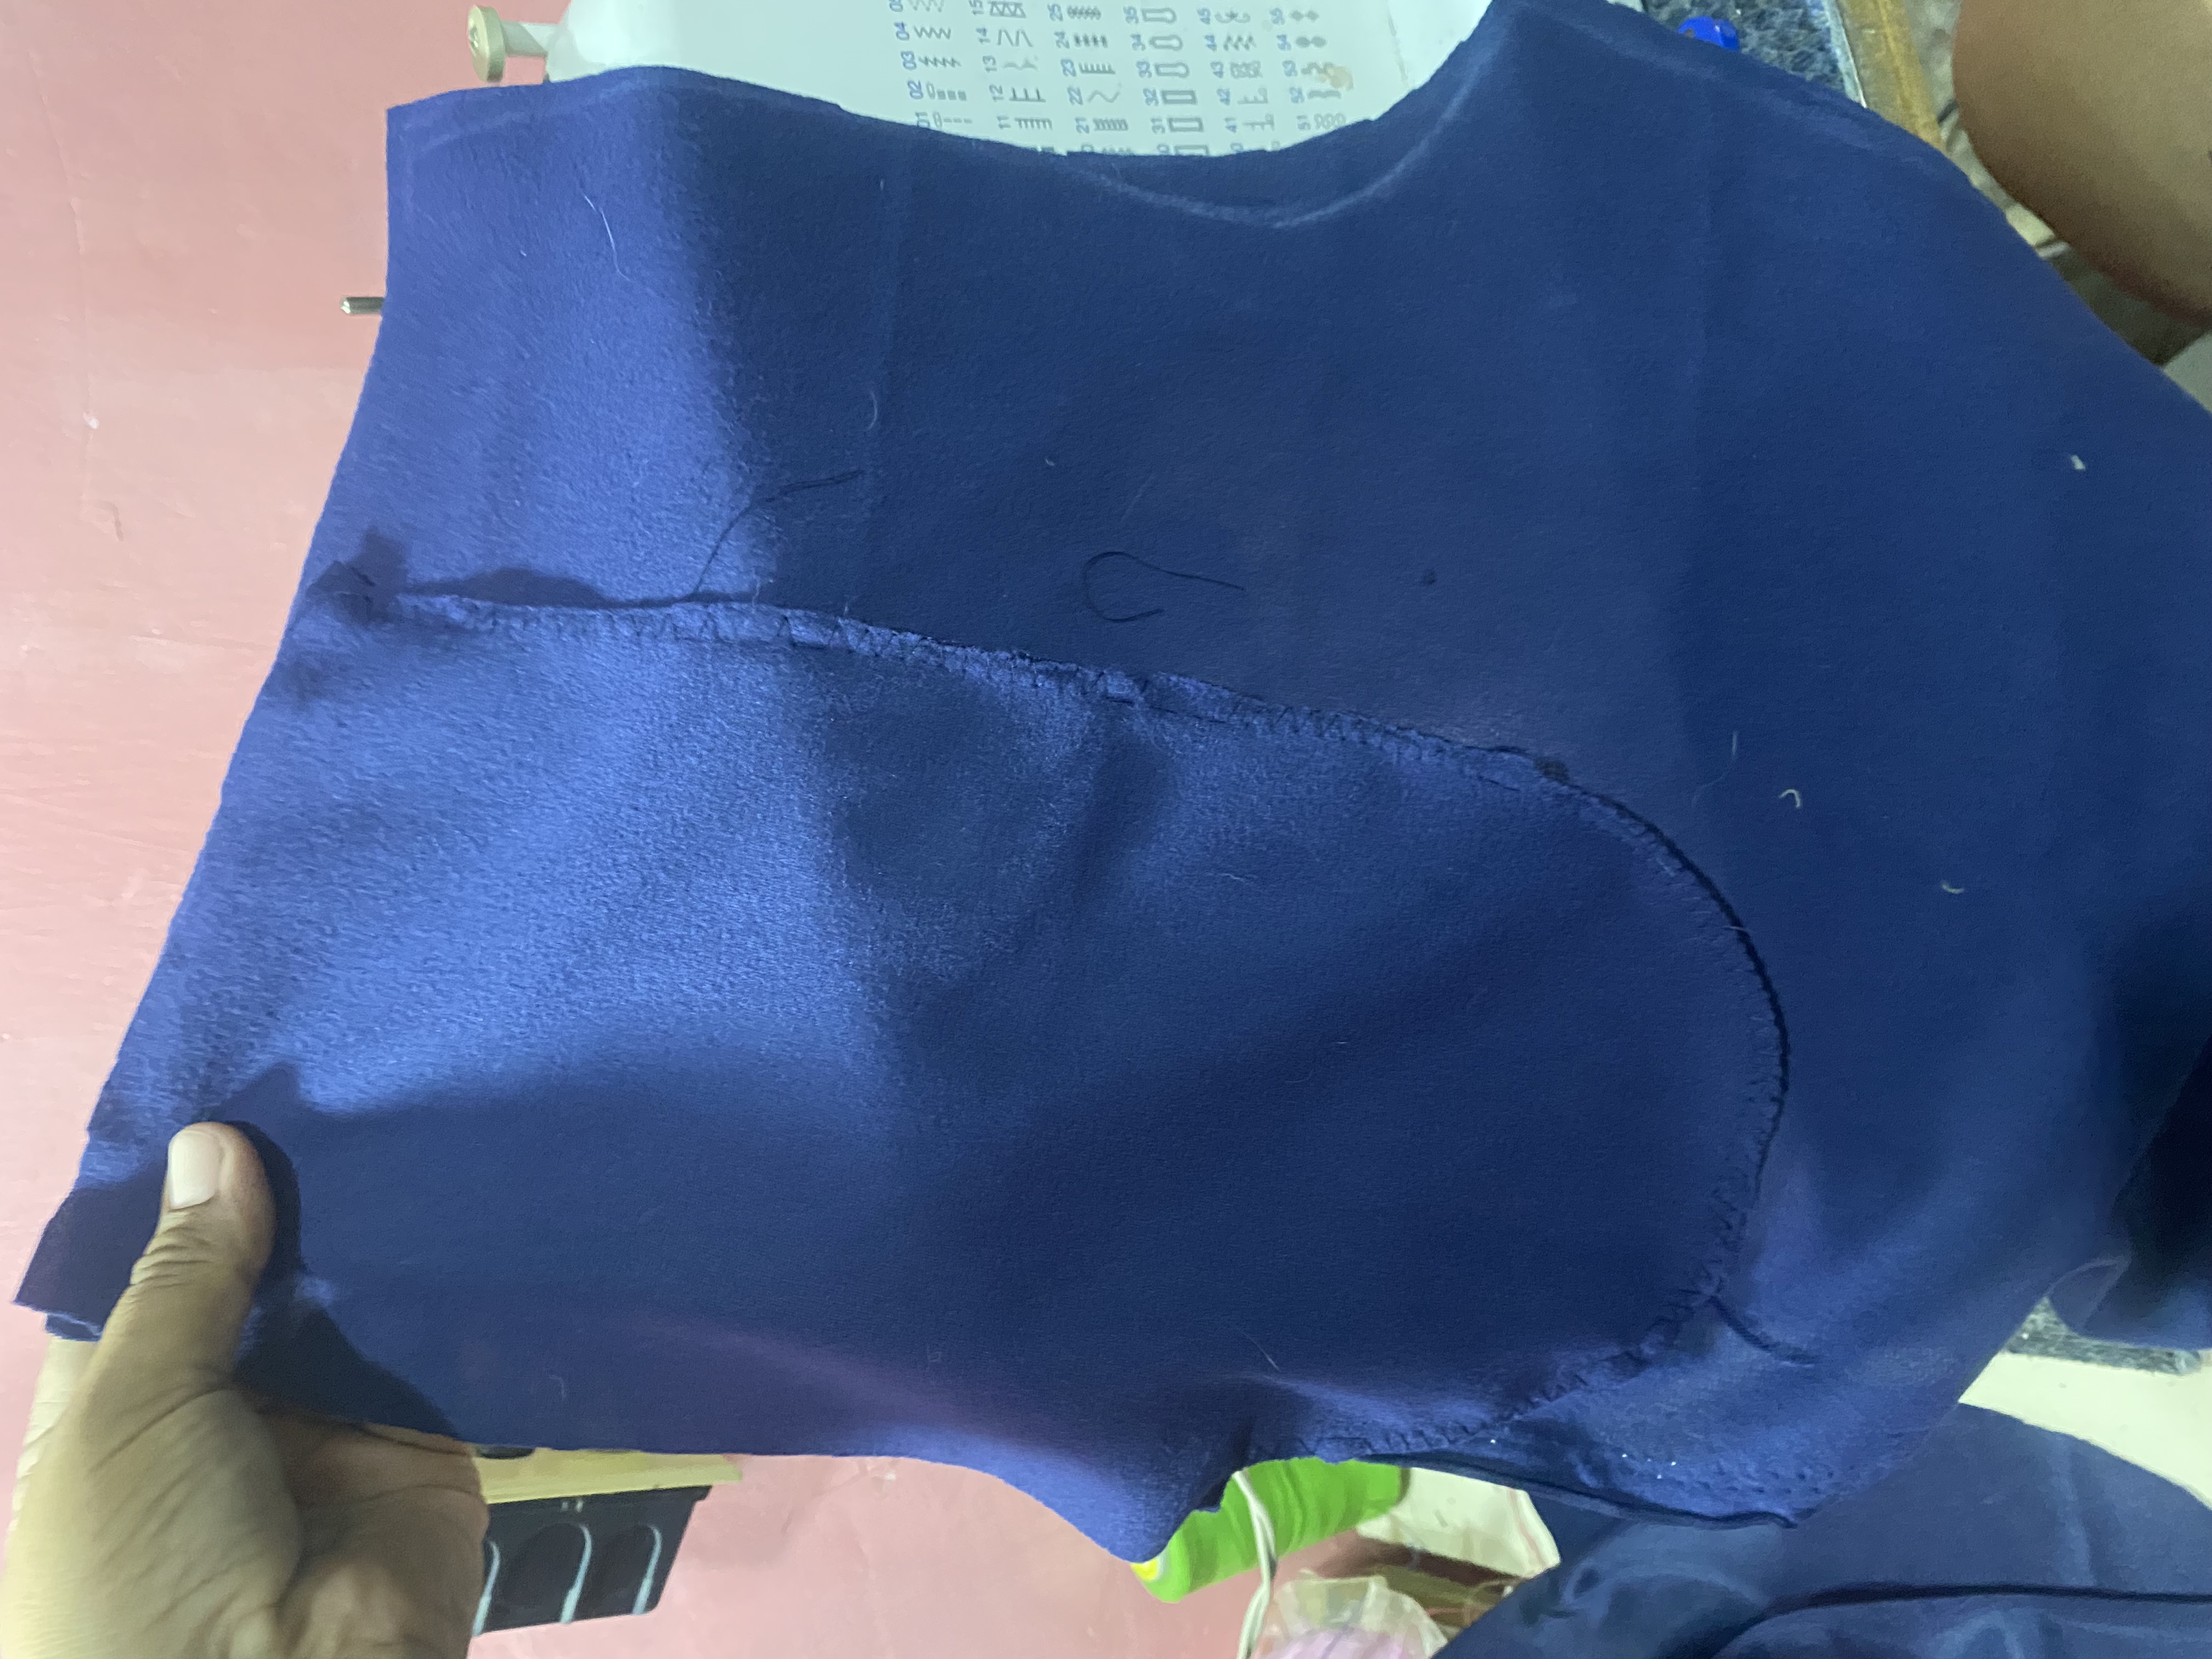
El modelo de bolsillo que llevan estos monos es casi escondido, dibujaremos la abertura en las partes delanteras del mono, dejaremos un espacio en la parte superior de 4 cm, y haremos una línea de 1 cm de distancia desde la orilla de los lados y el largo de la abertura del bolsillo será de 15 cm.
Para el bolsillo cortaremos un retazo de tela de 17cm de ancha por 35 de larga, el bolsillo se puede dejar cuadrado o lo puedes redondear, de cualquier forma quedará bien, en mi caso lo redondeé.
The pocket model that these overalls have is almost hidden, we will draw the opening on the front parts of the overalls, we will leave a space at the top of 4 cm, and we will make a line 1 cm away from the edge of the sides and the length of the pocket opening will be 15 cm.
For the pocket we will cut a piece of fabric 17 cm wide by 35 cm long, the pocket can be left square or you can round it, either way it will look good, in my case I rounded it.
 |  |
|---|
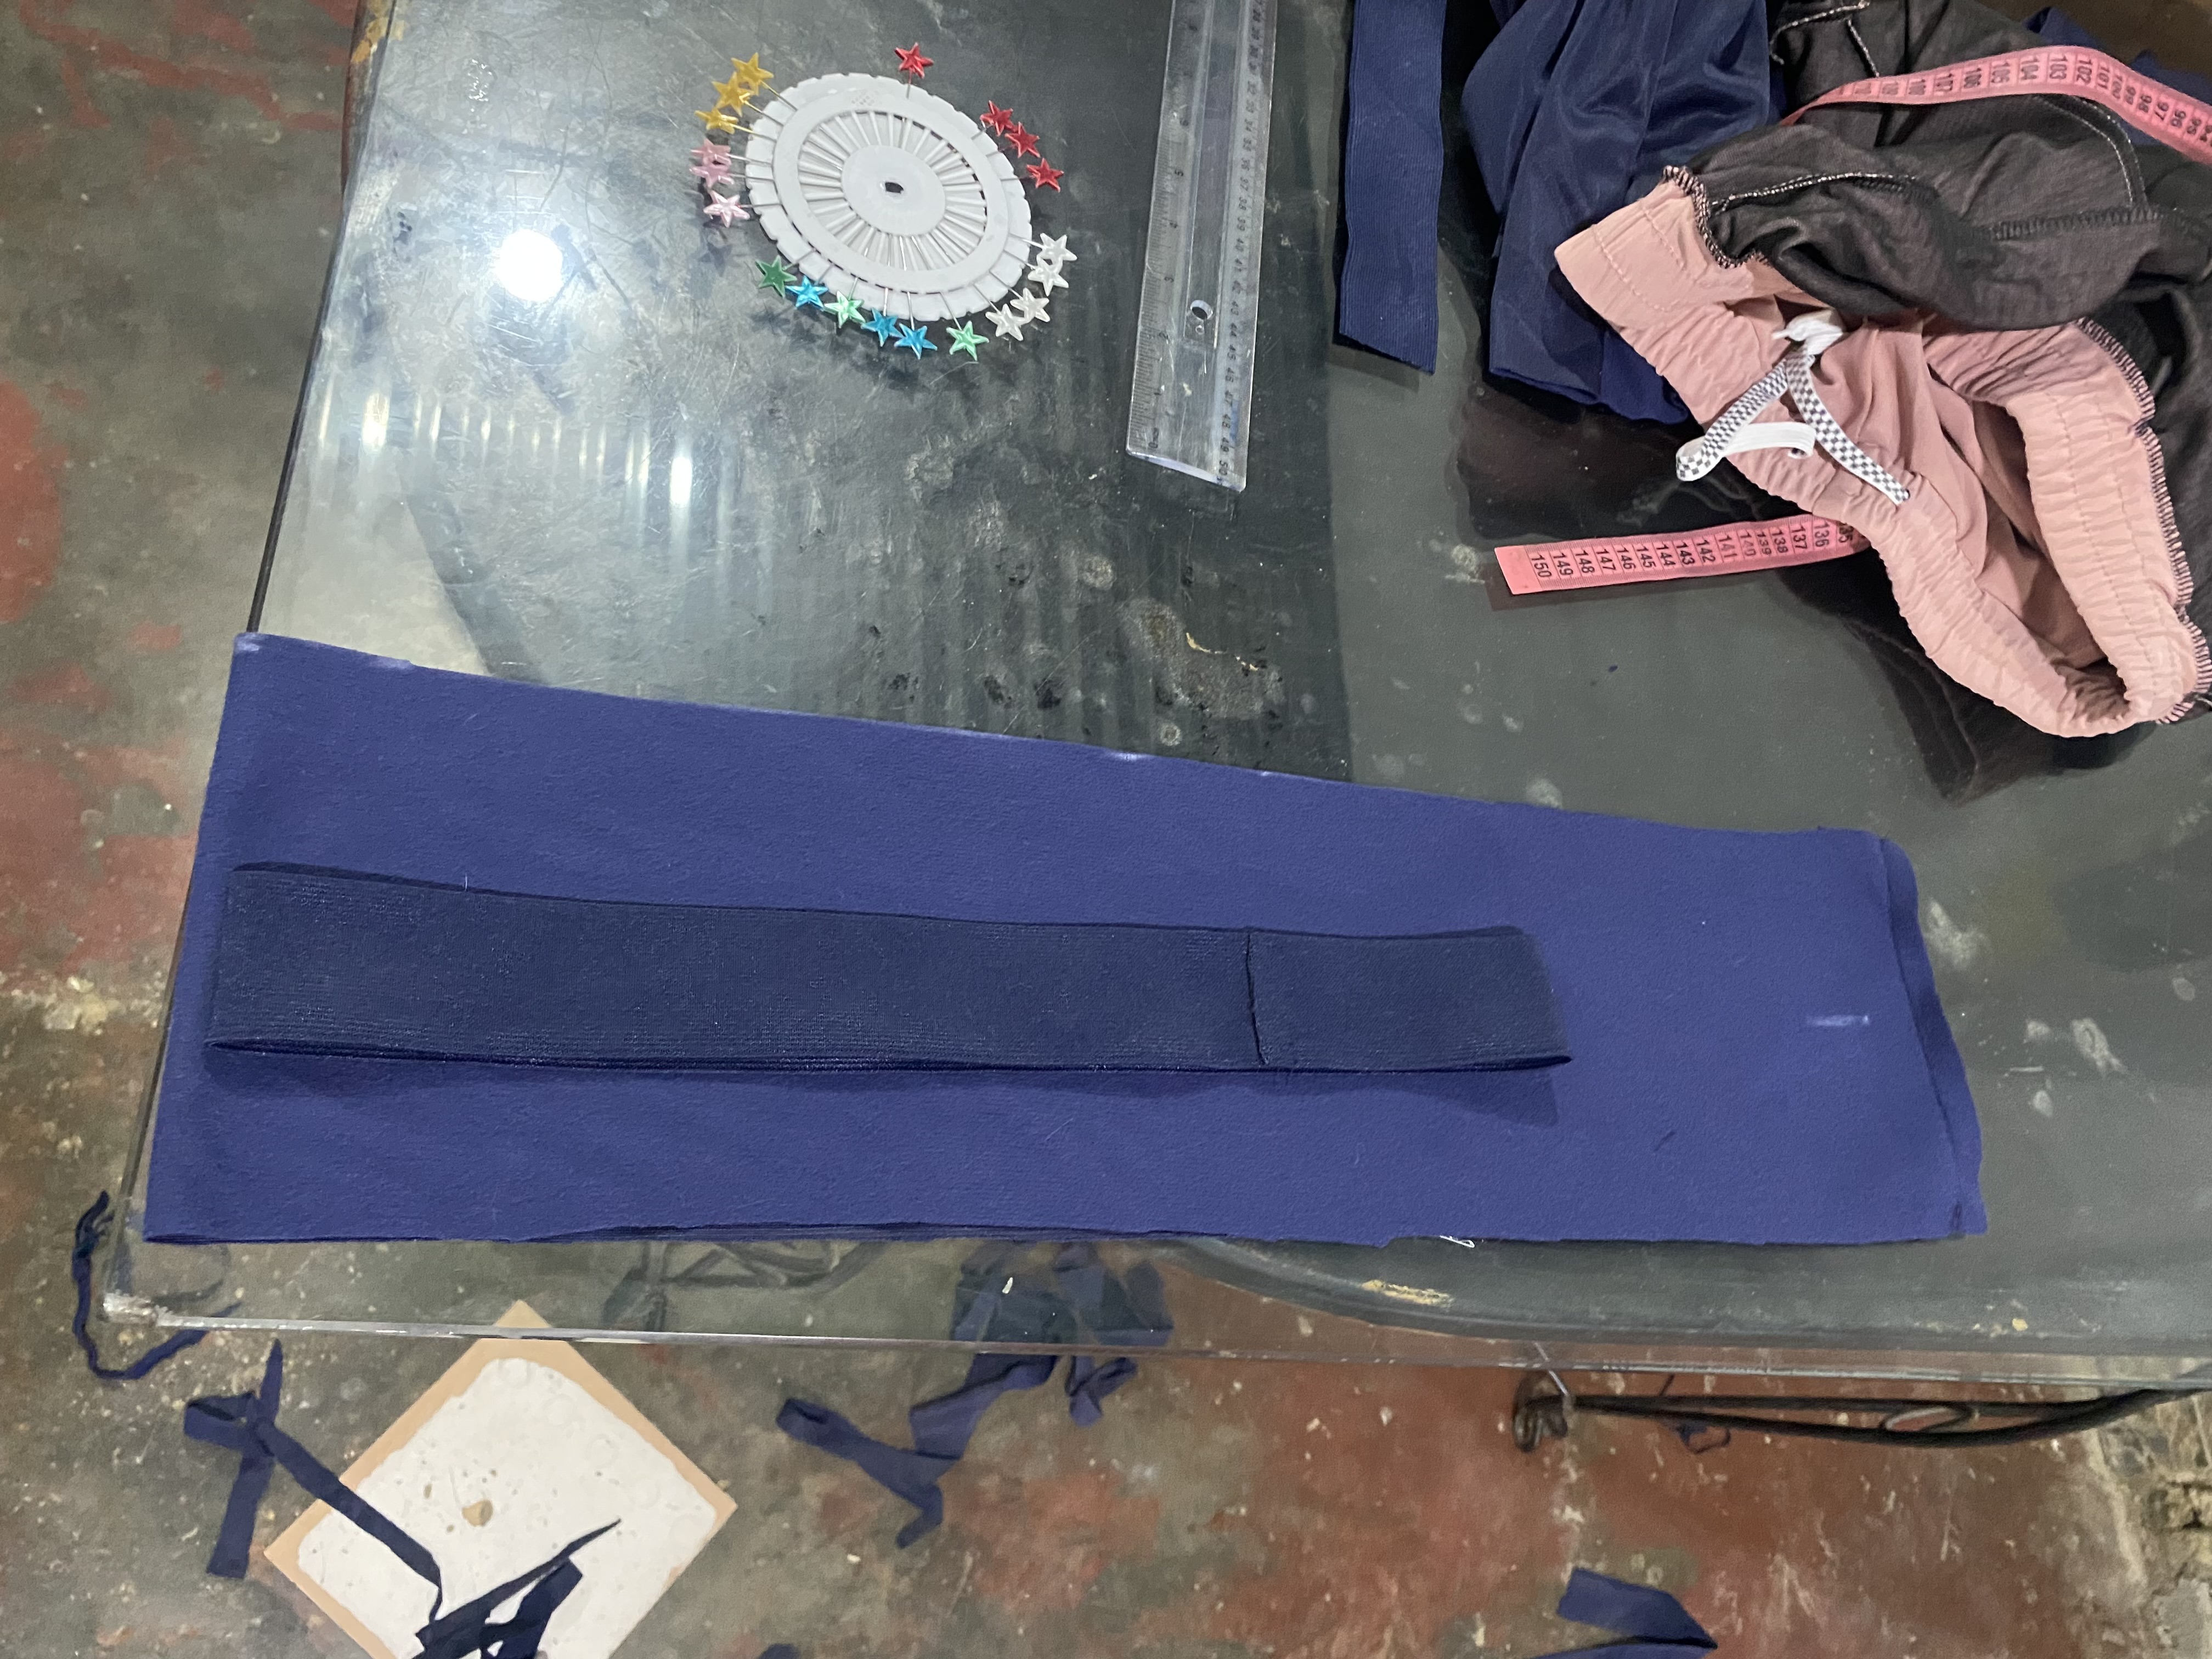
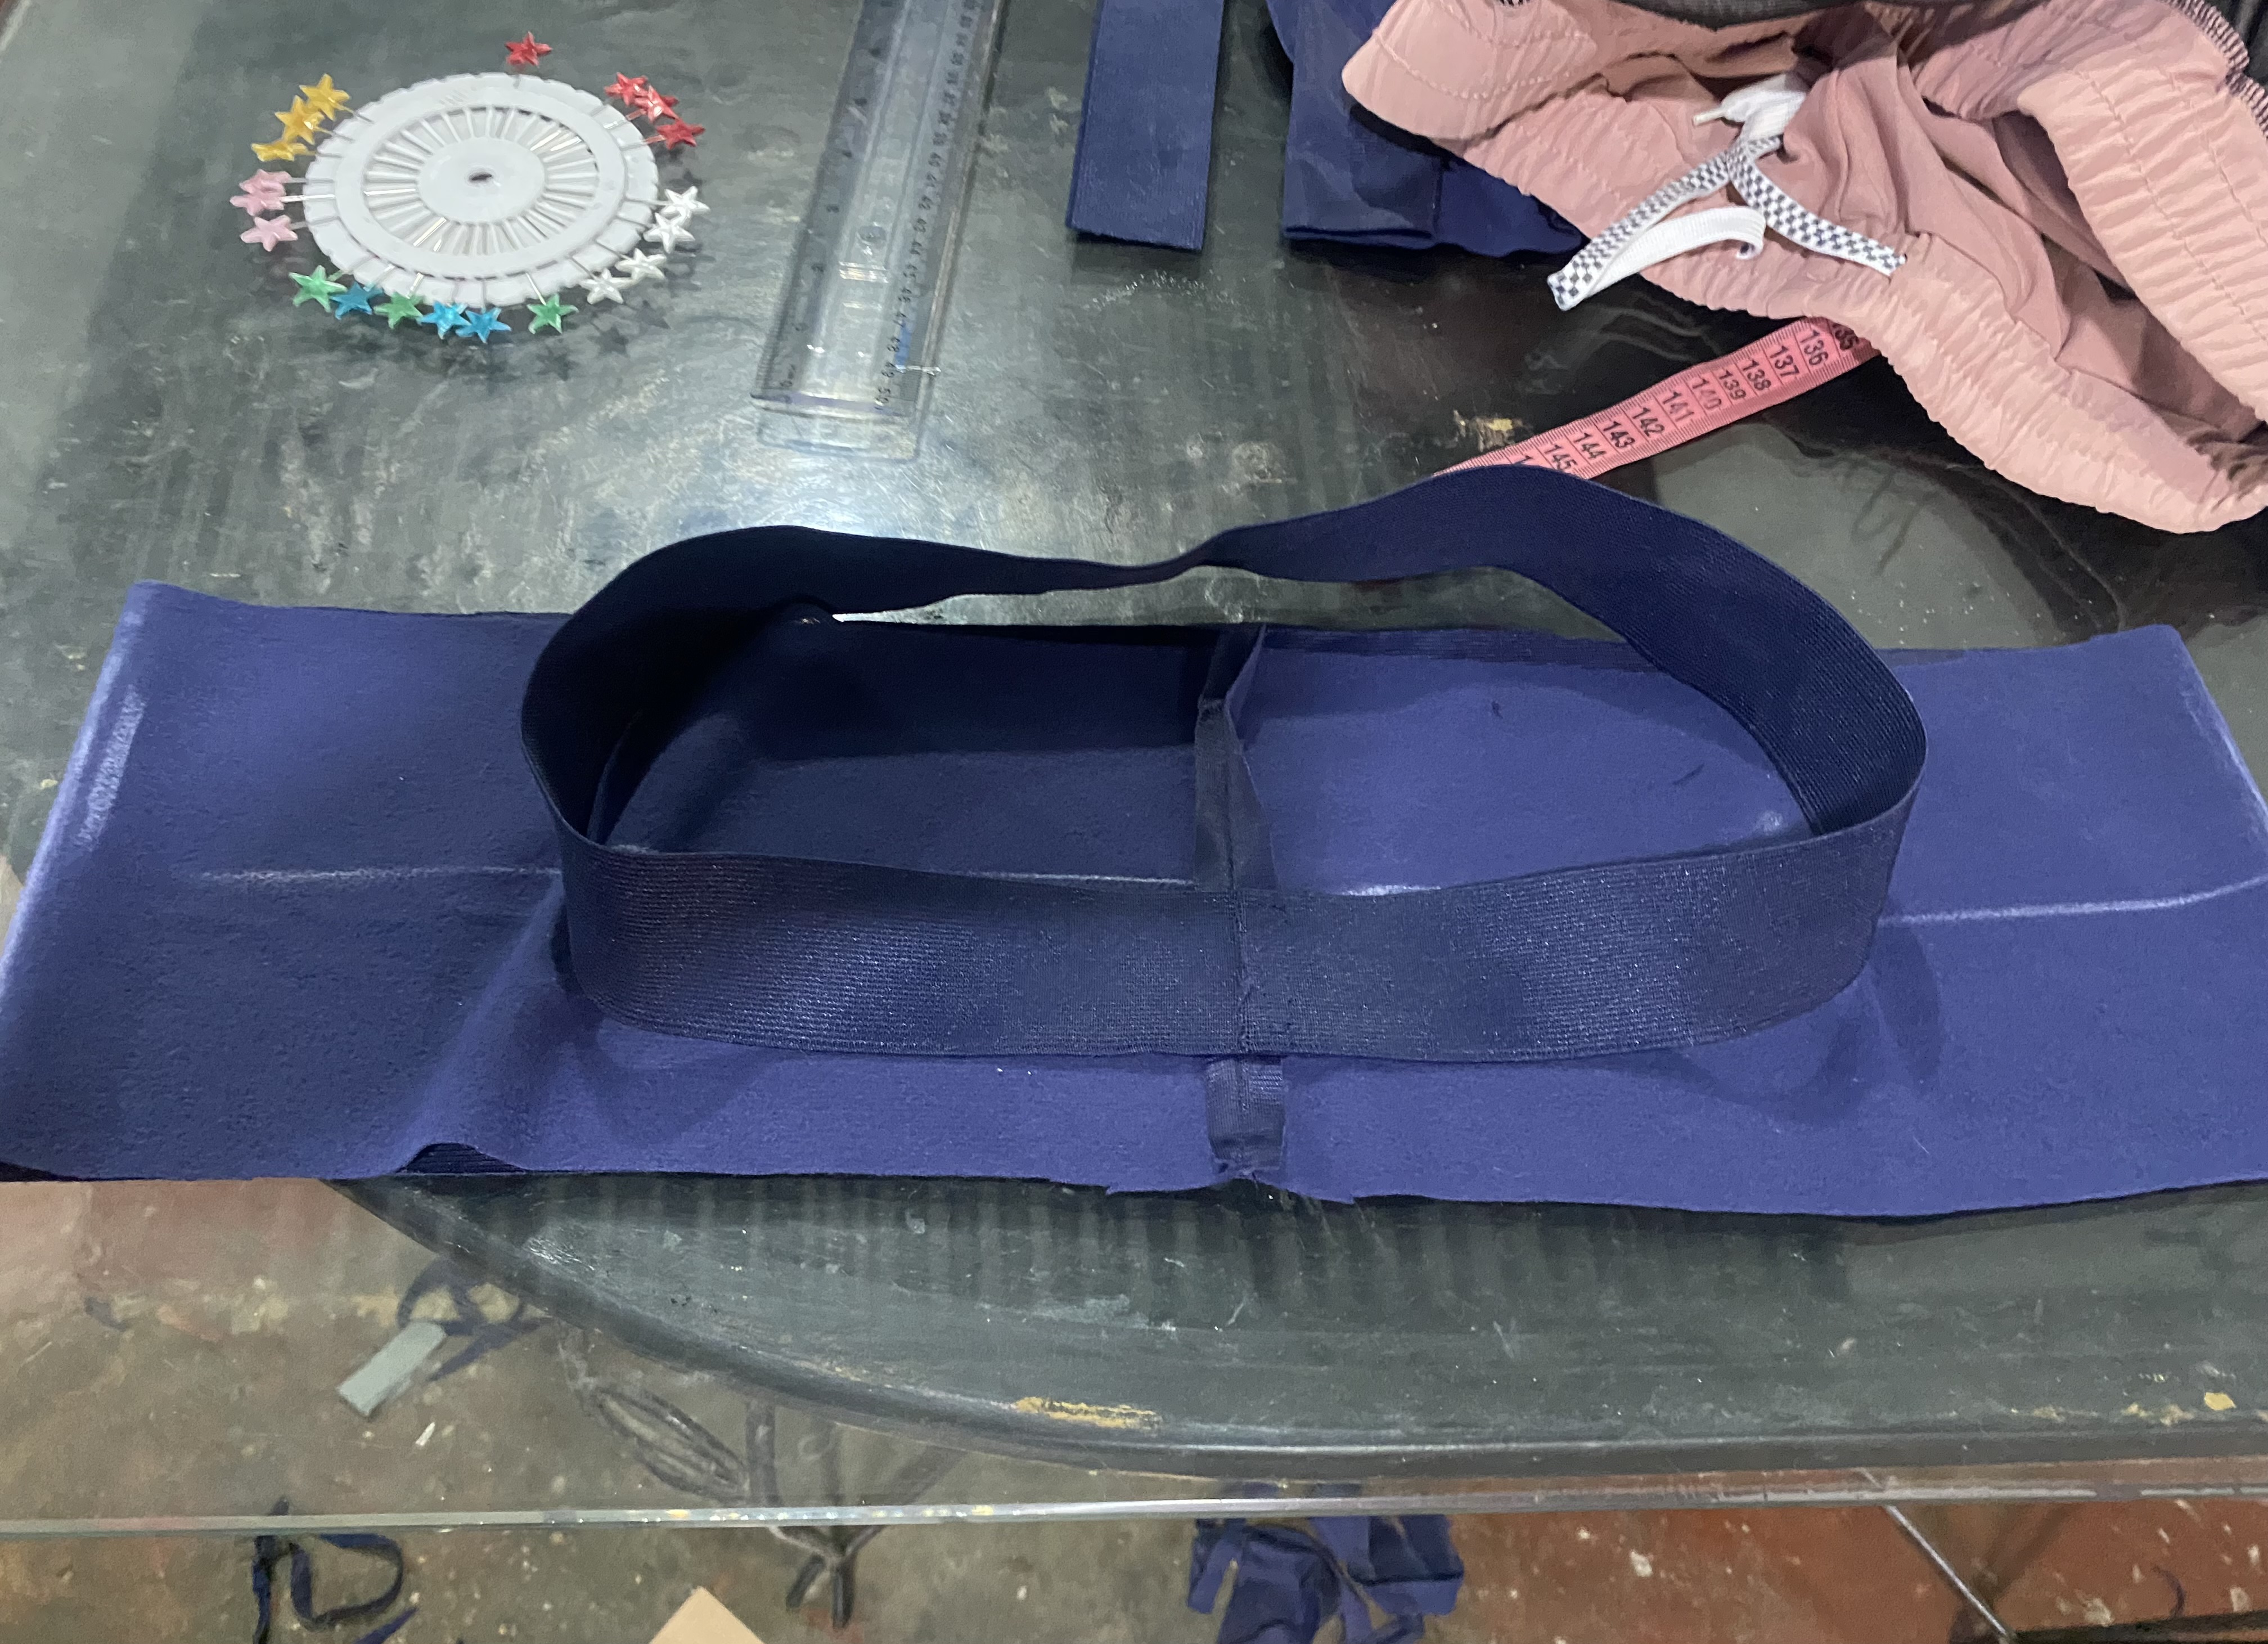
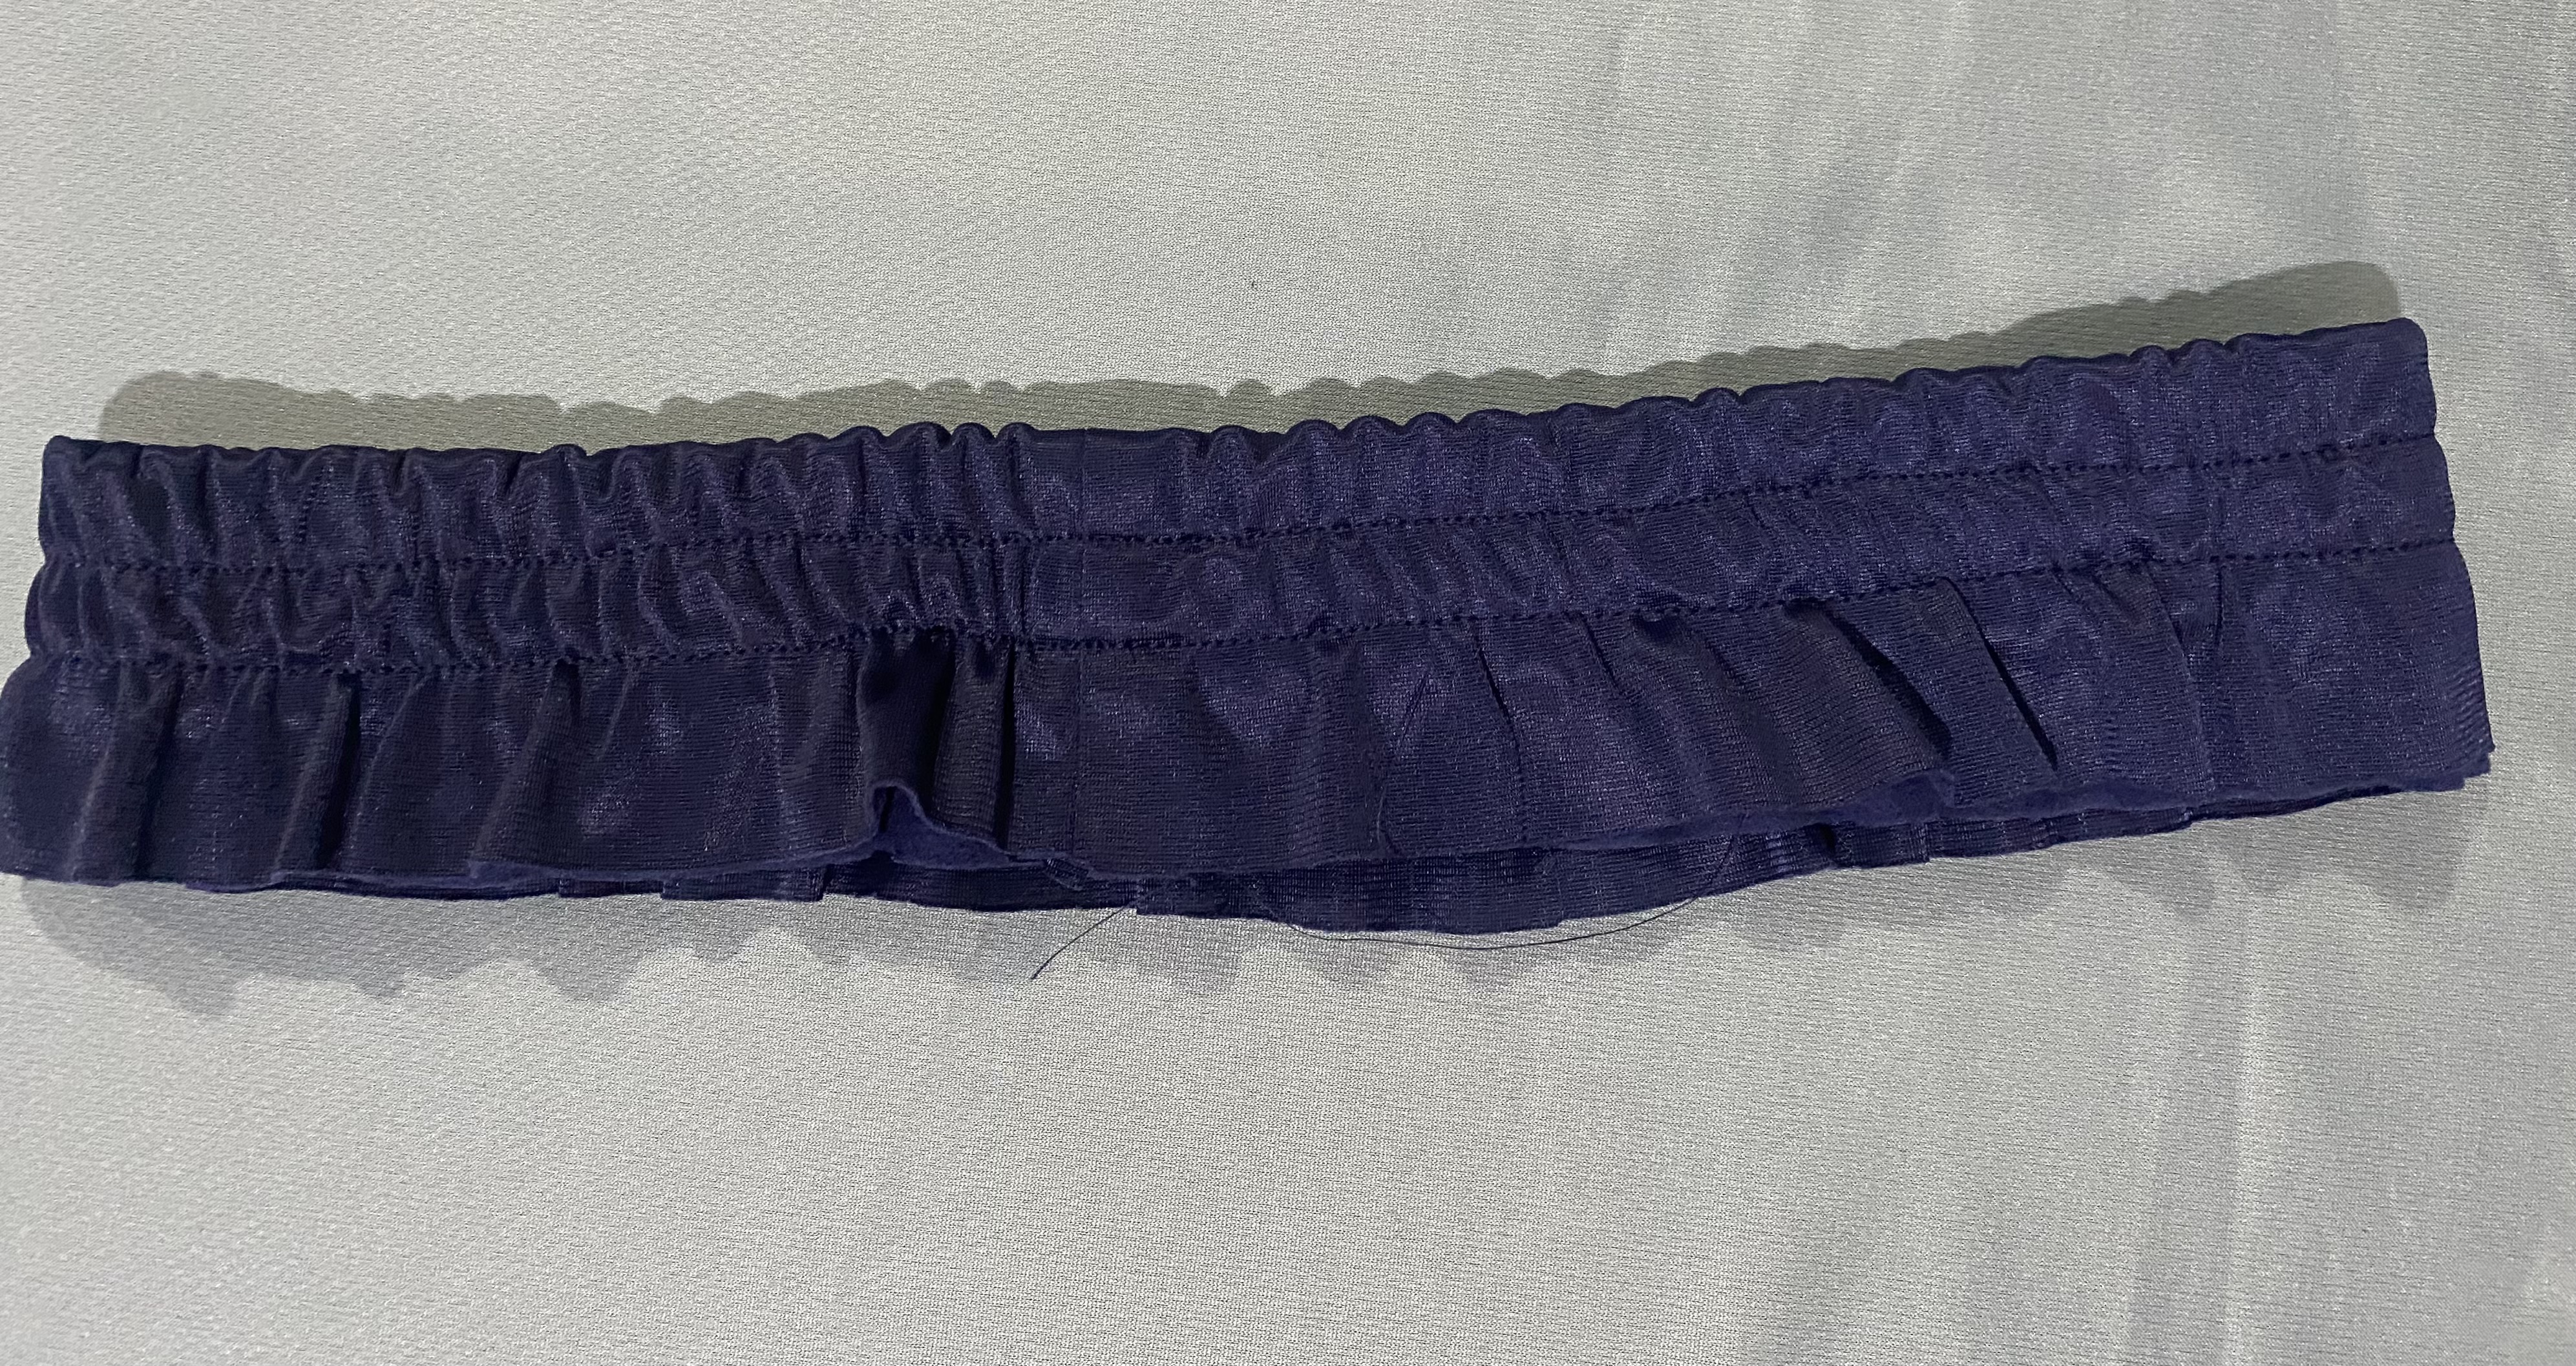
Para la cintura cortaremos una tira de tela de 15 cm de ancha y el largo según la medida de la cintura del mono, está la doblaremos a la mitad para cubrir el elástico quedando de aproximadamente 7,5 cm de alto, cortaremos el elástico 10 cm menos de los que nos dé la medida de cintura, luego le pasaremos varias costuras para fijar el elástico y vamos a coser cuando tengamos el mono listo.
For the waist, we will cut a strip of fabric 15 cm wide and the length according to the waist measurement of the jumpsuit. We will fold it in half to cover the elastic, leaving it approximately 7.5 cm high. We will cut the elastic 10 cm less than the waist measurement, then we will sew several seams to secure the elastic and we will sew when we have the jumpsuit ready.
 |  |
|---|---|
 |  |
En este paso vamos a comenzar a hacer el bolsillo de nuestro mono, colocaremos una de las piezas del bolsillos sobre una de las piezas delanteras del mono, le haremos la figura con costura y luego volteamos y pasamos costura por el lado de afuera, luego unimos a la otra pieza del bolsillo pasando costura por toda la orilla, es importante reforzarlo para que el bolsillo sea resistente.
In this step we are going to begin making the pocket of our jumpsuit, we will place one of the pocket pieces on one of the front pieces of the jumpsuit, we will make the figure with sewing and then we will turn it over and sew along the outside, we will repeat with the other pieces of the jumpsuit, then we will join the other pocket piece by sewing along the entire edge, it is important to reinforce it so that the pocket is resistant, when we have the pockets ready we will join the two front pieces by the seam.
 |  |
|---|---|
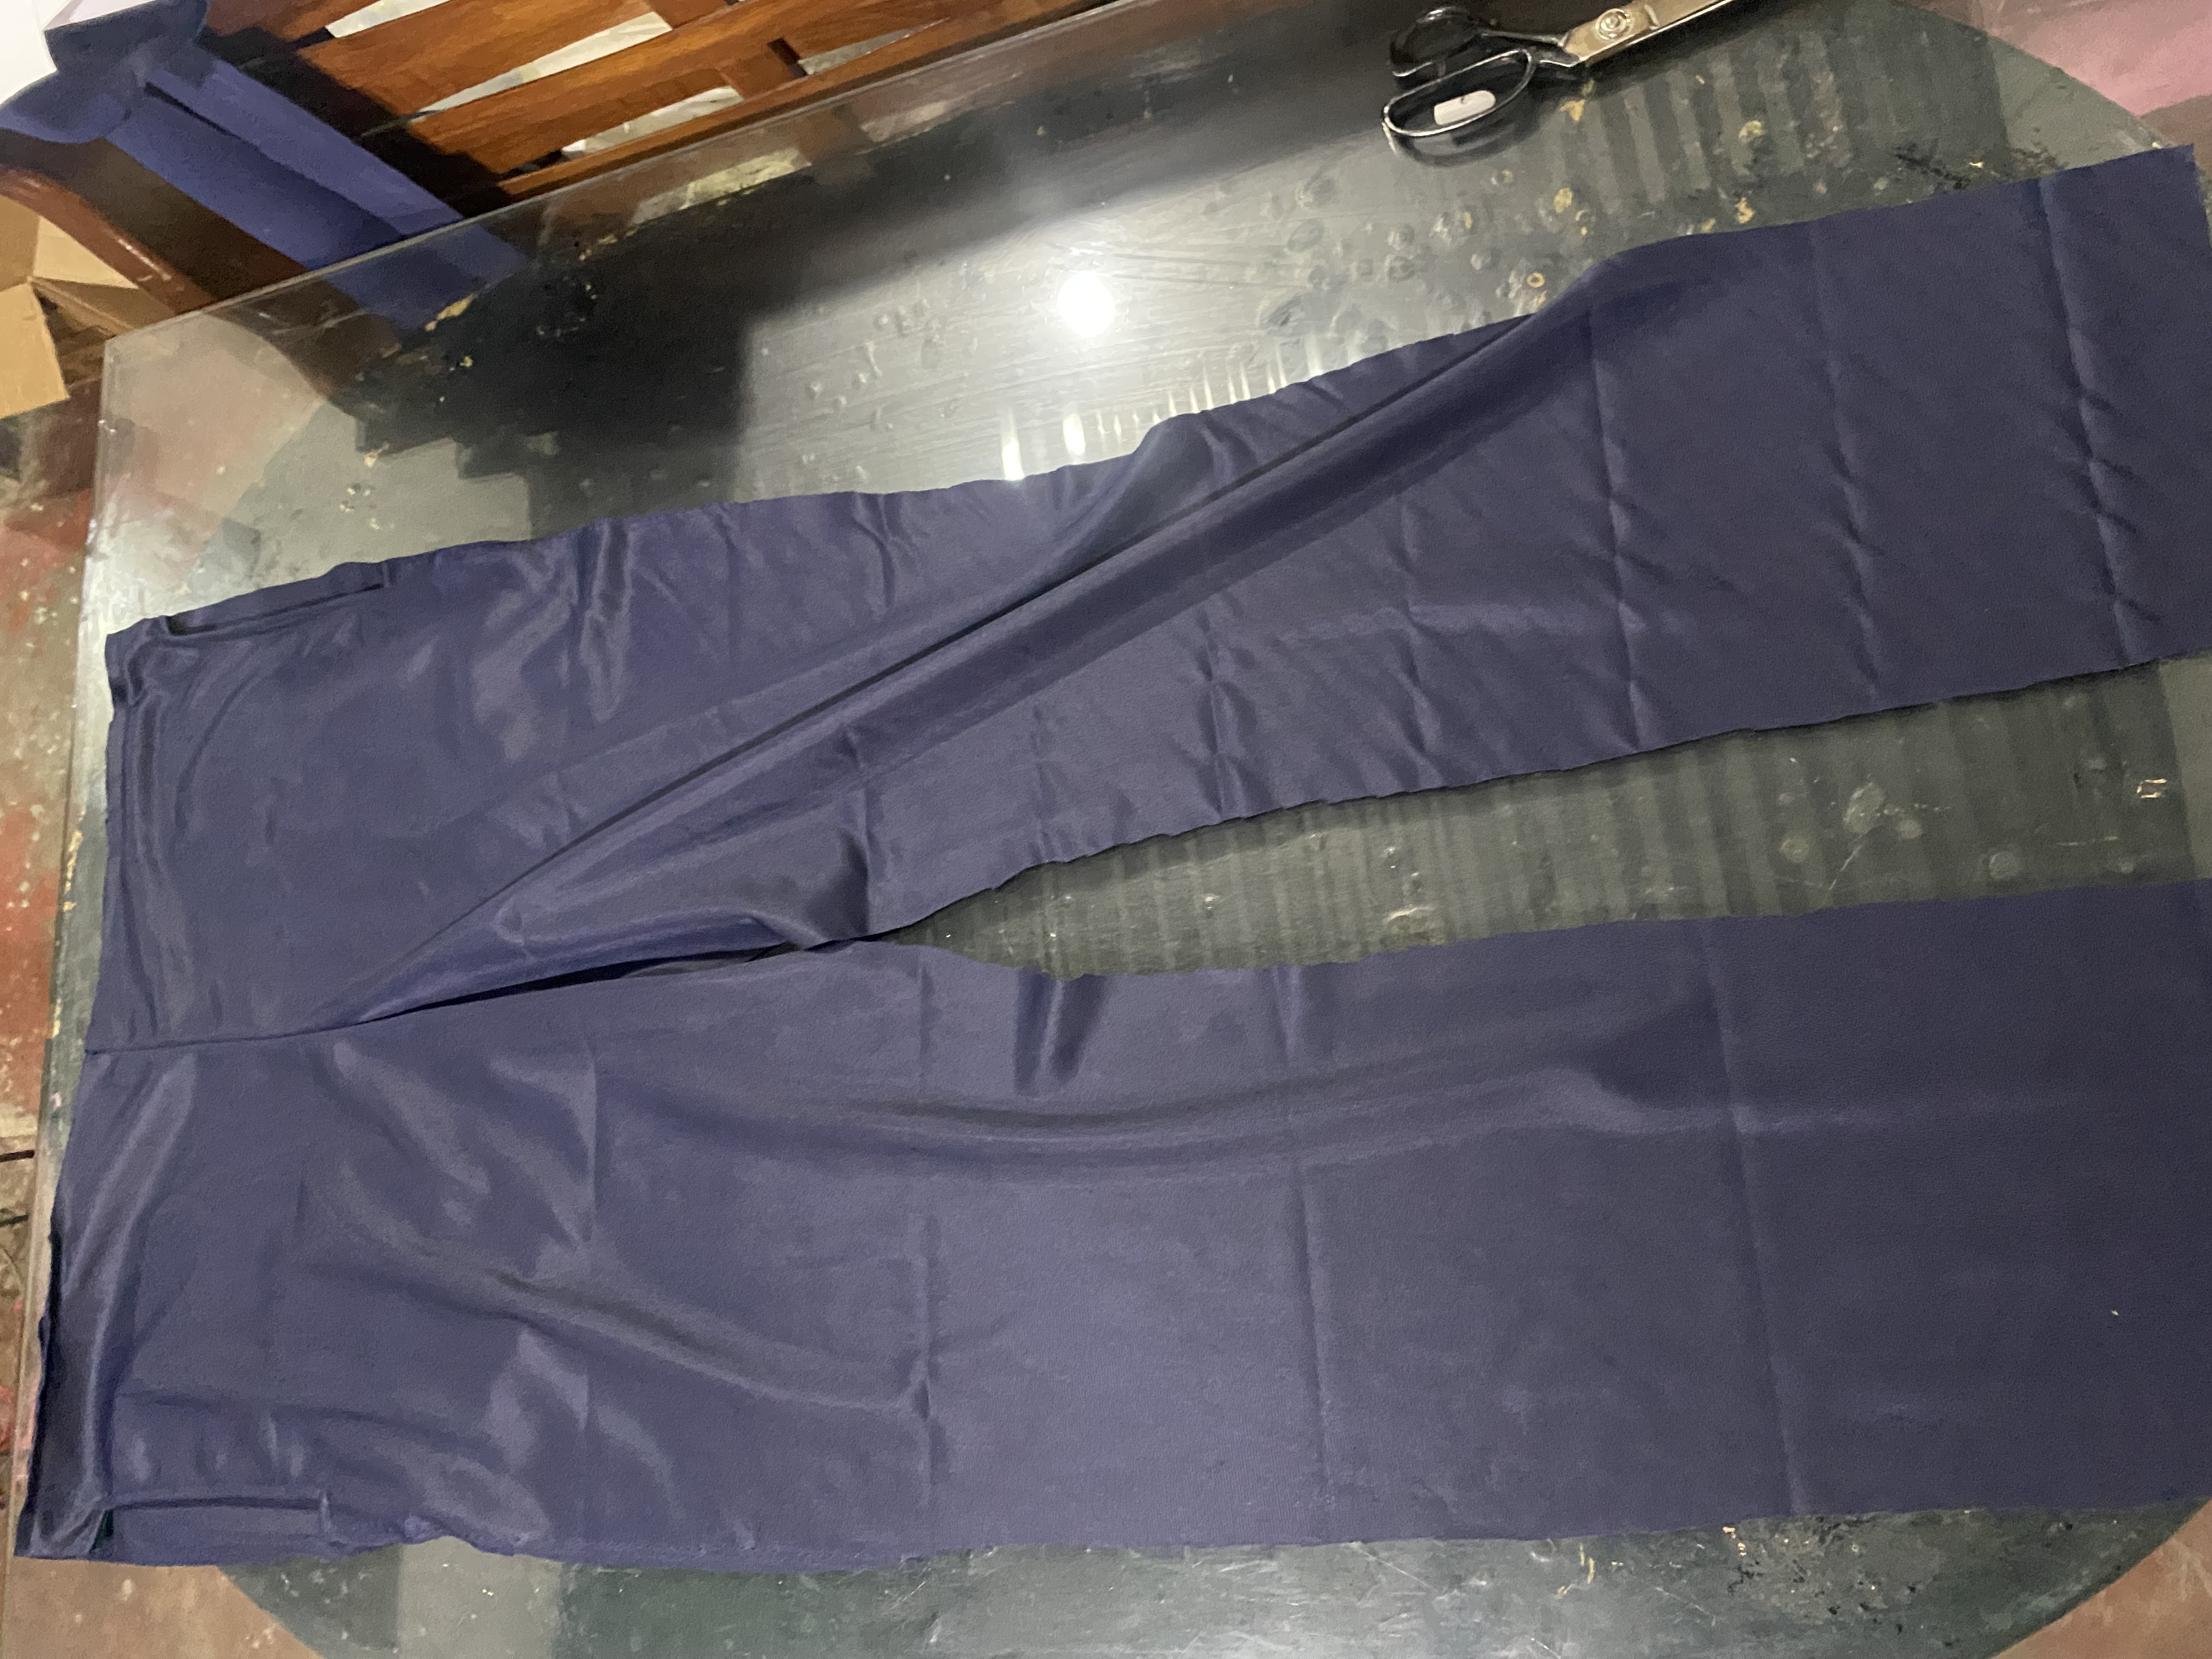 |  |
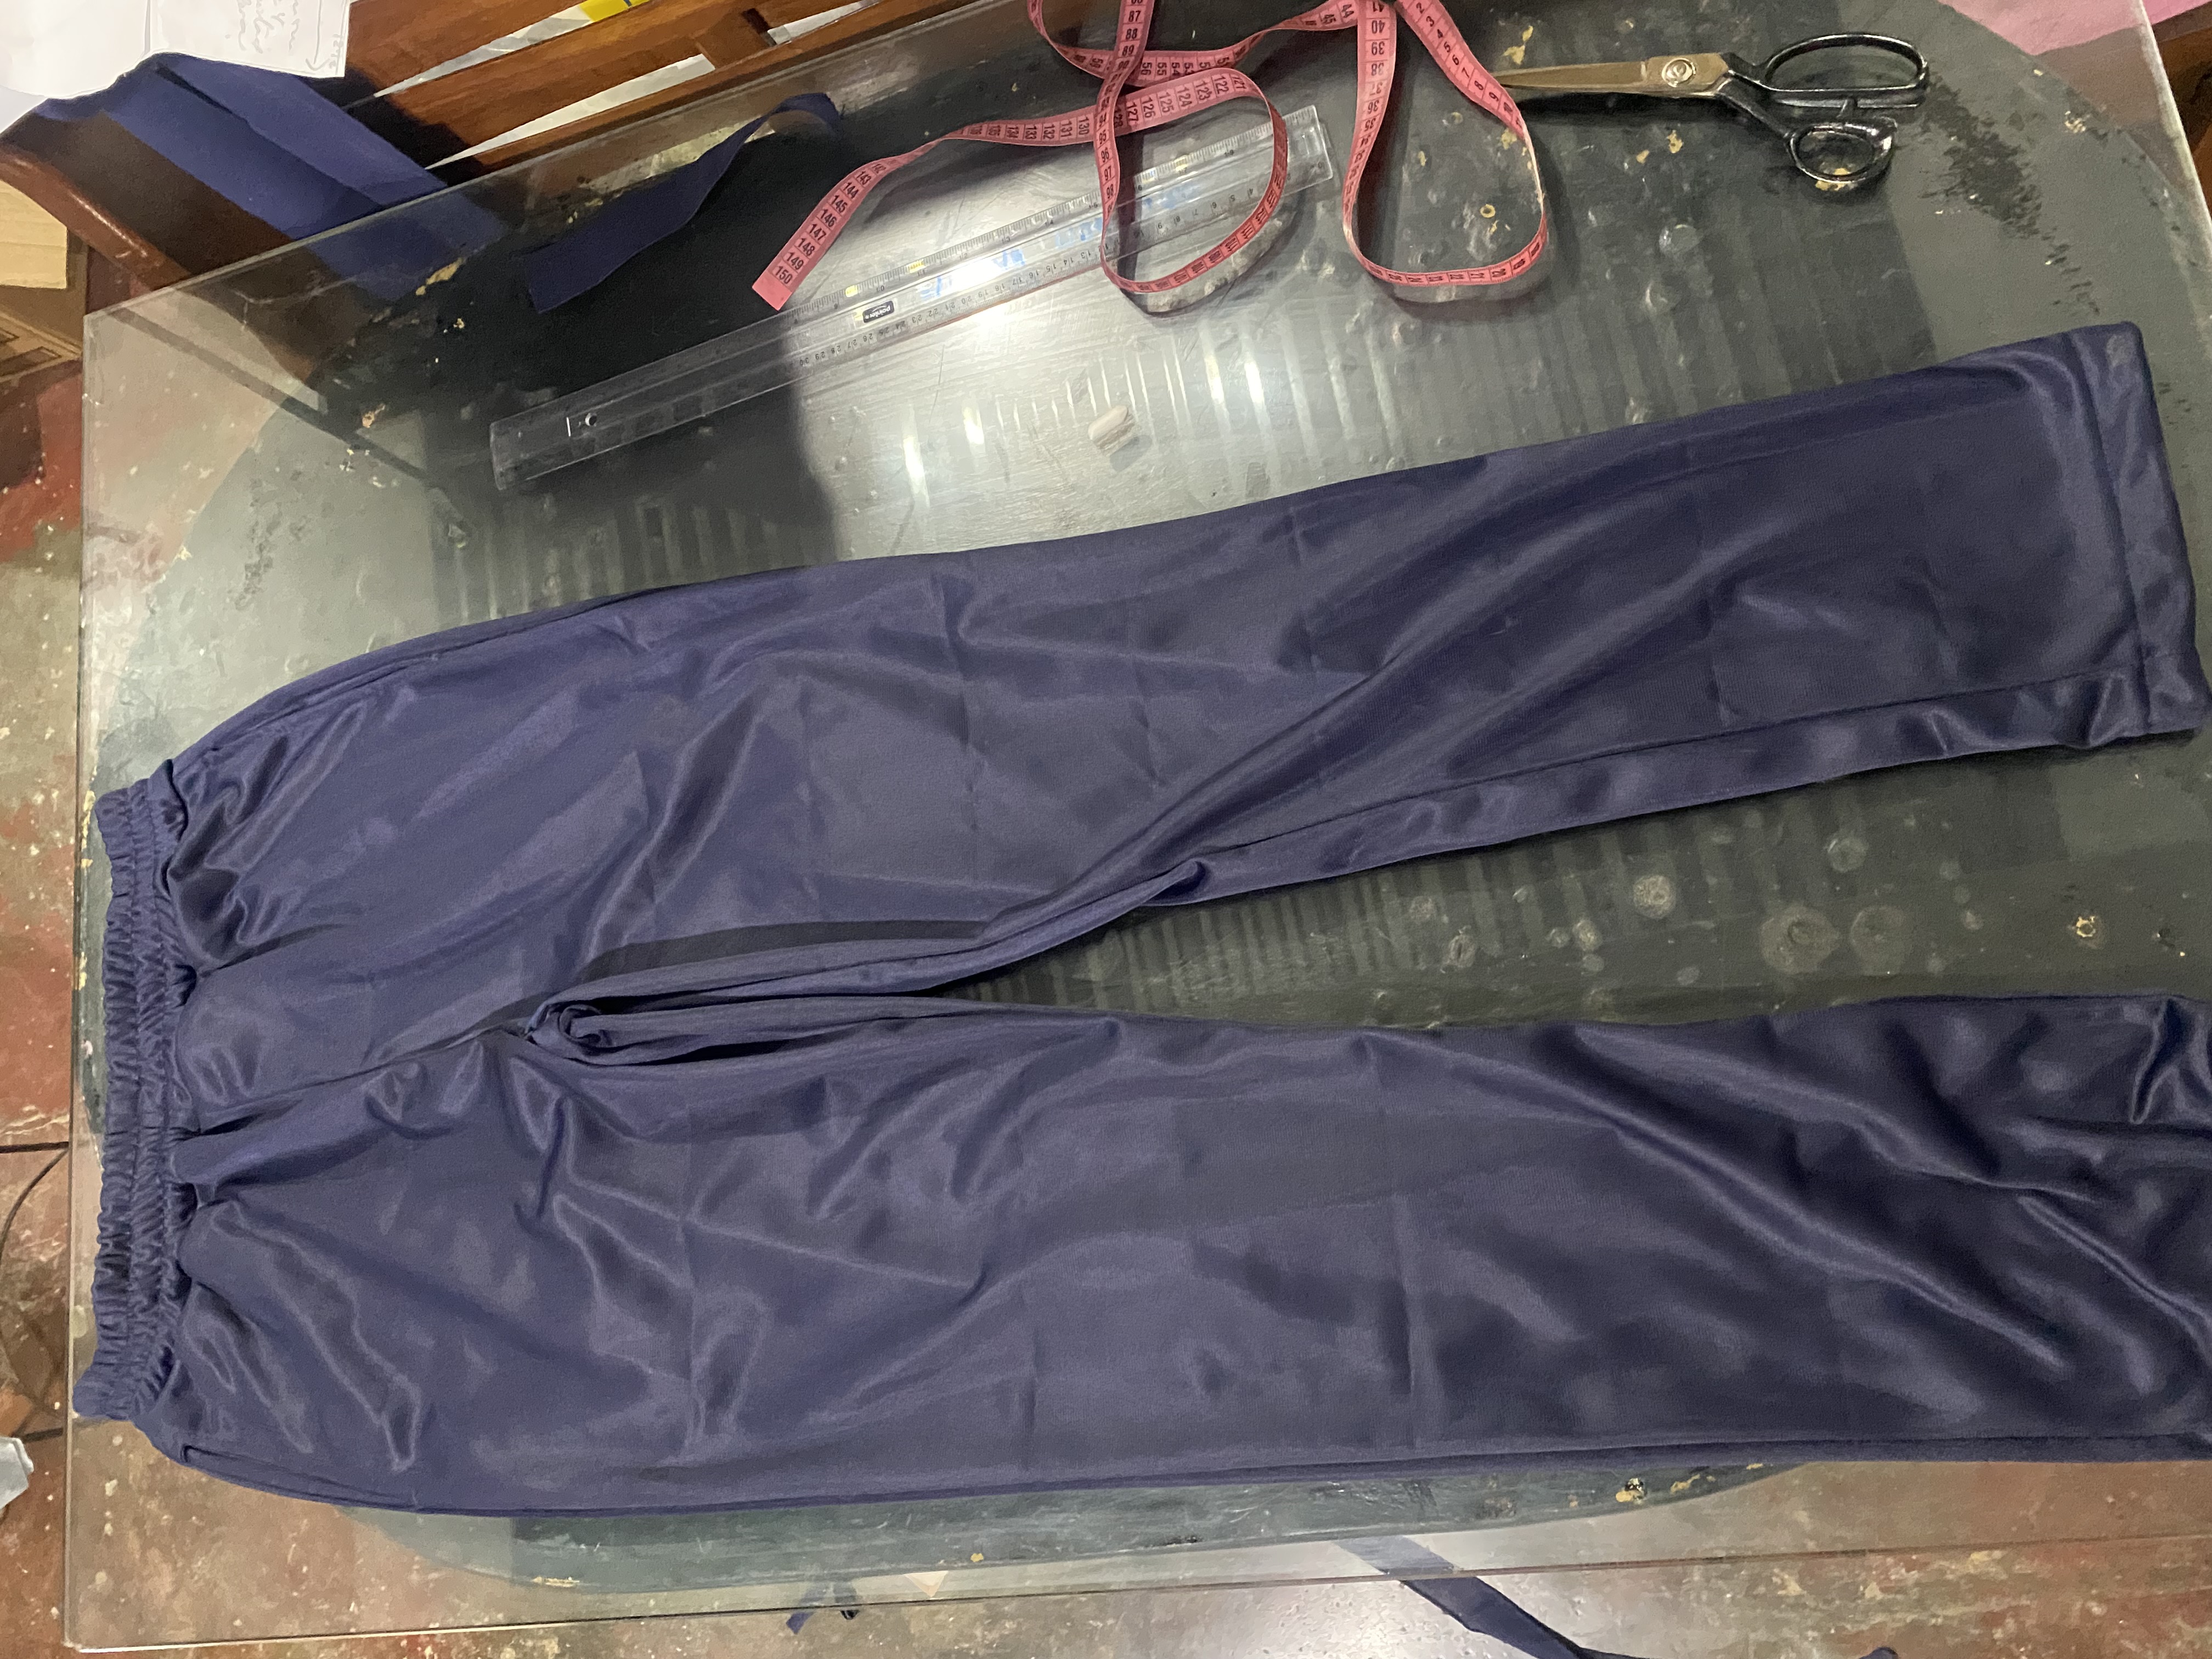
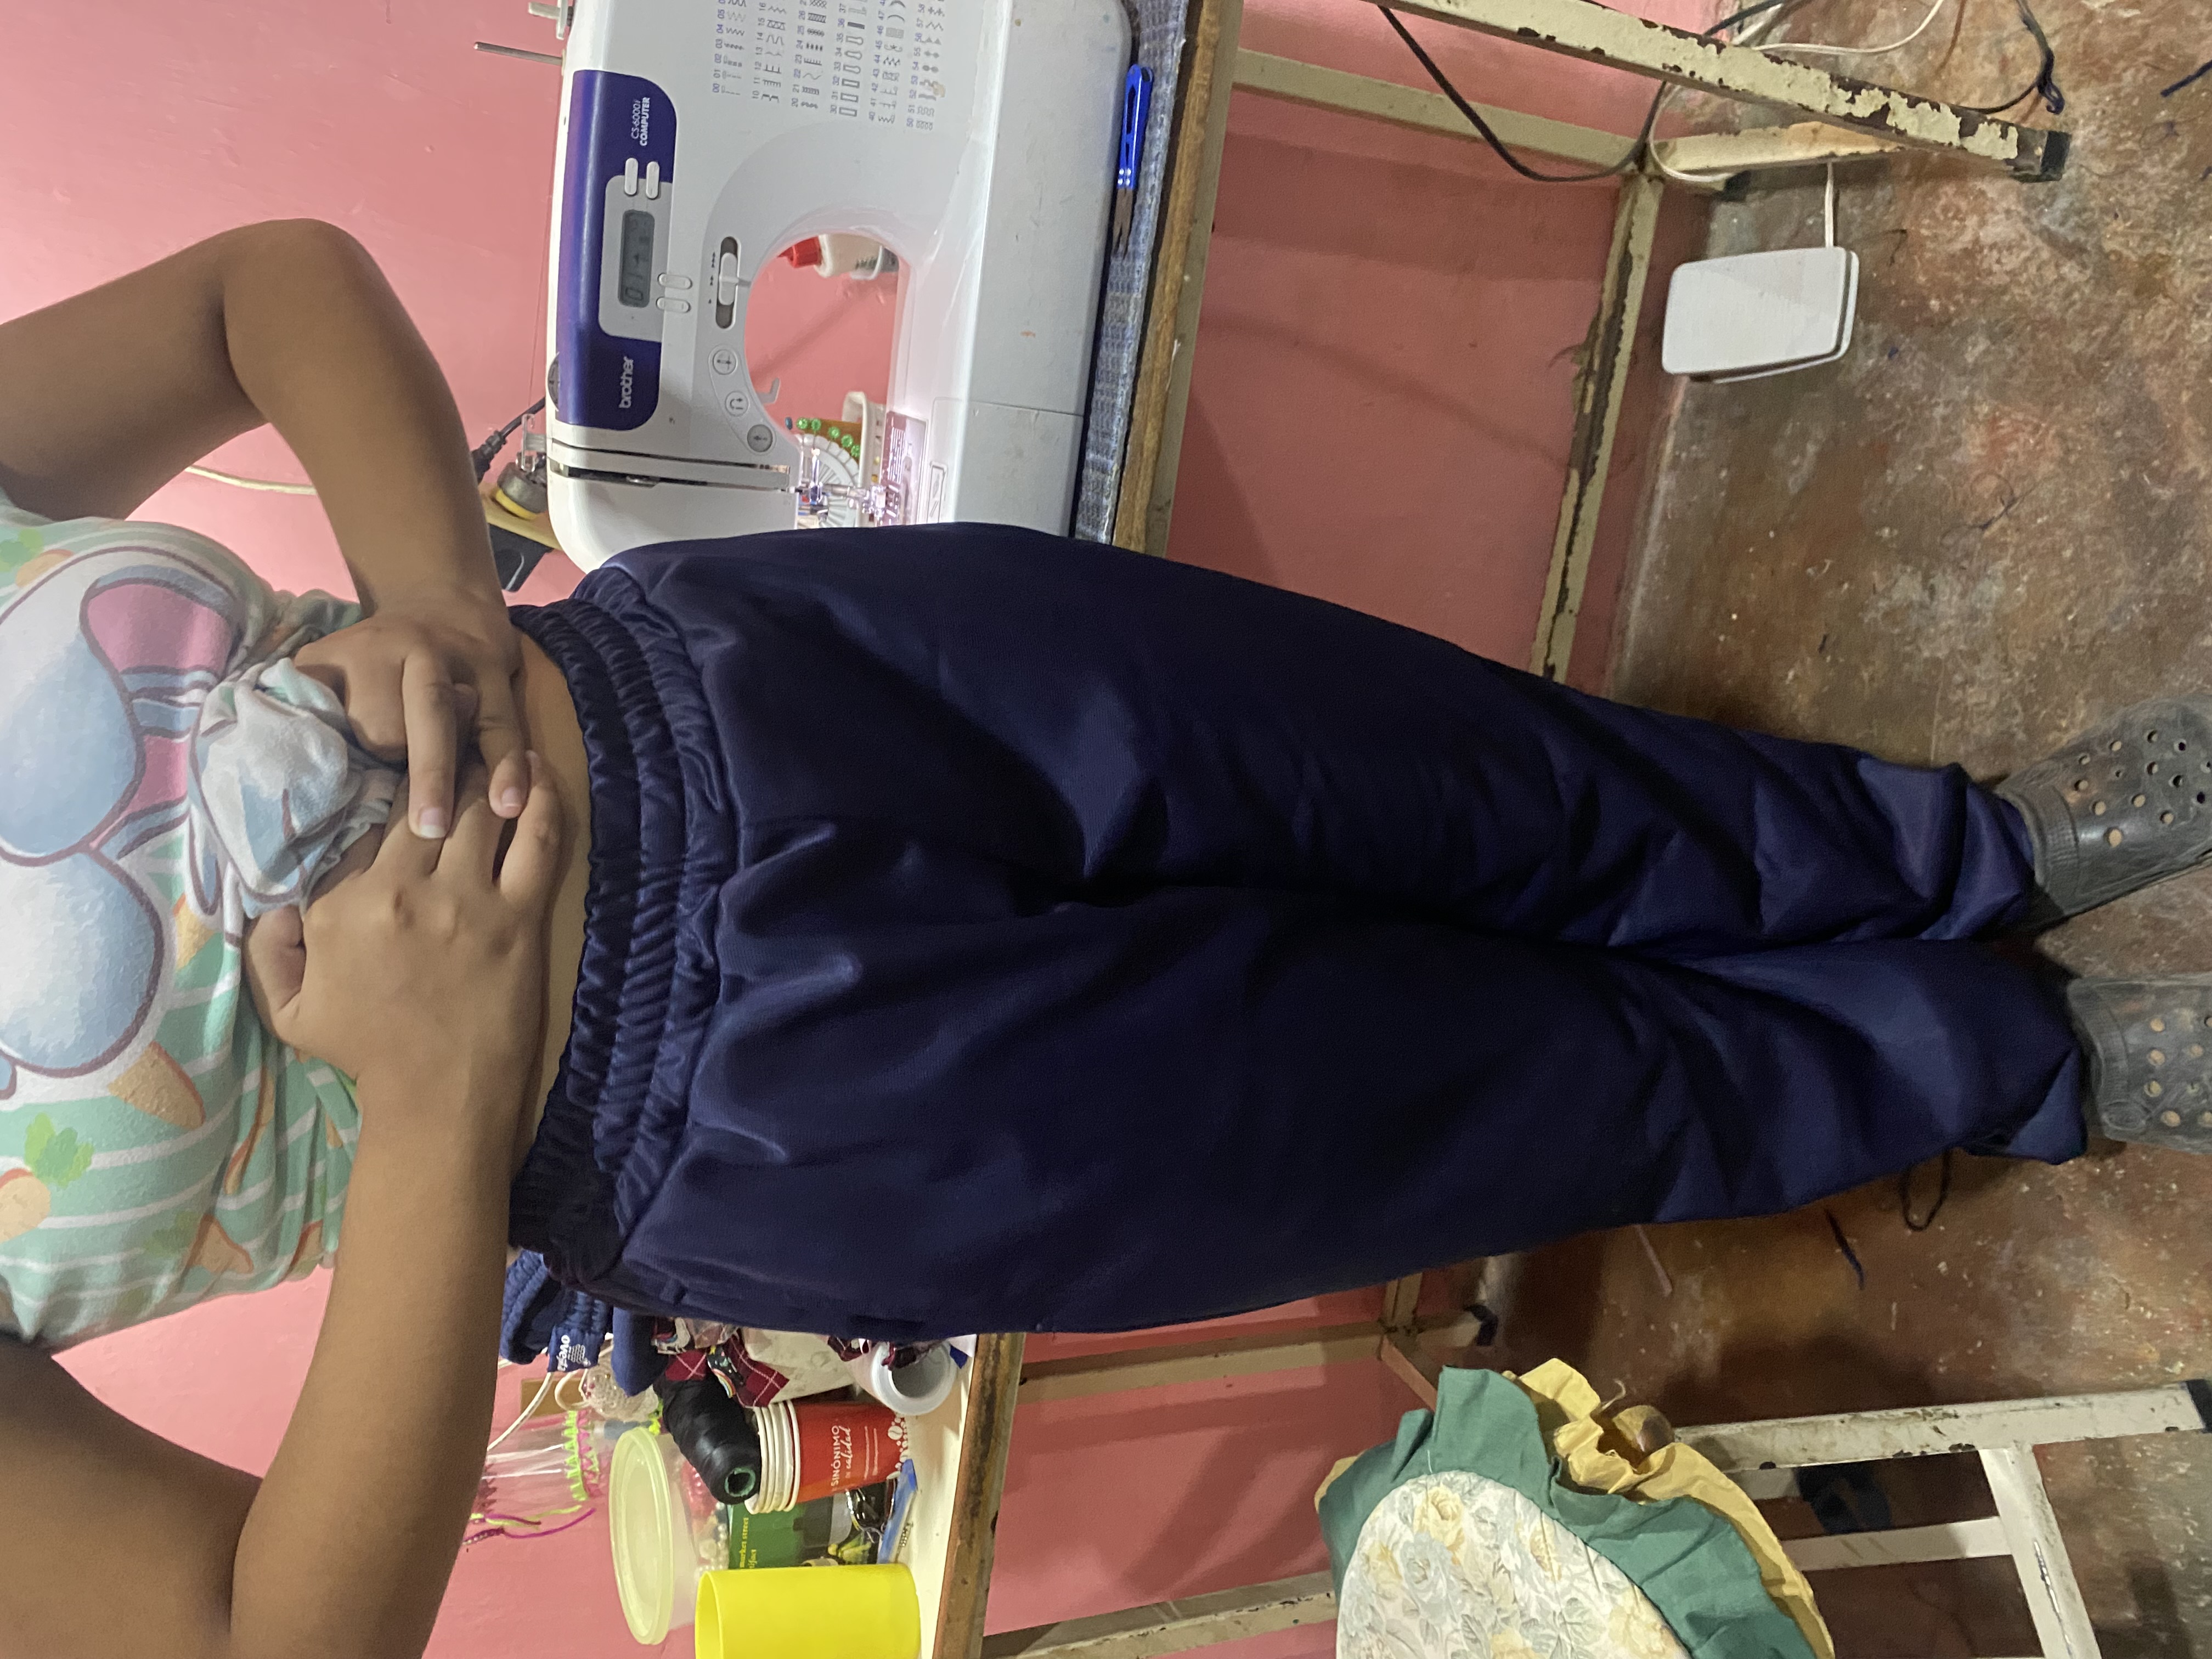
Continuaremos uniendo con costuras las piezas traseras por el fundillo , seguido coseremos los laterales y el entrepiernas, luego de armar estas prendas me gusta hacer la primera prueba, llamé a mi hija y al medírselo le quedó perfecto 😊, la cintura de el mono midió 53 cm.
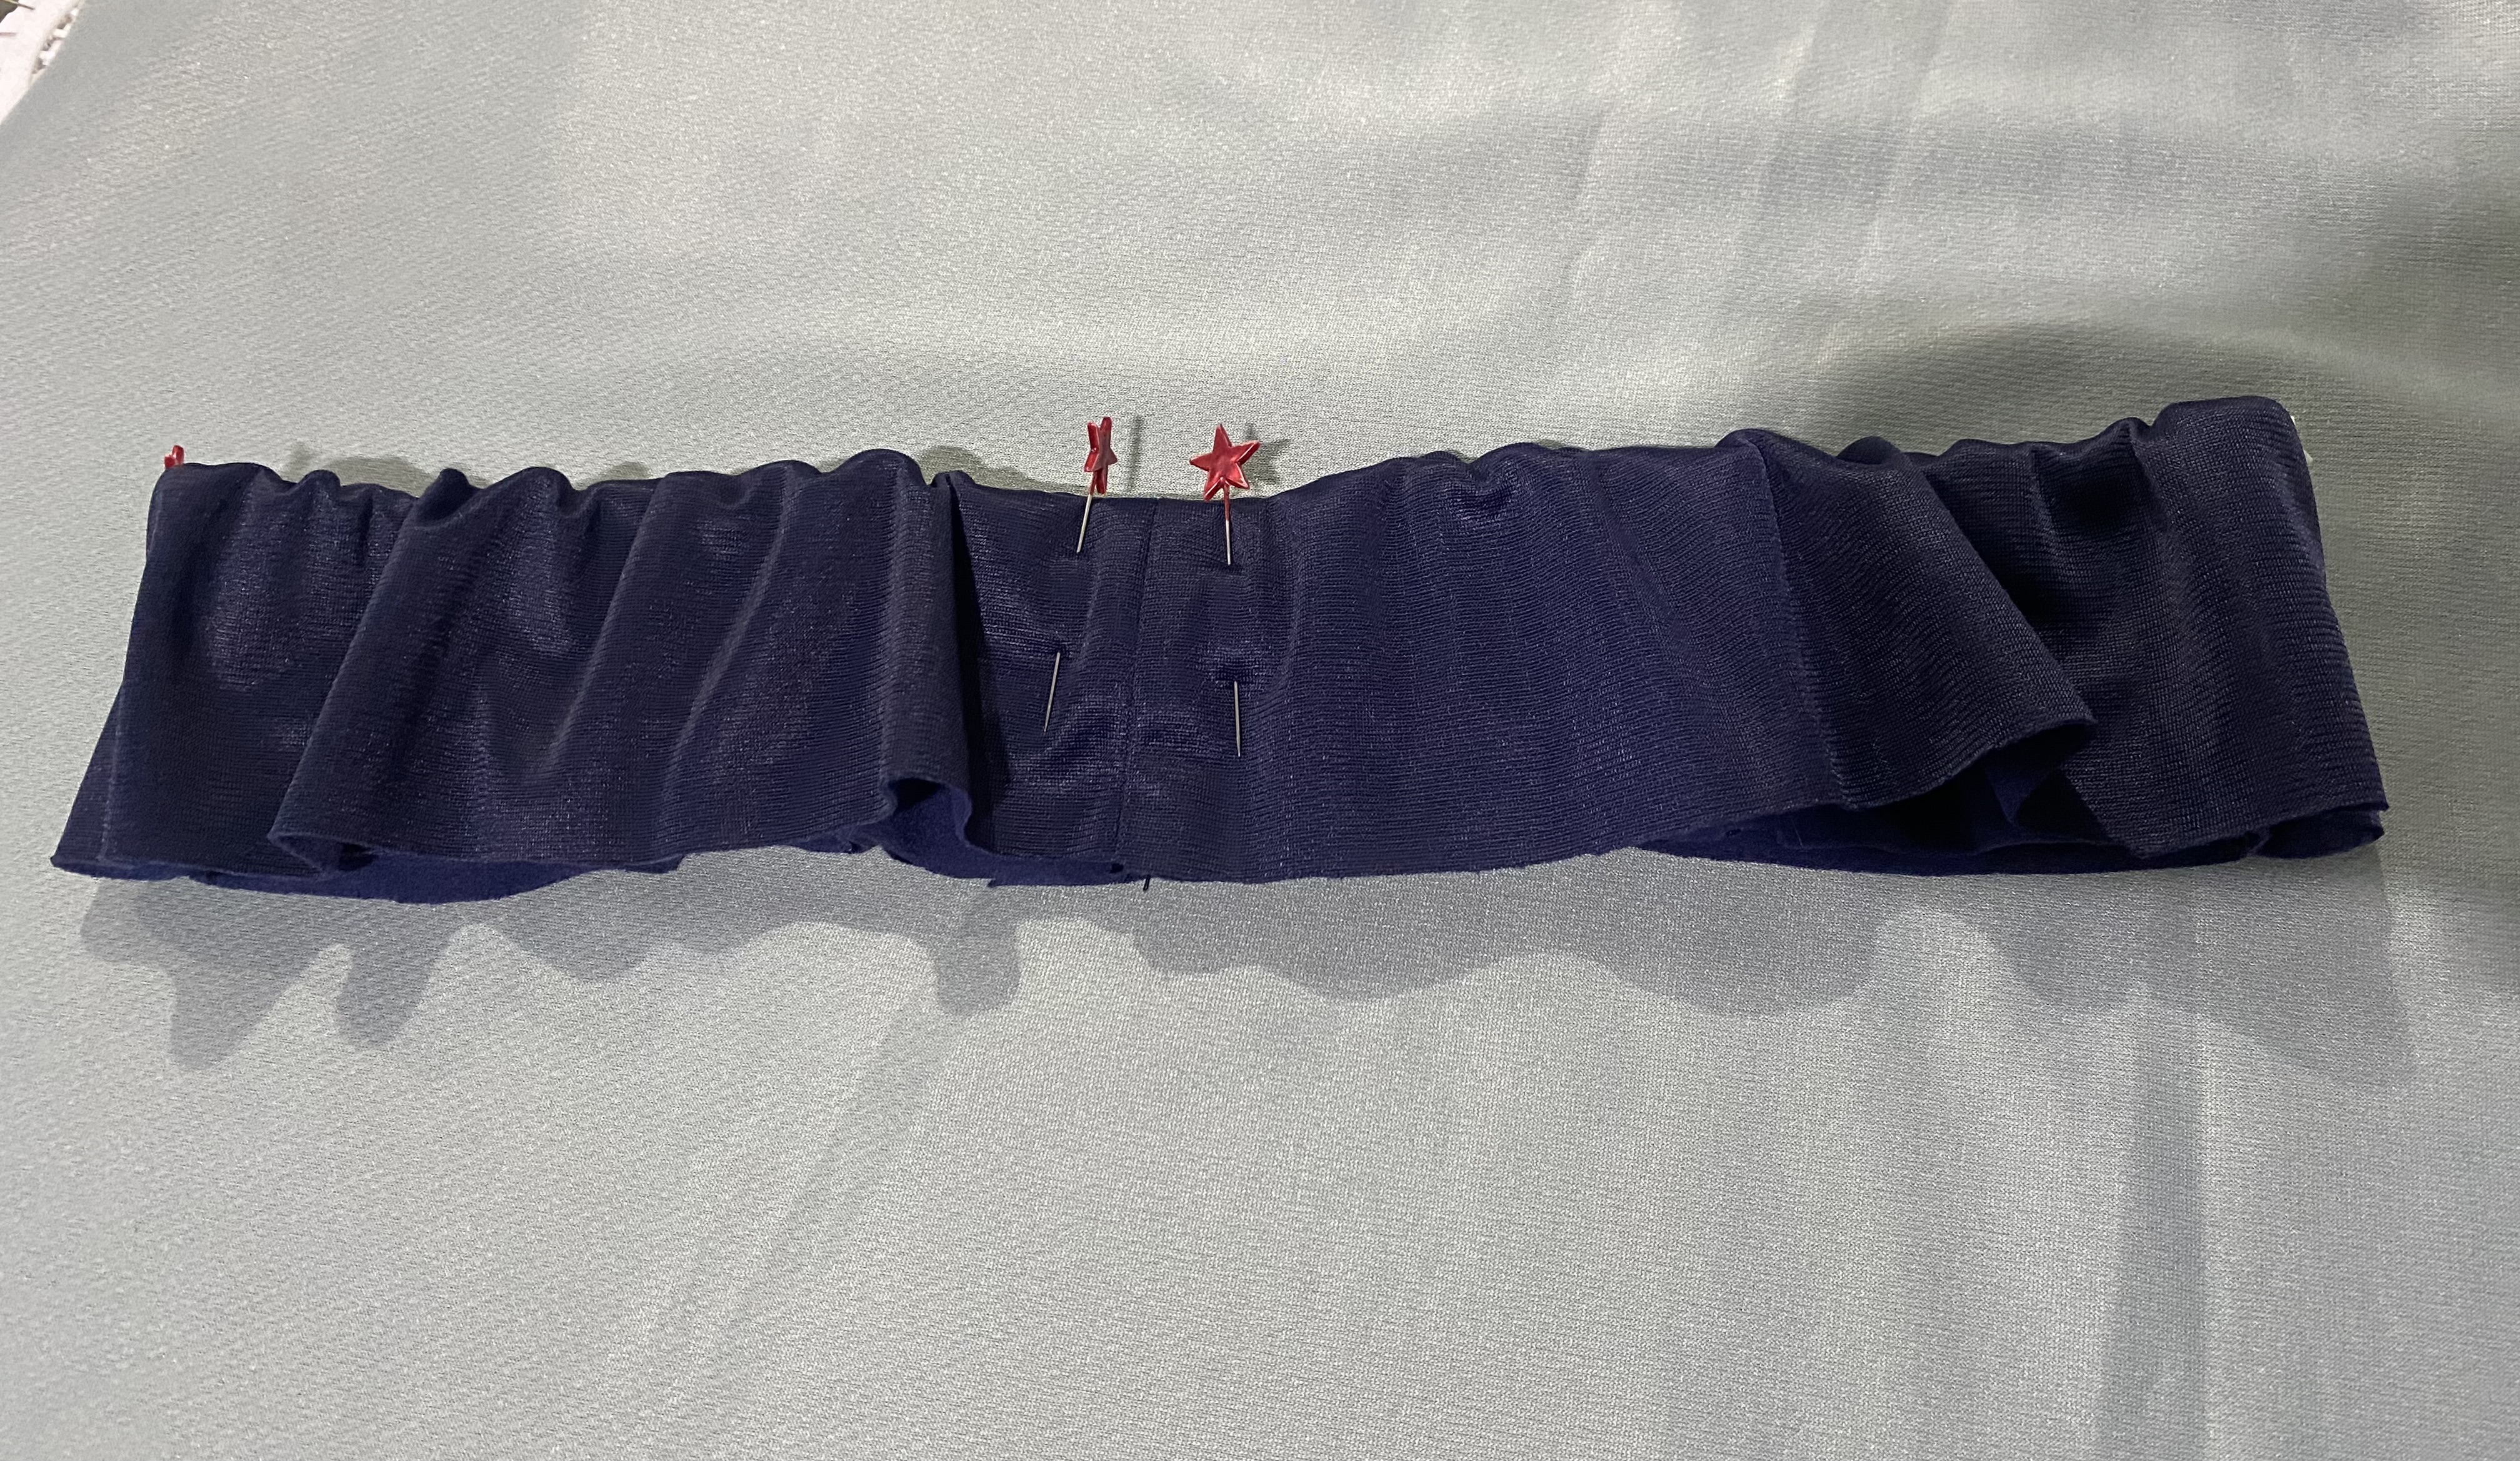
para unir la cintura vamos a pasar costura a unos 2 cm de distancia entre el mono y la tela sobrante de la cintura pasaremos varias costuras para reforzar, para finalizar el mono cortaremos el excedente en la parte de abajo y hacemos el ruedo de aproximadamente centímetro y medio de ancho, y así ya estará listo este mono deportivo.
We will continue to sew the back pieces together at the gusset, then we will sew the sides and the crotch. After putting these garments together I like to do the first fitting. I called my daughter and when she measured it, it fit her perfectly 😊. The waist of the jumpsuit measured 53 cm.
To join the waist, we will sew a seam about 2 cm away from the jumpsuit and the excess fabric of the waist. We will sew several seams to reinforce it. To finish the jumpsuit, we will cut off the excess at the bottom and make the hem approximately one and a half centimeters wide, and this sports jumpsuit will be ready.
 |  |
|---|---|
 |
PASO A PASO PARA LA CONFECCIÓN DE LA FRANELA
STEP BY STEP FOR MAKING FLANNEL
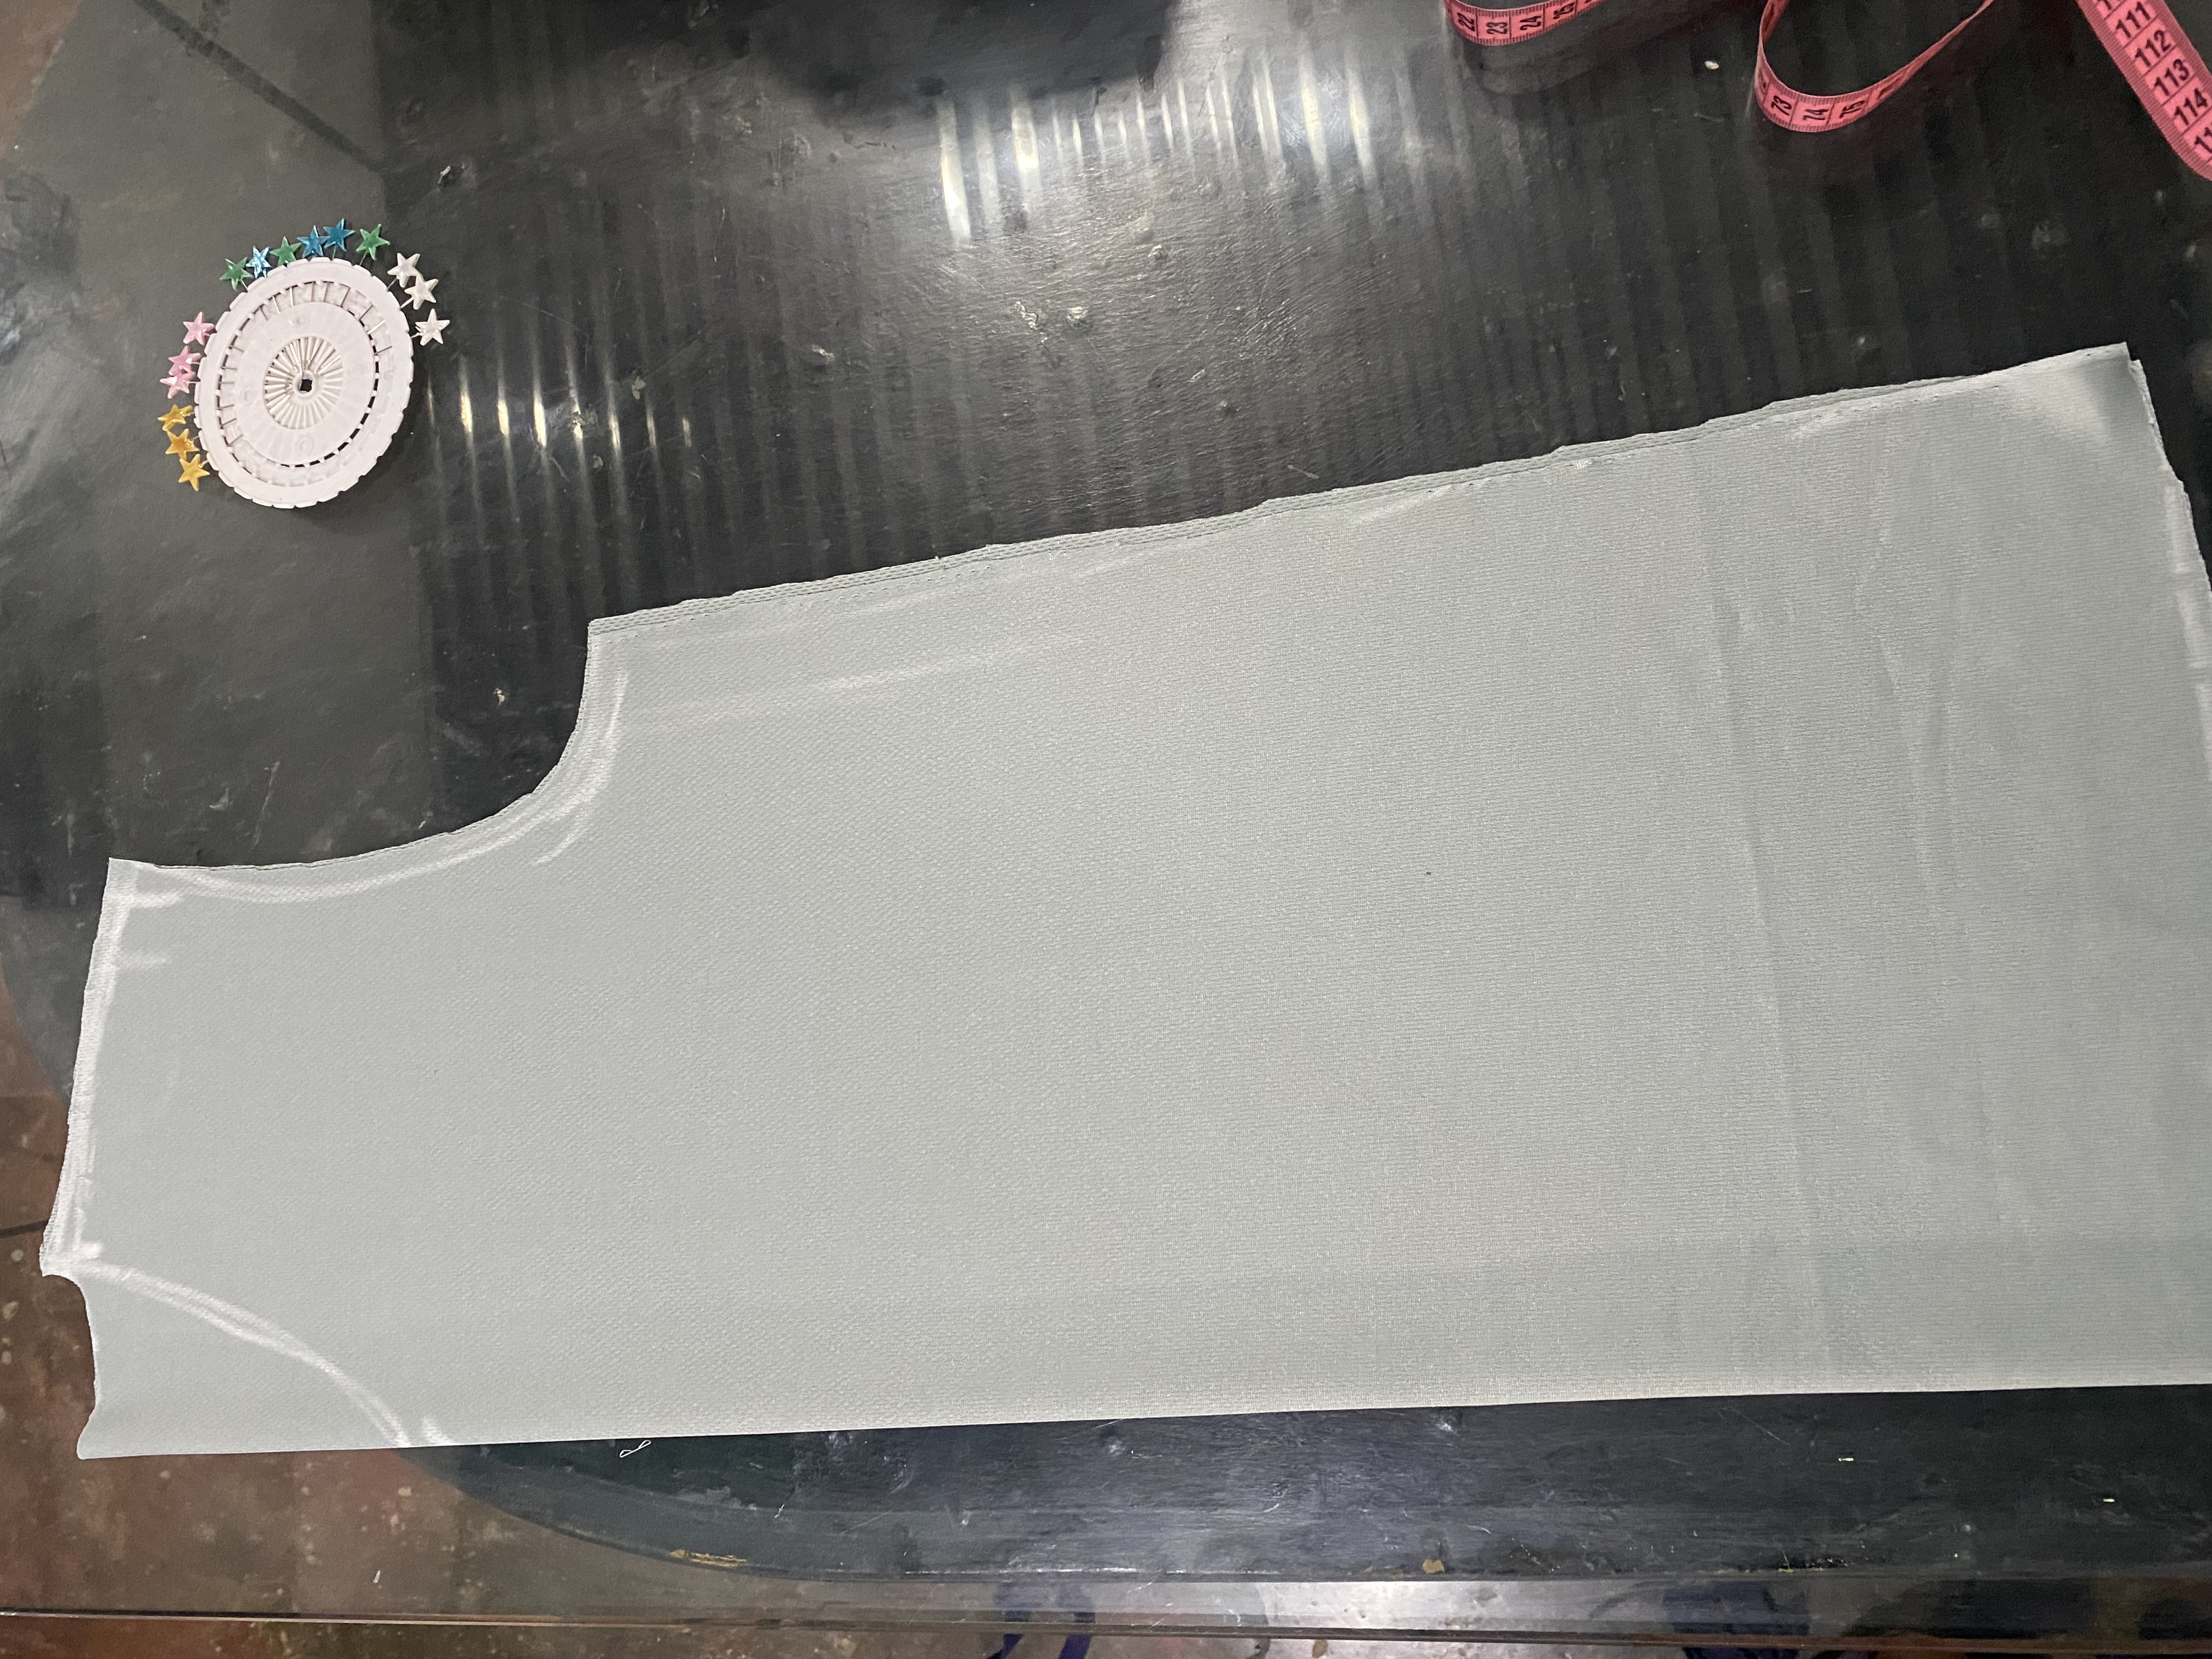
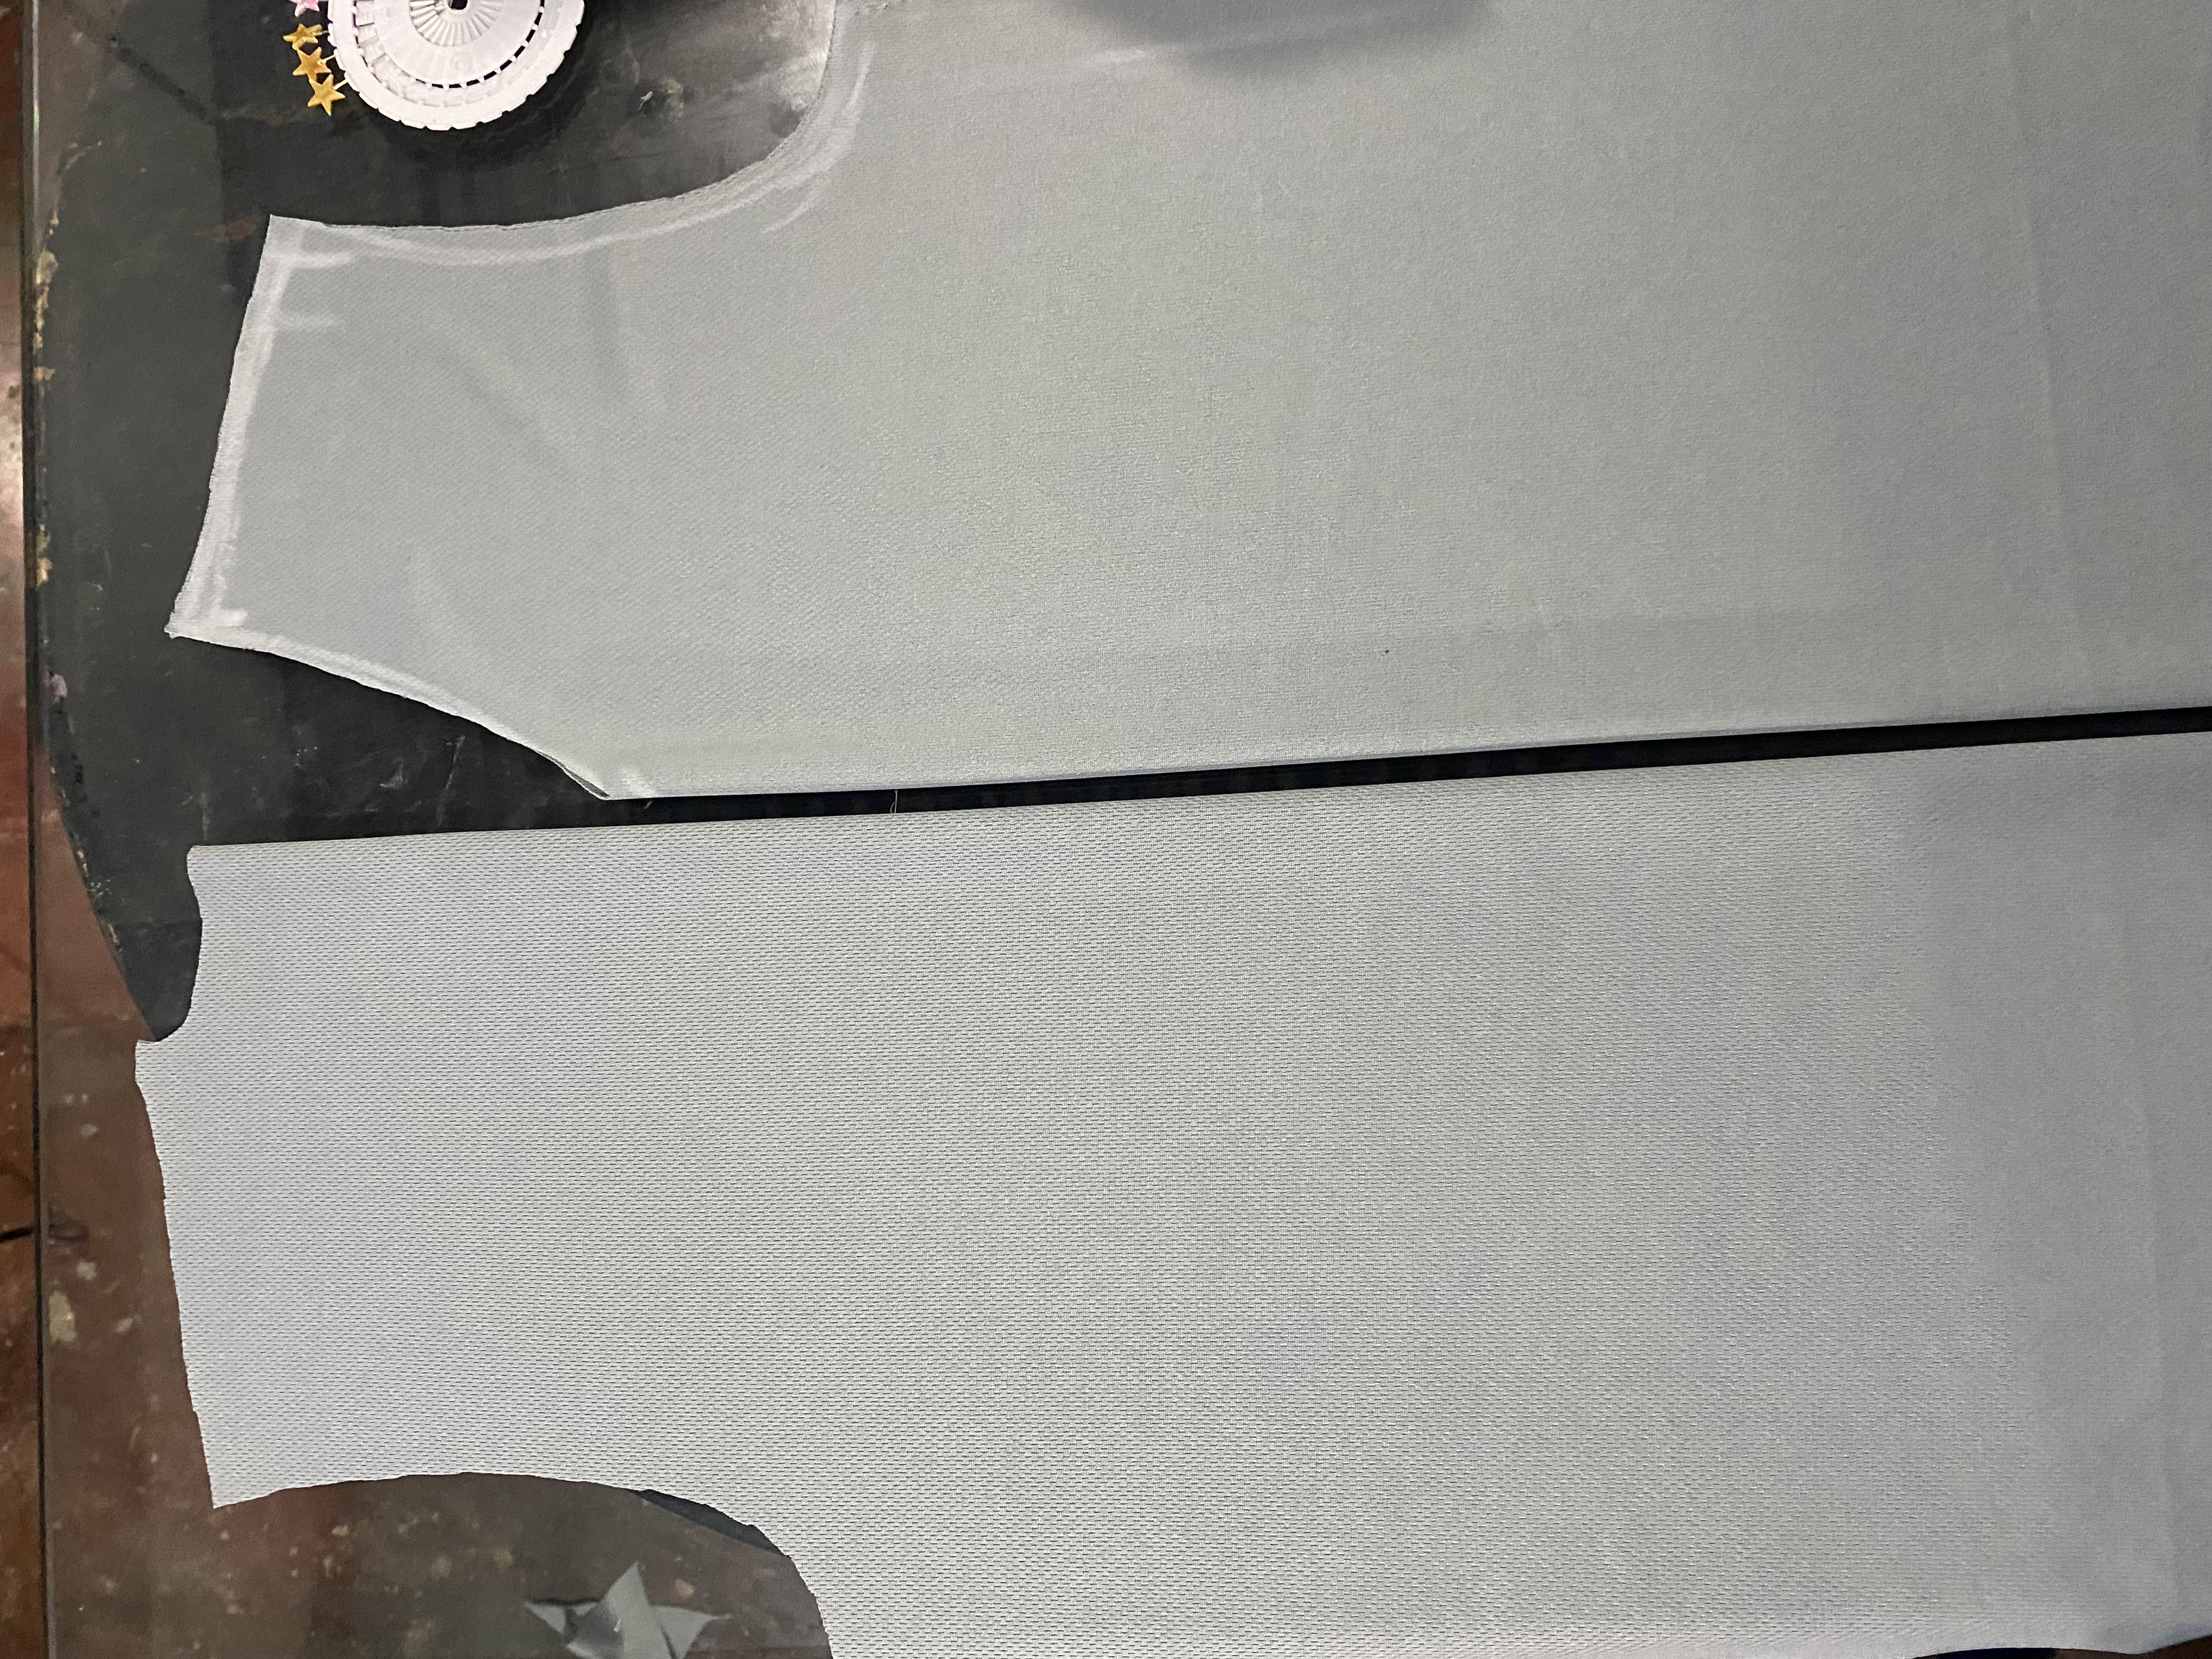
Éste tipo de franela es bastante sencilla de hacer ya que no lleva forma en la cintura, me guiaré por la franela de mi hija, y las medidas serán las siguientes: desde la punta del hombro hasta abajo tiene 74 cm, él cuello trasero tiene el largo de 7 cm y 1 cm de ancho, el hombro tiene 14cm de largo con 3 cm de caída, el contorno de manga es de 26 cm y el ancho de la franela doblada a la mitad tiene 28 cm.
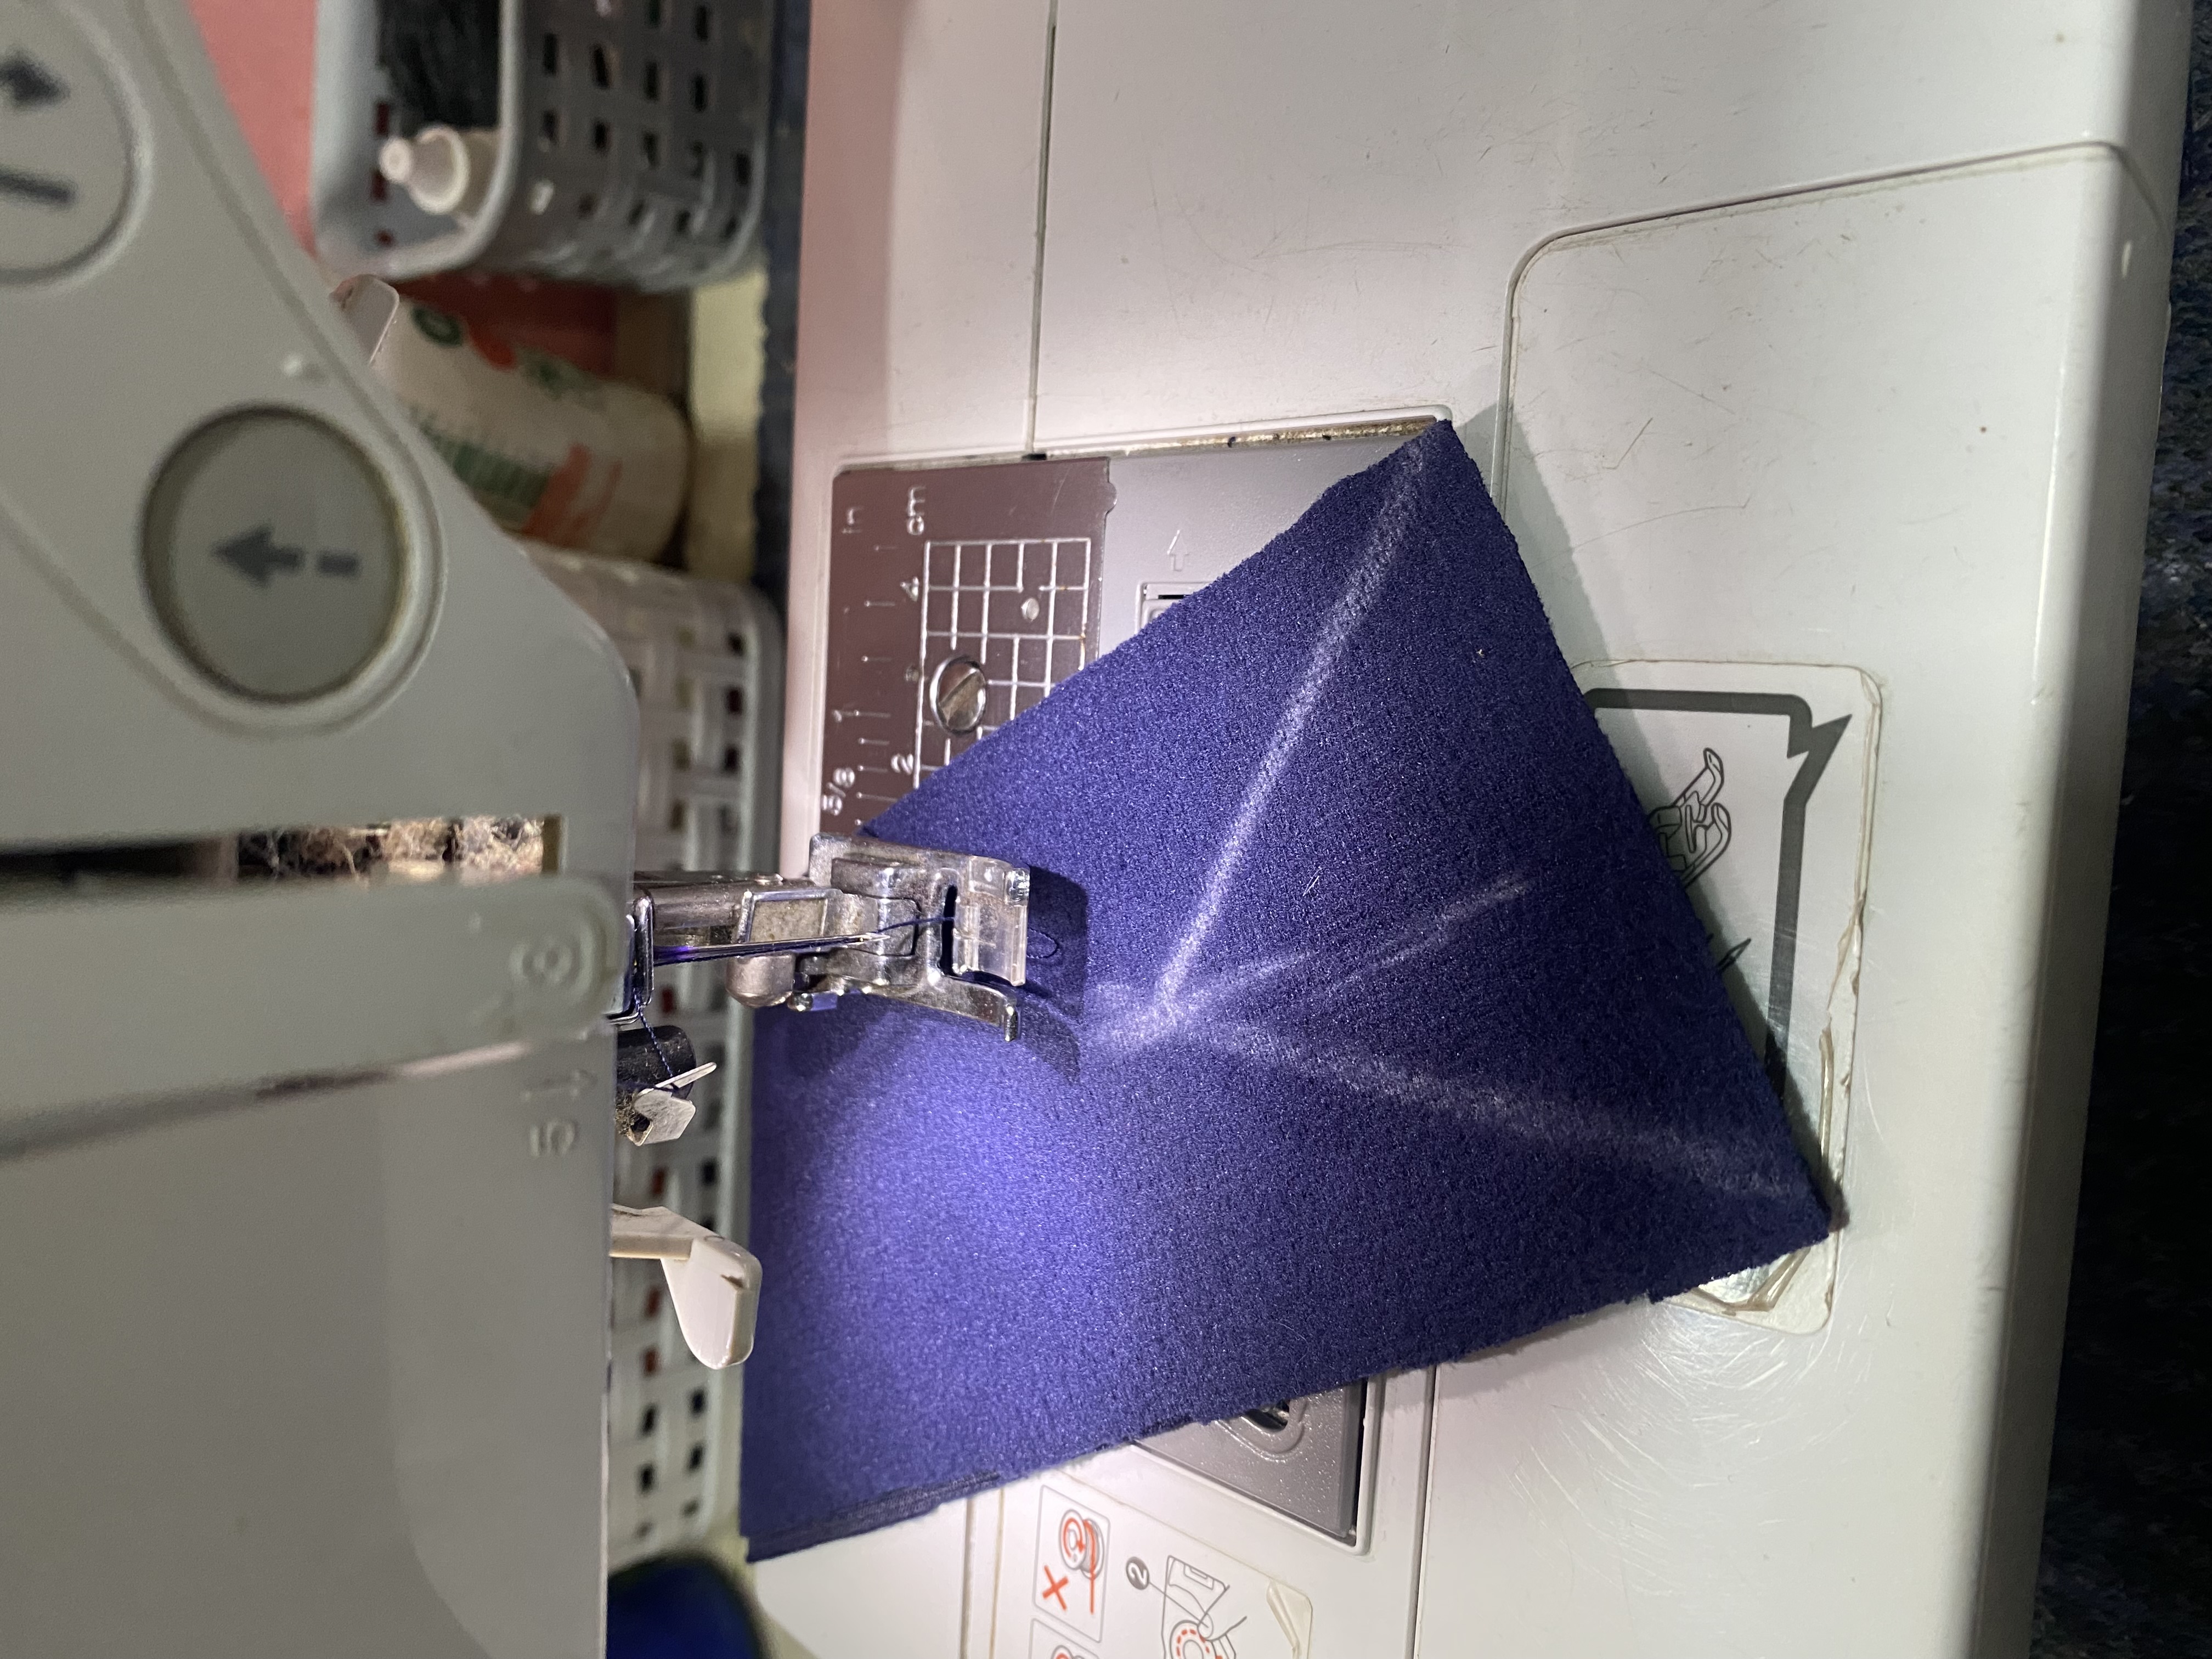
Para el cuello en V meditemos 7 cm de ancho y dibujamos una línea diagonal de 16 cm, cortaremos tiras de tela sobrante del monode 6 cm de ancha.
This type of flannel is quite simple to make since it has no shape at the waist. I will use my daughter's flannel as a guide, and the measurements will be as follows: from the tip of the shoulder down it is 74 cm, the back neck is 7 cm long and 1 cm wide, the shoulder is 14 cm long with a 3 cm drop, the sleeve circumference is 26 cm and the width of the flannel folded in half is 28 cm.
For the V-neck, let's measure 7 cm wide and draw a diagonal line of 16 cm, we will cut strips of leftover fabric from the jumpsuit that are 6 cm wide.
 |  |
|---|
Para comenzar con las costuras uniremos en los hombros y luego doblamos a la mitad para tomar la medida de lo que será el cuello, el mío quedó de 27 cm, cortamos la tira doblada la tela a la mitad, la tela sobrante de mi mono es muy poco elástica así que la corté de la misma medida del cuello al pasar costura se reducirá aproximadamente 1 cm.
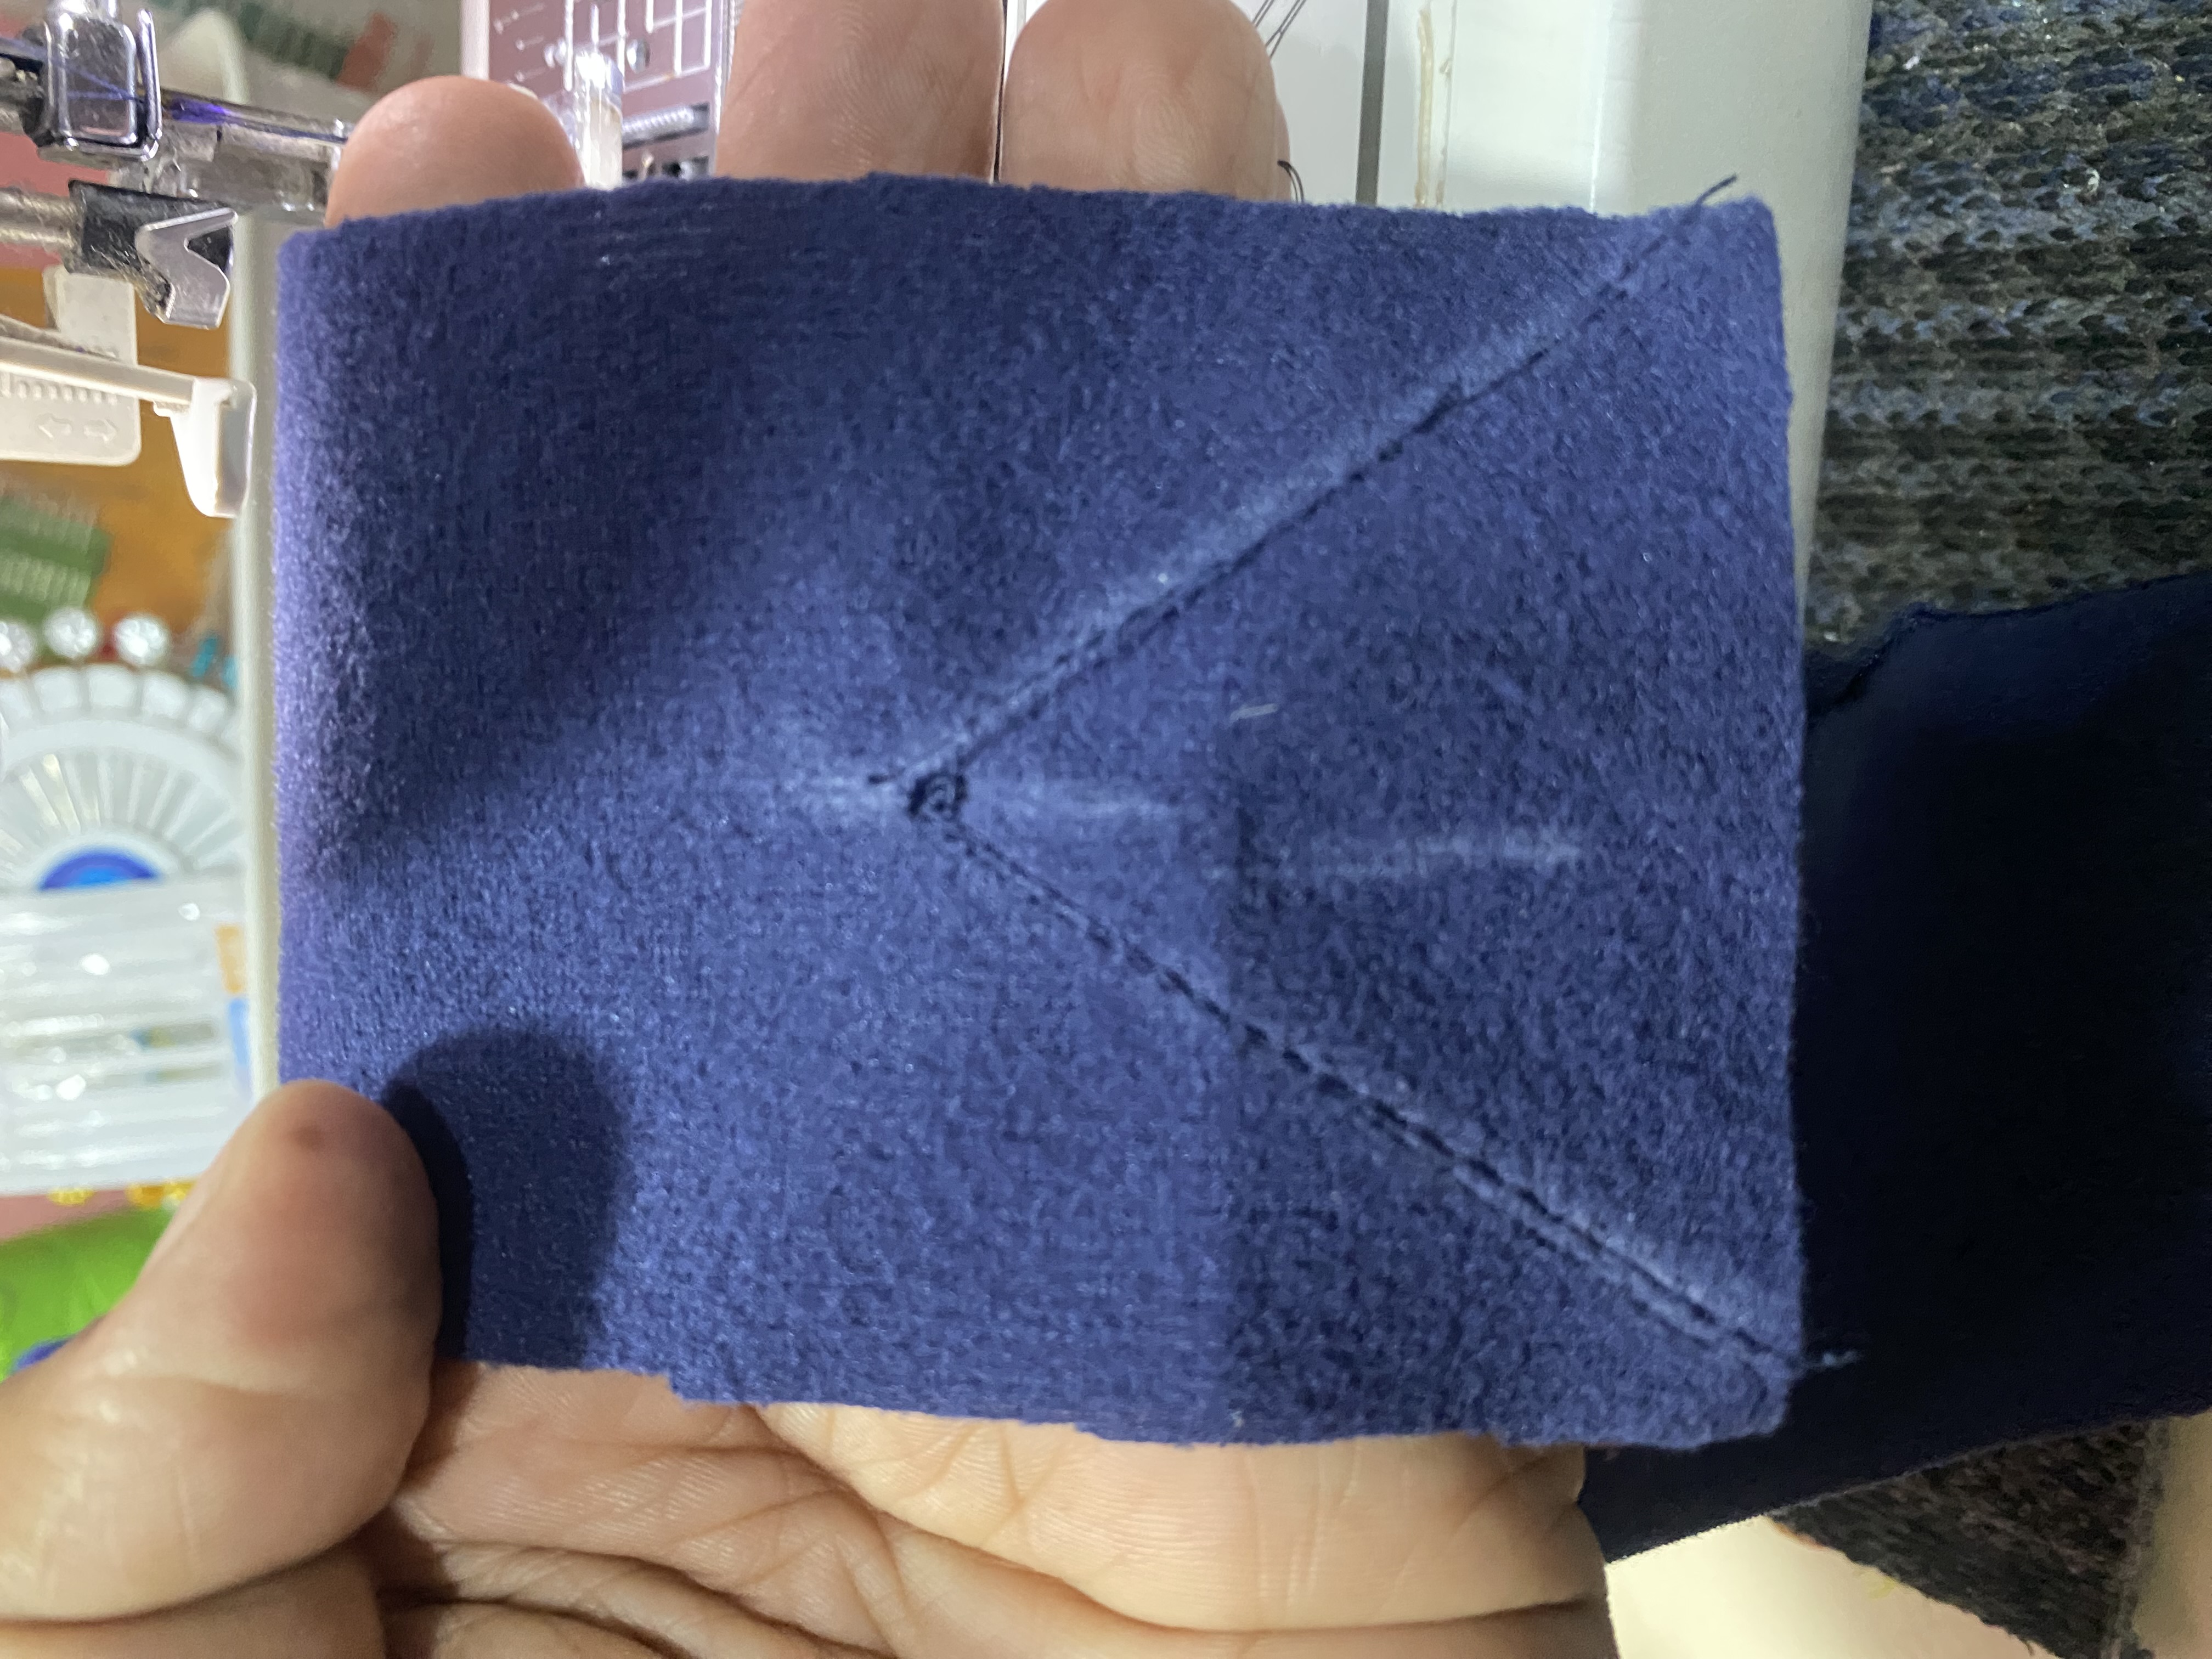
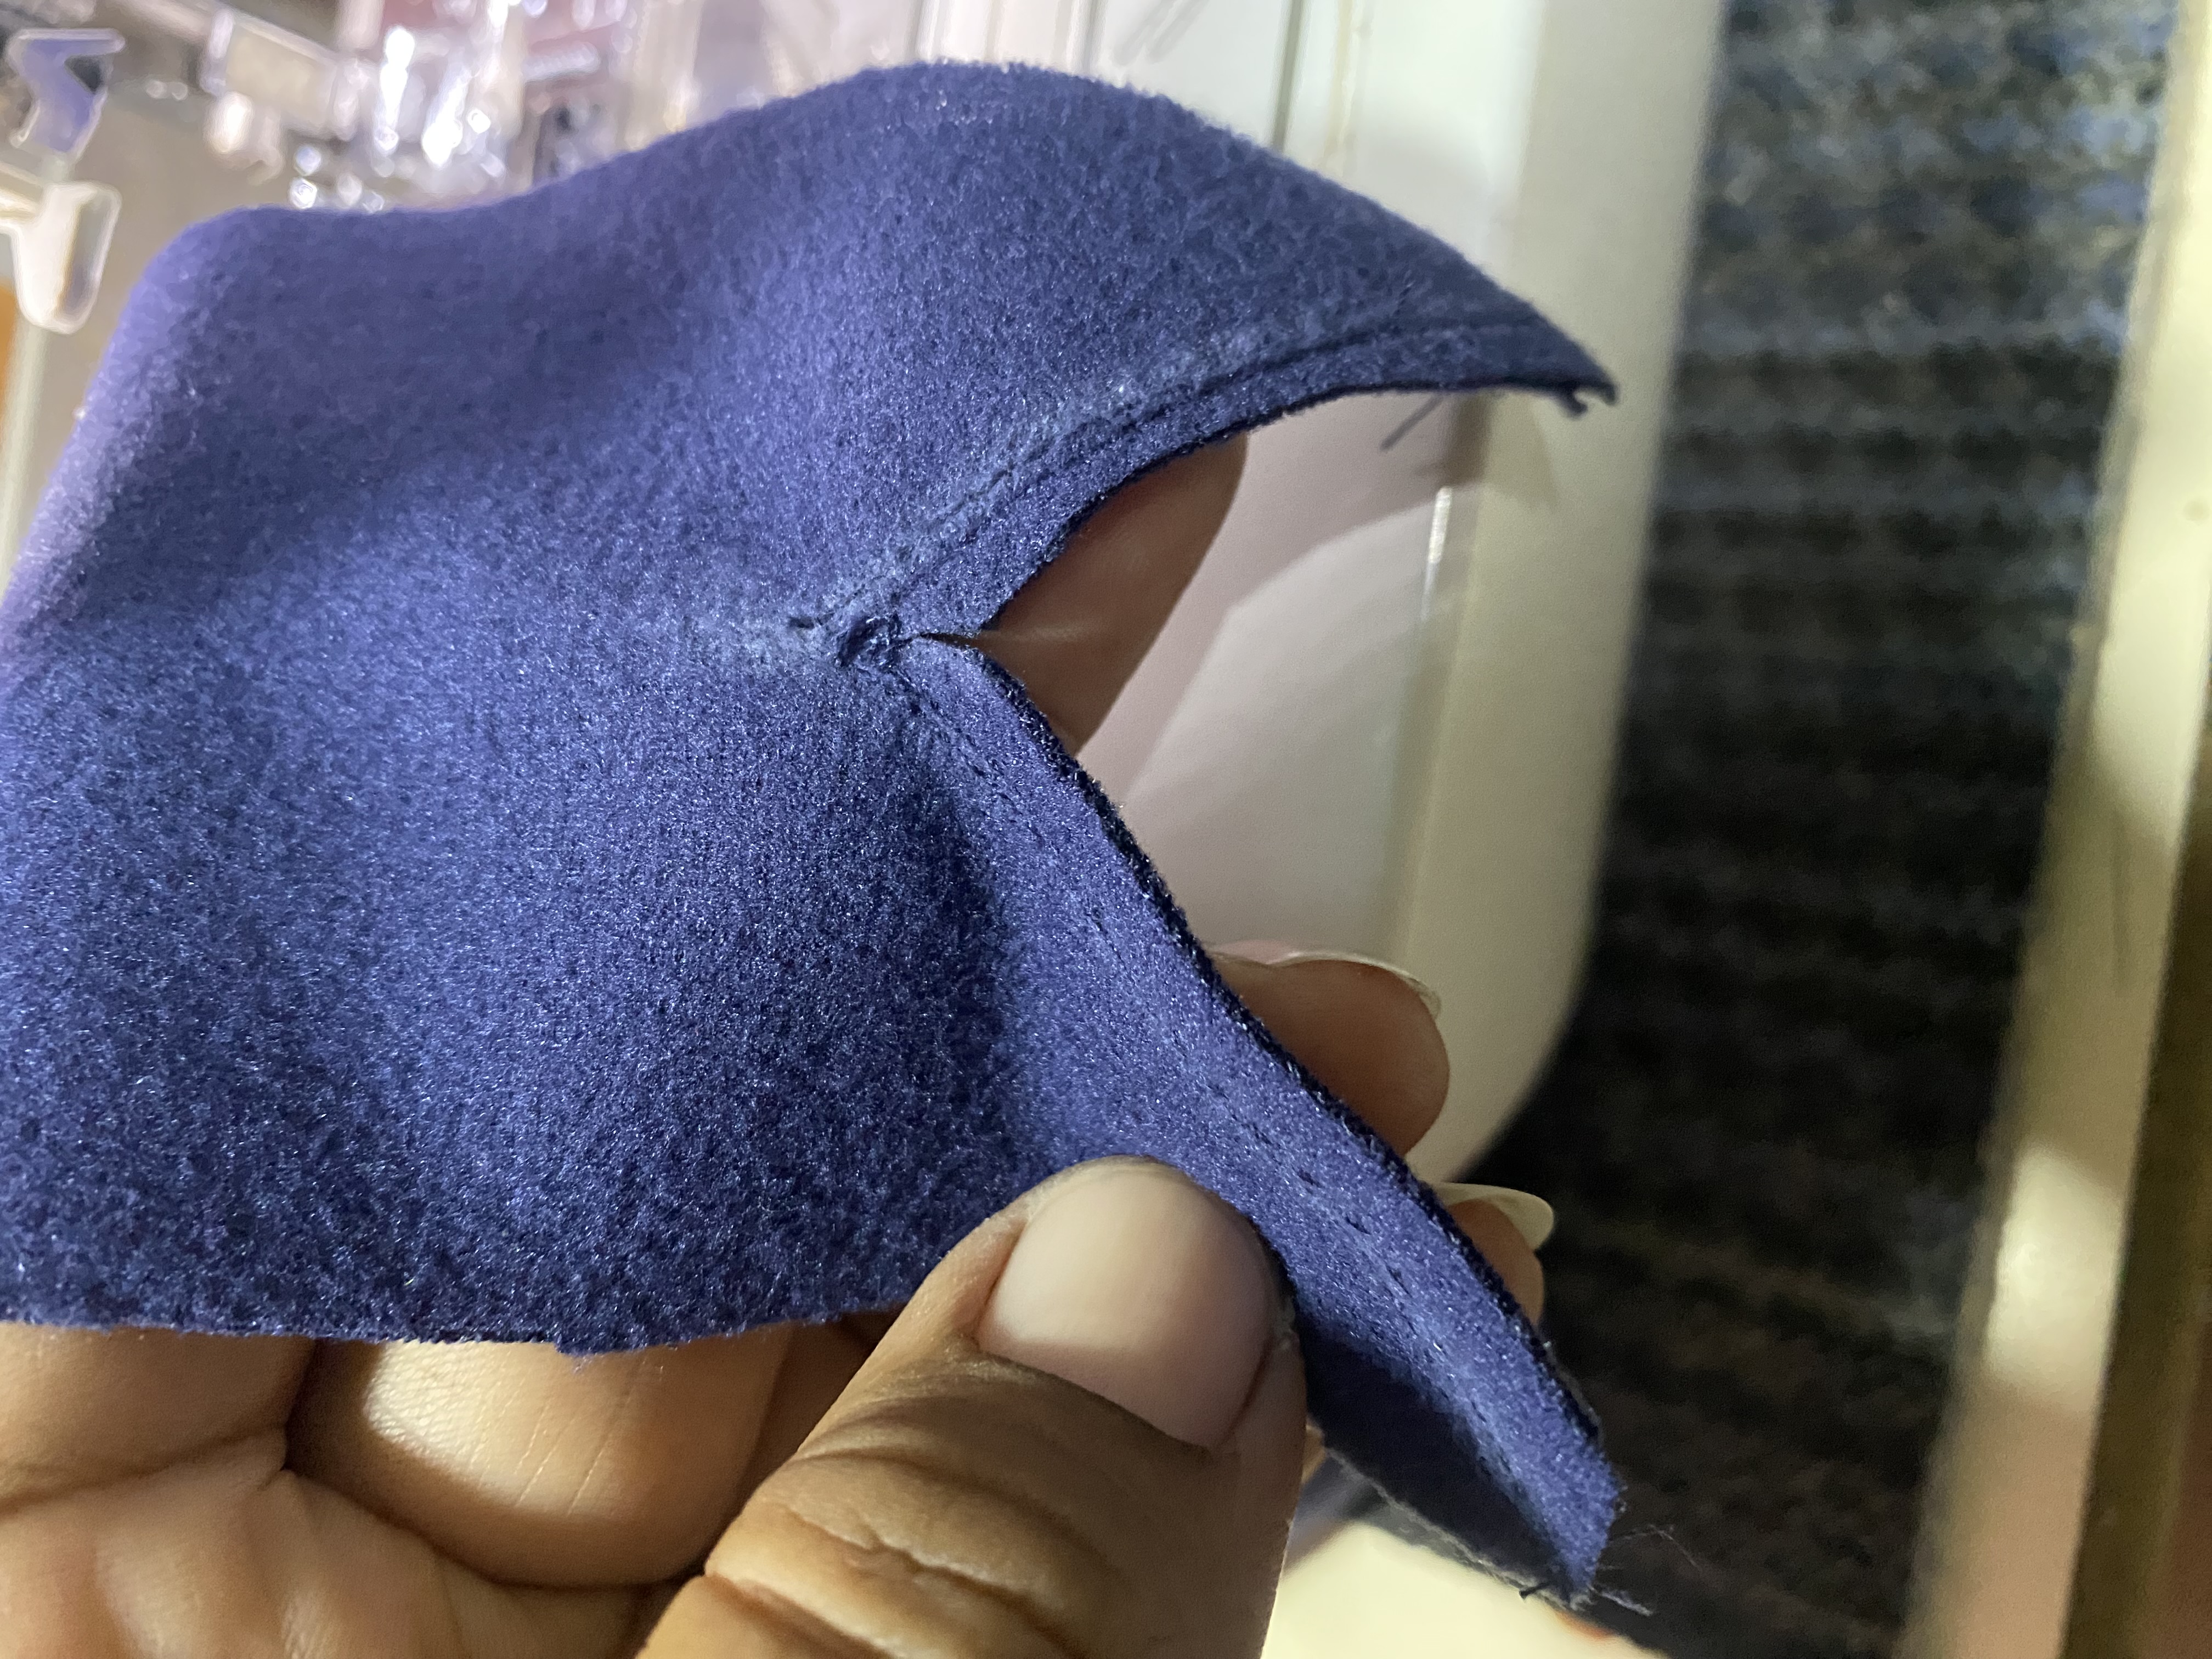
Para darle la forma V uniremos las dos puntas de tela del cuello, vamos a hacer un Punto! en el centro a una distancia de 3 cm y hacemos dos líneas diagonales, en mi imagen les muestro cómo debe quedar.
To start with the seams we will join at the shoulders and then fold in half to take the measurement of what will be the neck, mine was 27 cm, we cut the folded strip of fabric in half, the leftover fabric from my jumpsuit is not very elastic so I cut it the same measurement as the neck when sewing it will reduce approximately 1 cm.
To give it the V shape we will join the two ends of the fabric of the neck, we will make a Point! in the center at a distance of 3 cm and we will make two diagonal lines, in my image I show you how it should look.
 |  |
|---|---|
 |  |
Al tener ya listo el cuello uniremos a nuestra franela, luego continuaremos el proceso habitual, unimos las mangas y le hacemos las orillas con el corte de tela que hicimos en azul marino, luego pasamos costura por los costados y hacemos el ruedo, y así ya está lista la franela para el uniforme de mi hija.
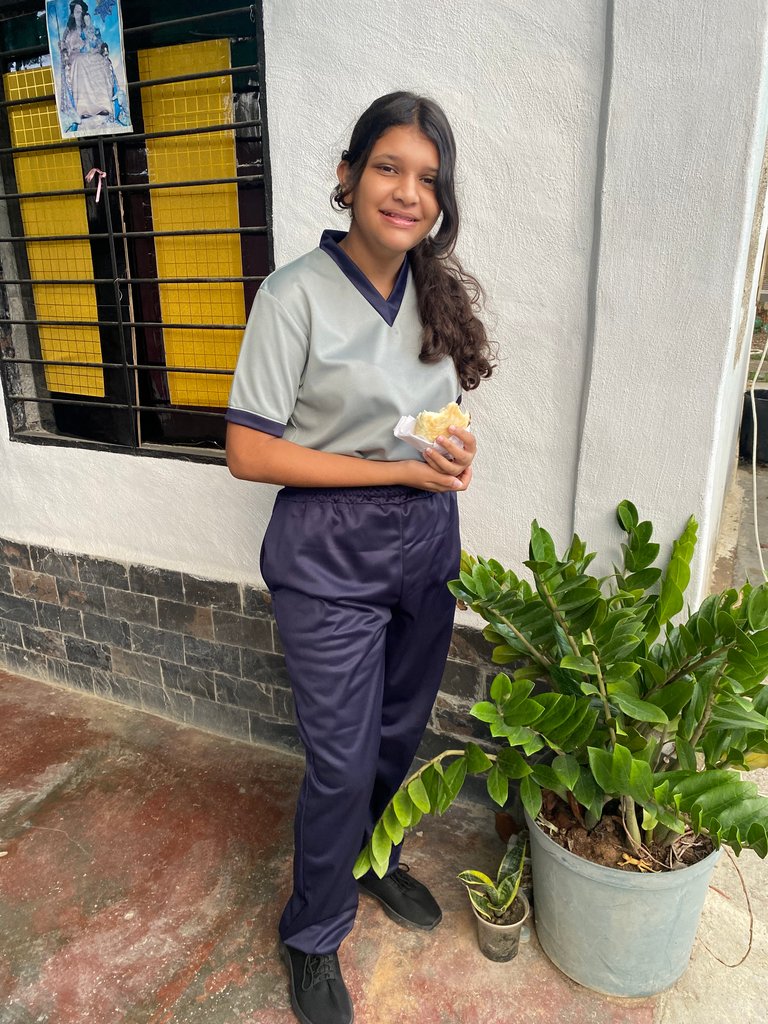
Les confieso que tuve miedo de no poder costear el Uniforme, y me siento muy feliz de poder hacerlo, la mayor satisfacción la sentí al ver a mi hija llegar a su liceo con su uniforme nuevo al igual que casi todos sus compañeros, es un orgullo para mí haberle hecho su uniforme de deporte y ver su Alegría en su carita 😊
Once the collar is ready, we will join our shirt, then we will continue the usual process, we join the sleeves and make the edges with the fabric cut that we made in navy blue, then we sew along the sides and make the hem, and so the shirt is ready for my daughter's uniform.
I confess that I was afraid of not being able to afford the uniform, and I feel very happy to be able to do so, the greatest satisfaction I felt when I saw my daughter arrive at her high school with her new uniform just like almost all of her classmates, it is a pride for me to have made her sports uniform and to see the joy on her little face 😊
Es todo por esta oportunidad, espero que le sirva de guía para poder realizar sus uniformes escolares, me despido deseándoles muchos éxitos y bendiciones 🤗❤️
That's all for this opportunity, I hope it serves as a guide to make your school uniforms, I say goodbye wishing you much success and blessings.🤗❤️
Woww, you made a whole dress.. it looks amazing!
 Follow Eceny's curation trail to earn better APR on your own HP. : )
Sending Love and Ecency Curation Vote!
Thank you 😊
wow
Wow , this dress look so beautiful on you. I love the outfit
Thank you 🥰
So beautiful 😍❤️❤️
Thank you 😊
Welcome 🤗
Nice work
Thank you 😊
Your work is superb
So neat and beautiful
Weldone.
Thank you 🥰