¡Saludos Comunidad Creativa! | ¡Greetings Creative Community!
Hoy quiero compartirles un tutorial muy fácil para elaborar un hermoso topper de cumpleaños con detalles de corazones, muy delicado y llamativo a la vista, sin duda un topper que hará de tu pastel de cumpleaños único, espero que les guste y lo puedan elaborar en casa.
Today I want to share with you a very easy tutorial to make a beautiful birthday topper with details of hearts, very delicate and striking to look at, without a doubt a topper that will make your birthday cake unique, I hope you like it and can make it at home .

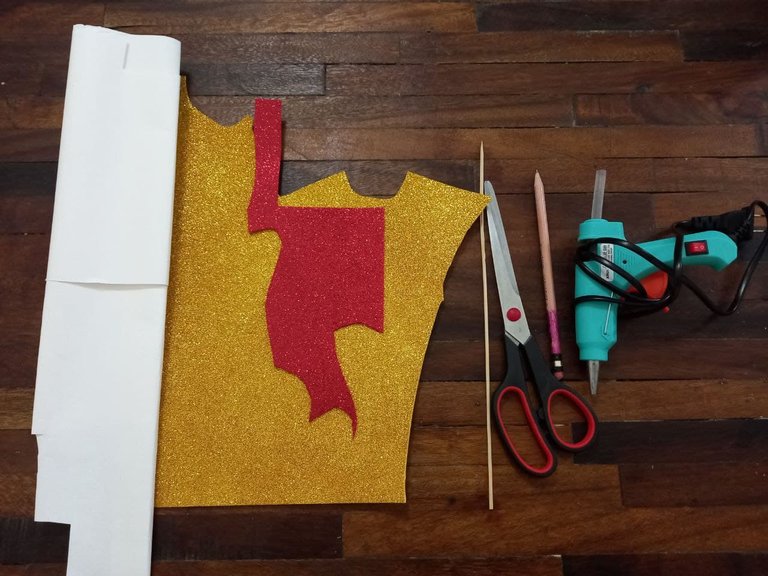
Materiales | Materials
❤ Cartulina escolar blanca.
❤ Foami escarchado dorado y rojo.
❤ Tijera.
❤ Lápiz.
❤ Hoja de papel.
❤ Barra de silicón.
❤ Pistola de silicón.
❤ Palito de altura.
❤ White school cardboard.
❤ Gold and red frosted foam.
❤ Scissors.
❤ Pencil.
❤ Sheet of paper.
❤ Silicone bar.
❤ Glue gun.
❤ Height stick.
Procedimiento ✂ | Process ✂
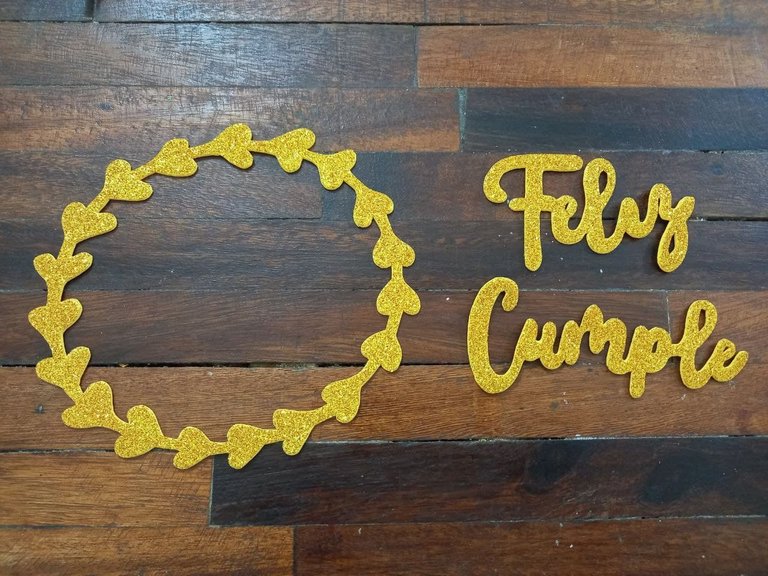
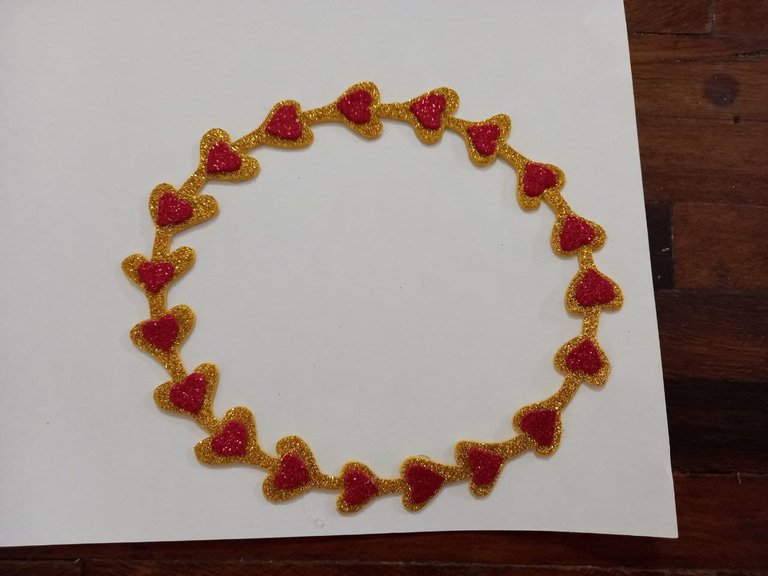
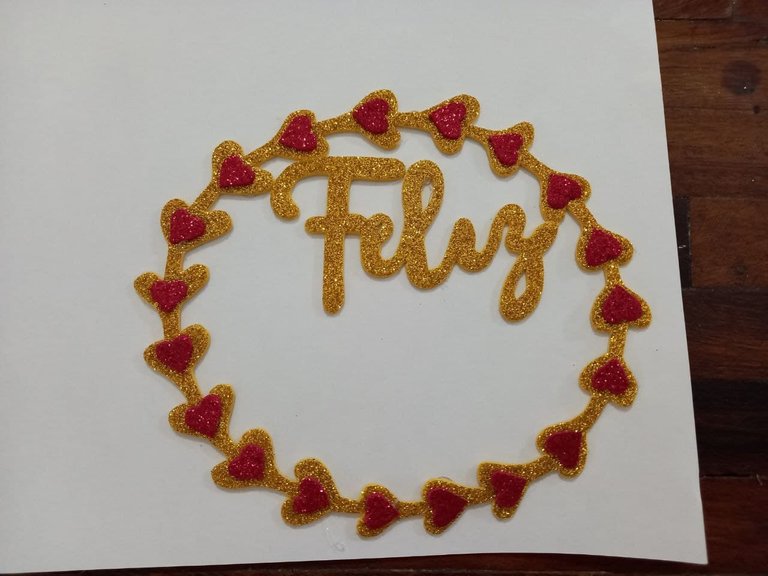
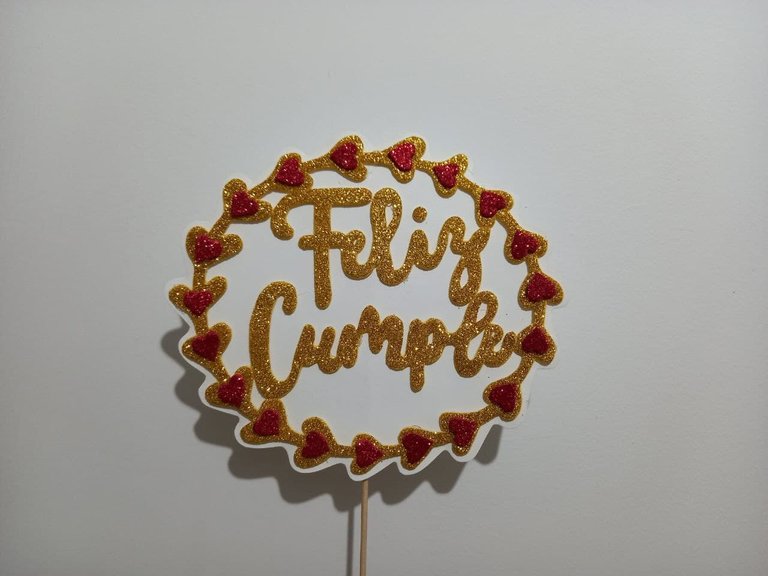
❤ PASO 1. En la hoja de papel haremos el molde de la frase “Feliz Cumple” y un circulo con corazones que serán el borde del topper, debemos asegurarnos que la frase tenga el tamaño adecuado para quedar dentro del círculo, luego recortamos.
❤ STEP 1. On the sheet of paper we will make the mold of the phrase "Happy Birthday" and a circle with hearts that will be the edge of the topper, we must make sure that the phrase is the right size to fit inside the circle, then we trim .
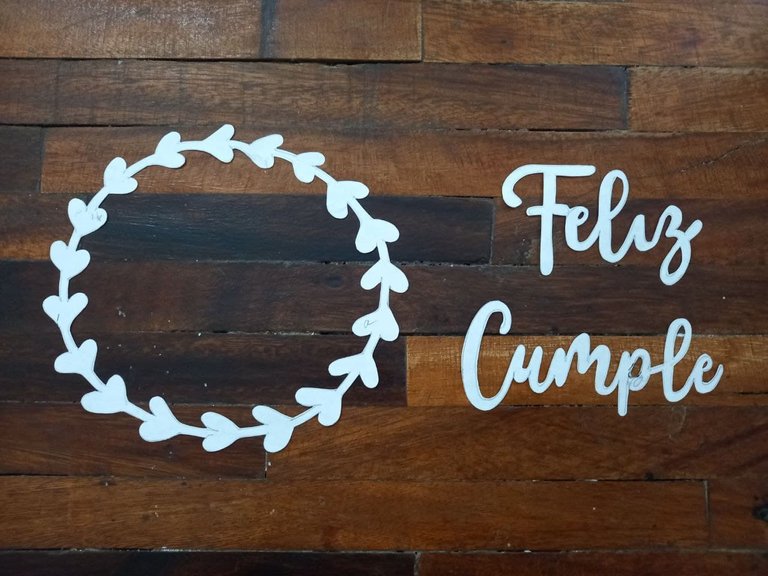
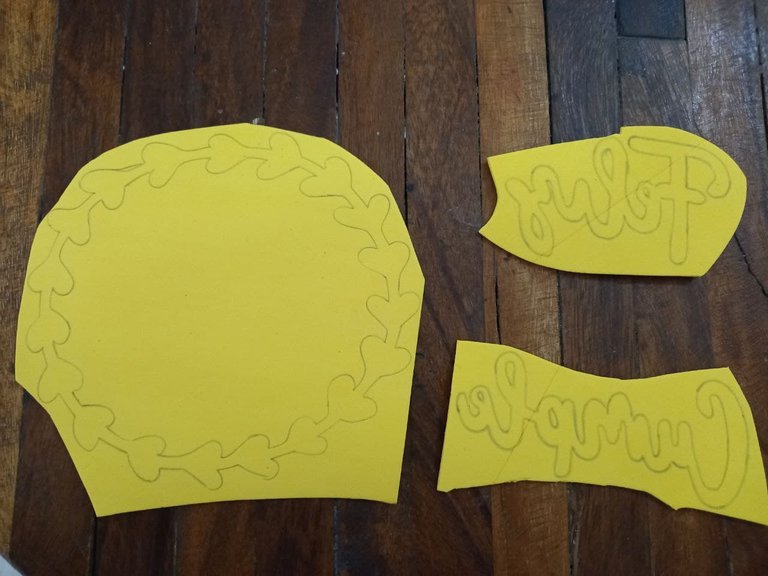
❤ PASO 2. Procedemos a hacer la frase y el circulo en el foami escarchado dorado y recortamos.
❤ STEP 2. We proceed to make the phrase and the circle in the golden frosted foami and cut out.
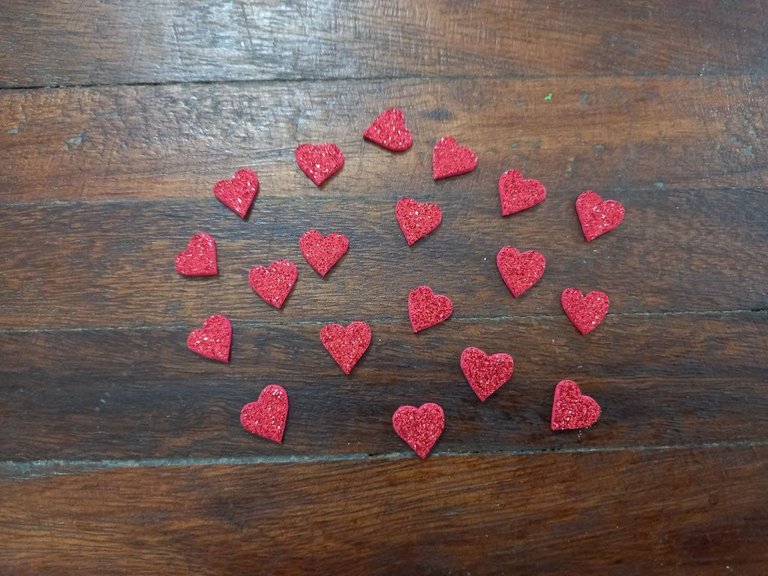
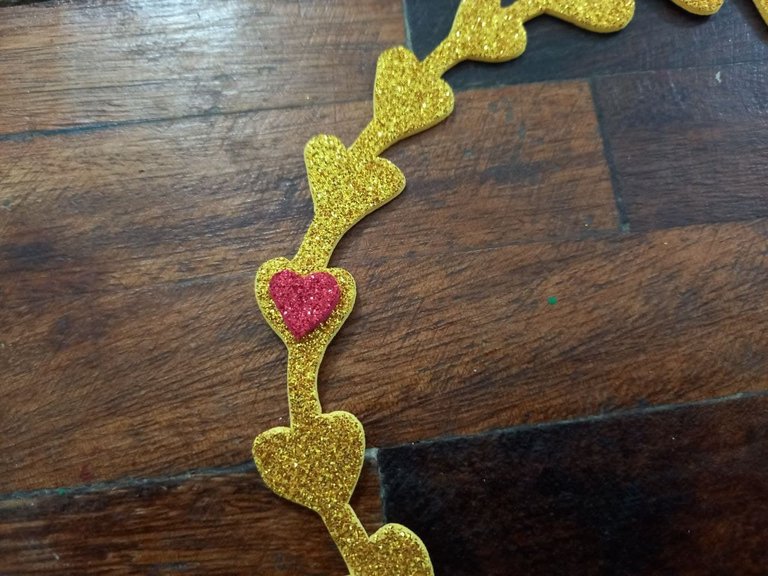
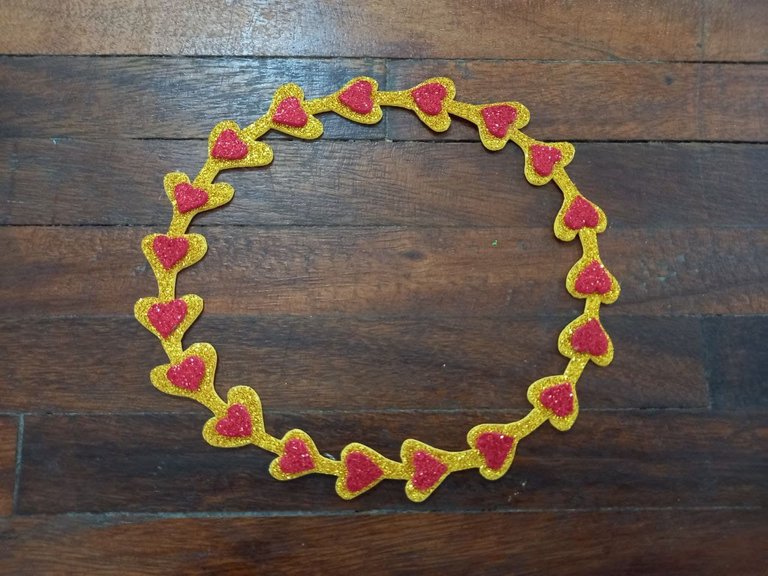
❤ PASO 3. Hacemos 19 corazones pequeñitos en foami escarchado rojo, deben ser más pequeños que los que tiene el circulo de foami dorado, luego pegamos uno a uno hasta pegarlos todos.
❤ STEP 3. We make 19 tiny hearts in red frosted foam, they must be smaller than the ones in the golden foam circle, then we glue one by one until we glue them all.
❤ PASO 4. Pegamos el círculo de foami sobre la cartulina escolar blanca, luego dentro del circulo pegamos la frase feliz cumple.
❤ STEP 4. We paste the circle of foami on the white school cardboard, then inside the circle we paste the phrase happy birthday.
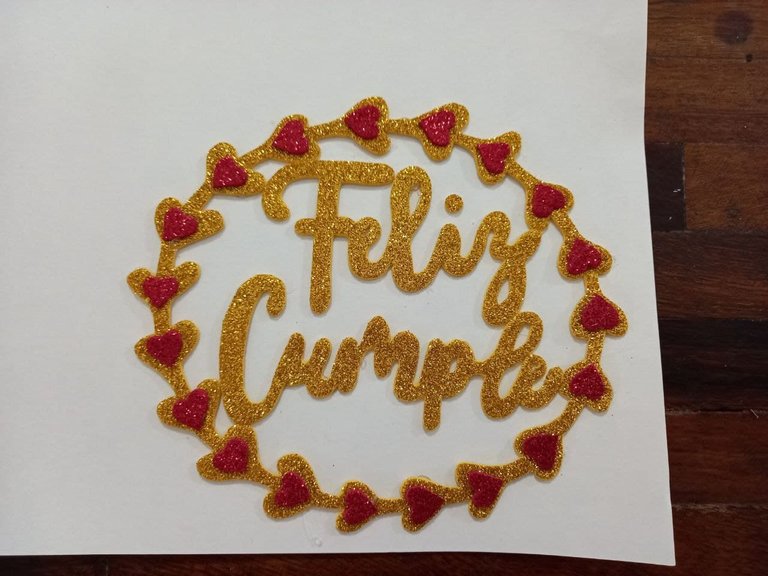
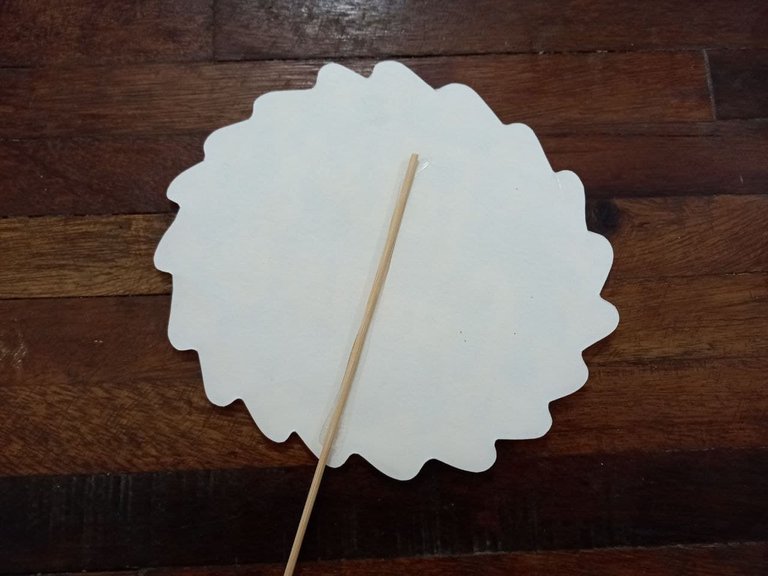
❤ PASO 5. Recortamos el exceso de cartulina y dejamos un delgado borde de esta alrededor del círculo de foami, para finalizar pegamos el palito de altura en la parte trasera justo en el centro.
❤ STEP 5. We cut the excess cardboard and leave a thin edge of it around the circle of foam, to finish we glue the height stick in the back right in the center.
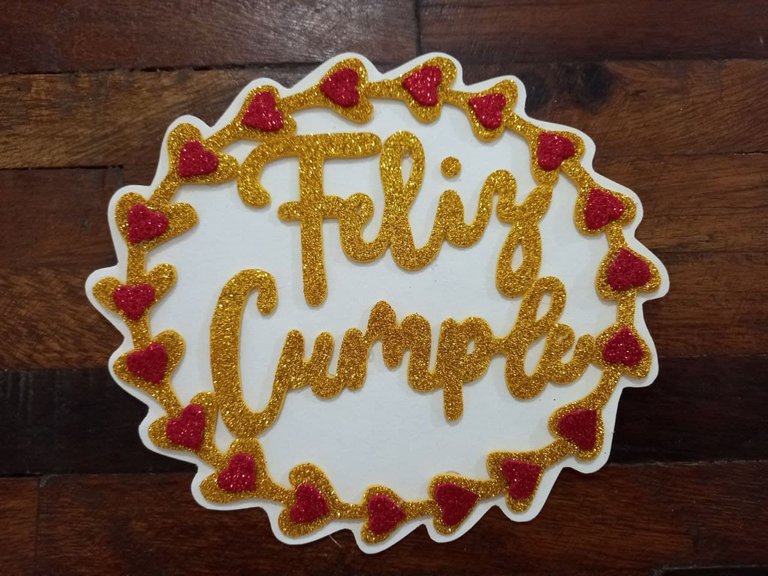
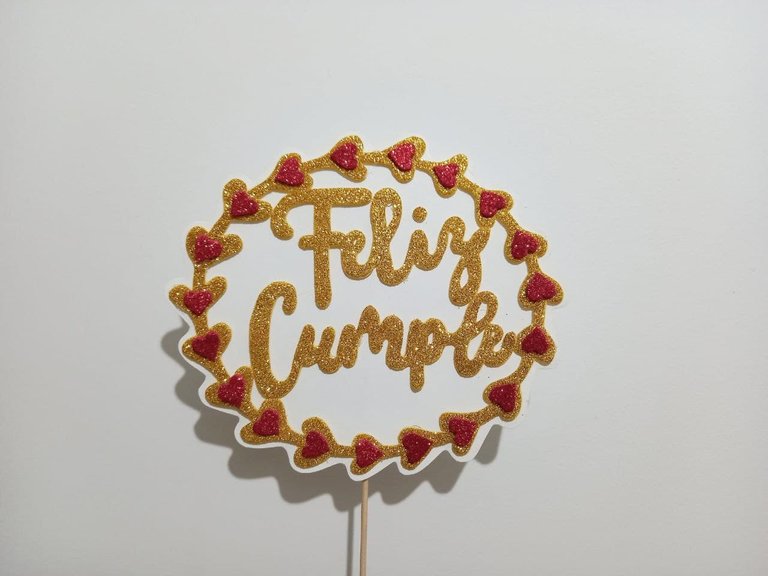
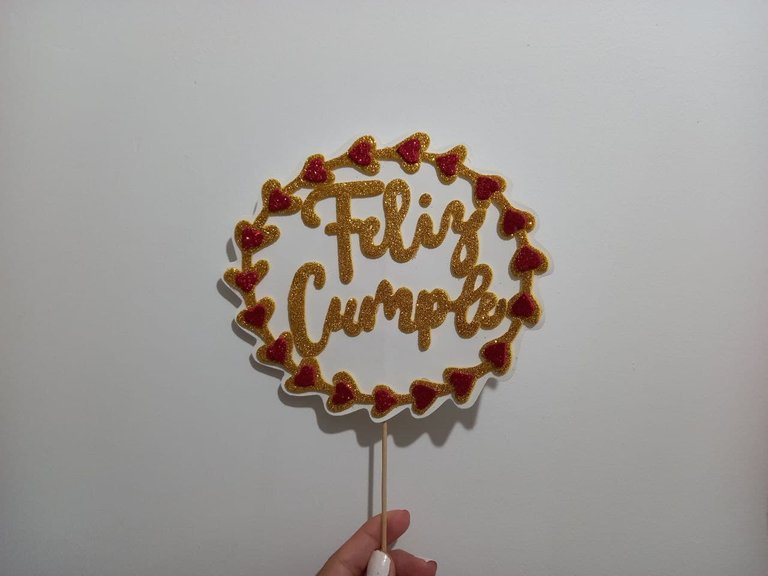
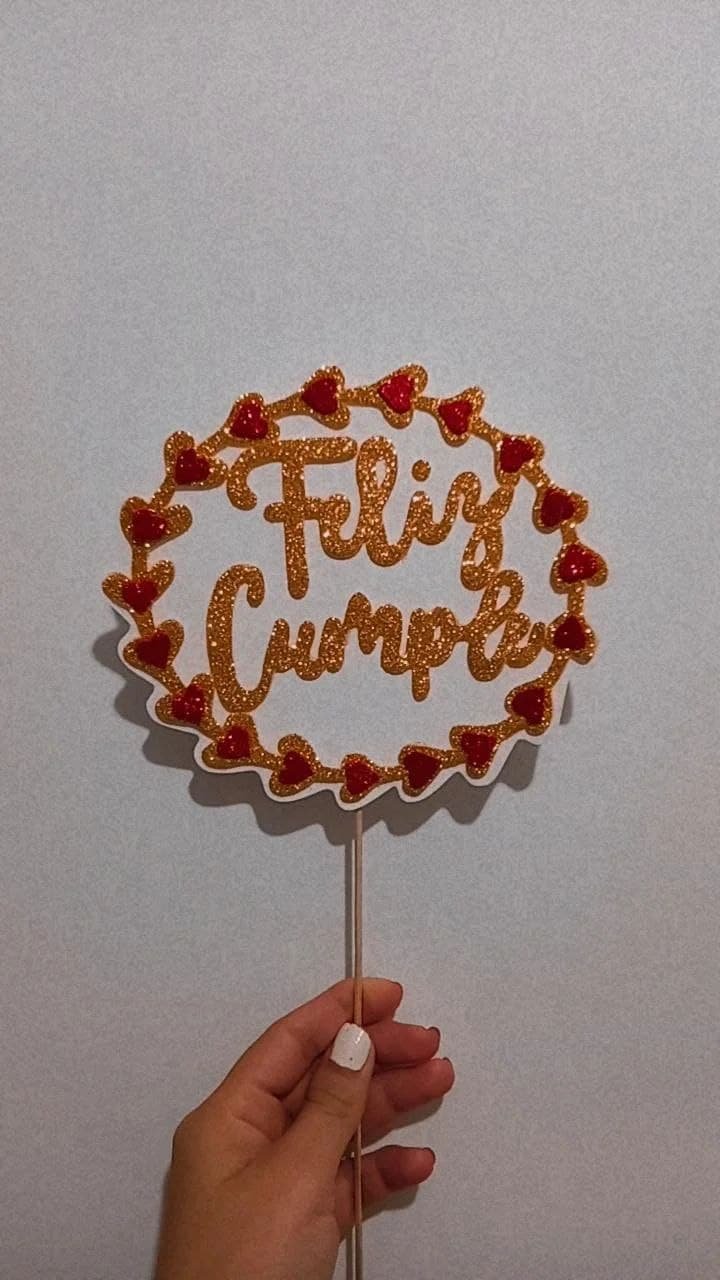
¡Y listo! De esta forma tan fácil tenemos un hermoso topper de cumpleaños siguiendo estos simples pasos, sin duda esta es de mis mejores creaciones y de todos los toppers que he hecho este es el que más me ha encantado porque a pesar de lo simple luce muy lindo en cualquier pastel, espero que les haya gustado esta idea y les sirva de inspiración para elaborar sus propios toppers.
¡And ready! In this easy way we have a beautiful birthday topper by following these simple steps, without a doubt this is one of my best creations and of all the toppers that I have made this is the one that I have loved the most because despite how simple it looks very cute in Any cake, I hope you liked this idea and it inspires you to make your own toppers.
Resultado | Result
Todas las fotografías son de mi propiedad.
Fotografías capturadas con mi Samsung Galaxy A12
Separador de texto elaborado en Canva.
Nos vemos en mi próxima publicación.
¡Tengan un feliz día!
All photographs are my property.
Photos captured with my Samsung Galaxy A12
Text separator made in Canva.
See you in my next post.
¡Have a happy day!
The rewards earned on this comment will go directly to the person sharing the post on Twitter as long as they are registered with @poshtoken. Sign up at https://hiveposh.com.
Queda hermoso.
Muchas gracias ♥️
esta muy bonito. siempre creando con tanta imaginación y buen gusto🤗
Gracias linda ♥️ agradezco siempre tu apoyo, me alegra que sea de tu agrado cada una de mis creaciones, un abrazo!
Hola amiga! Haces un buen trabajo felicidades! Será que puedes ayudarme y está a tu alcance enseñarme como hacer cross posting , he investigado pero no he logrado hacerlo! Por favor agradecería tu ayuda!
Hola amiga que tal? Gracias por comentar, utilizas peakd? Por allí puedes hacer el crosspost