
Bienvenidos // Welcome
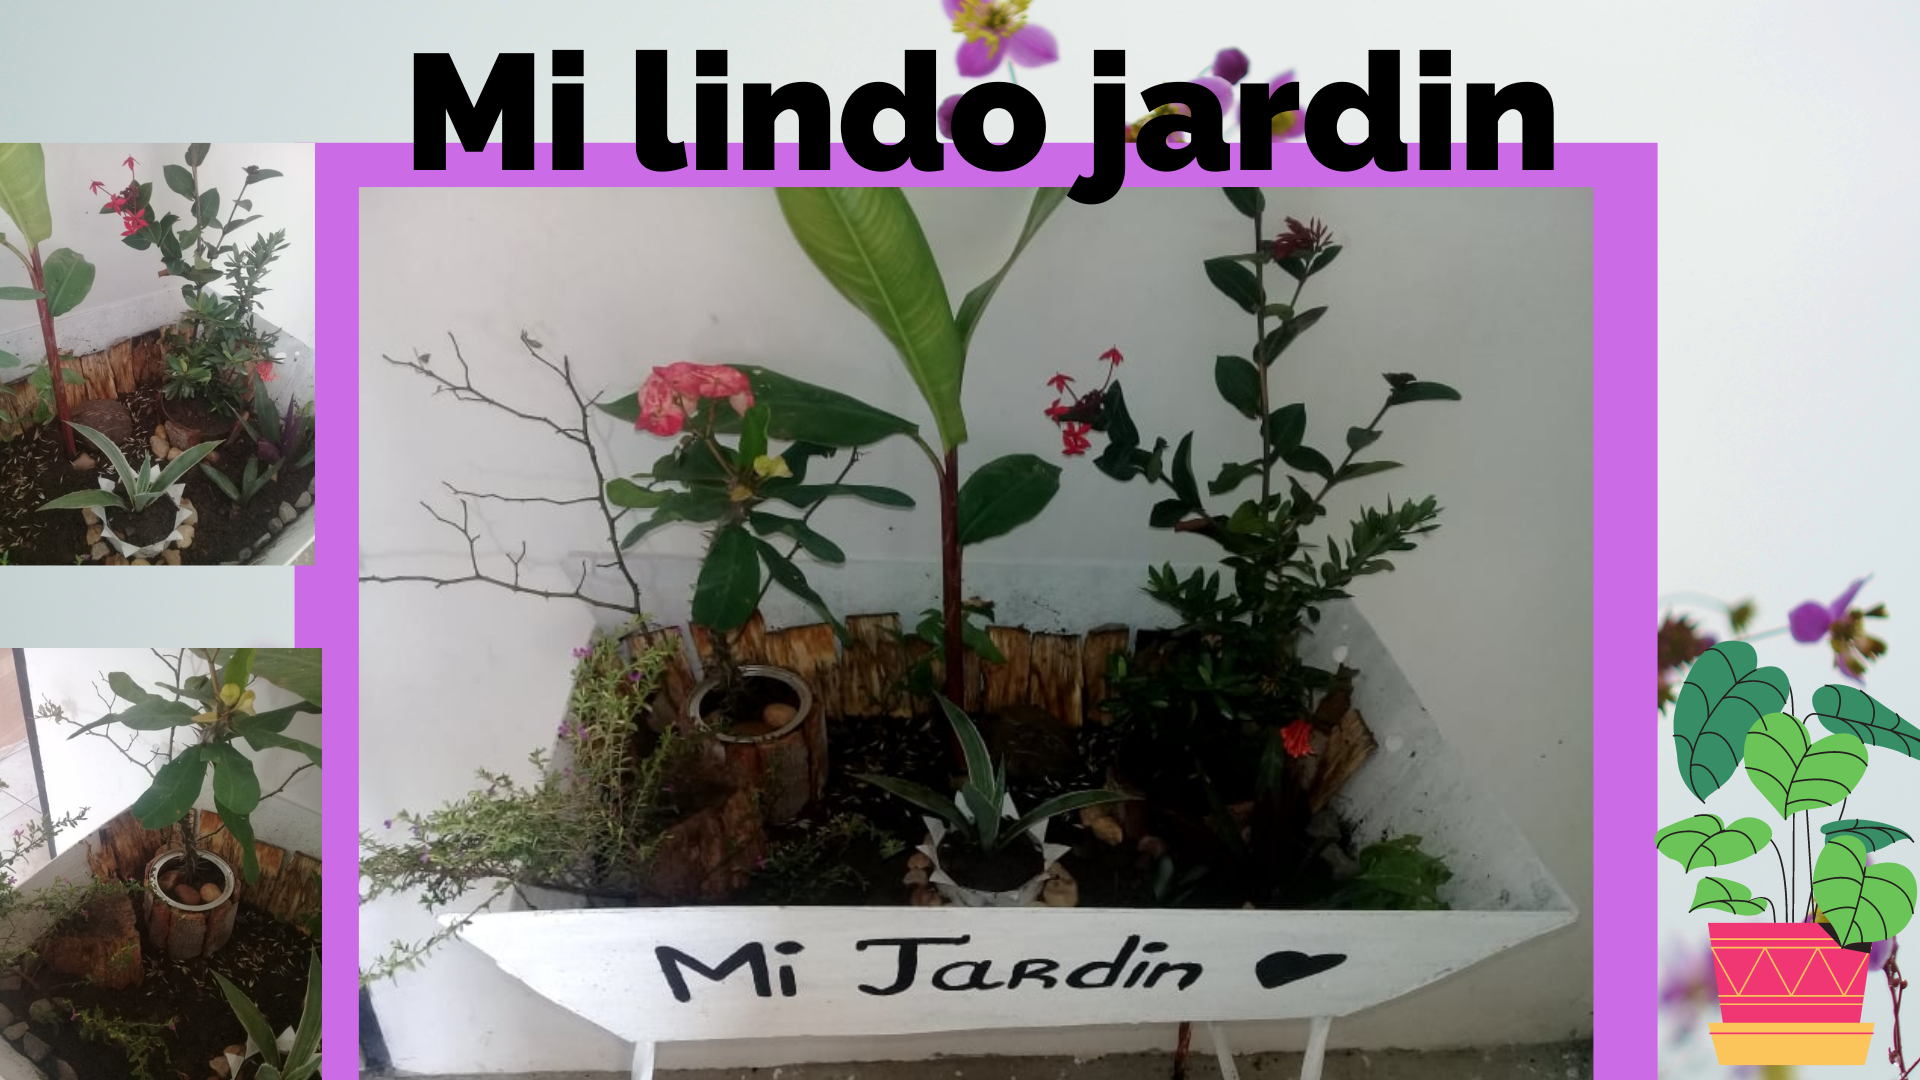
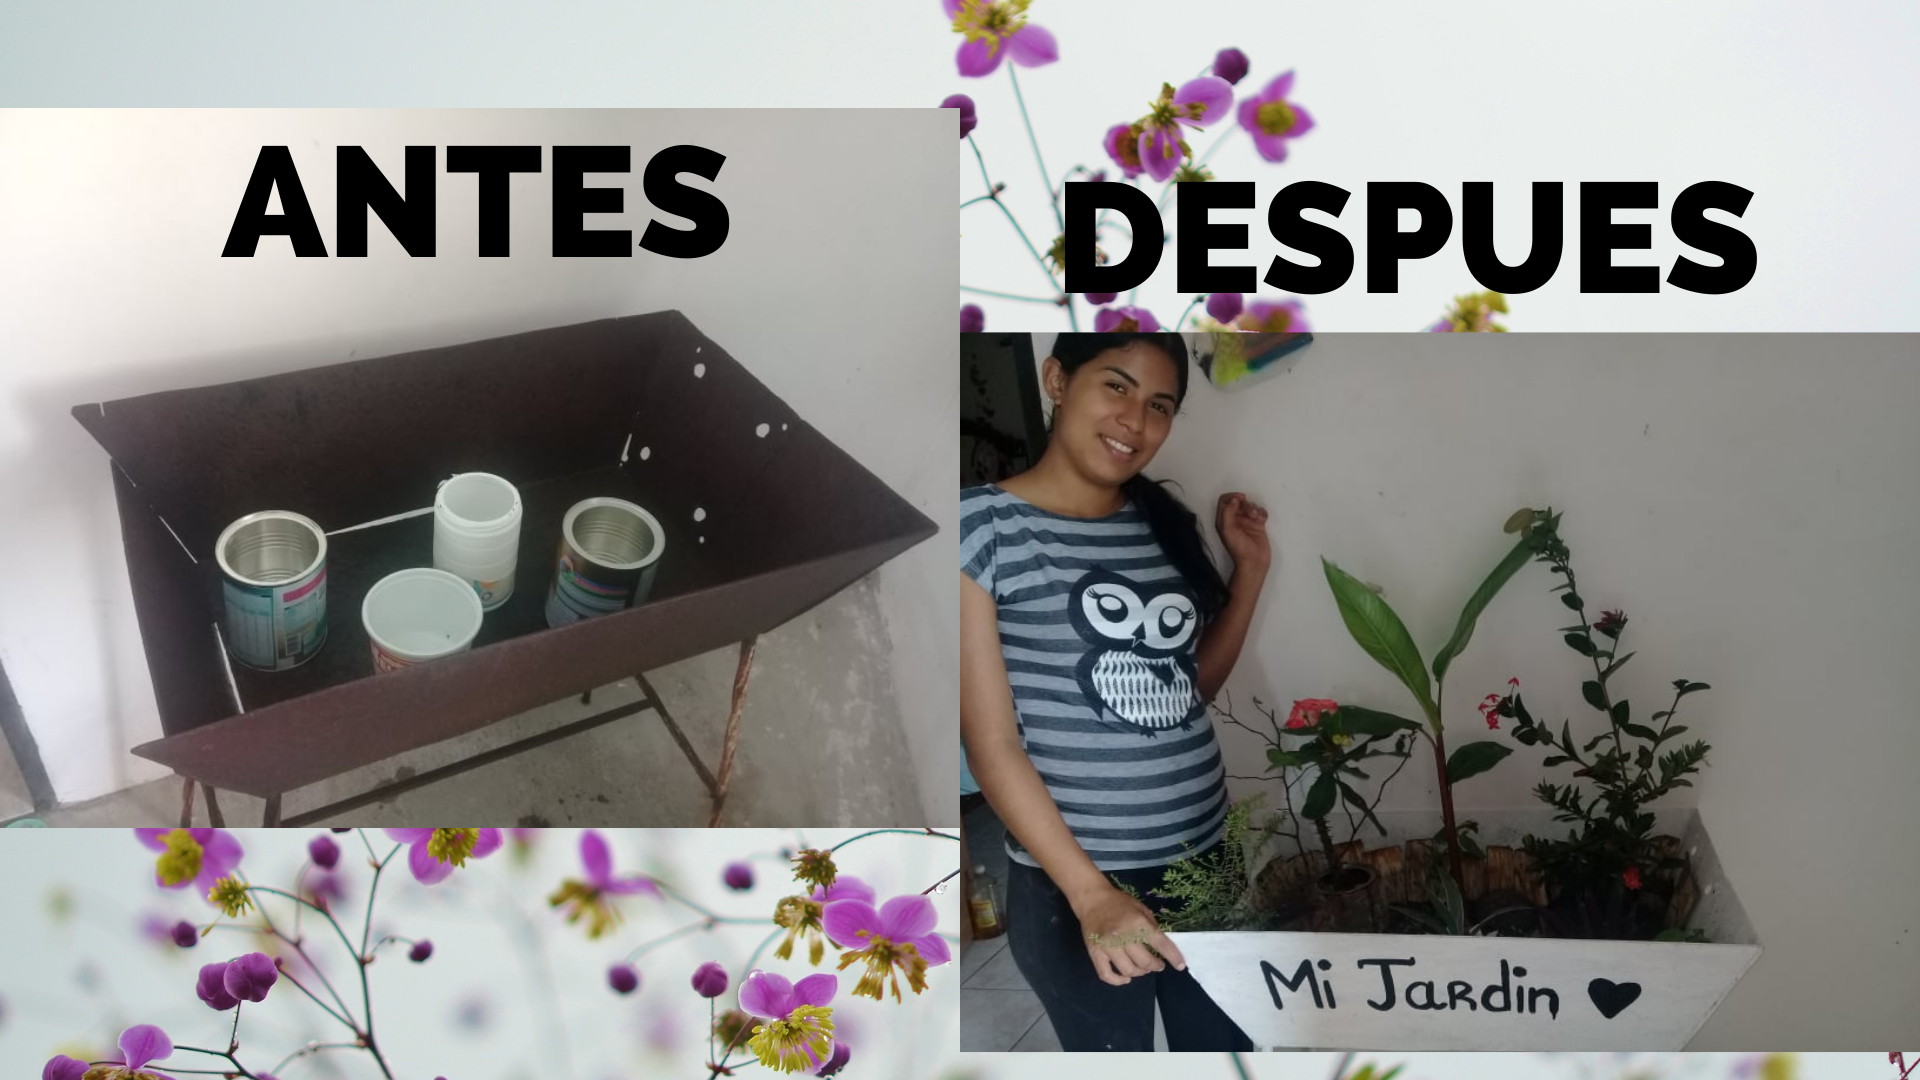
A cordial greeting to all my dear friends, I hope you are in good health, today I am very happy and the reason is that I have the opportunity to share with each of you how I managed to create a small creative space in my home, turning it into a beautiful, tidy, pleasant and relaxing place, I chose that area because I always wanted to have a mini garden on the balcony of my house full of love, peace, harmony and beautiful details that draw attention to my neighbors, harmony and beautiful details that call the attention of my neighbors, the most surprising thing I used recycled products that we usually discard, as I like to recycle those materials that can serve me to create new ideas, such as cans, plastic bottles and much more, one afternoon I started to think a little and a wonderful idea rumbled in my head so I did not want to waste more time and got down to work to realize and fulfill my project.
.png)
.png)
♻ Latas.
♻ Envases plástico.
♻ Maceta plástica
♻ Marcador.
♻ Tijera.
♻ Cutter.
♻ Tierra.
♻ Silicona.
♻ Martillo.
♻ Pequeños trozo de troncos de madera.
♻ Clavo.
♻ Piedras Picada N 1.
♻ Piedras Manzana.
♻ Machete.
♻ Pintura de color blanco y negro.
♻ Parrillera.
♻ Pincel.
♻ Cans.
♻ Plastic containers.
♻ Plastic pot.
♻ Marker.
♻ Scissors.
♻ Cutter.
♻ Soil.
♻ Silicone.
♻ Hammer.
♻ Small pieces of wood logs.
♻ Nail.
♻ Stones Picada N 1.
♻ Apple stones.
♻ Machete.
♻ Black and white paint.
♻ Grill.
♻ Brush.

.png)
Paso 1: Inicie pintando la parrillera de color blanco, en realidad no servia y dije porque no reutilizarla creando un mini jardín para decorar y crear un lugar agradable en el balcón de mi casa, así de esta manera llamar un poco las miradas. Al terminar de pintarla la coloque al sol para que secara muy bien
Step 1: I started by painting the grill white, it was not really useful and I said why not reuse it to create a mini garden to decorate and create a nice place on the balcony of my house, and in this way draw a little attention. When I finished painting it, I put it in the sun to dry very well.

.png)
Paso 2: Mientras que secaba la parrillera decidí hacerle pequeños agujeros a la lata por la parte de abajo con la ayuda del clavo y el martillo, para el envase de plástico lo hice con un clavo caliente, luego con el marcador marque el envase de plástico formando un zing zan y doblando cada una de sus pullas hacia afuera.
Step 2: While drying the grill I decided to make small holes in the bottom of the can with the help of the nail and hammer, for the plastic container I did it with a hot nail, then with the marker I marked the plastic container forming a zing zan and folding each of its pulleys outwards.

.png)
Paso 3: Ahora era el turno de decorar mis macetas, así que tome mis trozos de tronco de madera de acuerdo al tamaño de la lata y la maceta de plástico, si era necesario de recortar lo sobrante lo hacia con el machete, ya lista todas las piezas de tronco de madera la pegaba con silicona por el alrededor de la lata y la maceta.
Step 3: Now it was the turn to decorate my pots, so I took my pieces of wood trunk according to the size of the can and the plastic pot, if it was necessary to cut the excess I did it with the machete, once ready all the pieces of wood trunk I glued it with silicone around the can and the pot.

.png)
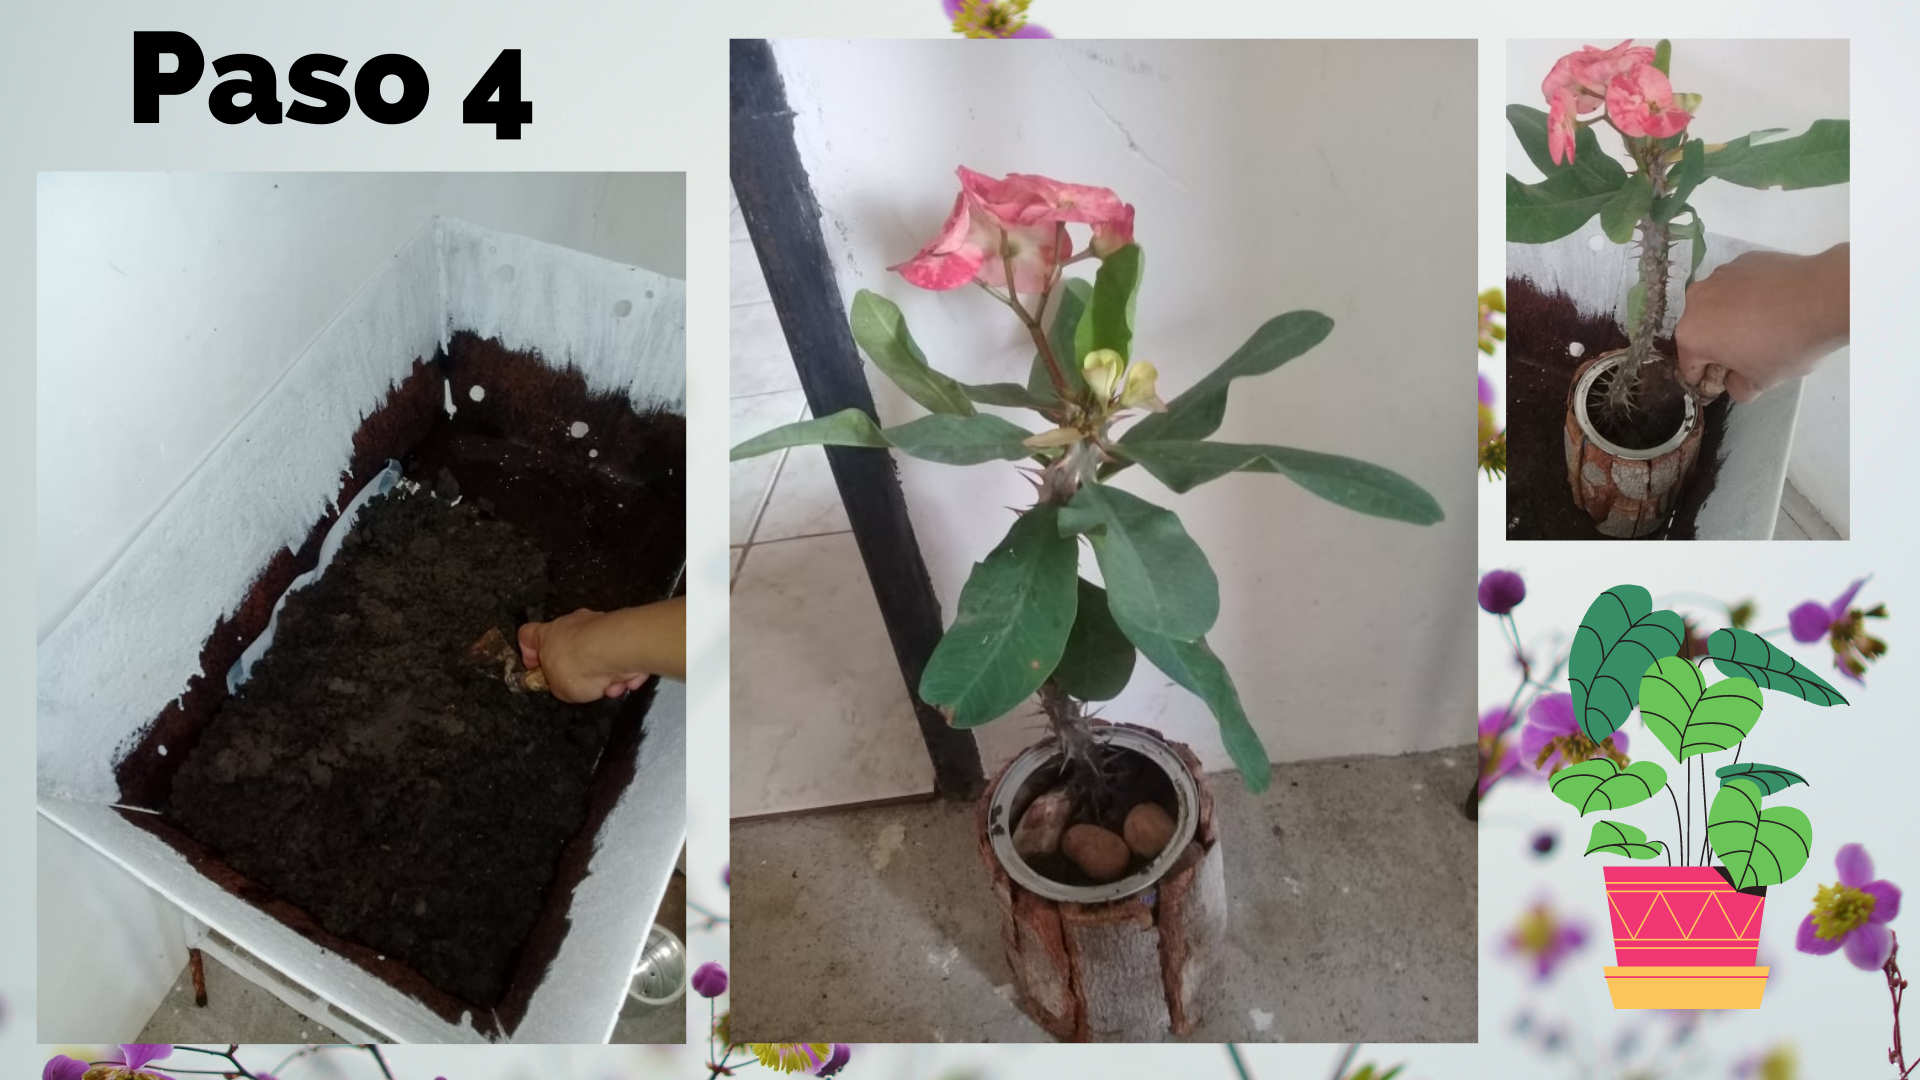
Paso 4: Lo siguiente seria llenar la parrillera de tierra por la mitad, luego la tierra que nos sobro la echamos en las macetas decoradas y empezamos a sembrar las plantas, desde pequeña siempre me a gustado las áreas verdes, sentarme a relajarme un poco y sentir esa brisa fresca en mi rostro, por esa razón en la lata sembré la planta que lleva por nombre Corona de Cristo, las personas piensan que esta planta fue utilizada para la terrible corona que llevo Jesús a la crucifixión por sus espinas rectas que esta posee.
Step 4: The following would be to fill the grill half full of earth, then the earth that we left over we throw it in the decorated pots and we begin to plant the plants, since I was little I always liked the green areas, sit down to relax a little and feel that cool breeze on my face, for that reason in the can I planted the plant that is called Crown of Christ, people think that this plant was used for the terrible crown that Jesus took to the crucifixion because of its straight thorns that this plant has.

.png)
Paso 5: Luego la posicione en una esquina donde realmente vi que llamaba la atención, para que mi mini jardín que viera mas vistoso enterré trozos de tronco de madera por el alrededor de la parrillera. En la siguiente esquina sembré una ixora grande y la maceta de plástico decorada una ixora pequeña rojo.
Step 5: Then I positioned it in a corner where I really saw that it attracted attention, to make my mini garden look more eye-catching I buried pieces of wood trunk around the grill. In the next corner I planted a large ixora and the decorated plastic pot a small red ixora.

.png)
Paso 6: En el envase de plástico sembré la planta Neoregelia ya que es muy conocida por la belleza de sus hojas, a ella la posicione en todo el centro del mini jardín. Luego a su alrededor forme un circulo de piedras bruta para darle mas vistosidad. Ademas de sembrar otros tipos de plantas mas que le quise agregar a mi jardín como Rosa y la planta Horgamania.
Step 6: In the plastic container I planted the Neoregelia plant since it is well known for the beauty of its leaves, I positioned it in the center of the mini garden. Then around it I formed a circle of raw stones to make it more attractive. In addition to planting other types of plants that I wanted to add to my garden as Rosa and Horgamania plant.

.png)
Paso 7: Para darle ese toque especial para que se viera diferente y mas vistoso con pintura negra dibuje una pequeña frase Mi jardín.
Step 7: To give it that special touch to make it look different and more colorful with black paint I drew a small phrase My garden.


Compermiso y me robó la idea jajaja. Cabe destacar que soy malísima con las plantas, hasta los cactus se me mueren. Pero lo intentaré con tu idea, realmente quiero un jardín
Hola amiga @virginianavas1, con intentarlo no perderas nada, se que lo lograras.