Saludos cordiales querida comunidad. El día de hoy quiero compartir con ustedes mis habilidades creativas en el mundo de las manualidades. Está es mi primera publicación en la comunidad Hive Diy , en esta oportunidad esta hermosa muñeca, llamada Fotucha Maestra. La cuál realice con mucho cariño, seleccionando cada uno de los materiales y colores más tiernos adaptados a este trabajo. Estaré atenta a cualquier sugerencia que puedan realizarme. Acá les mostrare paso a paso como fue el proceso detalladamente que realice en este proyecto.
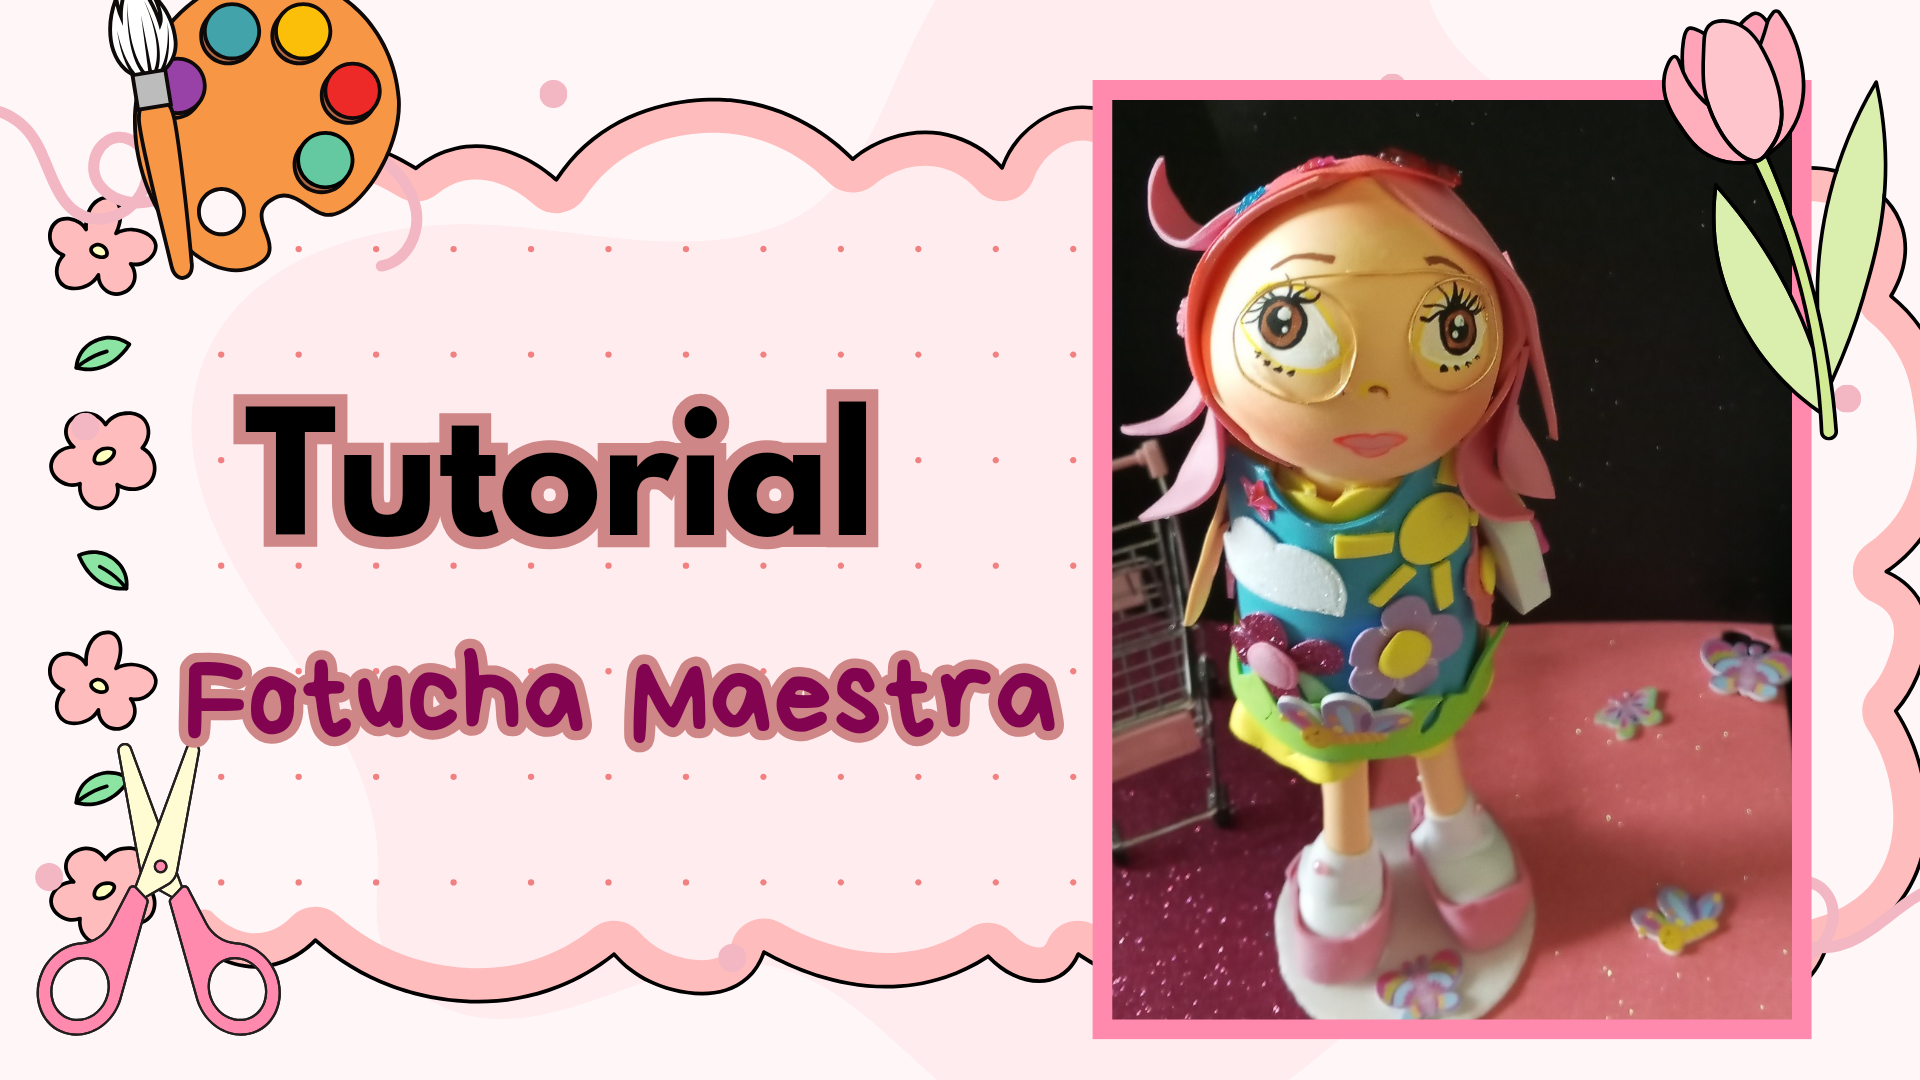
Best regards dear community. Today I want to share with you my creative skills in the world of crafts. This is my first post in the Hive Dyi community, this time this beautiful doll, called Fotucha Maestra. Which I made with great love, selecting each of the most tender materials and colors adapted to this work. I will be attentive to any suggestions you may make to me. Here I will show you step by step how the process I carried out in this project was in detail.
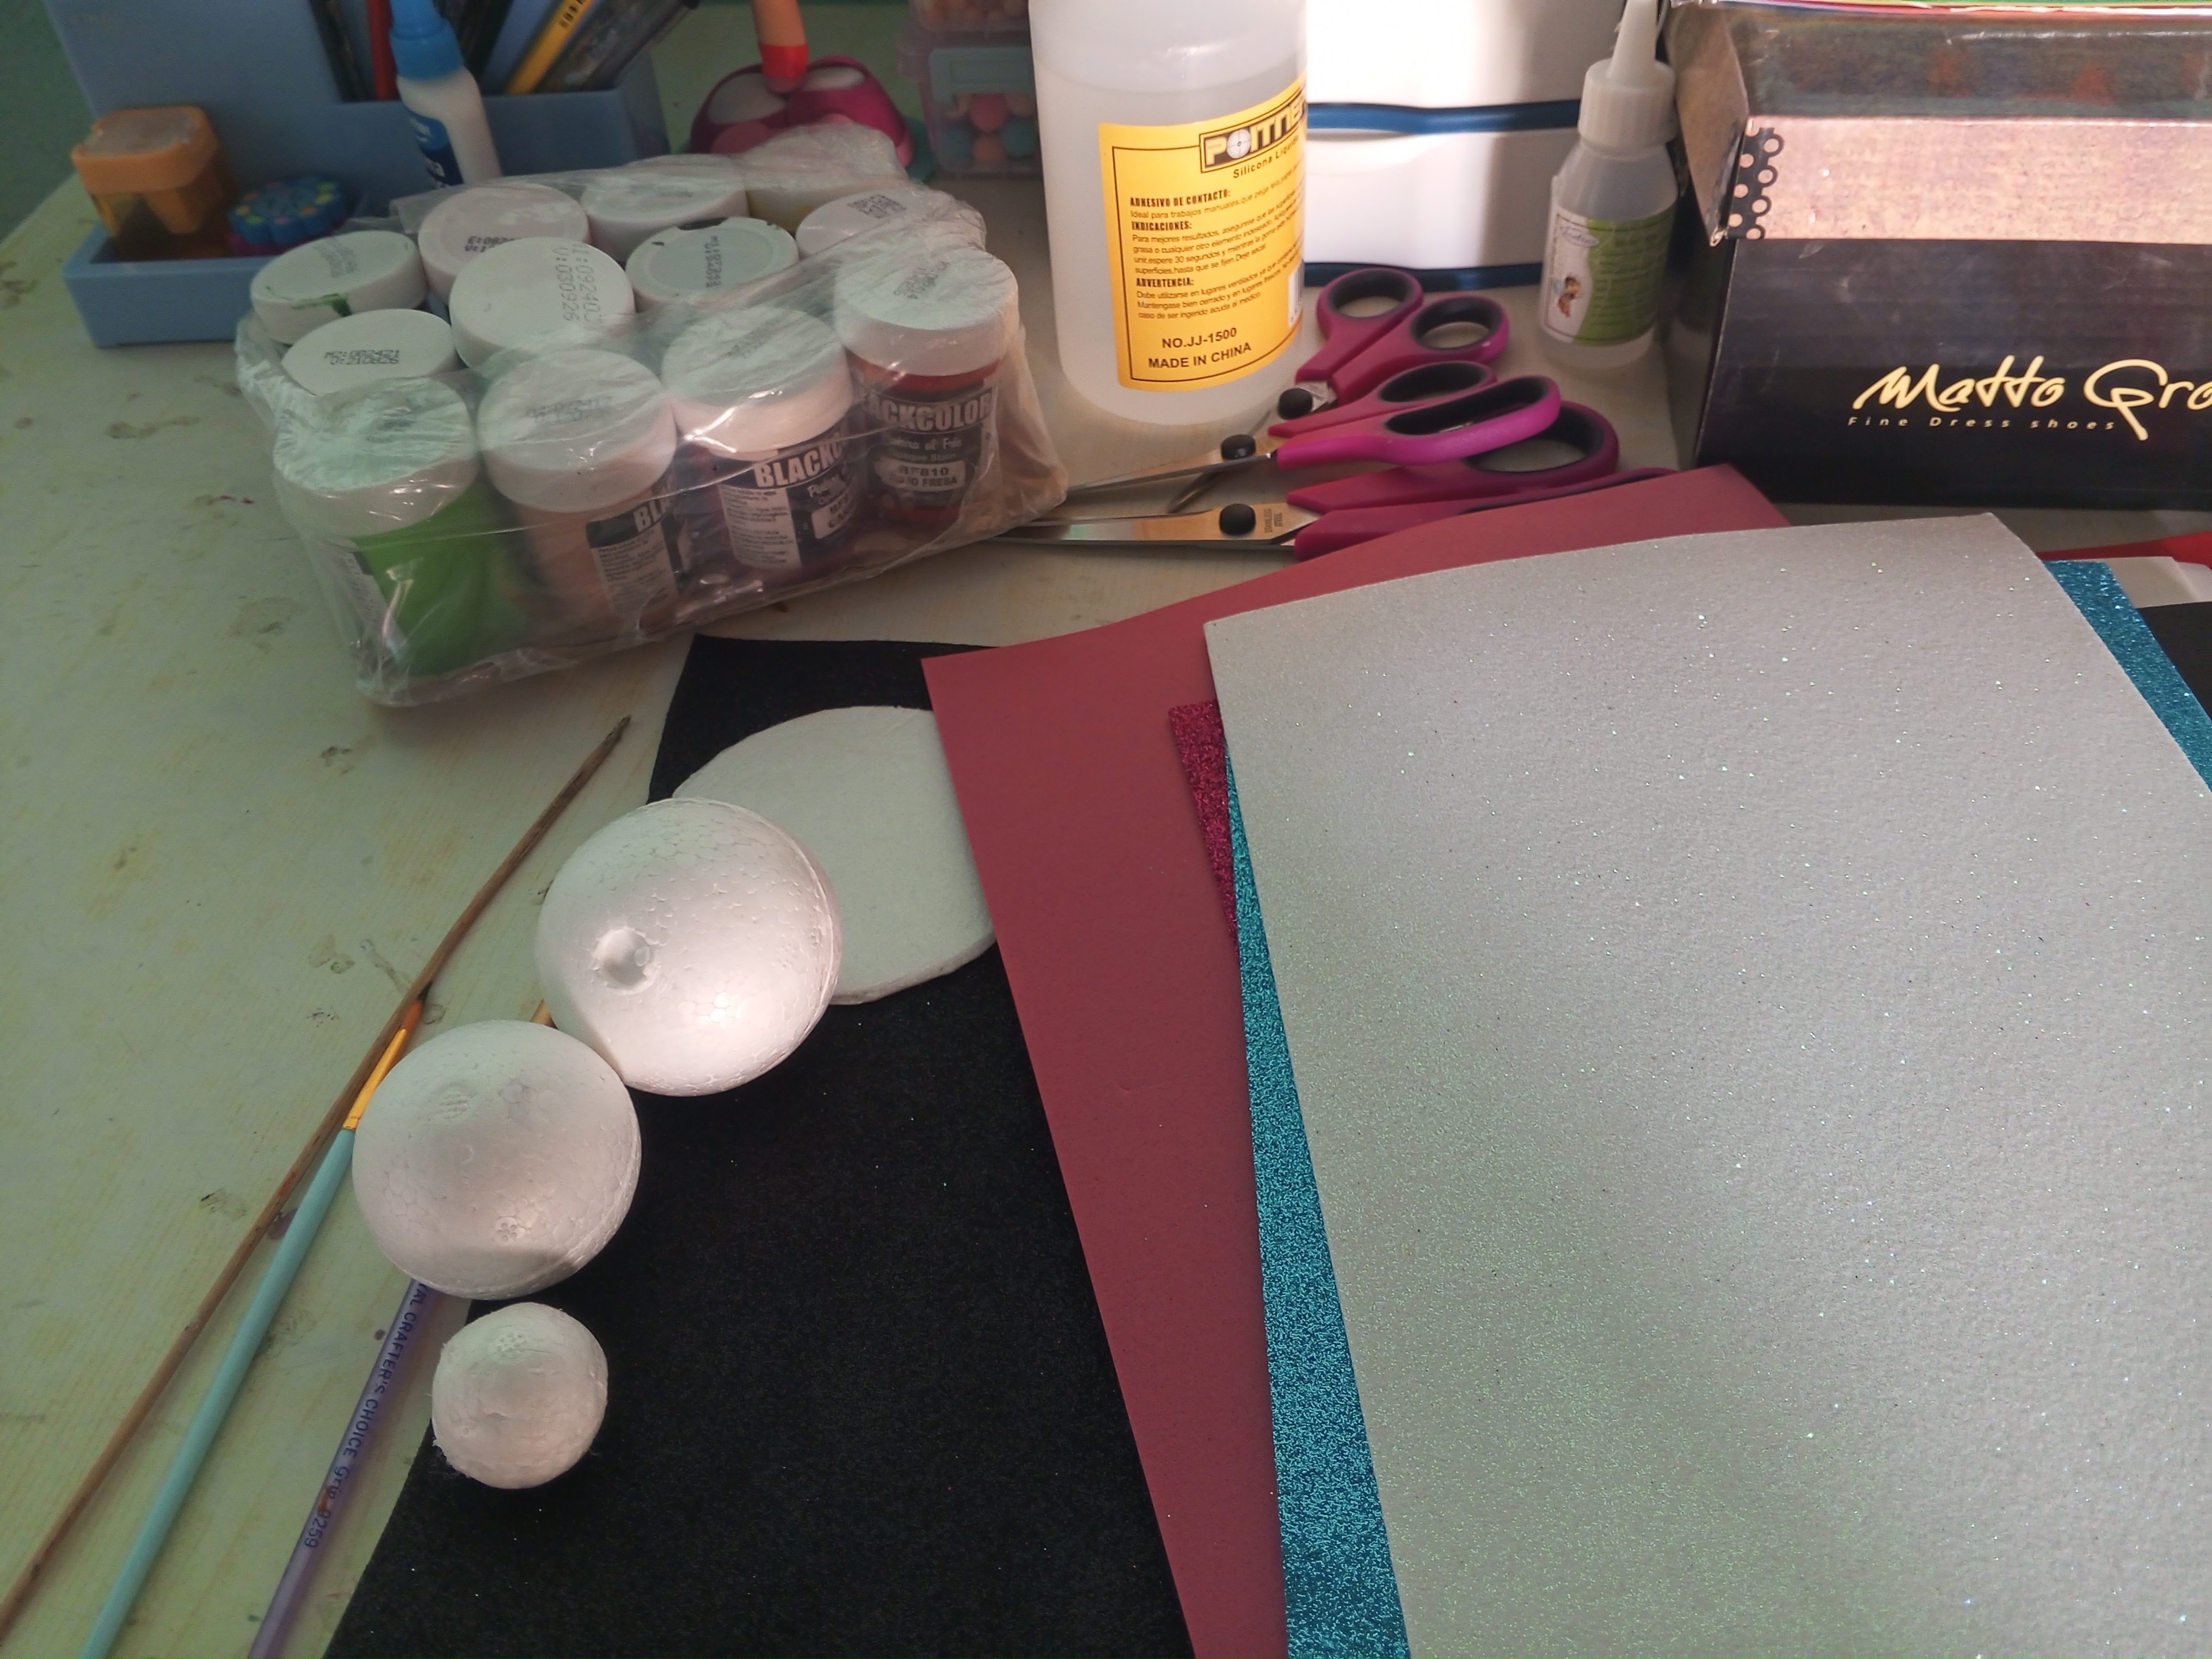
Materiales:
Foami
Silicón líquido
Pinceles
Base de anime
Tijeras
Pinturas al frio
Alambre de bisutería
Pegatinas de figuras
Palitos de altura
Cinta
Esferas de anime en tamaño 6, 4 y 2.
Materials :
foami
liquid silicone
brushes
anime base
scissors
cold paints
jewelry wire
figure stickers
tall sticks
tape
anime spheres in size 6, 4 and 2.

Pasos a seguir:
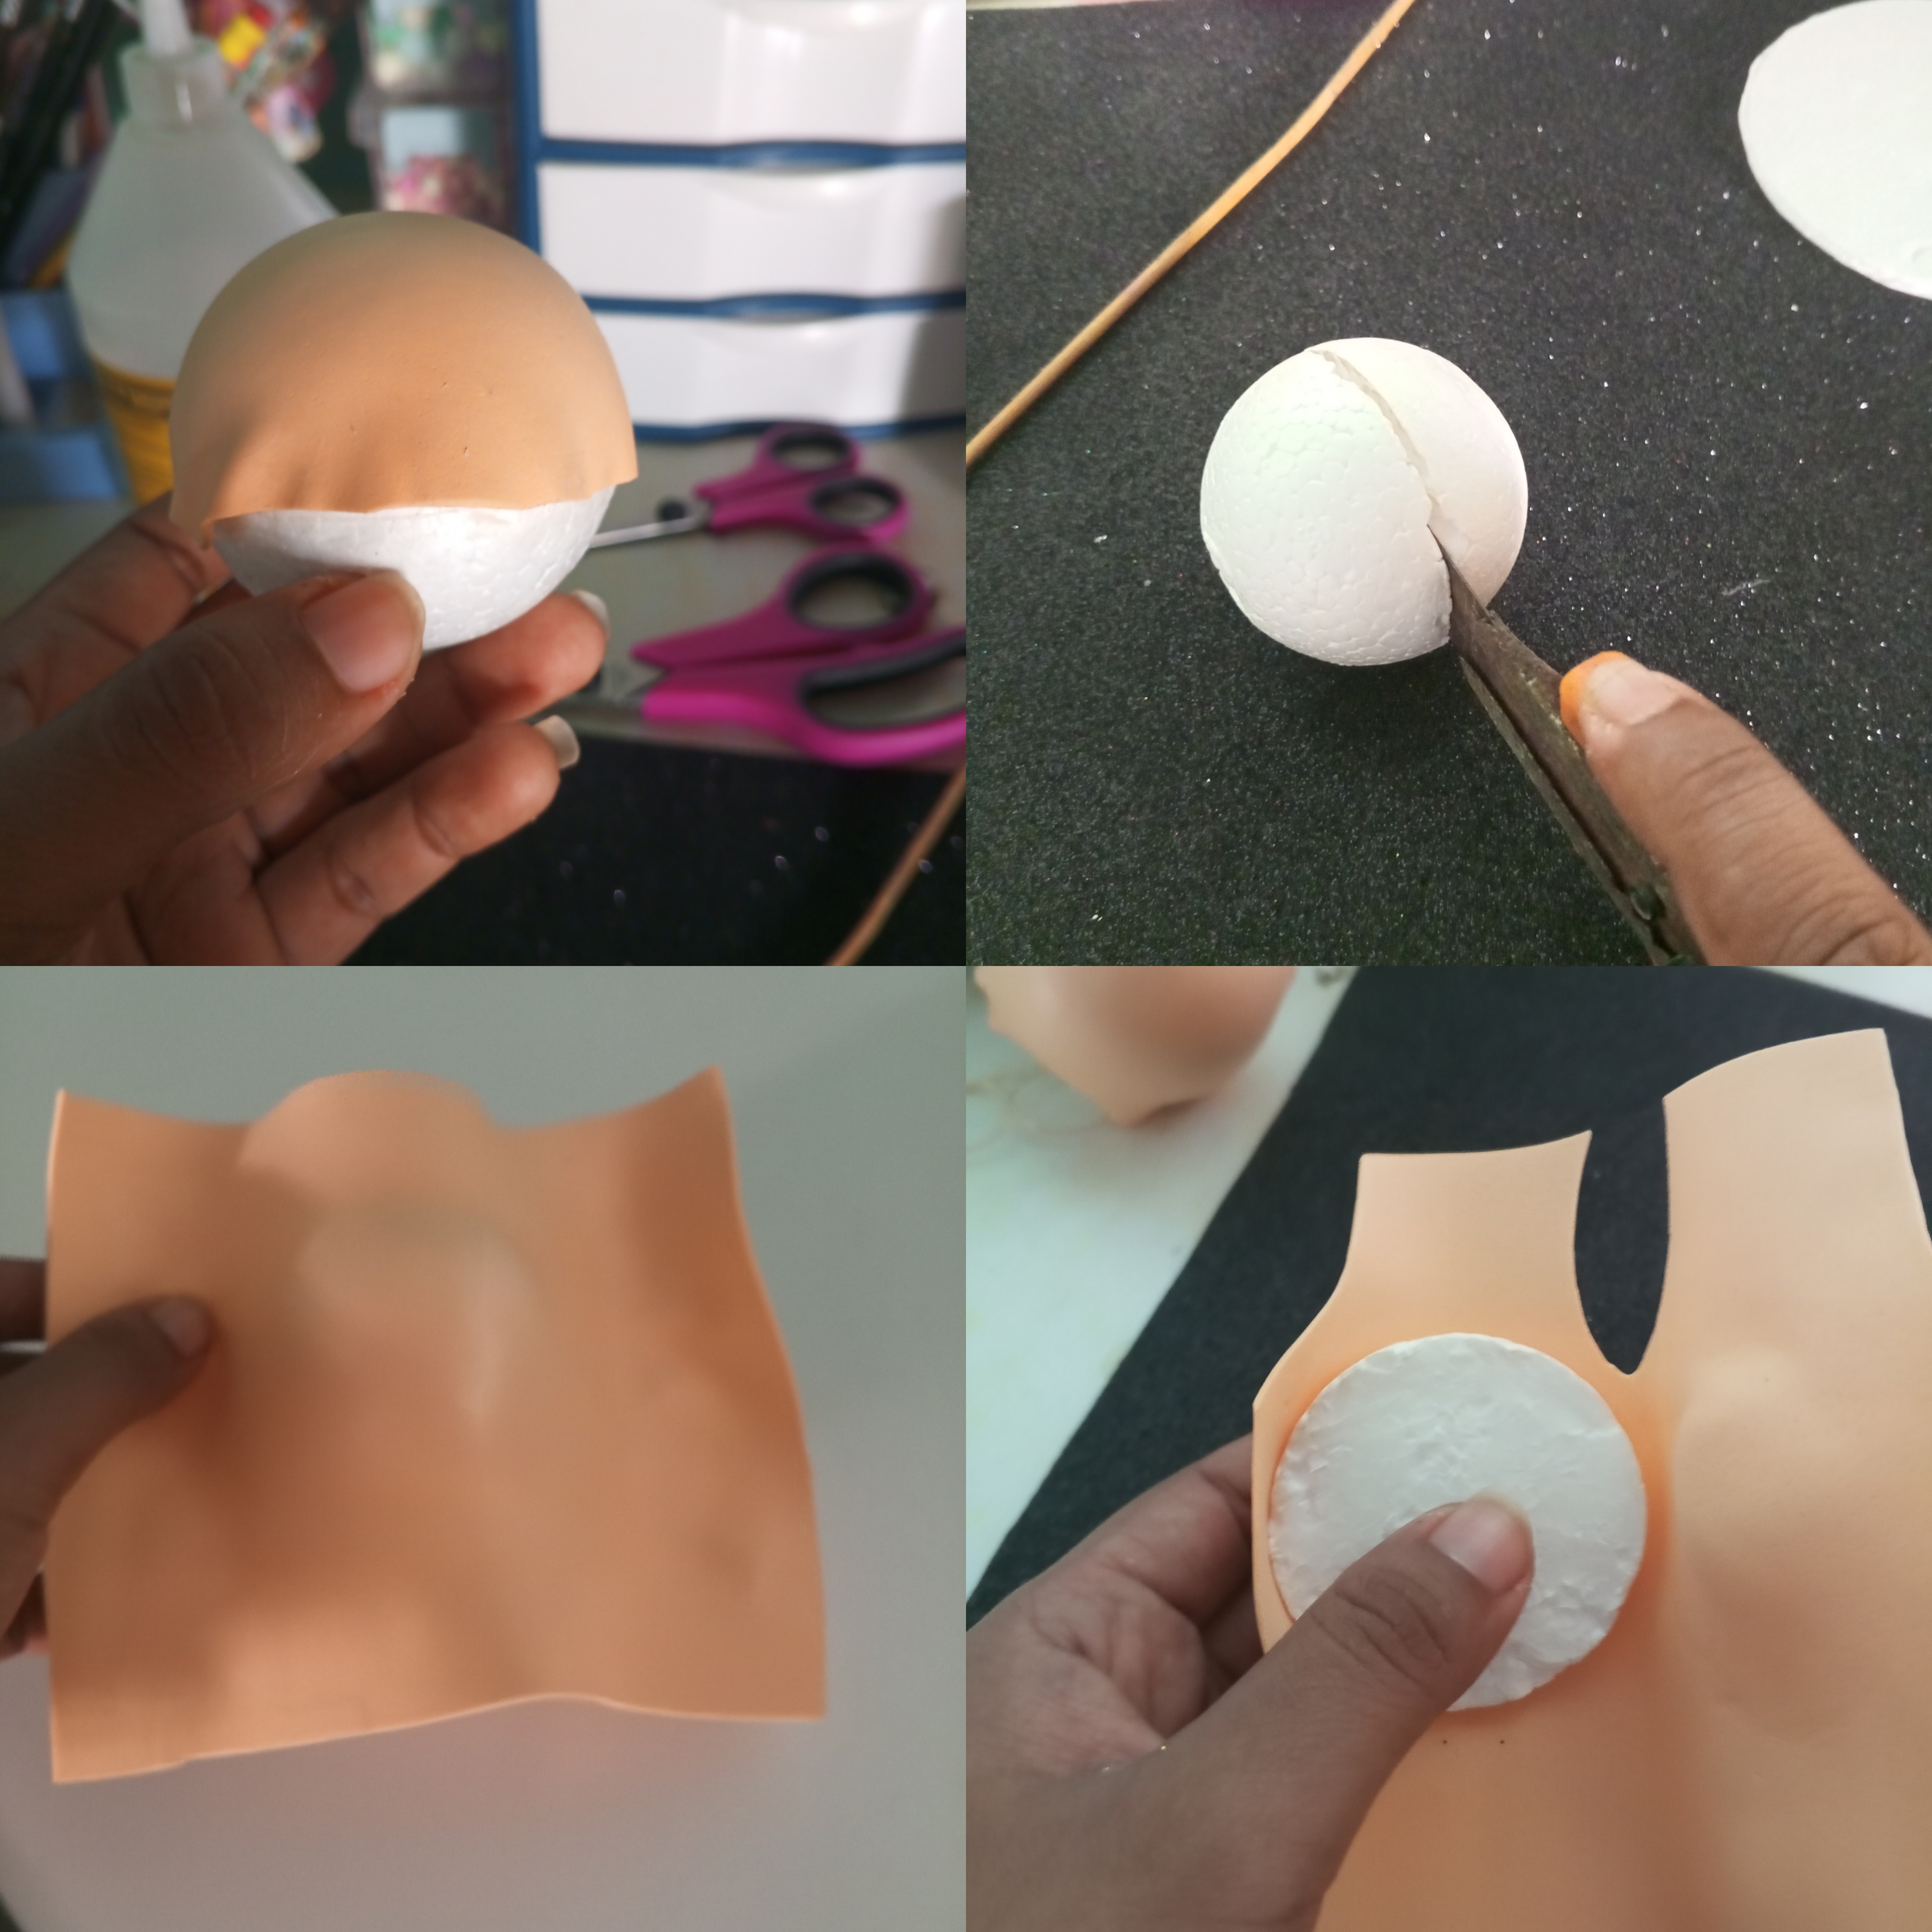
Paso 1: Recortar foami color piel, dos cuadros.
Paso 2: Con la plancha aplica calor al foami color piel y sobre la esfera de foami tamaño 6 ejerce presión. Esto para que tome la forma de la esfera y poder diseñar el rostro.
Paso 3: Aplicar silicón frio al foami piel y pegar en la esfera. Ejercer presión totalmente para que no queden grumos.
Steps to follow:
Step 1: Cut out skin-colored foam, two squares.
Step 2: With the iron, apply heat to the skin-colored foam and apply pressure on the size 6 foam sphere. This so that it takes the shape of the sphere and can design the face.
Step 3: Apply cold silicone to the skin foam and glue it to the sphere. Press completely so that there are no lumps.


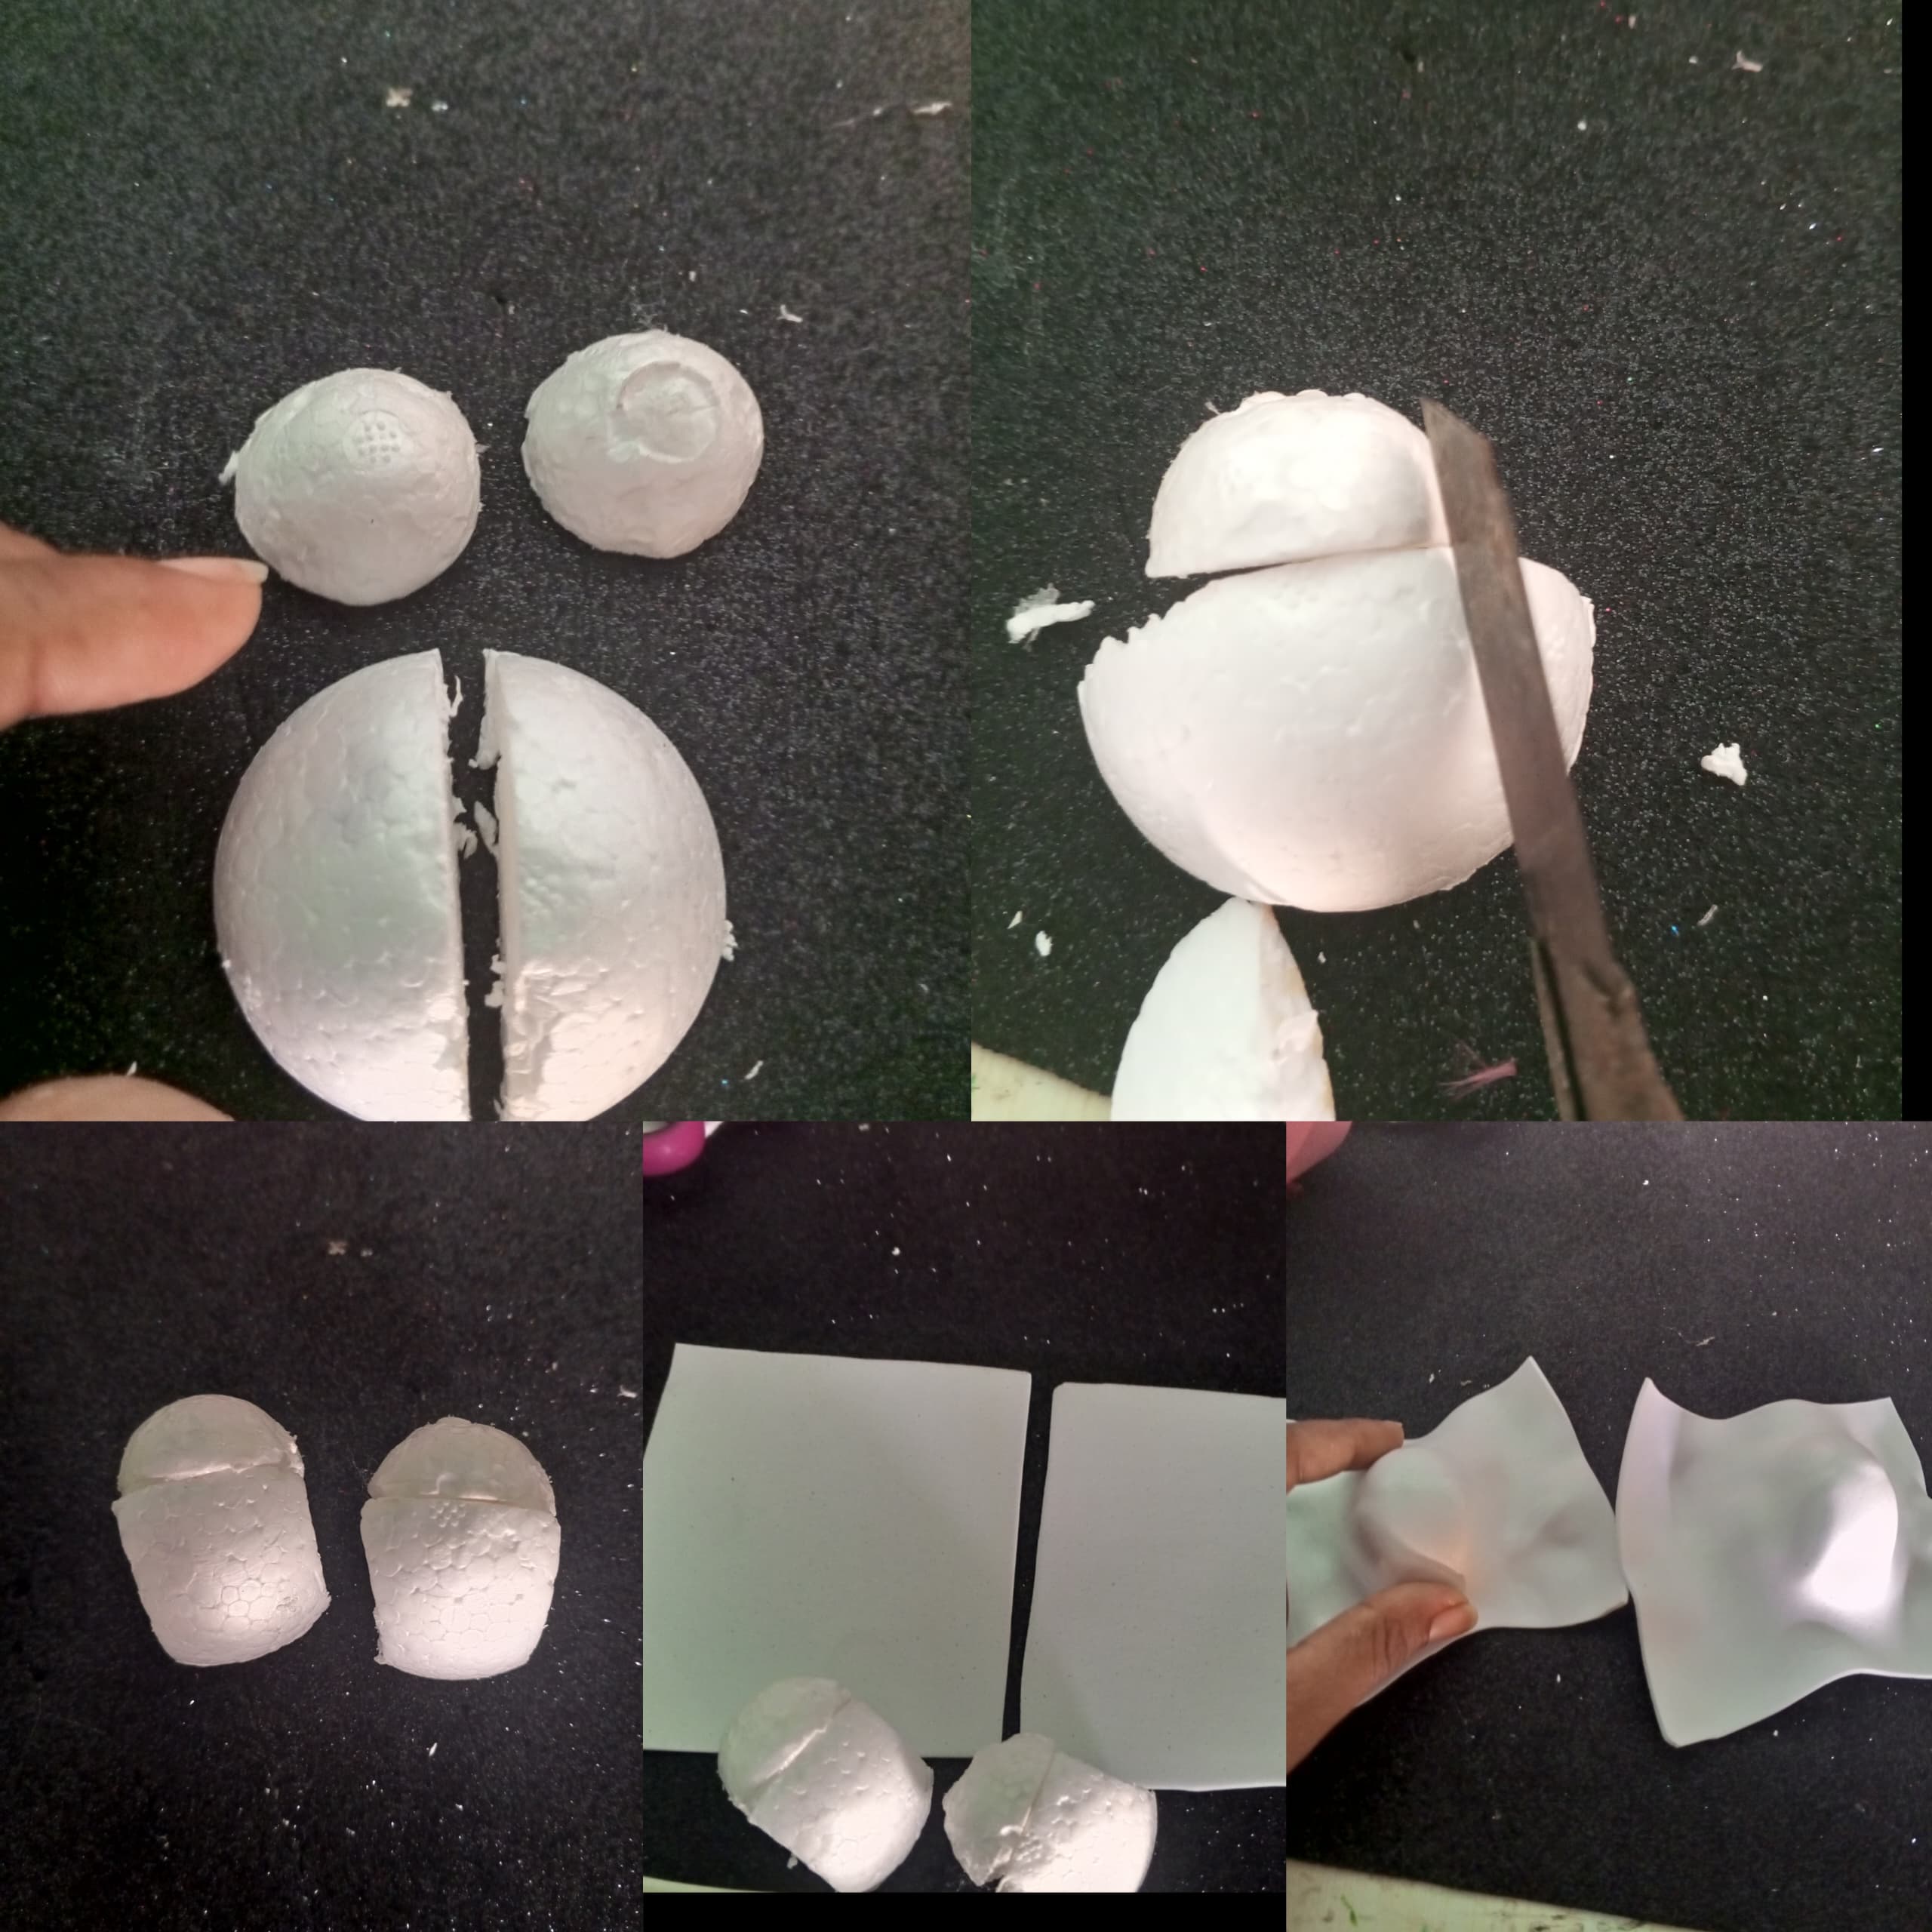
Paso 4: Tomar la esfera número 4 y cortarla a la mitad con un exacto. Luego con otro trozo de foami color piel aplicar calor nuevamente para que tome la forma del cuerpo de la muñeca.
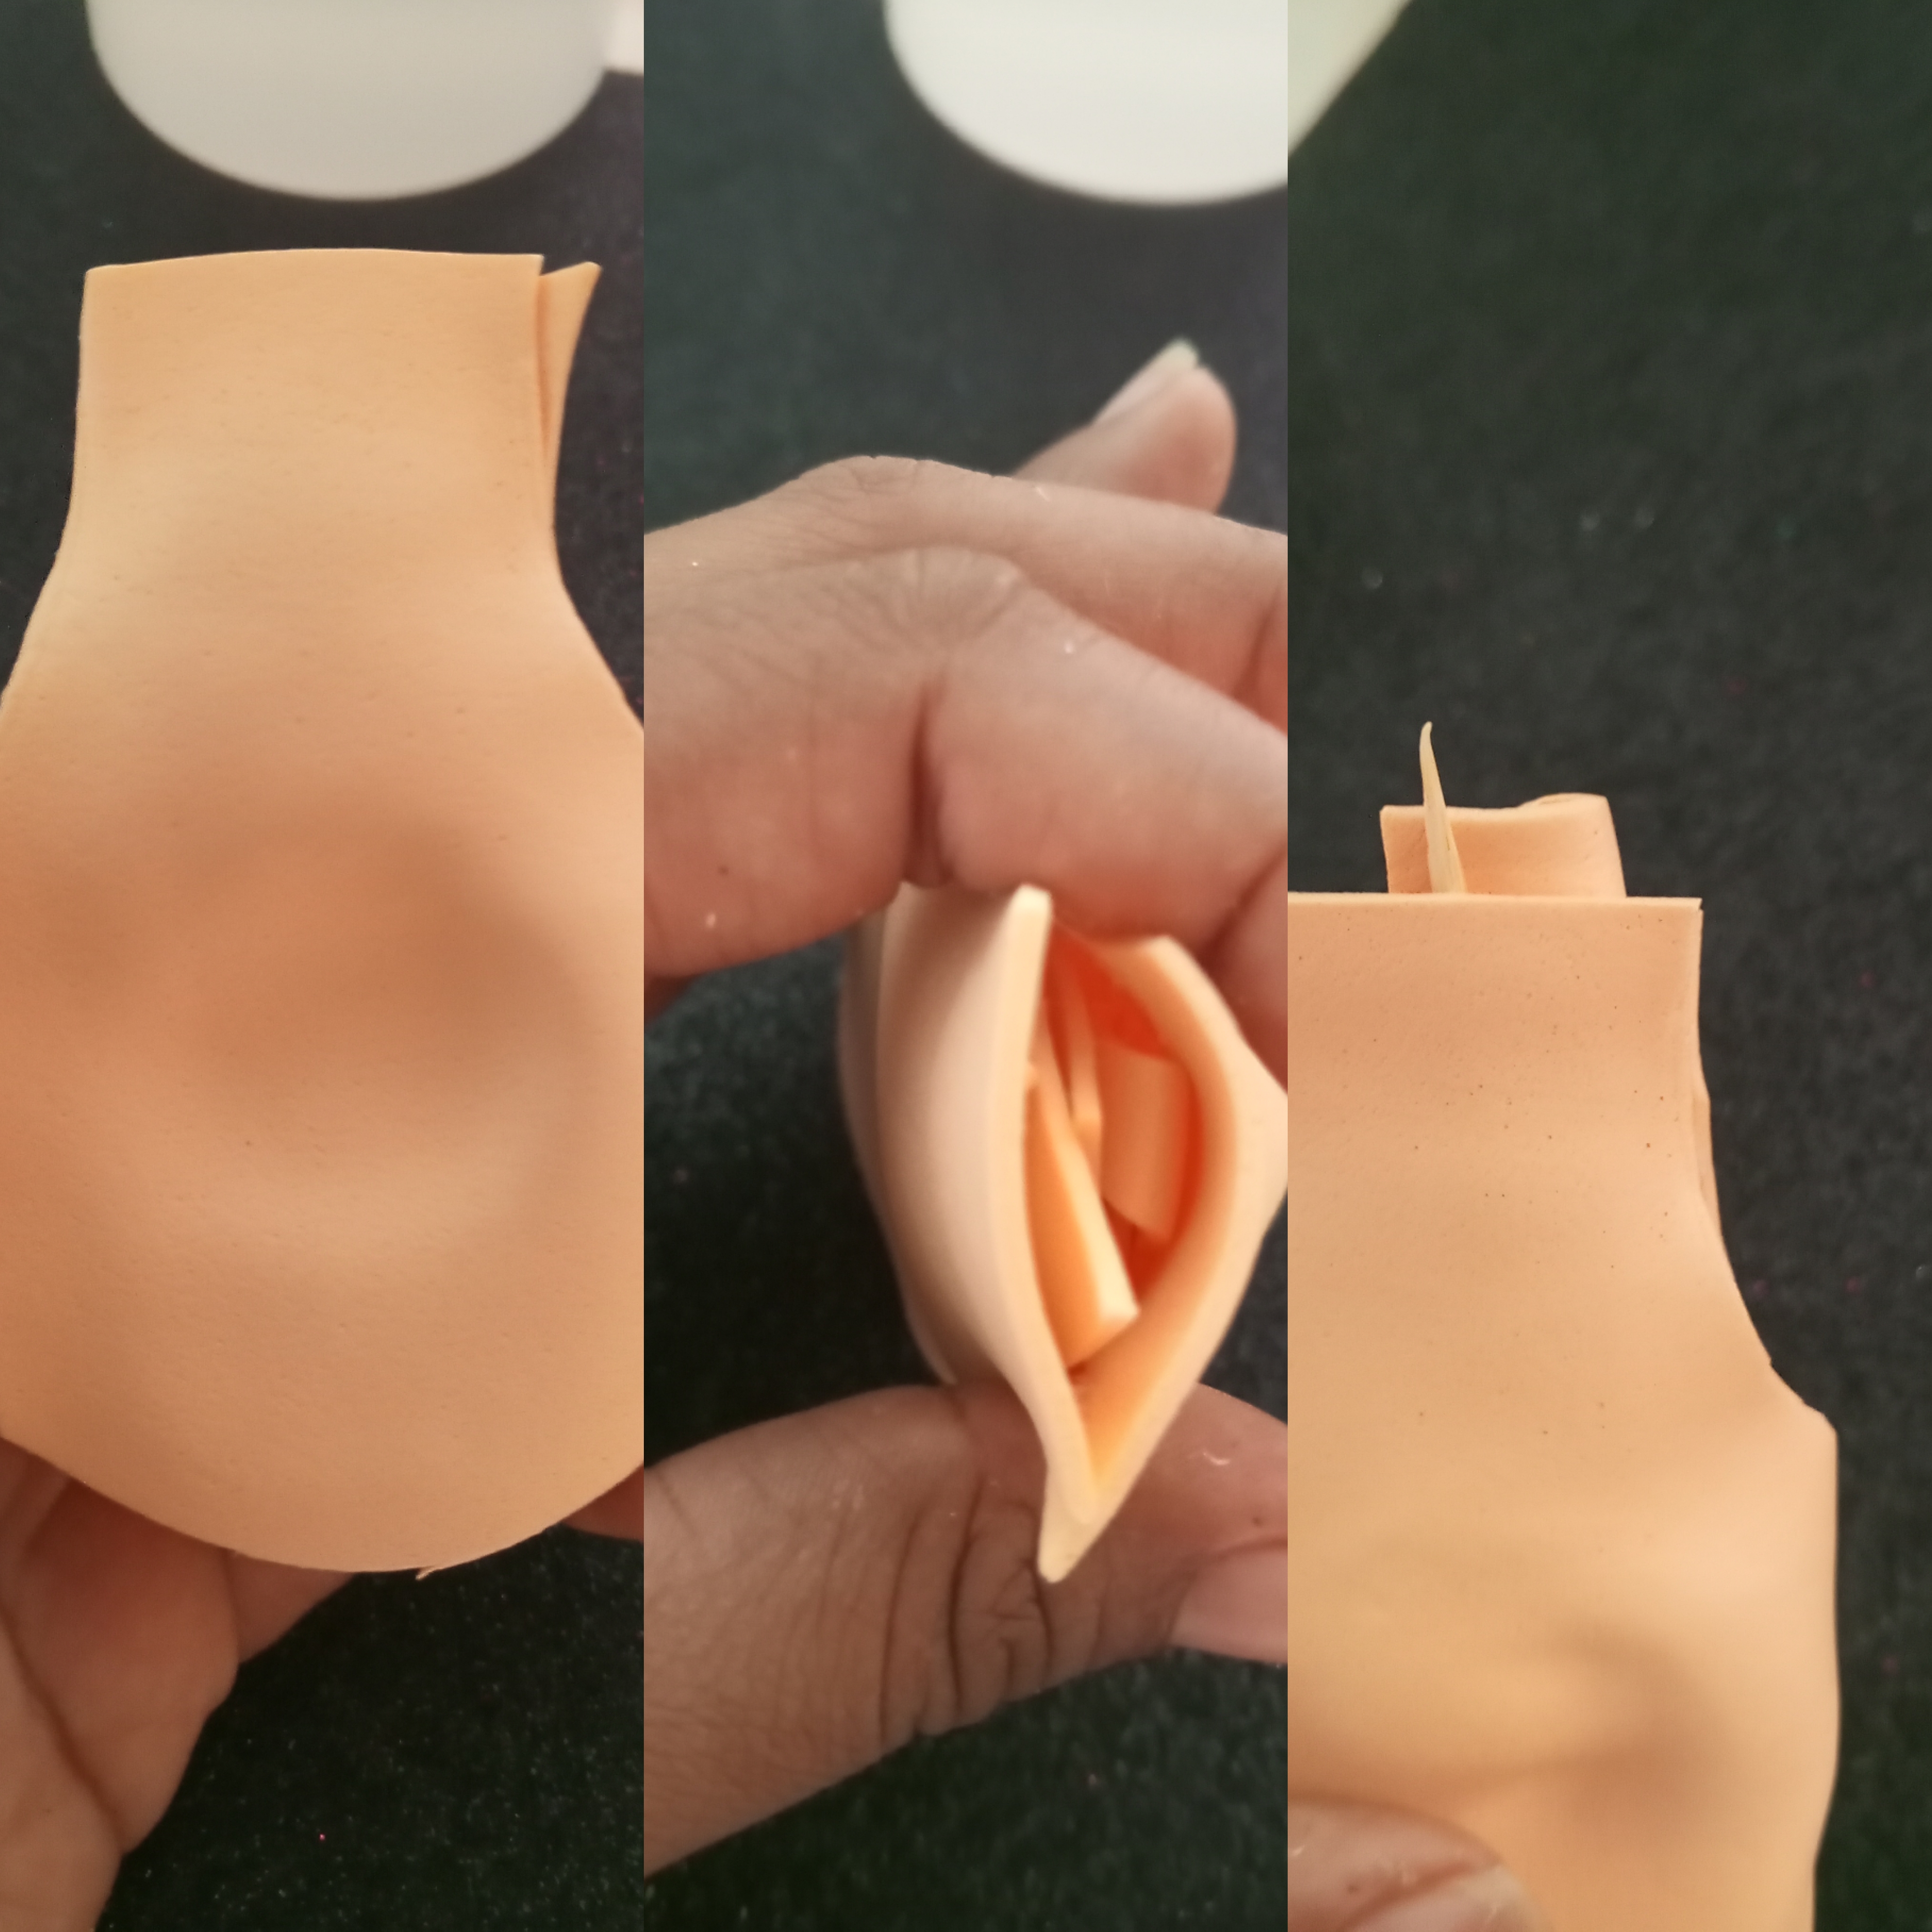
Paso 5: Pegar el cuerpo y rellenar en la parte del cuello con trozitos de foami o algodón. Luego de pegado incrustar palitos de altura en el área del cuello. Esto con el fin de darle más firmeza a la cabeza de la muñeca cuando se vaya a colocar.
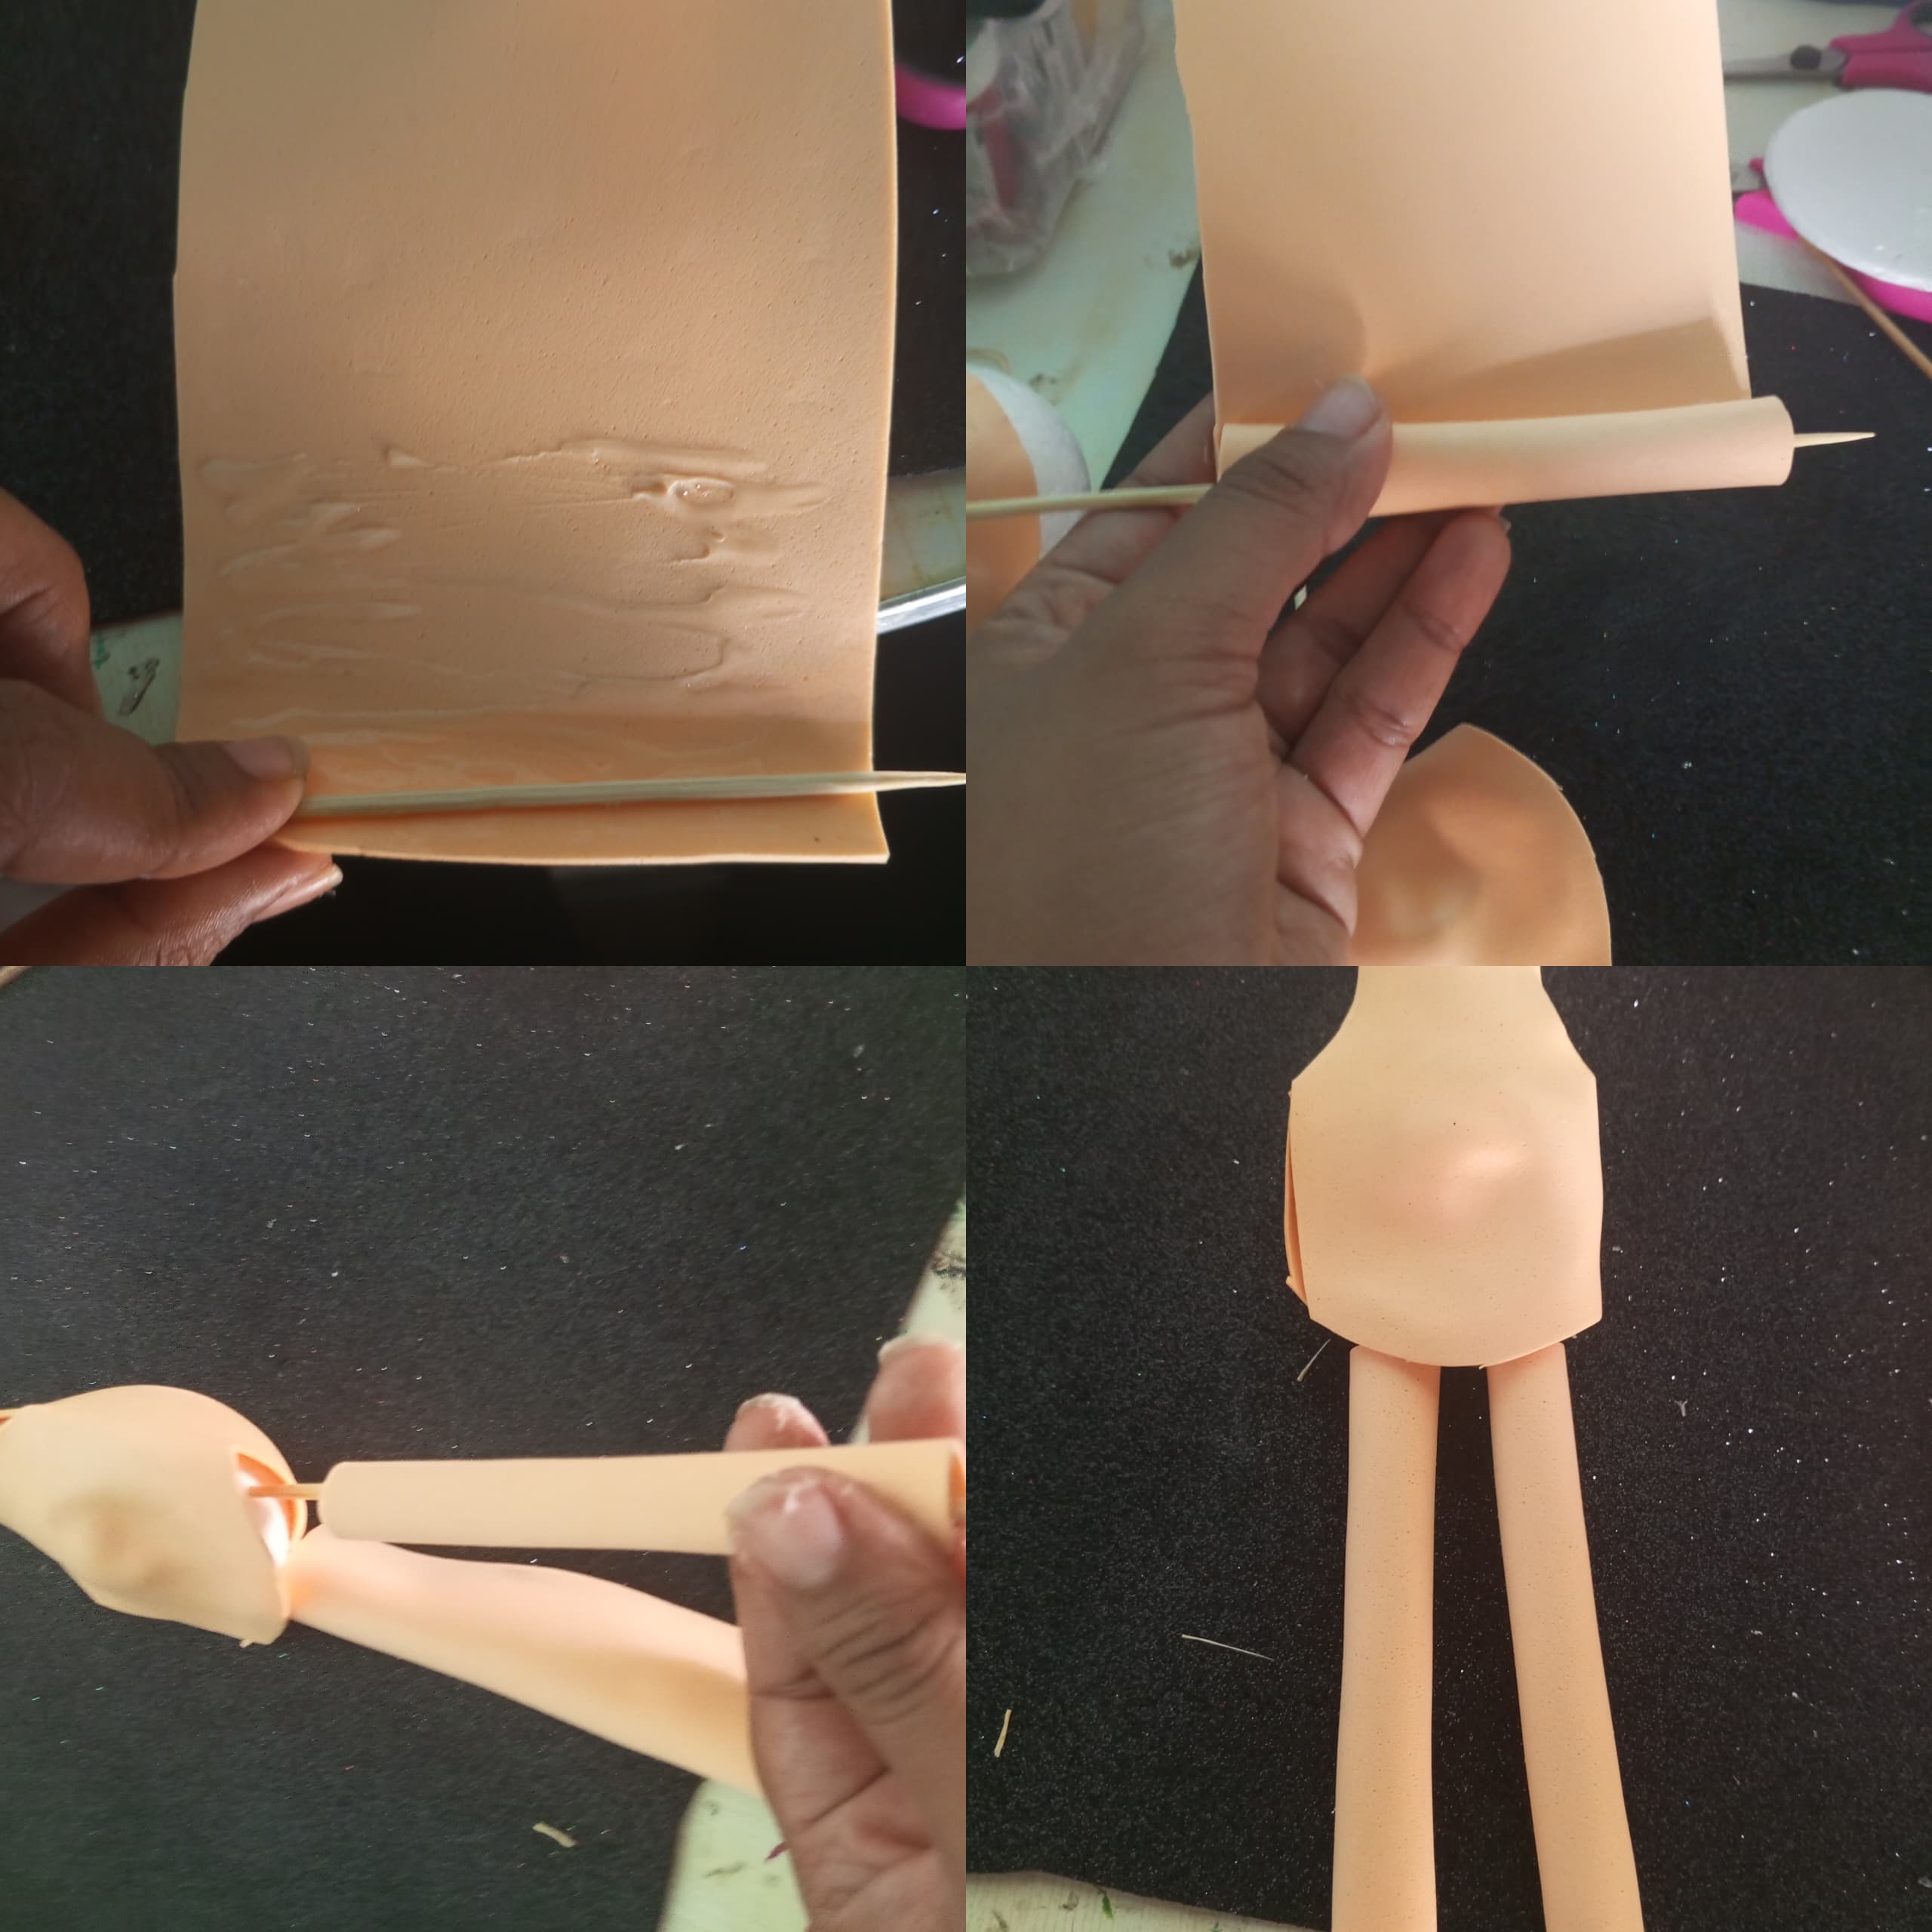
Paso 6: Tomar nuevamente dos palitos de altura y con foami color piel enrollar alrededor. Esto para formar las piernas y que queden firmes con el silicón.
Step 4: Take sphere number 4 and cut it in half with an Exacto. Then with another piece of skin-colored foam, apply heat again so that it takes the shape of the doll's body.
Step 5: Glue the body and fill the neck part with pieces of foam or cotton. After gluing, embed tall sticks in the neck area. This is in order to give the doll's head more firmness when it is to be placed.
Step 6: Take two tall sticks again and roll them around with skin-colored foam. This to form the legs and make them firm with the silicone.

Paso 7: Incrustar las piernas en el cuerpo. De manera que queden sus extremidades unidas totalmente con una gota de silicón en cada pierna.
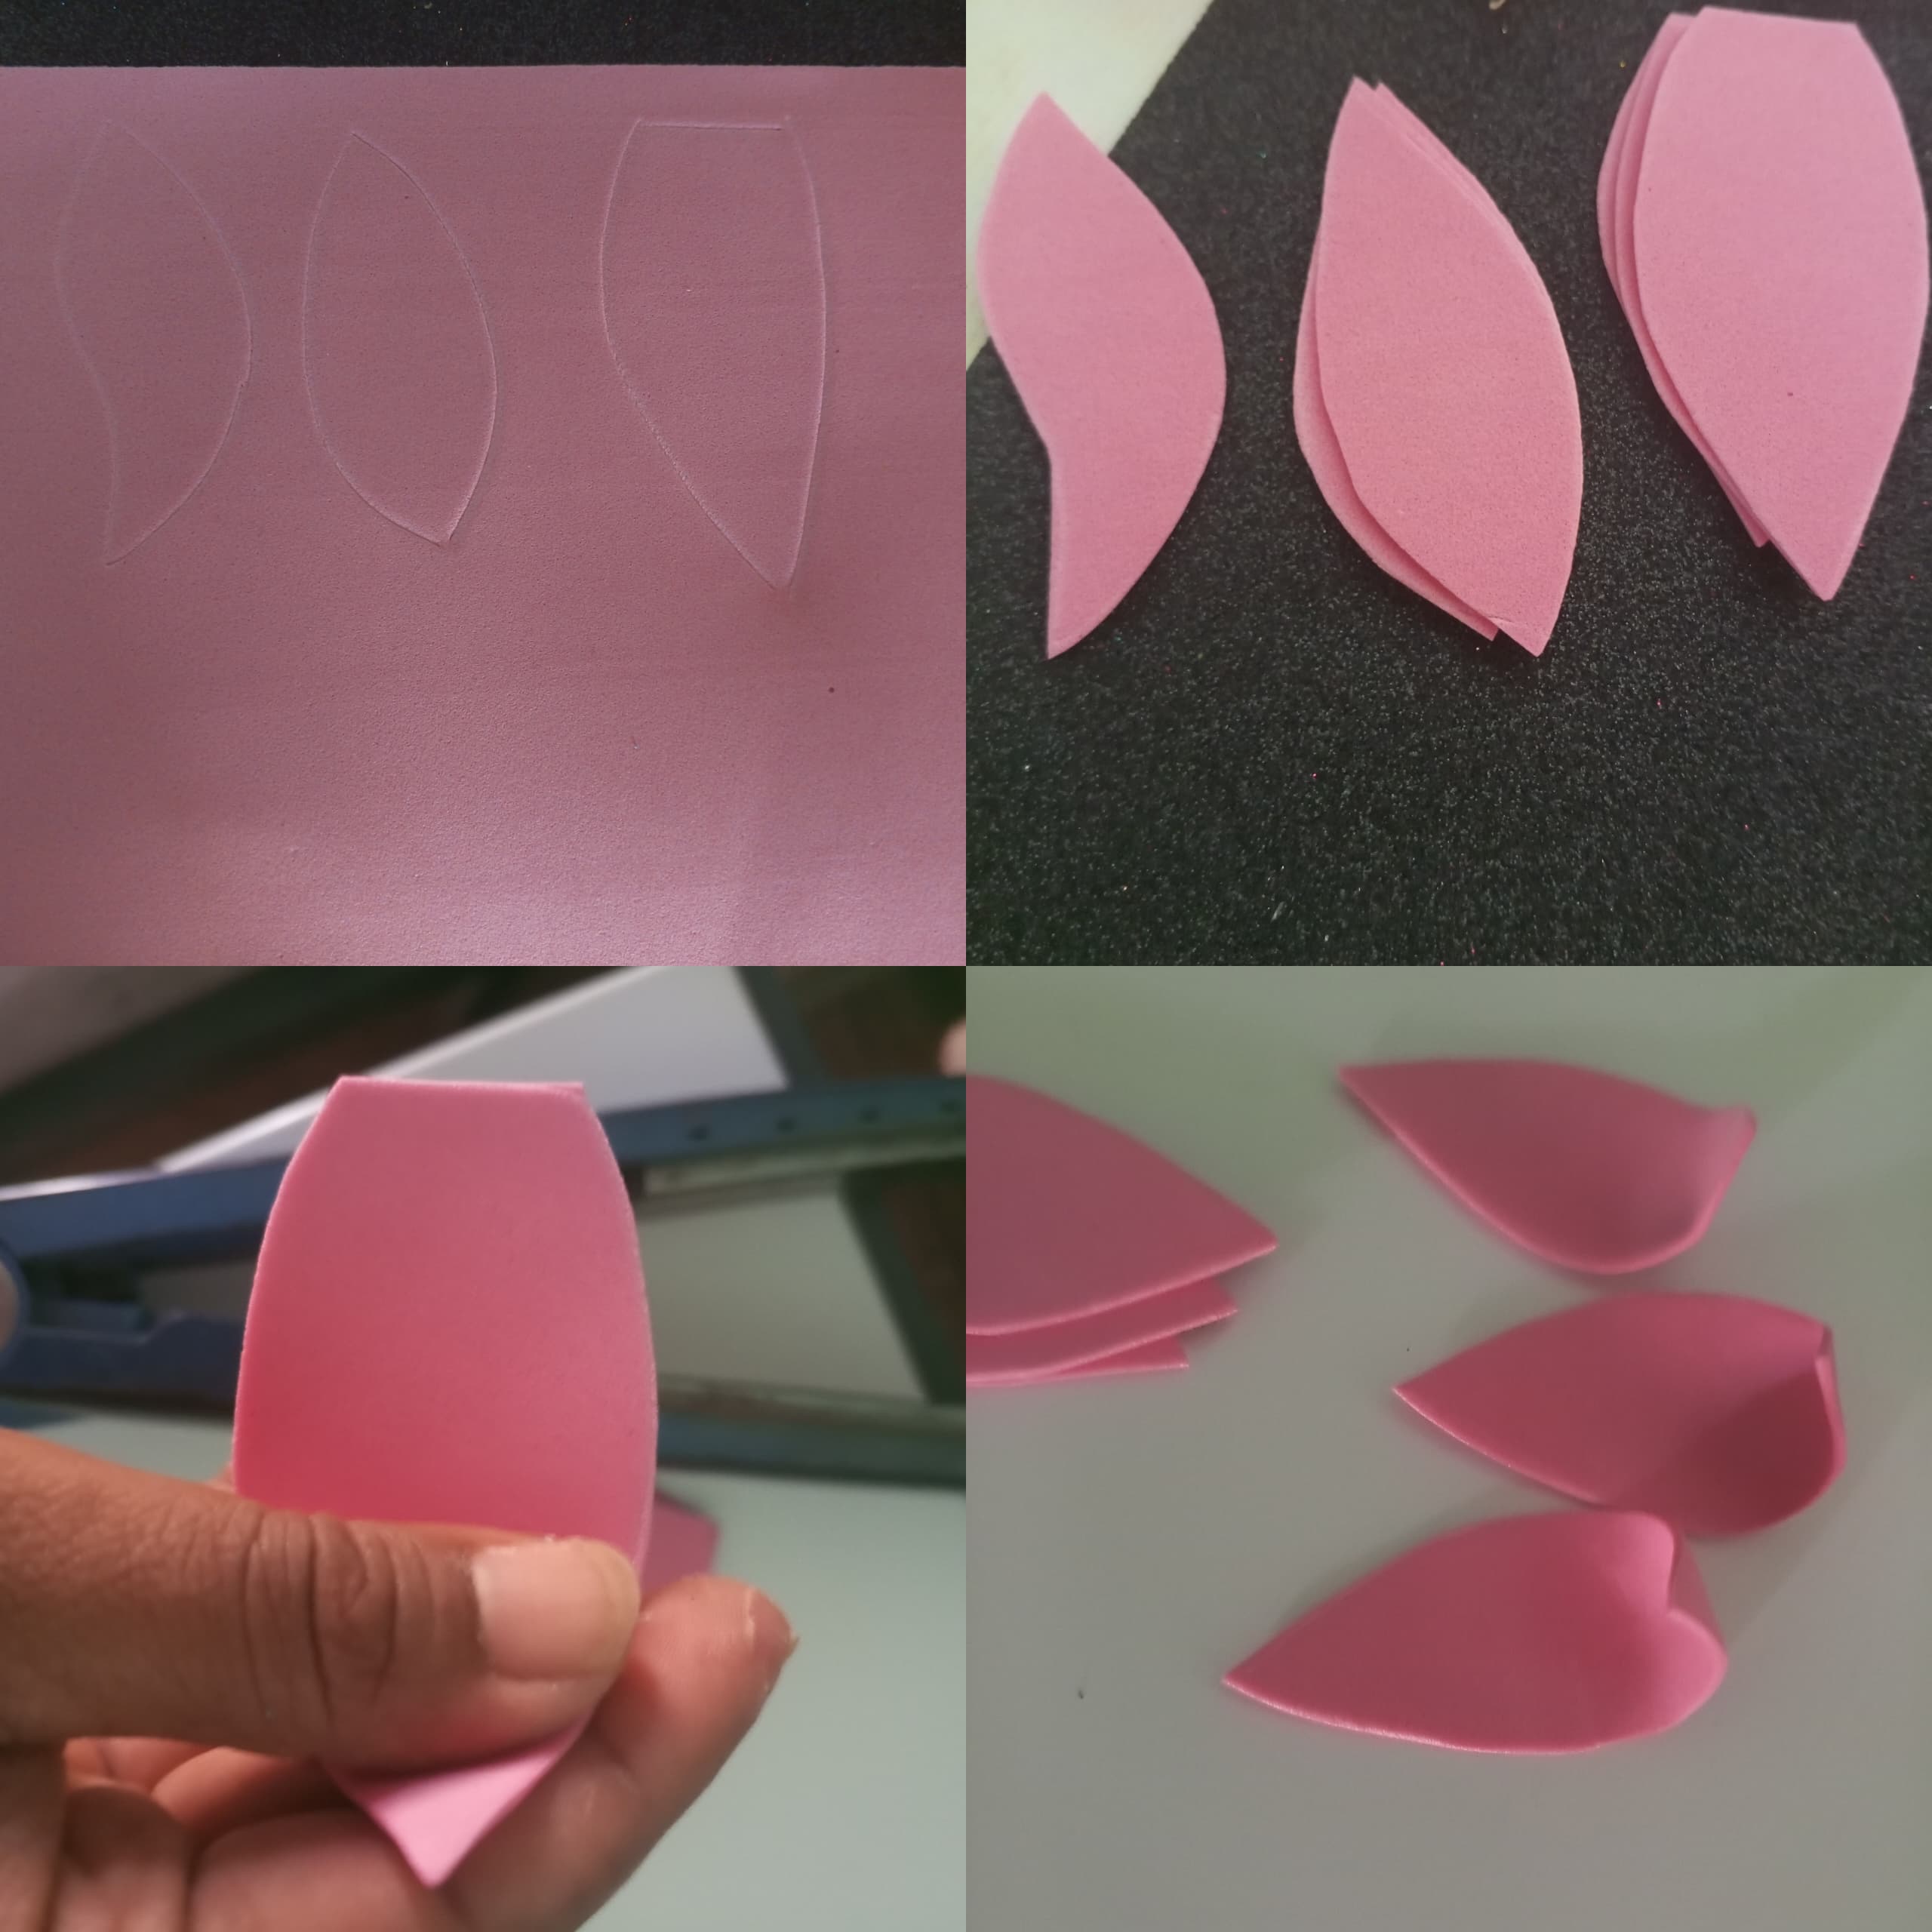
Paso 8: Dibujar en el foami rosado siluetas para realizar el cabello. De la primera pieza 1, segunda pieza 4 y tercera pieza 3 . Recortar y aplicarles calor solo a la punta de cada pieza. Con los dedos darle forma hacia arriba a cada una.
Paso 9: Comenzar pegando las terceras piezas rosadas en la parte descubierta de la esfera número 6. Con ello se armara la base del cabello de la muñeca. Luego seguidamente se colocan las segundas piezas y por último la primera como haciendo alusivo al cabello de la parte de adelante.
Step 7: Embed the legs into the body. So that their limbs are completely joined with a drop of silicone on each leg.
Step 8: Draw silhouettes on the pink foam to make the hair. From the first piece 1, second piece 4 and third piece 3. Cut out and apply heat only to the tip of each piece. With your fingers, shape each one upwards.
Step 9: Begin by gluing the third pink pieces to the exposed part of sphere number 6. This will create the base of the doll's hair. Then, the second pieces are placed and finally the first, as if alluding to the hair on the front.

Paso 10: En un trozo de cinta rosada colocar pegatinas de diferentes formas. Luego pegar en el cabello de la muñeca como un cintillo.
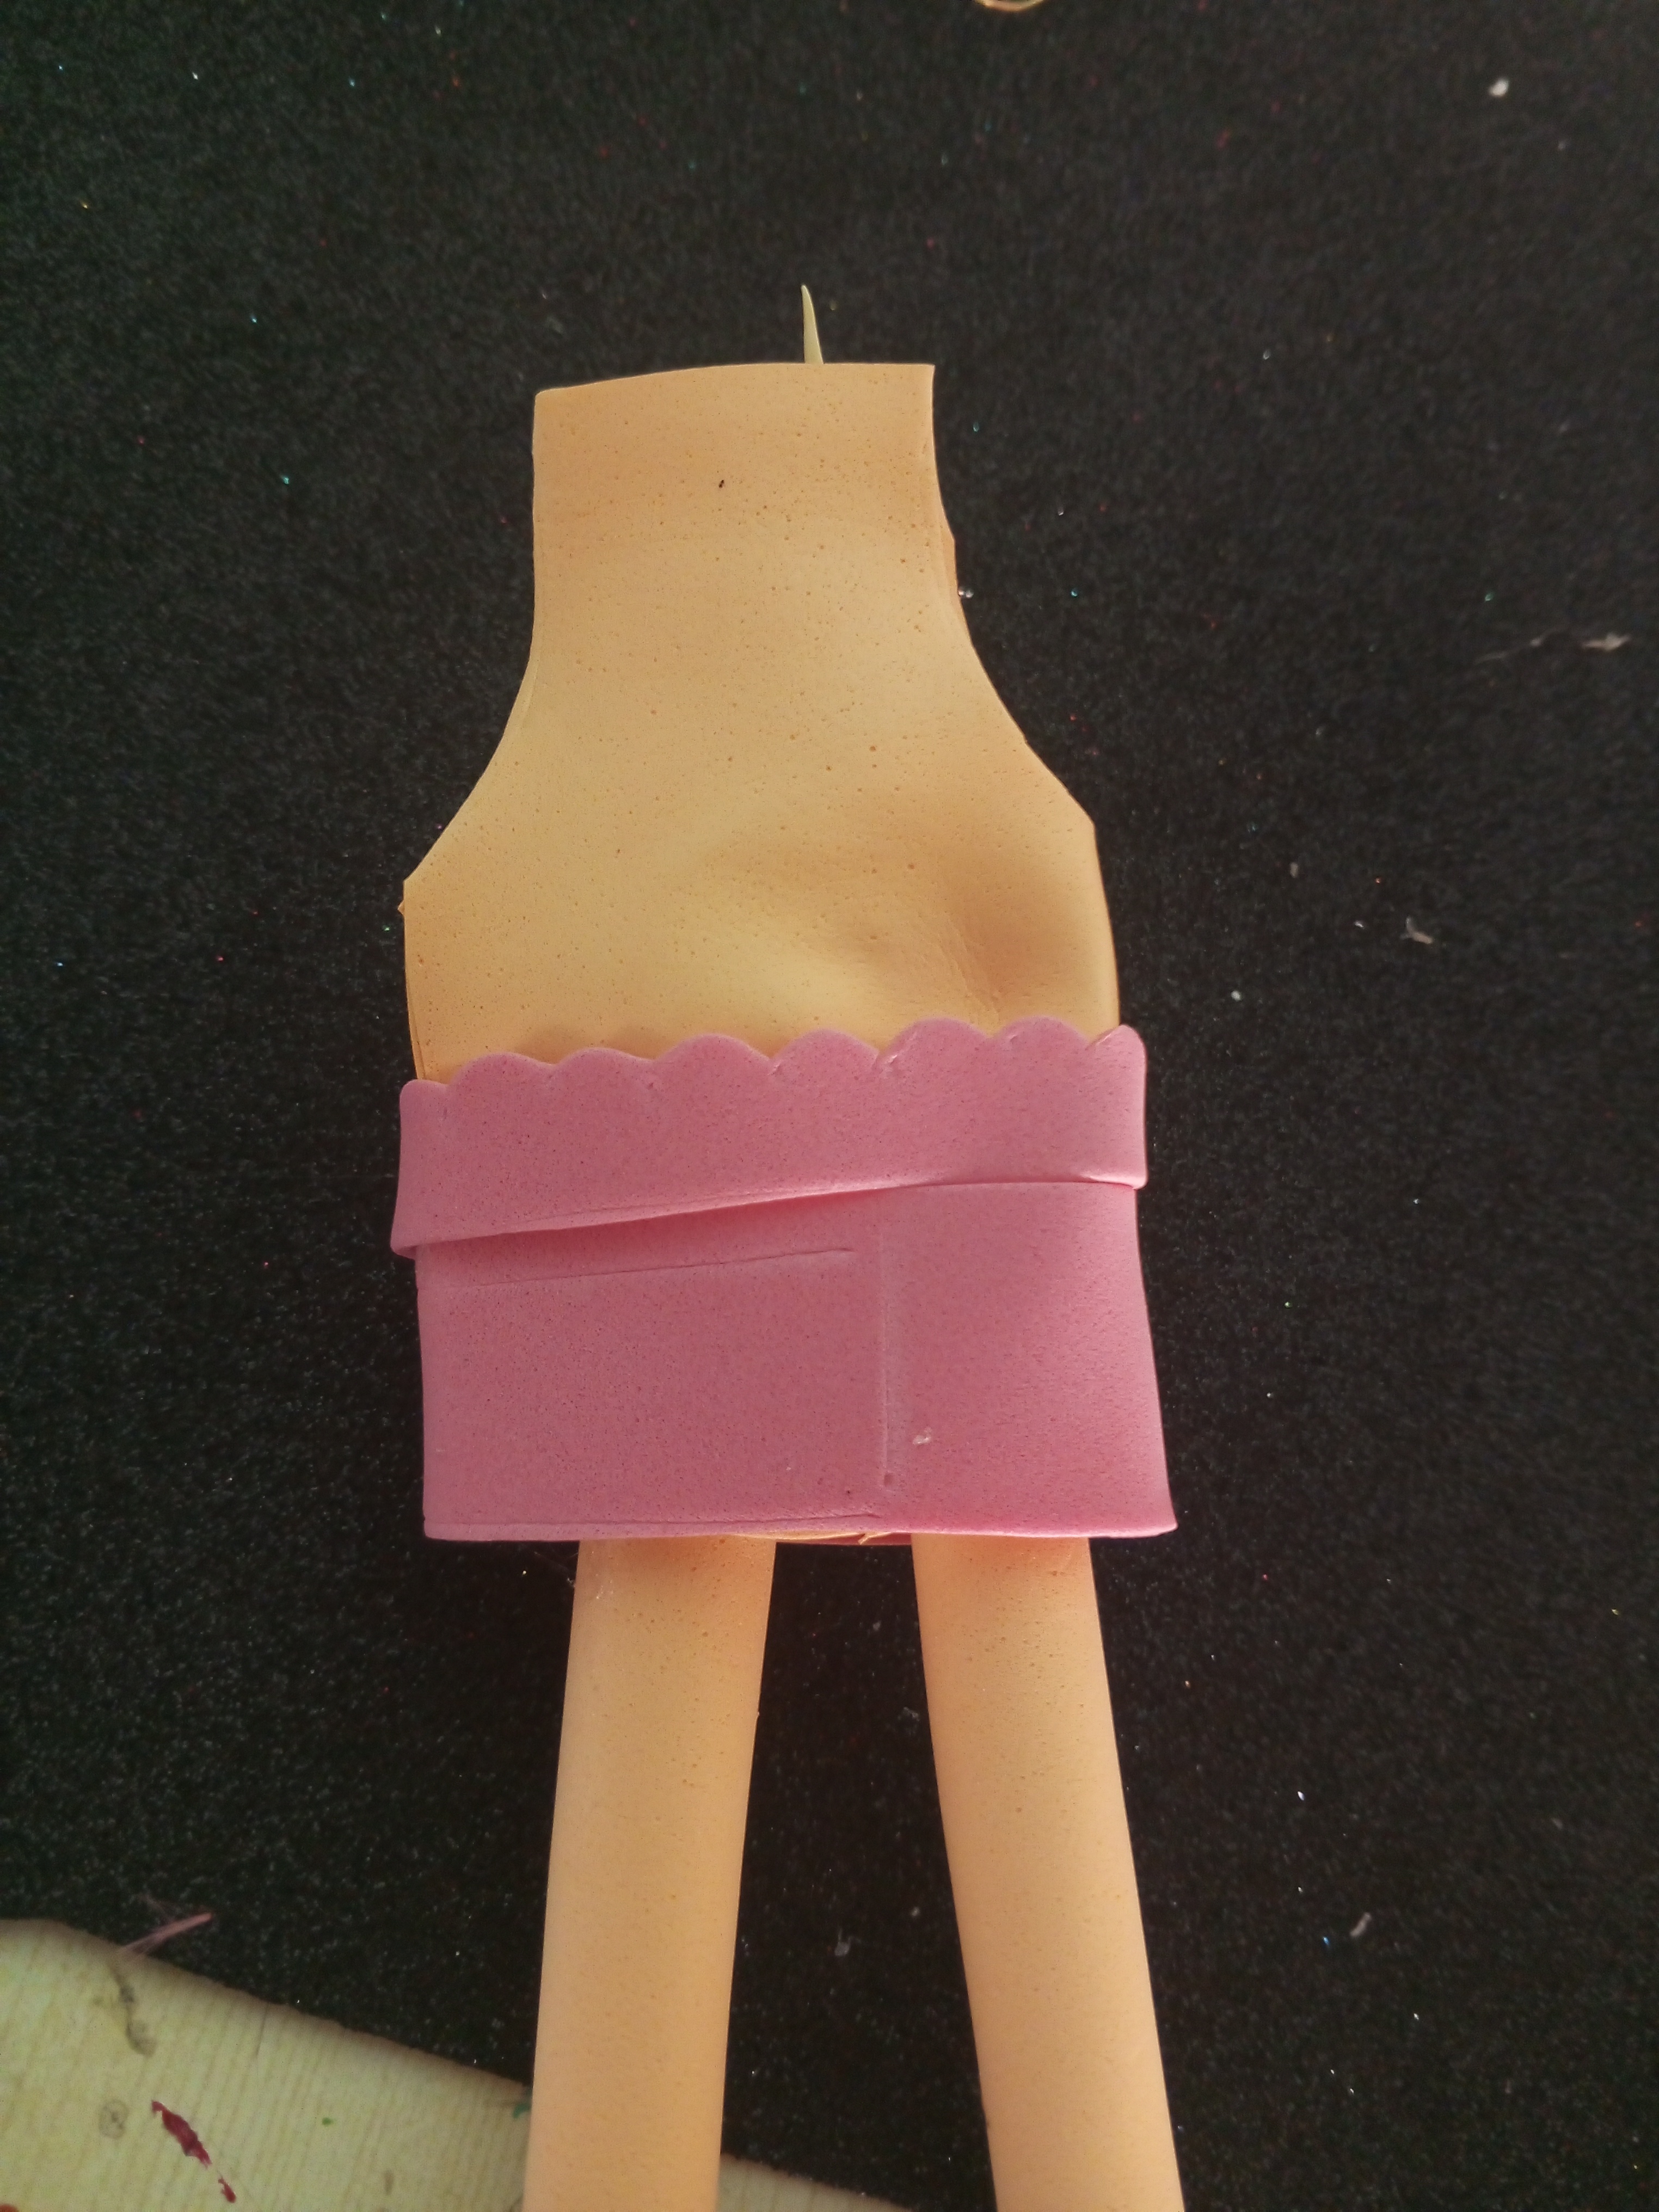
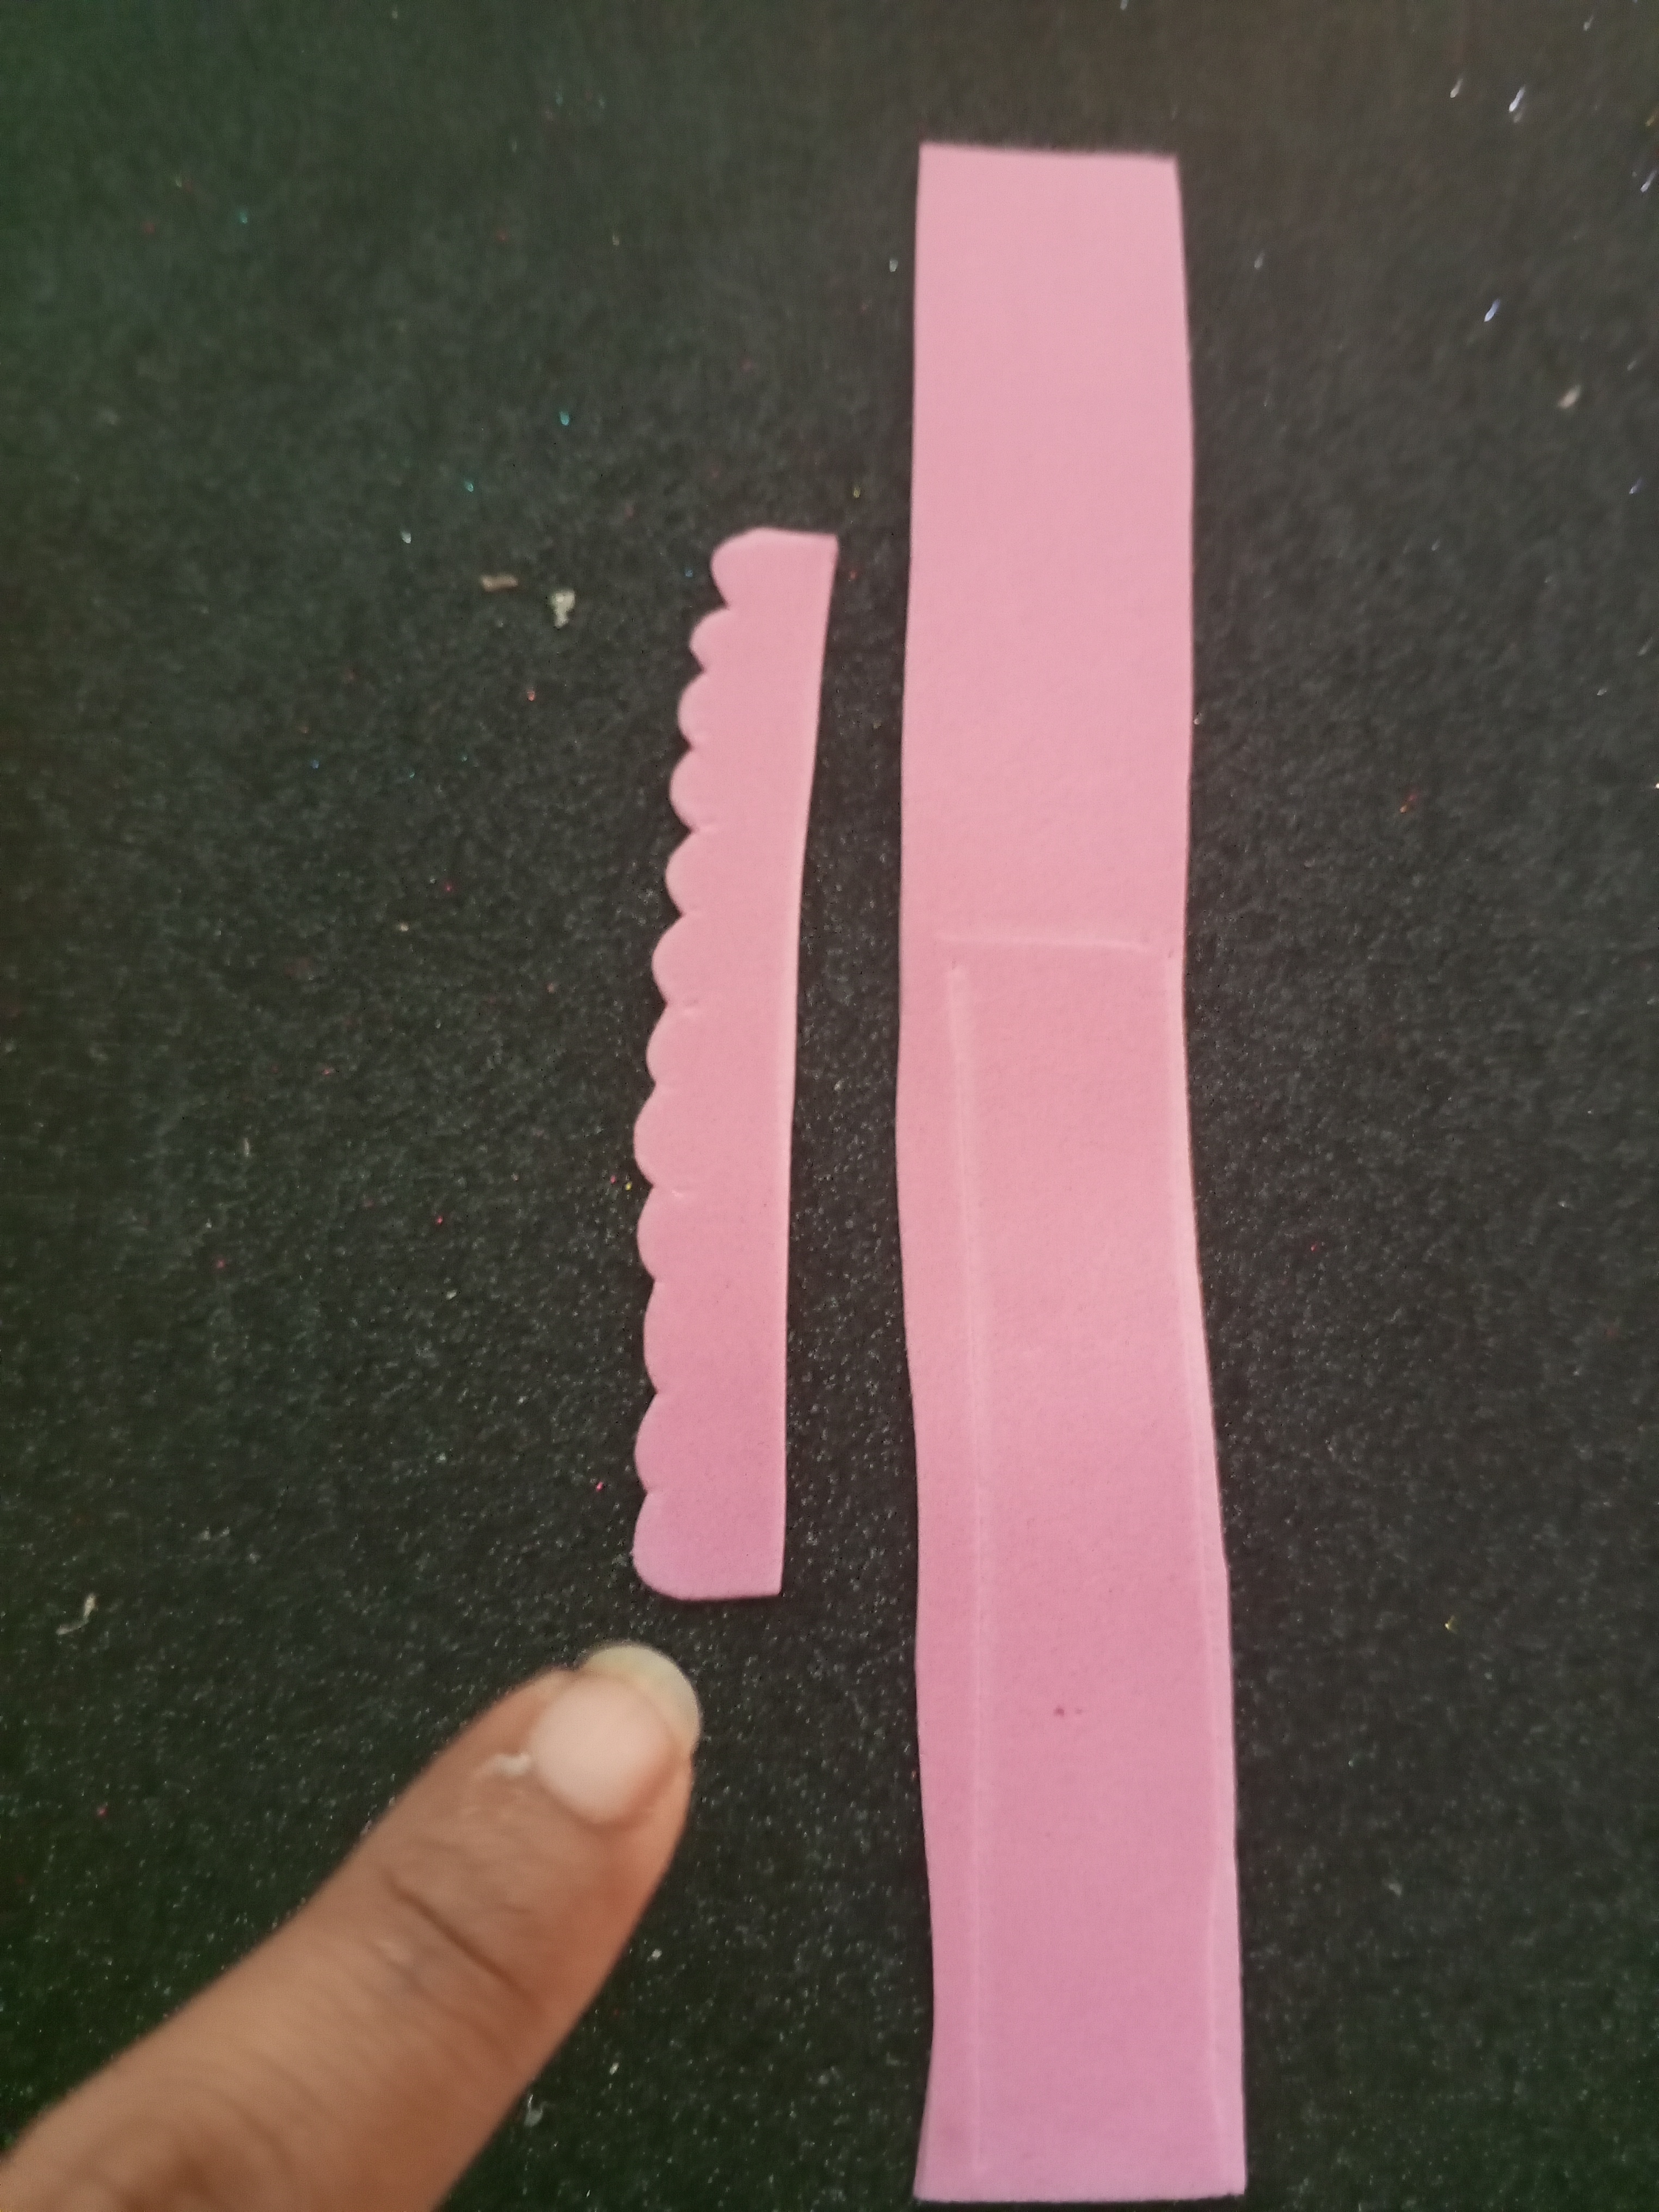
Paso 11: Cortar una tira de foami color rosado de 20 cm y una de 4 cm. Sobre el cuerpo bordear con las tiras para formar la ropa interior.
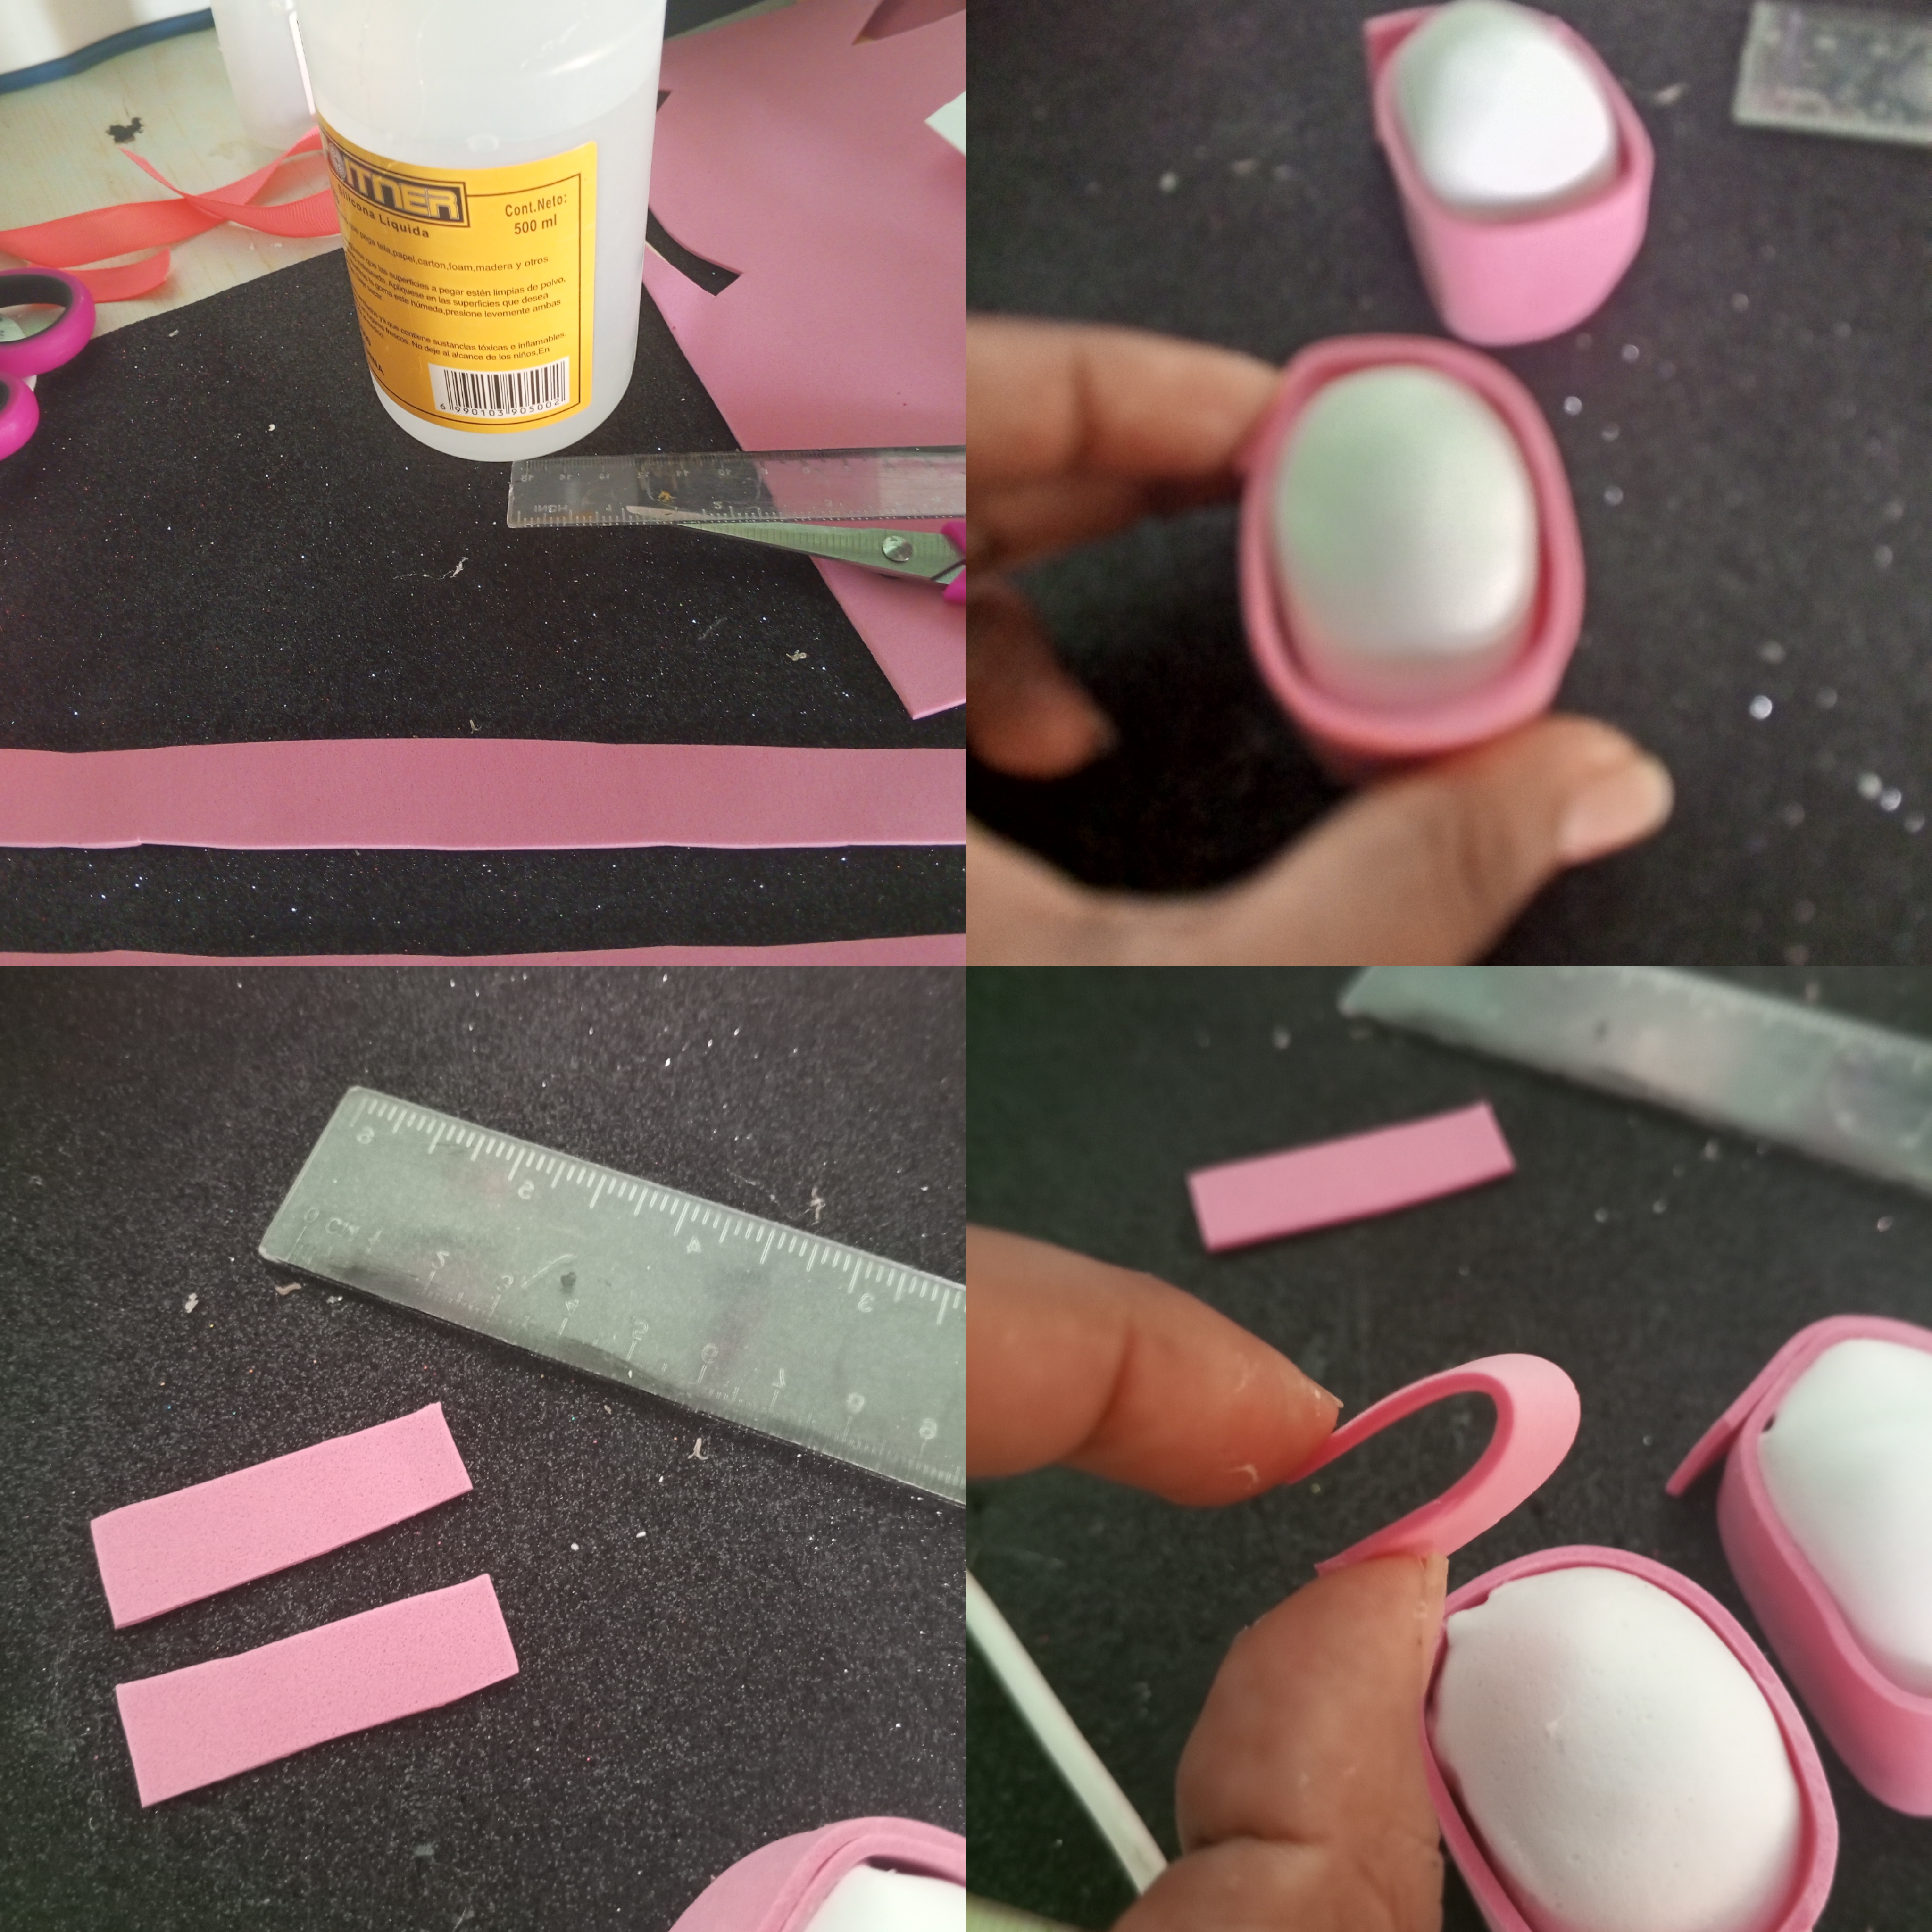
Paso 12: Cortar otra esfera de tamaño 4 a la mitad y luego cortar la de tamaño 2 para formar los zapatos. Seguidamente aplicar calor a foami blanco y ejerce presión en las piezas previamente pegadas. Bordear con foami rosado alrededor de cada zapato para decorar.
Step 10: Place stickers of different shapes on a piece of pink tape. Then glue it to the doll's hair like a headband.
Step 11: Cut a strip of pink foam measuring 20 cm and one measuring 4 cm. On the body, edge with the strips to form the underwear.
Step 12: Cut another size 4 sphere in half and then cut the size 2 sphere to form the shoes. Next, apply heat to white foam and apply pressure to the previously glued pieces. Border with pink foam around each shoe to decorate.


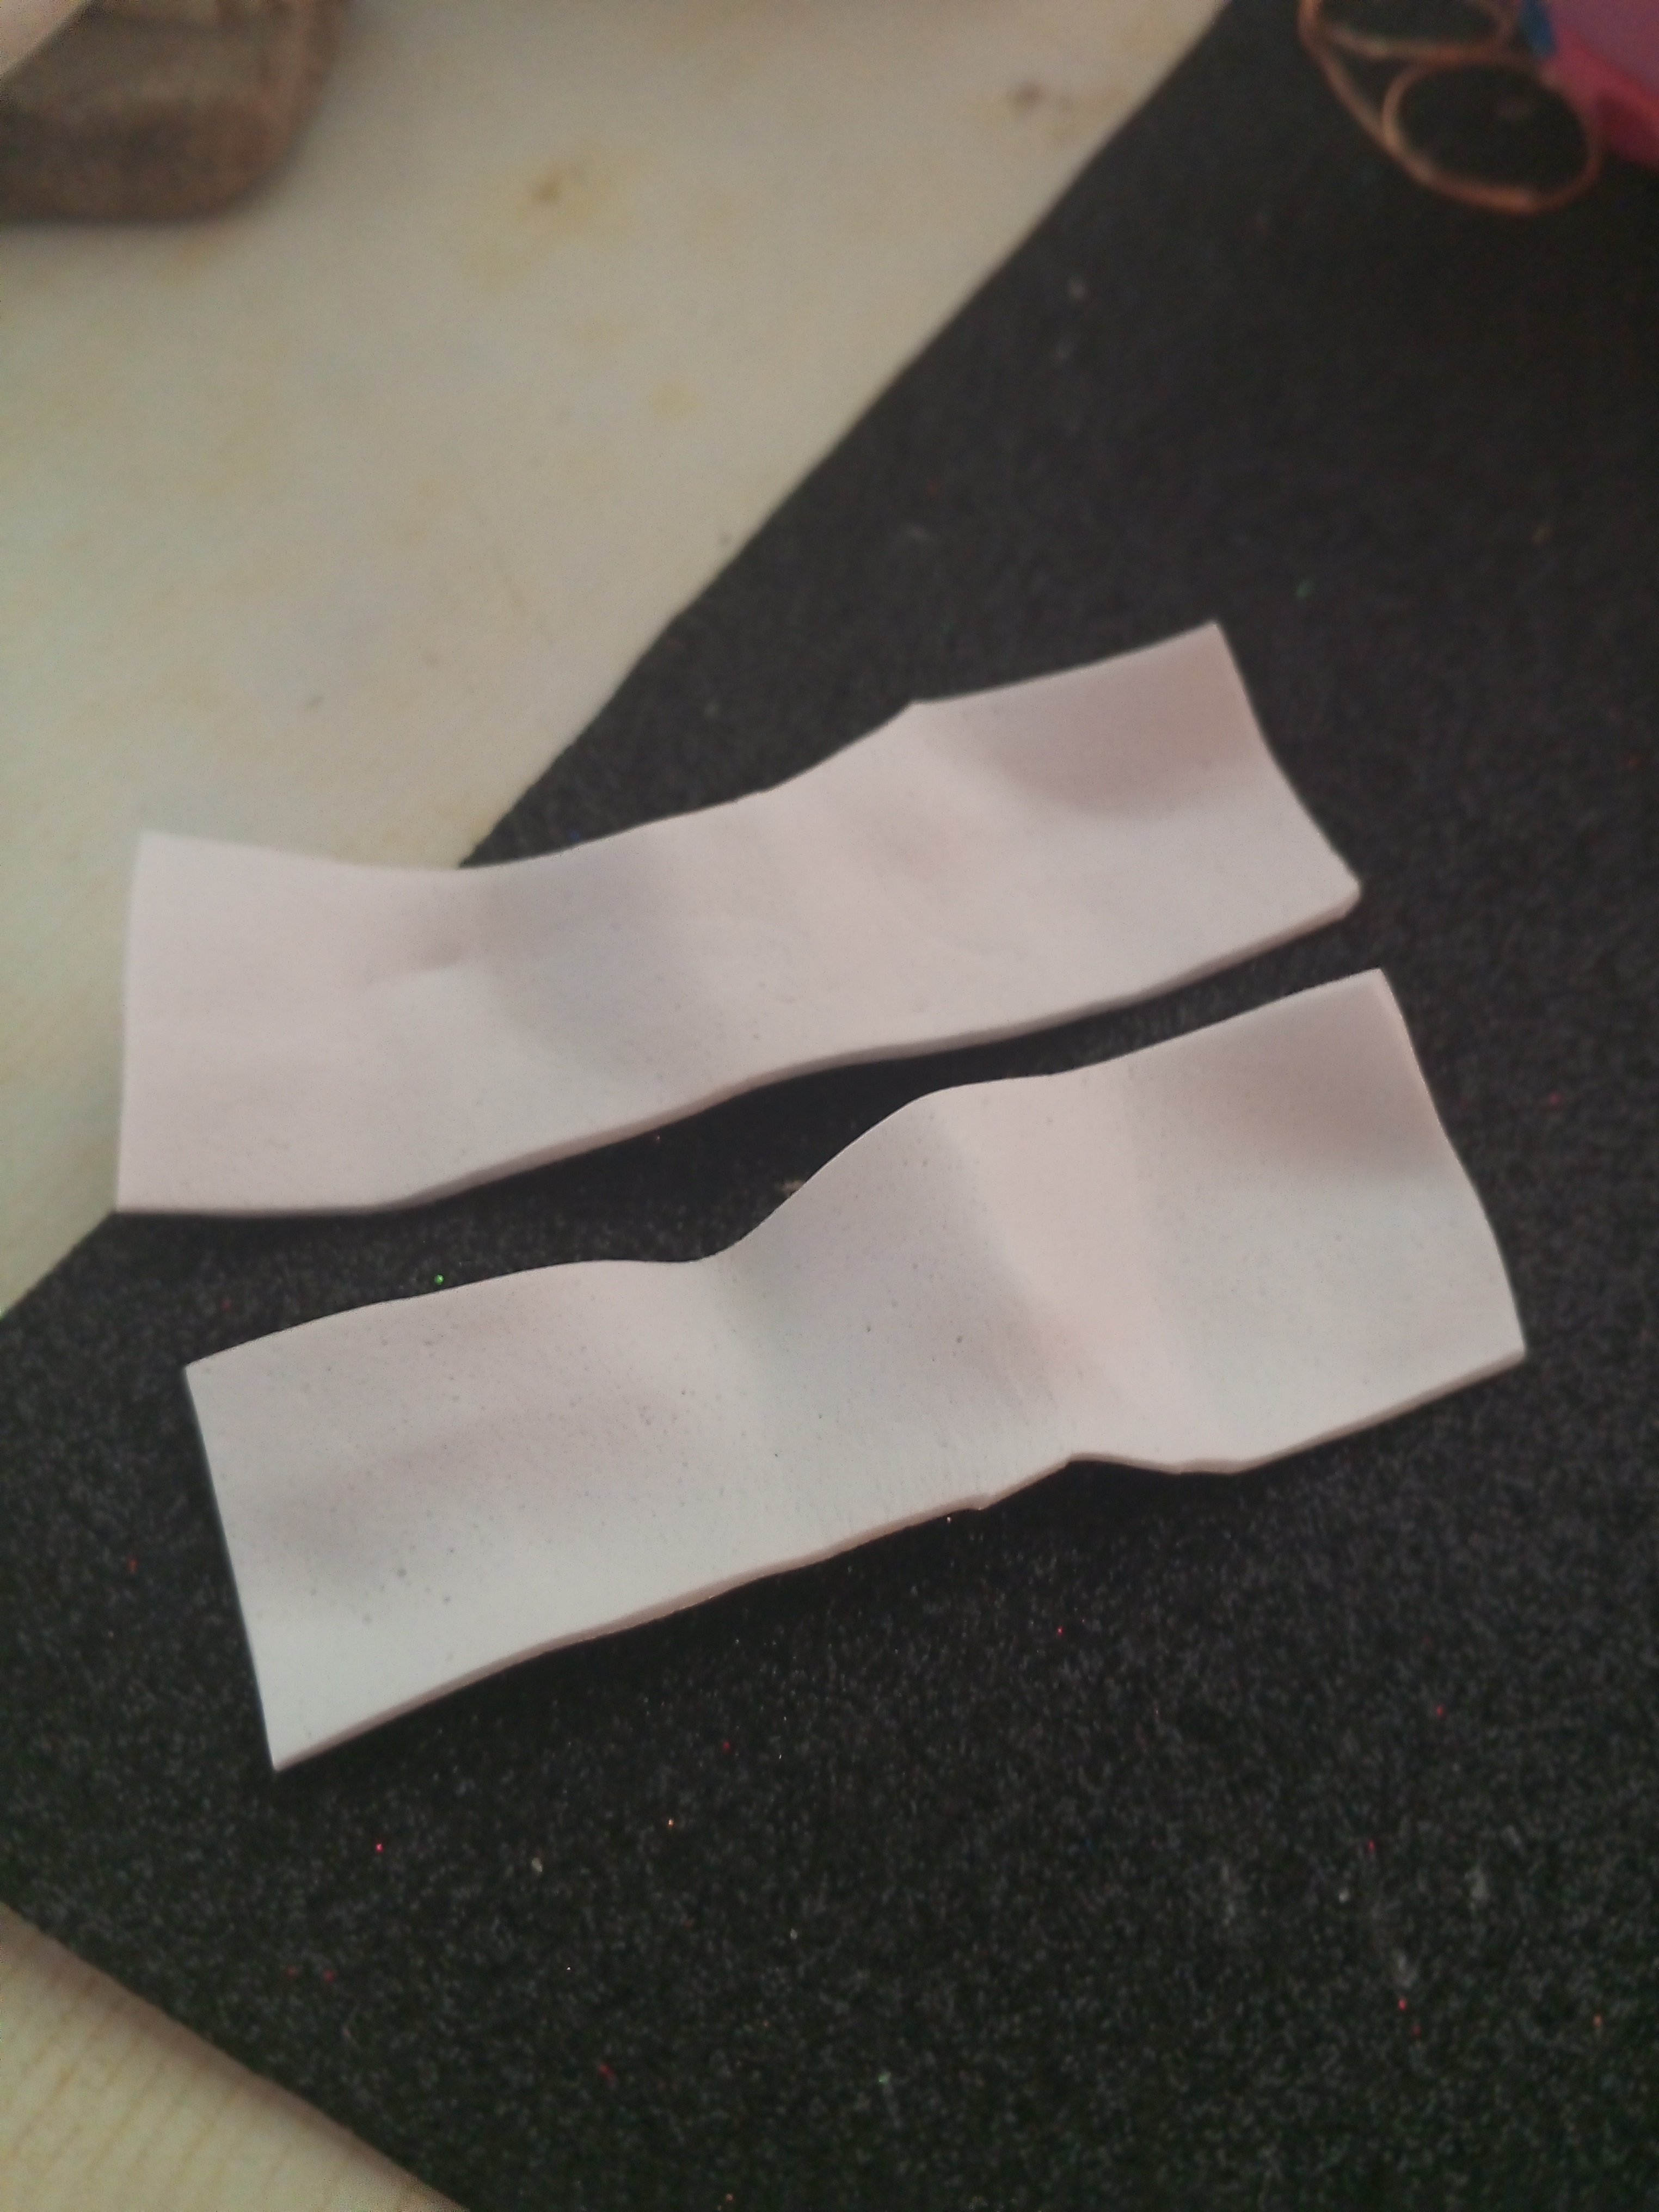
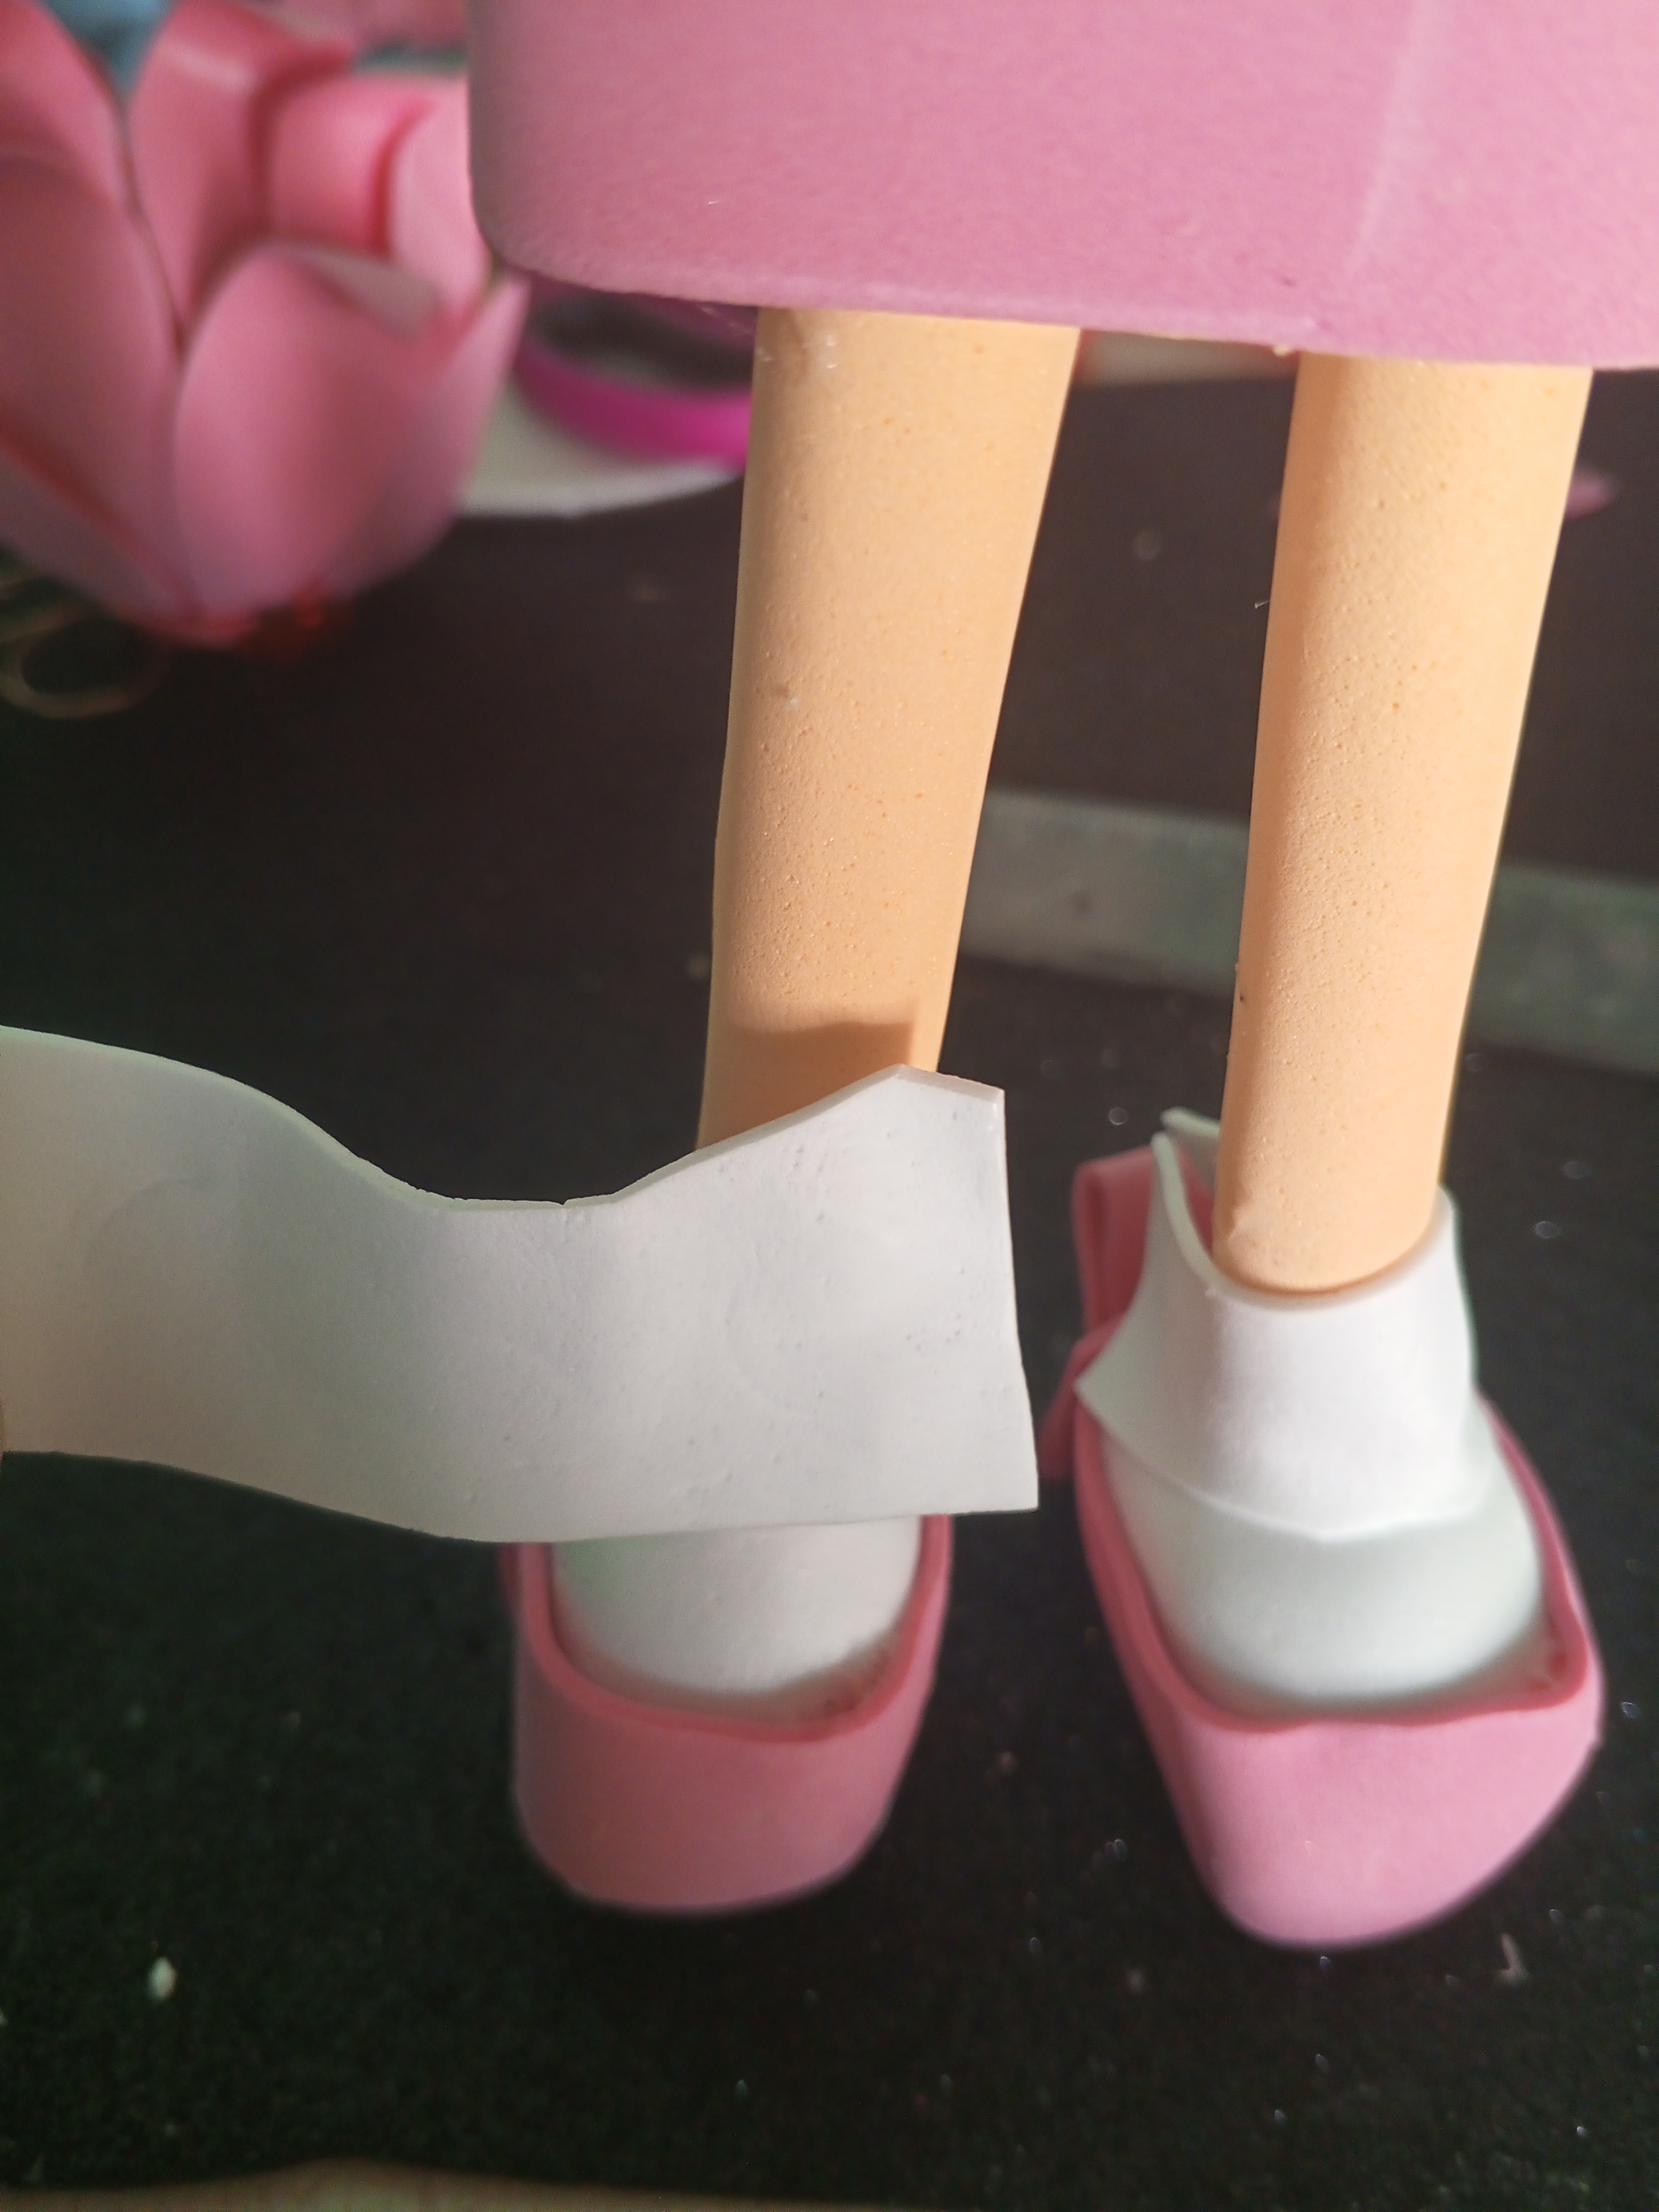
Paso 13: Recortar dos tiras de foami rosado para decorar cada zapato en la parte trasera. Incrustar cada zapato en las piernas de la muñeca. Luego recortar dos tiras igualmente de 4cm pero blancas , esto para hacer las medias.
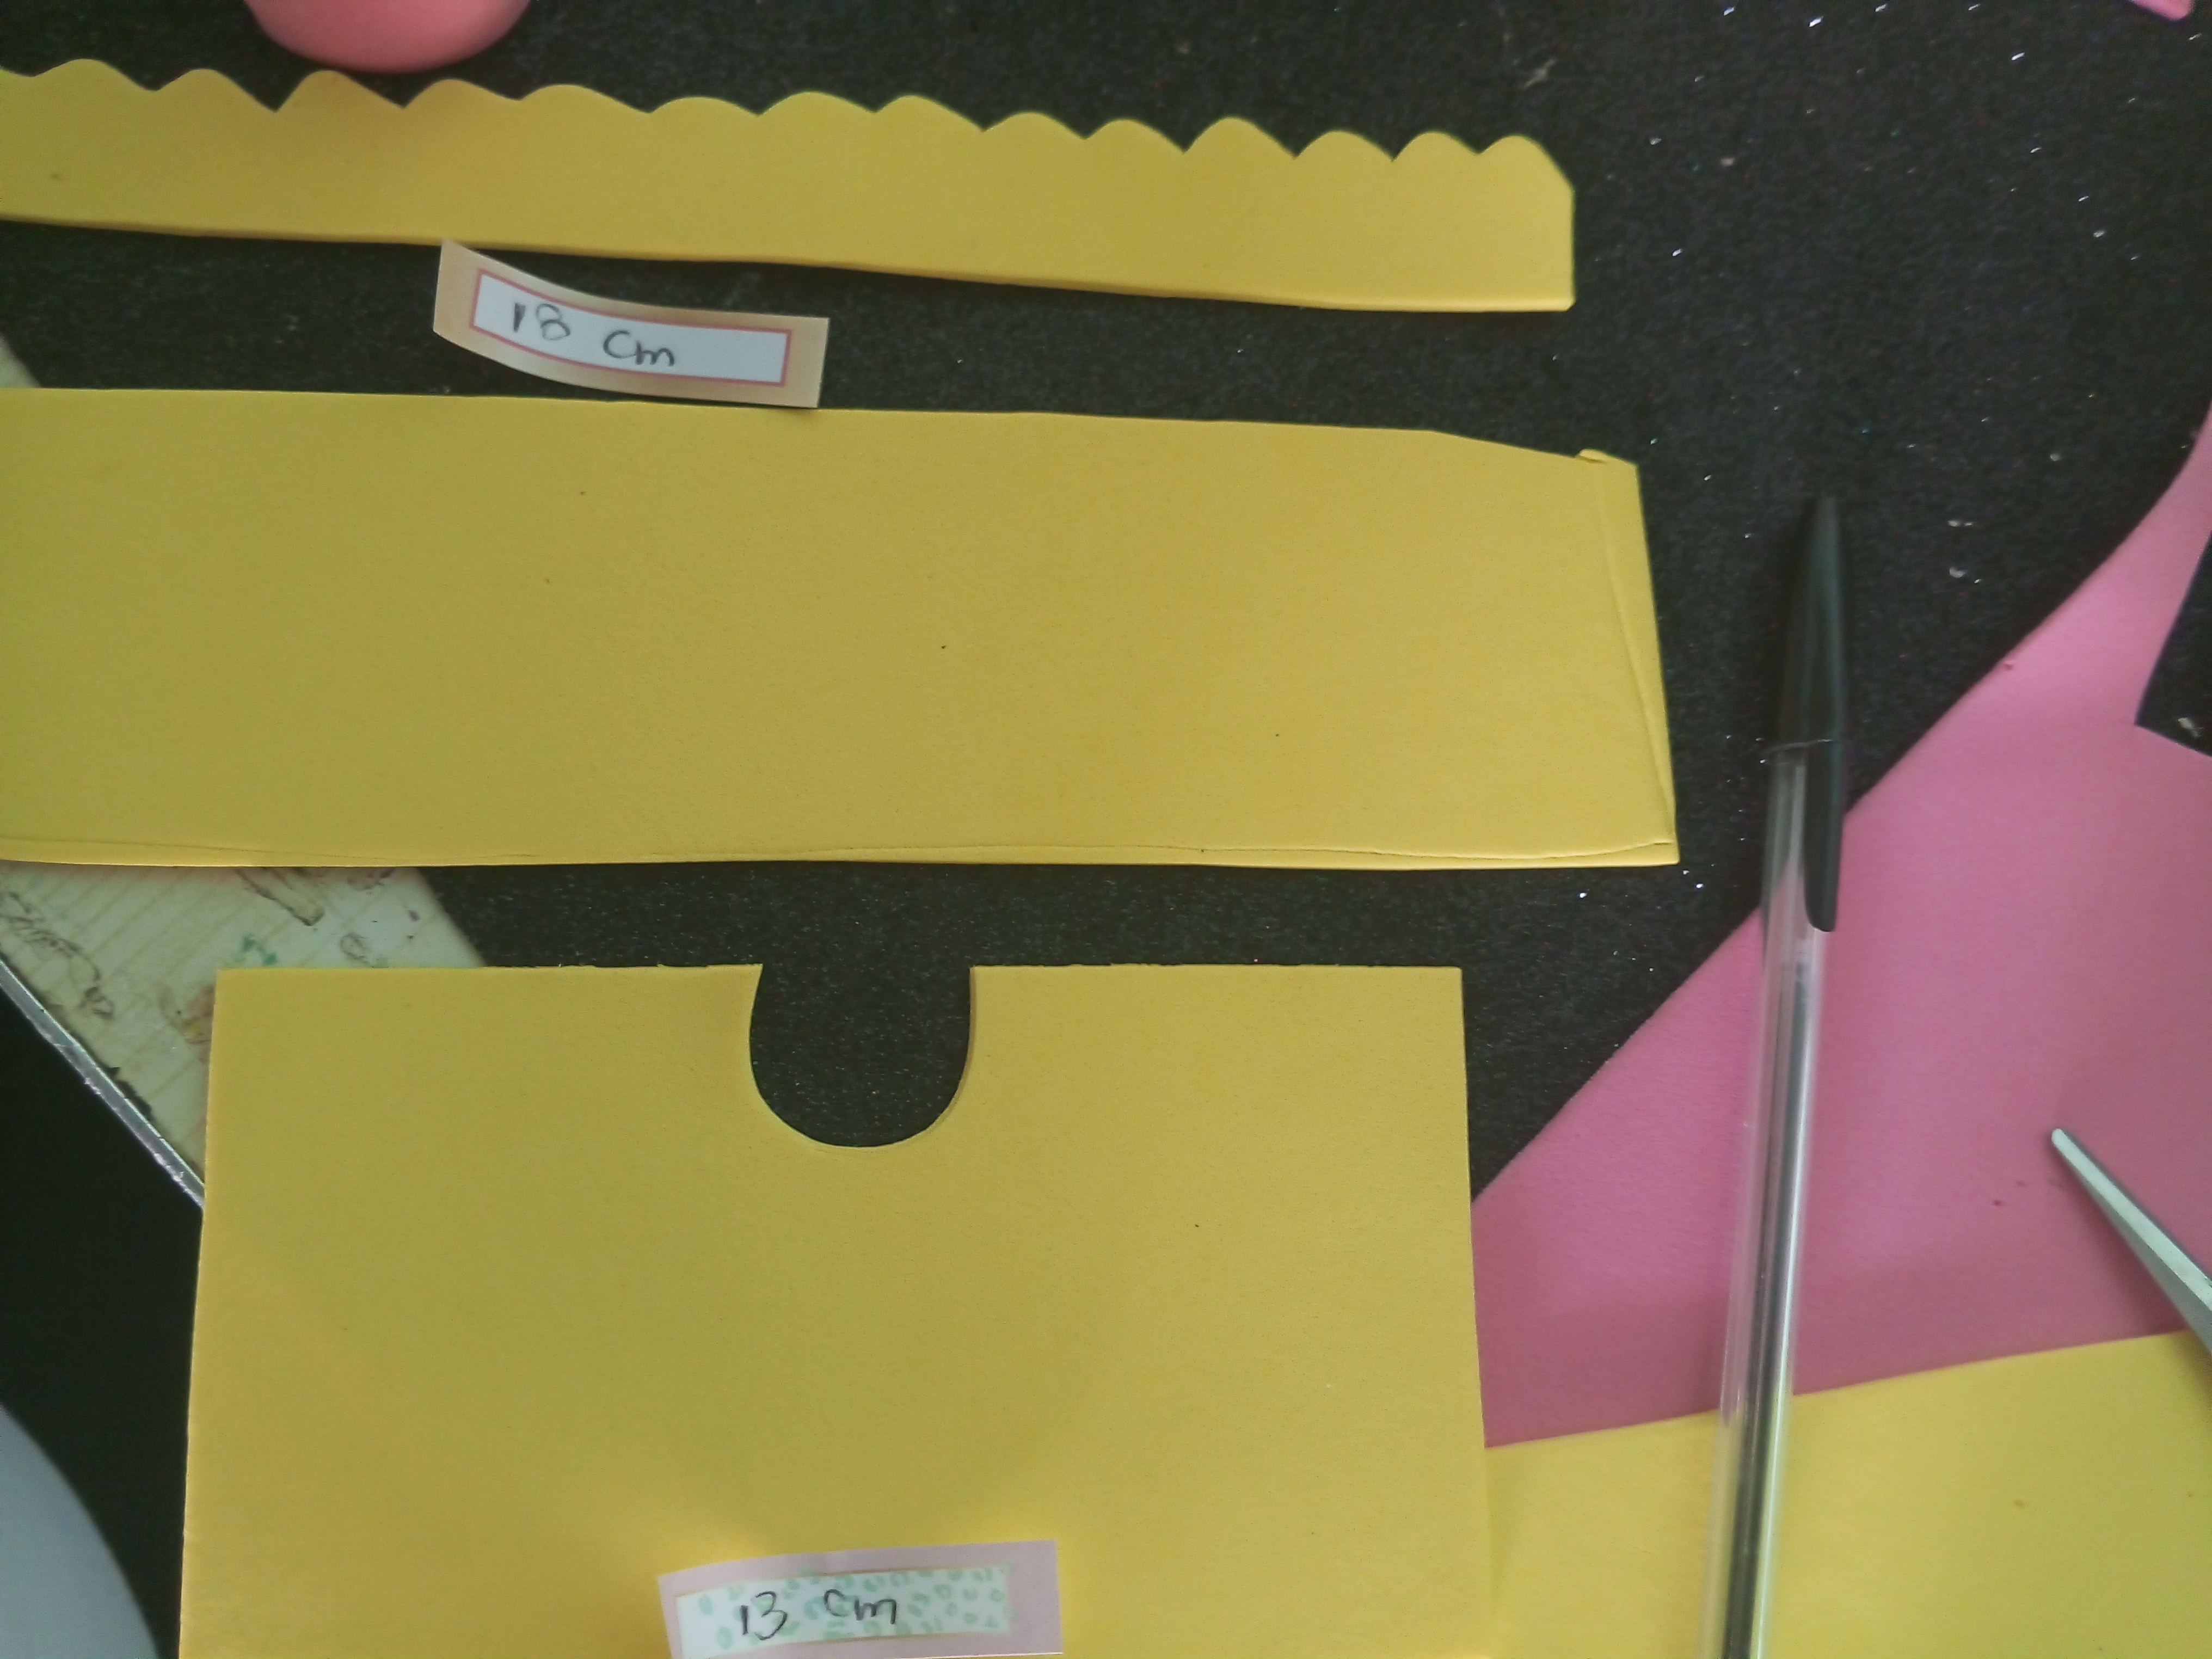
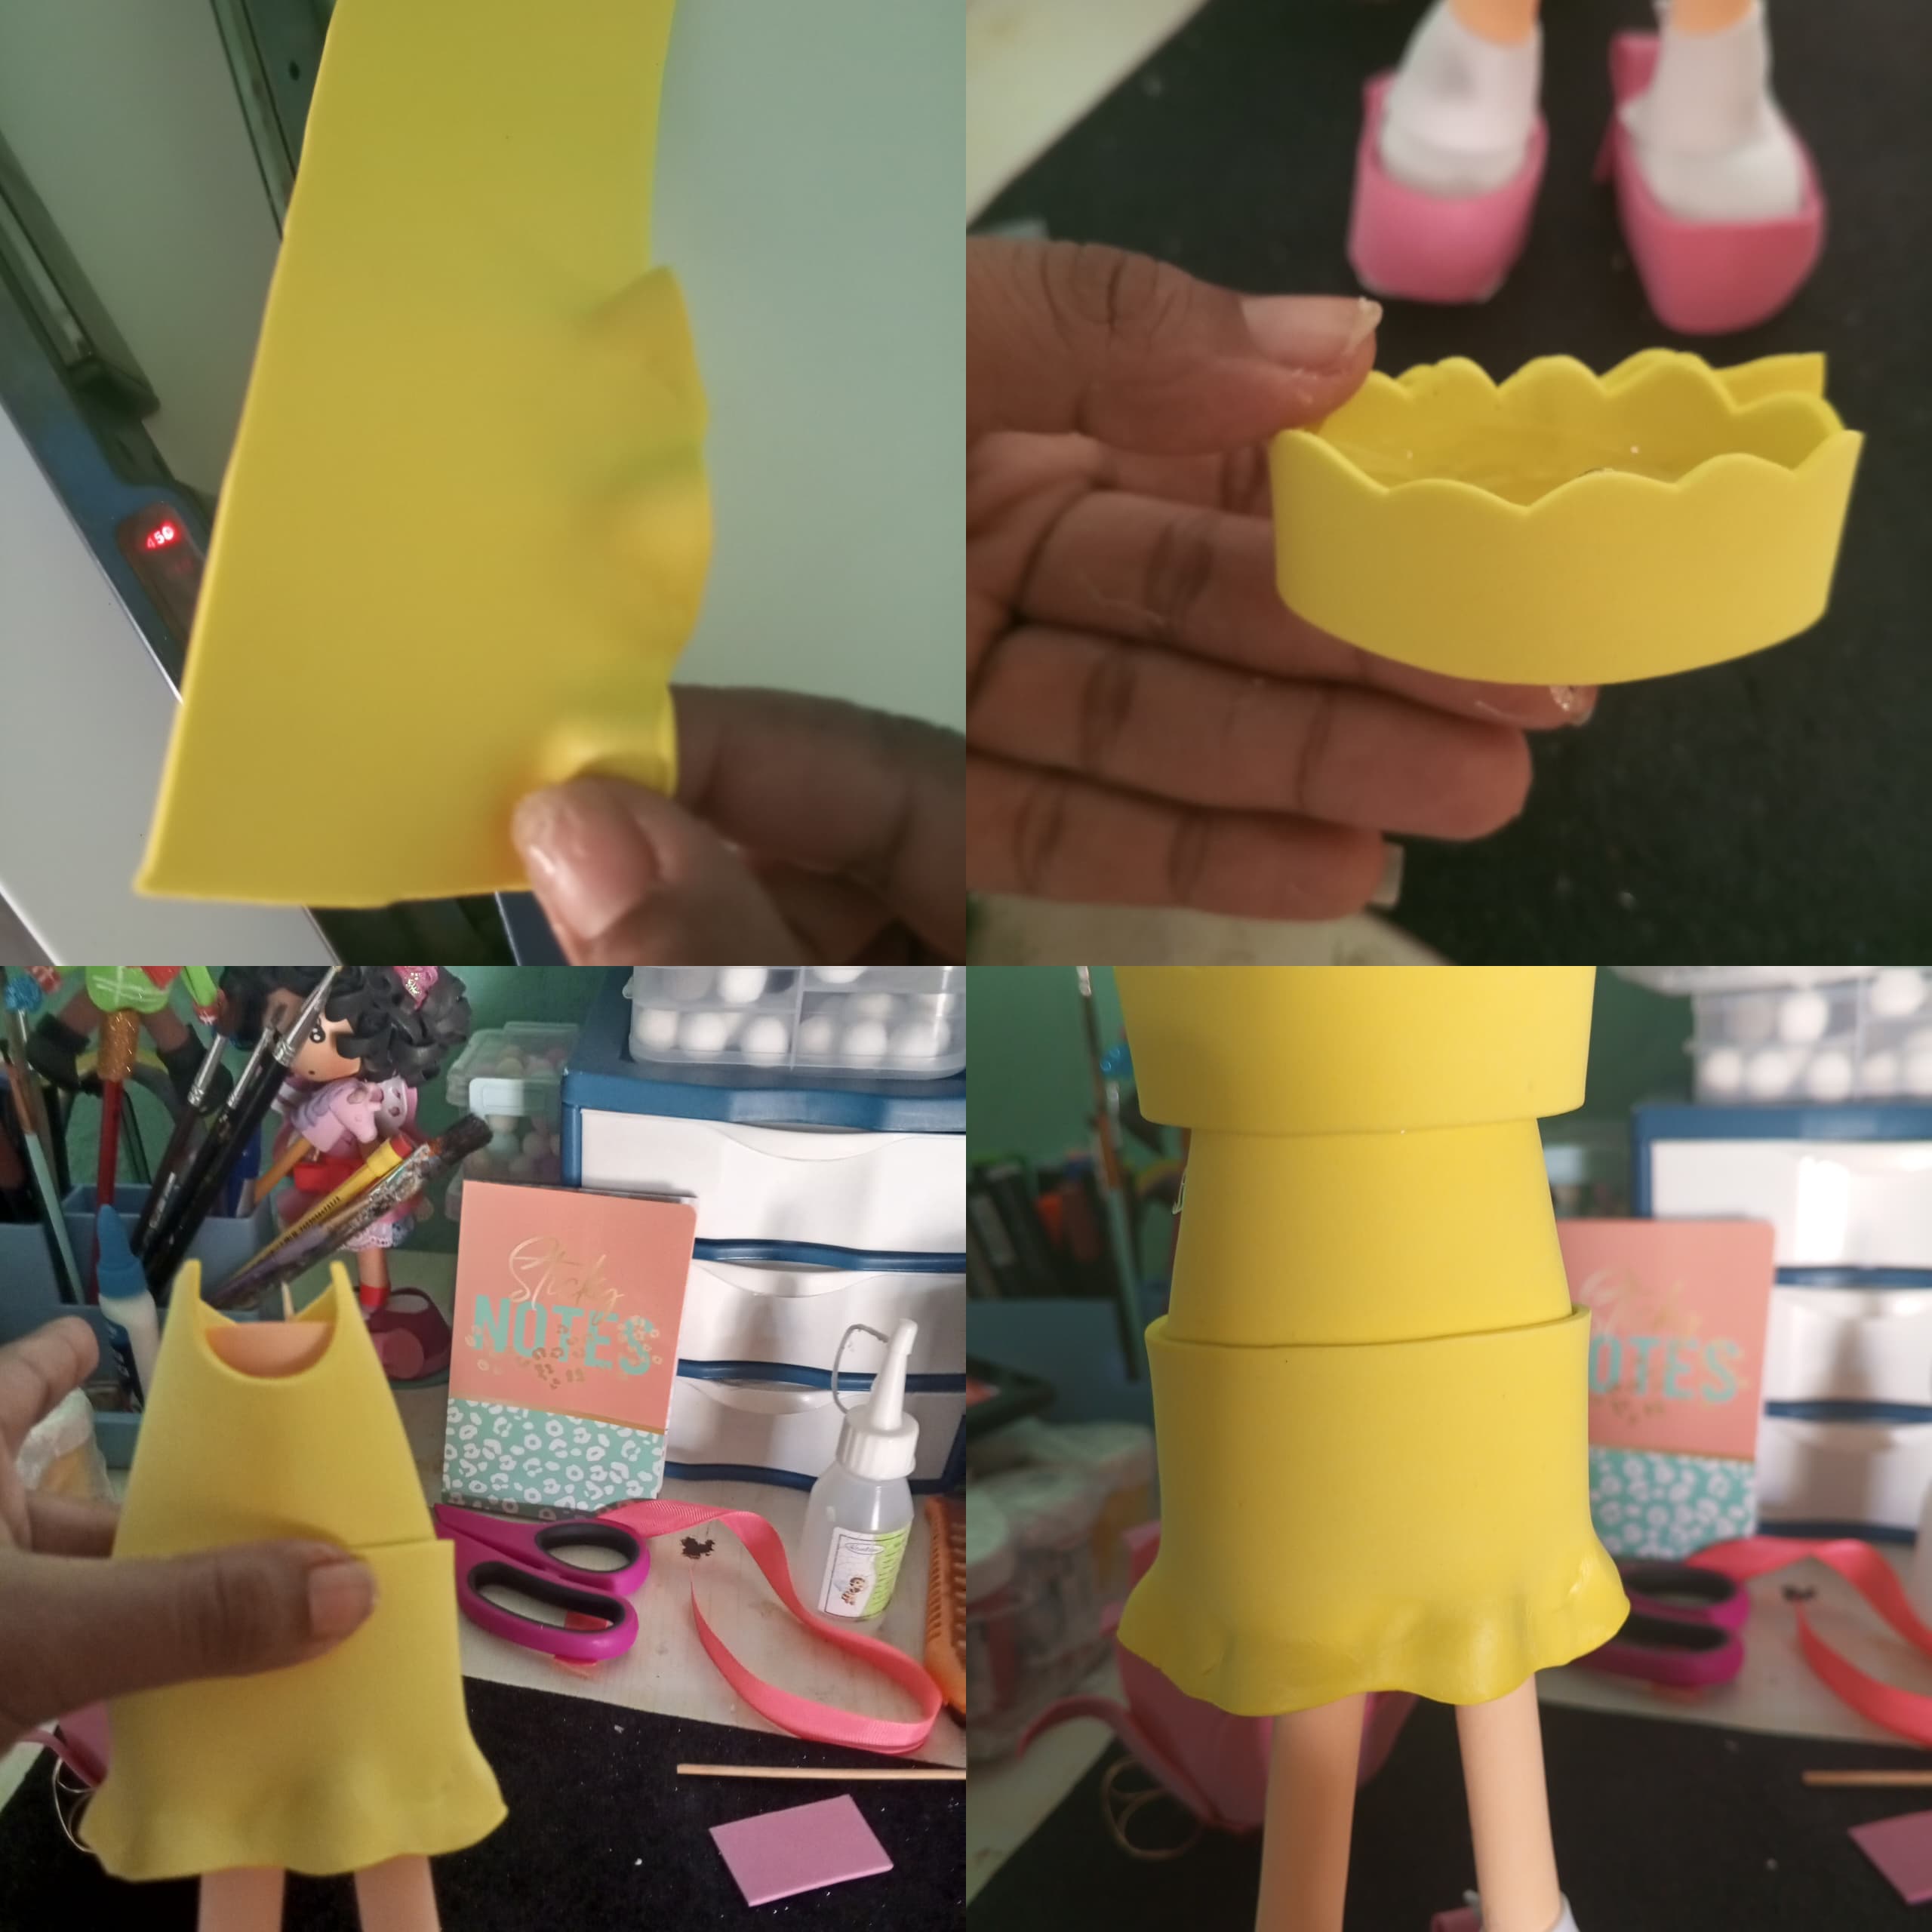
Paso 14: Recortar tres tiras en foami amarillo, dos de 18 cm y una de 13 cm. Para la elaborar el vestido, pegar las piezas al cuerpo y darle forma con los dedos a una de las piezas de 18cm para hacer la falda.
Paso 15: Dibujar sobre foami azul cielo el delantal e ir recortando piezas para decorar como nube, flores, sol, mariposas y pasto. Puedes usar los colores de foami que gustes para decorar. Anexarle cinta delgada en las esquinas para luego poder hacer un lazo en la parte trasera.
Step 13: Cut out two strips of pink foam to decorate each shoe on the back. Embed each shoe into the doll's legs. Then cut two strips of equally 4cm but white, this to make the stockings.
Step 14: Cut three strips of yellow foam, two 18 cm and one 13 cm. To make the dress, glue the pieces to the body and shape one of the 18cm pieces with your fingers to make the skirt.
Step 15: Draw the apron on sky blue foam and cut out pieces to decorate such as cloud, flowers, sun, butterflies and grass. You can use any foam colors you like to decorate. Attach thin tape to the corners so you can then make a bow at the back.
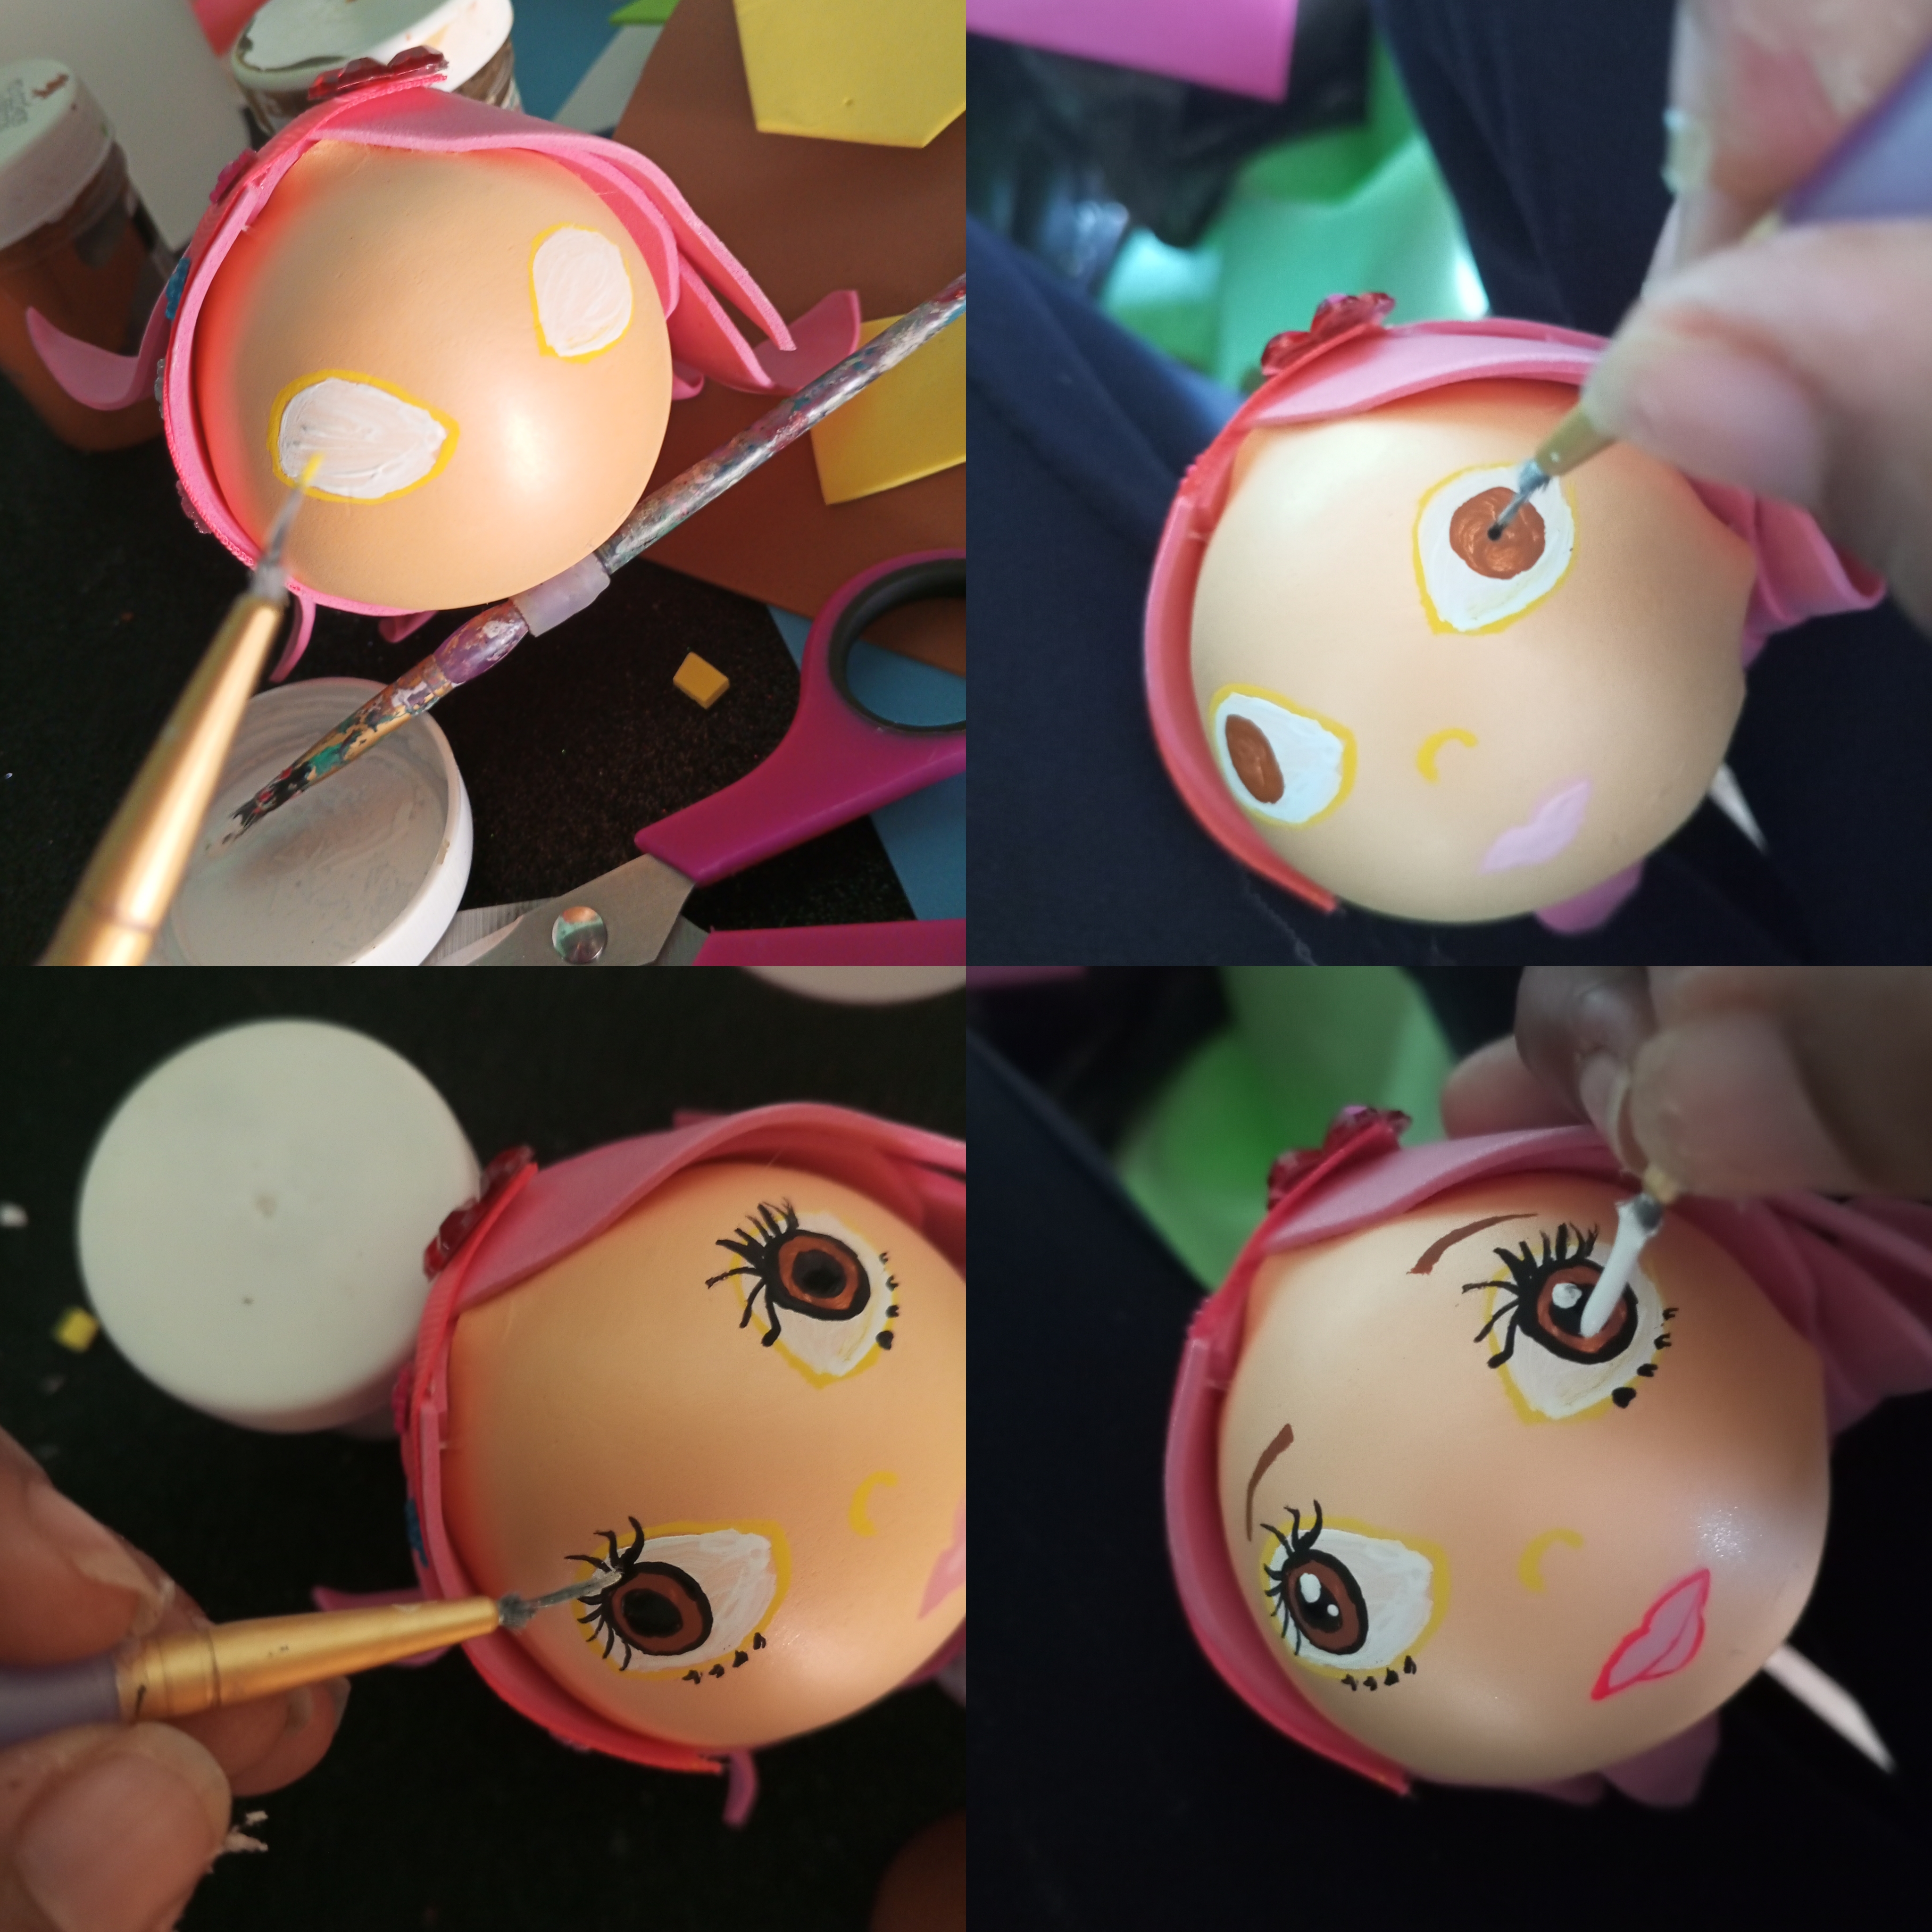
Paso 16: Pegar el mantel a la muñeca. Y comenzar a dibujar el rostro. Iniciando por los ojos, luego las pestañas, cejas, nariz y boca. Suavemente sombrear con maquillaje rosado el rostro para darle un toque más tierno y delicado.
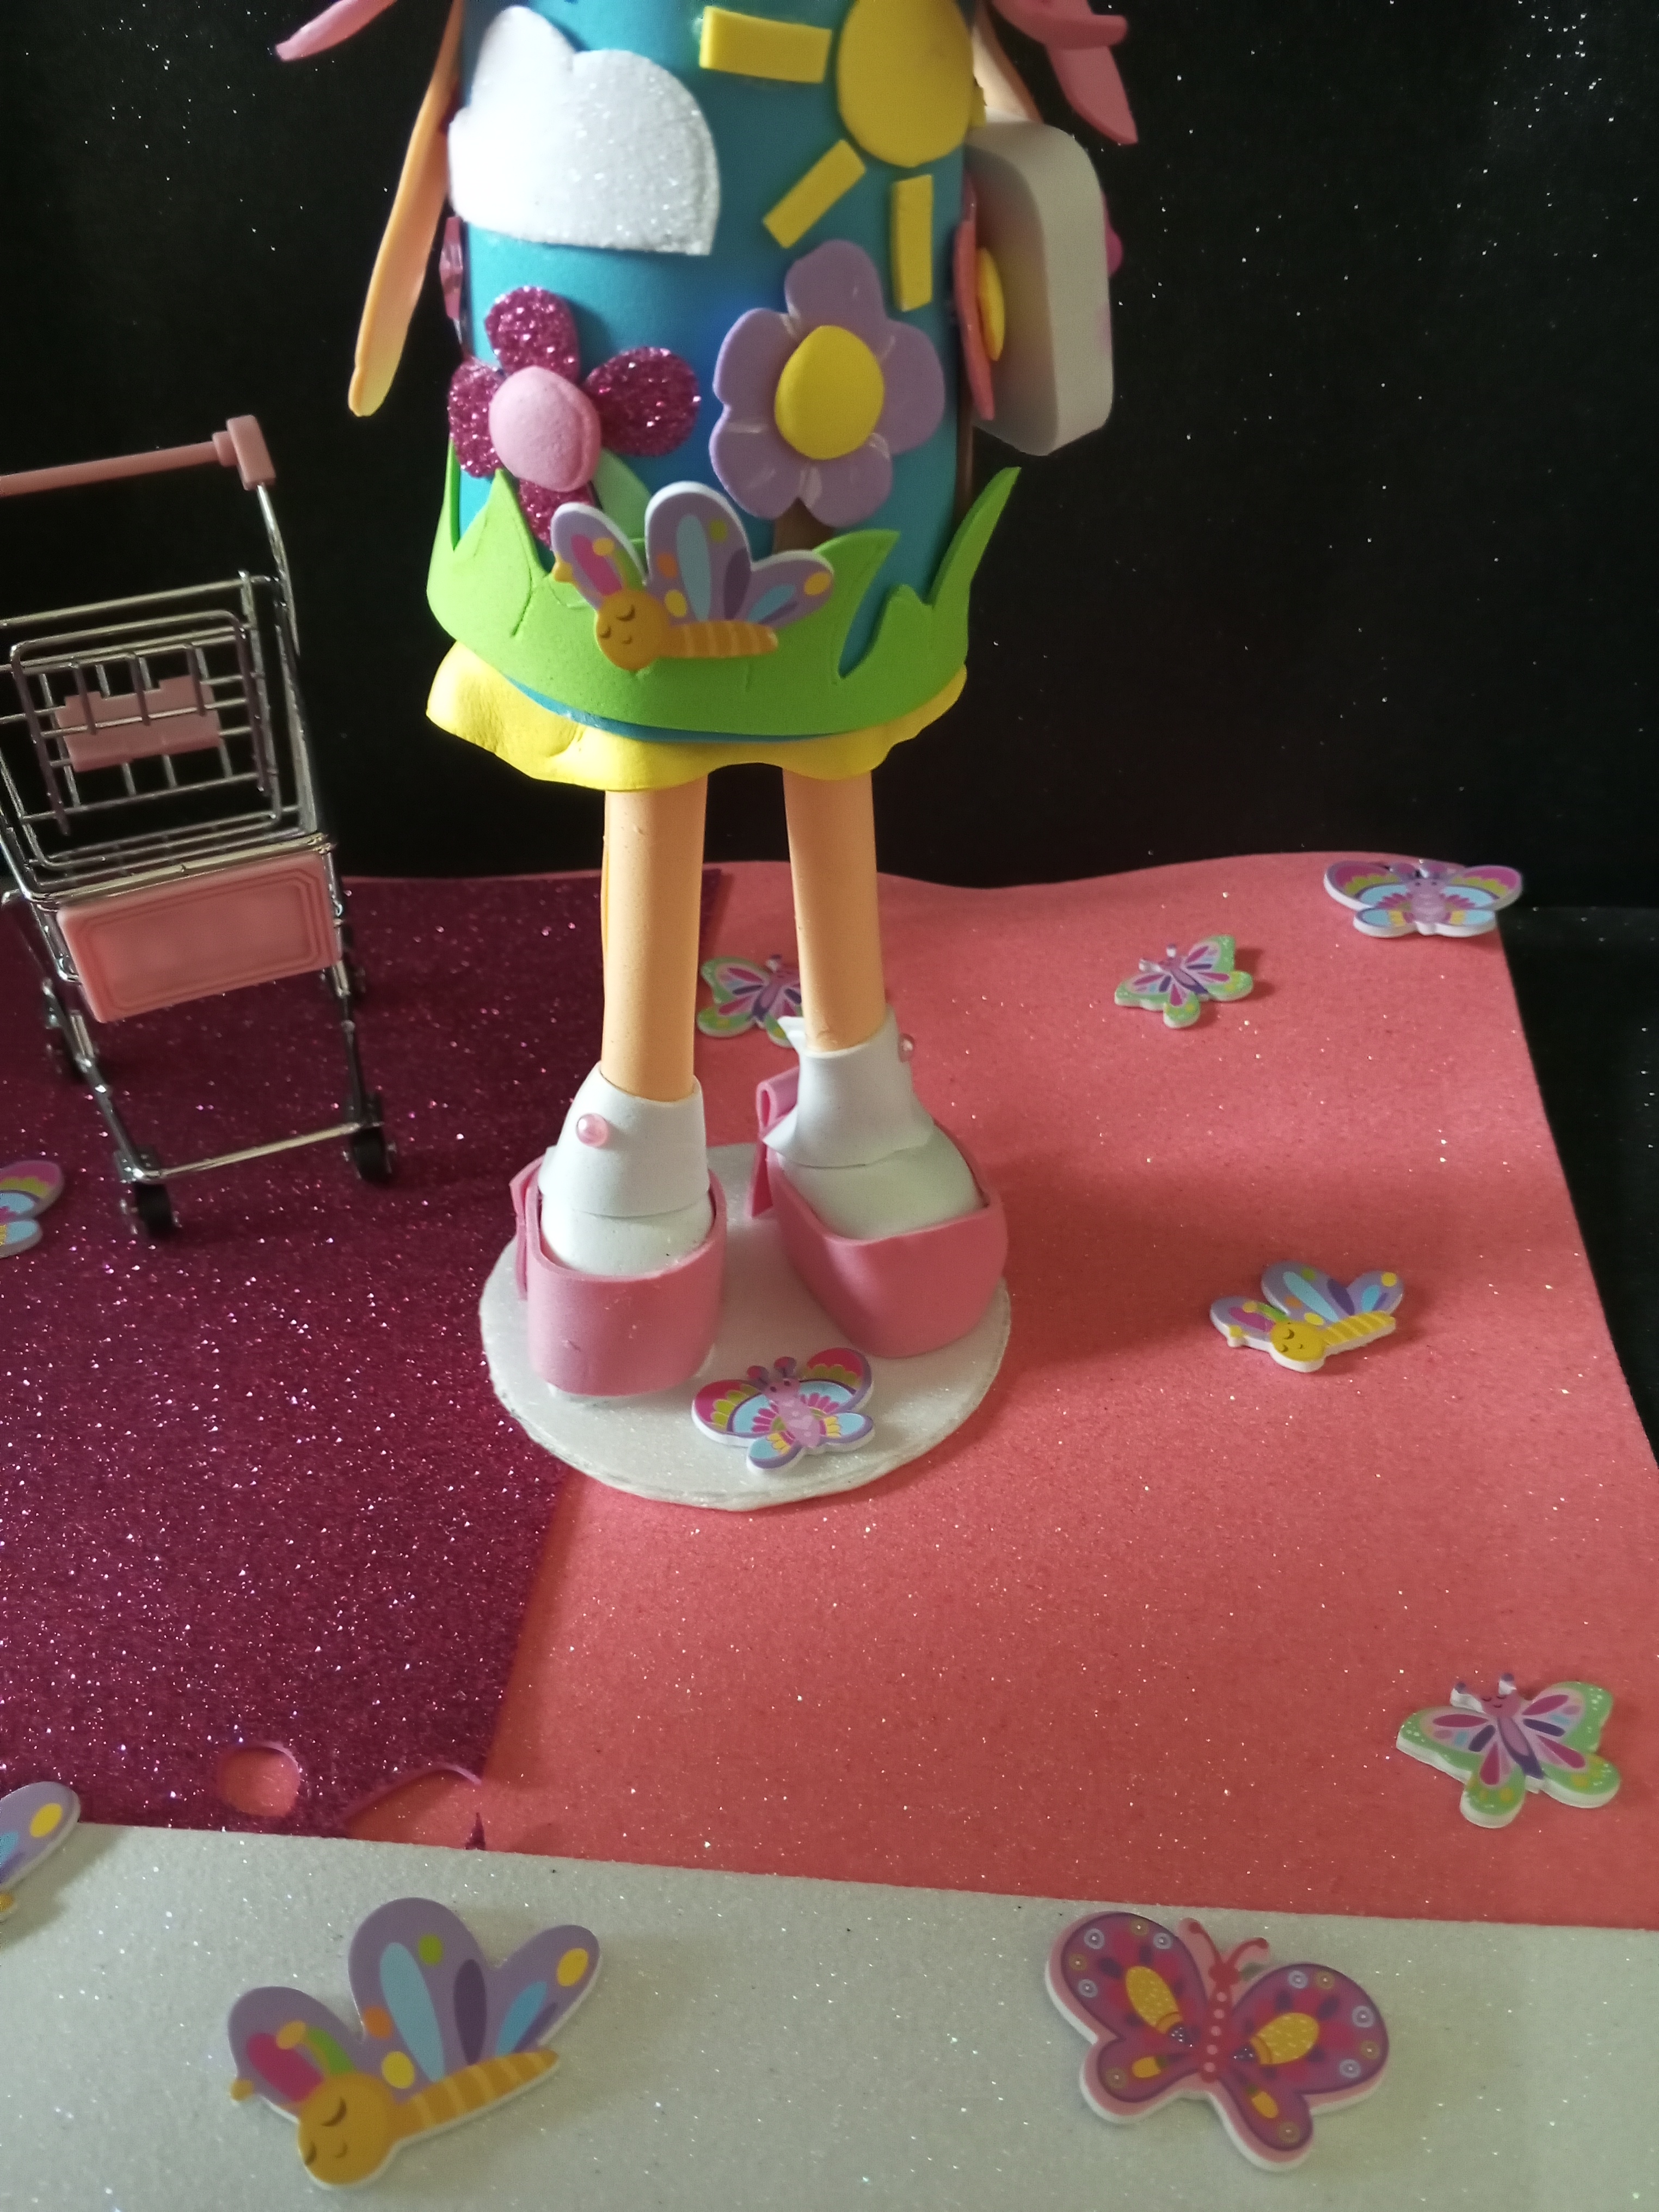
Paso 17: Pegar la cabeza al cuerpo con silicón y los pies a la base de anime. Si gustas puedes usar una base de vidrio, es opcional. Con mariposas de pegatina decorar la base, usar una pieza decorativa de foami para colocar en la mano de la muñeca, haciendo semejanza a un libro.
Step 16: Glue the tablecloth to the doll. And start drawing the face. Starting with the eyes, then the eyelashes, eyebrows, nose and mouth. Gently shade the face with pink makeup to give it a more tender and delicate touch.
Step 17: Glue the head to the body with silicone and the feet to the anime base. If you like you can use a glass base, it is optional. Decorate the base with sticker butterflies, use a decorative piece of foam to place in the doll's hand, resembling a book.


Resultado final:
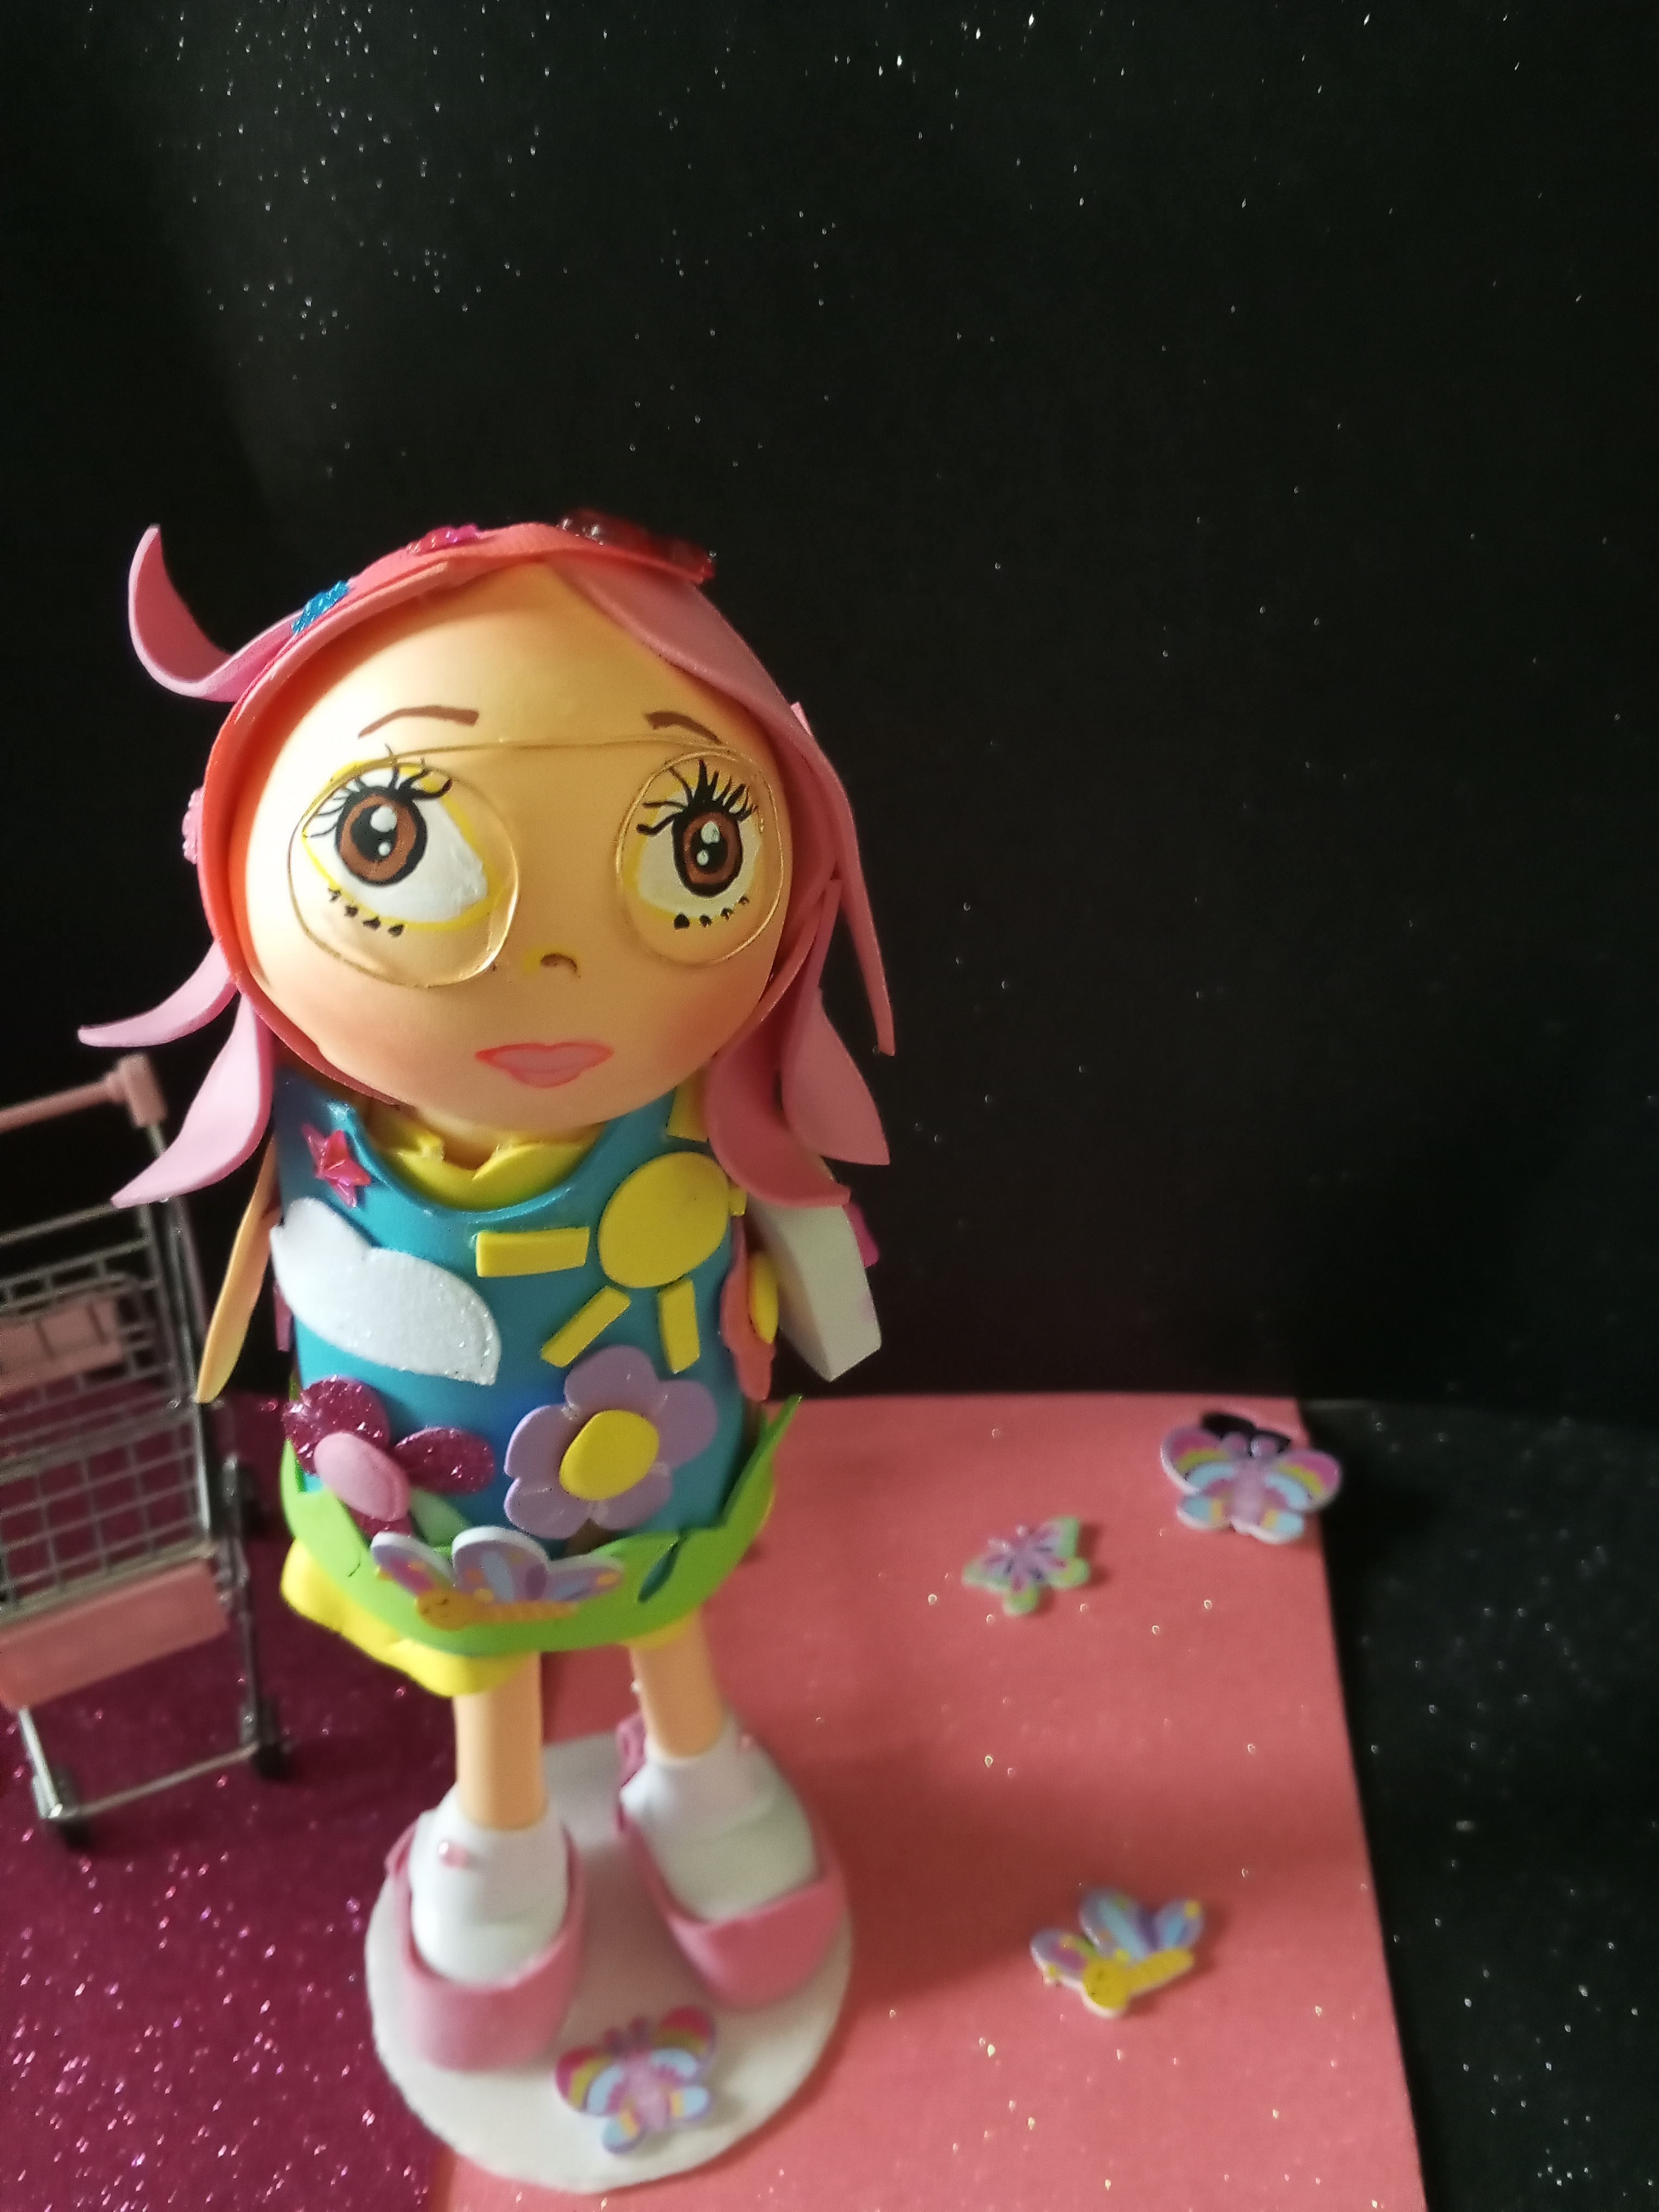
De esta forma nuestra muñeca Fotucha Maestra ya está lista para decorar tu espacio de trabajo, con ella puedes brindarle una linda decoración a tu hogar u oficina. Además de que puedes realizarla usando los colores que gustes y ofrecerla como un práctico regalo. Es una técnica muy hermosa y decorativa que le brindara un espacio tierno y delicado al sitio que escojas para ella.
Espero les haya sido de su agrado está técnica creativa en el foami. Gracias por llegar hasta aquí conmigo, nos vemos en una próxima oportunidad.
Bottom line:
In this way our Fotucha Maestra doll is now ready to decorate your workspace, with it you can provide a nice decoration to your home or office. In addition, you can make it using the colors you like and offer it as a practical gift. It is a very beautiful and decorative technique that will provide a tender and delicate space to the place you choose for it.
I hope you liked this creative foami technique. Thank you for coming this far with me, see you next time.
-Realicé el banner con canva.
-Traducción de Google traductor.
-Fotografias tomadas con mi teléfono tecno spark 20c.

Congratulations @mailethcaro! You have completed the following achievement on the Hive blockchain And have been rewarded with New badge(s)
Your next target is to reach 50 upvotes.
You can view your badges on your board and compare yourself to others in the Ranking
If you no longer want to receive notifications, reply to this comment with the word
STOPCheck out our last posts:
Achieving this no doubt was no easy feat but you did it anyway and the outcome is amazing. Nice work and keep up the good work.