
Hello Colleagues!
Welcome to another content from me.... Today I will be sharing with you all another good basic tutorial on how to make a Glitch effect in Photoshop.
Without further ado get comfortable to start this content =)
To start I set up a workspace with a size of 720x370 pixels, anyone who wants to put this tutorial into practice can make a workspace at their convenience.
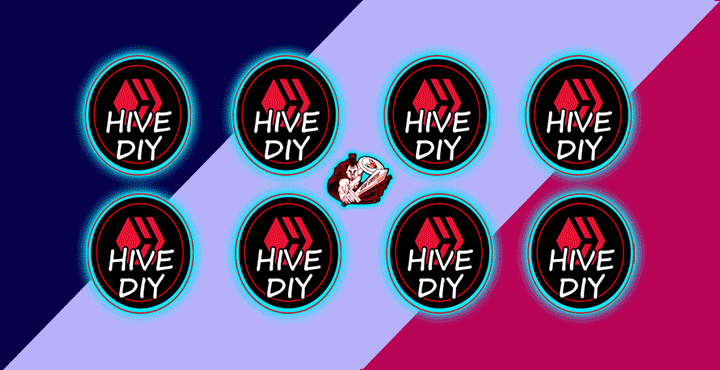
Once my workspace was ready I created an image to which I am going to put the Glitch effect, this image I was making before starting the tutorial, as you can see in the image, my workspace was completely ready.
¡Hola Colegas!
Bienvenidos a otro contenido de mi autoría... Hoy estaré compartiendo con todos ustedes otro buen tutorial básico de cómo hacer un efecto Glitch en Photoshop.
Sin más preámbulos pónganse cómodos para comenzar este contenido =)
Para empezar he configurado un espacio de trabajo con un tamaño de 720x370 pixeles, cualquiera que quiera poner en práctica este tutorial puede hacer un espacio de trabajo a su conveniencia.
Una vez que mi espacio de trabajo estaba listo he creado una imagen a la que le voy a poner el efecto Glitch, esta imagen la estuve haciendo antes de empezar el tutorial, como podéis ver en la imagen, mi espacio de trabajo estaba completamente listo.

At this point I will clarify the following, the image that will be running the Glitch effect will be the one you can see below.
En este punto aclararé lo siguiente, la imagen que estará ejecutando el efecto Glitch será la que podrán ver a continuación.
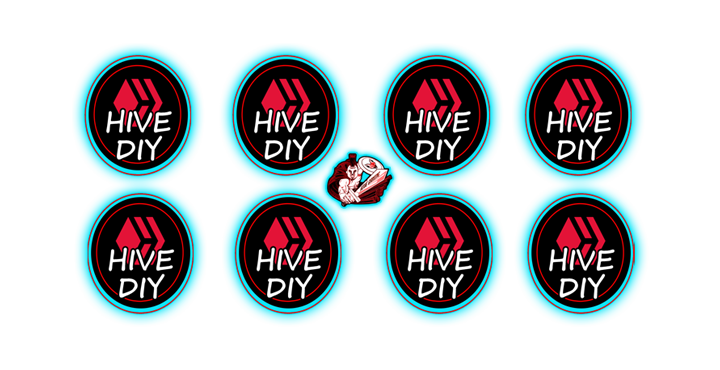
The background is optional... For those who are implementing this tutorial you can make use of a single image.
El fondo es algo opcional… Para el que esté poniendo en práctica este tutorial puede hacer uso de una imagen única.
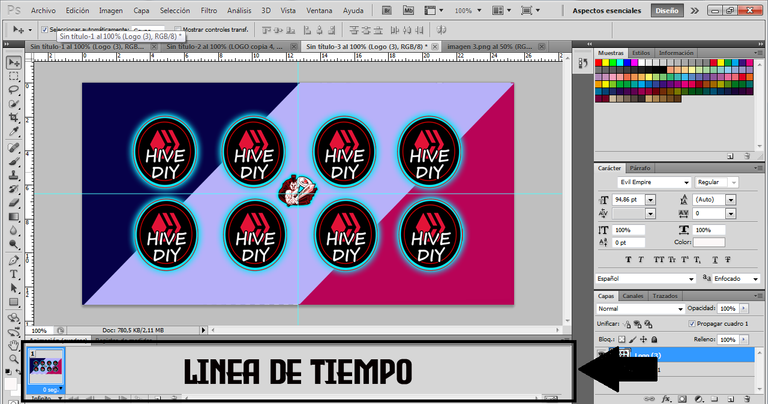
To make the Glitch Effect we must enable the "Animation Option" which we can get in the top, specifically in the "Window" section, this will allow us to have a timeline in which we can position the layers to achieve the effect.
Para hacer el Efecto Glitch debemos habilitar la “Opción de Animación” la cual podemos conseguir en la parte superior, específicamente en el apartado de “Ventana”, esto nos permitirá tener una línea de tiempo en la cual podremos ir posicionando las capas para conseguir el efecto.

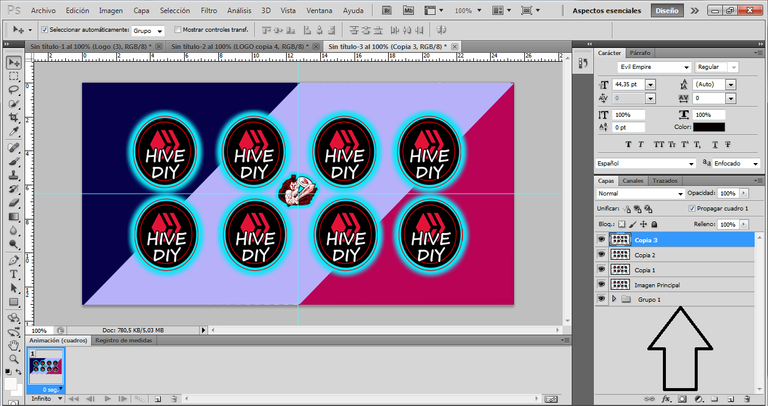
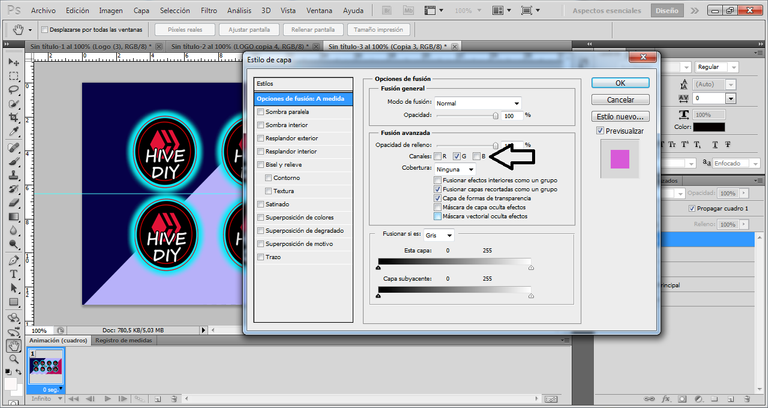
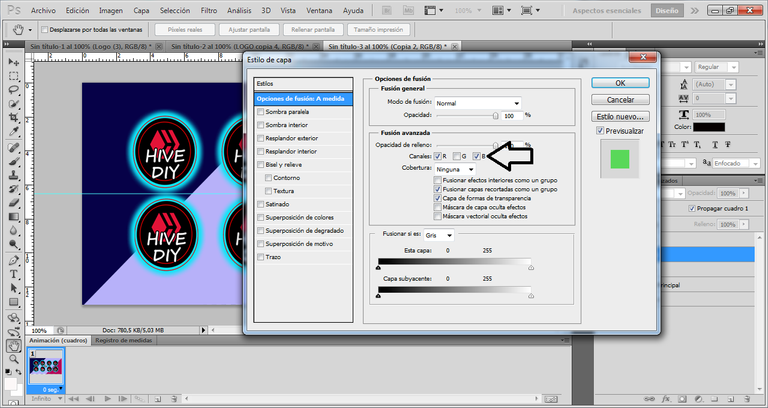
We are going to make 3 copies of our image, you can use the following shortcut keys "Ctrl+J" to make the copies of the main image. Once they are ready, we will go to copy 3 and open "Merge Options", there we will deselect the "R and B Channels". Then we will go to copy 2 and we will do the same procedure but we will deselect only "Channel G".
A nuestra imagen le vamos hacer 3 copias, pueden hacer uso de los siguientes atajos de teclas “Ctrl+J” para hacer las copias de la imagen principal. Une vez estén listas, nos ubicaremos en la copia 3 y abriremos “Opciones de Fusión”, ahí vamos a deseleccionar los “Canales R y B”. Luego nos vamos a ubicar en la copia 2 y vamos hacer el mismo procedimiento solo que vamos a deseleccionar únicamente el “Canal G”.
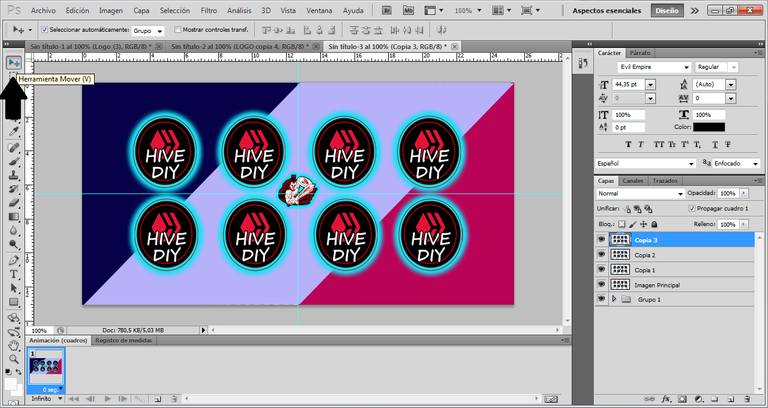
Once these steps have been completed, we will proceed to copy 3 again, then we will select the "Free Motion" tool. At this point we are going to give 1 to 3 times to the right side with the arrow key, in this case I have made 3 movements. We will go back to copy 2 and we will do exactly the same but this time to the opposite side, that is to the left. Once this is done, you will be able to see part of the effect =)
Una vez listo estos pasos procederemos a ubicarnos nuevamente en la copia 3, luego vamos a seleccionar la herramienta de “Movimiento Libre”. En este punto vamos a dar de 1 a 3 veces al lado derecho con la tecla de dirección, yo en este caso he hecho 3 movimientos. Nos ubicaremos nuevamente en la copia 2 y haremos exactamente lo mismo pero esta vez hacia el lado contrario, es decir a la izquierda. Una vez hecho esto, ya se podrá ir viendo parte del efecto =)

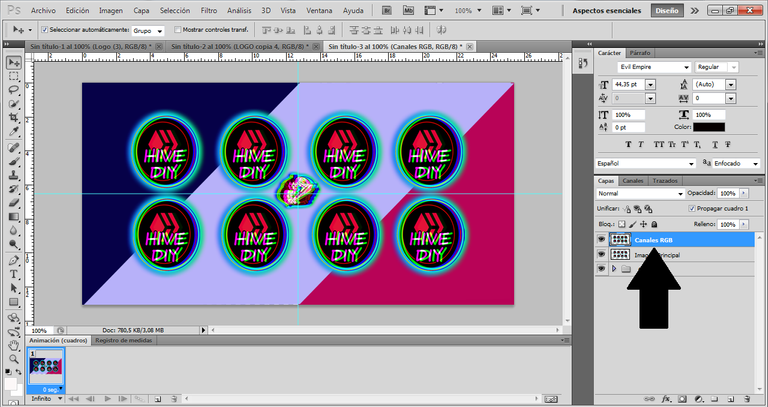
Now we will proceed to combine the 3 copies to convert them into a single image, to do this quickly we can use the shortcut "Ctrl+E" once the copies are selected. Once they are already combined and have a single image I suggest you rename the layer to have it specified, I for my part I have put "RGB Channels".
Ahora procederemos a combinar las 3 copias para convertirlas en una sola imagen, para hacer esto de forma rápida podemos usar el atajo de teclas “Ctrl+E” una vez las copias estén seleccionadas. Una vez ya estén combinadas y tengan una única imagen les sugiero renombrar la capa para que la tengan especificada, yo por mi parte le he puesto “Canales RGB”.
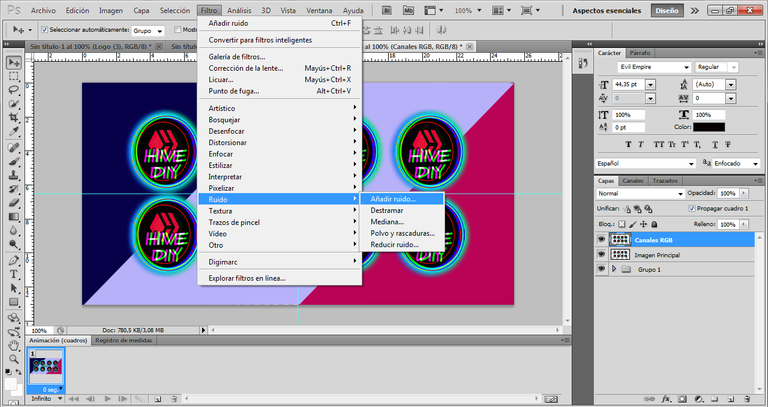
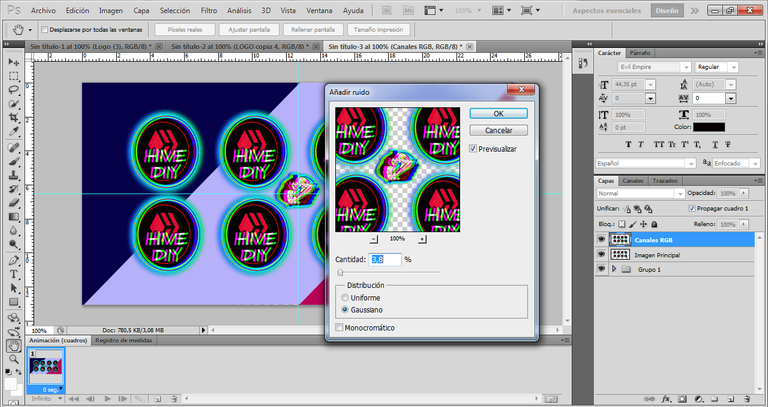
Ok! For this point we will give some noise to our image, for this we will go to the "Filter" section, then we go to "Noise" and select "Add Noise", once this is ready a window will open to give the parameters to this option, in my case I have left a percentage of 3.8 with a Gaussian distortion.
Ahora bien! Para este punto le daremos algo de ruido a nuestra imagen, para esto nos ubicaremos en el apartado de “Filtro”, luego nos dirigimos a “Ruido” y hacemos la selección de “Añadir Ruido”, una vez esté listo esto se nos abrirá una ventana para dar los parámetros a esta opción, en mi caso le he dejado un porcentaje de 3,8 con una distorsión gaussiana.
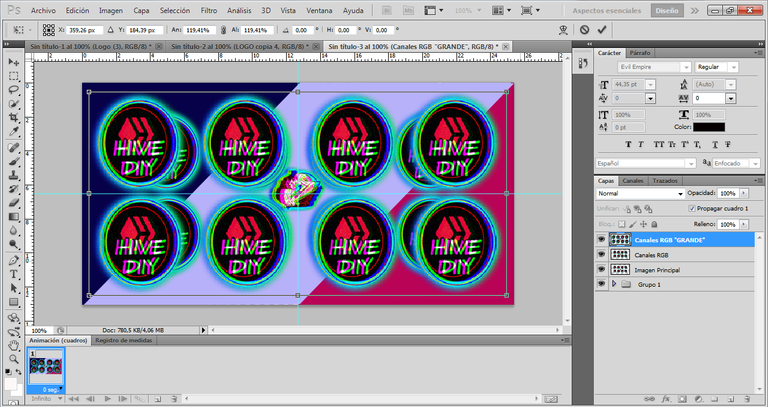
Now we will continue making a copy of the image, for this we execute the shortcut of keys that we had already used previously "Ctrl+J". This new copy I will rename it with "Large RGB Channels", I rename it this way because this copy will be a little bit bigger than the previous image to make this copy bigger we only need to apply the shortcut "Ctrl+T" to make a selection of the whole image and thus to be able to graduate its size, you can use the size that best fits your image.
Ahora proseguiremos haciendo una copia de la imagen, para esto ejecutamos el atajo de teclas que ya habíamos usado anteriormente “Ctrl+J”. Esta nueva copia la renombrare con “Canales RGB Grande”, la renombrado así porque esta copia será un poco más grande que la imagen anterior para hacer esta copia más grande solo debemos aplicar el atajo de teclas “Ctrl+T” para hacer una selección de toda la imagen y así poder ir graduando su tamaño, pueden usar el tamaño que más se ajuste a su imagen.
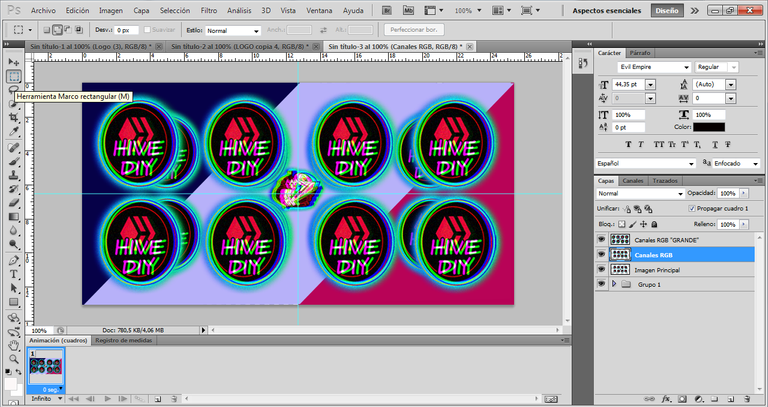
Then we will go back to the "RGB Channels" image and proceed to select the "Rectangular Frame" tool, we must be careful that in this tool we have selected "Add Selection".
Luego nos vamos a ubicar nuevamente en la imagen “Canales RGB” y procederemos a seleccionar la herramienta de “Marco Rectangular”, debemos estar atentos que en esta herramienta tengamos seleccionado “Añadir Selección”.

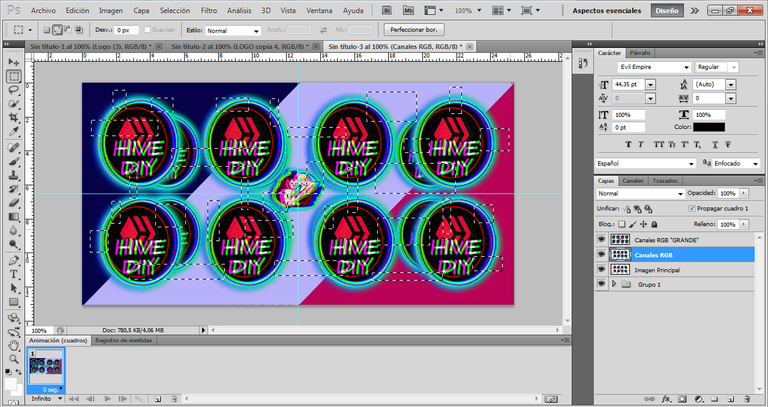
Once this is ready we will start making several rectangular selections over the image. After we have our selections ready we will execute "Ctrl+J", with this we will be able to create a new layer where only the parts we selected previously will appear. Once we have this ready, we will go to the "Large RGB Channels" layer and hide it, then we will go to the new layer where the selection boxes we made before are located, once there we will press the "Shift" key and with the "Free Motion" tool selected we will move the image to the right side a couple of times. In this process we should have obtained something like in the images below.
Una vez listo esto empezaremos hacer varias selecciones rectangulares sobre la imagen. Después que tengamos listas nuestras selecciones ejecutaremos “Ctrl+J”, con esto podremos crear una nueva capa donde solo aparecerán todas las partes que seleccionamos anteriormente. Una vez tengamos listo esto, nos vamos a ubicar en la capa “Canales RGB Grande” y la vamos a ocultar, luego nos ubicaremos en la nueva capa donde están los cuadros de selecciones que hicimos anteriormente, aun vez allí vamos a presionar la tecla “Shift” y con la herramienta de “Movimiento Libre” seleccionada moveremos la imagen al lado derecho un par de veces. En este proceso se tuvo que haber obtenido algo como en las imágenes a continuación.
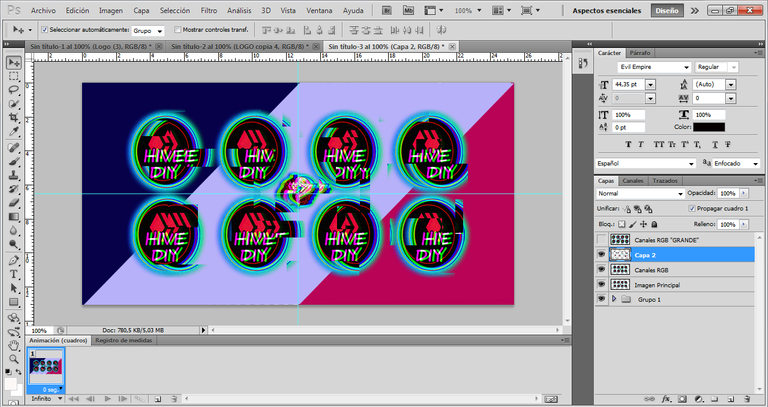
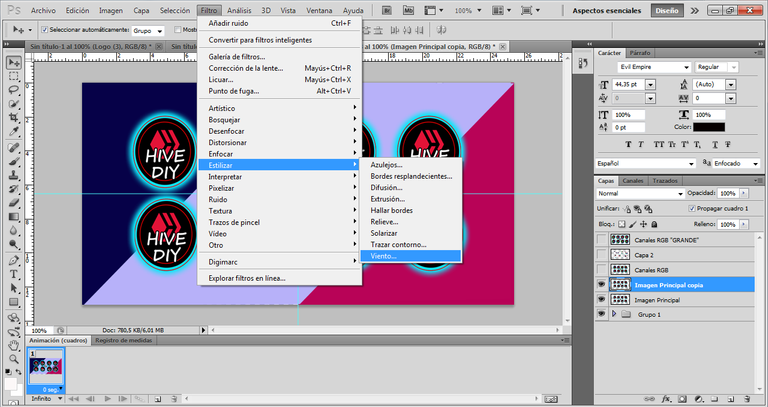
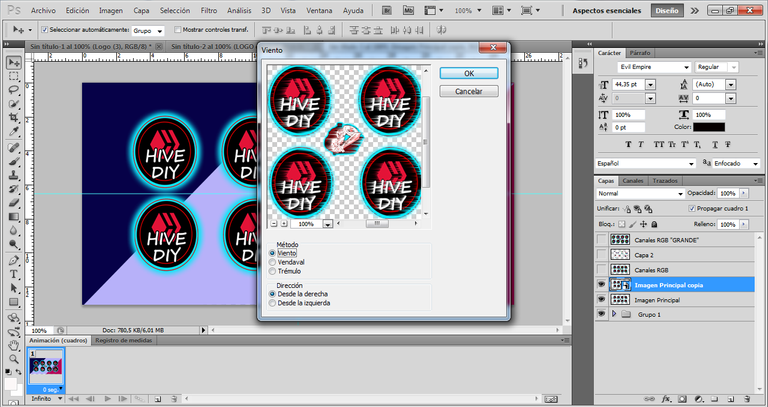
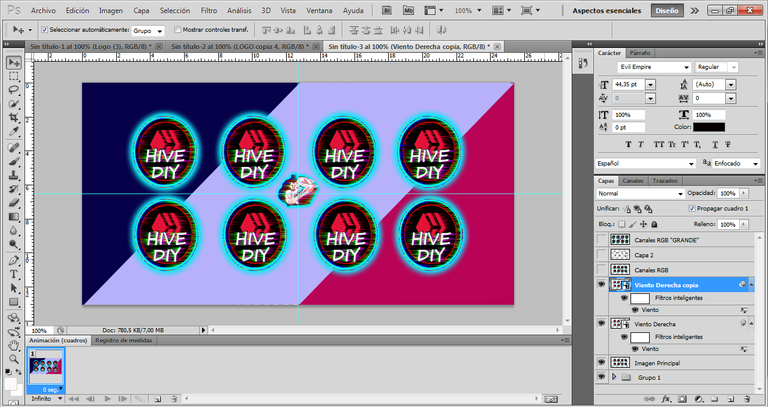
For this part of the tutorial we will do the following, we will hide all the layers except the main one which in this case is the first layer. To this layer we are going to make a copy as we have done before with "Ctrl+J". When we have our new layer we will go to "Filter", then we will select "Stelize" and we will go to the "Wind" section, select it and a window will open to give the parameters to this selection. We will find several options, in my case I will use a "Wind" Method with Direction to the right, once this is done we will apply again the effect of the "RGB Channels", for this layer we will deselect the "R and B Channels", then we will proceed to make a copy of this same layer pressing "Ctrl+J", for this new layer we will be doing the opposite of the previous one. In this case we will apply a "Wind" Method with a Direction, this time to the left and for the "RGB Channels" we will only deselect "Channel G". It should look something similar to what the following images show.
Para esta parte del tutorial haremos lo siguiente, vamos a ocultar todas las capas menos la principal que en este caso es la primera capa. A esta capa le vamos hacer una copia como ya lo hemos hecho anteriormente con “Ctrl+J”. Cuando tengamos nuestra nueva capa nos dirigiremos a “Filtro”, luego seleccionaremos “Estelizar” y nos ubicaremos en el apartado de “Viento”, seleccionamos y se nos abrirá una ventana para dar los parámetros a esa selección. Encontraremos varias opciones, en mi caso usare un Método de “Viento” con Dirección hacia la derecha, una vez hecho esto aplicaremos nuevamente el efecto de los “Canales RGB”, para esta capa vamos a deseleccionar los “Canales R y B”, luego procederemos hacer una copia de esta misma capa presionando “Ctrl+J”, para esta nueva capa estaremos haciendo implementando lo contrario de la anterior. En este caso le aplicaremos un Método de “Viento” con una Dirección, esta vez a la izquierda y para los “Canales RGB” solo vamos a deseleccionar el “Canal G”. Debería quedar algo similar a lo que muestran las siguientes imágenes.
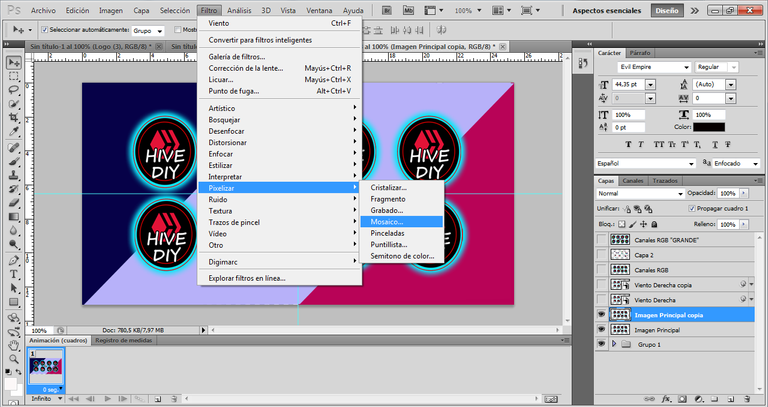
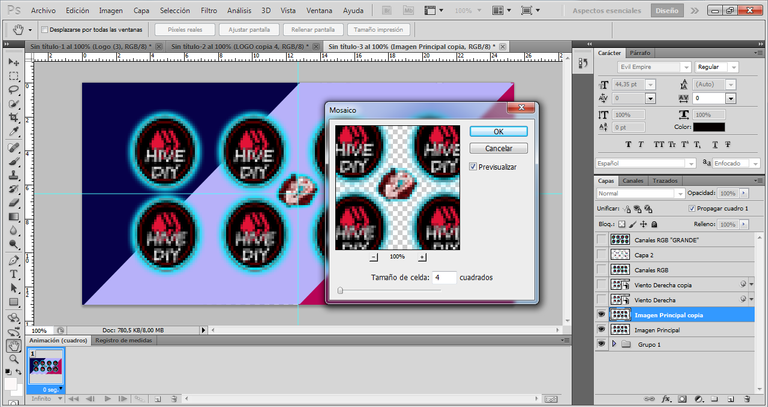
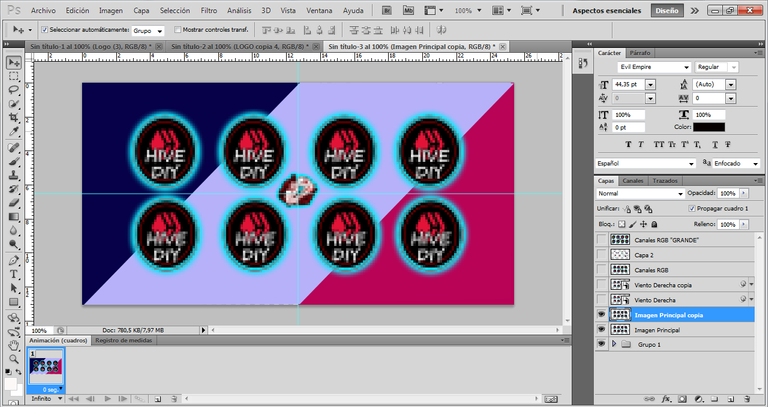
Now we will make another duplicate of the main image using again "Ctrl+J", to this new copy we will apply a "Mosaic" effect. To achieve this we go to "Filter", select "Pixelize" and then a window will open with the parameters, in my case I will use a cell size of 4 squares.
Ahora haremos otro duplicado de la imagen principal usando nuevamente “Ctrl+J”, a esta nueva copia le vamos a aplicar un efecto de “Mosaico”. Para lograr esto nos vamos a “Filtro”, seleccionamos “Pixelizar” y a continuación se nos abrirá una ventana con los parámetros, en mi caso usare un tamaño de celda de 4 cuadrados.
For this point of the tutorial, we already have what would be all our images with their respective effects, now we will make use of the "Timeline" with which we will be able to make our "Glitch" effect. In the timeline we will create the same amount of layers that we have in images, in this case we have 7 images so we will create 7 layers.
Para este punto del tutorial, ya tenemos lo que serían todas nuestras imágenes con sus respectivos efectos, ahora nos dispondremos hacer uso de la “Línea de Tiempo” con la cual lograremos hacer nuestro efecto “Glitch”. En la línea de tiempo crearemos la mis cantidad de capas que tenemos en imágenes, en este caso tenemos 7 imágenes así que serán 7 capas las que crearemos.
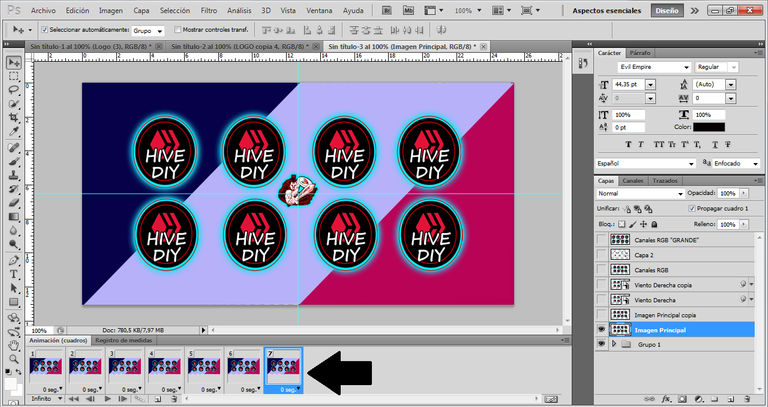
As you can see in the image I just showed with the 7 layers in the timeline, you can also see that the images are hidden except the main one. At this point you must be very attentive and understand this part very well since the layers of the timeline must be synchronized with the image that is selected, in this case it will be quite simple since we are going to select each one in order. That is to say, layer 1 will go with the main image, we select layer 2 and give visualization to the second image, we go now and select layer 3 and give visualization to image 3, in this way we will do with all the other layers and images.
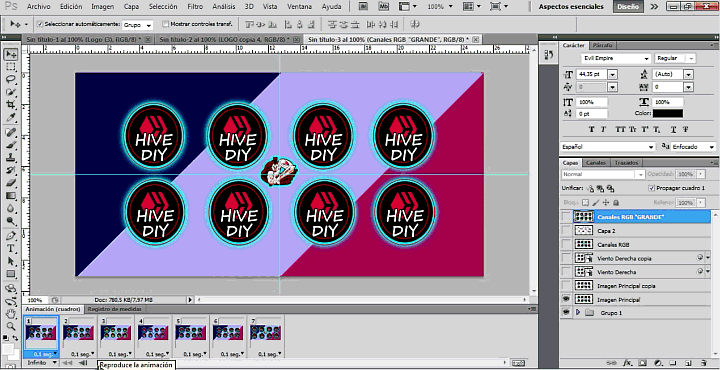
Once these steps are ready, the only thing left to do is to set the travel time to the layers, for this Glitch effect I recommend to set all the layers with a time interval of 0.1 seconds. To see how all the work is done, just click on the first layer of the timeline and press the play button that you can see below =) If everything went well it should look something like this.
Como pueden darse cuenta en la imagen que acabo de mostrar con las 7 capas en la línea de tiempo, también pueden darse cuenta que las imágenes están ocultas menos la principal. En este punto deben estar muy atentos y comprender muy bien esta parte ya que las capas de la línea de tiempo deben estar sincronizadas con la imagen que se seleccione, en este caso va ser bastante sencillo ya que vamos a ir seleccionando cada una en orden. Es decir, que la capa 1 ira con la imagen principal, seleccionamos la capa 2 y damos visualización a la segunda imagen, vamos ahora y seleccionamos la capa 3 y damos visualización a la imagen 3, de esa manera haremos con todas las demás capas e imágenes.
Una vez listo estos pasos, solo queda por ponerle el tiempo de recorrido a las capas, para este efecto Glitch recomiendo poner todas las capas con un intervalo de tiempo de 0.1 segundos. Para ver como quedo todo el trabajo solo deben ubicarse en la primera capa de la línea de tiempo y darle al botón de play que podrán ver abajo =) Si todo ha salido bien debería haberles quedado algo como esto.
Final Result
Resultado Final
Another model with unique image
Otro modelo con Imagen única

The Hive DIY Logo has been provided to me to use it, thanks to its creator for providing it. All other images are from my total authorial, thanks for visiting and reading my content, see you soon!
El Logo Hive DIY se me ha sido facilitado para darle uso al mismo, gracias a su creador por facilitarlo. Todas las demás imágenes son de mi total autorial, gracias por visitar y leer mi contenido, hasta pronto!

 |  |  |
Que genial este programa permita todas estas características que nos muestras. recuerdo hacer gifs en un photoshop muy antiguo, quedaban geniales. Gracias por compartir tu tutorial con nosotros querido.
Querida @equipodelta disculpa por lo tardado, pero usted saber siempre seguro =) Me alegra que mi tutorial le haya gustado, muchas gracias por su visita.
Photoshop se ha convertido para mi una herramienta muy completa para mis trabajos =) 100% recomendado.
Saludos y bendiciones, espero se encuentre bien!