

¡De vuelta a mi comunidad favorita! Haciendo lo que me gusta. Hace unos días les presenté una manualidad de un llavero de Mickey Mouse, en esta nueva oportunidad les mostraré el paso a paso para hacer un llavero de Stitch. Un obsequio que regalaré con mucho cariño a una persona muy especial y que seguro le encantará.
Back to my favorite community! Doing what I like. A few days ago I presented you with a Mickey Mouse keychain craft, in this new opportunity I will show you the step by steps to make a Stitch keychain. A gift that I will give with love to a very special person and I'm sure she will love it.

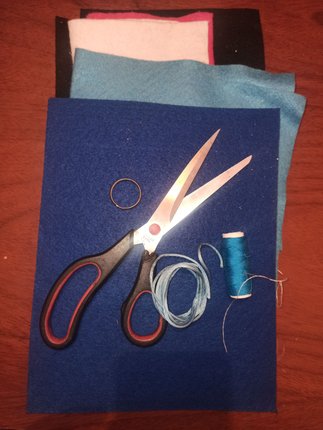
- Fieltro Azul rey
- Fieltro azul cielo
- Fieltro lila o rosado
- Fieltro blanco y negro
- Hilo de coser
- Aguja de coser
- Cinta cola de ratón
- Argolla para llavero
- King Blue Felt
- Sky blue felt
- Lilac or pink felt
- Black and white felt
- Sewing thread
- Sewing needle
- Mouse tail ribbon
- Keyring

Así que ya estamos listos para explicar el proceso. Les dejo los patrones para quien le guste este personaje y se anime a hacerlo, más fácil con los moldes preparados.
So we are ready to explain the process. I leave you the patterns for anyone who likes this character and is motivated to make it easier with the molds ready.

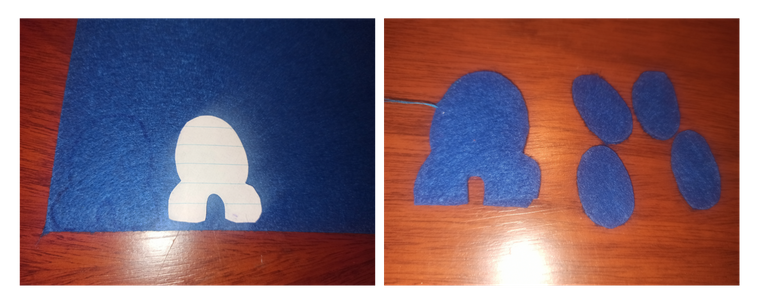
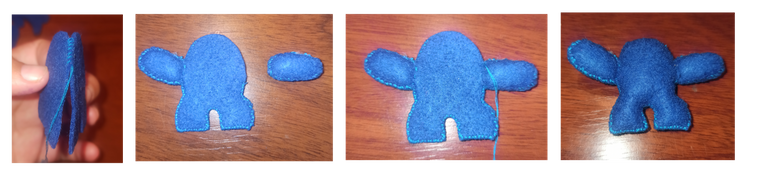
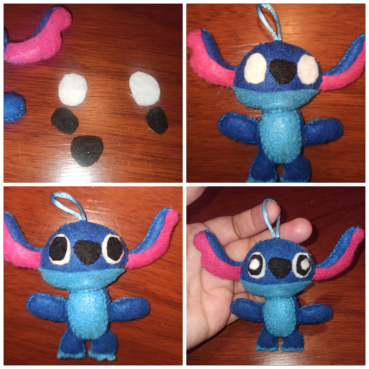
- Empezaremos por la parte inferior del cuerpo, es decir, los brazos y el tronco junto a las piernas. Trazamos los moldes sobre el fieltro azul rey.
- We will start with the lower part of the body, that is, the arms and the trunk next to the legs. We trace the molds on the royal blue felt.

- Una vez que tengamos las piezas, primero uniremos los brazos, coseremos usando la puntada de sobrehilado para unir, recuerda dejar una abertura donde vamos a introducir el relleno, y luego sellaremos completamente.
- Once we have the pieces, we will first join the arms, sew using the overcasting stitch to join, remember to leave an opening where we are going to introduce the stuffing, and then seal completely.

- Una vez que tenemos los brazos, pasamos al tronco, empezamos a unir las dos piezas utilizando la misma puntada e insertamos los brazos que hemos armado anteriormente. Rellenar y sellar completamente.
- Once we have the arms, we move on to the trunk, start joining the two pieces using the same stitch and insert the arms that we assembled previously. Fill and seal completely.
- En este paso, vamos a coser la panza y las patas.
- In this step, we will sew the belly and legs.
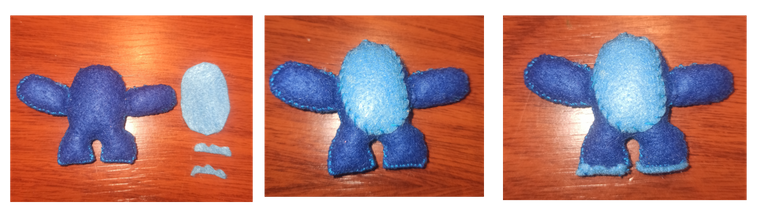
- Pasamos a la parte superior. Primero, montamos las orejas de nuestro personaje, cosemos la parte azul, rellenamos, y por último el detalle rosa.
- We move on to the upper part. First, we assemble the ears of our character, sew the blue part, stuff, and finally the pink detail.

- Pasamos a la cabeza. Empezamos a coser y vamos insertando las orejas de lado a lado. En la parte inferior de la cabeza insertamos el cuerpo y en el centro de la parte superior de la cabeza la cinta donde vamos a colocar la argolla de llavero.
- We move on to the head. We start sewing and we insert the ears from side to side. In the lower part of the head we insert the body and in the center of the upper part of the head the ribbon where we are going to place the key ring.
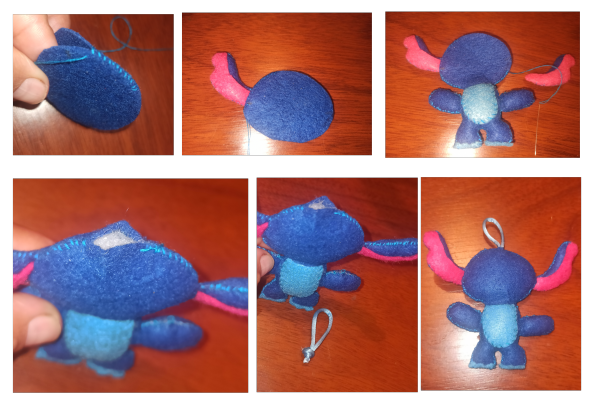
- Para finalizar con stitch agregamos los detalles de la cara, la boca que la cosí, y los ojos use silicona caliente.
- To finish with stitch we added the details of the face, the mouth I sewed it, and the eyes I used hot silicone.
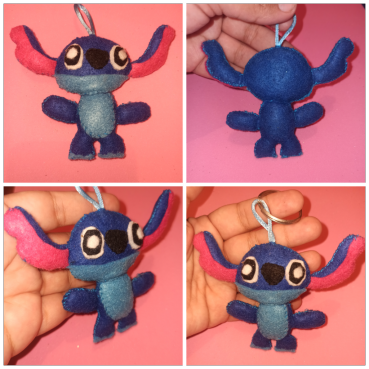
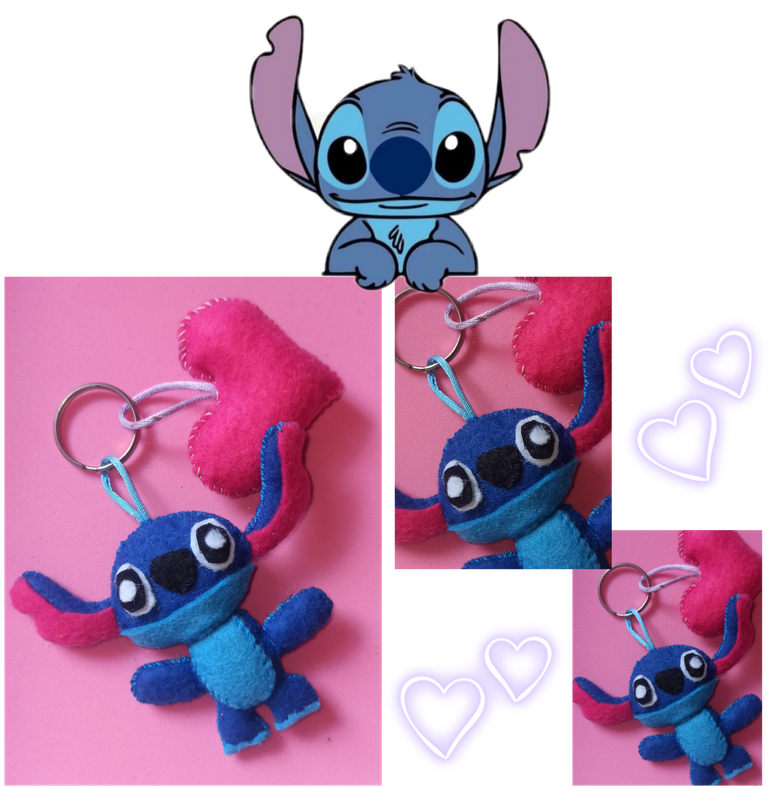
- Aquí tienes otras imágenes en las que puedes ver con detalle cómo ha quedado la figura.
- Here are some other images where you can see in detail how the figure has turned out.
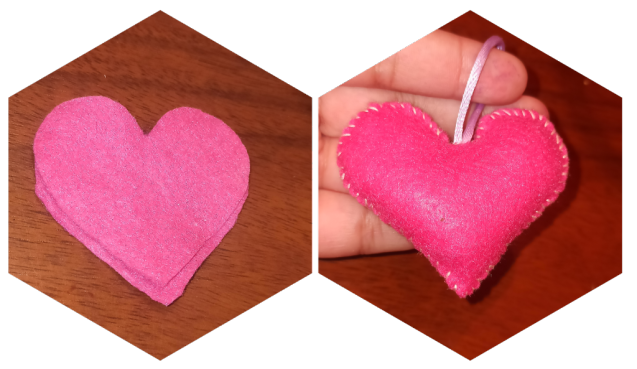
- ¡Pero no ha terminado! Quería añadir un detalle más a este llavero. Para acompañar a stitch realice un corazón de color fucsia. El procedimiento es el mismo, trazar dos piezas que luego vamos a unir con hilo y aguja, utilizar la misma puntada, sobrehilado, relleno, y antes de sellar completamente insertar la cinta.
- But it's not over! I wanted to add one more detail to this keychain. To go with stitch make a fuchsia-colored heart, the procedure is the same, trace two pieces that we will then join with thread and needle, use the same stitch, overcast, fill, and before sealing completely insert the ribbon.
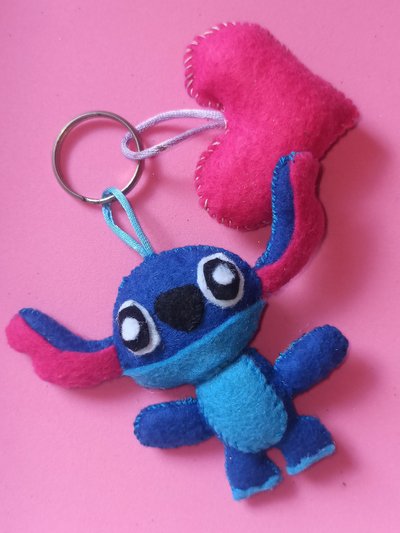
- Y éste es el resultado final
- And this is the final result
¿Qué le pareció el resultado? ¡Me fascinó! No es muy difícil, con dedicación, muy concentrada en lo que estaba haciendo, música, y comiendo pastel de chocolate en un par de horas tenía mi manualidad lista.
Espero que a ti, que me lees, te haya gustado mi tutorial que como en cada tutorial que hago, pongo mucho cuidado para que sea lo más comprensible posible y útil para alguien. Si tenéis algún comentario o pregunta, estaré encantada de responderlo. ¡! ¡Que Dios los bendiga!
What did you think of the result? I was fascinated! It is not very difficult, with dedication, very focused on what I was doing, music, and eating chocolate cake in a couple of hours I had my craft ready.
I hope that you, who read me, liked my tutorial that as in every tutorial I do, I put a lot of care to make it as understandable as possible and useful for someone. If you have any comments or questions, I will be happy to answer them. ! God bless you!
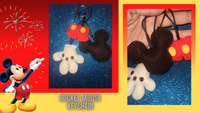
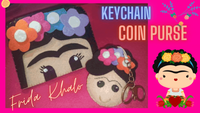
Además de este personaje de Stitch, he hecho dos llaveros de otros personajes. Os dejo la dirección para que puedas echar un vistazo y si te gusta alguno te animes a realizarlo.
In addition to this Stitch character, I have made two keychains of other characters. I leave you the address so you can take a look and if you like any of them you can do it.

Fotografías de mi propiedad tomadas con el celular Redmi note 8 pro, editadas en canva
Traducción realizada con la versión gratuita del
traductor DeepL
Sticker de Stitch usados en esta publication fueron descargados desde la app picsart
Separador realizado en picsart
Photographs of my property taken with the Redmi note 8 pro cell phone, edited in canva
Translation made with the free version of the translator DeepL
Stitch stickers used in this publication were downloaded from the app picsart
Separator made in picsart
que lindo, a mi hija le gusta este personaje! es una muy buena idea. Gracias por compartir.
Holaa 🎈💐 el de mi hija también. Este llavero lo hice para ella. Gracias por tu agradable comentario 😊
Queeee.. Esto esta demasiado increible. Como hiciste a Stitch, los patrones que hiciste son tan buenos que cuando los ibas uniendo estaba quedando tan genial.. Deberías hacer uno de Spiderman, te va a quedar grandioso. Gracias por compartir con nosotros es tuturial!
Holaaaaa!! Oookk sería genial hacer uno de Spiderman, es el personaje favorito de mi hijo, de seguro lo estaré haciendo. Muchas gracias por tu comentario 😊 que te vaya bonito
Que bello quedó, me gustó mucho tu trabajo
Holaa 🎈🎈 muchas gracias amiga!
Hermoso su llavero me encanto
Holaa! Gracias, me contenta que mi llavero le haya gustado a varias personas. ☺️🎈
The rewards earned on this comment will go directly to the person sharing the post on Twitter as long as they are registered with @poshtoken. Sign up at https://hiveposh.com.