Cuando somos padres, la seguridad de los hijos se convierte en uno de nuestros principales objetivos a cumplir, es por ello que nos damos la tarea de indagar las posibles soluciones a determinados inconvenientes que se van presentado en cada etapa de sus vidas; en mi caso tengo una pequeña bebé de 8 meses vida, y desde hace un par de semanas ha aprendido a mantenerse sentada sin ayuda de un espaldar; ciertamente se siente segura de mantener su equilibrio y no caer hacia atrás; de hecho le doy mi voto de confianza de que será así; sólo que como madre prevenida me tomé la tarea de colocarle un cojín grande detrás de ella de manera que tuviera un espaldar donde recargarse y por si ella llegase a caer de espaldas pues no golpeara su cabeza contra el piso (sabemos que eso sería el caos) pero fallé en el intento, pues ella no quería de ninguna manera tener nada detrás, al parecer restaba su valioso espacio para jugar en la alfombra de la sala; no me di por vencida y me decidí a buscar una manera en la que las dos saliéramos ganando; se me ocurrió crear una almohadilla súper cómoda y liviana a la que cargaría casi que desapercibidamente en su espalda , pero que le brindara la seguridad que yo estaba procurando. Amigos les garantizo que si me funcionó. Jajaja creo que ni cuenta se dio de cuando le coloqué la almohadilla protectora; jugó full relajada, y en una de esas mientras yo le aplaudía a la rítmica de una canción se agitó tanto que, puff! Cayó hacia atrás y tras un silencio confundido, ella solo rió y extendió sus manitas para que la ayudara a sentarse nuevamente; su cabecita había sido salvada de un golpe contra el piso por una cómoda almohadilla que “mágicamente” estaba en el momento que ella lo necesitó; me reí tanto de ese suceso, que alivio y satisfacción pude sentir en ese momento por haber tomado acción sobre ese tema. Hurra! Un punto más para mami. ;)
Para realizar esta almohadilla quise resaltar la belleza, la dulzura y lo curiosas que pueden llegar a ser las mariquitas; personalmente la combinación de sus colores: rojo y negro en un cuerpecillo tan diminuto es cuestión de cuchitura desde mi perspectiva; y sumando las pintitas circulares en sus alitas las hacen ver más tiernas. Una acotación relevante que no puedo dejar por fuera es que para este post los materiales utilizados han sido de material de provecho (camisas y retazos de telas viejas y sin uso, el broche de seguridad la tomé de un morral que ya no servía).
When we are parents, the safety of our children becomes one of our main objectives to fulfill, which is why we give ourselves the task of investigating possible solutions to certain inconveniences that arise at each stage of their lives; In my case, I have a little 8-month-old baby, and for a couple of weeks she has learned to stay seated without the help of a backrest; she certainly feels sure to keep her balance and not fall backwards; in fact, I give you my vote of confidence that it will be so; only that as a forewarned mother I took the task of placing a large cushion behind her so that she would have a back to rest on and in case she were to fall on her back then she would not hit her head on the floor (we know that would be chaos) but I failed in the attempt, because she did not want in any way to have anything behind, apparently it subtracted her valuable space to play on the living room carpet; I did not give up and I decided to find a way in which both of us would win; It occurred to me to create a super comfortable and light pad that he would carry almost unnoticed on his back, but that would provide him with the security that I was looking for. Friends, I guarantee you that it worked for me. Hahaha I think he didn't even notice when I put the protective pad on him; She played completely relaxed, and in one of those, while I applauded the rhythm of a song, she became so agitated that, puff! She fell backwards and after a confused silence, she only laughed and extended her little hands to help her sit up again; her little head had been saved from hitting the floor by a comfortable pillow that “magically” was there when she needed it; I laughed so much at that event, that I could feel relief and satisfaction at that moment for having taken action on that issue. Hurrah! One more point for mom. ;)
To make this cushion I wanted to highlight the beauty, the sweetness and how curious ladybugs can be; personally the combination of its colors: red and black in such a tiny body is a matter of cut from my perspective; and adding the circular dots on their wings make them look more tender. A relevant note that I cannot leave out is that for this post the materials used have been useful material (shirts and scraps of old and unused fabrics, the safety pin I took from a backpack that no longer served).

Materiales:
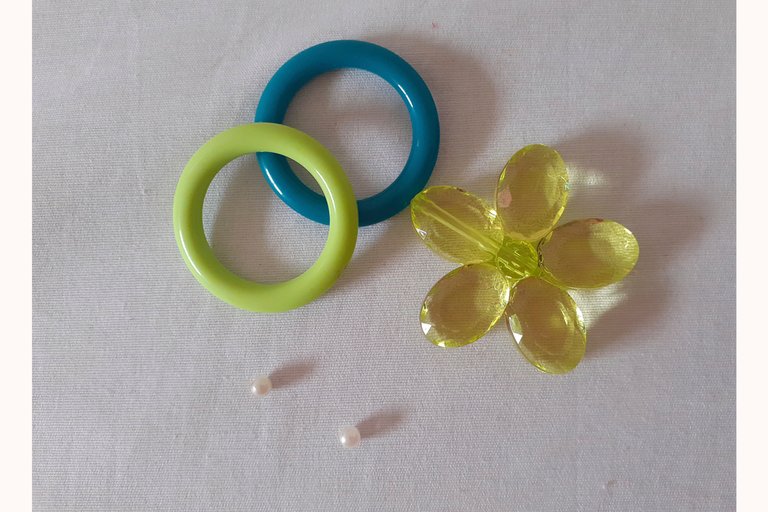
Piedritas y aritos de bisutería
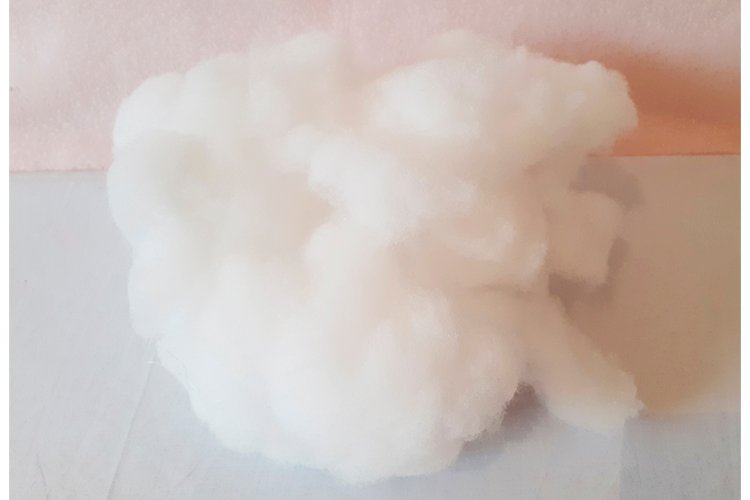
Felpa
Telas
Cinta elástica, hilos, tijeras y agujas.
Broche
Materials:
Stones and jewelry earrings
Plush
fabrics
Elastic tape, threads, scissors and needles.
Brooch


Pasos // Steps
1 En hojas reciclables trazamos los siguientes patrones.
1 On recyclable sheets we trace the following patterns.

2 recortamos el circulo más grande de color rojo, estas serás nuestras alitas.
2 We cut out the largest red circle, these will be our wings.


3 luego con el mismo patrón recortamos en una tela negra. Lo que será la parte baja de la mariquita.
3 then with the same pattern we cut out on a black fabric. What will be the lower part of the ladybug.


4 del patrón del círculo más pequeño recortamos en una tela negra dos círculos negros. Lo que será la cabeza de la mariquita.
4 From the pattern of the smaller circle we cut out two black circles on a black fabric. What will be the head of the ladybug.

5 con el patrón de la cinta de 4 cm de ancho recortamos en una tela negra dos tiras, una de 45 cm de largo y una de 35 cm de largo; estas medidas cubren la misma circunferencia respectivamente de las telas circulares cortadas previamente.
5 With the pattern of the 4 cm wide ribbon we cut two strips in a black fabric, one 45 cm long and one 35 cm long; these measurements cover the same circumference respectively of the previously cut circular fabrics.

6 vamos a comenzar por armar el cuerpo de la mariquita; para ello debemos sellar con aguja e hilo la tira negra de 45 cm de largo al círculo de tela color rojo.
6 we are going to start by assembling the body of the ladybug; To do this, we must seal the 45 cm long black strip to the circle of red fabric with a needle and thread.

7 dejamos la pequeña abertura que forma los dos extremos de la tira negra; tal cual la pueden observar.
7 we leave the small opening that forms the two ends of the black strip; as you can see it.

8 le echamos un vistazo al volverlo del lado derecho y huepa! Todo bien para continuar.
8 we take a look at it by turning it from the right side and huepa! All good to continue.

9 colocamos nuevamente lo que ya hemos cosido del lado inverso para agregar parte baja de la mariquita, cosemos por los bordes, nos podemos ayudar con los alfileres.
9 we place again what we have already sewn on the reverse side to add the lower part of the ladybug, we sew along the edges, we can help ourselves with the pins.


10 luego de haber sellado ambas caras en la tira, por la apertura que habíamos dejado vamos a desdoblar sal lado derecho de la costura.
10 After having sealed both sides in the strip, through the opening that we had left we are going to unfold salt on the right side of the seam.


11 para darle vida al aspecto de la mariquita recorté las pintas con una tela negra. Usé un trazo de cinta negra para dividir las alas y un pequeño triangulo que le da una forma más abierta de las alas.
11 To give life to the appearance of the ladybug I cut out the spots with a black fabric. I used a stroke of black tape to divide the wings and a small triangle that gives a more open shape to the wings.


12 introducimos la felpa dentro del “cuerpo” de la mariquita por la apertura abierta y luego sellamos con aguja he hilo.
12 we introduce the plush inside the “body” of the ladybug through the open opening and then we seal it with a needle and thread.


13 hacemos el mismo proceso con los círculos de tela negra. Recuerden nos podemos ayudar con los alfileres, ya que nos dan un apoyo más preciso de puntear la tela con la exactitud posible.
13 We do the same process with the circles of black fabric. Remember we can help ourselves with the pins, since they give us a more precise support to dot the fabric with the possible accuracy.


14 luego de haber finalizado ambas partes de la mariquita (cabeza y cuerpo), vamos a acoplarlas de la siguiente manera; con los alfileres nos aseguramos la posición en la que estarán ambas piezas entre sí. Y procedemos a sellar con aguja he hilo.
14 After having finished both parts of the ladybug (head and body), we are going to attach them as follows; With the pins we ensure the position in which both pieces will be with each other. And we proceed to seal with a needle and thread.


15 para recrear la carita de la mariquita, recorte en una tela blanca y negra los ojitos y para los destellos les coloqué con pegamento dos perlitas de bisutería. Para la sonrisa le agregue un trocito de estambre rojo.
15 To recreate the ladybug's face, I cut the little eyes out of a black and white cloth and for the sparkles I glued two little jewelry beads to them. For the smile I added a piece of red yarn.


16 para darte un toque más femenino le coloque un lindo detalle a su cuello. No dejemos de sr creativos en cada obra que hagamos.
16 To give you a more feminine touch, I placed a nice detail on her neck. Let's not stop being creative in every work we do.


17 ahora nos dedicamos a convertir nuestra almohadilla en una especie de mochila; necesitamos las tiras elásticas, aguja, hilo y el broche de seguridad. Y opcional unos aritos de bisutería.
17 now we are dedicated to turning our pad into a kind of backpack; we need the elastic strips, needle, thread and the safety pin. And optional some jewelry earrings.

18 tomamos las medidas de los hombros y debajo; que nos parezcan más cómodas al momento de colocárselas, la idea es que no queden ni tan sueltas ni apretadas, porque ya este hecho si les incomodaría un montón.
18 we take measurements from the shoulders and below; that they seem more comfortable to us when putting them on, the idea is that they are not so loose or tight, because this done if it would bother them a lot.

19 recortamos dos tiras de aproximadamente 5 cm de ancho y del mismo largo dependiendo cuanto hayas decidido para tu bebé. Hacemos un doblaje por la mitad y sellamos con aguja e hilo.
19 We cut two strips approximately 5 cm wide and the same length depending on how much you have decided for your baby. We fold it in half and seal with a needle and thread.


20 luego de sellar metemos la costura por la parte de adentro y le introducimos las tiras elásticas, agregue los aritos de plástico para dar un toque más vistoso.
20 after sealing we put the seam on the inside and we introduce the elastic strips, add the plastic rings to give a more colorful touch.


21 sellamos las tiras en la parte baja de la mariquita con ayuda de aguja e hilo.
21 We seal the strips in the lower part of the ladybug with the help of a needle and thread.


22 nuevamente tomamos medidas frontales en la parte del pecho del bebe para estas siguientes tiras; estas serias para colocar el broche de seguridad.
22 again we take frontal measurements on the baby's chest for these next strips; You're serious about placing the safety pin.


23 no olvidemos las particulares antenitas de estos animalillos; con dos trozos de cordón de una vieja pulsera y dos perlitas negras de bisutería bastaron para realizarlas.
23 let's not forget the particular little antennas of these little animals; with two pieces of cord from an old bracelet and two small black jewelry beads, they were enough to make them.


Listo! Hemos realizado una almohadilla protectora para nuestros bebés; podemos sentir un poco más de alivio y libertad en momento que juguemos en el piso con ellos; sabremos que si estamos frente a ellos resguardando cualquier inconveniente, nuestra estupenda almohadilla estará haciendo su función protectora, cuidando las espaladas de esa personita tan especial para nosotros.
Ready! We have made a protective pad for our babies; we can feel a little more relief and freedom when we play on the floor with them; we will know that if we are in front of them protecting any inconvenience, our wonderful pad will be doing its protective function, taking care of the backs of that special little person for us.


Mis queridos amigos! Hemos llegado al final de este post, gracias infinitas por permitirme compartir con ustedes mis creaciones, ciertamente espero que les haya gustado tanto como a mi, les aseguro este producto les va a servir de mucho a quienes tienen sus pequeños retoños en esta etapa de crecimiento, en la cual nuestros bebitos ya no se siente tan bebitos y quieren explorar todos los rincones en donde se encuentren, y por ende nos obligan a buscar nuevas y buenas alternativas en las que ellos se puedan desenvolver con más confianza sin salirse de los campos de la seguridad que les podamos aportar. Un saludo para todos ustedes, se les quiere un montón; hasta la próxima. Bendiciones.
My dear friends! We have reached the end of this post, infinite thanks for allowing me to share my creations with you, I certainly hope you liked it as much as I did, I assure you this product will be very useful to those who have their little shoots in this stage of growth , in which our babies no longer feel so babies and want to explore all the corners where they are, and therefore force us to look for new and good alternatives in which they can develop with more confidence without leaving the fields of the security that we can provide. Greetings to all of you, we love you a lot; until next time. Blessings.


Fotografía por | Photography by: @kathysteele, Android A10.Edición por | Edition by: @kathysteele, Photoshop.Separador y stikers| Separator and stikers: autoria propia.Translated with www.traductorgoogle
Your content has been voted as a part of Encouragement program. Keep up the good work!
Use Ecency daily to boost your growth on platform!
Support Ecency
Vote for new Proposal
Delegate HP and earn more
Que linda quedó
Saludos querida @jorgelissanchez, muchas gracias por comentar, un gusto saber le haya gustado! Bendiciones.
Que hermosura. Buena manera de proteger a nuestros niños y a la vez le sirven para jugar . Excelente trabajo amiga. Bendiciones🥰👏👏👏
Que hermosura de trabajo; muy buena opción para proteger a nuestros hijos y a la vez le sirven para jugar. Bendiciones amiga👏👏🥰
Amén, amén mi querida amiga @zullyarte, bendiciones para ti también, es cierto a parte de ser un protector para nuestros pequeños también lo pueden usar para jugar, gracias por comentar, saludos, hasta un próximo Post! 😊☕✌🏼
Amiga @kathysteele como siempre que buen trabajo super creativo, fácil de hacer y con poco material. Estoy segura que la bebé estará ahora más protegida. Bendiciones y que lo disfruté mucho. Saludos amiga..
Mi querida amiga @floreudys79, que grato halago, de verdad me alegro que te haya gustado tanto como a mí, ciertamente me siento segura sabiendo que tiene mas protección al momento de jugar en el piso, y es el lugar donde más quiere jugar jeje . Bendiciones.
Hola amiga felicito tu creatividad, está muy linda está almohadita y es muy importante para cuando los bebés están comenzando a caminar. Gracias por compartir.😊
Hola, que tal amiga @mayi04, me ha salido cómo anillo al dedo está idea bya que mi bebé se le ve mucho mas segura al momento de jugar en el piso. Gracias por tu valioso comentario. Bendiciones.
Congratulations @kathysteele! You have completed the following achievement on the Hive blockchain and have been rewarded with new badge(s):
Your next target is to reach 1500 upvotes.
You can view your badges on your board and compare yourself to others in the Ranking
If you no longer want to receive notifications, reply to this comment with the word
STOPTo support your work, I also upvoted your post!
Check out the last post from @hivebuzz:
Support the HiveBuzz project. Vote for our proposal!
Hola amiga!
Ame este proyecto, por que resulta muy útil para los padres con bebes en esa etapa, eso dará un poco de seguridad al ir avanzando en su crecimiento y para cuando comienzan a caminar es genial.
Saludos!
Gracias por compartir esa idea!
Gracias por el comentario amiga @hetyg, me alegra te haya gustado, s mí también menha5 parecido nuna idea genial para3 el resguardo vde nuestros pequeños. Saludos y muchas bendiciones.