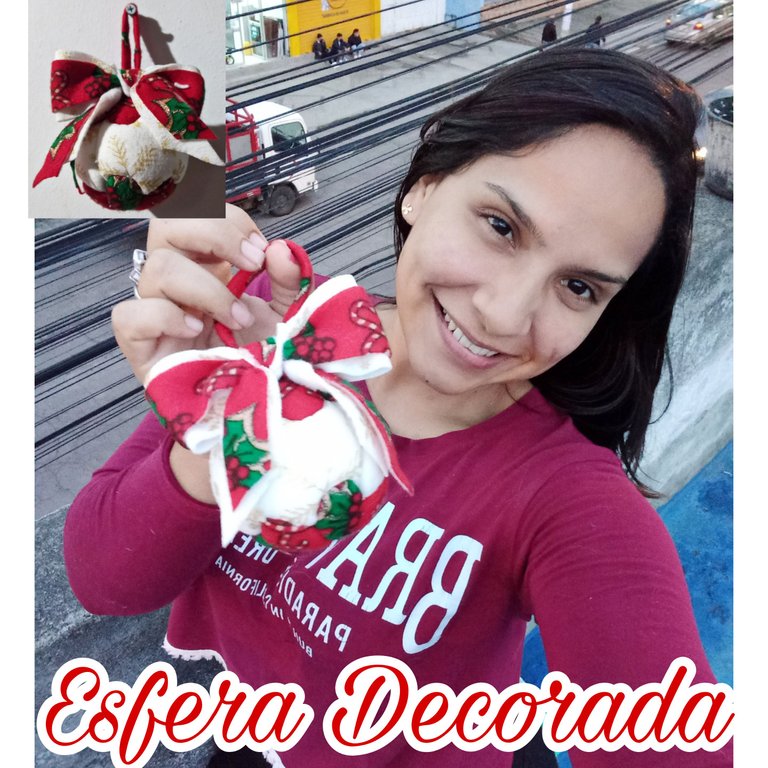
Feliz fin de semana mis queridos amigos artesanos de #Hive-Diy, espero estén pasando un grandioso día, lleno de mucha salud. Me emociona compartir con ustedes mi participación en el nuevo concurso que lleva a cabo cada semana ésta creativa comunidad, en ésta oportunidad con el Tema: Esferas Decorativas con Tela, bajo la moderación de nuestra amiga @equipodelta, la esfera que le haré muestra una técnica muy buena, aquí se la enseño.
Happy weekend my dear artisan friends of #Hive-Diy, I hope you are having a great day, full of health. I am excited to share with you my participation in the new contest that takes place every week this creative community, this time with the theme: Decorative Spheres with Fabric, under the moderation of our friend @equipodelta, the sphere that I will make shows a very good technique, here I show it to you.
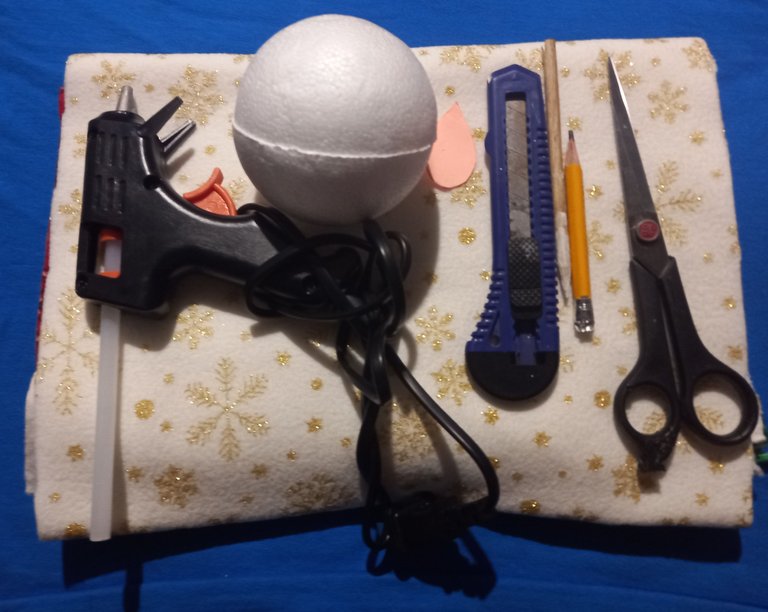
MATERIALES:
- Esfera de anime.
- Tela polar navideña, blanca y roja.
- Cuter.
- Palillo de altura con punta plana.
- Figura en papel de una gota.
- Lápiz.
- Tijeras.
- Pistola de Silicón.
- Silicón
MATERIALS:.
- Anime sphere.
- Christmas polar fleece, white and red.
- Cutter.
- Flat-tipped toothpick.
- Paper figure of a drop.
- Pencil.
- Scissors.
- Silicone gun.
- Silicone.

PROCEDIMIENTO
PROCEDURE
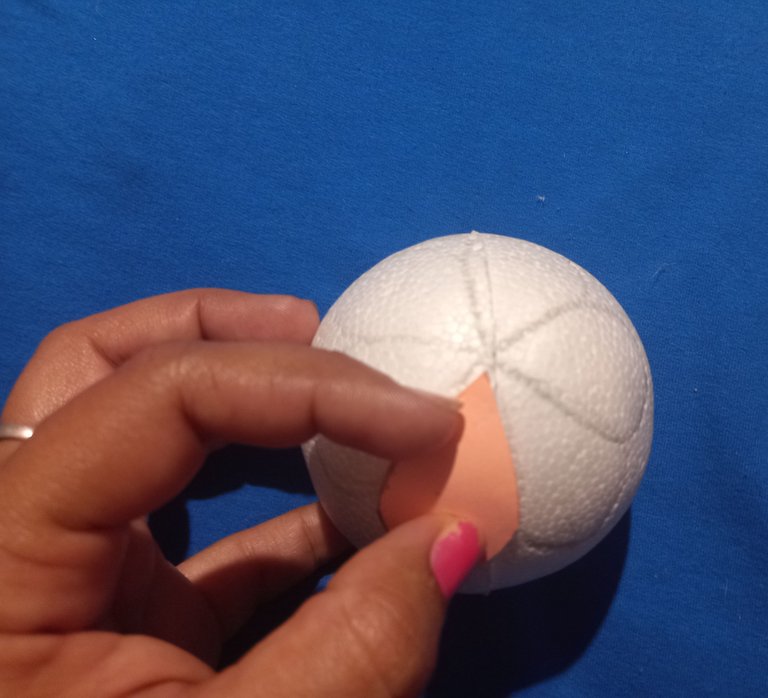
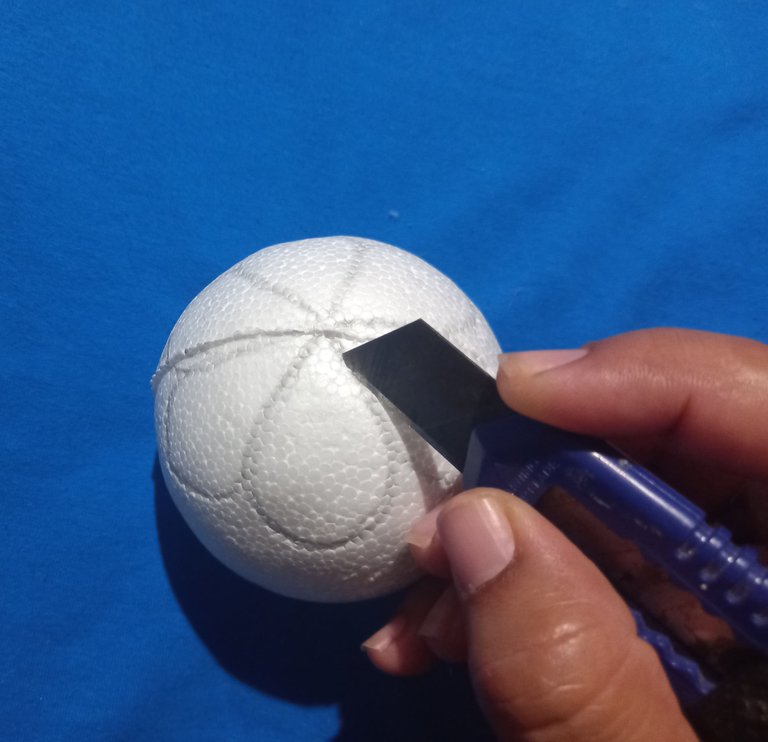
Comenzaremos marcando el patrón de la gota en la parte superior e inferior de la esfera, específicamente en el centro de ésta, hasta formar una especie de flor.
We will start by marking the drop pattern on the top and bottom of the sphere, specifically in the center of the sphere, until we form a kind of flower.
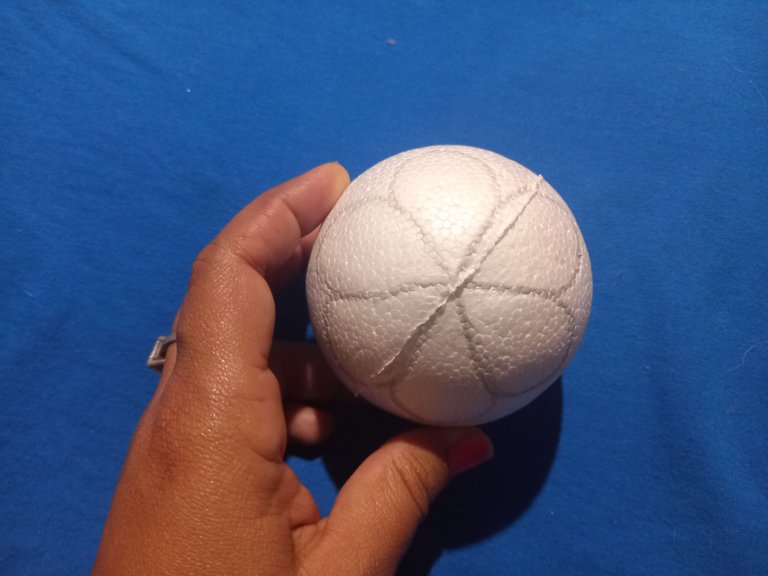
Después abrimos una fina abertura con el Cuter, siguiendo las líneas de la figura.
Then we open a fine opening with the cutter, following the lines of the figure.
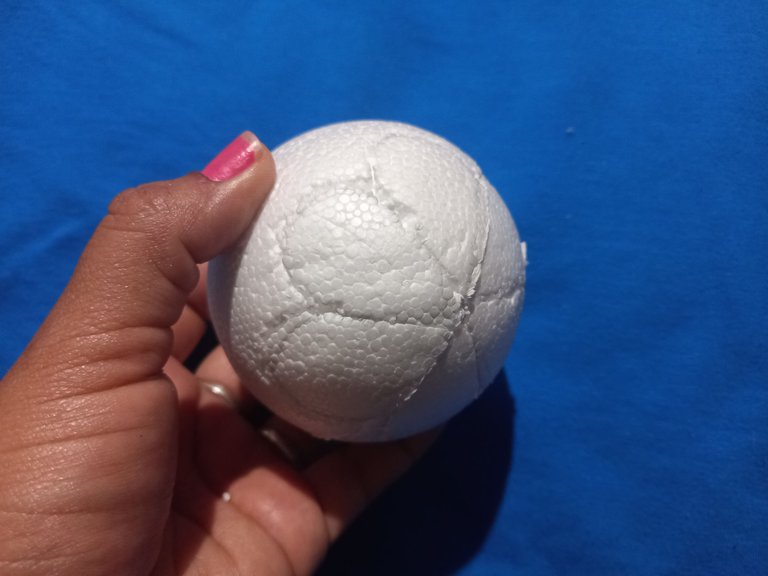
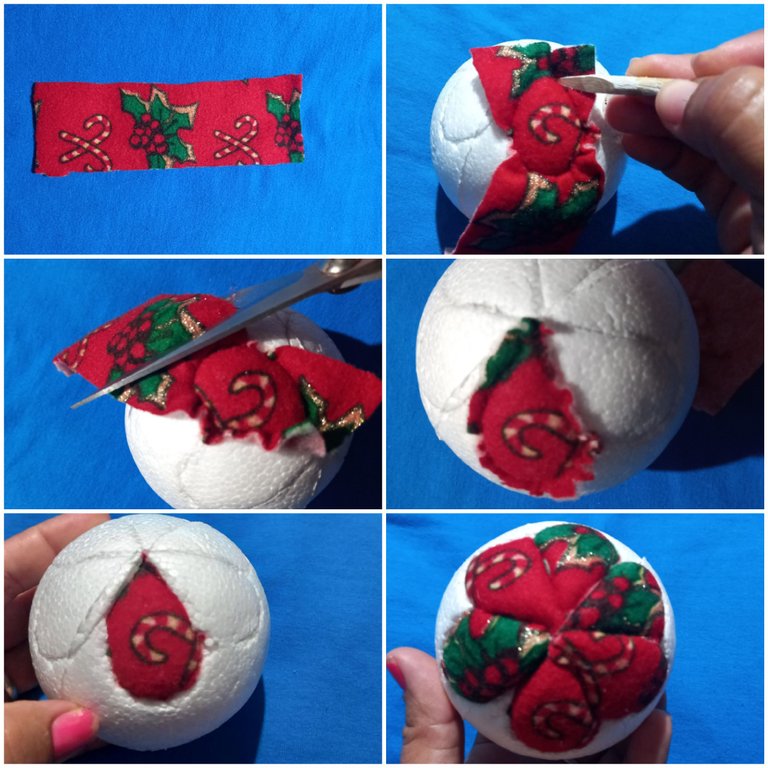
Luego recortamos pequeño trozos de tela o tiras las cuales vamos a ir introduciendo con la punta del Palillo de altura, por las aberturas que hicimos en la figura. También puedes hacer con la tela la forma de la gota pero un poco más grande y a medida que vamos introduciendo cada tela, vamos cortando el exceso y empujando hacia dentro hasta que no quede ningún exceso de tela.
Then we cut small pieces of fabric or strips which we are going to introduce with the tip of the toothpick, through the openings that we made in the figure. You can also make with the fabric the shape of the drop but a little bigger and as we introduce each fabric, we cut the excess and push it in until there is no excess fabric.
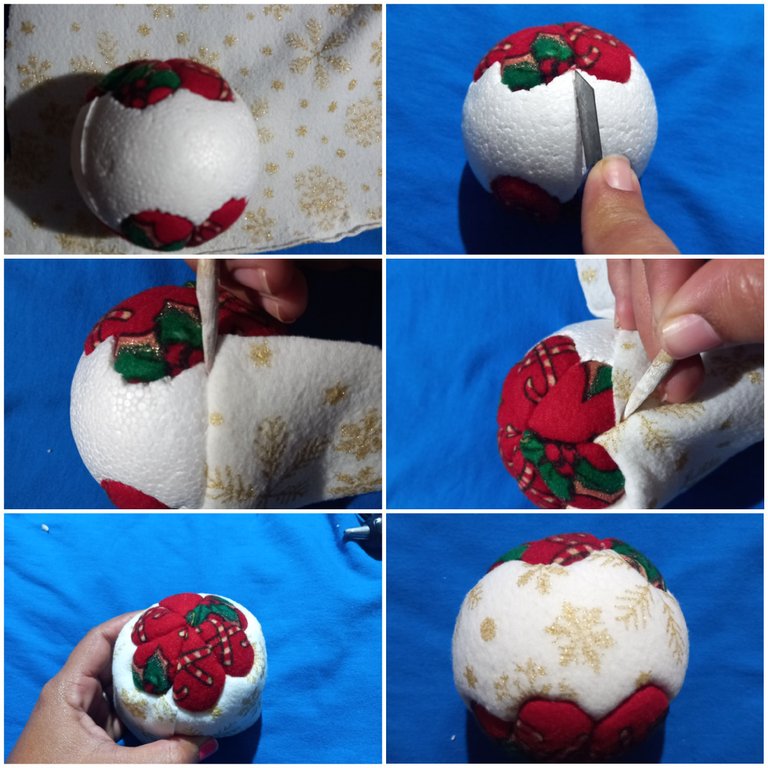
Después que hayamos cubierto con tela las dos figuras, haremos una abertura en los lados de la esfera para forrar la parte que queda descubierta, esto lo haremos introduciendo una tira del tamaño necesario de tal manera que nos alcance en el momento que vayamos introduciendo la tela por las aberturas de los bordes de la flor.
After we have covered the two figures with fabric, we will make an opening on the sides of the sphere to line the part that is uncovered, this will be done by introducing a strip of the necessary size so that it reaches us at the time we are introducing the fabric through the openings of the edges of the flower.
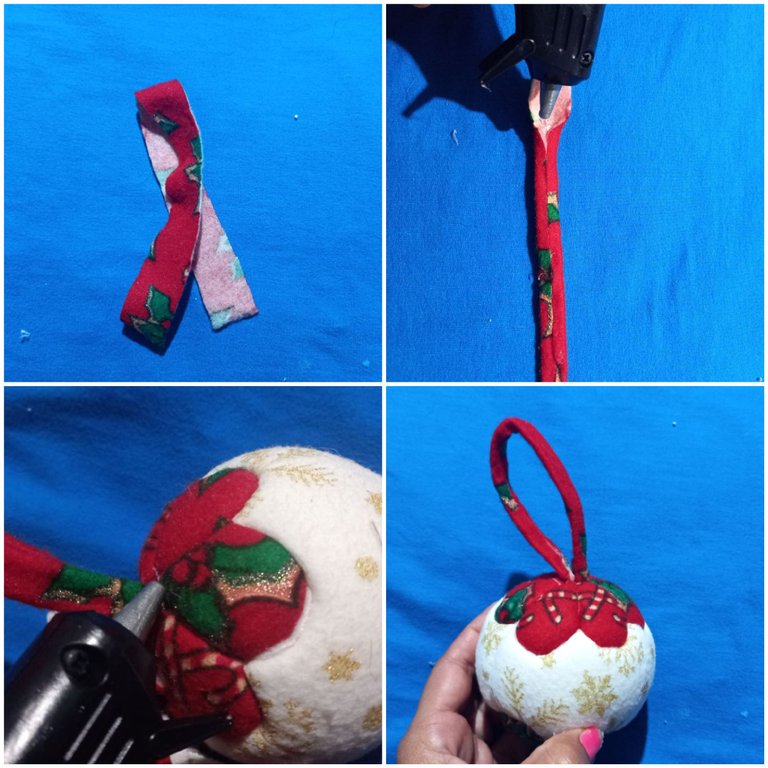
Luego realizaremos una tira de tela roja y la fijamos en la parte de arriba de la esfera para colgarla.
Then we will make a strip of red fabric and attach it to the top of the sphere to hang it.
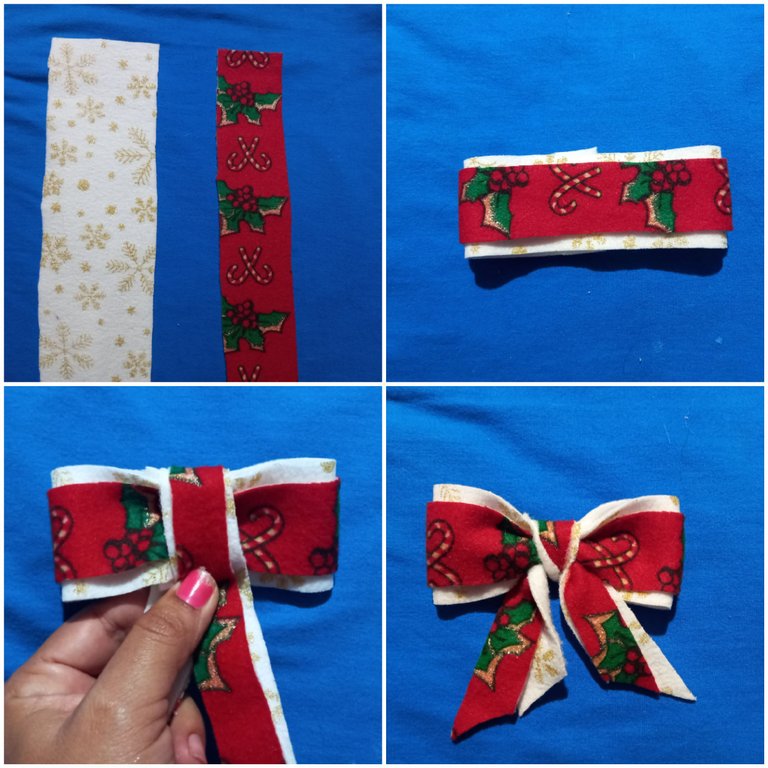
Finalizamos haciendo un pequeño lazo con las mismas telas y lo fijamos en frente del cordón.
We finish by making a small bow with the same fabrics and fix it in front of the cord.

RESULTADO FINAL
FINAL RESULT
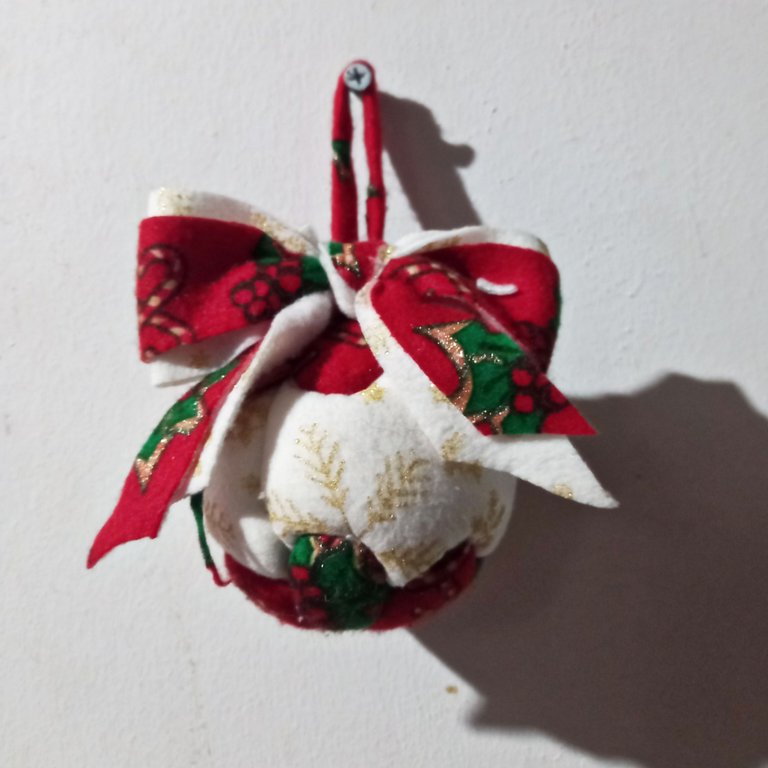
*Ésta fue mi participación en el concurso Esferas Decoradas con Tela, espero que les haya gustado el resultado mis queridos amigos. Quiero hacerle la invitación a mis amigos @chandehc y @gemahernandez a participar de éste hermosos concurso.
This was my participation in the contest Esferas Decoradas con Tela, I hope you liked the result my dear friends. I want to invite my friends @chandehc and @gemahernandez to participate in this beautiful contest.
These are beautiful! Thank you for the tutorial
Gracias estimado amigo @blackstarboho por comentar, me alegra que te haya gustado éste tutorial, lo hice con mucha dedicación. Saludos 🙂
Ver todo ese procedimiento y lo hermosa que te quedó, es realmente fantástico. super ingenioso lo que hiciste con la tela y el anime, además de los motivos en la tela que escogiste, todo esta precioso, gracias por participar, mucha suerte en el concurso.
Hola apreciada amiga @equipodelta, es un gusto poder participar y saber que el trabajo realizado ha sido de su agrado, tratando siempre de crear buenos contenidos. Gracias por tu bonito comentario amiga. Saludos y Bendiciones 😊 🤗
Felicidades, esta súper el método que usaste para incluir la tela, me gusto mucho. Gracias por compartir.
Hola amiga @maryoris.marcano, me alegra que éste tutorial haya sido de mucha utilidad 😊, gracias por comentar amiga. Bendiciones 😊
@kathelopez 77 que linda te ha quedado, te felicito.