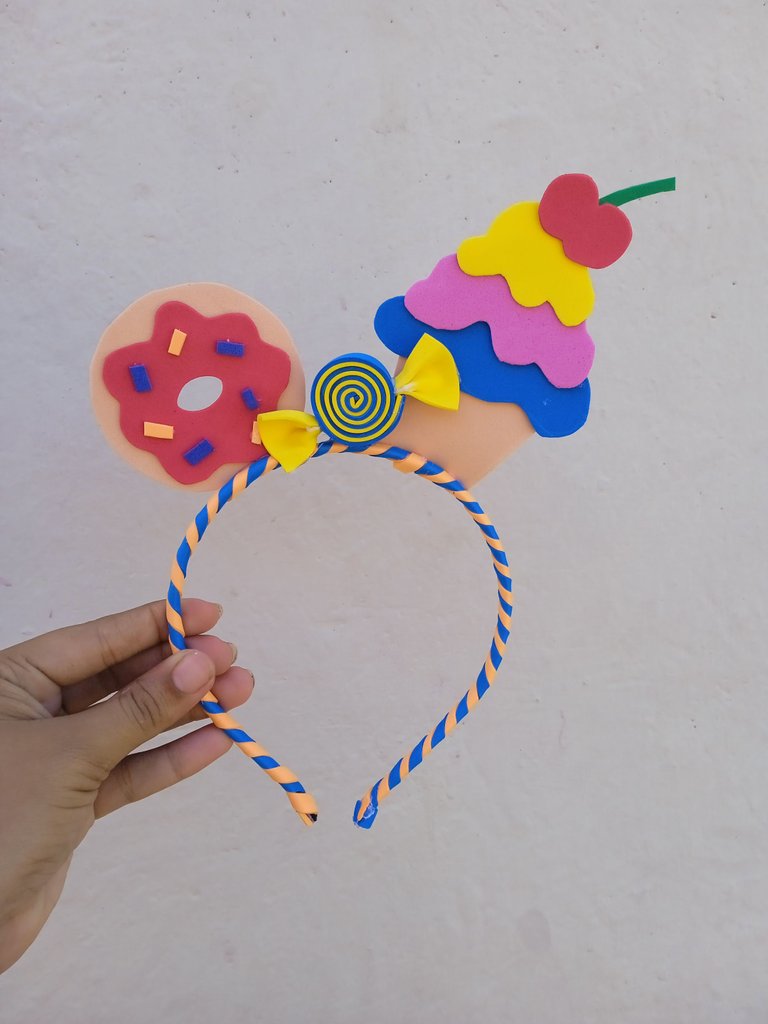
Hola buen día mis apreciados amigos , espero que se encuentren bien , les quiero compartir una manualidad que realice ,y quiero decirles que este será mi nuevo emprendimiento , realizar cintillos para princesas , este cintillo lo decore inspirado en dulces y caramelos con colores vivos y llamativos
Hello good morning my dear friends, I hope you are well, I want to share a craft I made, and I want to tell you that this will be my new venture, make headbands for princesses, this headband I decorate inspired by candy and sweets with bright colors and flashy.
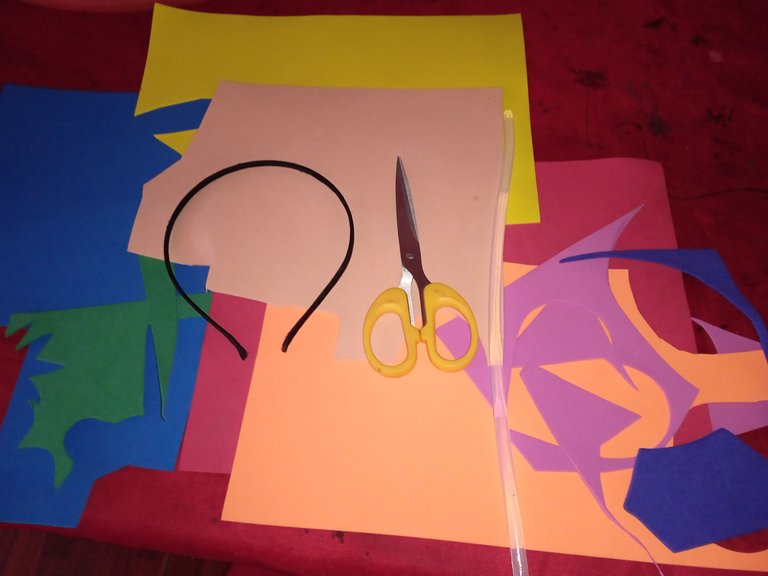
Materiales que utilice para mí cintillo:
-Foamis
-Cintillo para decorar
-Tijera
-Silicon
Materials I used for my headband:
-Foamis
-Cintillo to decorate
-Scissors
-Silicon
A continuación los pasos:
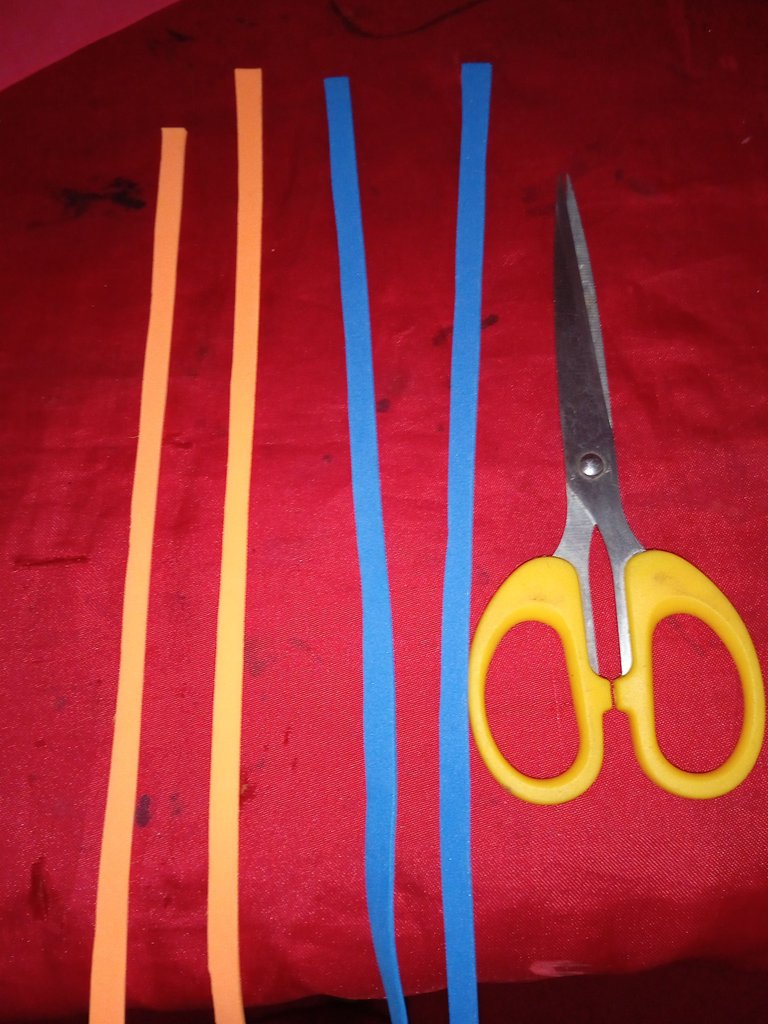
Iniciaremos con la decoración del cintillo , me base en los caramelos masticables que son larguito de colores , para eso recorte dos tiras color azul y dos color naranja
Here are the steps:
Let's start with the decoration of the headband, I based it on the chewy candies that are colorful, for that I cut two strips of blue and two strips of orange.
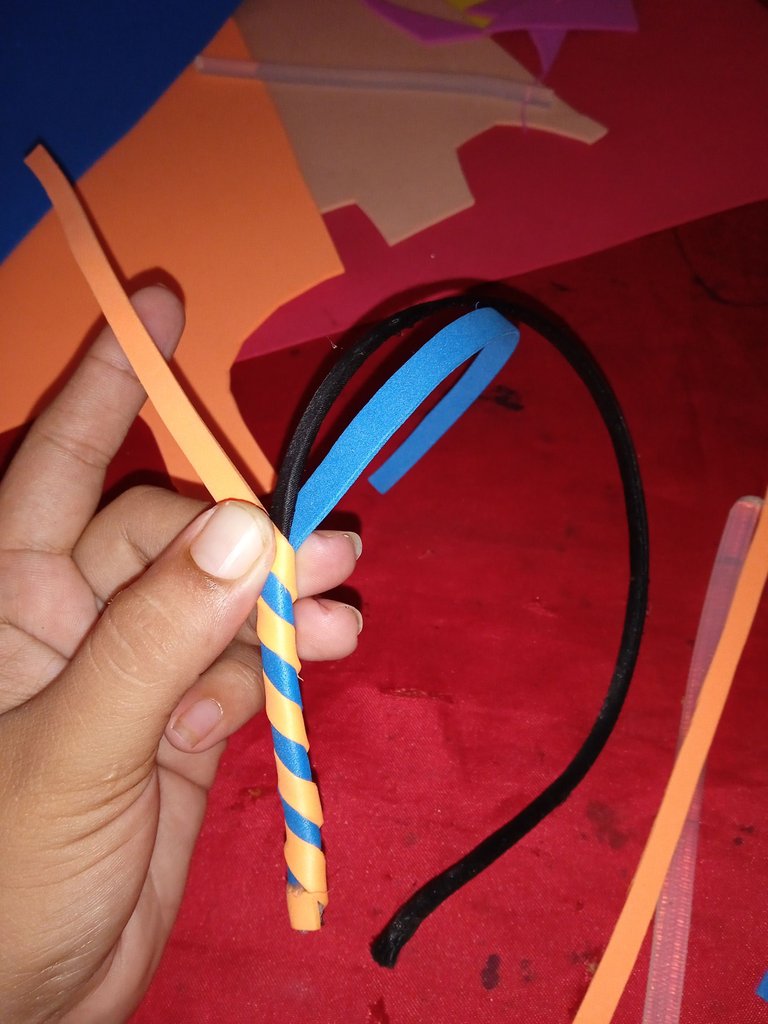
Luego continuaremos forrando el cintillo ,colocamos los dos colores juntos y iniciamos forrando primero el color naranja ,luego continuamos enrollando y entre metiendo los colores para que parezca el caramelo de barrita comestible
Then we will continue lining the headband, place the two colors together and start lining the orange color first, then continue rolling and tucking in the colors to make it look like an edible candy bar.
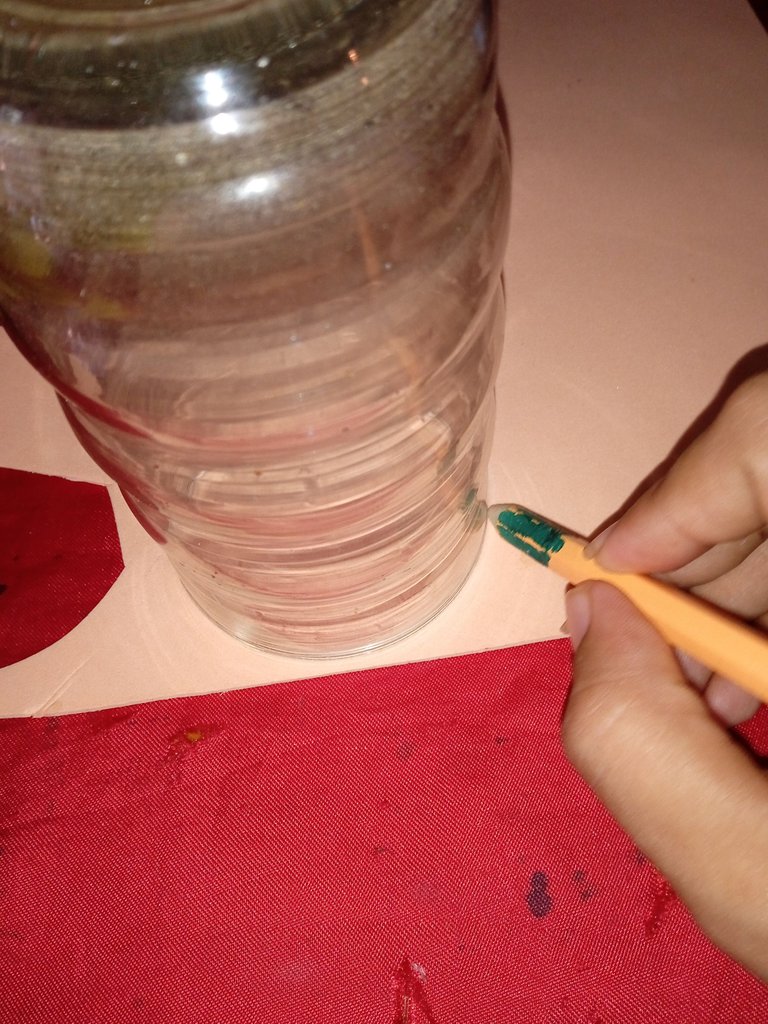
Una vez que forre mí cintillo ,continúe con la decoración ,con la ayuda de un vaso ,realice un círculo para hacer más adelante una dona
Once you have lined my headband, continue with the decoration, with the help of a glass, make a circle to make a donut later on.
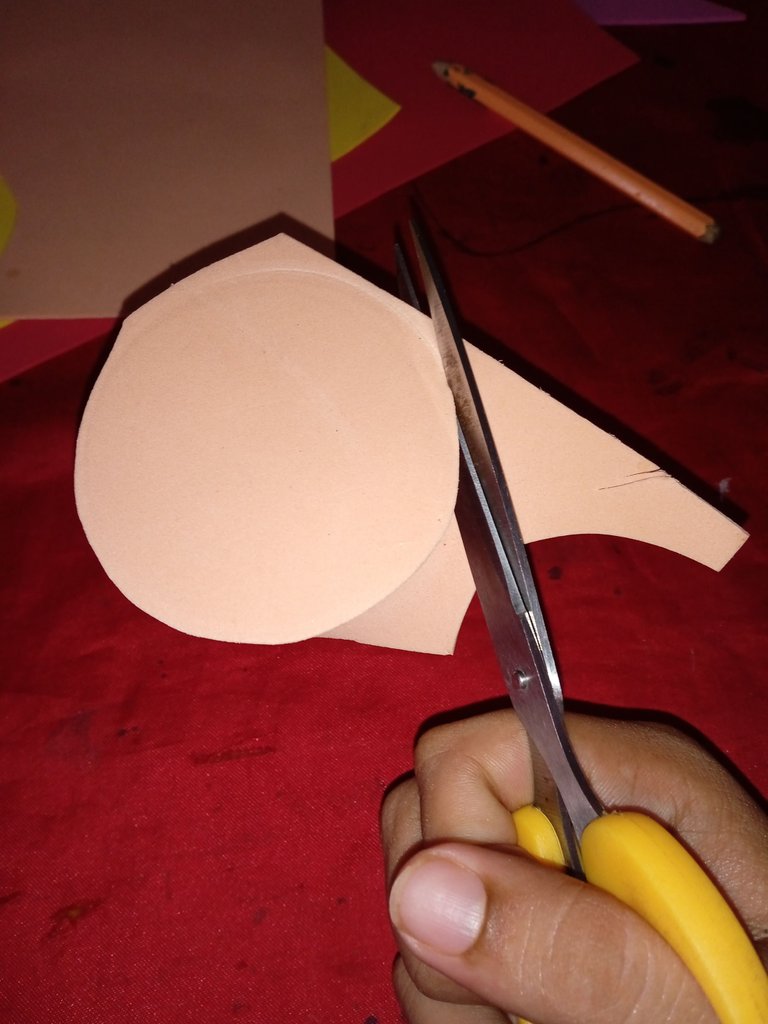
Una vez que culminemos de marcar el círculo ,continuaremos recortando lo con la ayuda de nuestra tijera , una vez que saquemos el círculo en el centro de la dona sacamos un círculo más pequeño
Once we finish marking the circle, we will continue cutting it with the help of our scissors, once we remove the circle in the center of the donut we will remove a smaller circle.
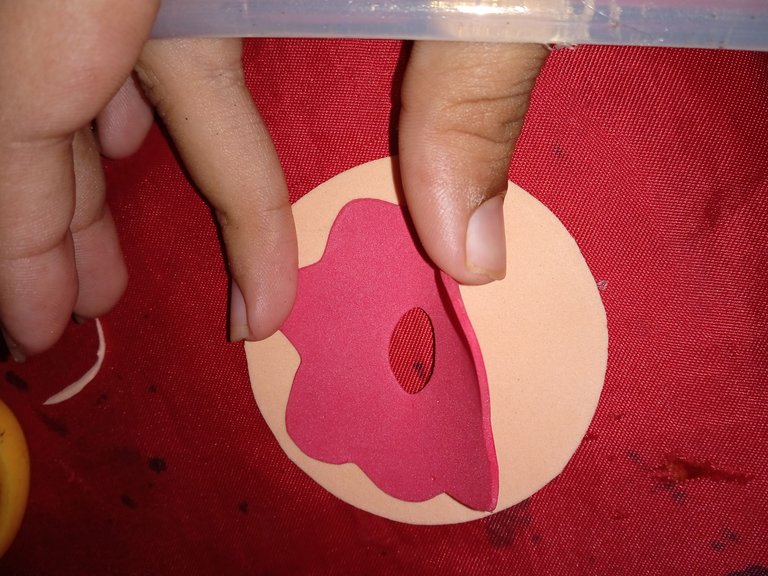
Ahora continuaremos con sacar la crema o el melado de la dona ,para eso utilice el foamis color rojo y le realice unas forma en los bordes para que parezca una rica crema
Now we will continue with removing the cream or honeydew from the doughnut, for that we will use the red foamis and make some shapes on the edges to make it look like a rich cream.

Luego continúe pegando en todo el centro de la dona la crema , ojo la crema debe ser más pequeña que la dona para que se pueda apreciar que es una dona
Then continue gluing the cream around the center of the doughnut, the cream should be smaller than the doughnut so that it can be seen that it is a doughnut.
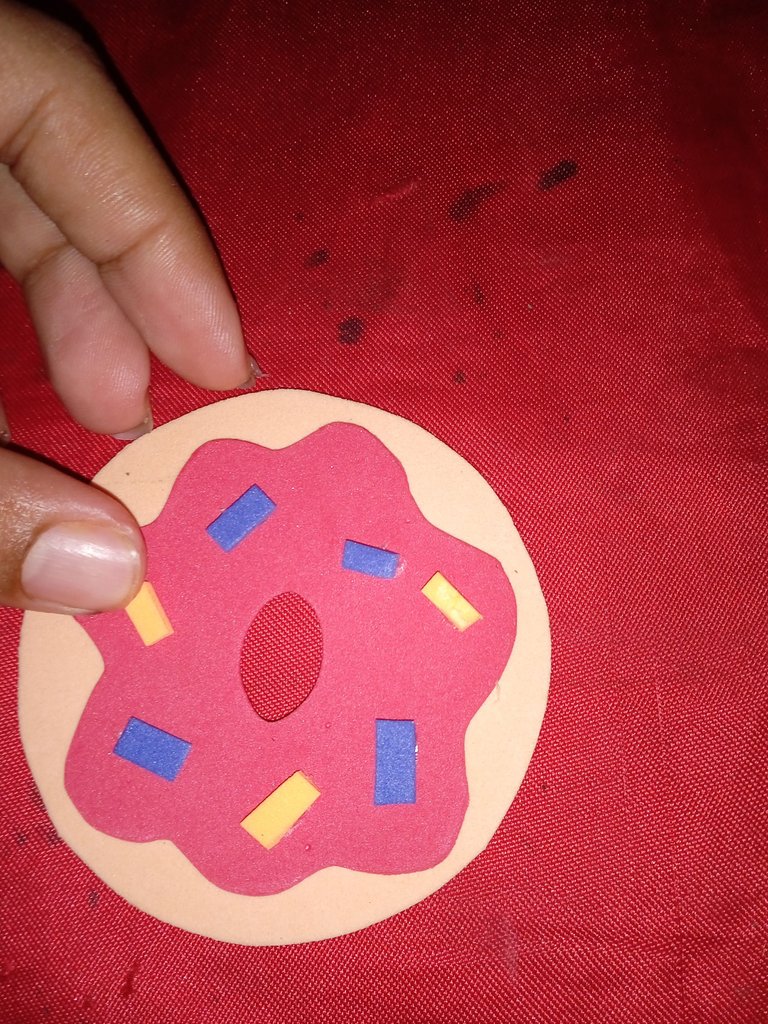
Luego encima de la crema de la dona pegue unas tiras de foamis para que parezca que son lluvias de colores comestibles
Then, on top of the doughnut cream, glue some strips of foamis to make it look like edible colored rains.
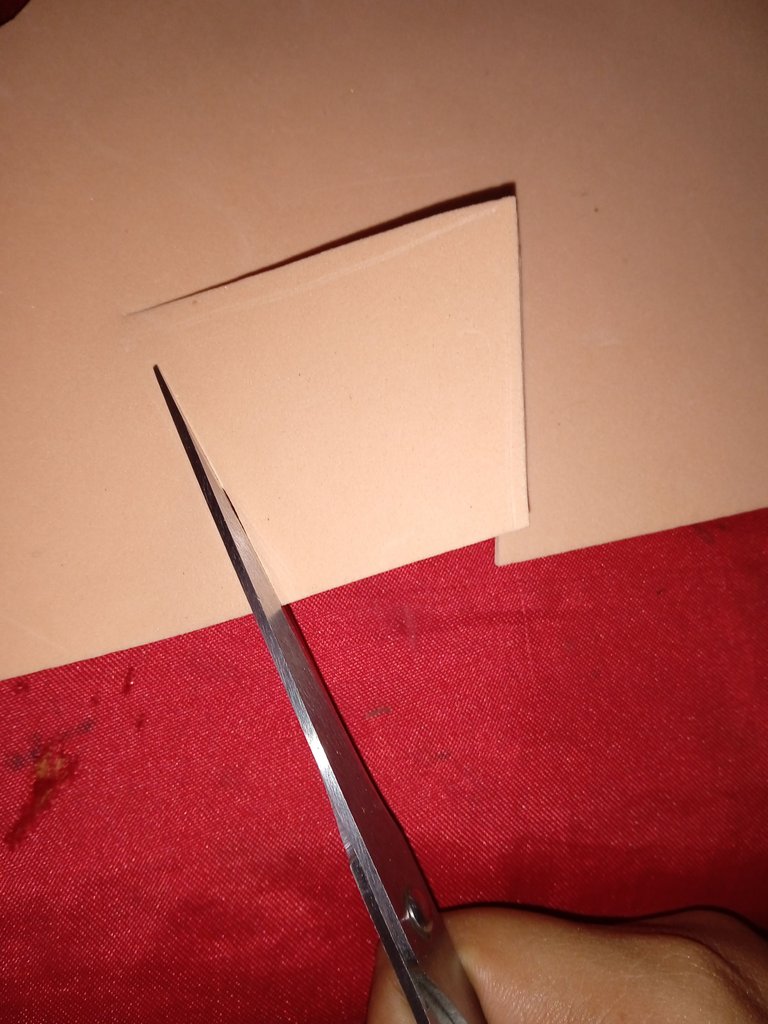
Ahora iniciaré realizando un ponquesito , recorte la base del ponqué con el mismo color de la dona
Then, on top of the doughnut cream, glue some strips of foamis to make it look like edible colored rains.
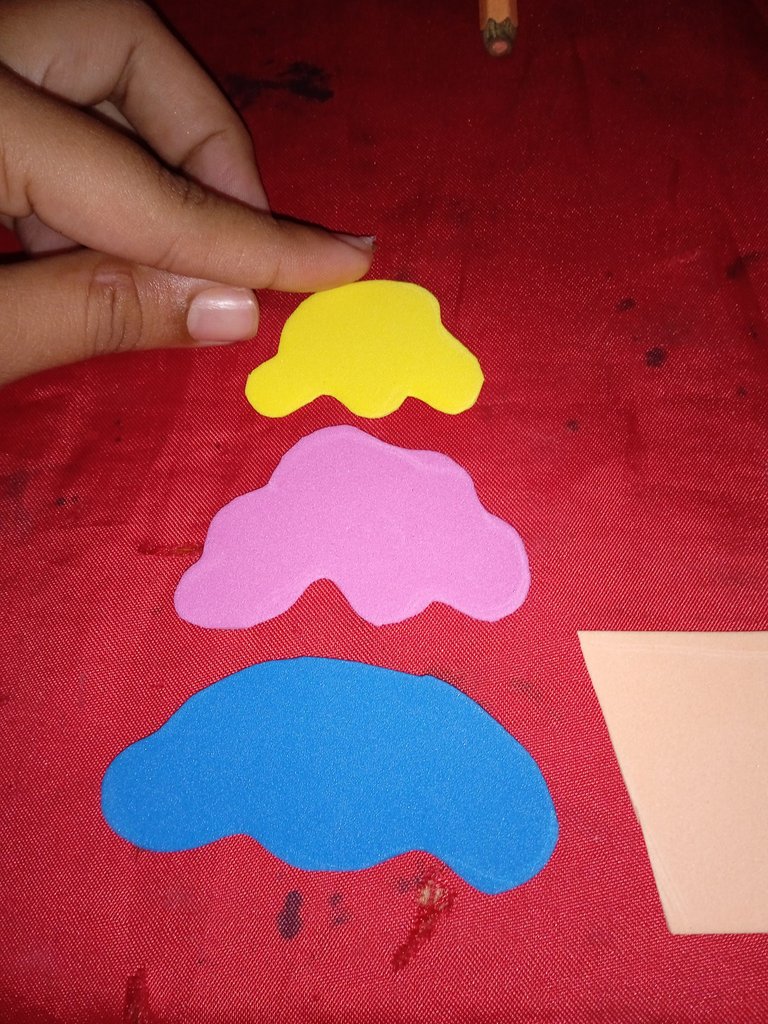
Luego continúe recortando tres tipo de crema con colores diferentes ,para decorar el ponqué ,utilice azul ,rosado y amarillo
Then continue cutting out three types of cream with different colors, to decorate the cake, use blue, pink and yellow.
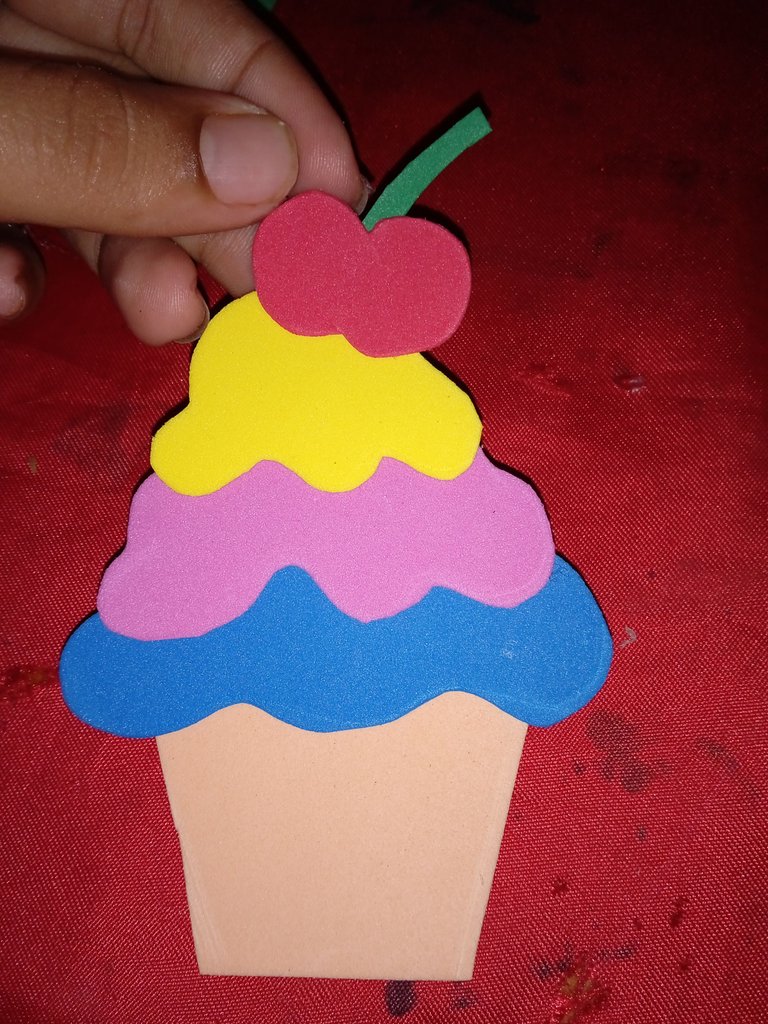
Luego continúe pegando al ponque las tres cremas , primero pegue la crema azul,luego el color rosa y por último el color amarillo ,encima de la crema amarilla pegue una cereza
Then continue pasting the three creams to the cake, first paste the blue cream, then the pink color and finally the yellow color, paste a cherry on top of the yellow cream.
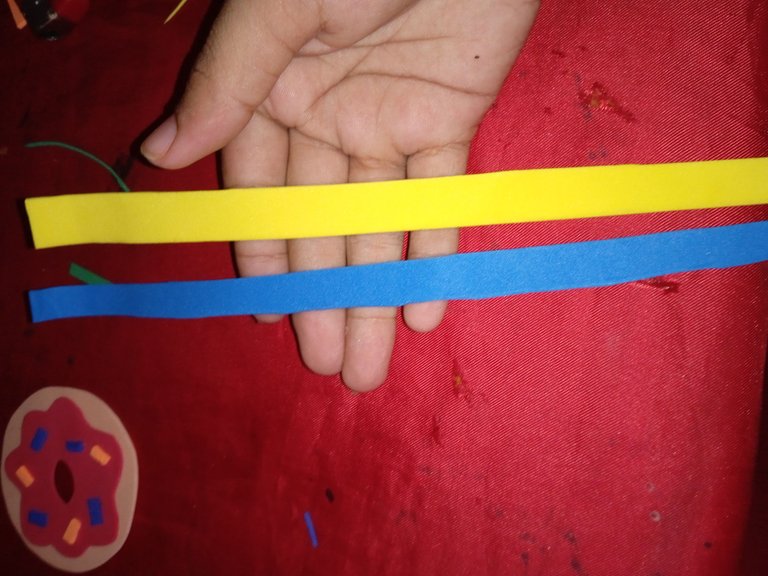
Finalmente realice un caramelo ,para eso utilizaremos dos tiras con tonos distintos , recorte una azul y una amarillo
Finally, make a candy, for that we will use two strips with different tones, cut a blue and a yellow one.
Tomamos las tiras,las juntamos ,y comenzamos a enrollar ambas , formando un pequeño círculo pero con dos tonalidades
We take the strips, put them together, and start to roll them both, forming a small circle but with two shades.
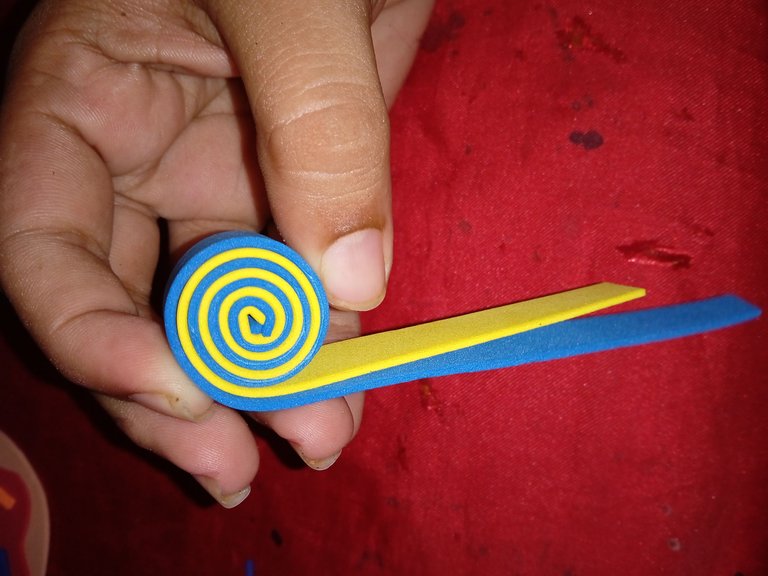
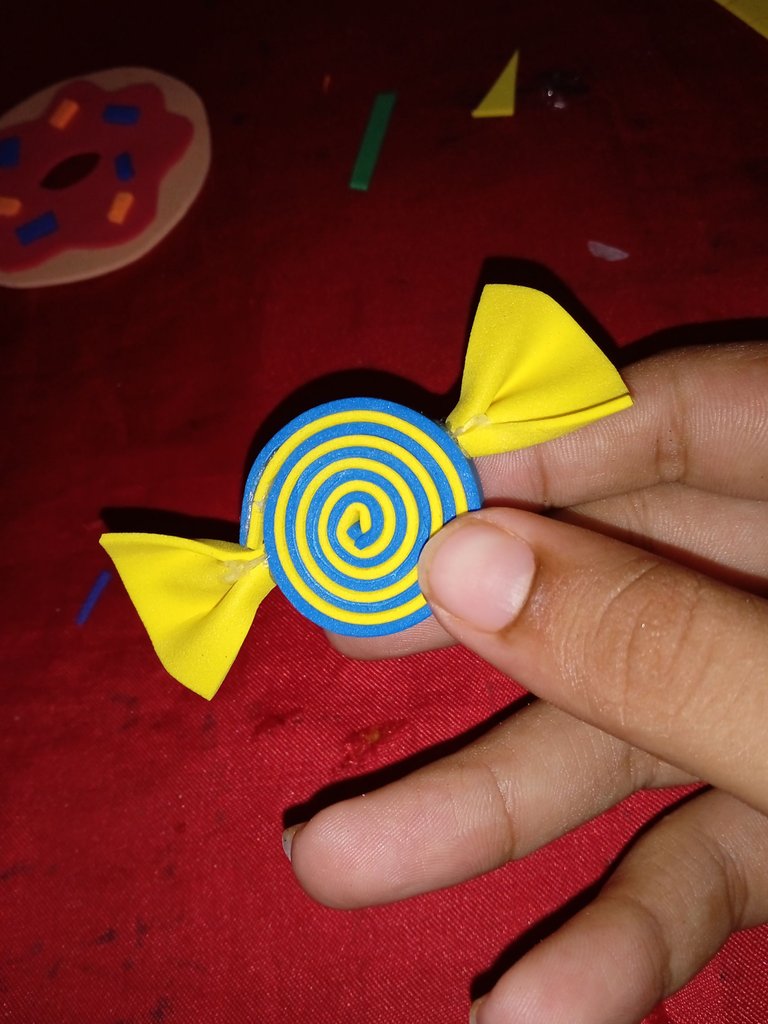
Luego realice dos pequeños abanicos para hacer la forma de la bolsa del caramelo ,una vez que los realice ambos los pegue a los lados
Then I made two small fans to make the shape of the candy bag, once I made them both I glued them to the sides.
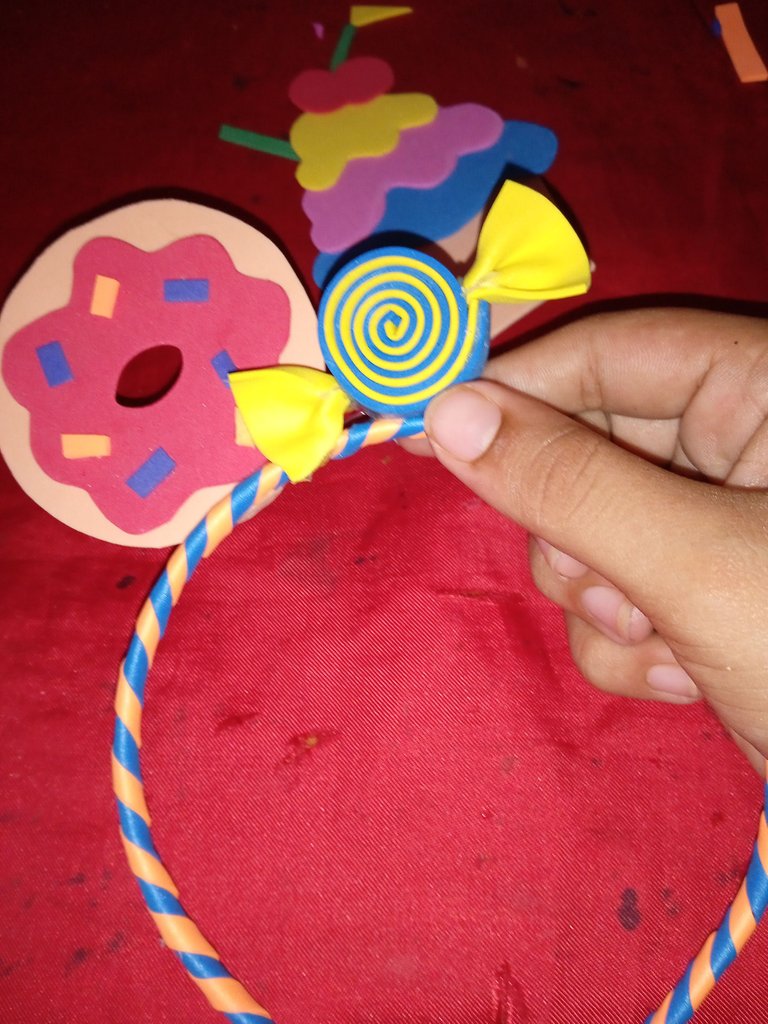
Una vez que termine de realizar ,la dona,el Carmelo y el ponquesito ,continúe pegando los en la parte de arriba del cintillo en todo el centro ,uno al lado del otro
Once you have finished making the donut, the Carmelo and the poncho, continue gluing them to the top of the headband in the center, one next to the other.
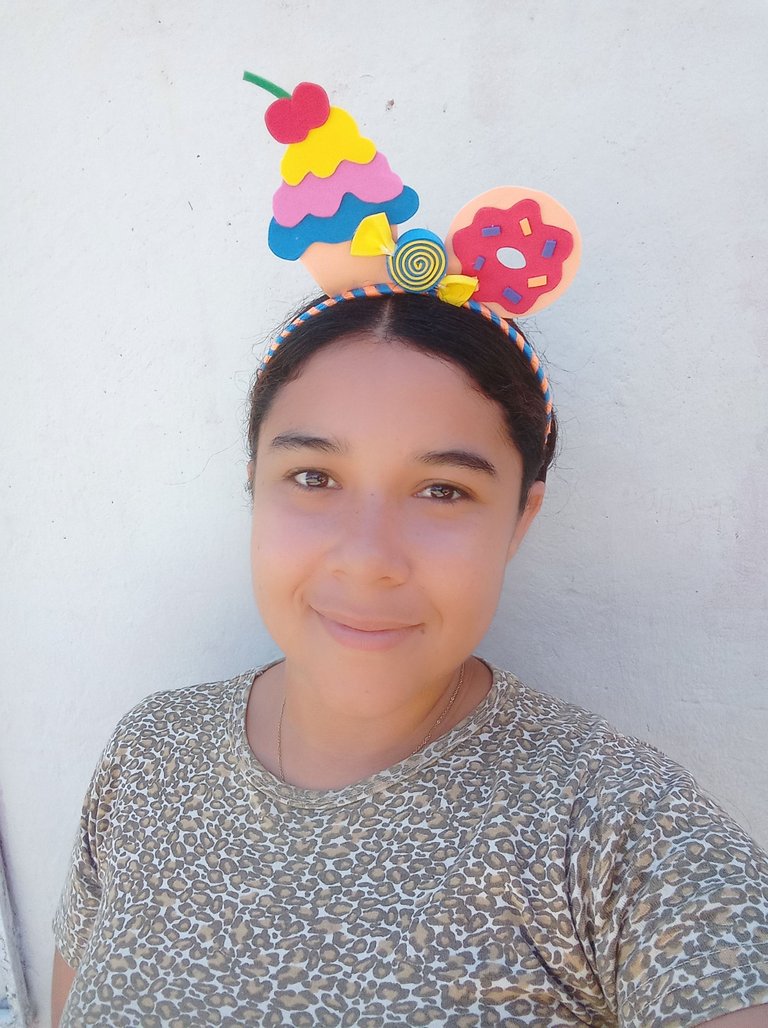
De este modo culmine mi lindo cintillo de golosinas , tomé las fotos con mi Redmi 9C y traduci mis textos con el traductor DeepL
So I finished my nice candy band, I took the pictures with my Redmi 9C and I translated my texts with the translator DeepL
Que bello quedó. Voy a tratar de hacerle así a hillary 😘😊
Gracias mana
Muy hermoso te quedo ese cintillo.
Gracias amiga
Muy lindo amiga @jorgelissanchez
Gracias amiga