Bienvenidos Queridos Amantes de la Artes Manuales
Welcome Dear Manual Arts Lovers
Saludos queridos amigos amantes de las manualidades, siempre es un placer regresar con ustedes para compartir mis creaciones. Lo que les enseñaré a realizar hoy les aseguro que podrá sacarlos de un apuro como lo hizo conmigo para darle un toque lindo, delicado y glamoroso a otra manualidad. Les cuento… se tratan de unas plumas de fantasía que realicé para elaborarle un tocado a mi hija menos realizadas con cinta de raso, resulta que, con la finalización del año escolar, vienen los cierres de proyectos.
Greetings dear friends who love crafts, it is always a pleasure to come back to share my creations with you. I assure you that what I am going to show you how to make today will get you out of trouble as it did for me to give a nice, delicate and glamorous touch to another craft. Let me tell you... these are some fancy feathers that I made to make a headdress for my daughter but made with satin ribbon, it turns out that, with the end of the school year, come the closing of projects.

Los cierres de proyectos normalmente son actos culturales y por supuesto los niños deben vestirse de acuerdo a la época que representen o con trajes típicos. En esta ocasión las maestras de mi pequeña, decidieron evocar tiempos de la Venezuela de antaño, donde las damas de la época, danzaban con bellos y voluminosos vestidos. Adornaban sus cabelleras con hermosos y llamativos tocados que incluían plumas y tul, allí es donde entra el proyecto que hoy les traigo, de elaborar nuestras propias plumas de fantasía.
Project closings are usually cultural events and of course the children should dress according to the era they represent or in typical costumes. On this occasion, my little girl's teachers decided to evoke the times of the Venezuela of yesteryear, where the ladies of the time danced with beautiful and voluminous dresses. They adorned their hair with beautiful and striking headdresses that included feathers and tulle, that's where the project I bring you today comes in, to make our own fancy feathers.

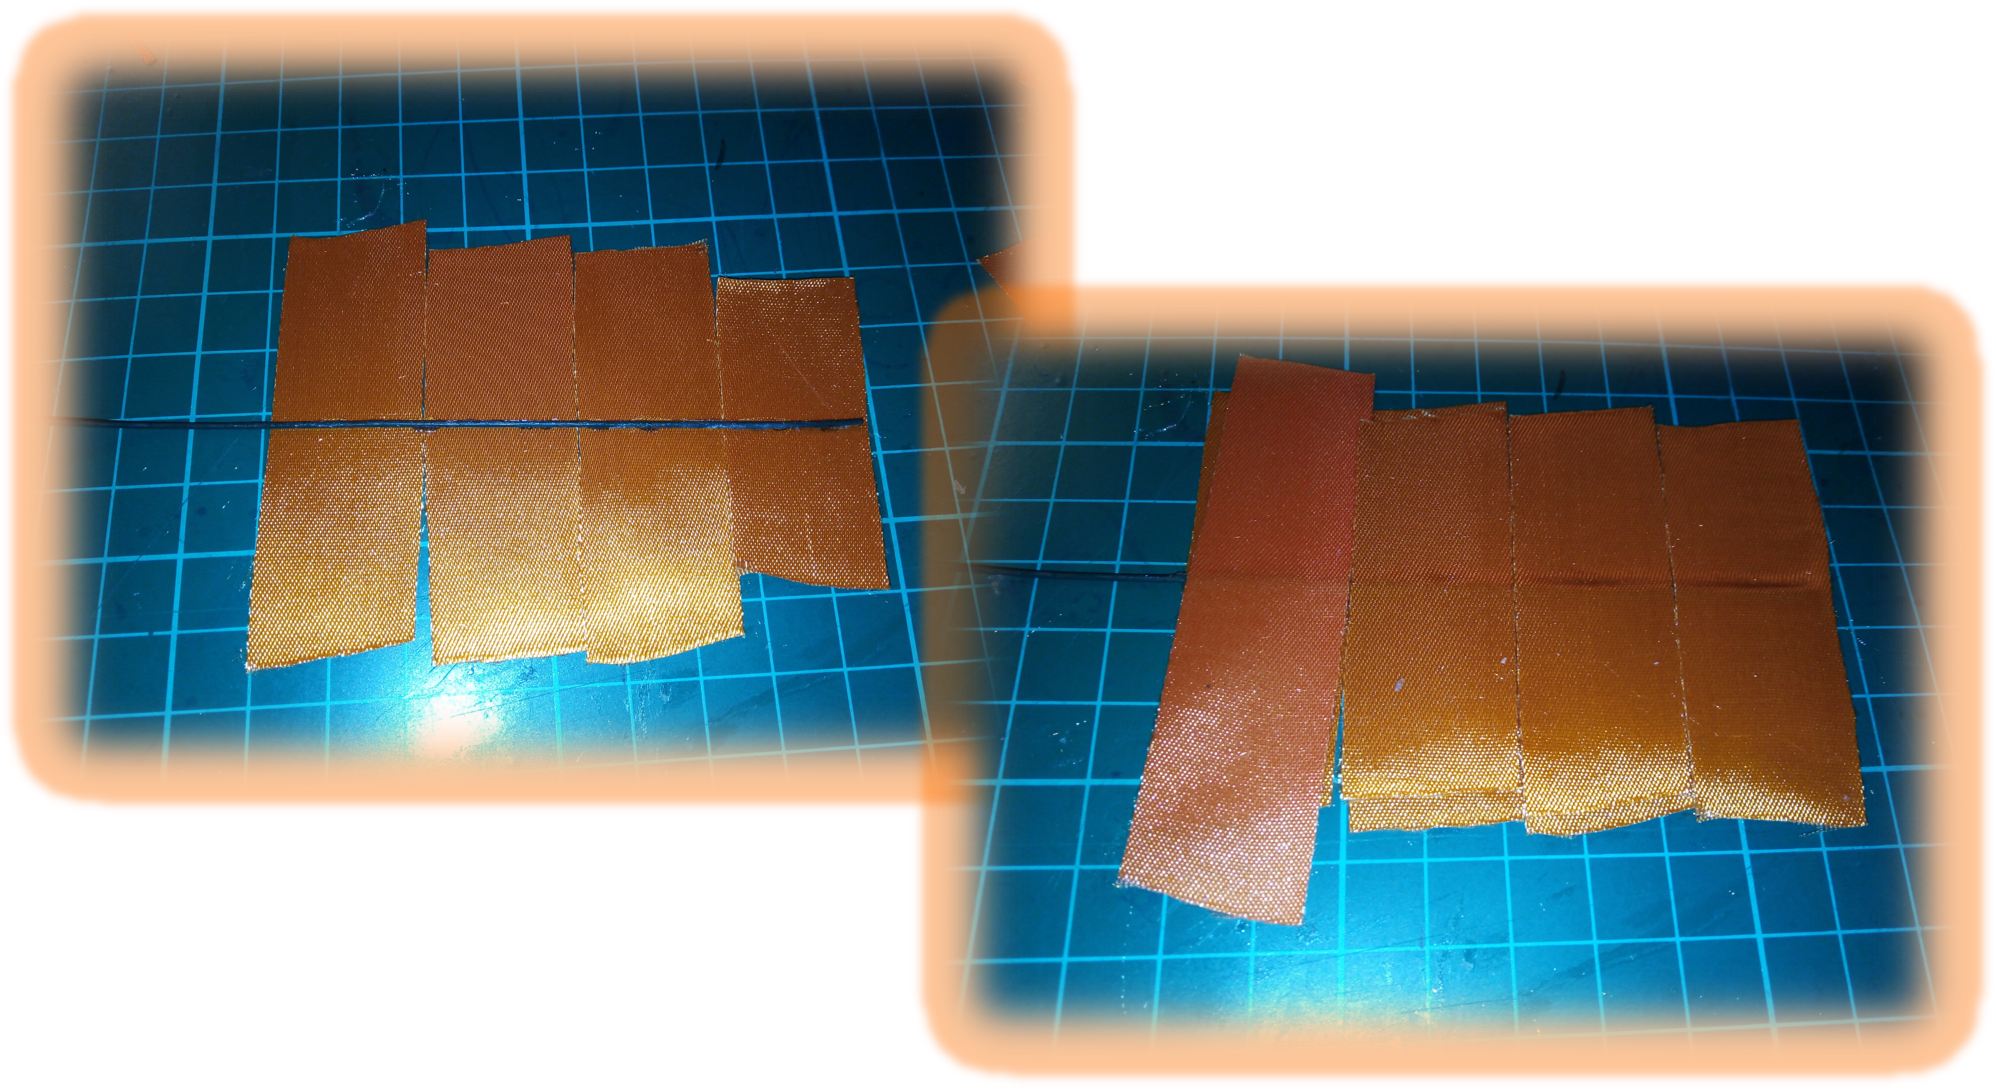
Se que en la mercería se le pueden encontrar, pero durante mi recorrido las que encontré realmente no fueron de mi agrado. Siendo sincera, no permitían dar la sensación de movimiento que buscaba eran como muy rígidas, es más, parecían plumas de gallinas pintadas de colores brillantes, jajaja. En definitiva, no me gustaron, por eso, decidí buscar una opción en internet y por suerte la encontré, y, además, resulto mucho más económica. Como pueden ver en la imagen anterior solo necesitamos cinta de raso, preferiblemente de 2,5 cm de ancho o más, unos trozos de alambre floral del largo que necesiten sus plumas y silicón líquido. Opcionalmente, para colocarle un toque especial, le coloque en el centro de las plumas una perla corrida, pequeñita, no usen una muy grande porque se verá muy rustico.
I know that in the haberdashery you can find them, but during my tour the ones I found were not really to my liking. To be honest, they did not give the feeling of movement that I was looking for, they were too rigid, in fact, they looked like chicken feathers painted in bright colors, hahaha. In short, I did not like them, so I decided to look for an option on the internet and luckily, I found it, and it was also much cheaper. As you can see in the image above, we only need satin ribbon, preferably 2.5 cm wide or more, a few pieces of floral wire of the length needed for your feathers and liquid silicone. Optionally, to add a special touch, I put a small pearl in the center of the feathers, do not use a very big one because it will look very rustic.
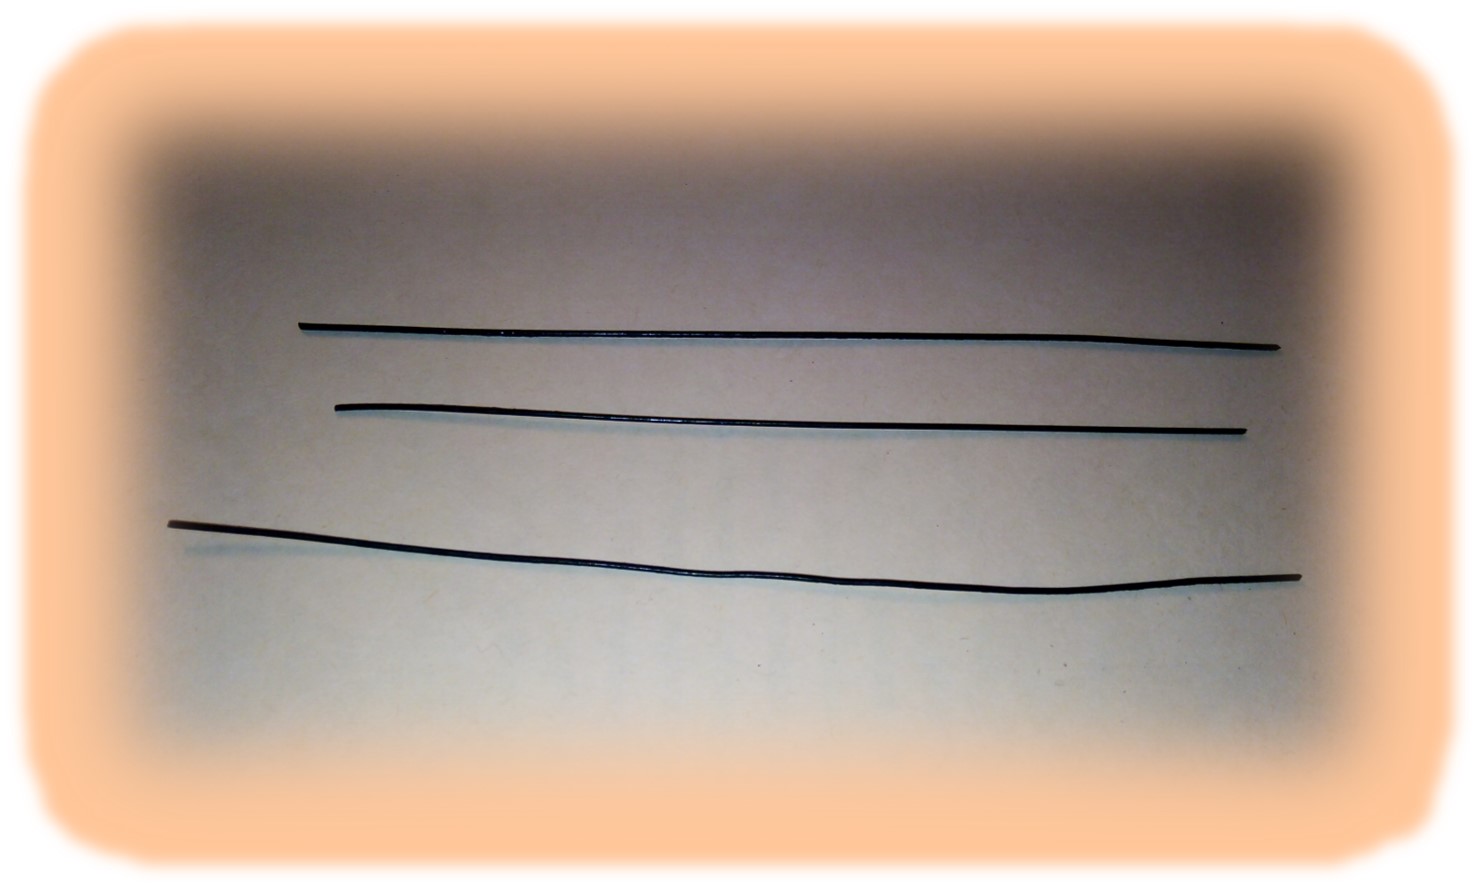
Ahora sí, empiezo con la explicación de como hacer estas hermosas plumas de fantasía, lo primero que debemos hacer es cortar el alambre floral. El largo y grosor del alambre dependerá del tamaño de nuestras plumas, en mi caso como eran para el tocado de una niña de 6 años, no necesitaba que las plumas fueran muy grandes. Así que corte algunos de 5 cm, 10 cm, e incluso unos de 15 cm.
Now yes, I start with the explanation of how to make these beautiful fantasy feathers, the first thing we must do is to cut the floral wire. The length and thickness of the wire will depend on the size of our feathers, in my case as they were for the headdress of a 6-year-old girl, I didn't need the feathers to be very big. So, I cut some of 5 cm, 10 cm, and even some of 15 cm.
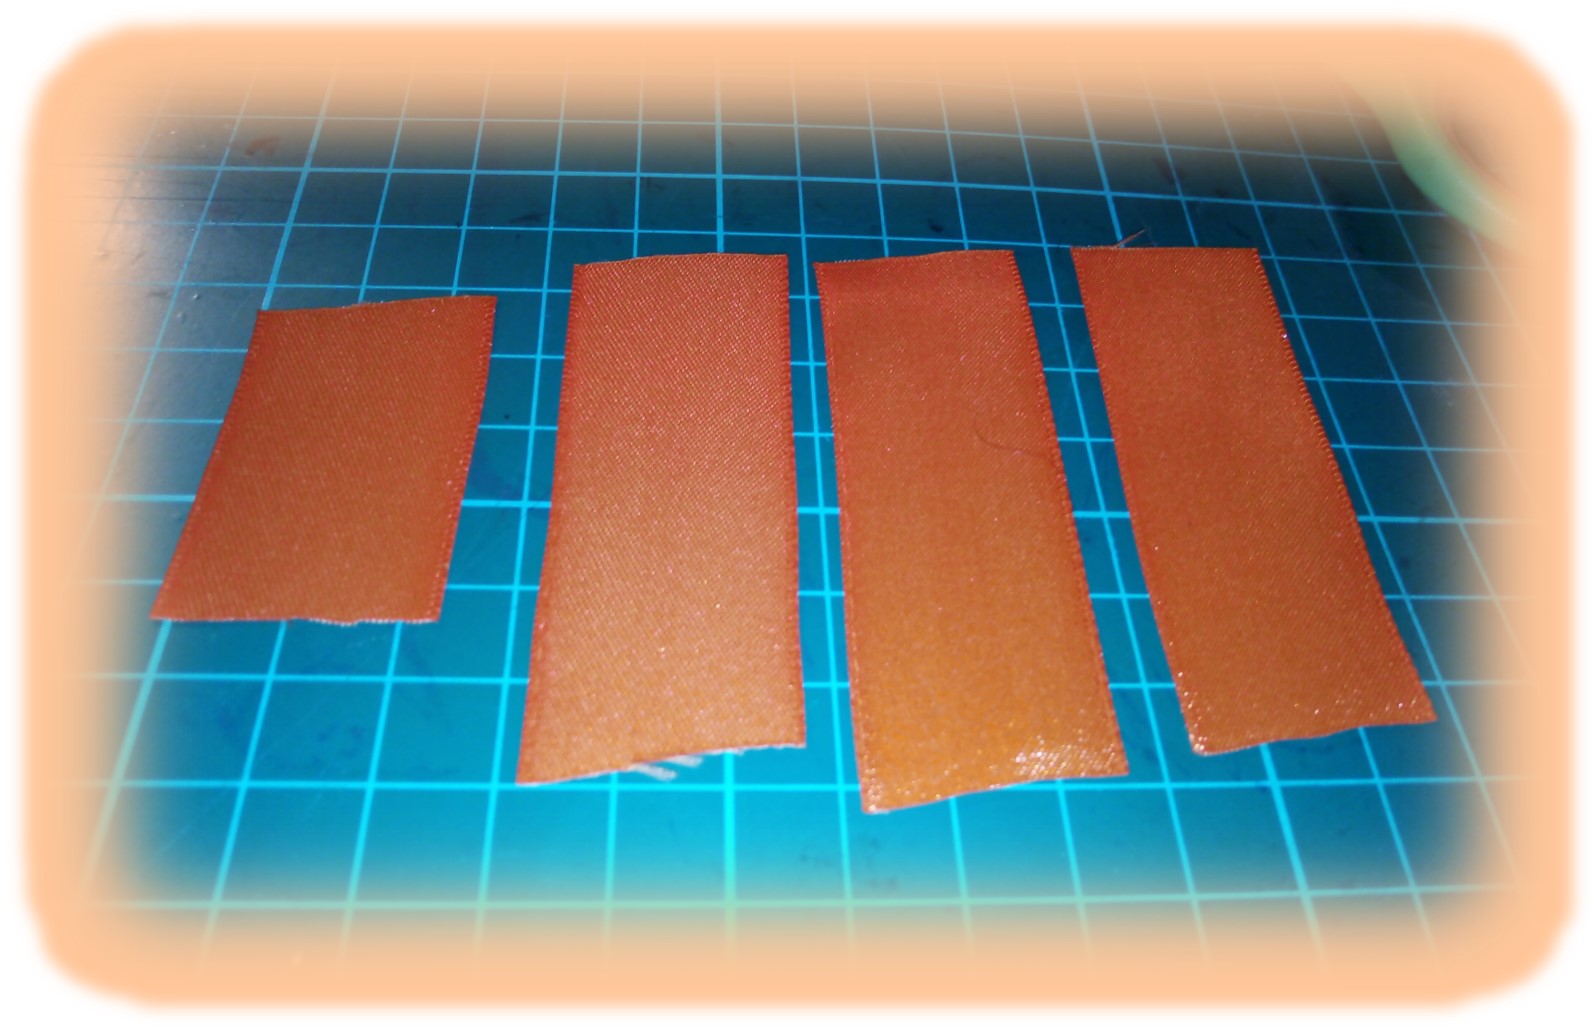
Seguidamente, toco en cortar la cinta, para ello dependiendo del largo del alambre fui cortando trozos de cinta, recordando que se debe dejar un tramo del alambre libre, es decir, no se le debe colocar cinta. Un detalle importante, una vez que definan el número de trozos que necesitan, deben duplicar la cantidad, porque necesitaran colocar dos pedazos, frente con frente.
*Next, I cut the ribbon, depending on the length of the wire, I cut pieces of ribbon, remembering to leave a section of the wire free, that is, no ribbon should be placed on it. An important detail, once you define the number of pieces you need, you must double the amount, because you will need to place two pieces, facing each other.
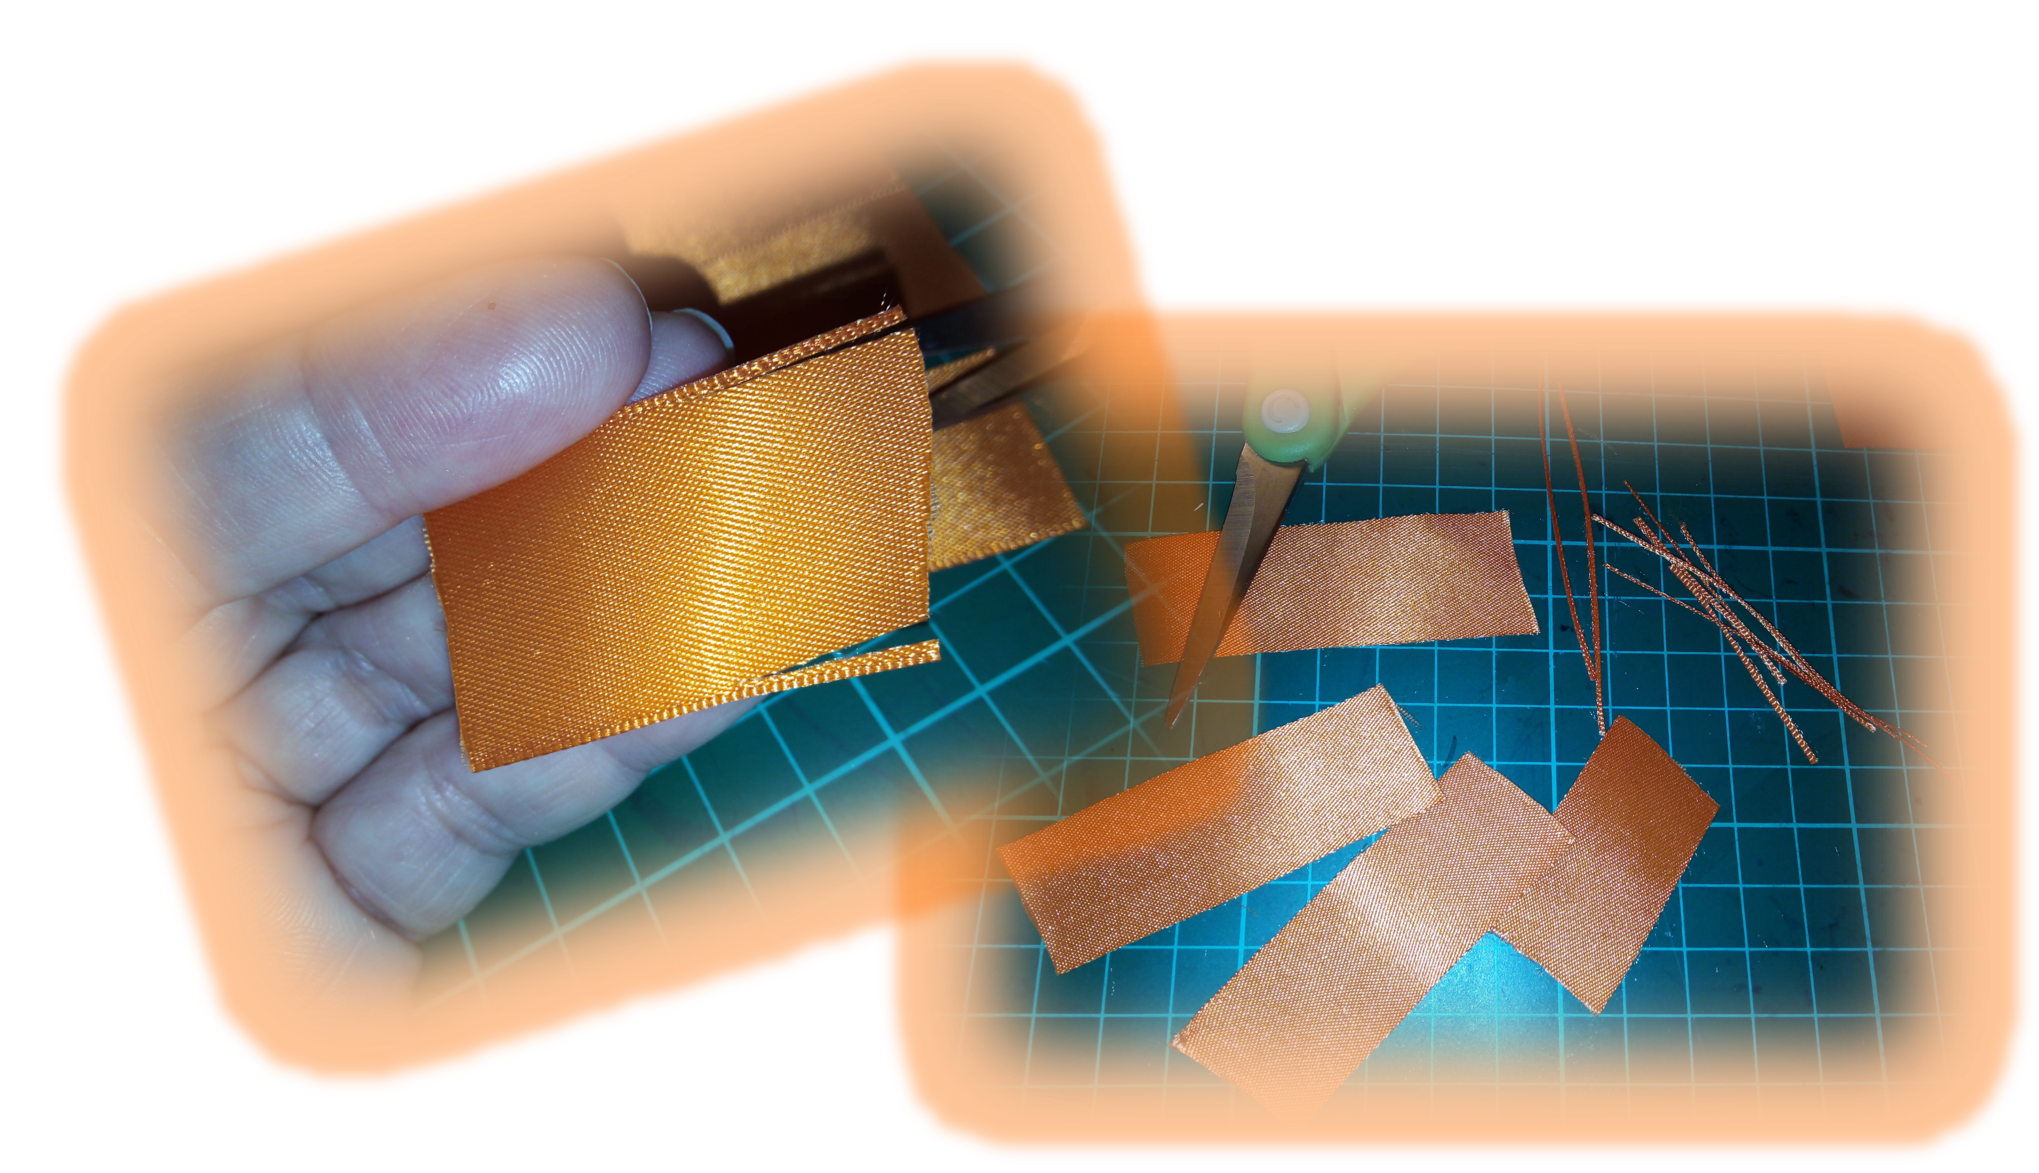
Después tomé cada uno de los tozos de cinta y le corté los bordes de ambos lados, esto es lo que permitirá poder deshilachar la cinta posteriormente.
I then took each of the pieces of ribbon and cut off the edges on both sides, this is what will allow the ribbon to be frayed later.
Ya con los elementos necesarios llego el momento de armar nuestra pluma, para ello, le colocaremos pegamento de silicón frio a lo largo del alambre donde se pegará la cinta. Iremos colocando cada uno de los trozos. Una vez terminemos, volvemos a colocar silicón en la parte del alambre que nos quedó sobre la cinta y colocaremos el resto de los trozos de cinta. Con esto cubrimos el alambre y además las plumas se verán más voluminosa y por supuesto, más hermosas
Now that we have the necessary elements, it is time to assemble our feather. To do so, we will place cold silicone glue along the wire where the ribbon will be glued. We will place each one of the pieces. Once we finish, we put silicone glue again on the part of the wire that was left over the ribbon and we will place the rest of the pieces of ribbon. With this we cover the wire and also the feathers will look more voluminous and of course, more beautiful.
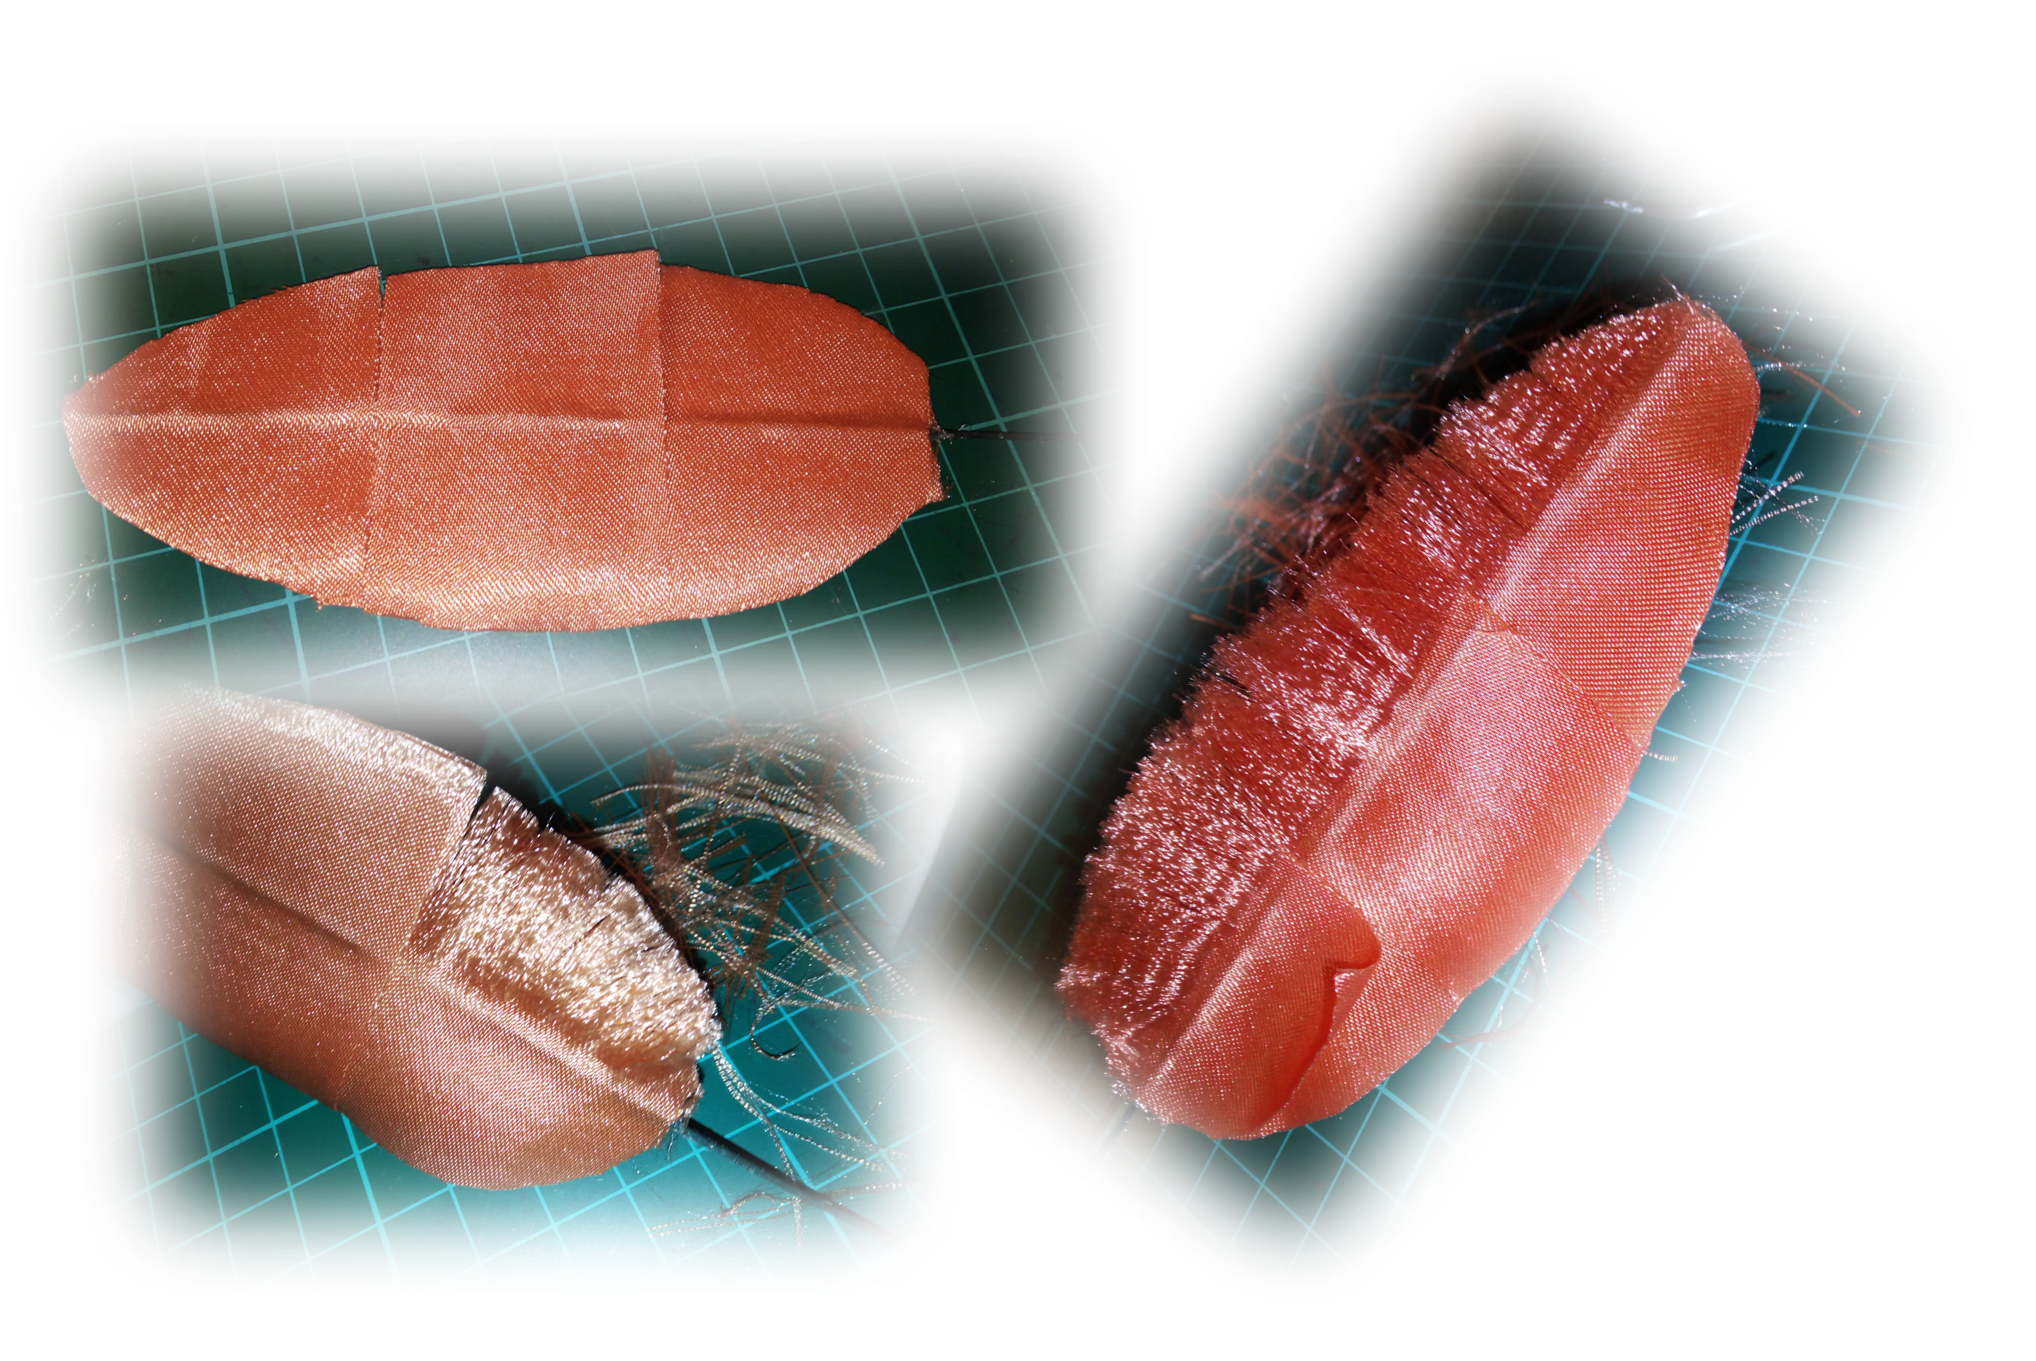
Lo que resta es ir deshilachando la cinta para que tome el aspecto de los pelitos de las plumas y una vez que terminemos ya nuestras plumas estarán lista para colocarlas donde queramos.
What remains is to fray the ribbon so that it takes the appearance of the feather hairs and once we finish our feathers will be ready to place them wherever we want.

Como pueden ver quedan súper hermosas, estas plumas de fantasía y lo mejor, es como tienen el alambre en el centro, nos permite que le demos la forma que queramos.
As you can see, these fantasy feathers are super beautiful, and the best thing is that they have the wire in the center, allowing us to give them the shape we want.
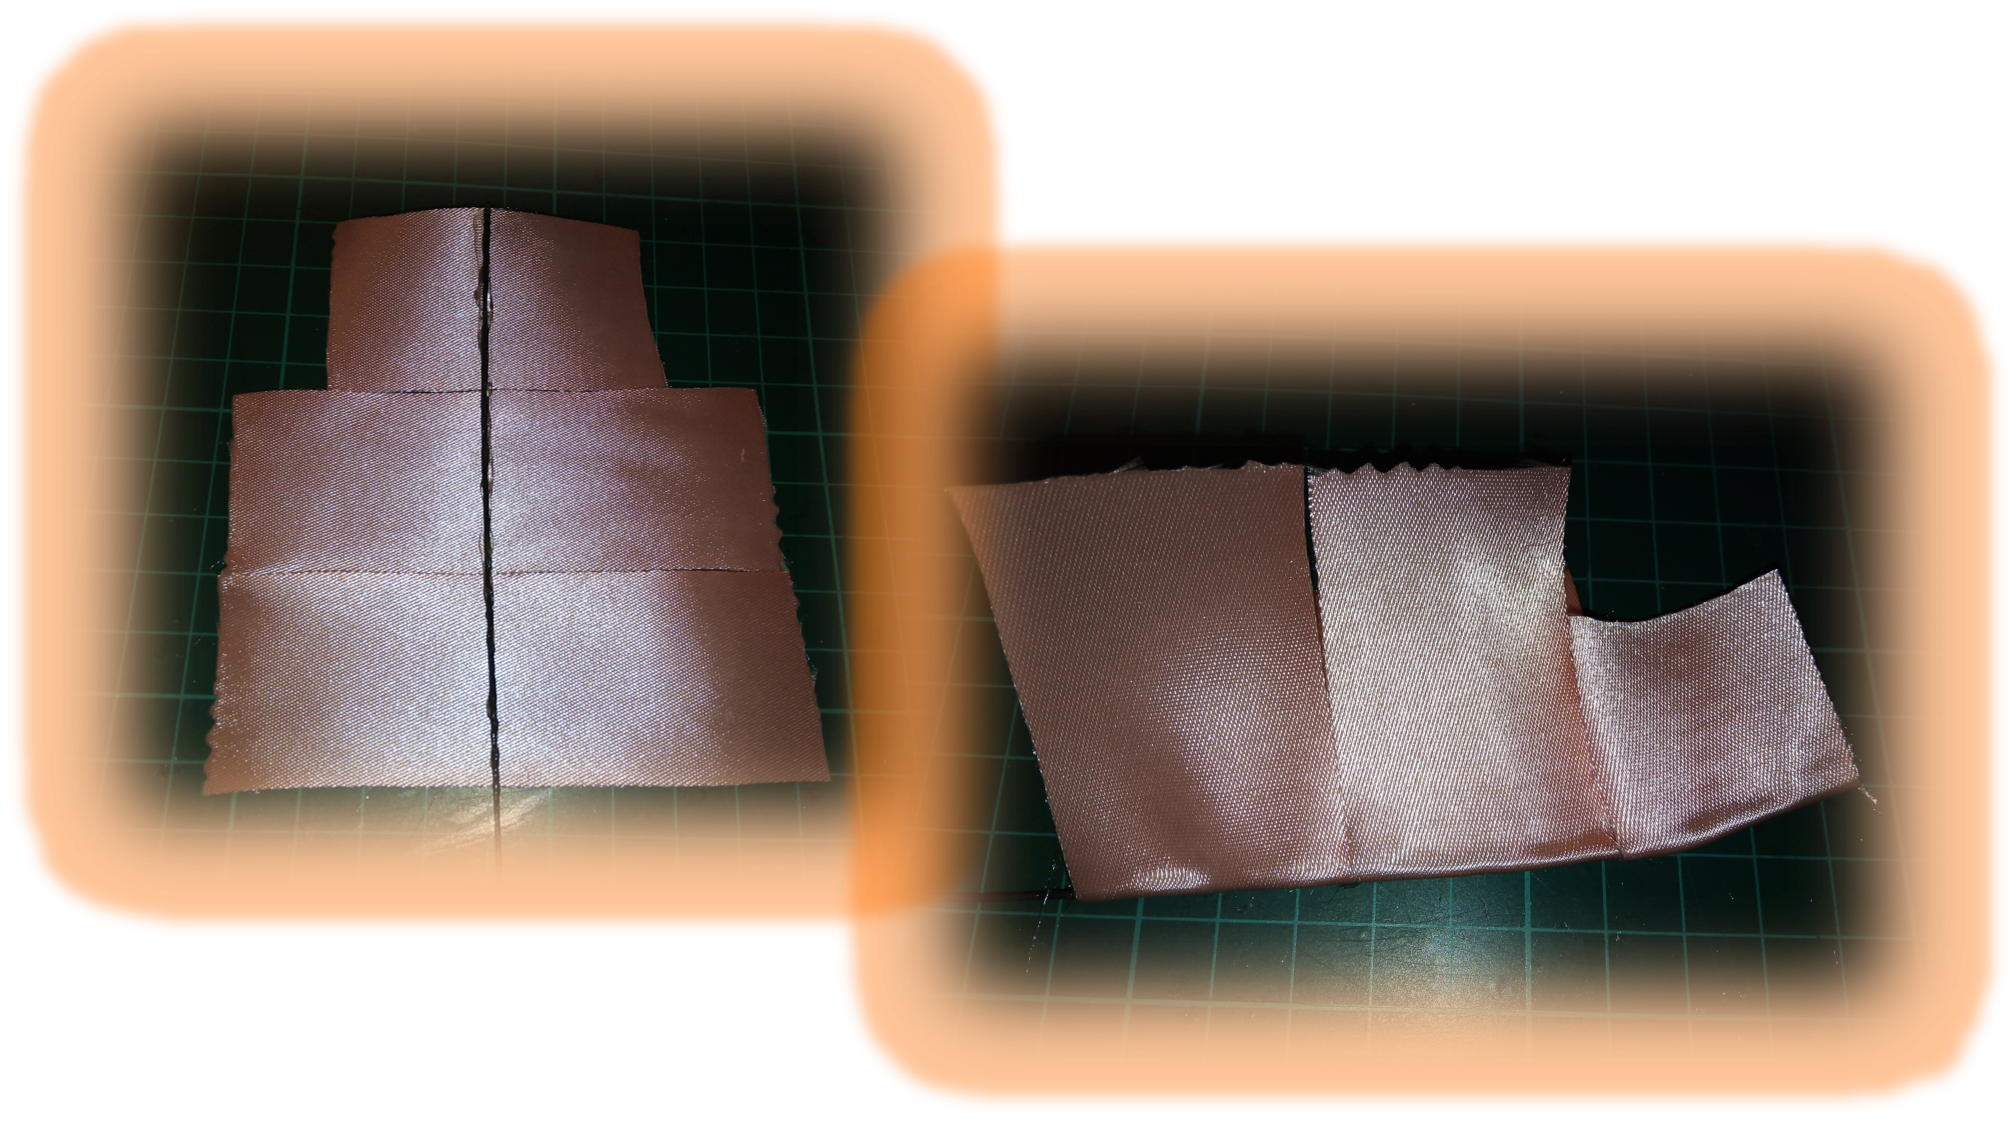
Ahora, les mostraré otro modelo de pluma que también realice, este es aún más sencillo de hacer, en este caso necesitamos solo la mitad de la cinta. Primero, contamos los trozos de cinta que necesitamos y le retiramos los bordes para podes deshilachar la cinta. Igual que en caso anterior, colocamos pegamento en el alambre, y pegamos de un lado los pedazos de cinta. Aquí empieza la diferencia, en lugar de cubrir con otros trozos de cinta, doblamos por el medio los que ya tenemos pegado, envolviendo el alambre, como pueden ver en la imagen.
Now, I will show you another feather model that I also made, this one is even easier to make, in this case we only need half of the ribbon. First, we count the pieces of ribbon we need and remove the edges so we can fray the ribbon. As in the previous case, we put glue on the wire, and glue the pieces of ribbon on one side. Here begins the difference, instead of covering with other pieces of tape, we fold in the middle the ones we have already glued, wrapping the wire, as you can see in the image.

Luego de esto, solo resta deshilachar la cinta y nuestro nuevo estilo de pluma estará listo.
After this, all that remains is to fray the ribbon and our new pen style is ready.

¿Qué les pareció este proyecto?, es súper sencillo, ¿verdad? y lo mejor, nos puede sacar de un apuro cuando necesitemos usar plumas, en alguna de nuestras manualidades. Y lo más maravilloso de estas plumas, es que las podemos hacer del tamaño que queramos, y como tienen el alambre, la podemos ajustar a distintas posiciones, dando a nuestro proyecto sensación de movimiento. Bueno amigos, no me queda más que despedirme deseándoles muchas bendiciones para ustedes y los suyos. Hasta la próxima.
What did you think of this project, it's super simple, isn't it, and the best part is that it can get us out of a jam when we need to use feathers in some of our crafts. And the most wonderful thing about these feathers, is that we can make them in any size we want, and as they have the wire, we can adjust them to different positions, giving our project a sense of movement. Well friends, I just have to say goodbye wishing you and yours many blessings. See you next time.
Contenido y fotografías de mi propiedad intelectual
Información Técnica
| Cámara | Pentax * istDL |
|---|---|
| Lente | * Pentax 18-55 |
| Iluminación | Luz Natural |
| Locación | Barcelona, Estado Anzoátegui, Venezuela |
Content and photographs of my intellectual property
Technical information
| Camera | Pentax * istDL |
|---|---|
| Lens | * Pentax 18-55 |
| Lighting | Natural Light |
| Location | Barcelona, Anzoátegui State, Venezuela |

The rewards earned on this comment will go directly to the people( @francyrios75 ) sharing the post on Twitter as long as they are registered with @poshtoken. Sign up at https://hiveposh.com.
Muy lindo este trabajo. Me encantó. Gracias por compartir tu técnica.
🎆🎇🎉🎊🌧️💐✨🌾🌱🌹🌙🌿🍃🥀⚡🌺☘️🍀🌈🌷⭐🪴🌵🌸🌟💮🌴🌳💫☀️💮☔🌲🌳🌍🌌🌠☄️🏵️🐝🌻🌼🍄🐞🦋💙☕💜🍍🎆🎇🎉🎊
Gracias a ti por la visita, y realmente, me alegra mucho que te haya gustado. Te envío bendiciones para ti y los tuyos.
Woow me encantó el resultado, es cierto las plumas que venden en algunas mercerías parecen de gallina🤣🤣, quedaron hermosas no conocía está opción, gracias por compartir!!
Jajaja, pensé que solo a mi me parecía. Me alegra mucho que te gustara el resultado, muchísimas gracias por tu visita. Saludos y bendiciones para ti y los tuyos.