
Hello dear friends, good evening to you all. The spirit of Christmas is approaching, and today I want to share with you a drawing I made this afternoon. Unlike most of my drawings, here I've returned to my roots; that is, I've used only graphite pencil and charcoal. Here I've used only the most basic drawing tools: a pencil and good shading. Shading alone can create an optical effect that impresses the eye. In this short drawing, I want to show you the encounter of two lovers, of whom we can only see shadows through a pane of glass that hides them from the outside world. Let's begin!
Hola queridos amigos, tengan todos y todas unas buenas noches, ya se acerca el Espíritu de la Navidad, y hoy quiero compartir con ustedes un dibujo que hice esta tarde. A diferencia de la mayoría de mis dibujos aquí he vuelto a mis raíces, es decir, he utilizado solamente lápiz de grafito y carboncillo, aquí solo he utilizado lo más básico del dibujo, a saber un lápiz y también un buen sombreado, solo con el sombreado se puede lograr un efecto óptico que impresione a la vista. En este dibujo breve quiero mostrarles el encuentro de dos amantes de los cuales solo podemos ver sombras a través de un vidrio que los oculta del mundo exterior. Comencemos!

 |  | |
|---|---|---|
 |  |
The first and most important step is choosing the paper. Sometimes you can use letter paper or school cardstock, but if you want to get the most out of your pencils, you should use a good background material. So I've used watercolor paper, which is thicker and allows you to easily erase or leave the strokes in, depending on your intention. Here, I'm not using guidelines or anything like that, not even a silhouette to fill in. I'm going straight to the form, only shading with a very light pencil. I've used a 4H, the best for making very light strokes and lines. Here, I'll be using a chiaroscuro technique, working with different pencils.
Como primer paso muy importante es elegir el papel, a veces se puede utilizar papel de carta o cartulina escolar, pero si queremos aprovechar bien nuestros lápices debemos utilizar un buen material de fondo así que yo he utilizado cartulina para acuarela, que es más gruesa y los trazos pueden borrarse fácilmente dejarse, todo depende del propósito. Aquí no hago líneas guías ni nada por el estilo, ni siquiera una silueta la cual rellenar, aquí voy directamente con la forma, solamente sombreando con un lápiz muy tenue, he utilizado un 4H, el mejor para hacer trazos y líneas muy claras, aquí utilizare una técnica de claroscuro trabajando con diferentes lápices.
 |  | |
|---|---|---|
 |  |
So, little by little, in this first step, I start by sketching the girl's shadow with the lightest pencil, then drawing both hands resting on the glass. With this pencil, I'll just sketch the shape, and then with the darker pencils, I'll create the shading effect so the shadow gradually gains volume and contrast.
Así poco a poco en este primer paso lo que hago es hacer la sombra de la chica con el lápiz mas claro, dibujando luego ambas manos apoyadas en el vidrio. Con este lápiz solo haría la forma para luego con los otros lápices más oscuros hacer el efecto de sombreado para que la sombra vaya tomando volumen y contraste.
 |  | |
|---|---|---|
 |  |
Now I'll move on to the second step, which is using a 2B and a 3B pencil. The shadow of the silhouette isn't uniform across the entire drawing; there are areas where it's very dark while in others it's barely perceptible. This is due to the effect of the light. So, with both pencils, I create that effect, aided by the type of pencil point and the pressure I apply to the paper. If I want the shadow to be more pronounced, I simply press harder.
Ahora voy con el segundo paso que es utilizar un lápiz 2B y uno 3B, la sombra de la silueta no es uniforme en todo el dibujo, sino que hay partes donde es muy oscura mientras que en otras partes apenas es perceptible, esto es por el efecto de la luz. Así que con ambos lápices me encargo de hacer ese efecto, todo ayudado por el tipo de punta del lápiz y por cuanta presión se ejerza en el papel, si quiero que la sombra se marque mucho, pues lo que hago es presionar más fuerte.
 |  | |
|---|---|---|
 |  |
Now it's the charcoal's turn. This is the final tone, as there's no darker shade. With the charcoal, I shade the center of all the shapes. For example, in the head, the darkest part is the center, while the edges gradually lighten. I apply this same principle to the entire drawing. Once that's done, I start blending with a brush, and now the drawing has that mysterious, shadowy appearance.
El turno le pertenece ahora al carboncillo, ya aquí es el tono final, ya que un tono más oscuro que este no existe, con el carboncillo lo que hago es sombrear el centro de todas las formas, por ejemplo, en la cabeza, la parte mas sombreada es la del centro mientras que los ordes se van aclarando. Este mismo principio lo voy aplicando en todo el dibujo, una vez hecho, con un pincel comienzo a difuminar y ahora el dibujo obtiene esa apariencia d esombra misteriosa.
 |  | |
|---|---|---|
 |  |
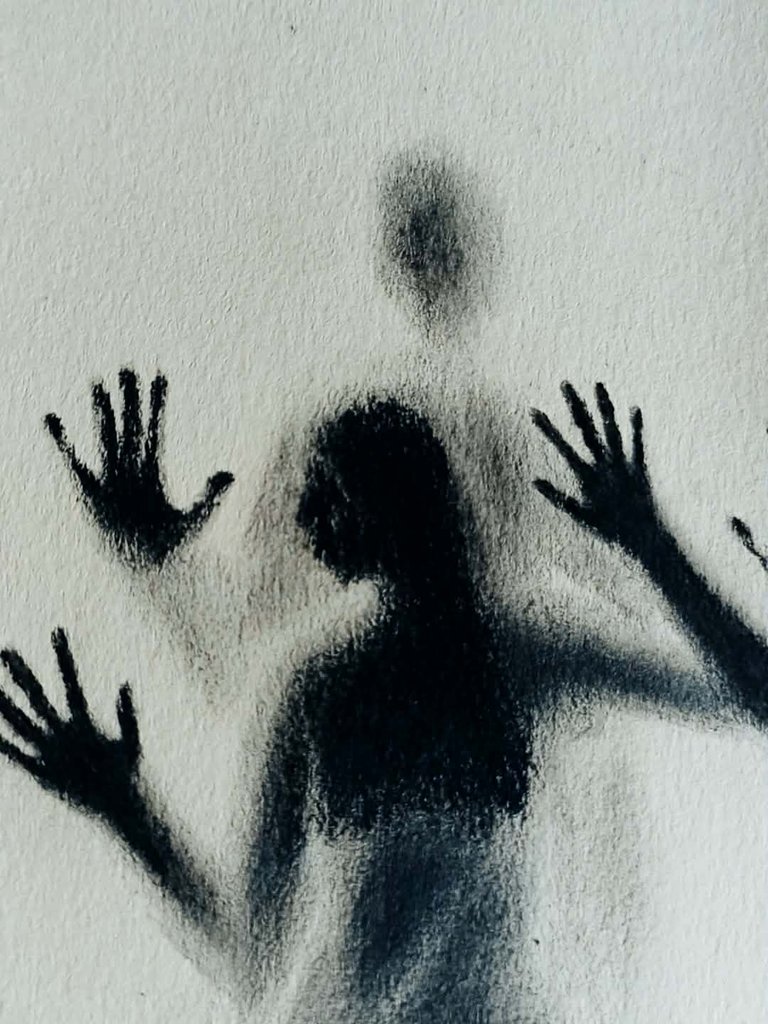
Next up is the mysterious man in the background, where his hands take center stage. The process is almost identical; the only difference is that I focus on the shadow his hands cast, while the rest of his visible body, like his head, is just a shadow that fades like mist. I apply the same process and then blend the entire drawing again with a brush so that the shadow now has more volume.
Luego es el turno del hombre misterioso al fondo de la escena donde sus manos son protagonistas, para hacerlo el proceso es casi igual, la única diferencia es que me concentro en la sombra que proyectan sus manos, mientras el retso de su cuerpo visible, como su cabeza solo es una sombra que se desvanece como la niebla. Aplico todo el mismo proceso y vuelvo a difuminar todo el dibujo con un pincel para que la sombra ahora si tenva mas volumen.


What do you think of the result? Just look at how good results you can achieve with only a pencil; you just need to concentrate and be inspired, and everything else will flow naturally. I really like this illustration because in a world where images sometimes sell a false reality, I prefer it because it only suggests an idea, rather than imposing it or showing it as it is. Instead, it allows our imagination to interpret many things. I hope you liked it. For now, I'll say goodbye and hope to return very soon.
¿Qué les ha parecido el resultado? solo observen que con únicamente lápiz se pueden obtener buenos resultados, solo hay que concentrarse, e inspirarse y todo lo demás fluirá naturalmente hacia su destino. Me gusta mucho esta ilustración, porque en un mundo donde la imagen vende una realidad a veces falsa, me gusta más porque solamente sugiere una idea, y no la impone o se muestra como es, sino que permite a nuestra imaginación interpretar muchas cosas. Espero que les haya gustado, por ahora me despido y espero volver muy pronto.
This post has been shared on Reddit by @dayadam through the HivePosh initiative.
Marav
gracias hermano!
Wowww espectacular 😍
!discovery
Gracias gracias amiga bella <3
This post was shared and voted inside the discord by the curators team of discovery-it
Join our Community and follow our Curation Trail
Discovery-it is also a Witness, vote for us here
Delegate to us for passive income. Check our 80% fee-back Program
This is such an inspiring piece of work, it's wonderful. So much creativity!
selected by @dayadam
El dibujo quedó increíble, hace poco tuve la oportunidad de ver un dibujo hecho con carboncillo de cerca y fue impresionante lo que se puede lograr con el, gracias por compartir 💕