Hola hola amigos creativos de HIVEDIY que la bendición de Dios nos acompañe siempre, en esta ocasión les compartiré un paso a paso para elaborar un hermoso Topper en foami. Mi incursión en este complejo arte fue desde el año 2019 y mis primeros Toppers fueron para familiares o amigos por lo que se puede decir que fueron mis conejillos de indias😁. Fue una aventura y a la vez un gran logro, pues, debido a la alta aceptación decidí empezar a ofrecerlos a mis clientes y estos a su vez recomendando mi trabajo. El que voy a realizar a continuación es para una amiga muy especial que quiero muchísimo, me emociona aún más porque el destino de este topper es llegar a Brasil, anteriormente había realizado un par de toppers que fueron exportados a Estados Unidos, pero siempre es una emoción que tú trabajo traspase las fronteras de tu pais y que sea apreciado. En este proyecto tenemos varios elementos, como la figura principal (Rapunzel), Gaspar(su amigo inseparable), los accesorios que caracterizan la historia de la pelicula, el nombre de la cumpleañera, las flores y aquí vamos...
Hello hello creative friends of HIVEDIY may God's blessing be with us always, this time I will share with you a step by step to make a beautiful Topper in foami. My foray into this complex art was since 2019 and my first Toppers were for family or friends so you can say that they were my guinea pigs😁. It was an adventure and at the same time a great achievement, because, due to the high acceptance I decided to start offering them to my clients and these in turn recommending my work. The one I'm going to make next is for a very special friend that I love very much, I'm even more excited because the destination of this topper is to reach Brazil, previously I had made a couple of toppers that were exported to the United States, but it is always a thrill that your work transcends the borders of your country and that it is appreciated. In this project we have several elements, such as the main figure (Rapunzel), Gaspar (her Ineparable friend), the accessories that characterize the story of the movie, the name of the birthday girl, the flowers and here we go...
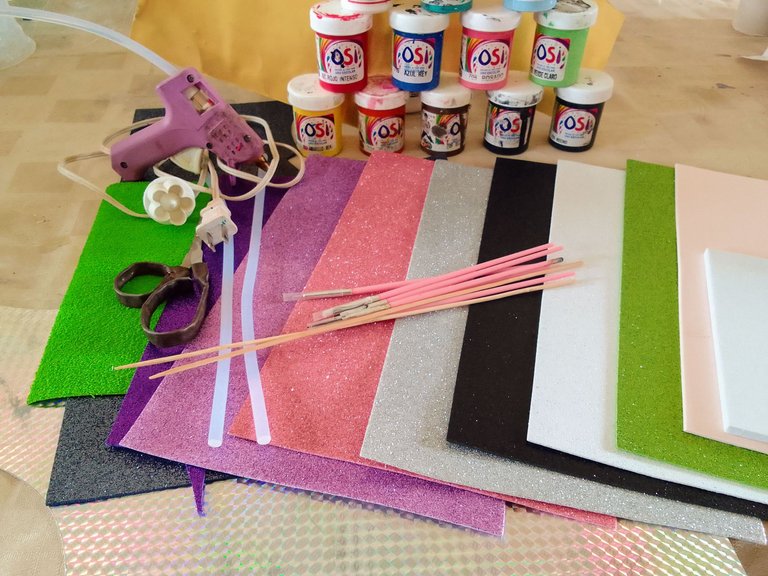
- Foami normal tipo carta: color piel, amarillo, verde y blanco
- Foami escarchado tipo carta: Morado, lila, Rosado, dorado, azul cielo, Blanco, turquesa.
- Foami grueso de 0.5cm de espesor.
- Cartulina metalizada: dorada y plateada holográfica.
- Pinturas al frio: Blanco, verde, negro, marrón, magenta.
- Tijera pequeña.
- Silicón en barra.
- Pistola de silicón.
- Palito de altura.
- Pinceles.
- Regla de circulos.
- Normal Foami letter type: skin color, yellow, green and white.
- Frosted Foami letter type: purple, lilac, pink, gold, sky blue, white, turquoise.
- Thick Foami of 0.5cm thickness.
- Metallized cardboard: gold and silver holographic.
- Cold paints: white, green, black, brown, magenta.
- Small scissors.
- Silicone stick.
- Silicone gun.
- Height stick.
- Brushes.
- Ruler of circles.
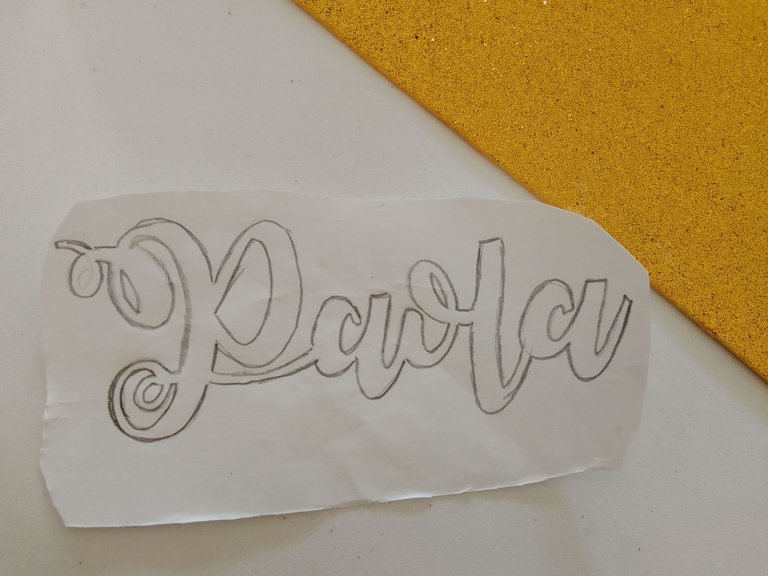
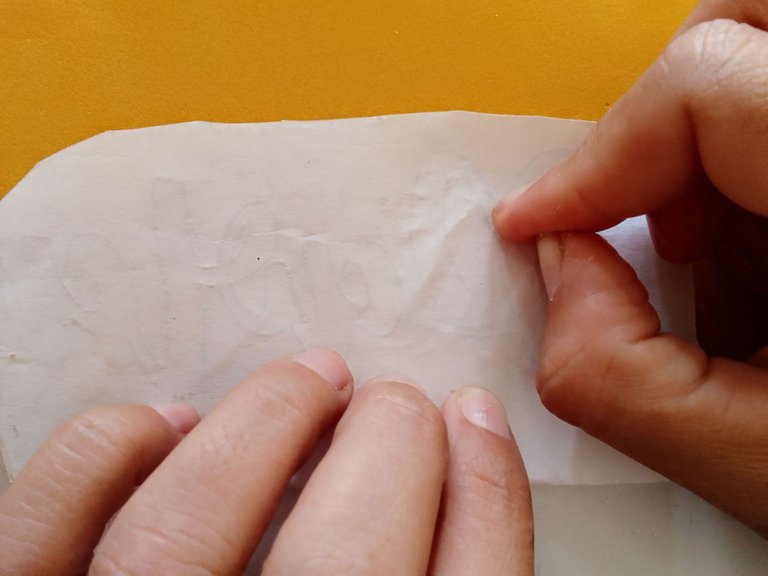
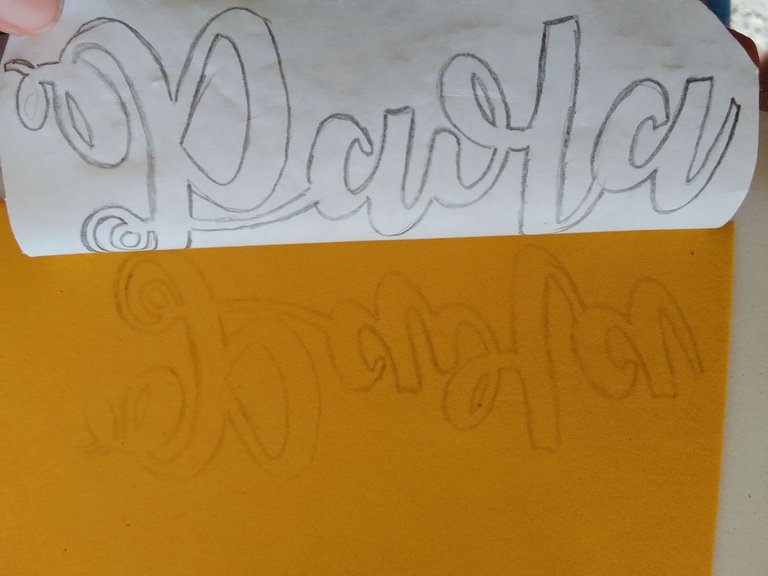
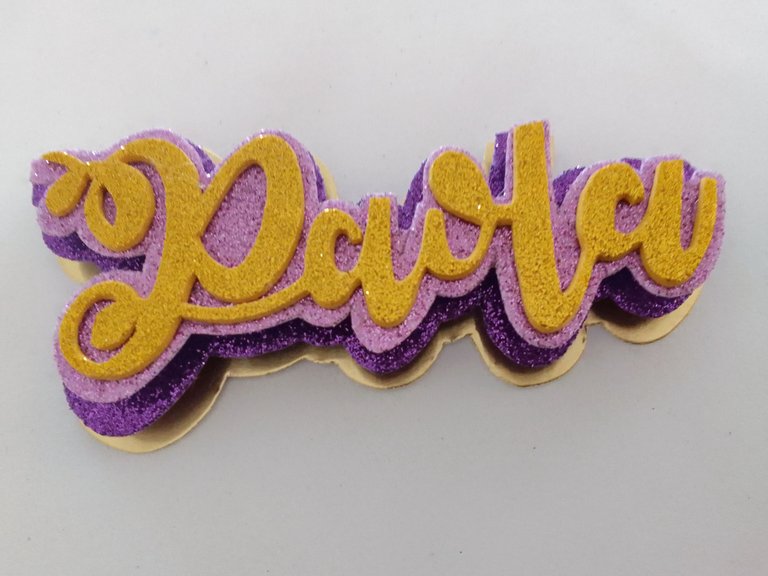
Con ayuda de la aplicación text arts elaboré un patrón del nombre este lo remarque en una hoja blanca varias veces con el lapiz, con el fin de que quede suficientemente visible y así poder usarlo en la parte posterior del foami escarchado sin necesidad de hacer un mayor esfuerzo y obtener como resultado una mayor precisión de las letras, esta tecnica la utilizo frecuentemente con los foami escarchados, los marco por la cara posterior para no dañar la cara principal.
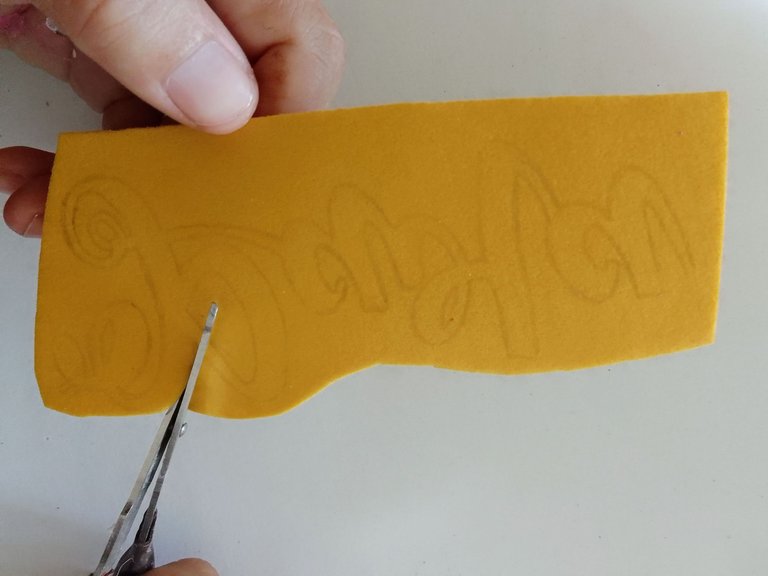
Haciendo uso de una tijera de punta delgada procedi a realizar los cortes en las superficies difíciles de alcanzar y maniobrar, hago énfasis en este tipo de tijera, debido a que con una tijera normal estos cortes no se pueden realizar, si no tienes tijera punta delgada, un cutter de lápiz te puede servir, para un trabajo más limpio.
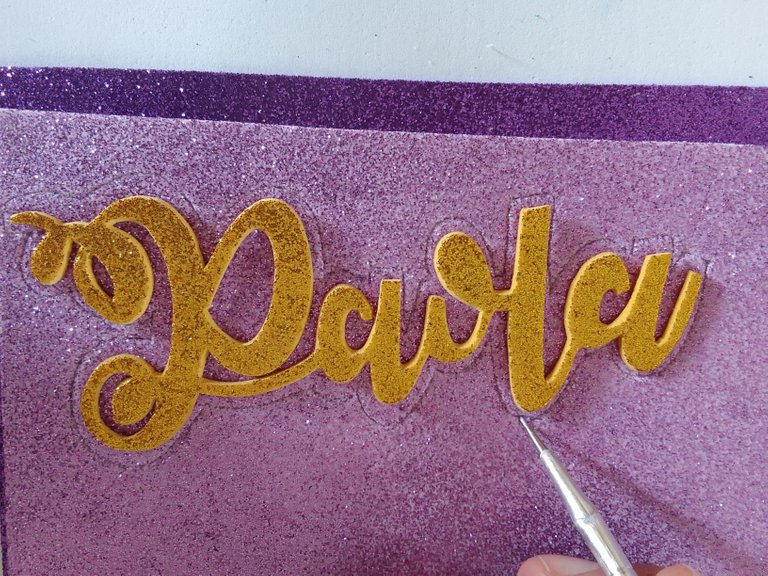
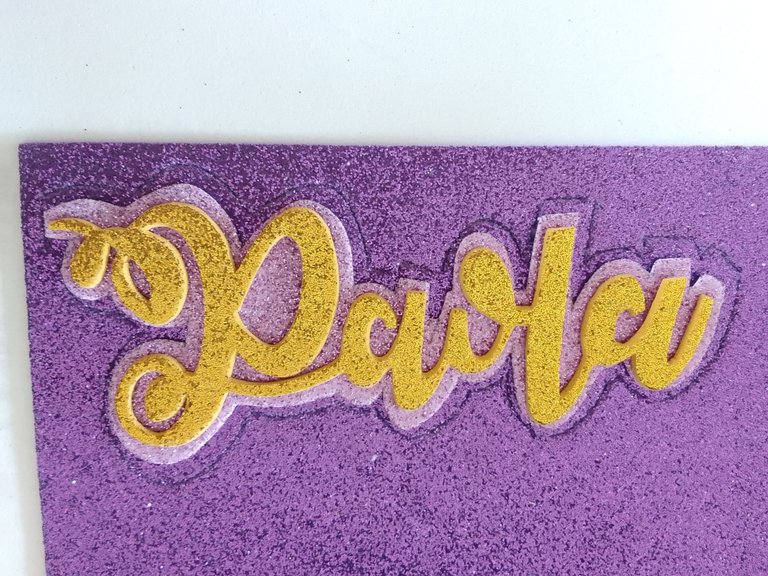
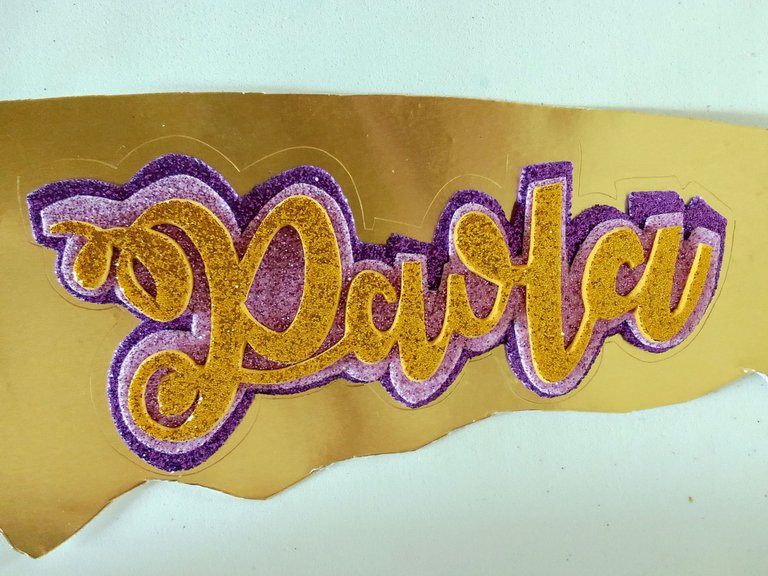
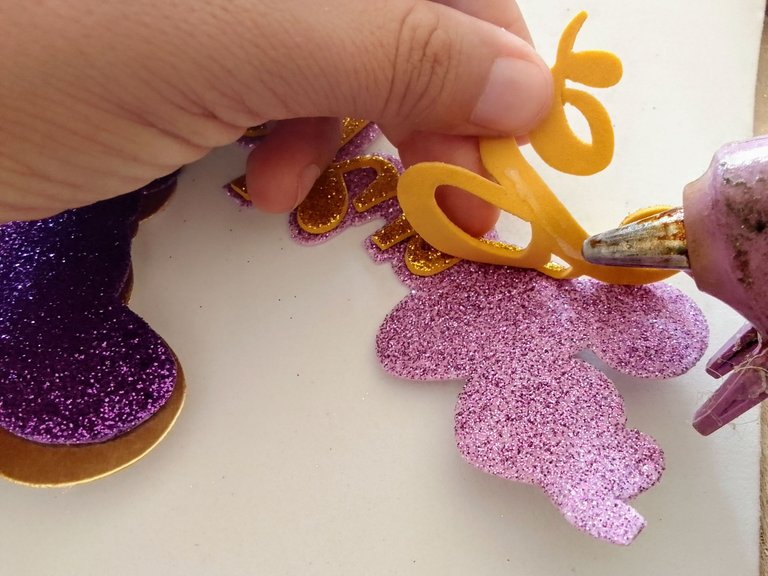
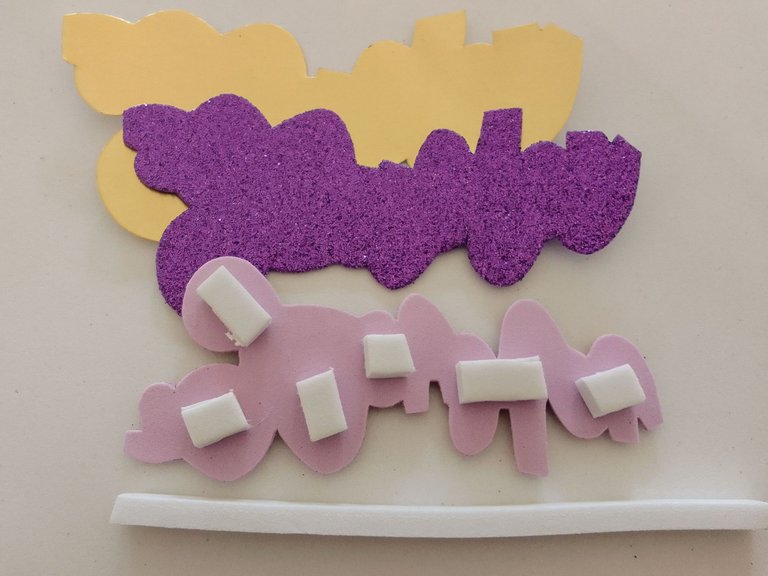
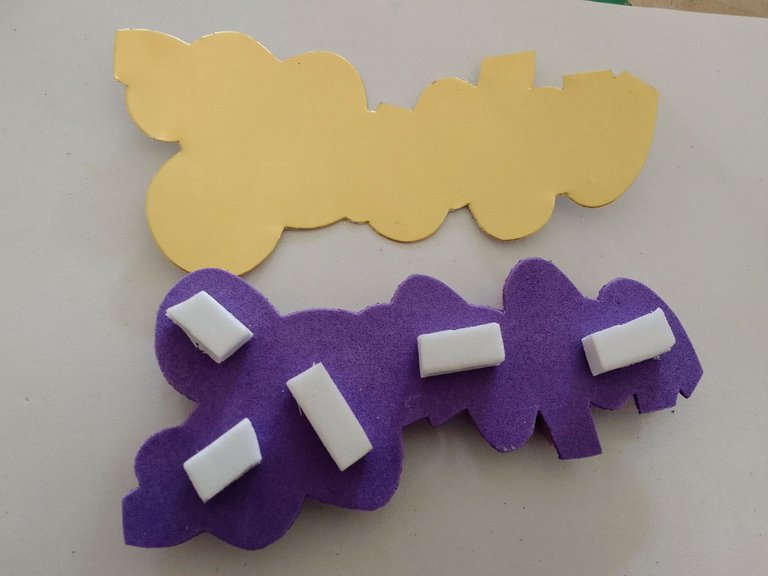
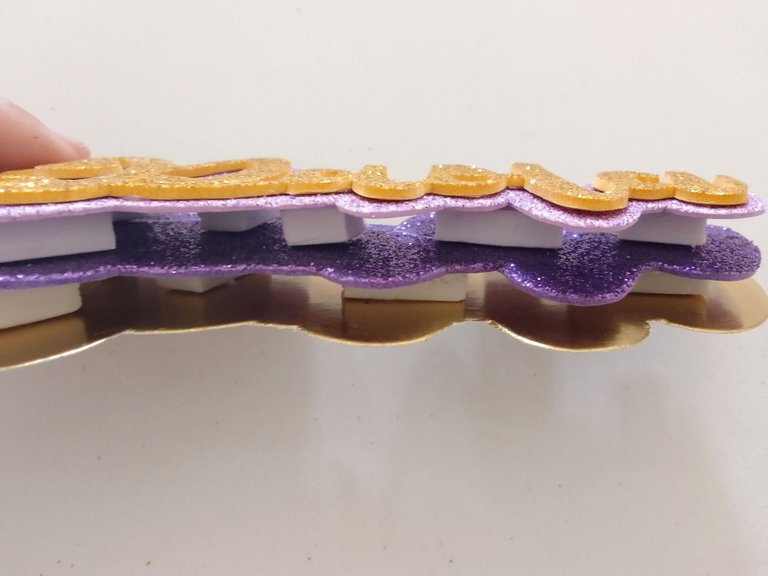
Una vez finalizado el corte procedi a dar profundidad y para esto, tomé como referencia las letras, delineó la silueta de las mismas en el foami y esta represento la segunda capa que voy a colocar (ese procedimiento se repite para la tercera capa), posteriormente me dispuse a realizar el relieve de las letras para ésto utilicé el foami grueso de 0,5 centímetros de espesor para dar altura y obtener el efecto 3D en las letras.
With the help of the text arts application I made a pattern of the name, I marked it on a white sheet several times with the pencil, in order to make it sufficiently visible and thus be able to use it on the back of the frosted foami without having to make a greater effort and get as a result a greater accuracy of the letters, I use this technique frequently with the frosted foami, I mark them on the back side to avoid damaging the main side.
Making use of a thin tip scissors I proceeded to make the cuts in the surfaces difficult to reach and maneuver, I emphasize this type of scissors, because with a normal scissors these cuts can not be made, if you do not have thin tip scissors, a pencil cutter can serve you, for a cleaner job.
Once the cut was finished I proceeded to give depth and for this, I took as a reference the letters, outlined the silhouette of the same in the foami and this represents the second layer that I will place (this procedure is repeated for the third layer), then I set out to make the relief of the letters for this I used the thick foami of 0.5 centimeters thick to give height and get the 3D effect on the letters.
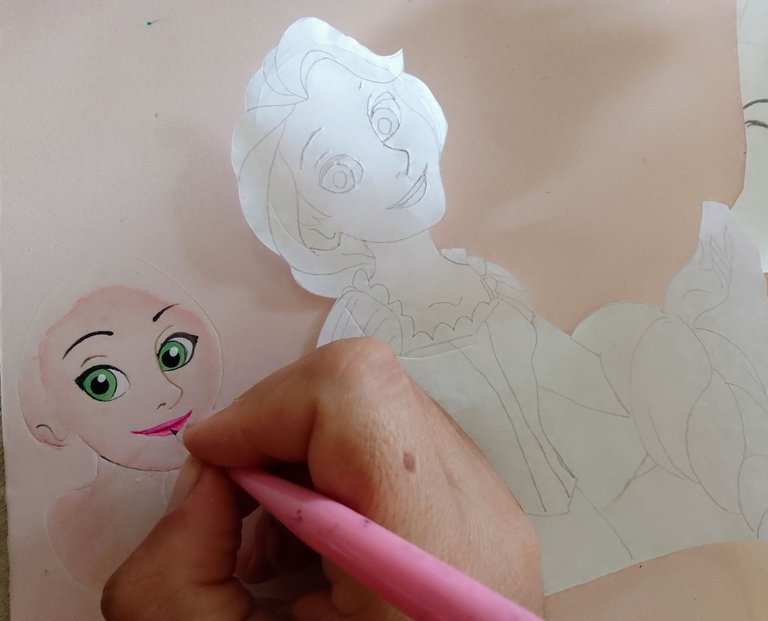
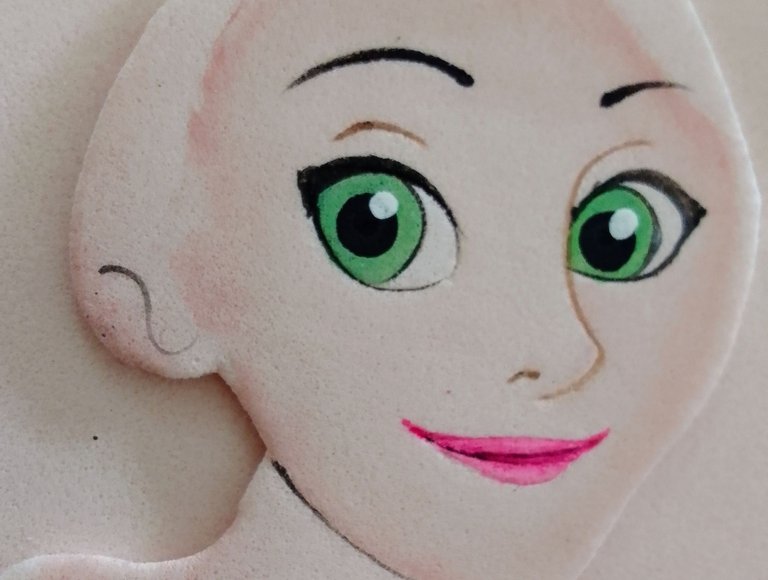
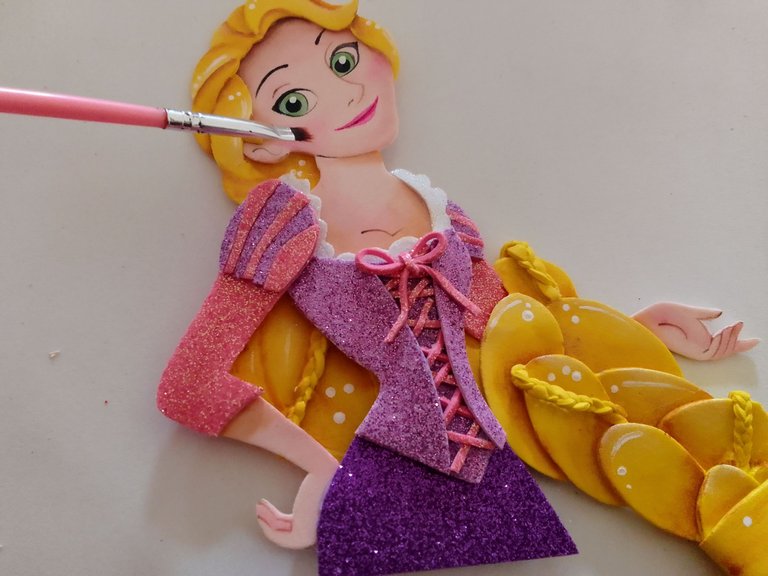
Coloqué fotos con los ojos ya avanzados, con intención 🤭 porque eso será parte de un futuro post, en el que les enseñaré a realizar ojos una técnica muy compleja que lleva mucho tiempo en perfeccionarse. En este caso utilicé la misma técnica que con las letras(realizar un patrón), luego procedí a dibujar el globo ocular con una base blanca seguido del iris del ojo con pintura color verde y por último la pupila de color negro y un punto blanco que le dió la dirección a la mirada de Rapunzel, la difuminación que realicé al contorno del rostro fue mediante un pincel seco y posteriormente humedecido con una combinación de colores: marrón(mayor cantidad) y blanco (poca cantidad), después, escurri el pincel y procedi hacer la difuminación en las partes que hizo falta o que creí conveniente, finalmente, Pinté los labios de color magenta dándole unos toques de luz con el color blanco.
I placed photos with the eyes already advanced, with intention 🤭 because that will be part of a future post, in which I will teach you how to make eyes a very complex technique that takes a long time to perfect. In this case I used the same technique as with the letters(make a pattern), then I proceeded to draw the eyeball with a white base followed by the iris of the eye with green paint and finally the pupil of black color and a white dot that gave the direction to the look of Rapunzel, the blurring that I made to the contour of the face was through a dry brush and then moistened with a combination of colors: brown (larger amount) and white (small amount), then, I wrung the brush and proceeded to make the blurring in the parts that were needed or that I thought appropriate, finally, I painted the lips magenta color giving a few touches of light with the white color.
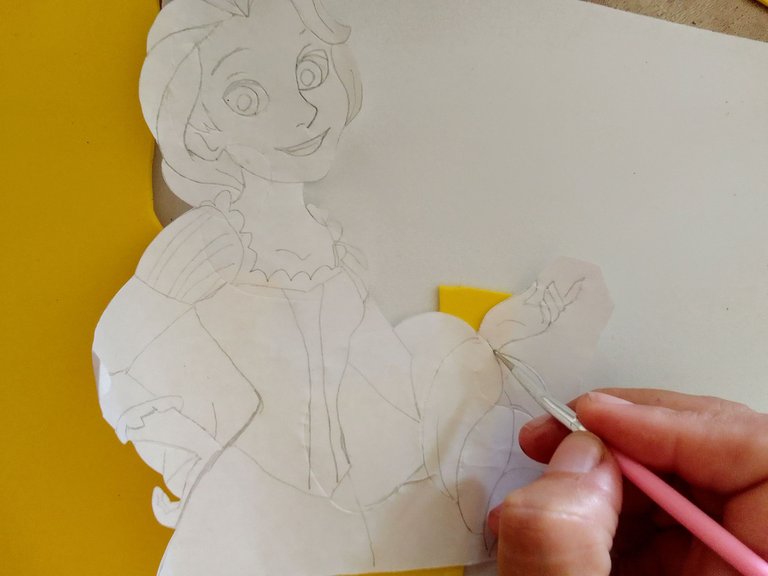
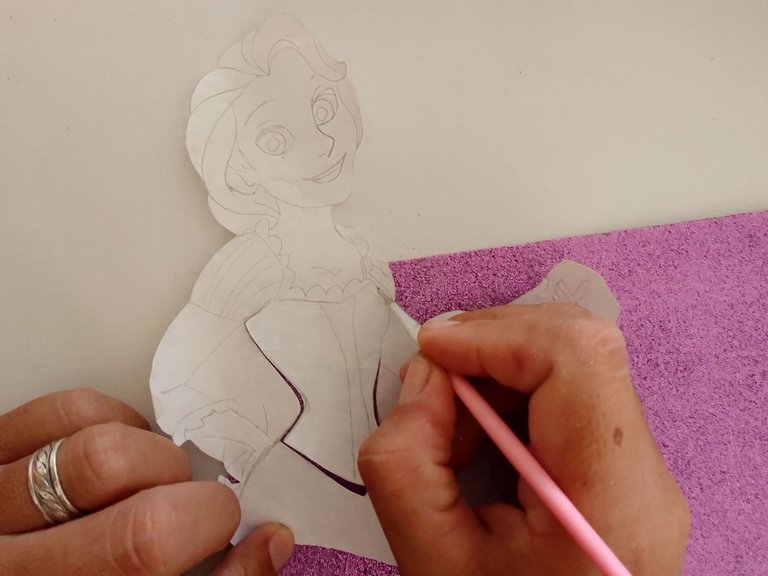
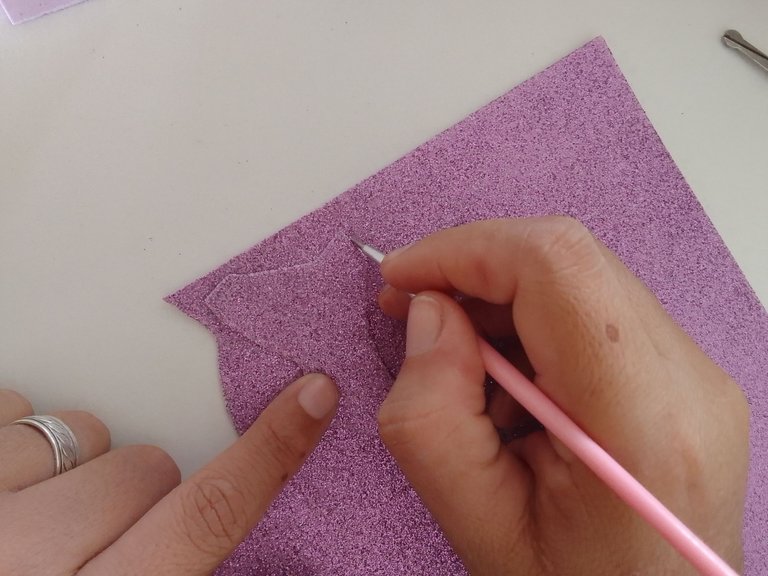
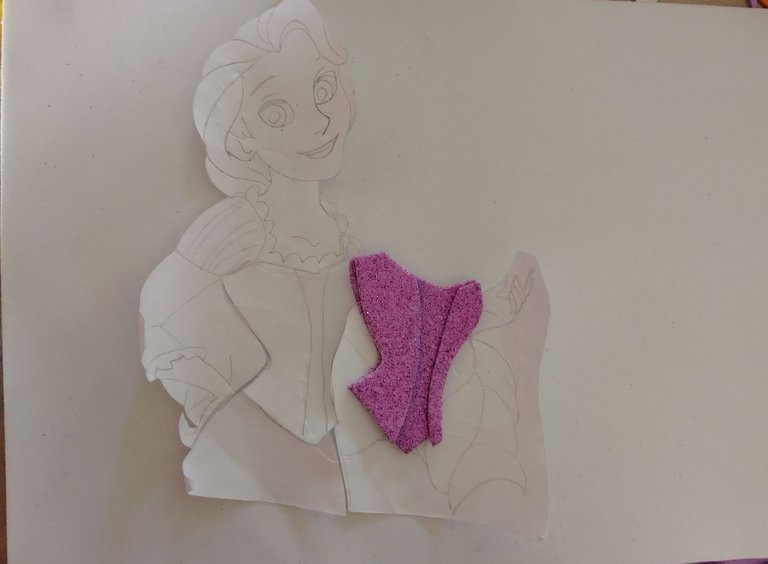
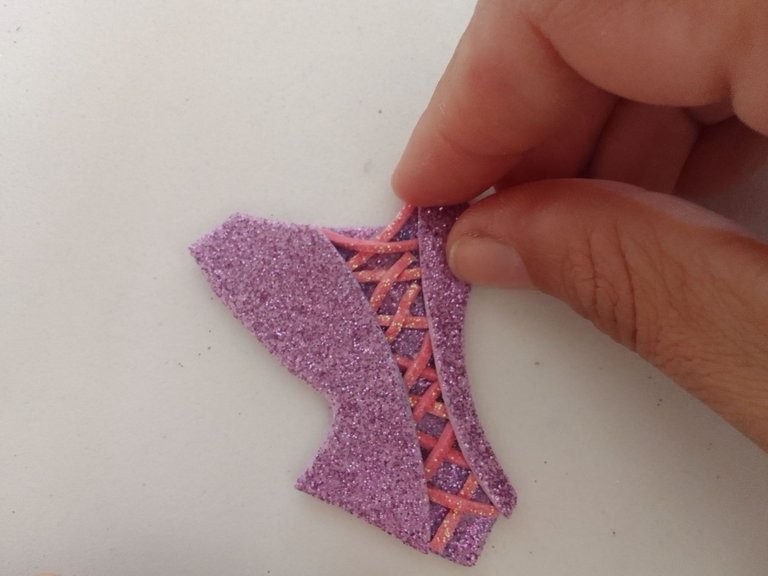
Utilicé el patrón base y lo recorte para individualizar cada una de las partes del vestido, esto a su vez permitió resaltar cada prenda por separado, los colores de foami escarchados permitieron resaltar la belleza de la pieza ademas de dar brillo y vistosidad. Comencé recortando el foami color lila y obteniendo dos piezas, de estas piezas una la dejé completa para hacer la base o cara posterior del corset de la otra pieza, realicé un corte en el centro para formar una división(dos caras del corset), luego corte de un foami escarchado de color rosado en tiras muy finas para representar el cordón del corset, por último procedi a ensamblar y pegar las partes.
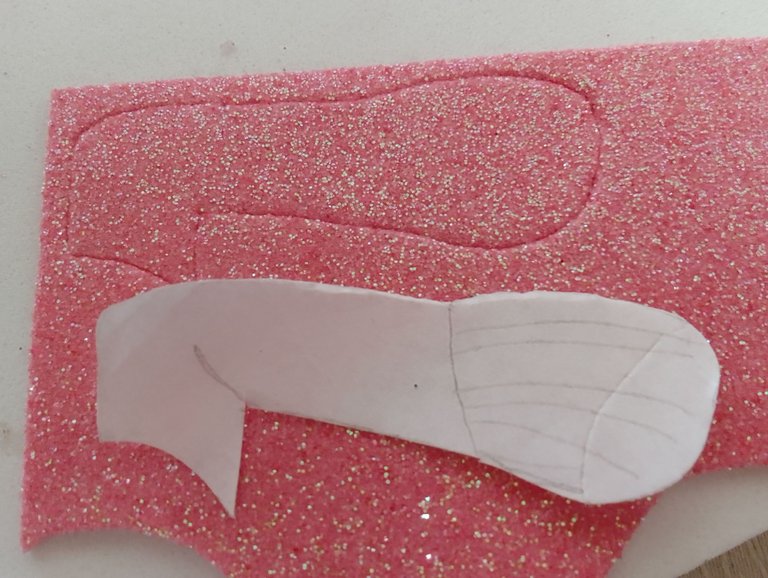
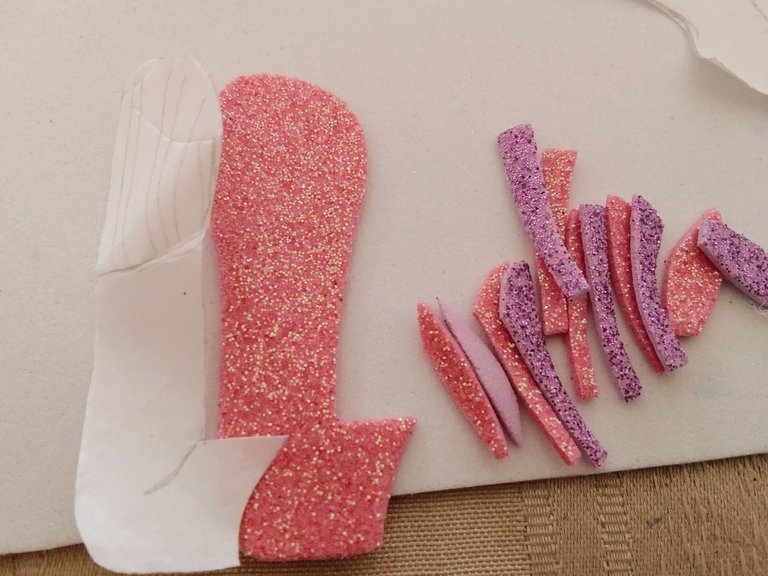
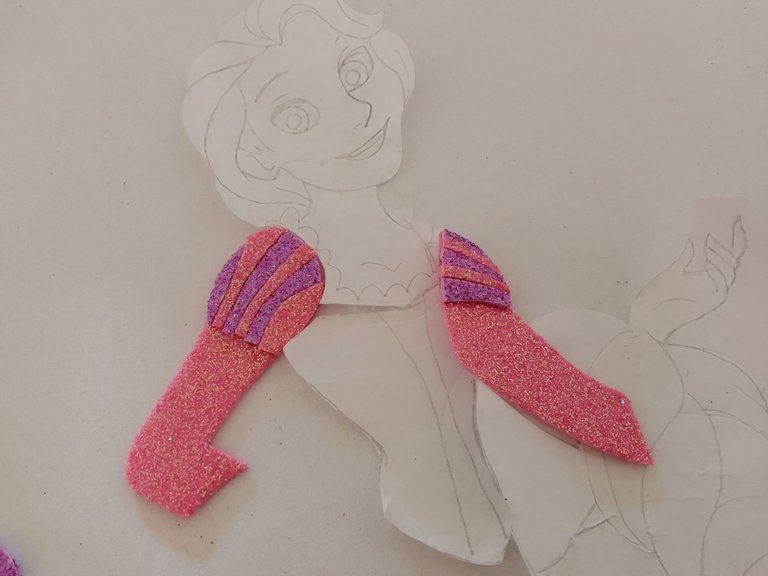
Posteriormente realicé el corte de 2 foamis de colores distintos para realizar las mangas, para esto utilicé foami de color lila y rosado las corte del mismo tamaño, luego elaboré tiras y mezcle tiras lila con rosadas de esta manera pude obtener las mangas como la imagen de referencia, esta tecnica facilita el trabajo para elaborar las mangas. Finalmente realicé un corte del foami morado oscuro en forma de triángulo para terminar el vestido.
I used the base pattern and cut it to individualize each of the parts of the dress, this in turn allowed to highlight each garment separately, the frosted foami colors allowed to highlight the beauty of the piece in addition to giving brightness and showiness. I started by cutting the lilac colored foami and obtaining two pieces, of these pieces I left one complete to make the base or back side of the corset of the other piece, I made a cut in the center to form a division (two sides of the corset), then cut a pink colored frosted foami in very thin strips to represent the cord of the corset, finally I proceeded to assemble and glue the parts.
Then I made the cut of 2 foamis of different colors to make the sleeves, for this I used lilac and pink foami cut them of the same size, then I made strips and mixed lilac and pink strips in this way I could get the sleeves as the reference image, this technique facilitates the work to make the sleeves. Finally I cut the dark purple foami in the shape of a triangle to finish the dress.
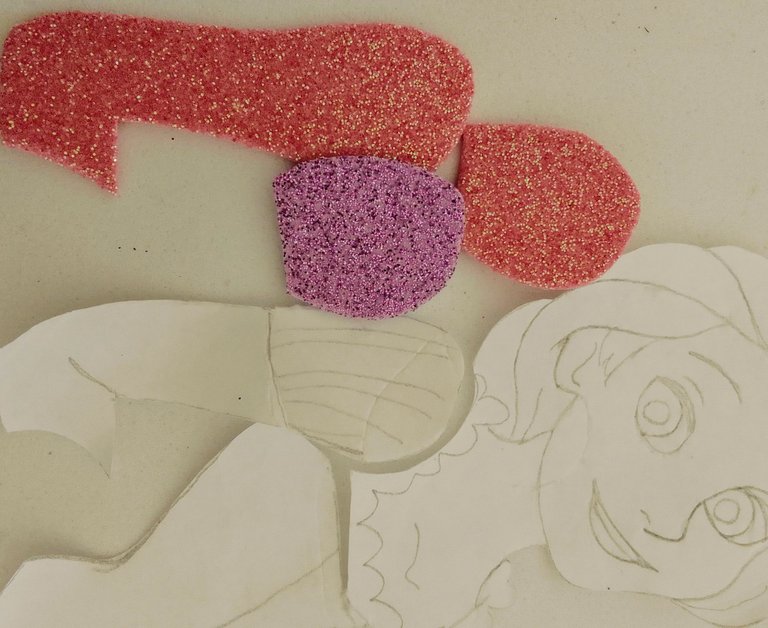
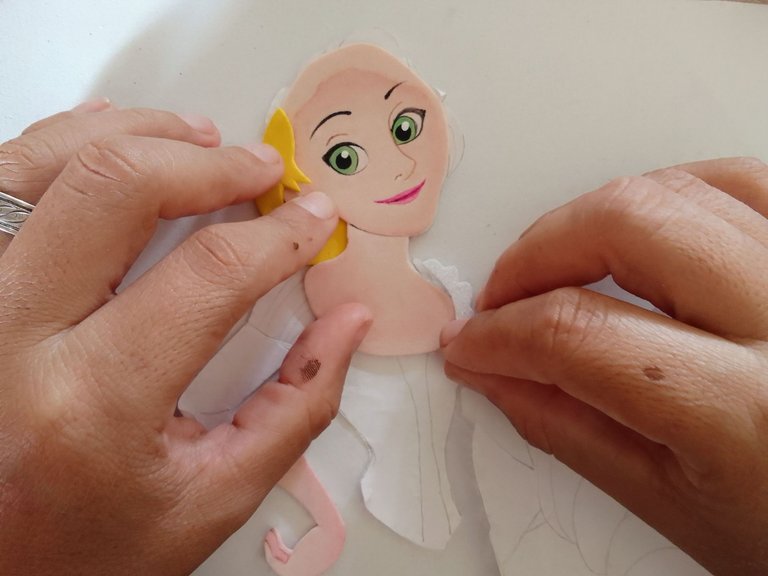
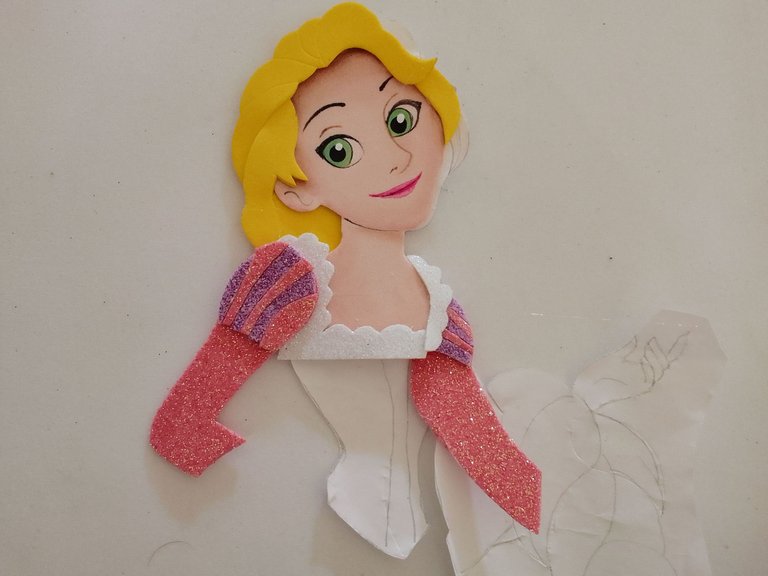
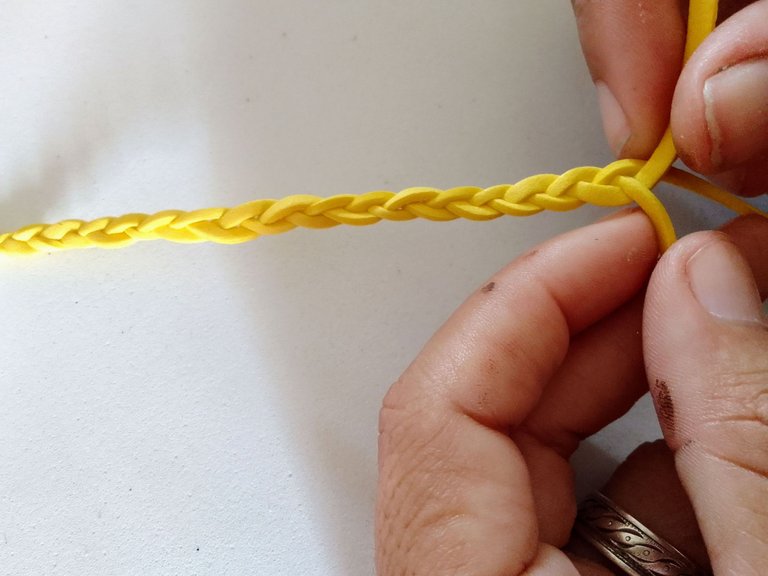
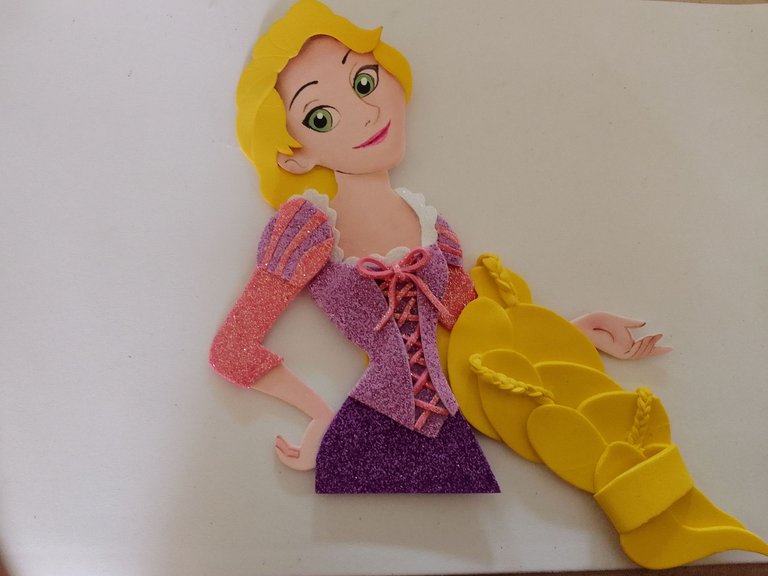
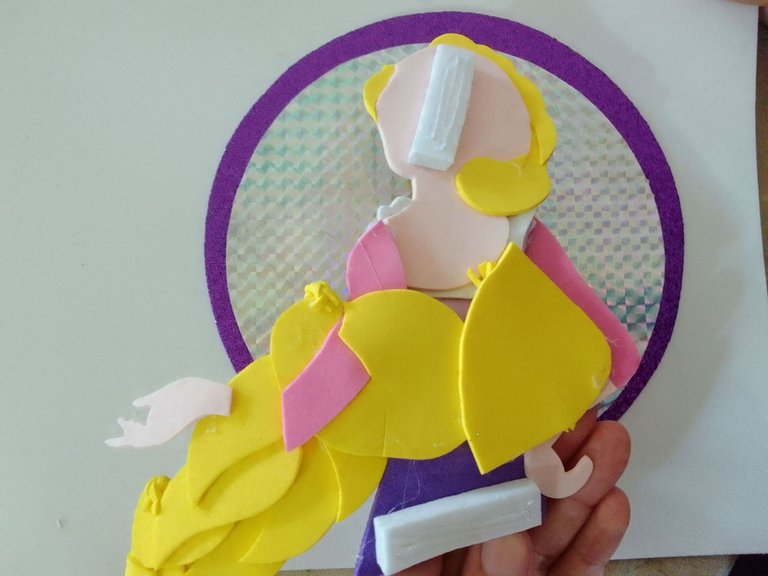
Para armar a Rapunzel dispuse todas las piezas de foami sobre la mesa y con patrón en mano empecé a colocar los recortes de foami sobre el patron y luego los fijé con silicón caliente. La parte más compleja fue el cabello, ya que, para está parte corté algunas tiras de foami amarillo y las fui tejiendo en pares para representar las trenzas, posteriormente las fijé en los lugares que dibujé en el patrón. Finalmente sombree con marrón para que para resaltar cada pliegue de la trenza de la misma forma difuminé el cabello con marrón.
To assemble Rapunzel I laid out all the foami pieces on the table and with pattern in hand I started to place the foami cutouts on the pattern and then I fixed them with hot silicone. The most complex part was the hair, since, for this part I cut some strips of yellow foami and wove them in pairs to represent the braids, then I fixed them in the places I drew in the pattern. Finally, I shaded with brown to highlight each fold of the braids in the same way I blurred the hair with brown.
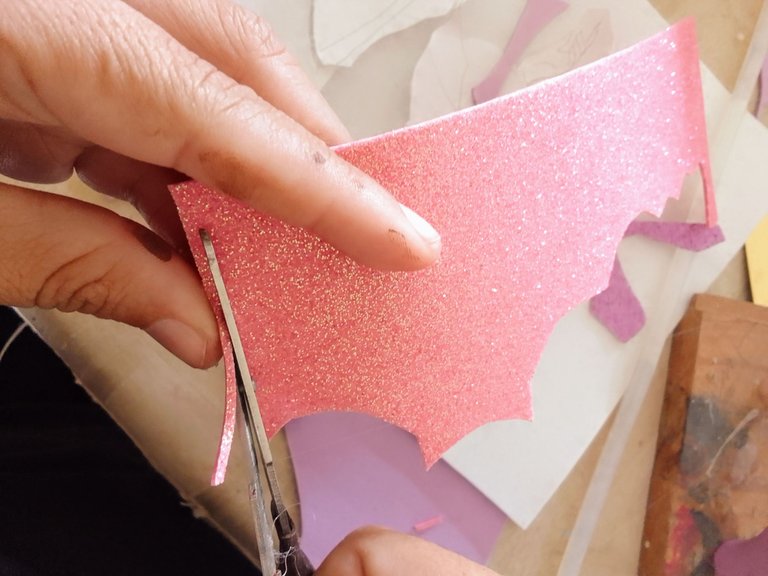
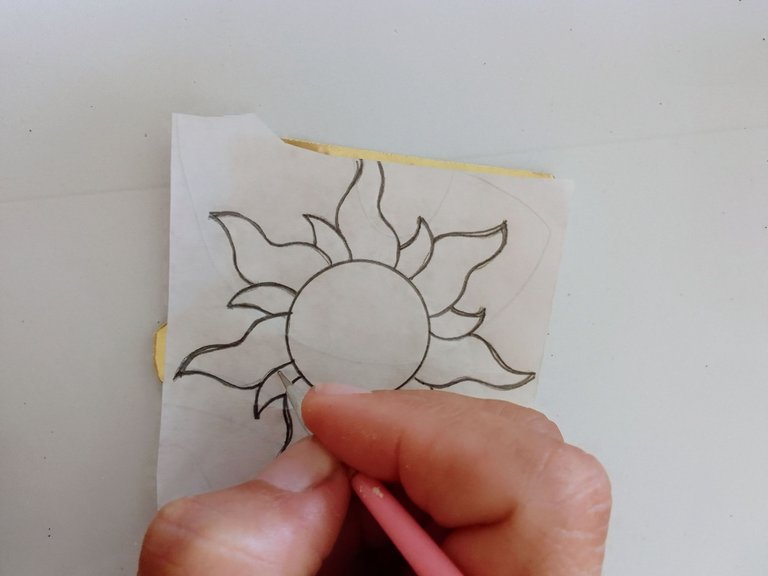
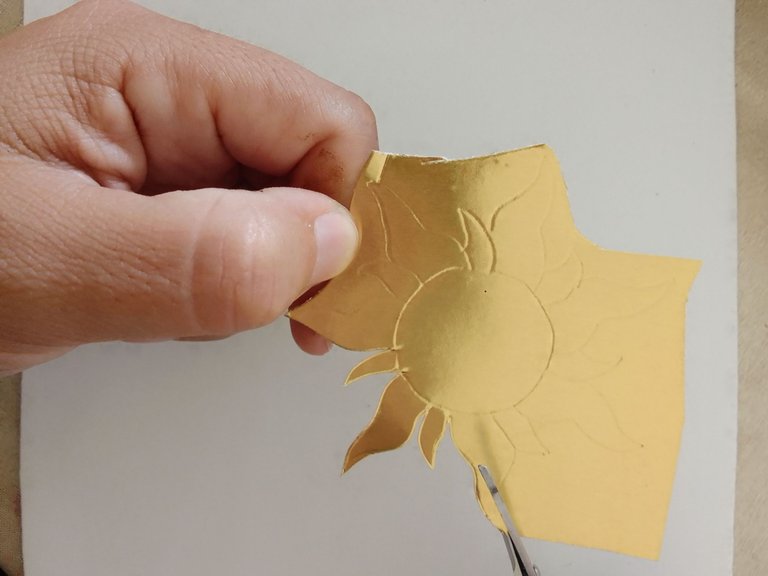
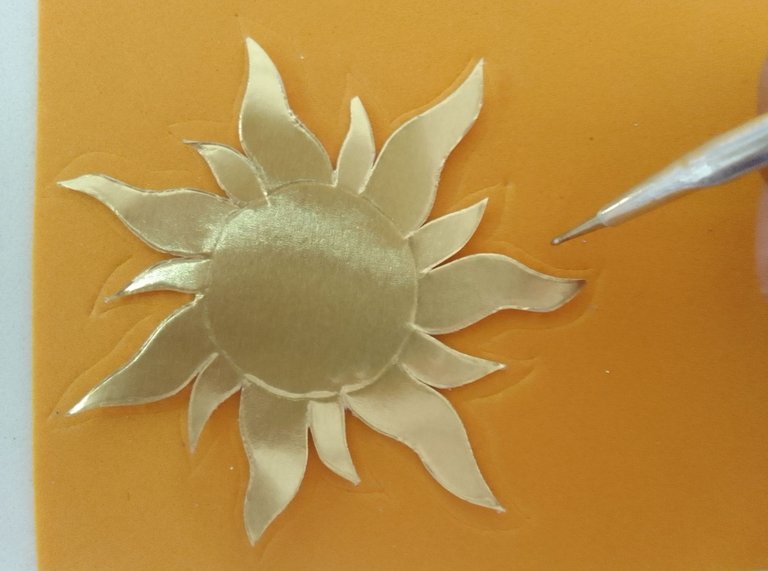
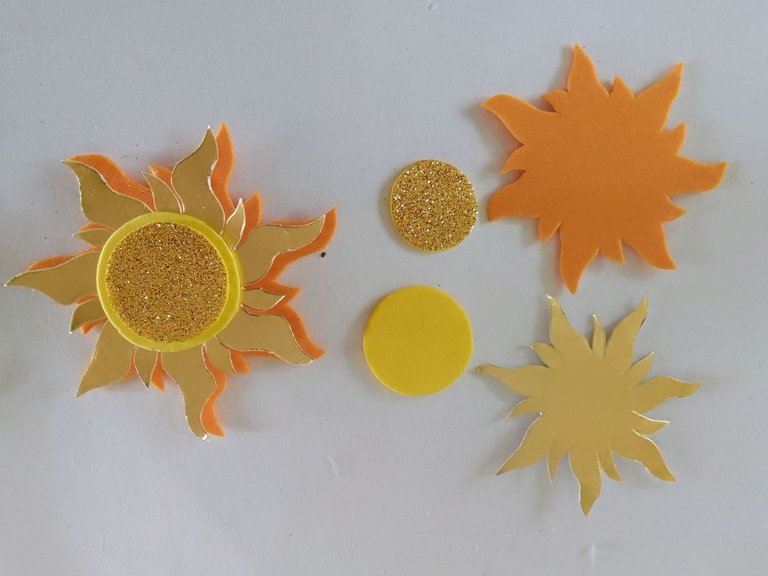
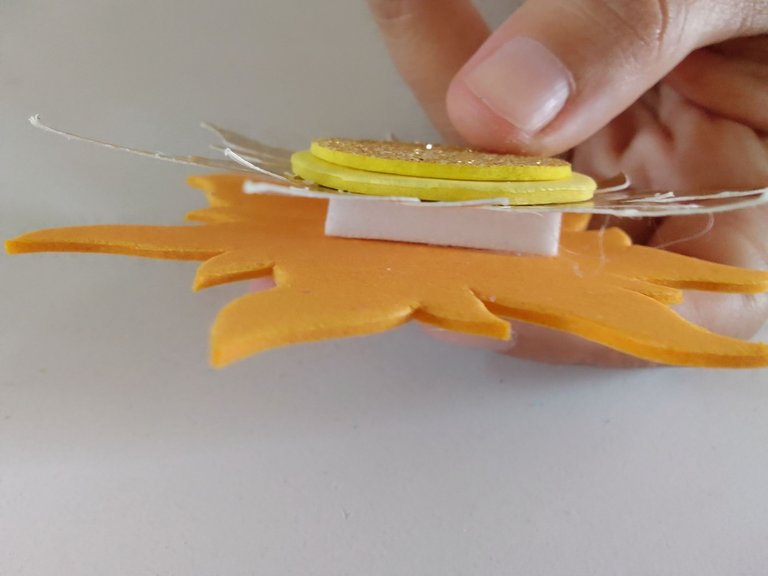
El Sol de Rapunzel no podía faltar para esta decoración es por esto que luego de realizar el patrón, marqué la primera pieza en cartulina metalizada y luego la corté. Posteriormente procedi a marcar la pieza en el foami escarchado utilizando como referencia la pieza que corté anteriormente, lo coloqué sobre el foami y delinee la silueta del sol, luego lo corte. Para resaltarlo un poco más decidí agregar dos círculos de distintos tamaños uno sobre otro y de distintas texturas y darle altura con el foami de 0.5 centímetros de grosor.
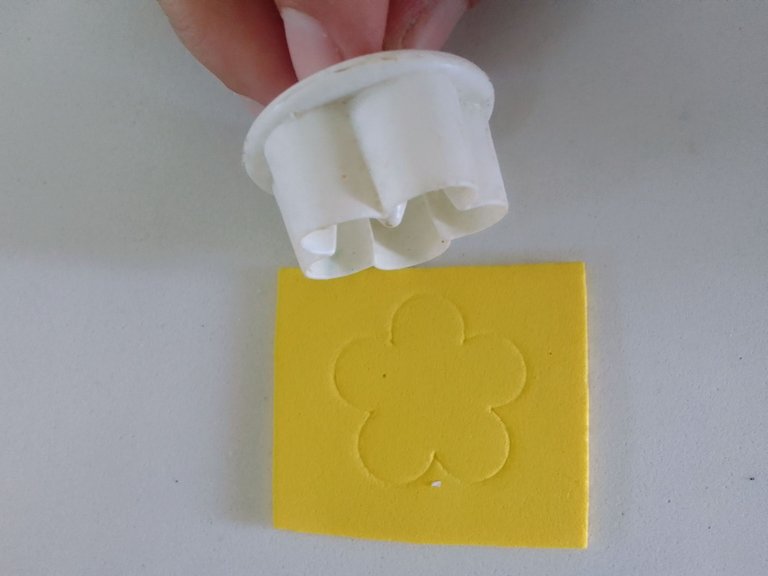
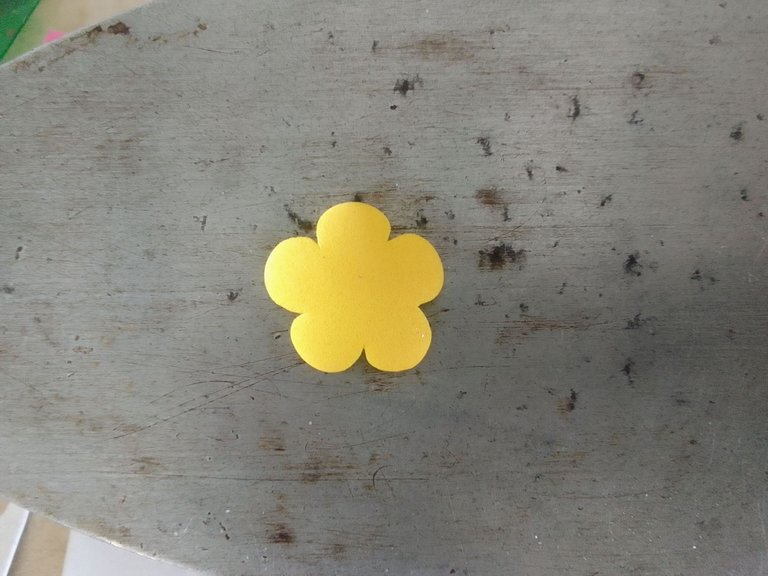
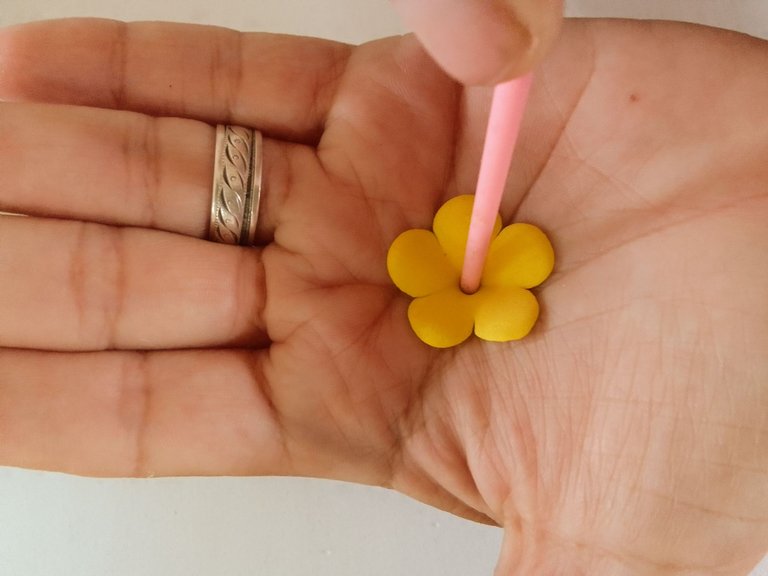
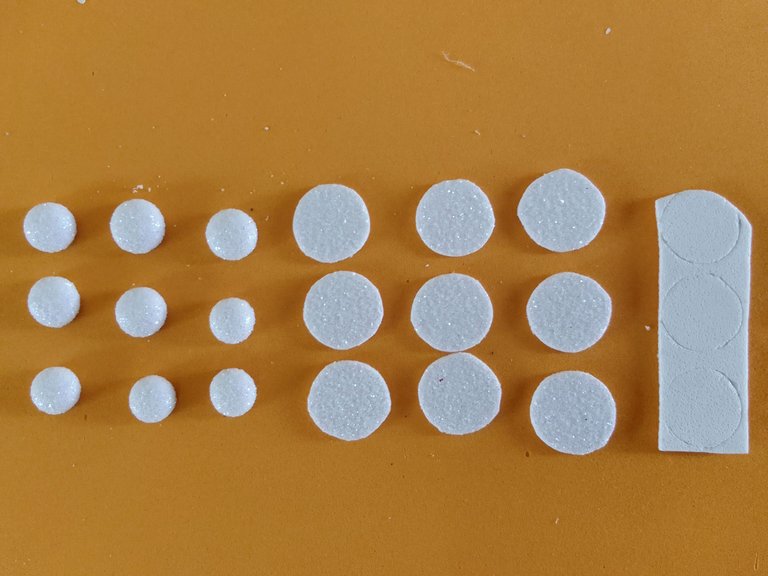
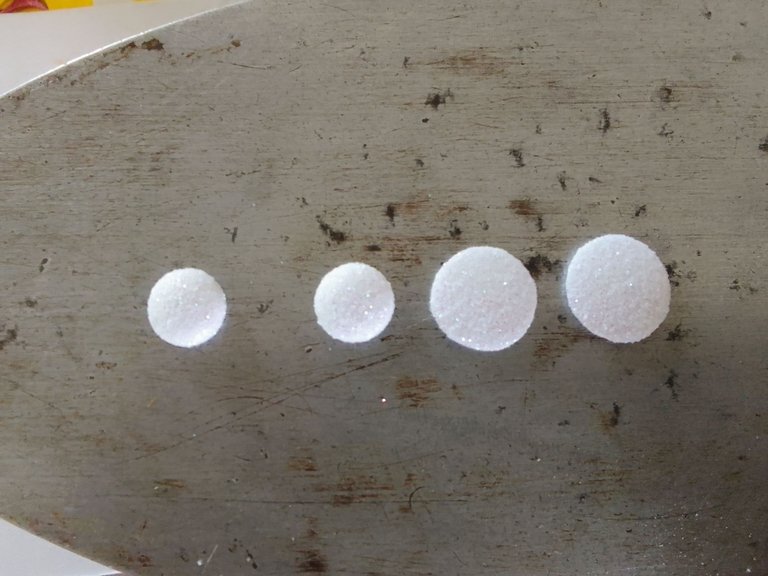
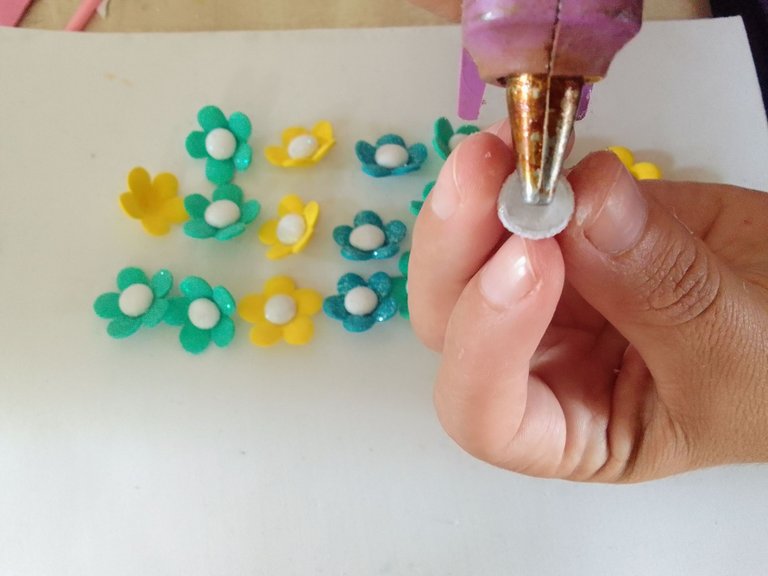
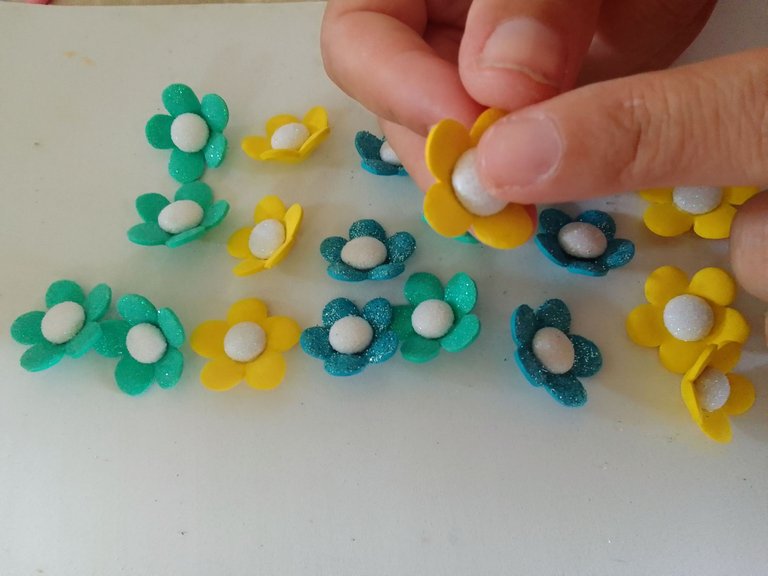
En el caso de las flores para hacer el trabajo más facil utilicé un molde para galletas en forma de flor 🤭. Haciendo presión sobre el foami marqué las flores que necesité, luego recorte y las coloque sobre la plancha a temperatura media (técnica de termoformado) una vez alcanza temperatura las puntas del foami (pétalos de la flor) se despega de la superficie de la plancha y ese el momento de retirarla, después la coloqué en mi mano y con la ayuda de un pincel hago precio en el centro para que esta quede más erguida, luego, utilicé la regla de círculo y marqué algunos sobre un foami escarchado blanco, lo recorte y los coloqué sobre la plancha a temperatura media hasta que estos quedarán lo suficientemente abultados para formar el centro de la flor.
Rapunzel's Sun could not be missing for this decoration is why after making the pattern, I marked the first piece in metallic cardboard and then cut it. Then I proceeded to mark the piece on the frosted foami using as a reference the piece I cut previously, I placed it on the foami and outlined the silhouette of the sun, then I cut it. To highlight it a little more I decided to add two circles of different sizes one on top of the other and of different textures and give it height with the 0.5 centimeters thick foami.
In the case of the flowers to make the work easier I used a flower-shaped cookie cutter 🤭. Making pressure on the foami I marked the flowers I needed, then cut them out and put them on the iron at medium temperature (thermoforming technique) once it reaches temperature the tips of the foami (flower petals) detaches from the surface of the iron and that's the time to remove it, then I put it in my hand and with the help of a brush I make price in the center to make it more upright, then, I used the circle ruler and marked some on a white frosted foami, I cut it and placed them on the iron at medium temperature until they were bulky enough to form the center of the flower.
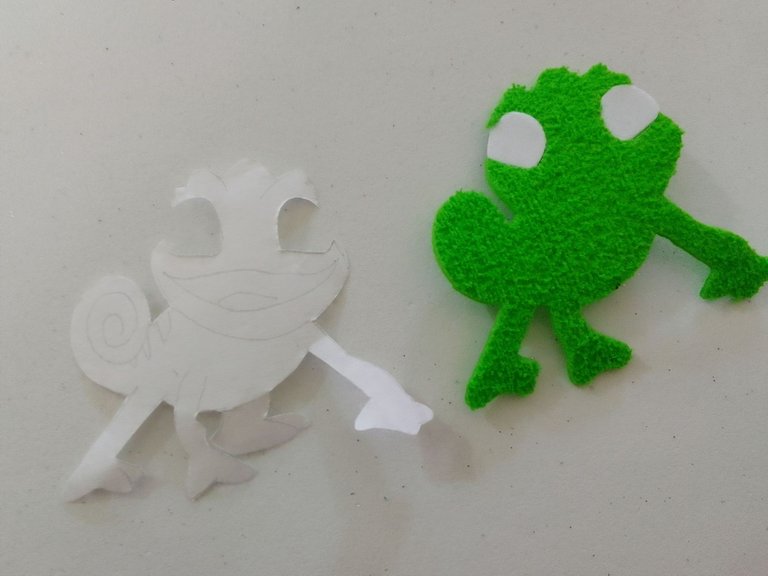
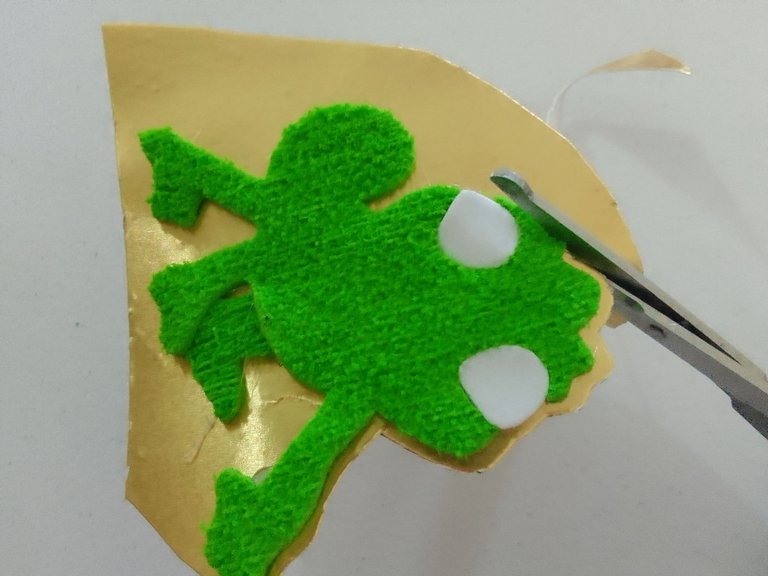
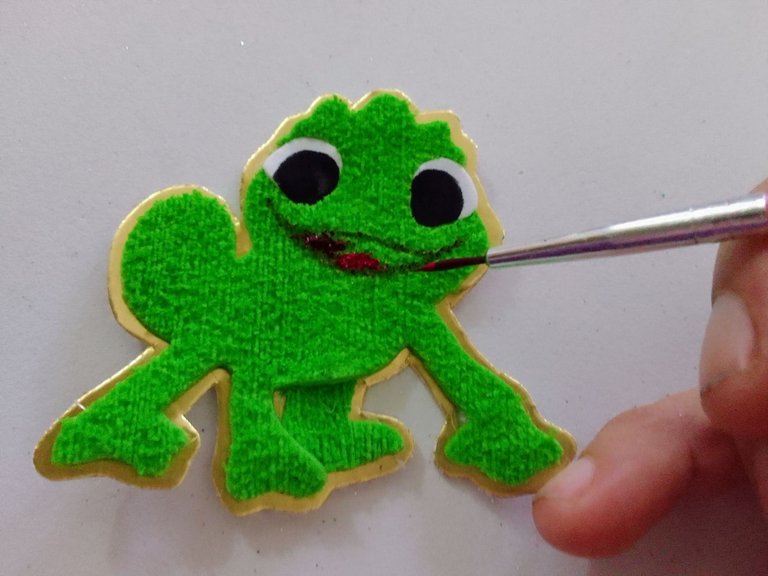
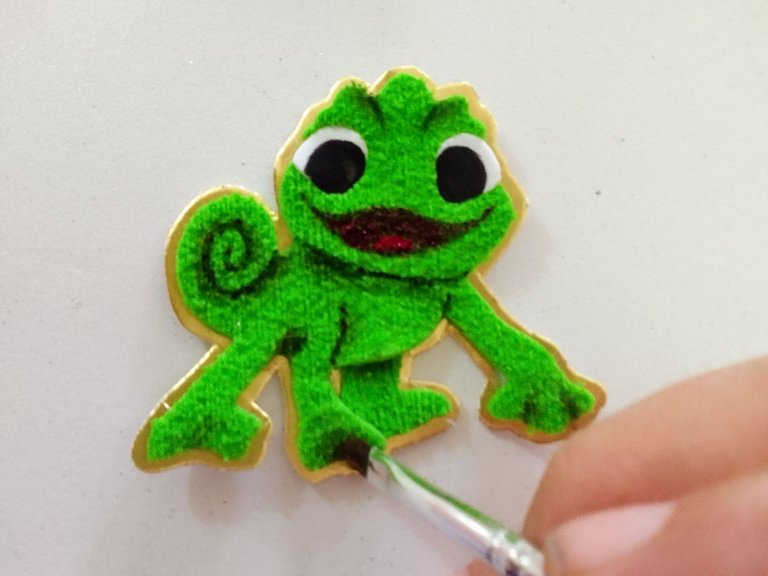
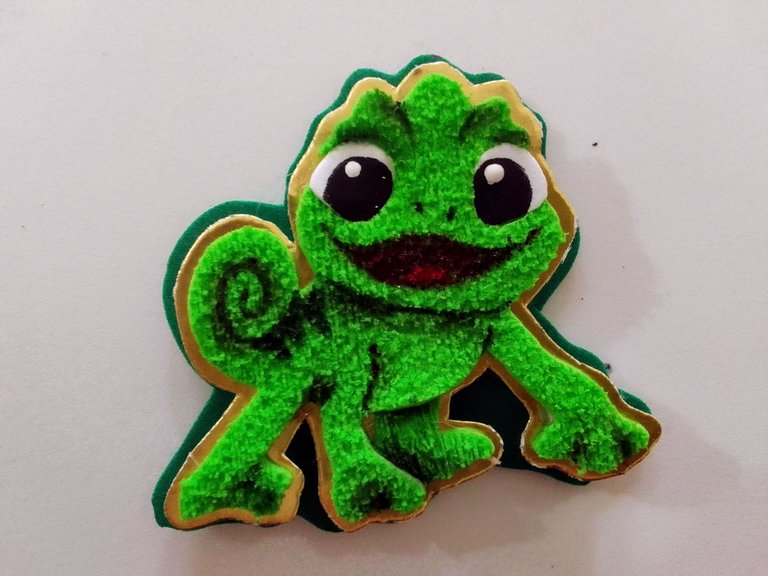
Es otra figura que no podía faltar en este topper, casi tan relevante como Rapunzel😍. Lo primero fue elaborar el patrón, recorte un foami blanco en el que posteriormente dibuje sus ojos y me permitió pintar sus pupilas de color negro. Para el resto del cuerpo utilicé un foami de paño color verde, delinee la silueta de Gaspar (camaleón) y con un pincel seco difuminé sus partes aprovechando al maximo la textura que ofrece este tipo foami. Resalte la figura bordeando la silueta con pintura de color negro y sus rayas con un verde oscuro, además coloque los puntos blancos en sus ojos para dar dirección a su mirada, enmarqué con un fondo dorado y azul para dar altura a la pieza.
It is another figure that could not be missing in this topper, almost as relevant as Rapunzel😍. The first thing was to elaborate the pattern, I cut out a white foami in which I later drew her eyes and allowed me to paint her pupils in black. For the rest of the body I used a green cloth foami, outline the silhouette of Gaspar (chameleon) and with a dry brush I blurred its parts taking full advantage of the texture offered by this type of foami. Highlight the figure bordering the silhouette with black paint and his stripes with a dark green, I also placed the white dots in his eyes to give direction to his gaze, framed with a gold and blue background to give height to the piece.
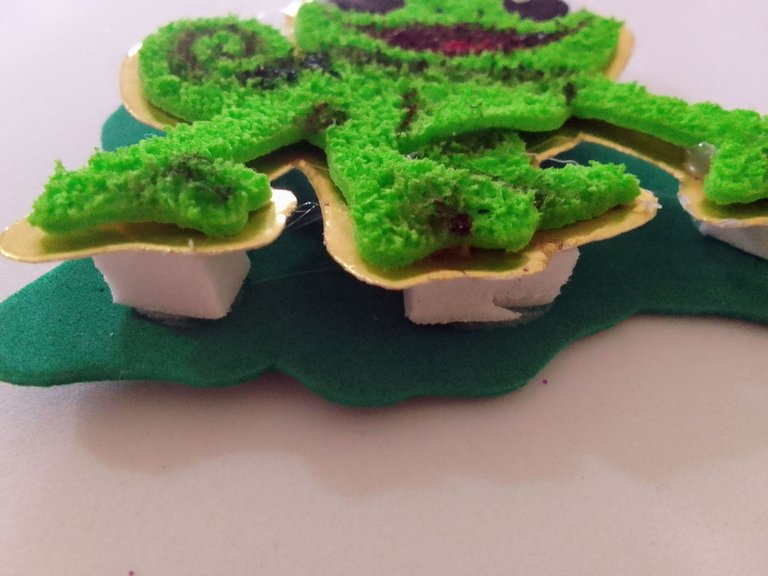
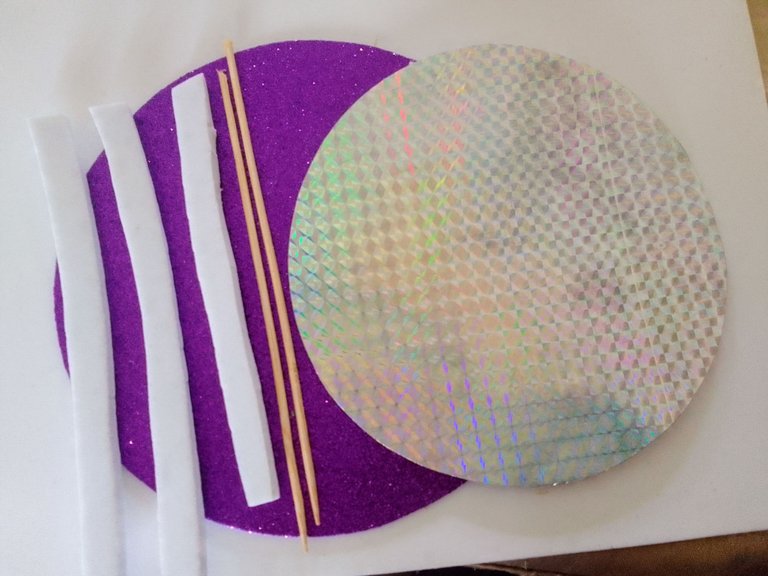
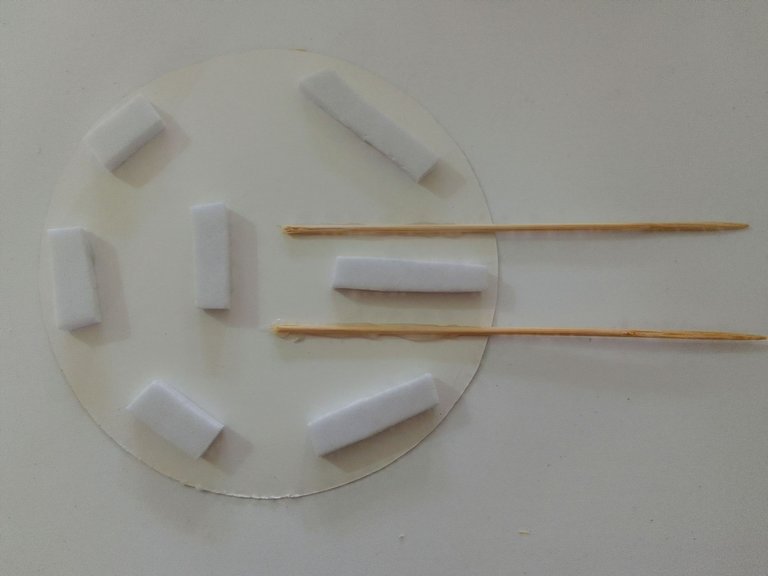
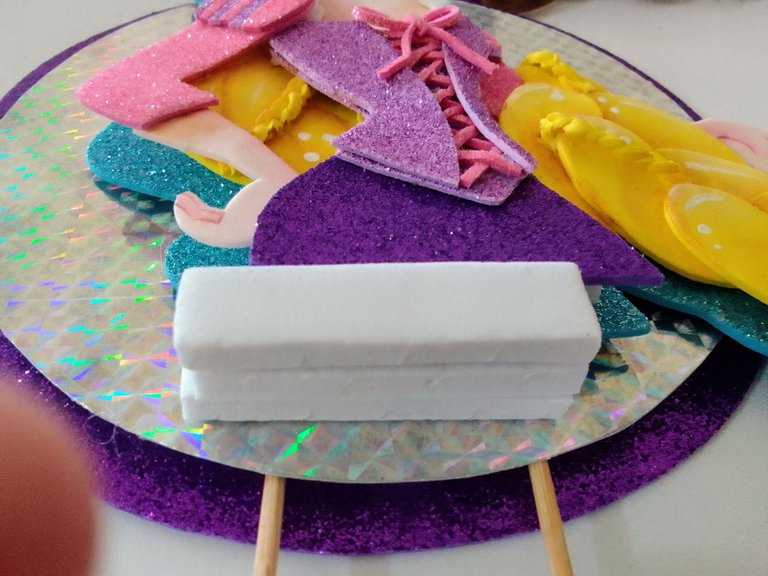
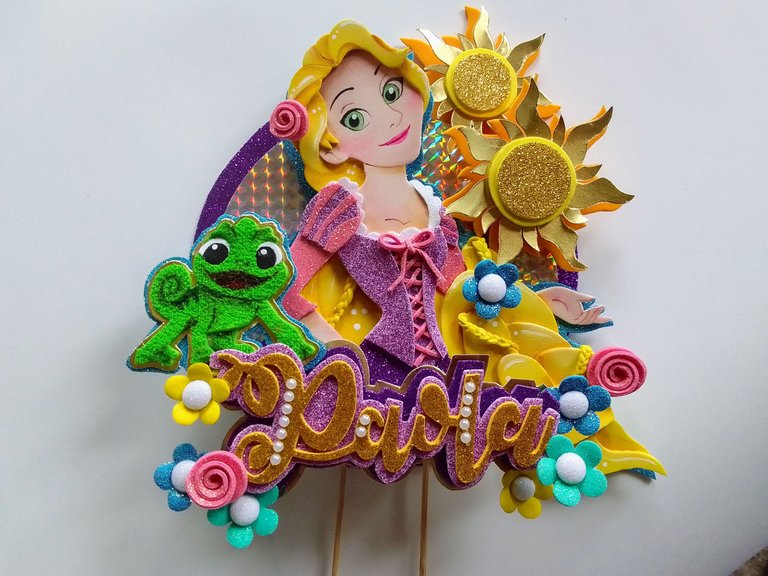
Para dar los toques finales y añadir aun mas vistosidad al topper marqué y corté dos círculos de distintos tamaños y colores uno morado realizado en foami escarchado (más grande) y uno con cartulina metalizada plateada holográfica (más pequeño), en este fijé dos palitos de altura y rectángulos de foami grueso para dar soporte y mantener el efecto 3D. Sobre está base de circulos procedí a ubicar cada una de las piezas según mi gusto (sin alejarme mucho de la imagen de referencia) en el centro coloqué a Rapunzel con retazos de foami grueso para seguir dándo altura a la figura. En la parte baja coloqué las letras correspondientes al nombre de la cumpleañera (este debería ser el punto más resaltante del topper) por esto coloqué cuatro rectángulos de foami grueso debajo de las letras, obteniendo un nombre sobresaliente. En los bordes coloqué 2 soles uno más grande que otro y del otro lado ubiqué a Gaspar una vez ubicados todos los elementos procedí a ubicar las flores tantas como fuera necesario, siendo estás la cereza del pastel.
To give the final touches and add even more showiness to the topper I marked and cut two circles of different sizes and colors one purple made in frosted foami (larger) and one with silver metallic cardboard holographic (smaller), in this I fixed two sticks high and thick foami rectangles to give support and maintain the 3D effect. On this base of circles I proceeded to place each of the pieces according to my taste (without straying too far from the reference image) in the center I placed Rapunzel with pieces of thick foami to continue giving height to the figure. In the lower part I placed the letters corresponding to the name of the birthday girl (this should be the highlight of the topper) so I placed four rectangles of thick foami under the letters, obtaining an outstanding name. On the edges I placed 2 suns, one bigger than the other and on the other side I placed Gaspar. Once all the elements were placed I proceeded to place the flowers as many as necessary, being the cherry on the cake.
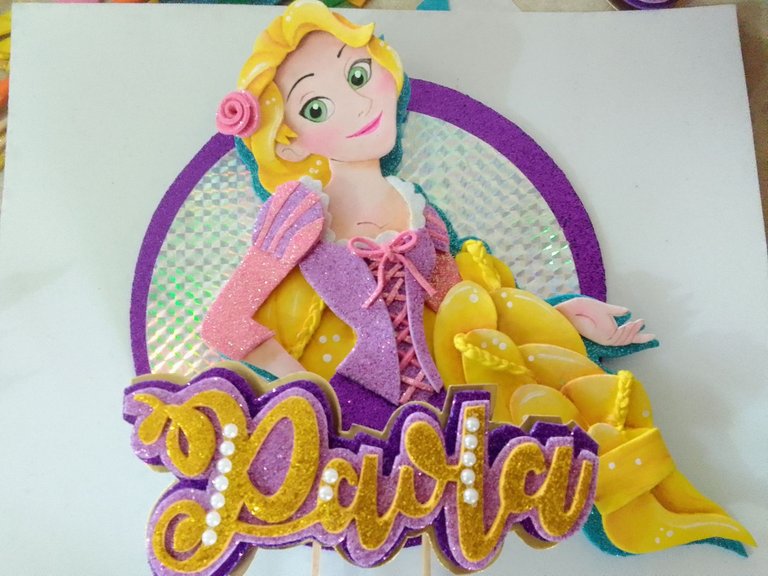
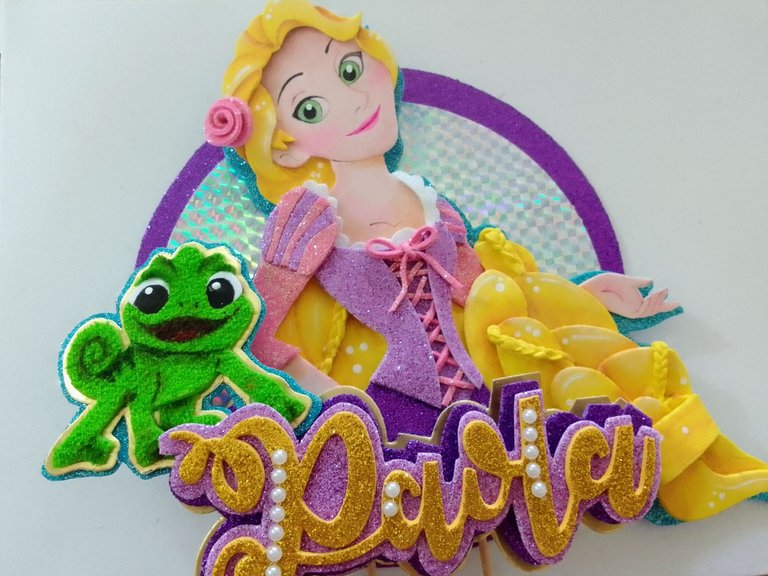
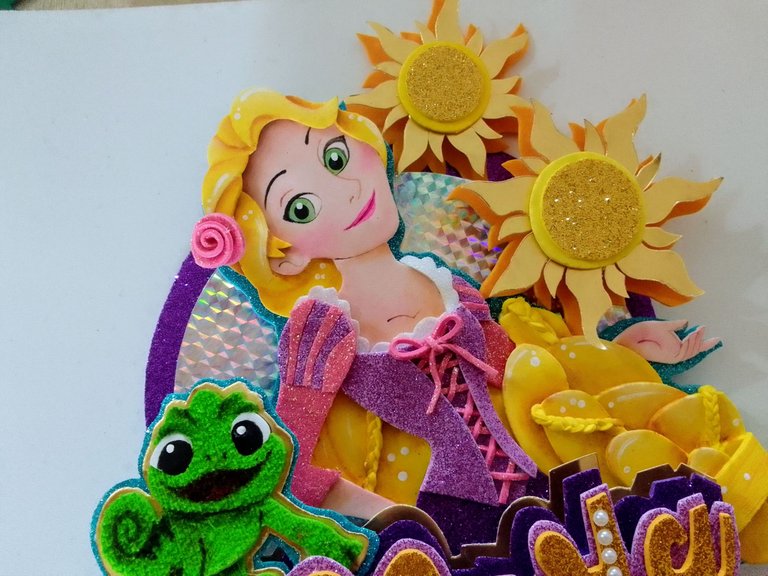
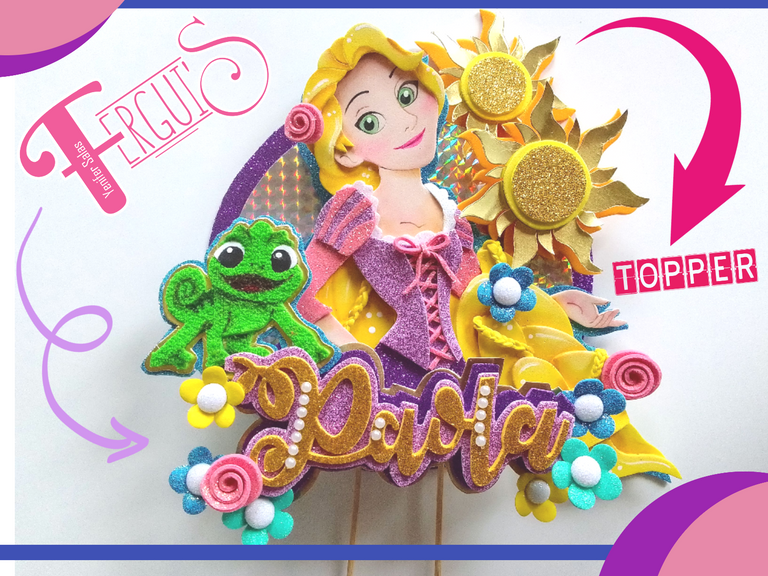
Este fue el resultado del hermoso topper para Paola. Espero que le guste tanto como a mí. Dios les bendiga siempre. Gracias por leer...!
This was the result the beautiful topper for Paola. I hope she likes it as much as I do. God bless you always. Thanks for reading...!

Las fotos de esta publicación son de mi propiedad y fueron tomadas desde mi celular Realme C11.
Las ediciones de Foto y el Banner lo realice con las aplicaciones: Poster Maker, Text Art e in shot descargadas desde Play Store.
Textos traducidos en deepL
The photos in this publication are my property and were taken from my cell phone Realme C11.
The photo editions and the banner were made with the following applications: Poster Maker, Text Art and in shot downloaded from Play Store.
Translated texts in deepL.
Congratulations @ferguis-ve! You have completed the following achievement on the Hive blockchain And have been rewarded with New badge(s)
Your next target is to reach 2500 upvotes.
You can view your badges on your board and compare yourself to others in the Ranking
If you no longer want to receive notifications, reply to this comment with the word
STOPCheck out our last posts:
Support the HiveBuzz project. Vote for our proposal!
Muchas gracias 🤗
¡Eso es perfecto @ferguis-ve! ¡Eres un verdadero campeón de Hive! ¡Adelante hacia esa nueva meta!
Por cierto, también necesitamos tu ayuda. ¿Podemos pedirle que apoye nuestra propuesta para que nuestro equipo pueda continuar con su trabajo?
Todo lo que necesita hacer es hacer clic en el botón "soporte" en esta página: https://peakd.com/proposals/248.
Thank you!
The rewards earned on this comment will go directly to the people( @kawsar8035 ) sharing the post on Twitter as long as they are registered with @poshtoken. Sign up at https://hiveposh.com.
Thanks so much for your support
Cuanto trabajo 😱
It is amazing how many details you have made and included, and that little chameleon is very cute :) I am sure that your friend from Brazil will like it a lot 😇
Hello @mipiano Thank you very much, I'm glad you like it. Yes, it really was a very difficult and exhausting work, with many details, but my friend deserves it and I know she will love it. 🤭
Thanks for reading...!
😇
Estaba navegando en hive cuando de repente mis ojos se quedan encantados con esta obra de arte, que hermoso te quedó amiga, me imagino todo el trabajo que hiciste y se nota en lo perfecto que te quedó. Waooo que bueno que tus trabajos hayan ya cruzado las fronteras y que es en realidad tu trabajo merece estar en todos los países, es realmente una hermosa, tiene varios elementos y todos están hermosos, mientras más lo detallo y leo el post me doy cuenta de cada detallito que tiene. De verdad quedé loco, admiro mucho este trabajo. Saludos!!
Hola @chemi.art me alegra que haya capturado tu atención, me encanta hacer algo que cautive y hacer más de lo que puedan esperar, y deseando que sea de provecho para aquel que va emprender o mejorar su trabajo.
Gracias por tu comentario 🤗
Que gran trabajo, está muy hermoso!! Felicidades ❣️
Muchas gracias, me alegra mucho la recepción que ha tenido mi trabajo y me inspira a continuar creando. Gracias por leer.
Que hermoso, me encanta Rapunzel, es un gran don, tengo cierto conocimiento y me gustaría aprender más, estoy segura de que esto me servirá, muchas gracias por compartir amiga, saludos.✨
Muchas gracias 🤗 a mí me gustan todas las princesas de Disney.😁
Esa es la idea compartir el conocimiento con otros, hay muchas personas con talento o con un don que solo necesitan ser pulidos y si puedo aportar mi granito de arena con lo que he aprendido hasta ahora, lo haré. Gracias por leer. 🤗
Que trabajo tan hermoso y detallado, me encanta la habilidad que tienes con la pintura, está hermosísimo 💕💖💓💞
Holaa @sylregne muchas gracias, me alegra que te haya gustado. Este es solo uno de los próximos proyectos que tengo por hacer. Gracias por leer.🤗
Amiga que hermoso e impecable tu trabajo 😻 Wow! Gracias a Dios tienes un don muy bonito. Te felicito 💟 @ferguis-ve
Holaaa amiga @purpleglitter. Gracias a Dios tengo ese don y a su vez El me permite desarrollarlo cada vez más. Gracias por el apoyo 🫂
Wow, simplemente increíble !!
Paciencia nivel experto
🤣🤣🤣 muchas gracias @janusmolinovsky. Si fueron muchas horas de trabajo y paciencia pero valió la pena.😁
Me sorprende tanto talento y prolijidad😍😍 está super detallado y con mucha precisión!! Me gustó mucho esa técnica que usaste para darle efecto 3D. Te felicito por esta belleza!!🌸
😊 Muchas gracias @imena siempre intento hacerlo lo mejor posible con lo que tengo al alcance de la mano y desde ahí surgen las ideas para esos trucos. Que bueno que te haya gustado, vienen más proyectos en camino...😁 Gracias por leer..!
hola esta hermoso, como cada detalle le va dando forma, tienes mucha paciencia
Hola @nahinels Muchas gracias, yo para entretenerme un poco lo veo como armar un rompecabezas🤭, disfruto mucho de hacerlo, me relaja. Gracias por leer..!
Quedo hermoso, lindo trabajo, saludos.
Muchas gracias @brahiam15. Gracias por leer..!
Detrás de esa maravilla de obra que lograste están dos ingredientes que no nombraste en tu lista: El amor y la pasión que le pones a cada diseño. Sin ellos la cosa no camina bien. Se ve en la dedicación, el cuidado de cada detalle y el resultado final es hermoso. Felicidades, tienes un gran talento.
Hola @gpache tienes mucha razón no los nombre pero la verdad es que amo hacer este tipo de cosas, algunos lo ven como un trabajo que de hecho lo es, pero esto para mí es un tiempo de relajación y poner a volar mi mente. Gracias por la apreciación y por leer..!
Que bello tu trabajo amiga. Pero se ve muy laborioso. Debes tener mucha paciencia para cada uno de tus trabajos.
Hola, si es una labor con muchos detalles, requiere paciencia y mucha creatividad. Pero me relaja mucho hacer estos proyectos, podría pasar todo el día haciéndolo y sería feliz😊
Me encanto tu trabajo amiga los ojos son un gran toque para este tipo de trabajo, los detalles felicidades🤗
Hola @dayanita2 muchas gracias, justamente aunque parezca increíble los ojos son un punto fundamental y hay que conocer la técnica para que la mirada tenga el efecto deseado, por ahí vienen muchos proyectos con nuevas técnicas y trucos. Gracias por leer.😊
Gracias a ti por compartir amia @ferguis-ve
Que hermosura de trabaja realizaste, Dios bendiga tus manos, eres una mujer bendecida. Gracias por mostrarnos como lo haces