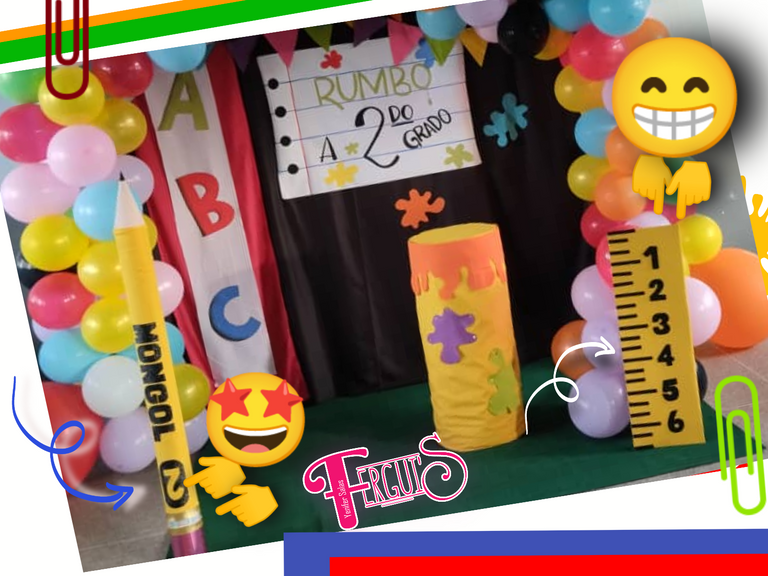
Hola hola familia creativa de HIVEDIY que la bendición de Dios nos acompañe siempre, culmina el año escolar para nuestros hijos y las maestras consiguen aliadas importantes en la madres manualistas, ese es mi caso ☺️. En esta ocasión la maestra de mi hija me pidió que la ayude con la decoración del salón para la fiesta de despedida, sin pensarlo acepté el reto, después de todo quien mejor que yo para aportar un granito de arena y que mi hija tenga una fiesta de grado inolvidable?. Como la mayoría de los casos el presupuesto es restringido y tuve que hacer una decoración con solo 20$. Para mí fortuna previamente había decorado el salón de mi hijo menor así que ya contaba con algunos materiales, solo completé la decoración con un hermoso lapiz y regla acá les muestro como lo hice...
Hello hello HIVEDIY's creative family, may God's blessing be with us always, the school year is ending for our children and the teachers get important allies in the manualist mothers, that is my case ☺️. This time my daughter's teacher asked me to help her with the decoration of the hall for the farewell party, without thinking I accepted the challenge, after all who better than me to do my bit and that my daughter has an unforgettable graduation party?, as most of the cases the budget is restricted and I have to make a decoration with just 20$. Fortunately for me I had previously decorated my youngest son's room so I already had some materials, I only completed the decoration with a beautiful pencil and a ruler, here I show you how I did it...
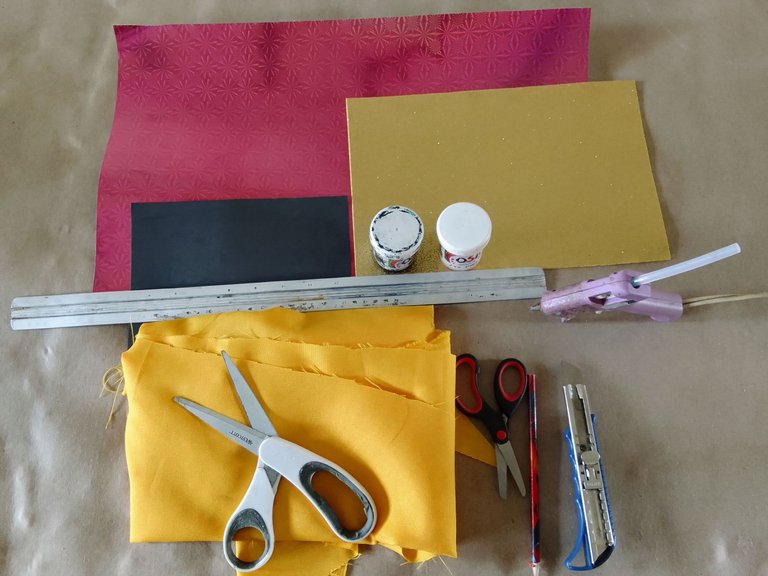
- Cartón 3 en kilo.
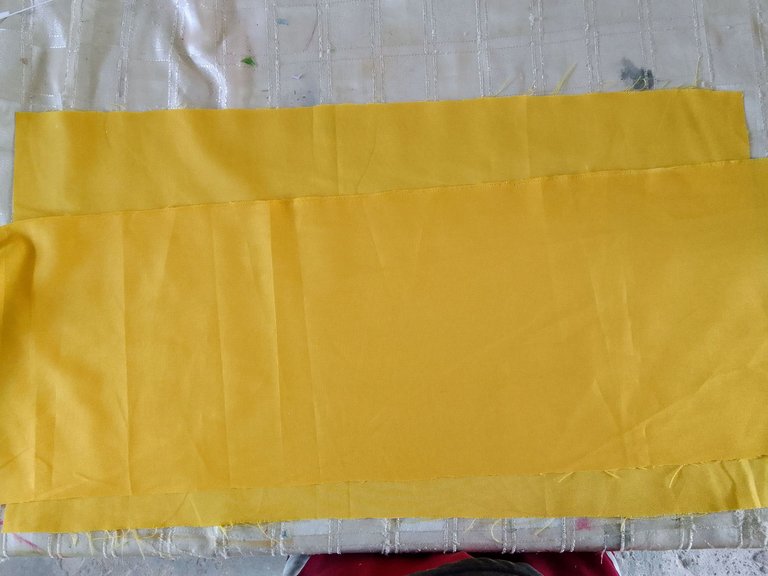
- Tela amarilla.
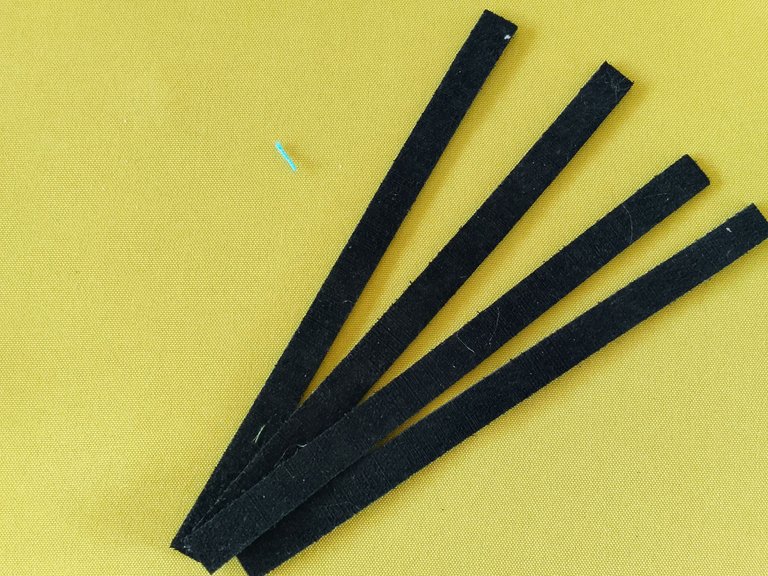
- Foami negro y dorado.
- Cartulina holográfica plateada y fucsia.
- Pintura al frío.
- Silicón en barra.
- Tubo de cartón.
- Pistola de silicón.
- Pincel.
- Exacto.
- Regla.
- Tijeras.
- Cinta métrica.
- Lápiz.
- Cardboard 3 in kilo.
- Yellow fabric.
- Black and gold Foami.
- Silver and fuchsia holographic cardboard.
- Cold paint.
- Silicone stick.
- Cardboard tube.
- Silicone gun.
- Brush.
- Exact.
- Ruler.
- Scissors.
- Tape measure.
- Pencil.
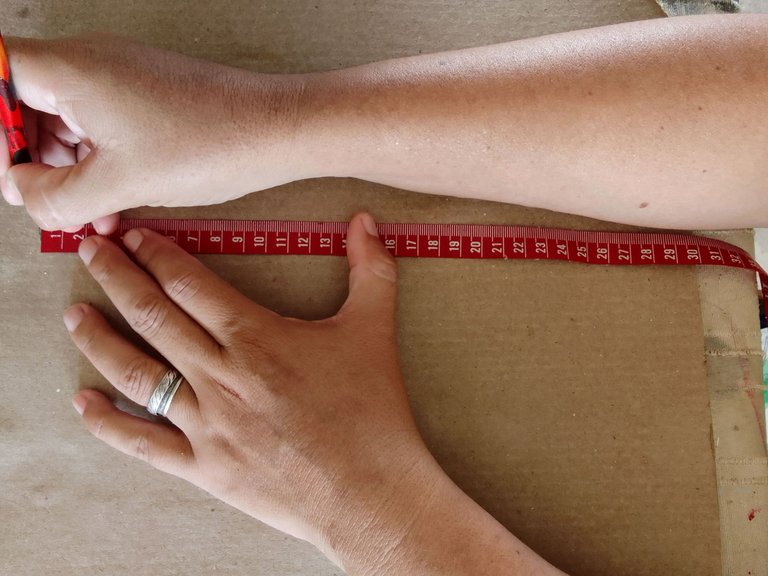
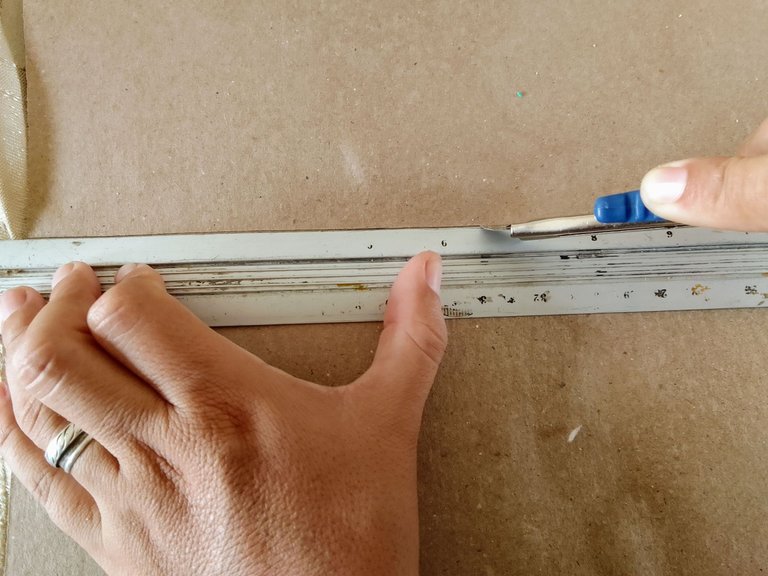
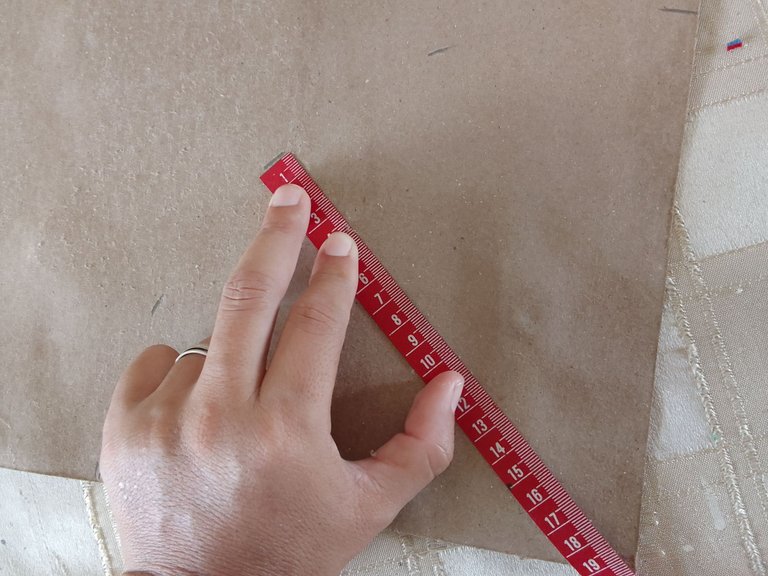
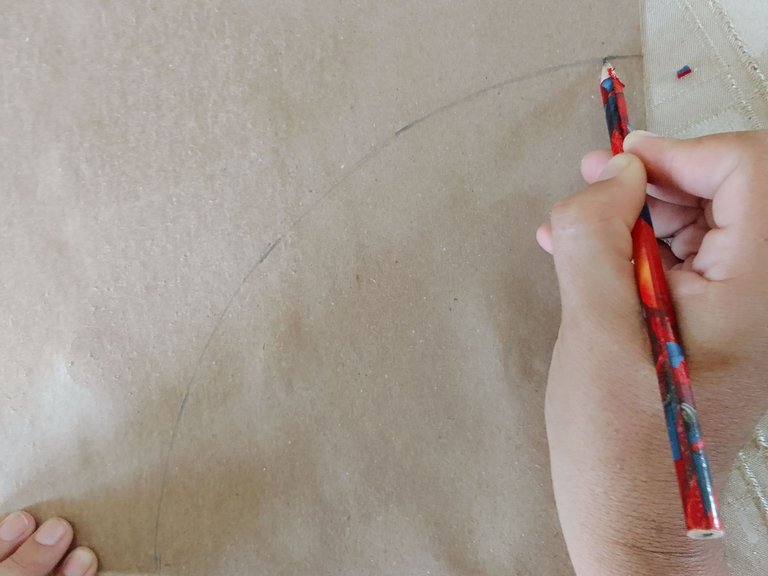
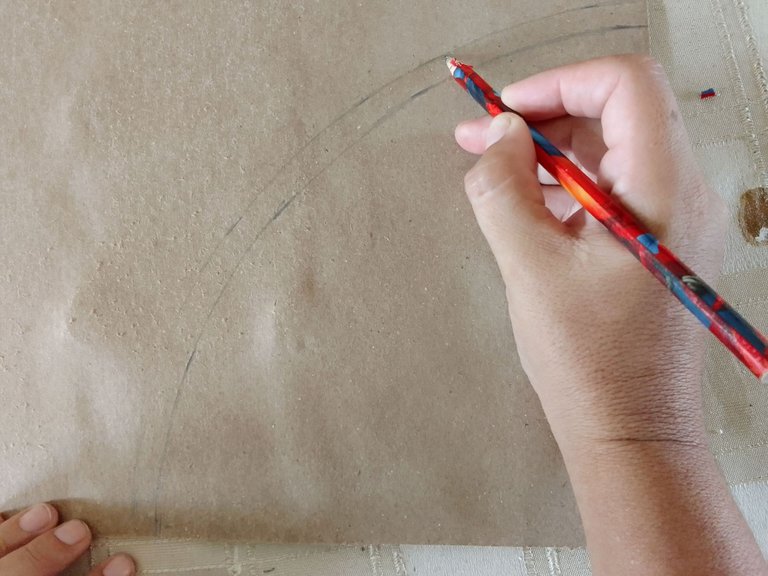
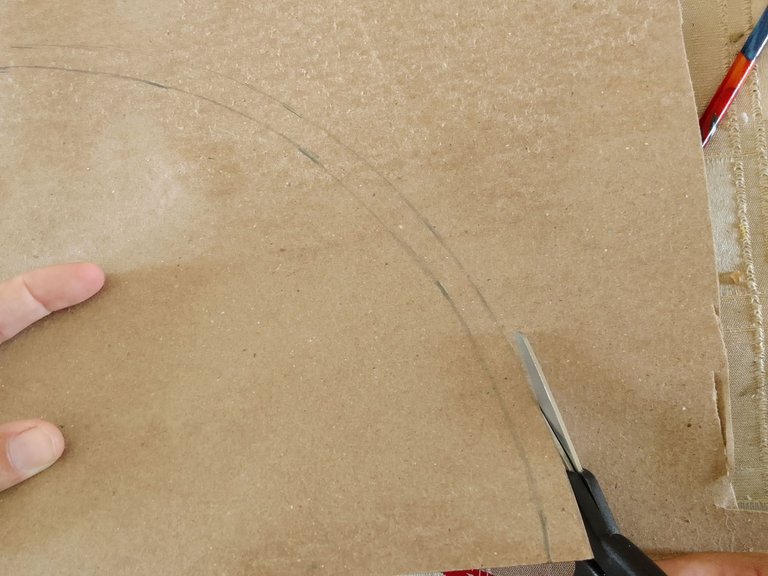
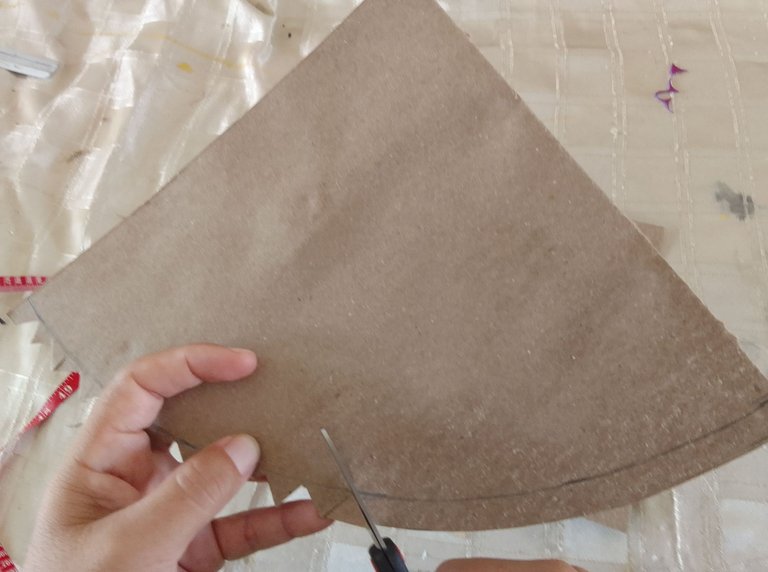
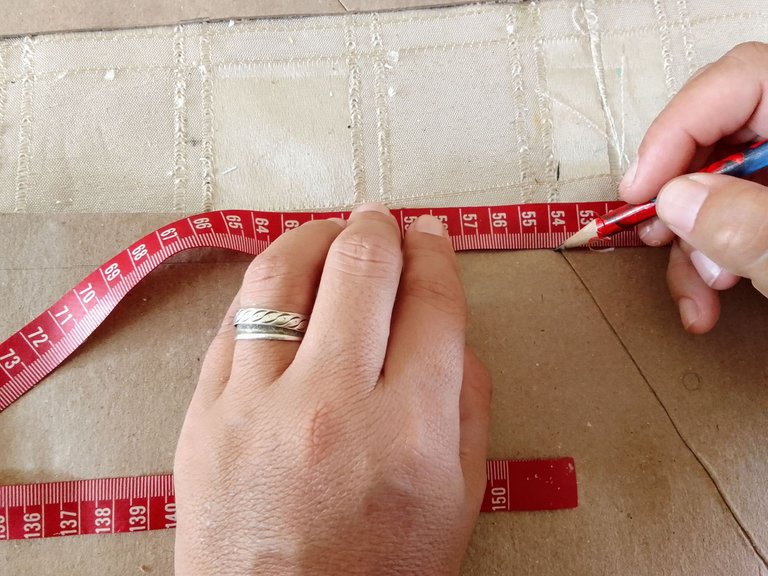
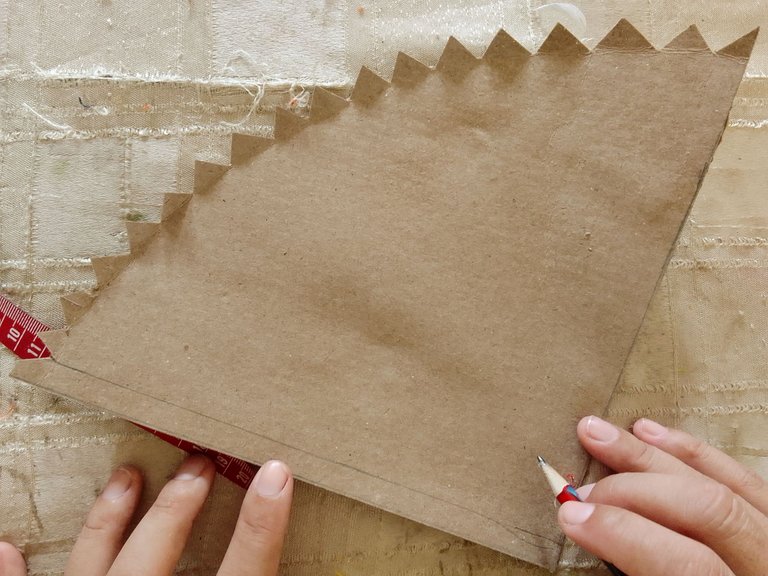
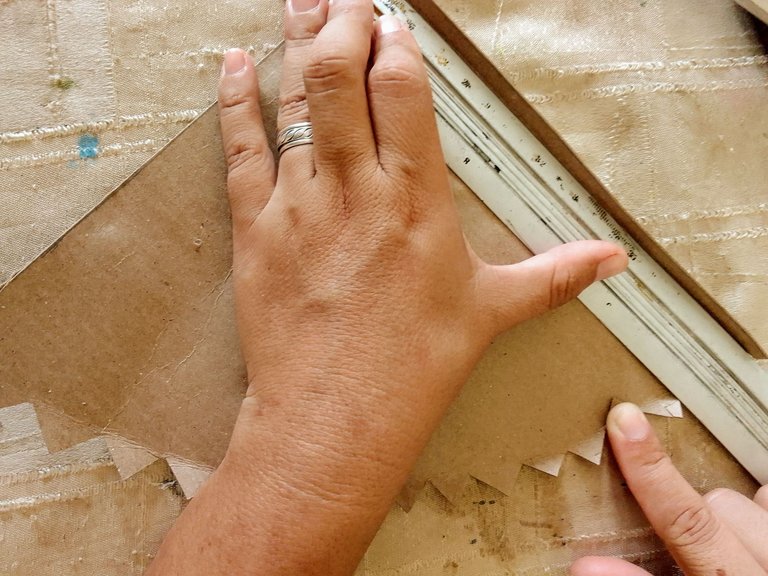
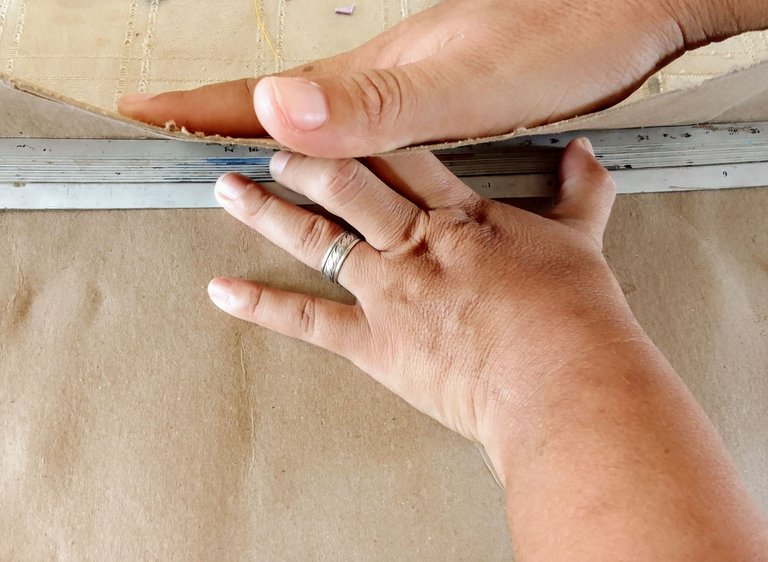
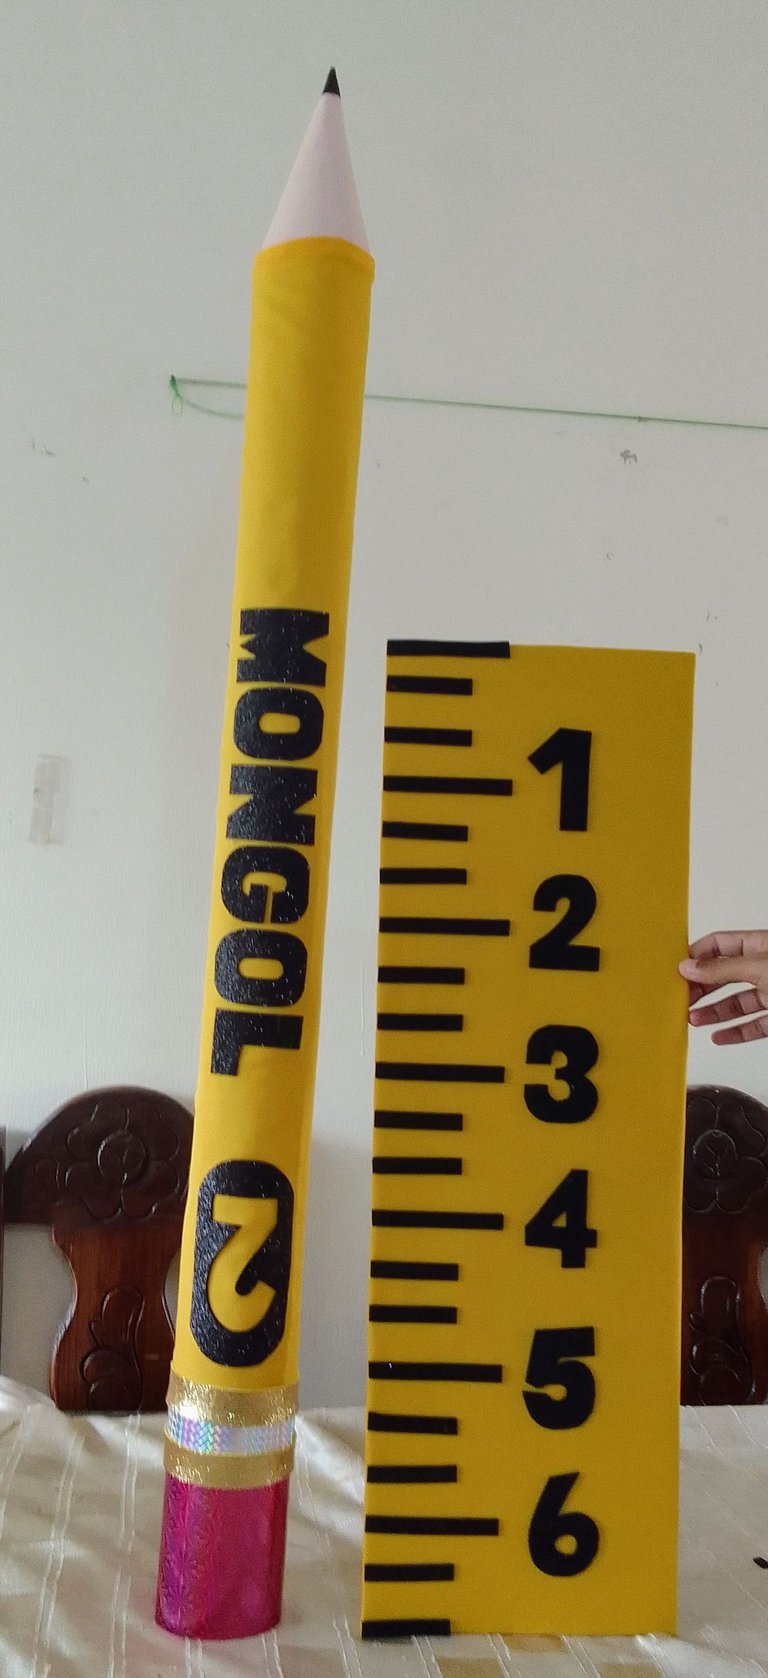
Con la ayuda de la cinta métrica medí el cartón para conocer su longitud y saber con qué magnitudes trabajar. Luego marqué 2 lineas rectas paralelas de 1.30 metros de largo por 30 centímetros de ancho (para el cuerpo del lápiz) y corté, para el área de la punta, por no tener un compás. Medí desde una de las esquinas del cartón 20 centimetro hasta formar 1/4 de circunferencia, repetí este procedimiento a 21 centimetros formando un listón de 1 centímetro que corté en forma de picos o semi triángulos.
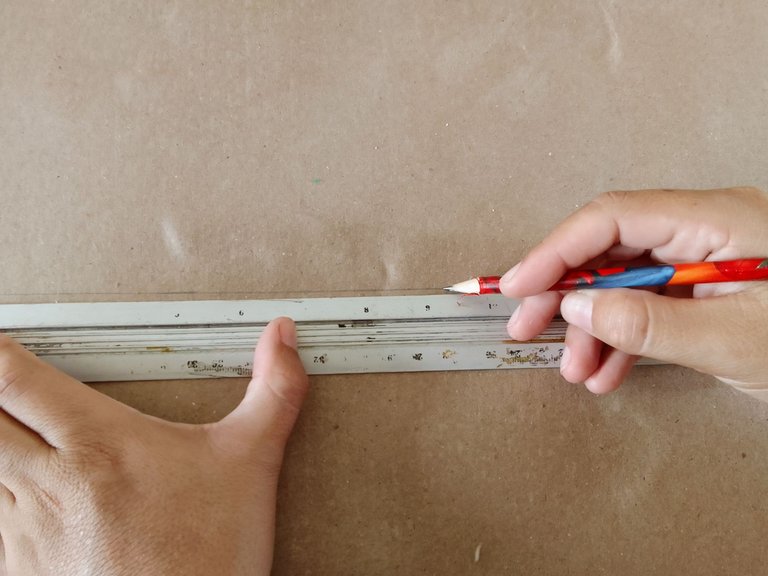
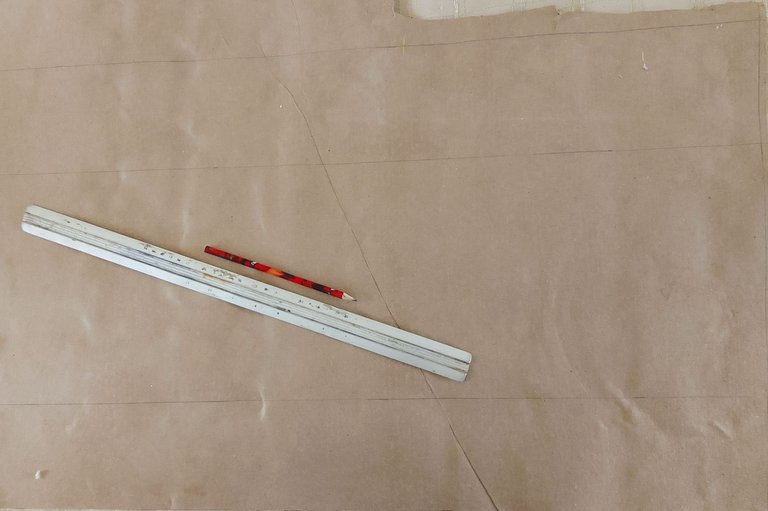
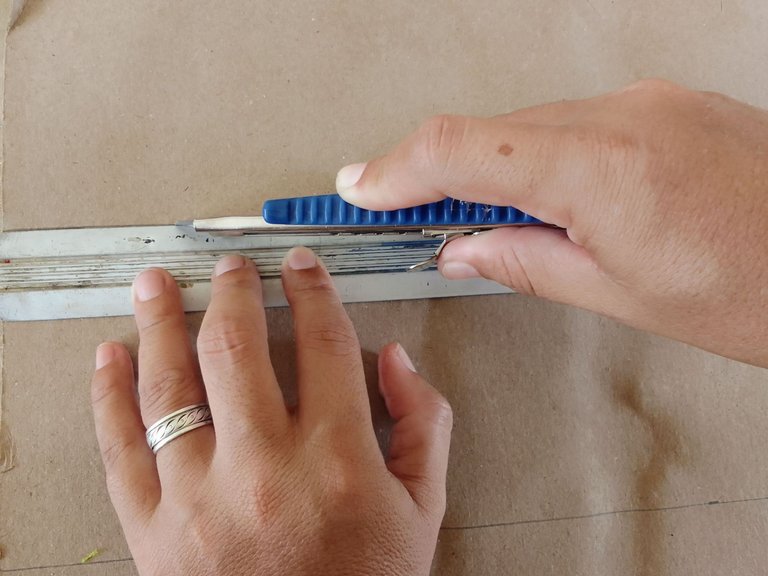
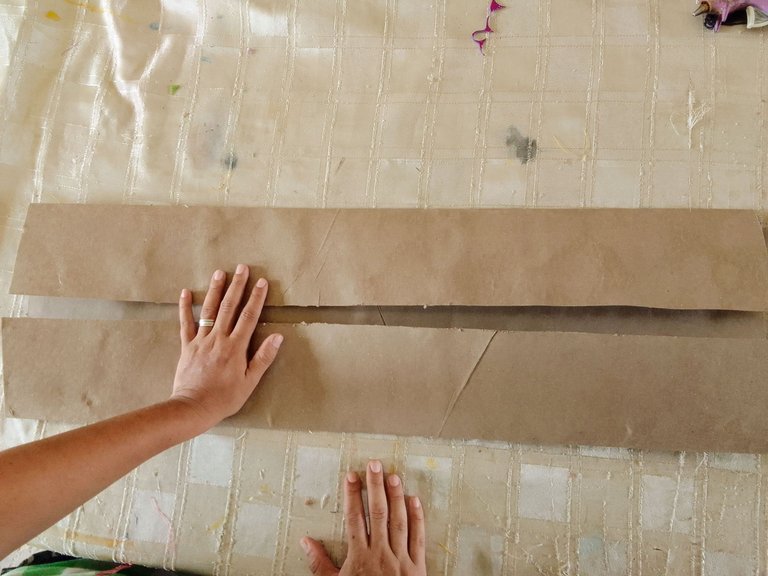
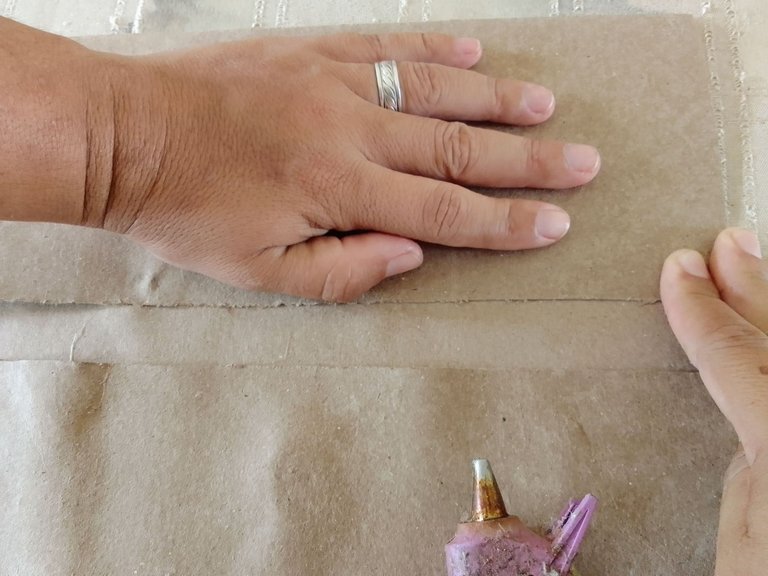
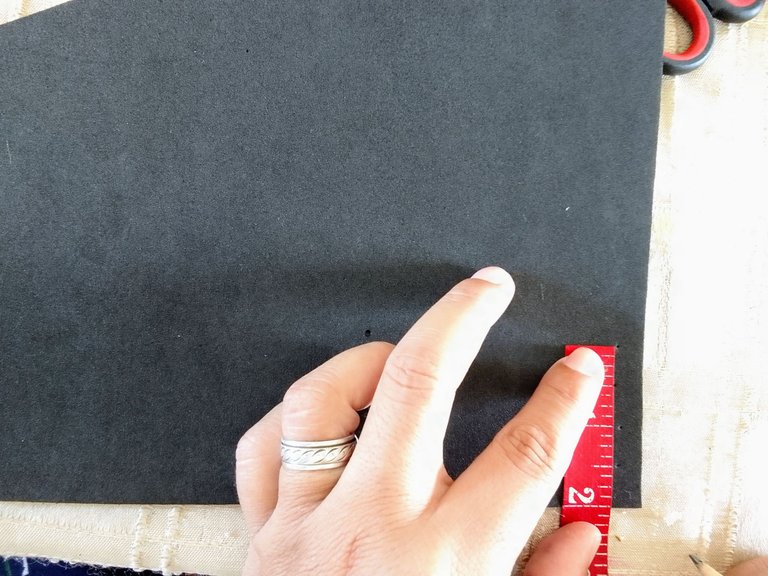
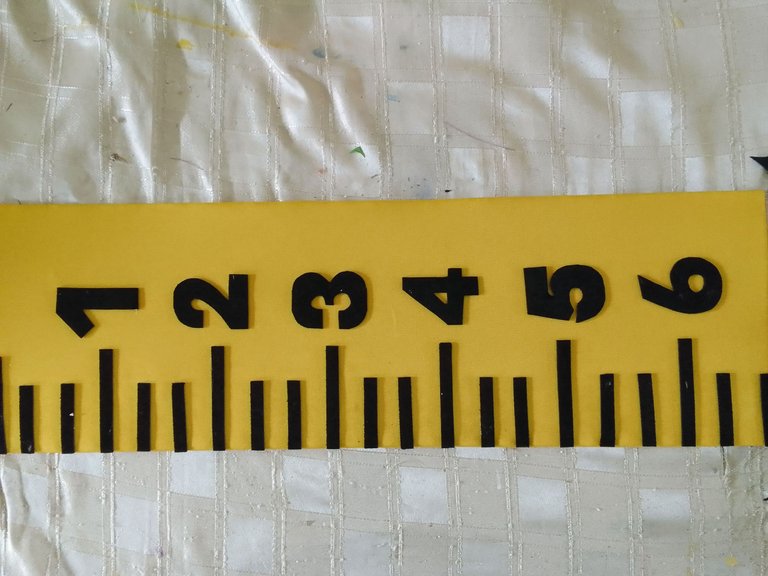
Para la regla realicé 2 lineas de 80 por 46 centimetros de ancho, estos 46 centimetros los dividí en 2 franjas de 11.5 centímetros a los lados y una de 23 centímetros al centro, esto con la intensión de hacerla doble porque el cartón 3 en kilo no es tan rígido y tiende a doblarse, posteriormente procedi a recortar el borde de la figura.
With the help of the tape measure I measured the cardboard to know its length and to know which magnitudes to work with. Then I marked 2 parallel straight lines of 1.30 meters long by 30 centimeters wide (for the pencil body) and cut it. For the area of the tip, because I didn't have a compass. I measured from one of the corners of the cardboard 20 centimeters to form 1/4 of a circumference, I repeated this procedure at 21 centimeters forming a 1 centimeter strip that I cut in the form of peaks or half triangles.
For the ruler I made 2 lines of 80 by 46 centimeters wide, these 46 centimeters I divided them into 2 strips of 11.5 centimeters on the sides and one of 23 centimeters in the center, this with the intention of making it double because the 3 in kilo cardboard is not so rigid and tends to bend, then I proceeded to cut out the edge of figure.


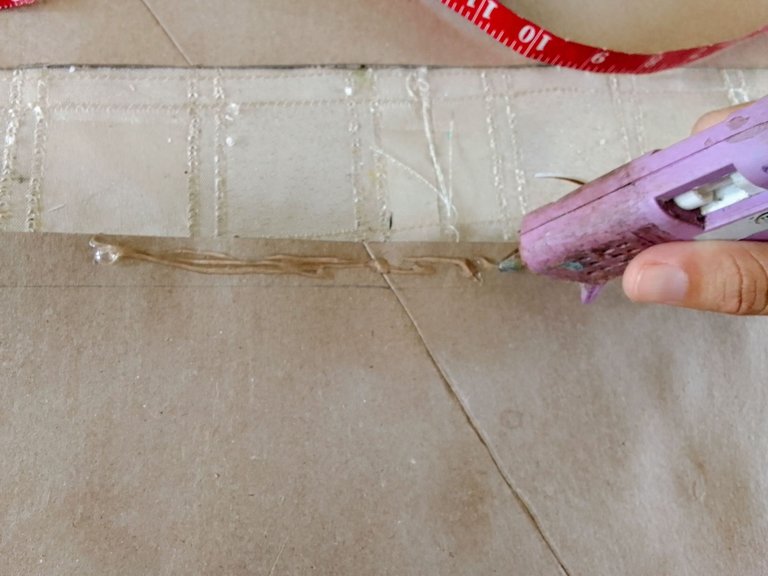
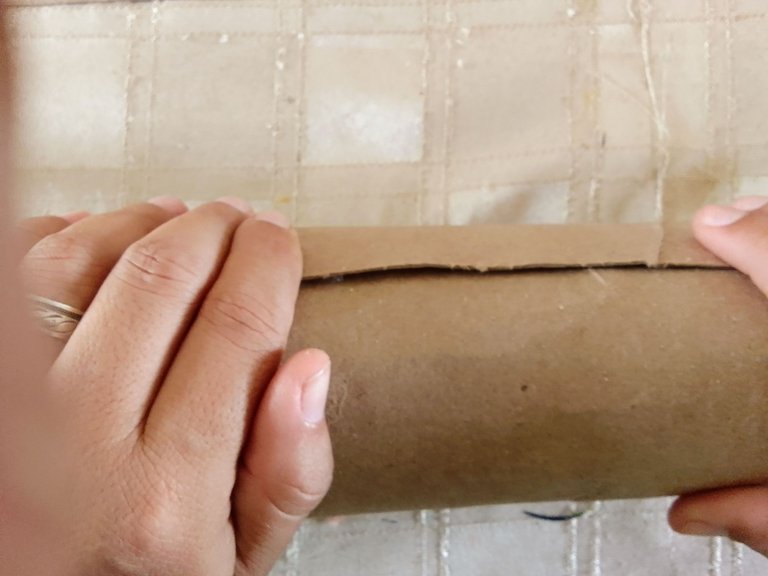
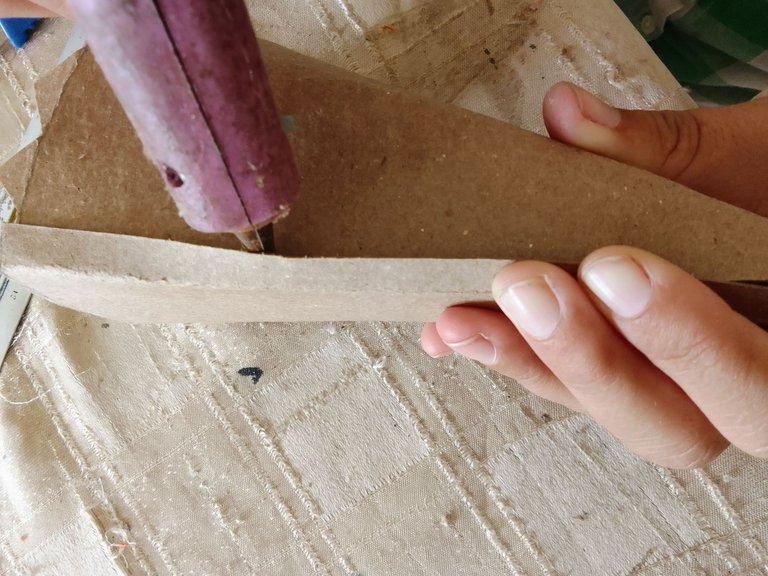
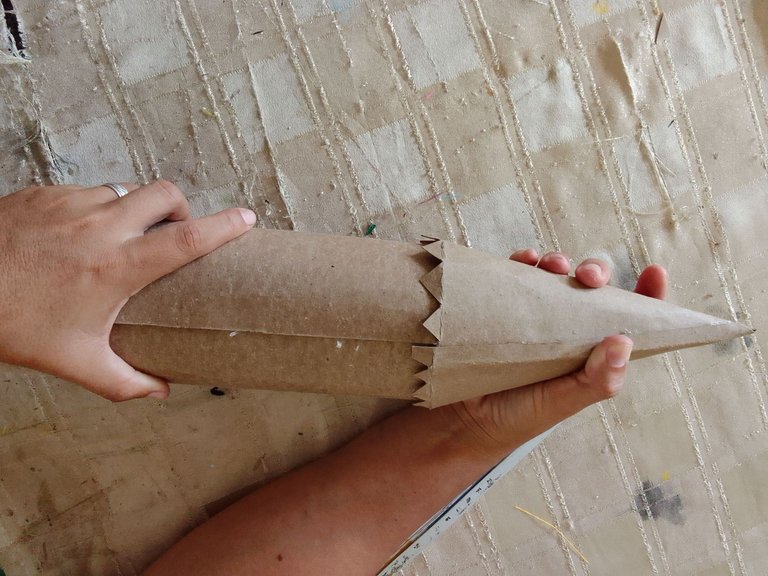
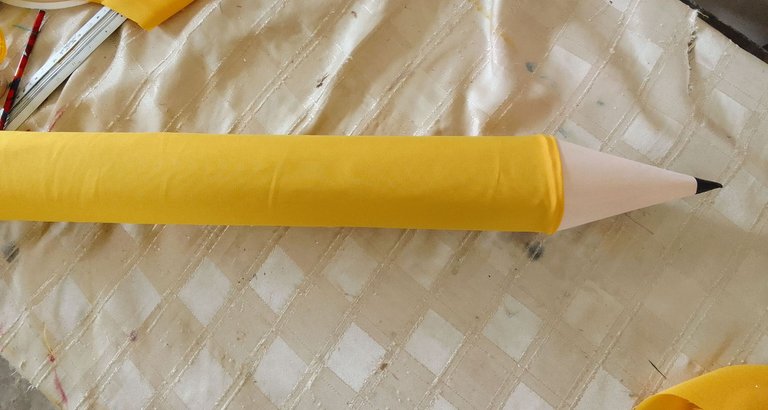
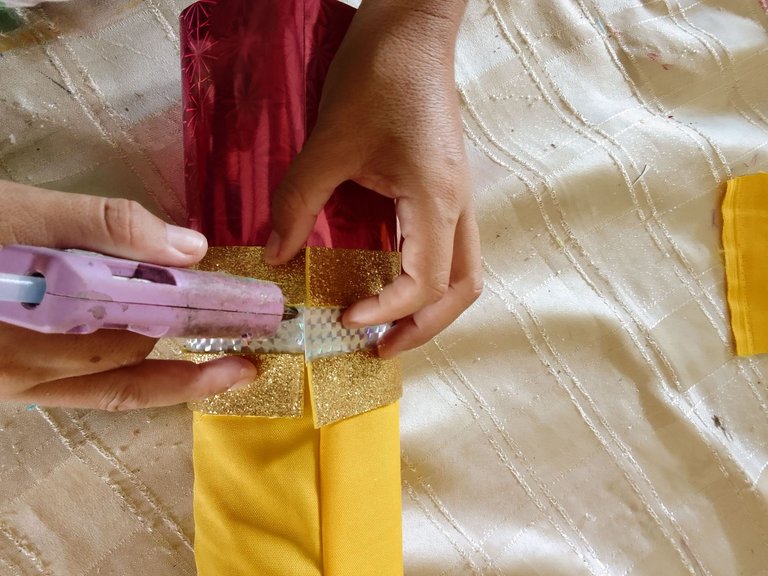
Para doblar el cartón y elaborar el lápiz hice uso de un tubo del mismo material pero más resistente, este me permitió manejar el cartón con mayor facilidad, sin necesidad de maltratar los bordes, luego medí una pestaña de 1 centímetro y agregué silicón caliente en la pestaña para unir ambos extremo del cartón (el recurso de la pestaña es un tip muy importante que ayuda a dar un mejor acabado además de mayor adherencia). Obtenido el cuerpo procedi a unir con silicón caliente los extremos del 1/4 de circunferencia para formar la punta del lápiz una vez seco junté con silicón caliente el cuerpo con la punta del lápiz.
En el caso de la regla procedi a doblar las franjas de cartón con ayuda de una regla con sentido a la parte posterior o trasera de la regla y lo pegué con silicón caliente.
To fold the cardboard and make the pencil I used a tube of the same material but more resistant, this allowed me to handle the cardboard more easily, without having to mistreat the edges, then I measured a tab of 1 centimeter and added hot silicone on the tab to join both ends of the cardboard (the use of the tab is a very important tip that helps to give a better finish as well as greater adhesion). Once the body was obtained I proceeded to join with hot silicone the ends of the 1/4 of circumference to form the tip of the pencil once dry I joined with hot silicone the body with the tip of the pencil.
In the case of the ruler, I proceeded to fold the cardboard strips with the help of a ruler in the direction of the back of the ruler and glued it with hot silicone.
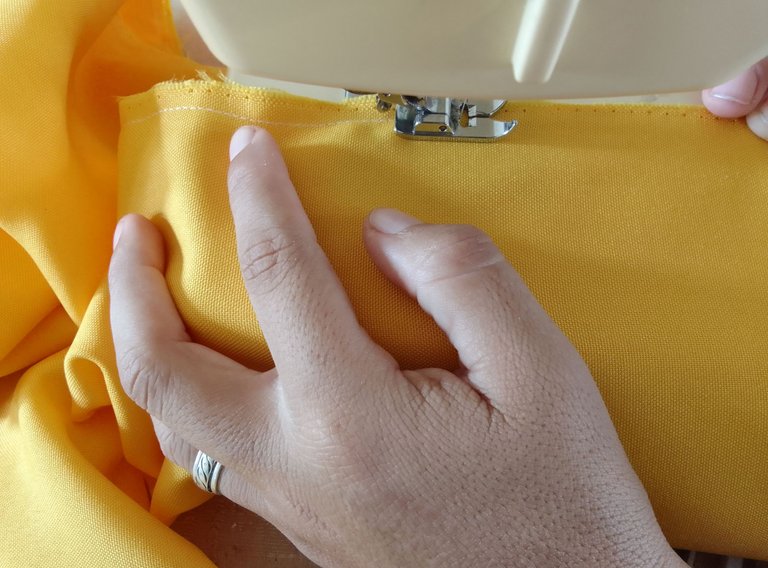
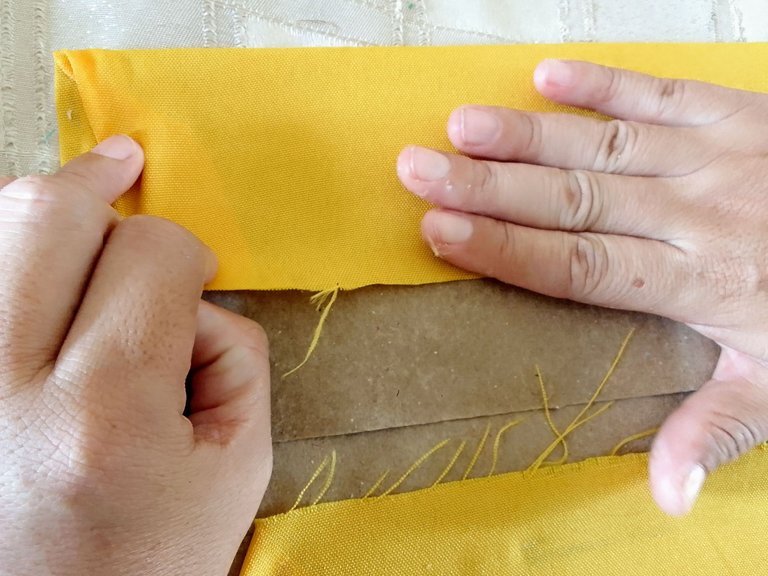
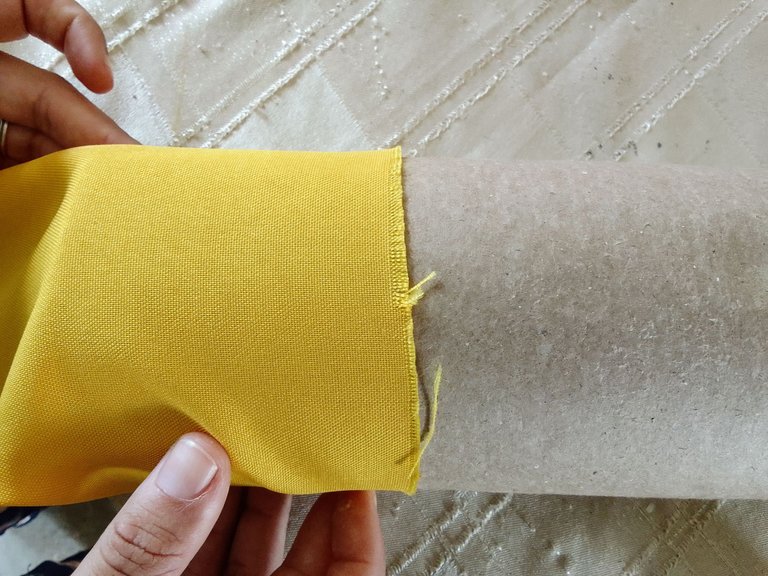
Para el lápiz medí y corte un trazo de tela de 1.30 metros de largo por 40 centímetro de ancho, luego junte los extremos verticalmente y lo pasé por la máquina de coser, obteniendo un forro o funda ideal para vestir el cuerpo del lápiz.
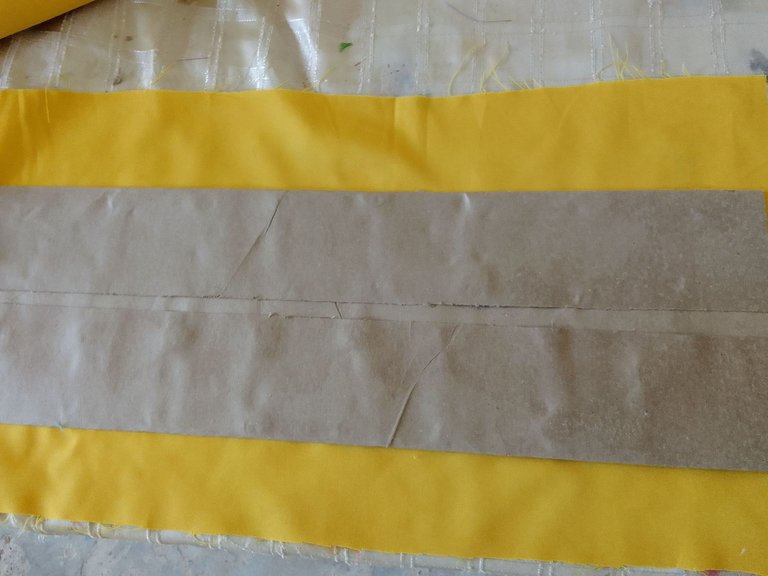
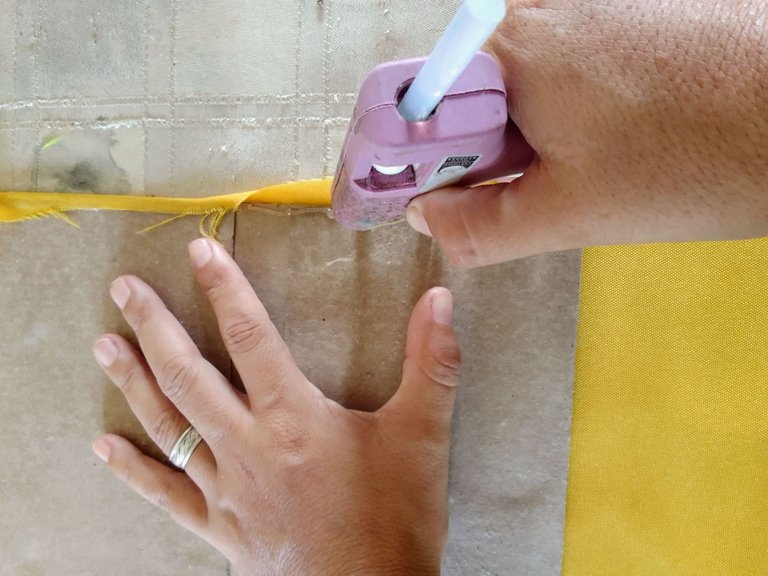
Para la regla la tela no fue suficiente por lo que forre el cartón con la tela amarilla y la pegué con silicón caliente en la parte posterior..
For the pencil I measured and cut a piece of fabric 1.30 meters long and 40 centimeters wide, then I joined the ends vertically and passed it through the sewing machine, obtaining an ideal lining or cover to dress the body of the pencil.
For the ruler, the fabric was not enough, so I lined the cardboard with the yellow fabric and glued it with hot silicone on the back.

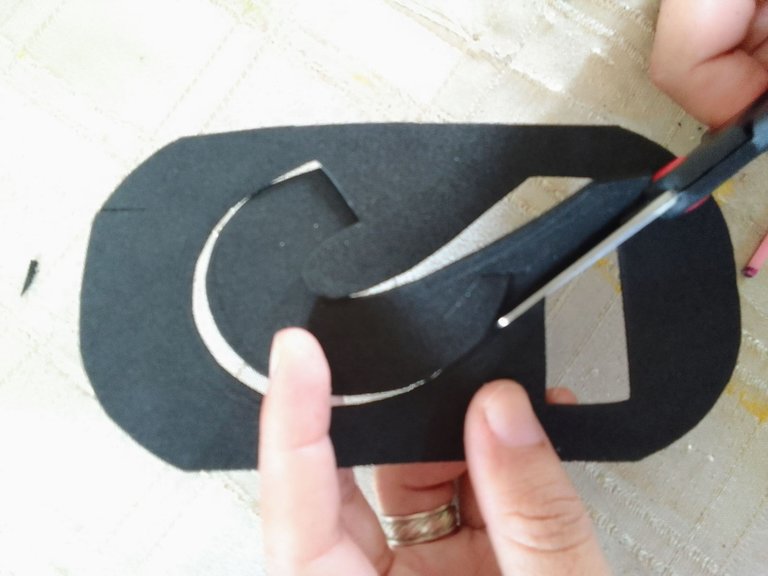
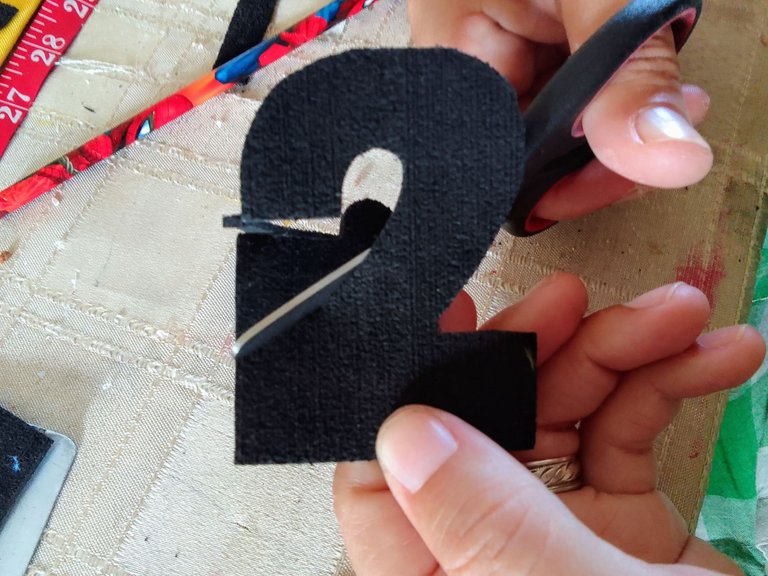
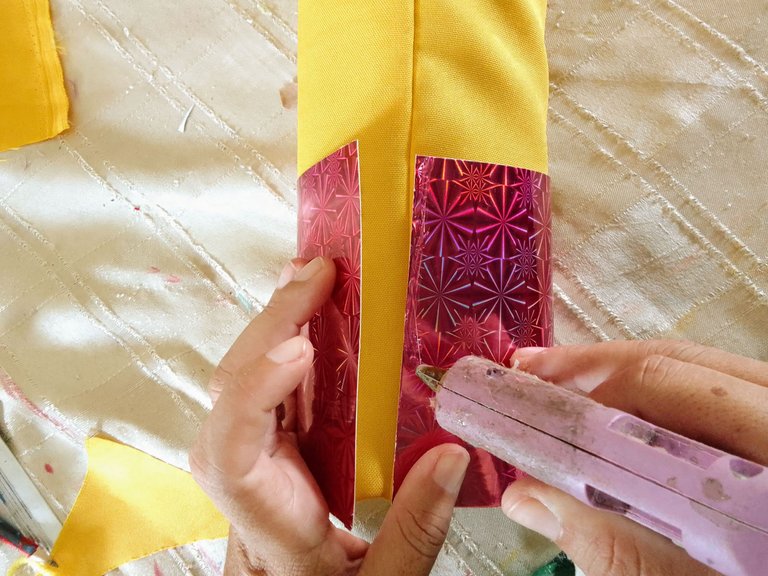
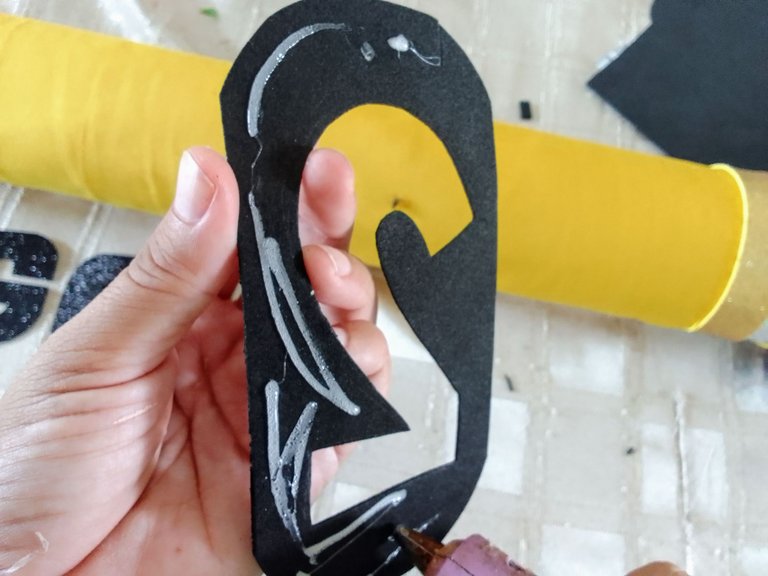
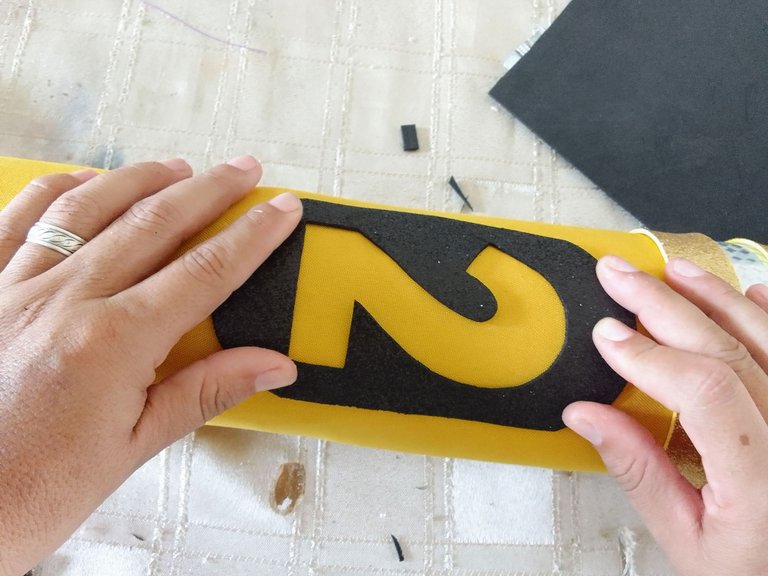
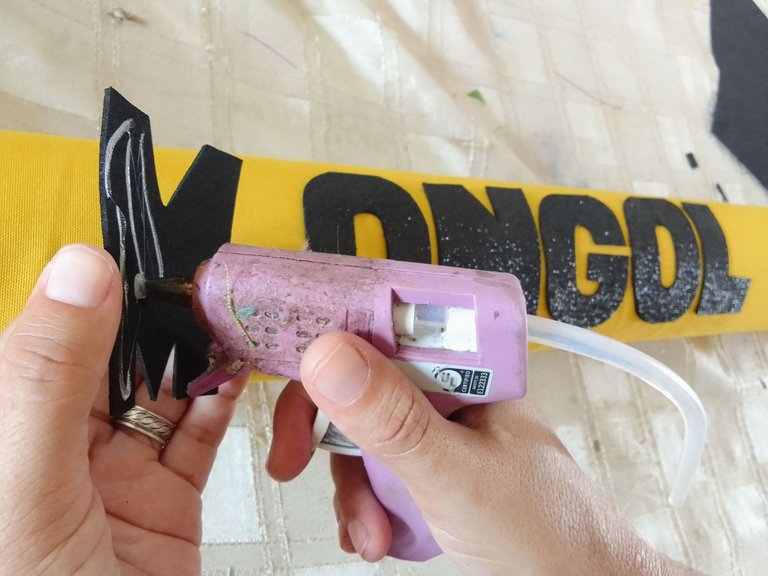
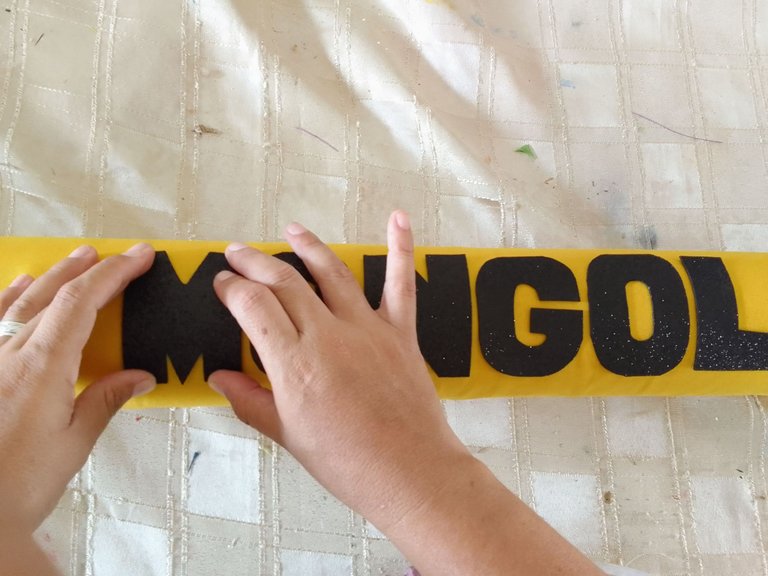
Medí y corte 2 tiras de foami dorado además de 2 tiras de cartulina holográfica (la tira fucsia representa el borrador y la plateada un poco más delgada representa el material de aluminio que sujeta el borrador del cuerpo del lápiz), también recorte a pulso las letras características de la marca de lápiz famosa y antigua de mi país MONGOL y el clásico número 2, el cual obtuve de recortar un óvalo en foami negro y en el medio de este recorte un 2 dejando un vacío con esa forma.
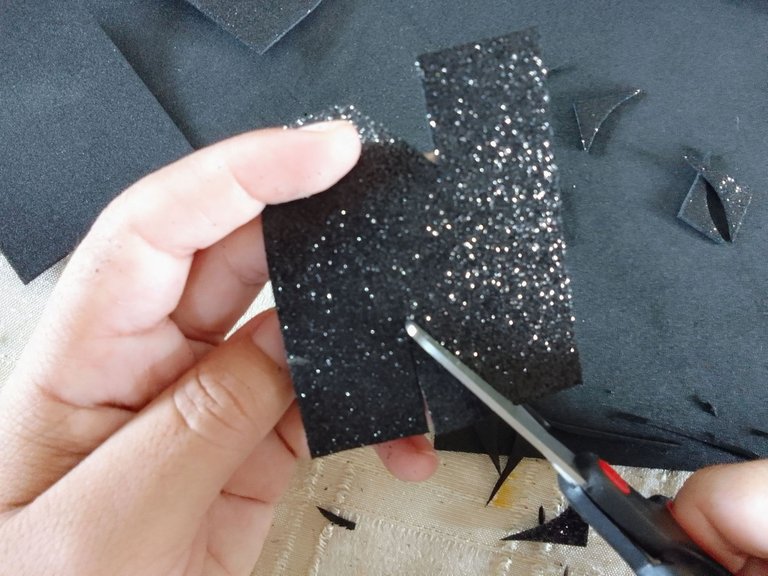
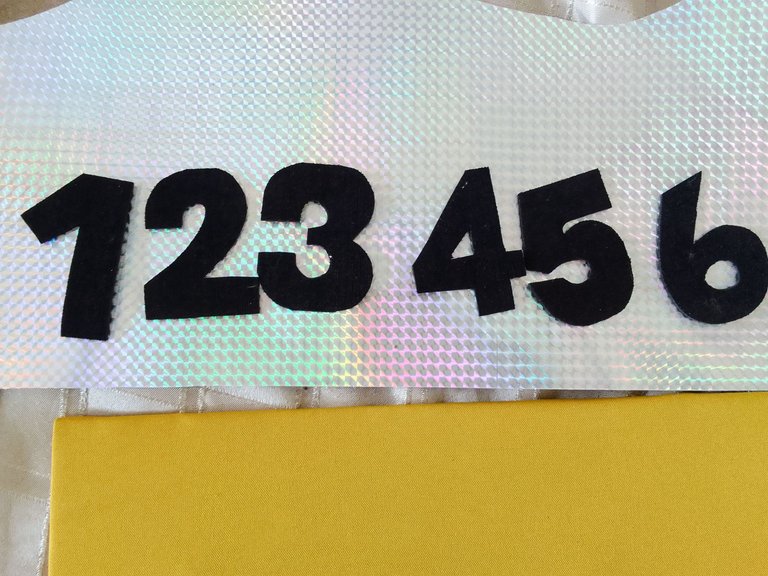
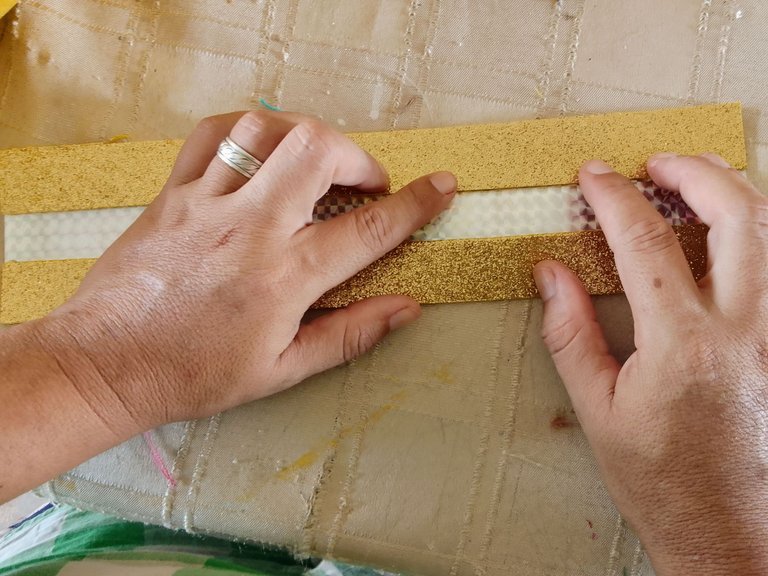
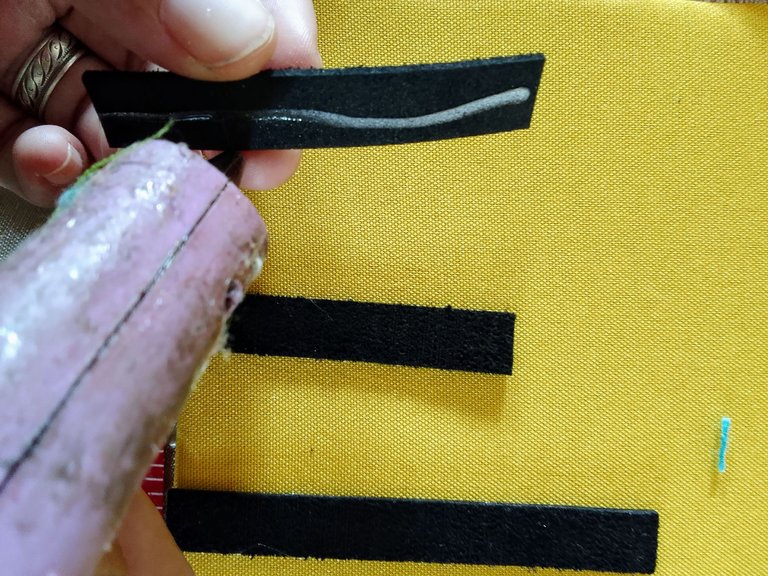
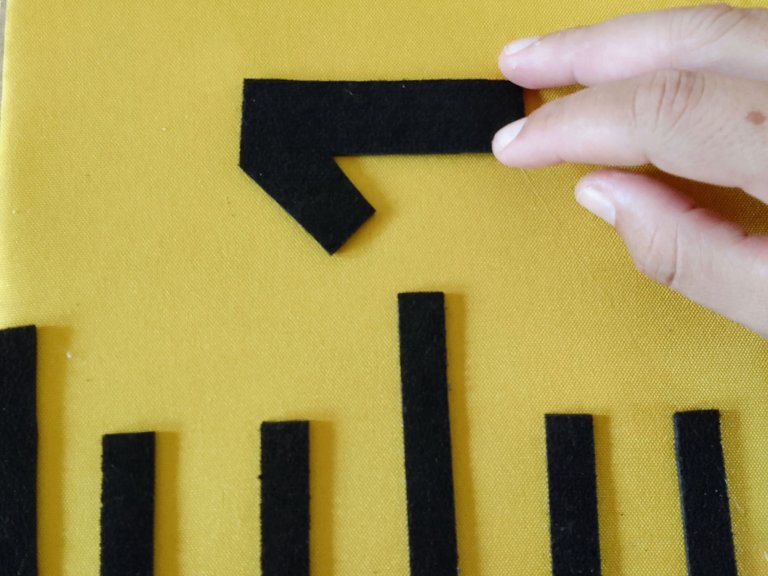
Medí y corte tiras finas de 2 tamaños diferentes en foami negro para simbolizar las líneas que indican las medidas en la regla, simultáneamente recorte a pulso los números que conforman la regla en este caso desde el 1 hasta el 6, todo esto en foami negro.
I measured and cut 2 strips of gold foami and 2 strips of holographic cardboard (the fuchsia strip represents the eraser and the silver one a little thinner represents the aluminum material that holds the eraser of the pencil body), I also cut by hand the characteristic letters of the famous and old pencil brand of my country MONGOL and the classic number 2, which I obtained by cutting an oval in black foami and in the middle of this cut a 2 leaving a void with that shape in the foami.
I measured and cut thin strips of 2 different sizes in black foami to symbolize the lines that indicate the measures in the ruler, simultaneously I cut the numbers that make up the ruler in this case from 1 to 6, all this in black foami.


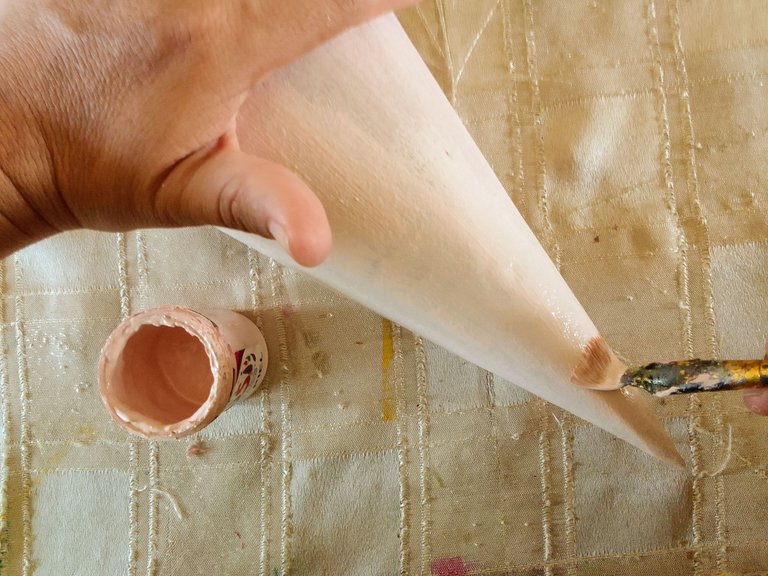
Antes de forrar el lápiz apliqué 2 capas de color piel en la parte superior hasta la punta del mismo y en la punta 2 capas de pintura negra. Dejé secar y procedi a vestir el cuerpo del lápiz con el forro realizado en el paso 3. Posteriormente adjunté las tiras de foami dorado y cartulina holográfica en la parte inferior del cuerpo del lapiz. Por último pegue las letras y el óvalo con el número 2.
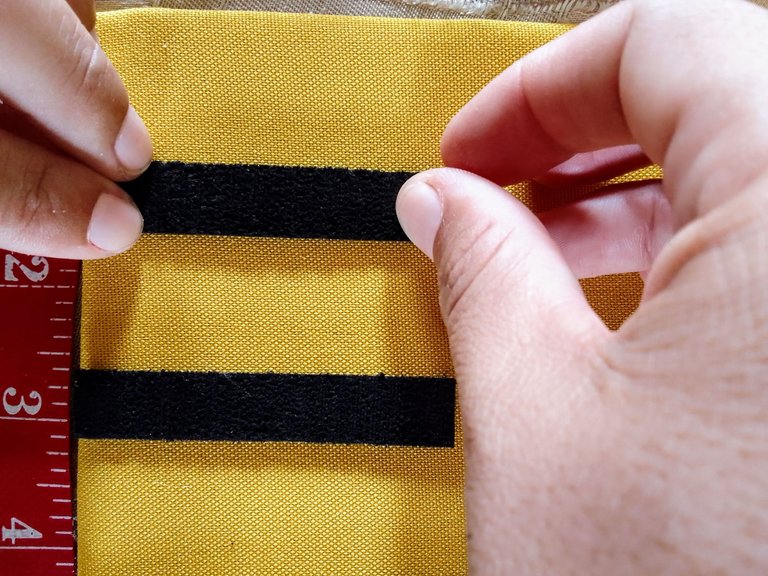
Pegué las tiras a la regla tratando en lo posible de mantener la simetría entre una y otra para esto hice uso de la cinta metrica, para finalizar fijé los números consecutivamente en el cuerpo de la regla.
Before lining the pencil I applied 2 coats of skin color on the upper part up to the tip of the pencil and 2 coats of black paint on the tip. I let it dry and proceeded to dress the body of the pencil with the lining made in step 3. Then I attached the strips of gold foami and holographic cardboard to the bottom of the pencil body. Finally I glued the letters and the oval with the number 2.
I glued the strips to the ruler trying as much as possible to keep the symmetry between one and the other for this I made use of the tape measure, and finally I fixed the numbers consecutively on the body of the ruler.


Después de terminar este proyecto me llamo la maestra de mi hija para que la ayudara a decorar el salón para la fiesta de grado y me pareció la ocasión ideal para mostrarles como se ven estos hermosos elementos en la decoración. Espero sea de provecho para todos que la bendición de Dios siempre este con nosotros. Gracias por leer..!
After finishing this project, my daughter's teacher called me to help her decorate the room for the graduation party and I thought it was the ideal occasion to show you how these beautiful elements look in the decoration. I hope it will be helpful to all of you and that God's blessing will always be with us. Thanks for reading...!
Las fotos de esta publicación son de mi propiedad y fueron tomadas desde mi celular Realme C11, solo una fue tomada por el celular de la maestra de mi hija y tengo su permiso para usarla.
Las ediciones de Foto y el Banner lo realice con las aplicaciones: Poster Maker, Text Art e in shot descargadas desde Play Store.
Textos traducidos en deepL
The photos in this publication are my property and were taken from my Realme C11 cell phone, only one was taken by my daughter's teacher's cell phone and I have her permission to use it.
The photo editions and the banner were made with the following applications: Poster Maker, Text Art and in shot downloaded from Play Store.
Translated texts in deepL.
This post was shared and voted inside the discord by the curators team of discovery-it
Join our Community and follow our Curation Trail
Discovery-it is also a Witness, vote for us here
Delegate to us for passive income. Check our 80% fee-back Program
Gracias por el apoyo.
Congratulations @ferguis-ve! You have completed the following achievement on the Hive blockchain And have been rewarded with New badge(s)
Your next target is to reach 300 comments.
You can view your badges on your board and compare yourself to others in the Ranking
If you no longer want to receive notifications, reply to this comment with the word
STOPTo support your work, I also upvoted your post!
Check out our last posts:
Todo esto es genial. Yo hoy precisamente publiqué un regalito para promoción que hice para la niña de una amiga. Siempee sin geniales estos regalitos porque son para realzar el buen trabajo de los chiquillos.
Holaaa si es un incentivo tremendo para ellos, nosotros como padres siempre tratando de mantener viva esa llama por el estudio. Gracias por el apoyo.☺️
Hola. Se ven muy bonitos los elementos decorativos que hiciste. Muy llamativos e ideales para la ocasión.
Hola, muchas gracias de igual manera ya con eso tengo una base para las futuras decoraciones, siempre incorporando nuevos elementos. Gracias por leer.
!discovery 35
Muy hermoso, excelente decoración 👍
Hola, muchas gracias ☺️
Que ideas tan geniales para decorar una fiesta de graduación, que lo hayas hecho con tela le da un toque más limpio, me ha encantado.
Muchas gracias. Me alegra que te haya gustado, además de verse mejor también valore el hecho que la tela puedo guardarla y reutilizarla. Ya poco a poco iré armando mi propio ser de decoración. ☺️ Gracias por leer.
Que bello todo!!! que fortuna para uno como maestra contar con una representante manualista y colaboradora.
Gracias por compartir @ferguis-ve