
[Esp]
¡Saludos desde mi taller creativo!
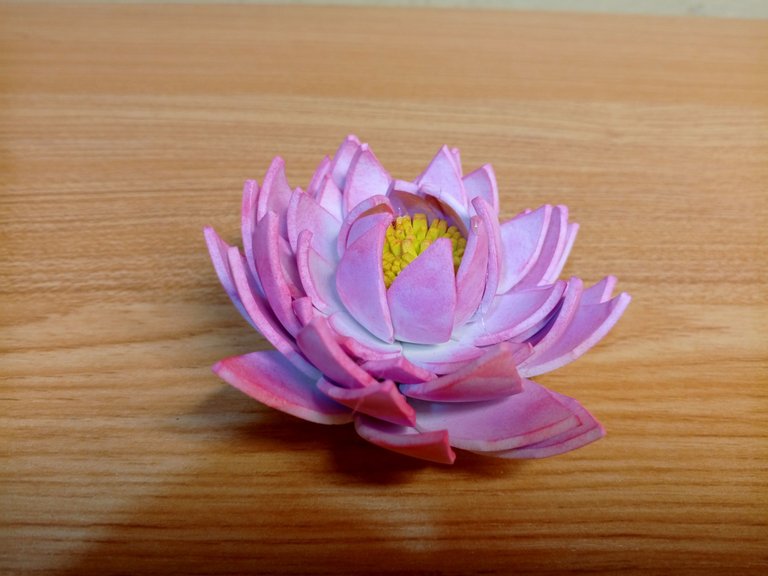
Espero se encuentren bien, inspirada en Feng Shui y cosas Zen, quise hacer una flor de loto, había hecho una ayer, peor no me gustó cómo quedó, volví a intentarlo hoy, me dije a mí misma que podía mejorarlo, así que lo intenté una vez más, corrigiendo algunas fallas que no me gustaron de la flor anterior, la que presento hoy, si me gustó, espero les guste también, es una linda decoración, hasta parece realista.
English version
Greetings from my creative workshop!
I hope you are well, inspired by Feng Shui and Zen things, I wanted to make a lotus flower, I had made one yesterday, but I did not like how it turned out, I tried again today, I told myself that I could improve it, so I tried again, correcting some flaws that I did not like the previous flower, the one I present today, if I liked it, I hope you like it too, it is a nice decoration, it even looks realistic.
Materiales / Materials

| Spanish | English | |
| Foami blanco, verde, amarillo | Foami white, green, yellow | |
| Sombras de maquillaje | Makeup shades | |
| Tijera | Scissors | |
| Pistola de silicón caliente | Silicone hot gun | |
| Plancha | Iron | |
| Lápiz, algún objeto redondo para usarlo como molde | Pencil, some round object to be used as a mold |
Paso a paso / Step by Step
Step 1️⃣/ Paso 1️⃣

 |  |
[Esp]
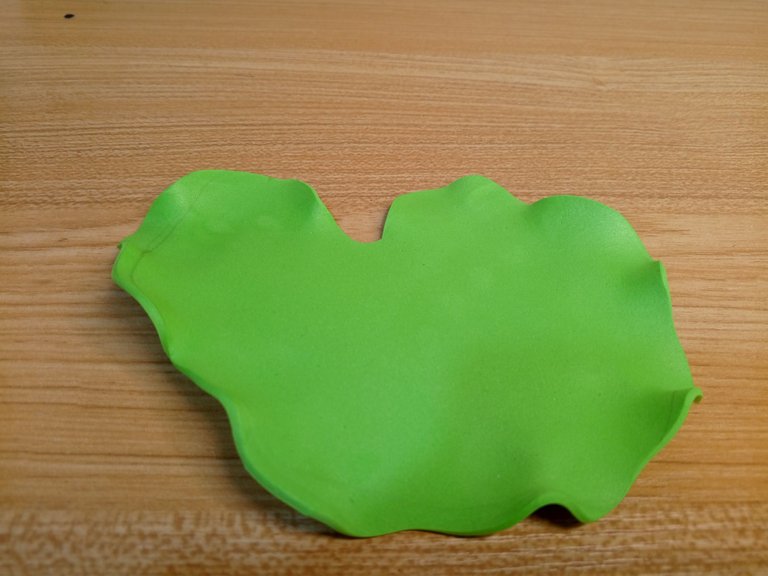
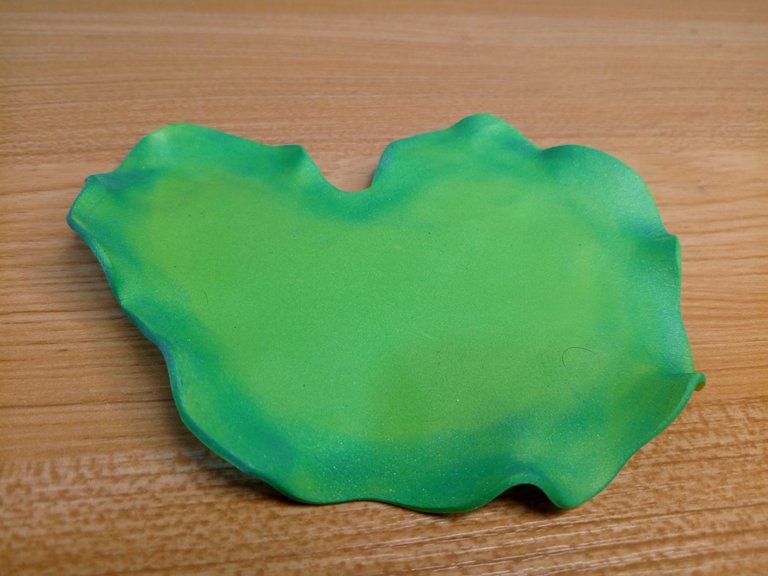
Con ayuda del lápiz traza la forma de una hoja en el foami color verde, recorta.
Termoforma la hoja, aplica un poco de calor con ayuda de la plancha a una temperatura que no signifique un peligro para quemarte, cuando la hoja esté caliente, dobla algunas pestañas de la hoja para que se vea más realista.
Aplica sombra de maquillaje de color verde por el borde de la hoja.
English version
With the help of the pencil trace the shape of a leaf on the green foami, cut it out.
Thermoform the leaf, apply a little heat with the help of the iron at a temperature that does not mean a danger to burn yourself, when the leaf is hot, bend some eyelashes of the leaf to make it look more realistic.
Apply green make-up shadow around the edge of the leaf.
Step 2️⃣/ paso 2️⃣
 |  |
[Esp]
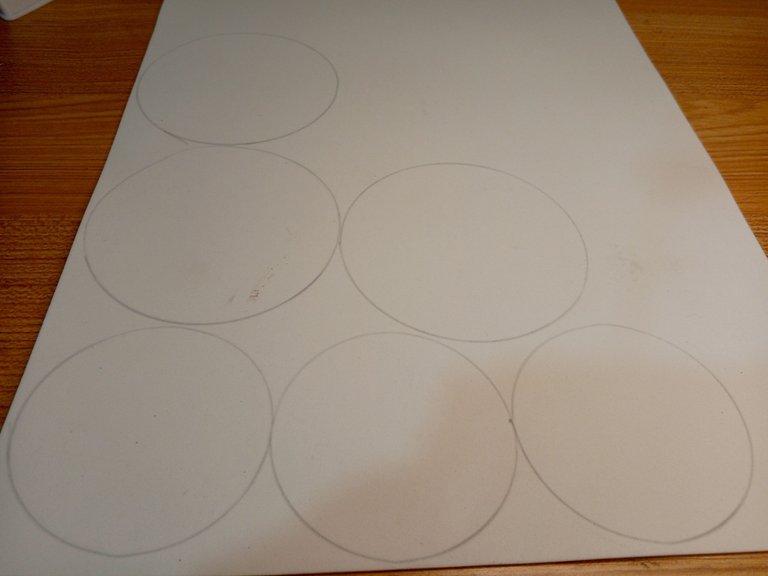
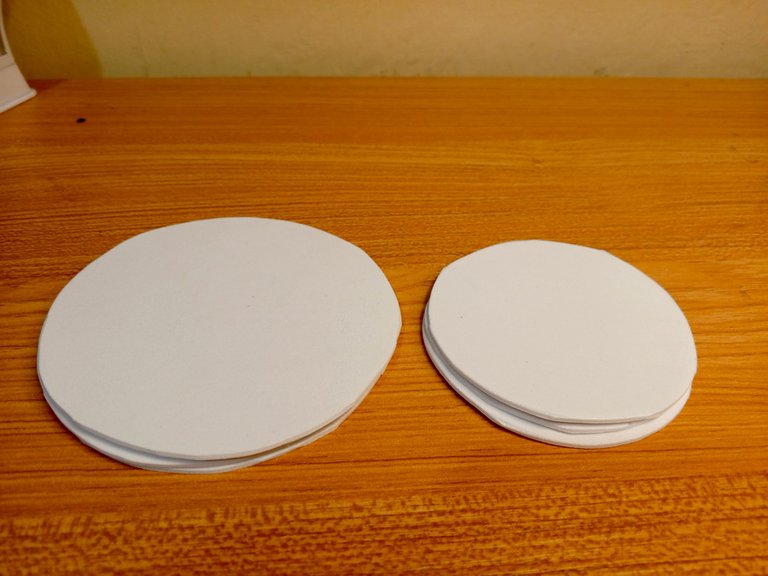
Con ayuda de un objeto redondo marca el foami blanco con el lápiz, necesitas: 3 círculos grandes y 3 círculos más pequeños.
Recorta las figuras.
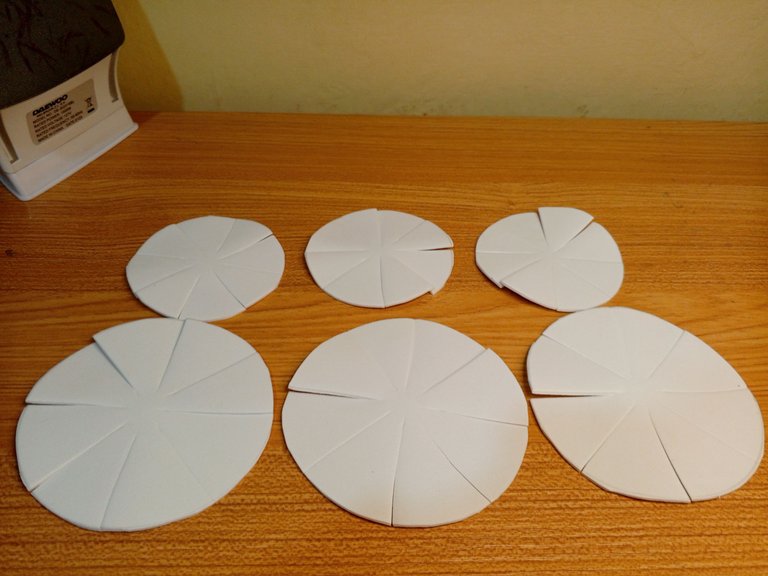
Dobla el foami por el centro y realiza dos cortes, luego dobla el foami nuevamente en el centro y realiza nuevamente dos cortes, luego corta en cada punto céntrico de cada corte como indica la última imagen.
English version
With the help of a round object mark the white foami with the pencil, you need: 3 large circles and 3 smaller circles.
Cut out the figures.
Fold the foami in the center and make two cuts, then fold the foami again in the center and make two cuts again, then cut at each center point of each cut as shown in the last picture.
Step 3️⃣/ paso 3️⃣
 |  | |
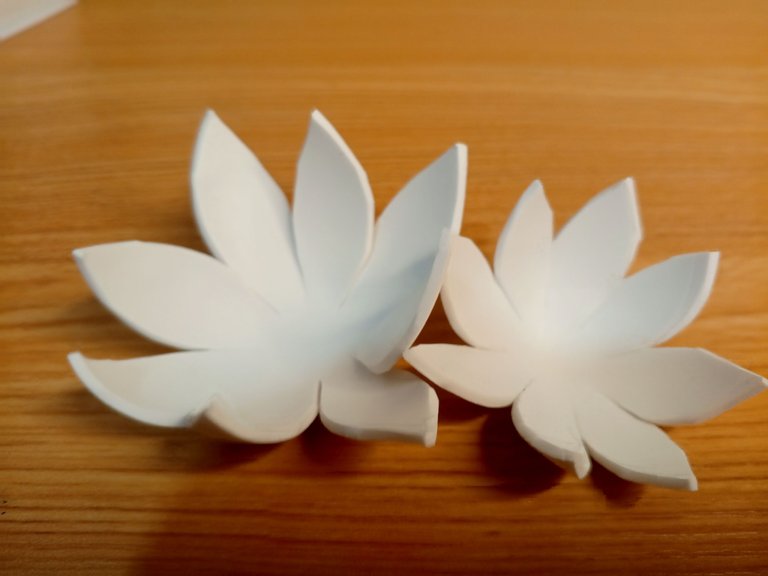 |  |

[Esp]
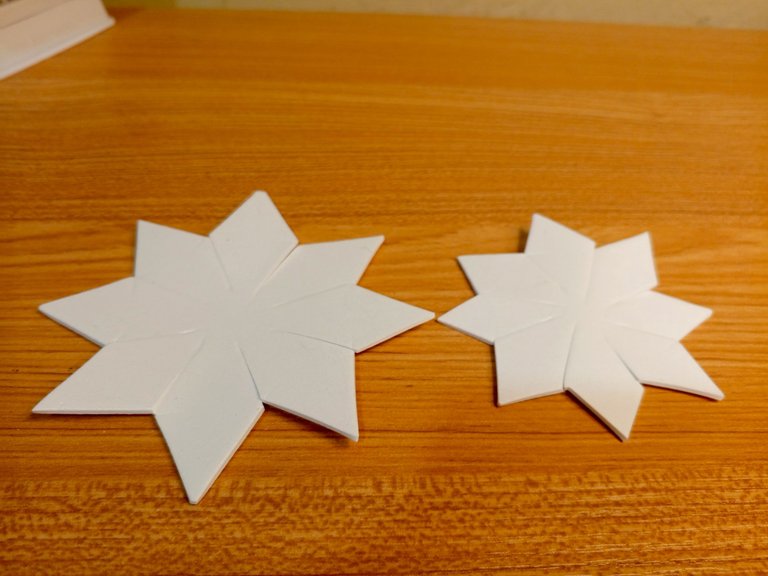
Toma un pétalo, coloca la tijera en medio, corta diagonal haciendo un pico, repite este paso en cada punta de pétalos, luego voltea la pieza y repite el mismo proceso.
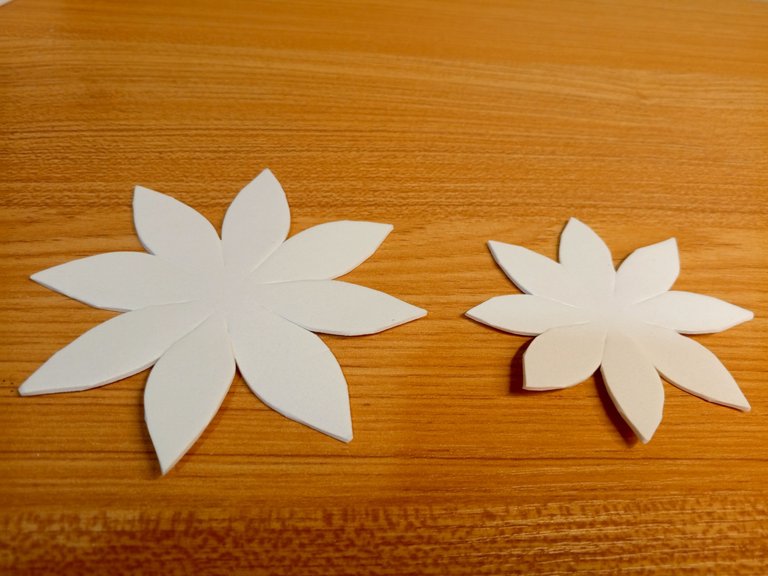
Termoforma la pieza con la plancha, tratando de doblar los pétalos hacia a dentro.
Estos pasos lo repites en cada una de las piezas
Aplica pegamento en el centro y pega dos de las piezas grandes.
English version
Take a petal, place the scissors in the middle, cut diagonally making a peak, repeat this step on each petal tip, then turn the piece over and repeat the same process.
Thermoform the piece with the iron, trying to fold the petals inwards.
Repeat these steps for each of the pieces.
Apply glue in the center and glue two of the large pieces together.
Step 4️⃣/ paso 4️⃣
 |  | |
 |  |
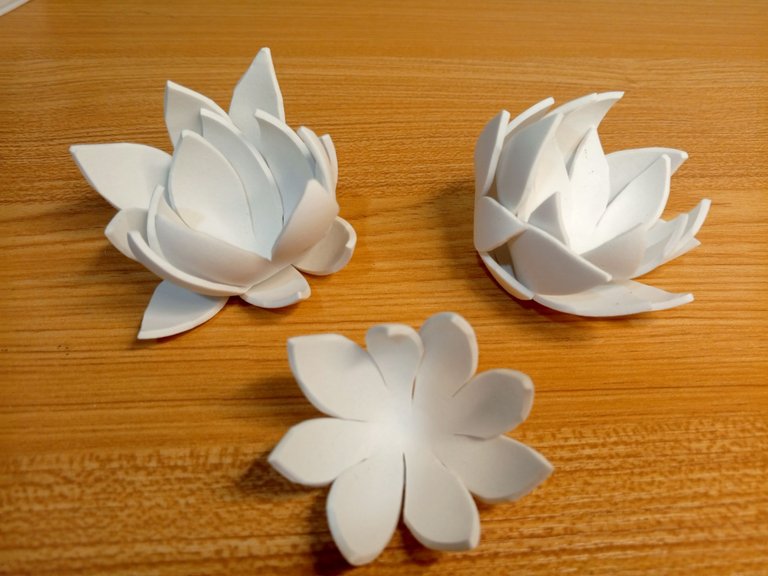
[Esp]
Pega las tres piezas grandes con un punto de pegamento en cada centro, una sobre la otra.
Repite este paso superponiendo las siguientes tres piezas pequeñas.
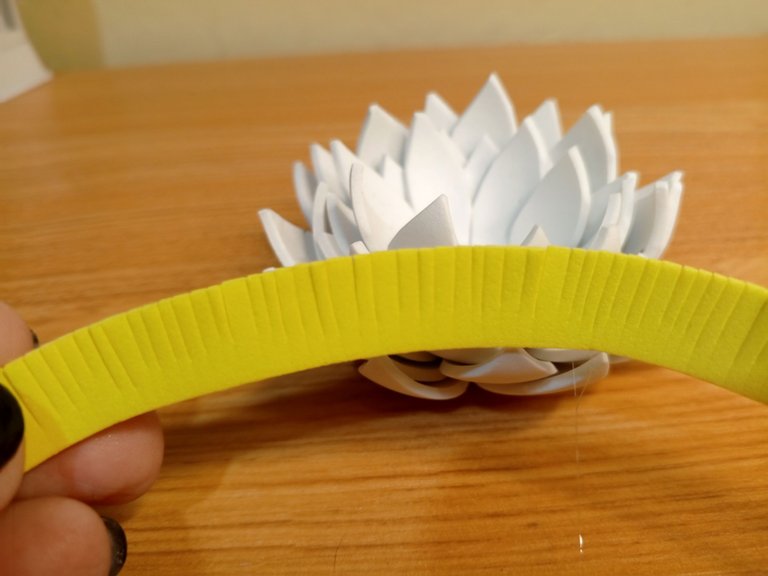
Toma un listón de foami color amarillo y realiza varios cortes con la tijera, muy juntos, sin llegar al final del listón.
Aplica pegamento en la parte que no tiene corte y enrolla, esto será el botón o los pistilos de la flor.
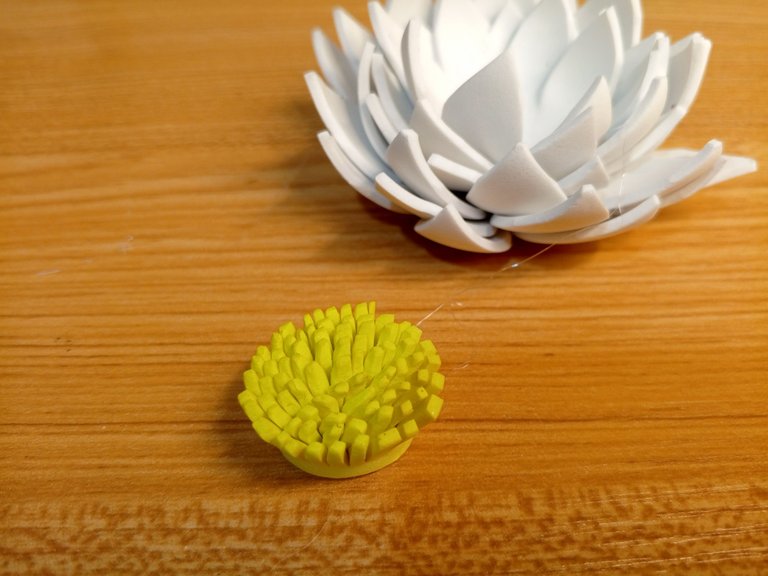
Termoforma la pieza céntrica de la flor con ayuda de la plancha.
Pega la pieza en el centro de la flor.
English version
Glue the three large pieces with a dot of glue in each center, one on top of the other.
Repeat this step overlapping the next three small pieces.
Take a yellow foami ribbon and make several cuts with the scissors, very close together, without reaching the end of the ribbon.
Apply glue on the part that has no cut and roll it up, this will be the button or the pistils of the flower.
Thermoform the center piece of the flower with the help of the iron.
Glue the piece in the center of the flower.
Step 5️⃣/ paso 5️⃣
 |  | |
 |  |
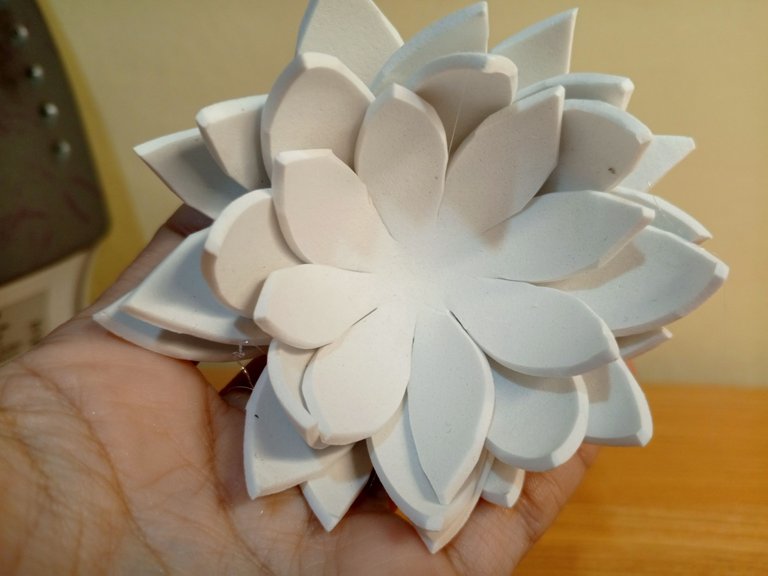
[Esp]
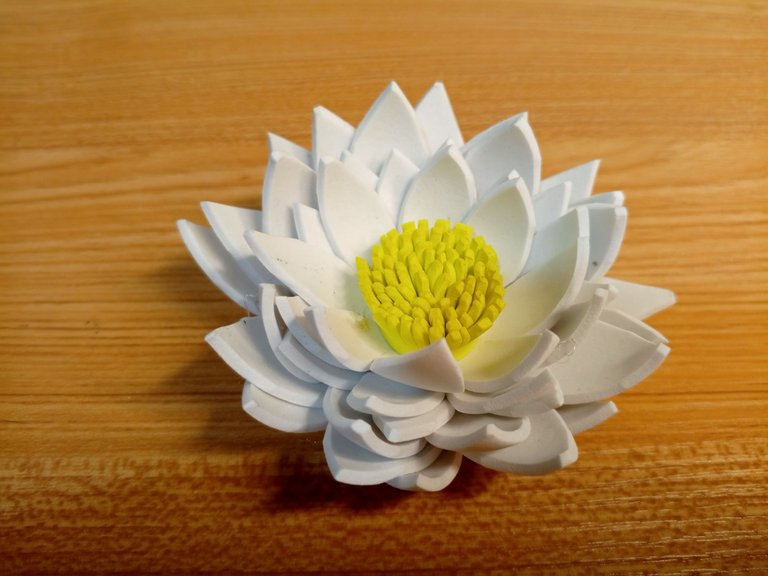
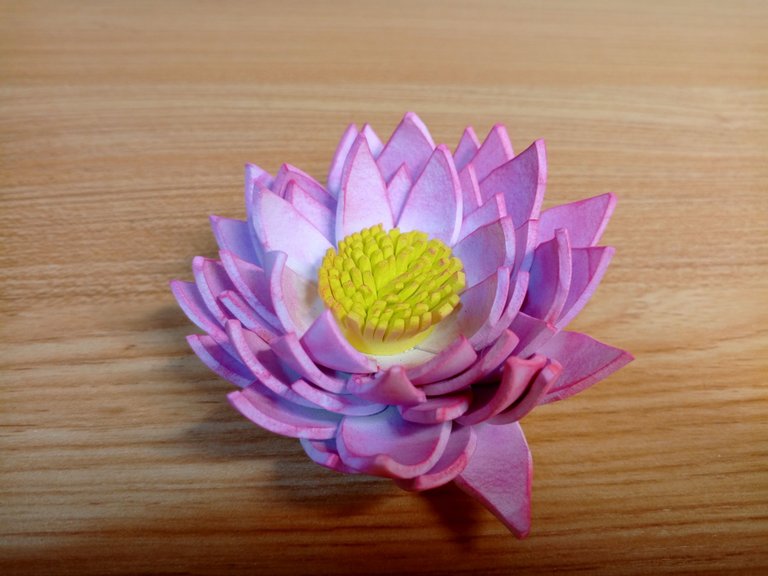
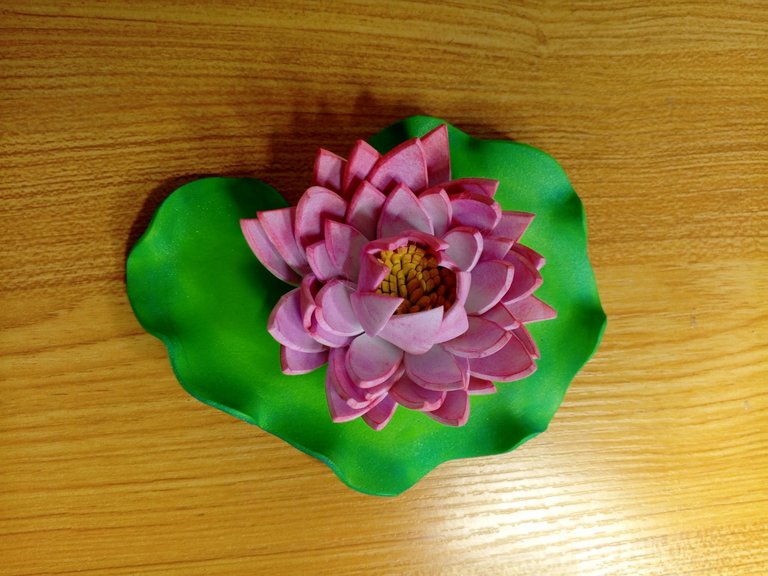
Con una brochita aplicamos sombra de maquillaje por las orillas de cada pétalo, por la parte delantera y trasera. Esto lo puedes sustituir por pintura.
Coloca pegamento en los pétalos cercanos a los pistilos y pégalos a él para que se vean más cerrados.
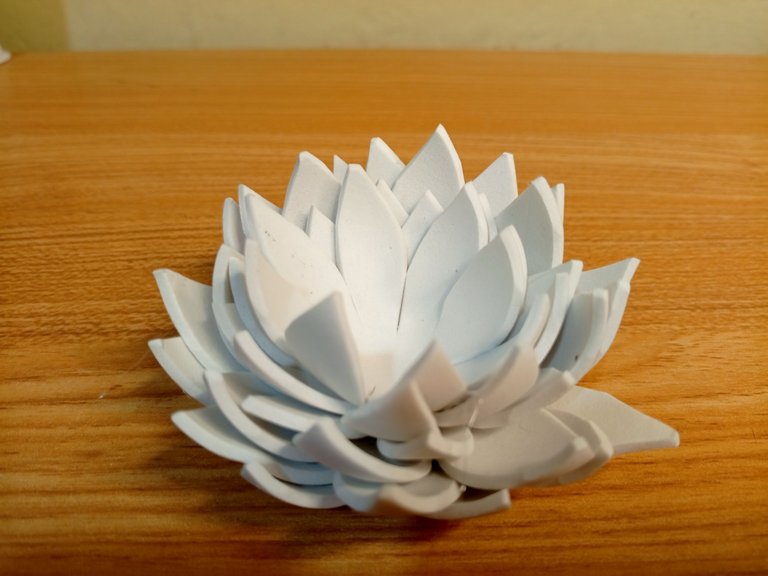
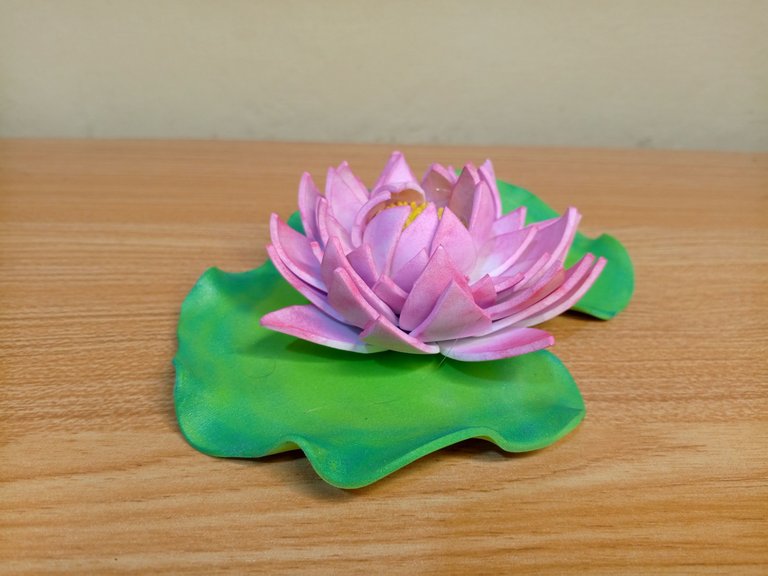
Pega la flor a la hoja.
English version
With a brush we apply make-up shadow along the edges of each petal, on the front and back. You can substitute this with paint.
Put glue on the petals near the pistils and glue them to it to make them look more closed.
Glue the flower to the leaf.
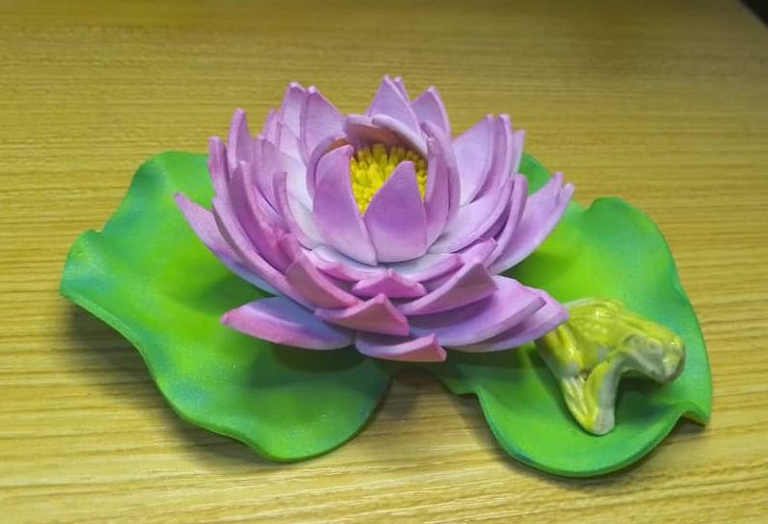
[Esp]
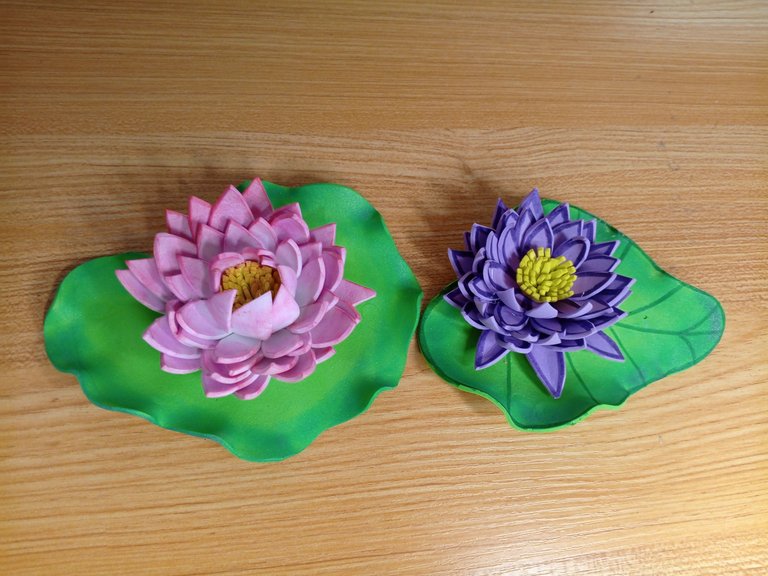
Como pueden ver, la otra flor no es muy agraciada, es la que hice primero, pero me sirvió de práctica.
Me divertí colándole un sapito de porcelana a la hojita.
Espero les guste, ahora decora mi mesa de trabajo.
English version
As you can see, the other flower is not very graceful, it is the one I made first, but it served as practice.
I had fun attaching a porcelain toad to the leaf.
I hope you like it, now it decorates my work table.

Créditos / Credits

💜💜💜
![]() 👉
👉  👉
👉 ![]() 👉
👉 ![]() 👉
👉 
Here / Bríndame un café

Congratulations @equipodelta. Great work, very realistic. I wouldn't be surprised if the @Holos-Lotus community asked you to recreate their logo.
I hope to be able to post a sneak peek of the preparations to restart my natural and handmade soap business, from the new headquarters.
Greetings and success on International Crochet Day.
Wow, I didn't know, I'll look into it <3 Thanks so much
Oh friend this is incredible, the flower looks so real and we all can see how much time and effort you put into achieving this. Well done and thanks for sharing this with the community.
thank you very much for your support
This week I went back to record music for Hive, and like you, I didn't like the first attempt, the next day I went back and corrected what was wrong, and that perseverance and pursuit of getting it right is powerful, especially understanding when is the ideal time to create. This flower is beautiful and everything it represents does good for the soul. Your work is beautiful, inspiring and an example for content creators in this niche. I hug you Isa
Mi corazón.... Interpreta mi silencio, es el sonido de la paz interior y el amor propio, te envio luz. Gracias por estar
This is a pretty nice handicraft creation and I like the shape of the lotus flower.
I am glad you like it
Okay, thank you, brother.
Hello lady @equipodelta good day
You are so right, it is beautiful and very realistic
Beautiful work. Congratulations
After a failed attempt, this one came out better.
Amiga te quedaron preciosas 😍 en verdad parecen reales, esa flor es muy bella y pintorezca, me causa curiosidad y asombro como crece en el agua, hubo un tiempo en que quise armar un estanque en mi jardin y poner de estas flores jaja algun dia quiza pueda hacerlo, tendre que estudiar mas a esta flor 😂
Mori con el sapito jajaja ❤️❤️
Jajaja! Ese sapito fue idea de una amiga, que me dijo: Está bello solo le falta el sapito!, Recordé que tenía uno muy antiguo que le pertenecía a mi madre y ahora luce feliz en su hojita al lado de su flor.
Quedó bella
Gracias linda.
Que hermosura 👏👏👏 Me encanta la versatilidad del foami. Que buen trabajo
Muchas gracias, a mi me cuesta mucho trabajar con él por los cortes, no me quedan muy prolijos pero hago el mejor esfuerzo. Gracias por apreciarlo
Qué belleza, ese color que elegiste para hacer los pétalos es mi favorito, me transmite paz y tranquilidad. La flor de Loto es una gran símbolo con mucho significado.
Es genial saber esto querido Fixie muchas gracias. La florecita está vibrando conmigo <3 Ahora vibra con todos.
Hermosa flor de loto. Muy creativa amiga. Amo este tipo de manualidades
Gracias Karoly, disfruté hacerla, la primera considero no me quedo bonita.
Te quedo preciosa, realmente parece real, que bueno que la pudiste mejorar y el resultado fue todo un éxito.💜
Hola amiga, esta si me gustó, la verdad es que el marcador endurece mucho las piezas, conviene no usarlo.
Wow !! no sabía, gracias por la acotación, estaré atenta de no exagerar en uso con este material.
Hermosa flor! 🪷
Awww Gracias comunidad hermosa <3
Que hermoso trabajo, de verdad te felicito!
Manos maravillosas!
Saludos amiga.
Qué linda! Aprendo mucho de usted <3
Hermoso resultado, la flor rosa me ha encantado como te ha quedado. Sabia que se podían hacer cositas muy lindas con foami, esto esta muy hermoso, se ve delicado pero resistente. ❤️✨
Hola Faffy, espero te encuentres bien, hace mucho no te veía, me alegra que te gustara, tal vez haga otros colores.
Realmente hermoso cariño, como siempre un bonito trabajo que nos presentas. Un fuerte abrazo.
Mi querido amigo, gracias por pasar, abrazos gigantescos para ti tambien.
Congratulations, your post has been curated by @dsc-r2cornell. You can use the tag #R2cornell. Also, find us on Discord
Felicitaciones, su publicación ha sido votada por @ dsc-r2cornell. Puedes usar el tag #R2cornell. También, nos puedes encontrar en Discord
Hello equipodelta!
It's nice to let you know that your article will take 5th place.
Your post is among 15 Best articles voted 7 days ago by the @hive-lu | King Lucoin Curator by keithtaylor
You receive 🎖 0.7 unique LUBEST tokens as a reward. You can support Lu world and your curator, then he and you will receive 10x more of the winning token. There is a buyout offer waiting for him on the stock exchange. All you need to do is reblog Daily Report 420 with your winnings.
Buy Lu on the Hive-Engine exchange | World of Lu created by szejq
STOPor to resume write a wordSTARTThe steps look so simple but I know how much work it needed to put it up. The flowers came out beautiful.