hello my dear #fans of this great #hive #community, that every day we are growing and creating as a beautiful family 👪. I tell you friends; that yesterday I was thinking of creating a beautiful detail for that super special person, but I wanted something unbelievable, something that would draw a lot of tension and above all that would be too romantic.
hola mi queridos #fanáticos de esta grandiosa #comunidad de #hive, que cada día vamos creciendo y creando como una hermosa familia 👪. Les cuento amigos; que el día de ayer estuve pensando creer un hermoso detalle para aquella persona super especial, pero quería algo incleible algo que llamara mucho la tensión y sobre todo que fuese demasiado romántico.
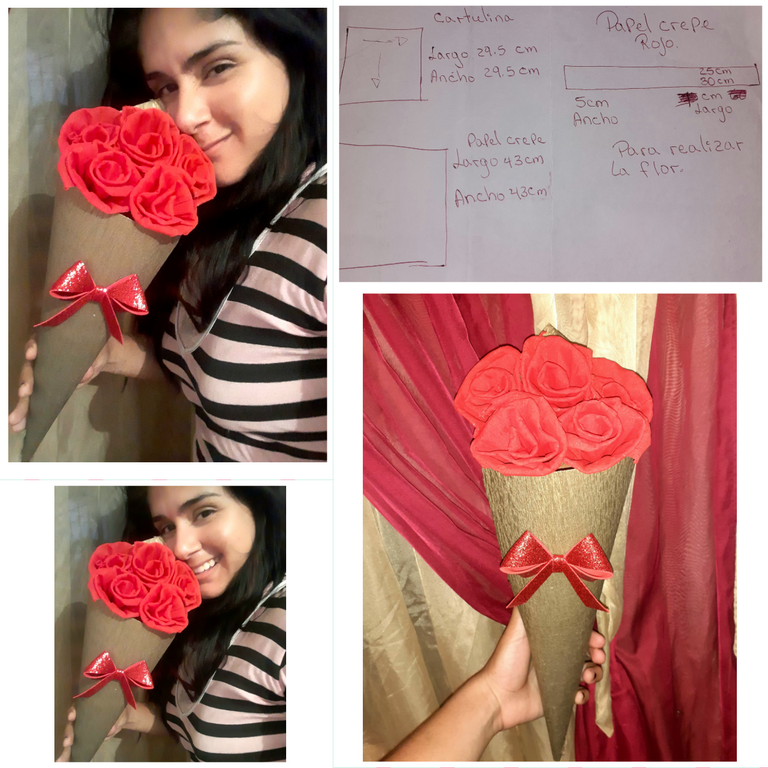
That is why it occurred to me to make this beautiful bouquet 💐 of red 🌹 roses, who woman 🚺 ♥ does not love flowers? Who doesn't love roses 🌹? Hehehehe we all love it, even if a percentage of women say they don't like it 🤷 😅 inside they love it, it's too romantic for a detail. So come with me to see the step by step. You will love the result ❤.
es por ello, que se me ocurrió realizar este hermoso ramo 💐 de rosas 🌹 rojas, a quien mujer 🚺 ♥ no le encanta las flores ? Q quién no le encanta las rosas 🌹? Jejejee a todas nosotras nos fascina, aunque un porcentaje de mujeres digan que no le gusta 🤷 😅 por dentro les encanta, es algo demasiado romántico para un detalle. Así que acompañenme a ver el paso a pasó. El resultado te Encantará ❤.
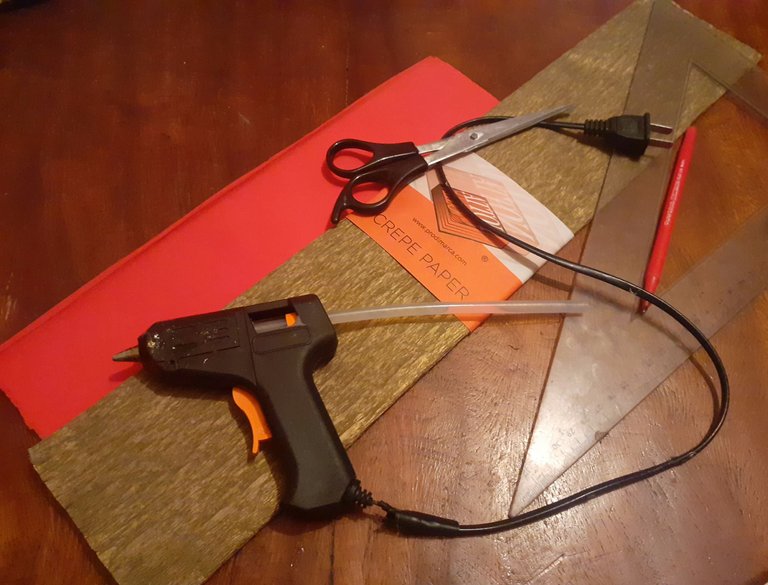
the materials I used were very simple, what we always use, which is scissors, hot silicone, a ruler, ✏ pencil, since I couldn't find brown double fax cardboard in stores, I used white cardboard and beige crepe paper dark metallic
los materiales que utilicé, fue muy sencillos, lo que nosotros siempre utilizamos, que es una tijera, silicon caliente, regla, ✏ lápiz, como no conseguía en las tiendas cartulina doble fax marrón,utilice una cartulina blanca, y un papel crepe como beis oscuro metalizado
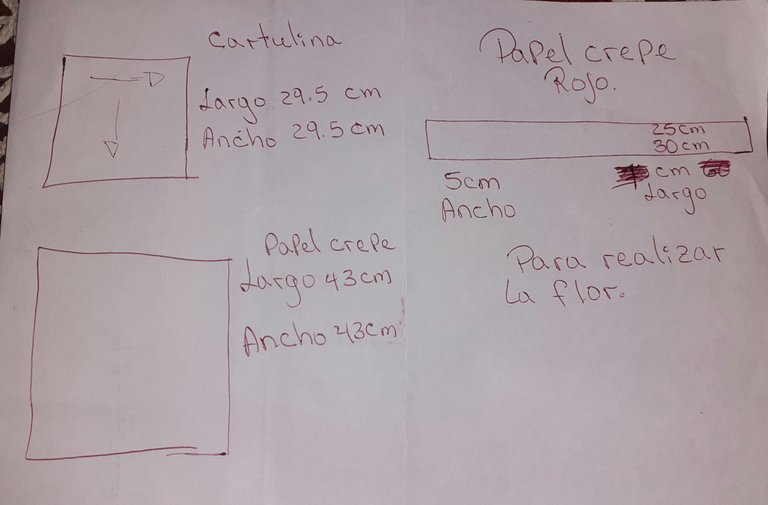
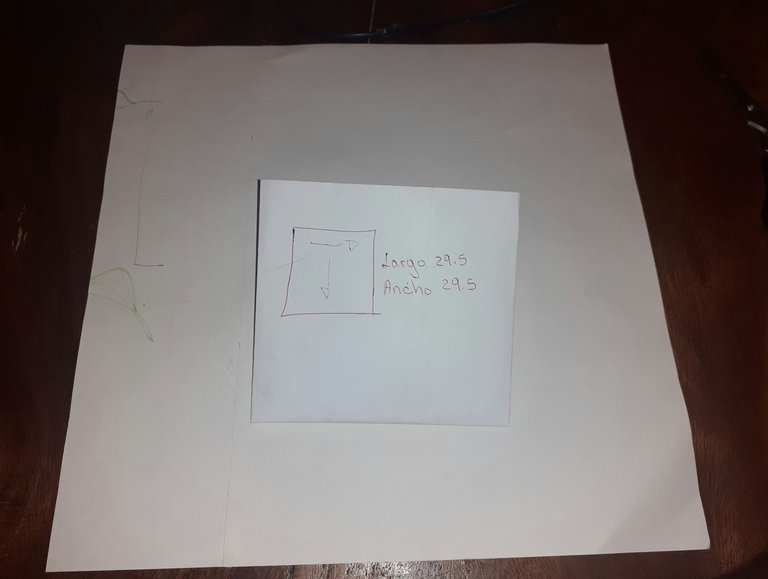
Step 1 The first thing I did was make the templates, both for the bouquet 💐 and for the roses. We made two templates for the bouquet, one with white cardboard and the other with metallic crepe paper, and the red roses.
Paso 1
Lo primero que hice fue realizar las plantillas, tanto del ramo 💐 como la de las rosas. La del ramo hicimos dos plantillas una con la cartulina blanca y la otra con el papel crepe metalizado, y las rosas rojas.
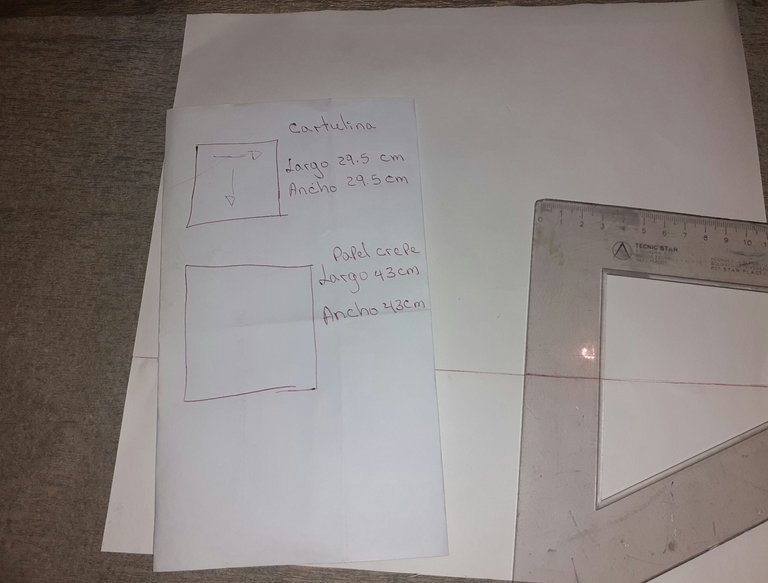
step 2 Now we are going to make a square with the white cardboard with the size of the template.
paso 2
Ahora vamos a sacar un cuadrado con la cartulina blanca con la medida de la plantilla.
step 3 Then we are going to take another square of metallic crepe paper, both the cardboard and the crepe paper are going to be rolled up together.
paso 3
Después vamos a sacar otra cuadrado del papel crepe metalizado, tanto la cartulina como el papel crepe van a ir juntos enrollados.
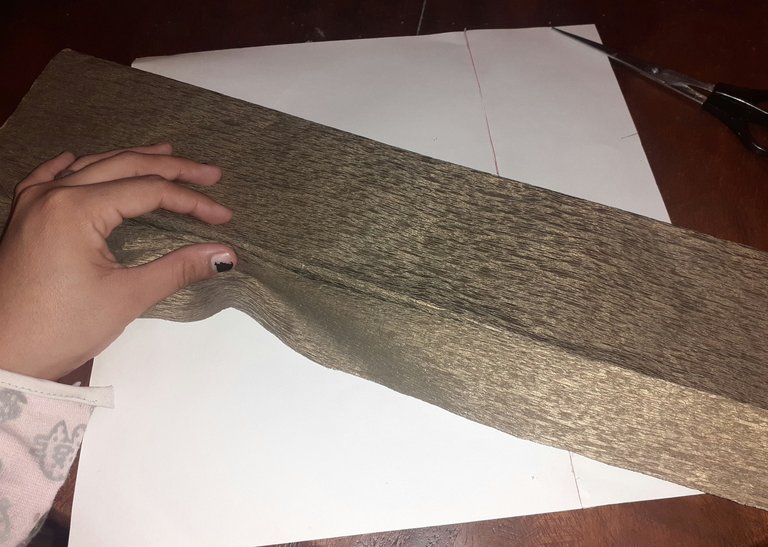
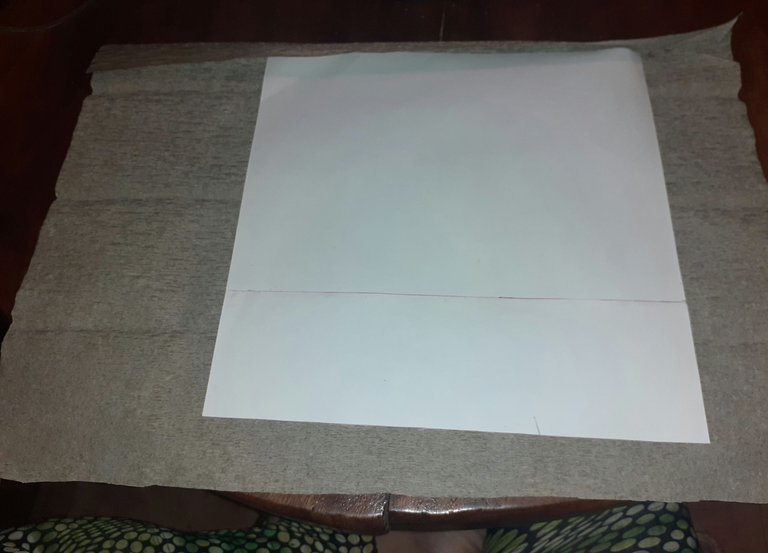
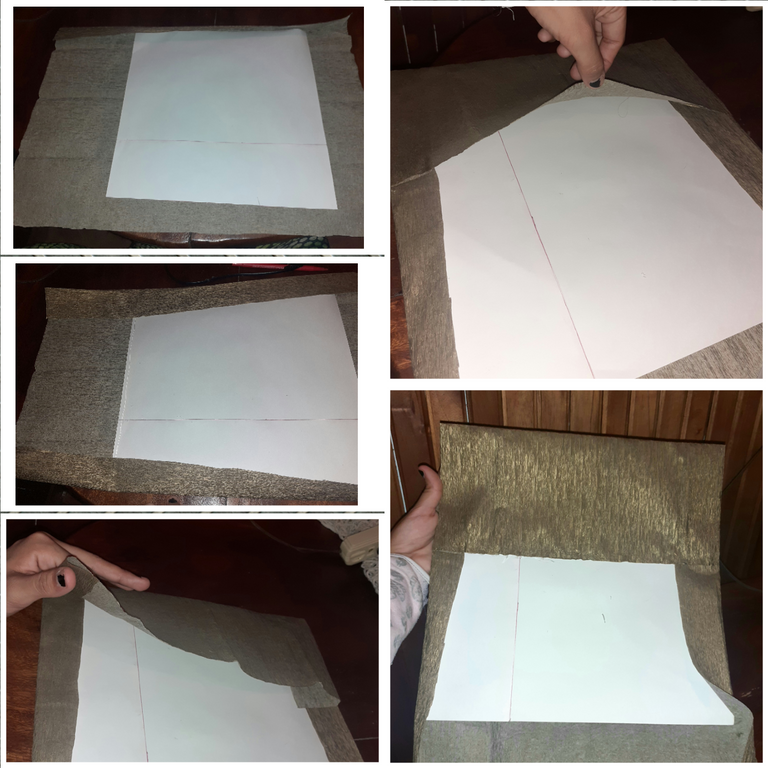
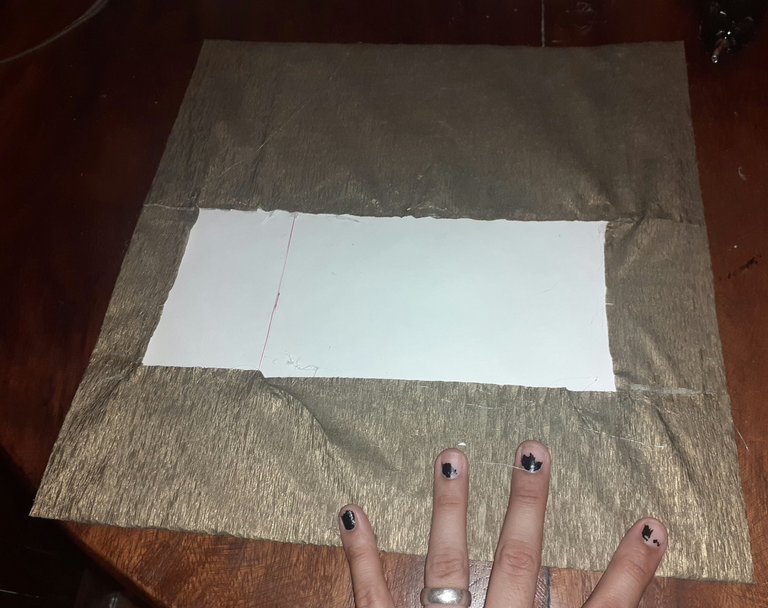
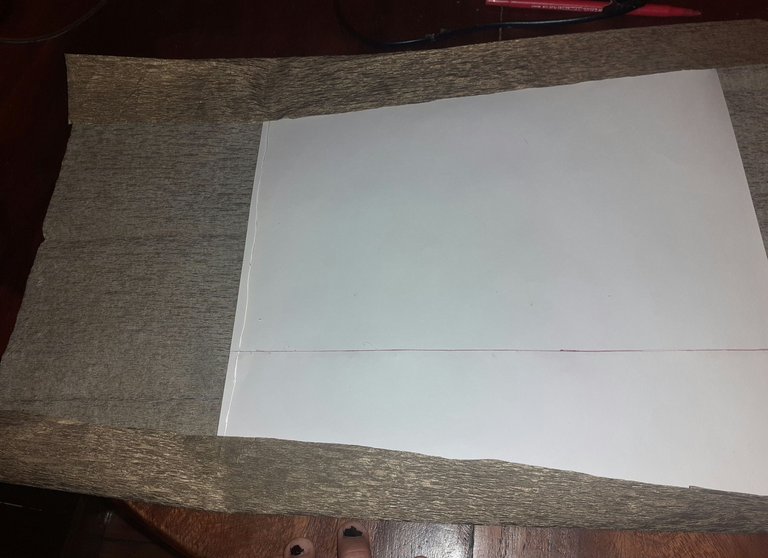
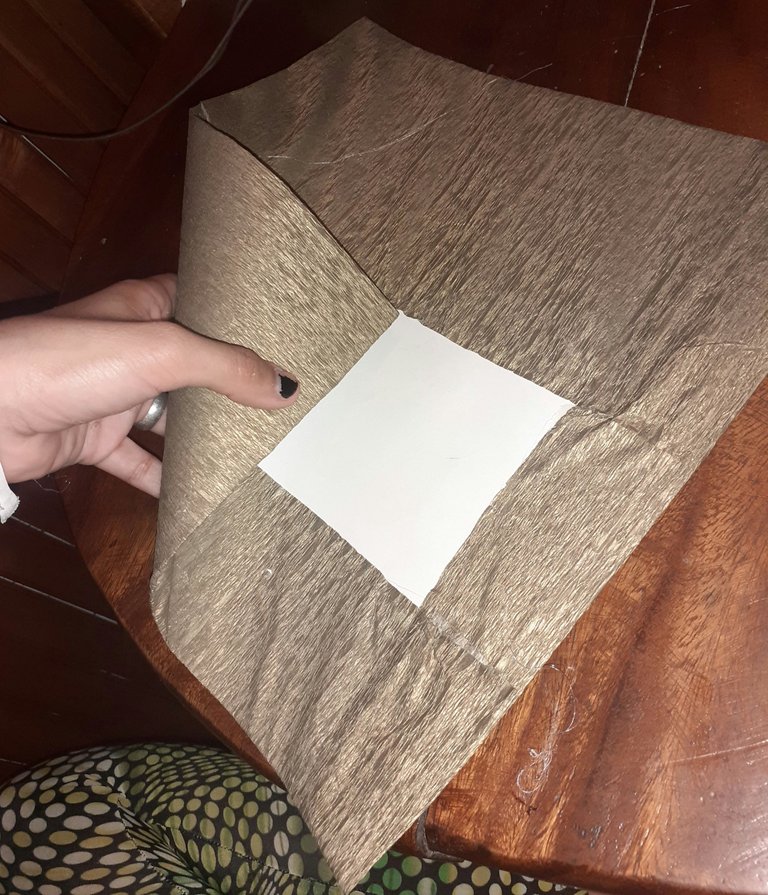
step 4 We are going to stick the crepe paper on the cardboard. We place the crepe paper turned upside down and on top of the cardboard, the crepe paper has to be a longer length on the other side, in which that side will make the upper part where the roses will be glued.
paso 4
Vamos a pegar el papel crepe en la cartulina. Colocamos el papel crepe volteado al revés y encima la cartulina, el papel crepe tiene que ser un largo más grande del otro lado, en el cual ese lado va hacer la parte de arriba donde va pegado las rosas.
step 5 we are going to start gluing the top part of the crepe paper then the bottom part, then both sides. In the following photos you can see better.
paso 5
vamos a comenzar a pegar la parte de arriba del papel crepe luego la parte de abajo, después en ambos lados. En las siguientes fotos podan apreciar mejor.
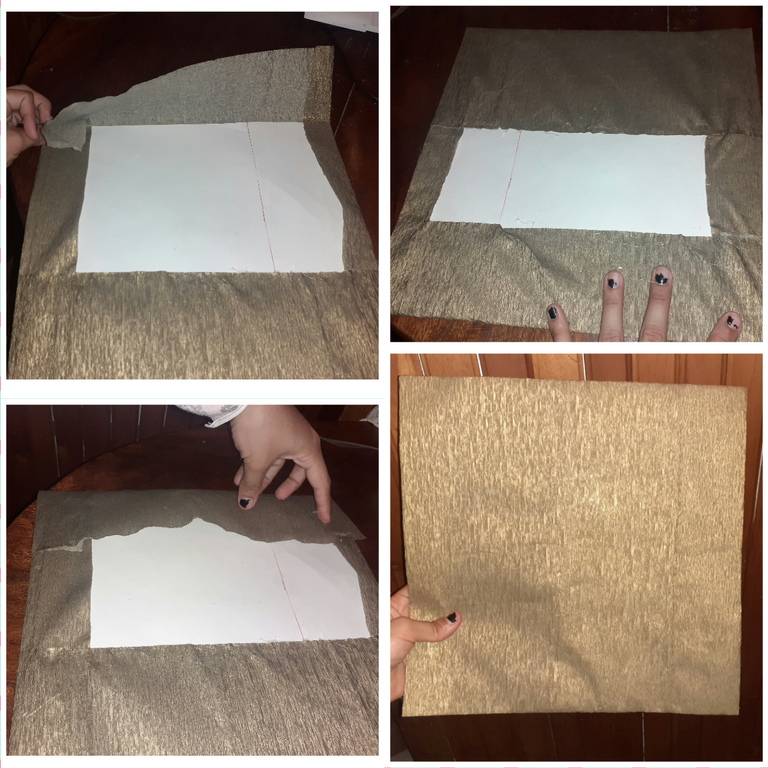
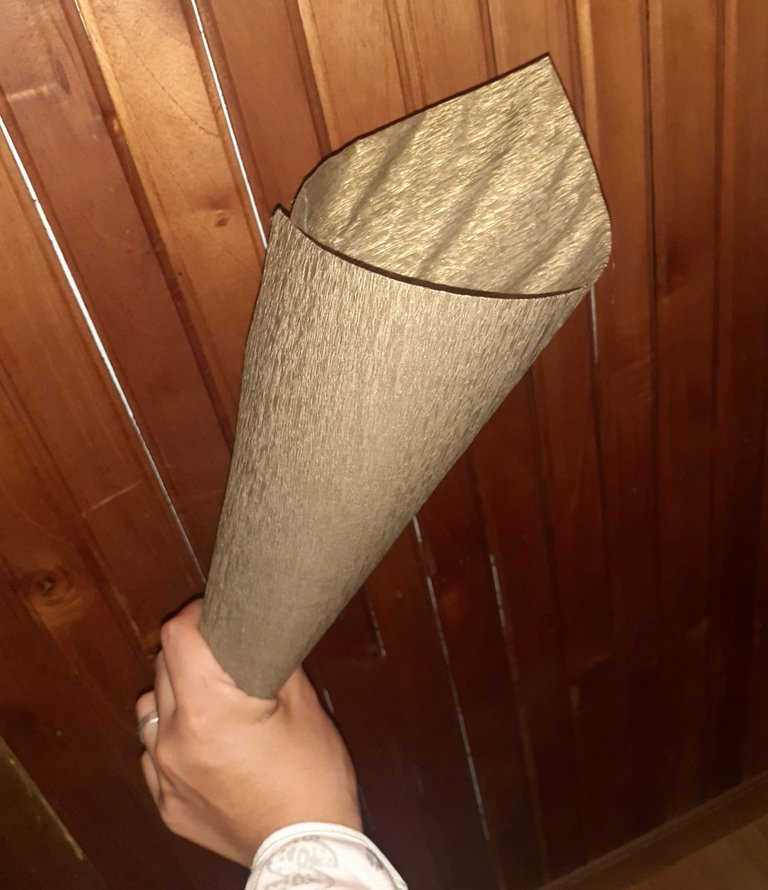
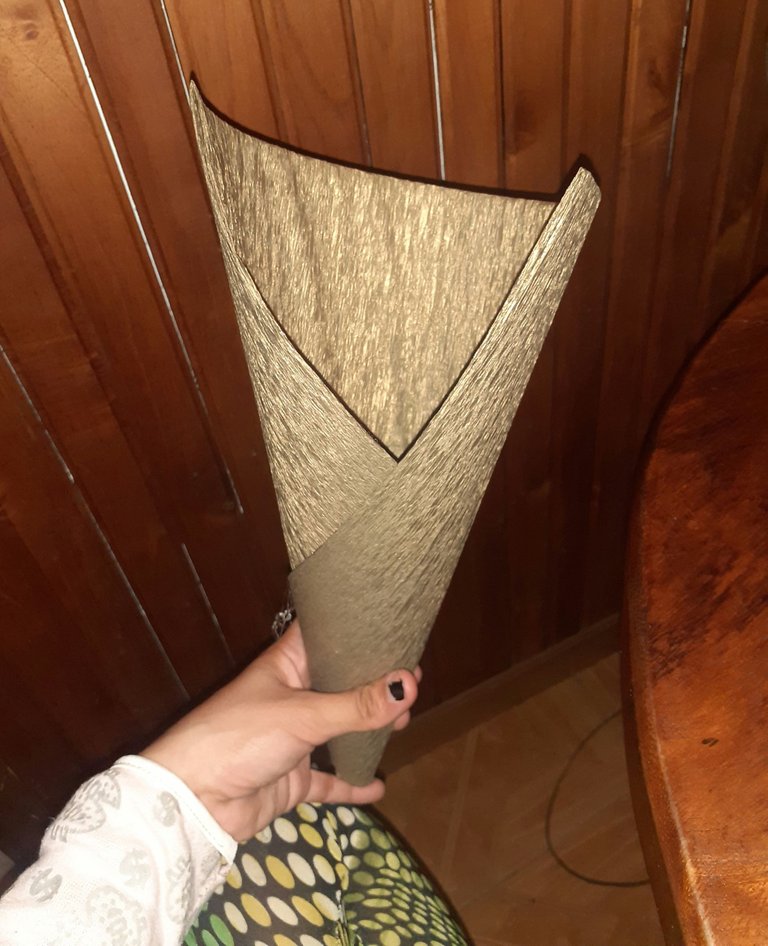
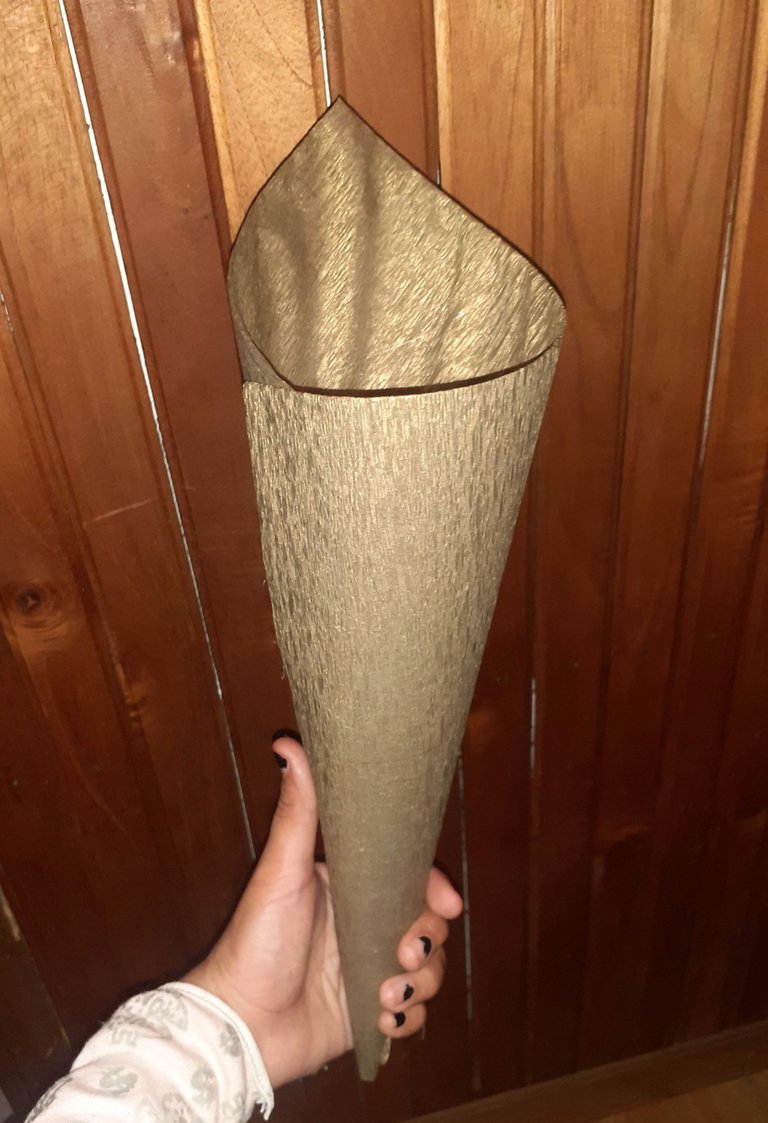
step 6 Already lined, now it's time to roll it up so it becomes a beautiful bouquet 💐. We place the part that has more crepe paper on top, then we place the tip of the bottom part in the middle, and we roll and shape our beautiful bouquet. In the photos below I will see the whole process.
paso 6
Ya forrado, ahora toca enrollarlo para que se convierta en un hermoso ramo 💐. Colocamos arriba la parte que tiene más papel crepe, entonces la punta de la parte de abajo la colocamos en el medio, y vamos enrollando y dando forma a nuestro hermoso ramo. En las fotos de abajo veré todo el proceso.
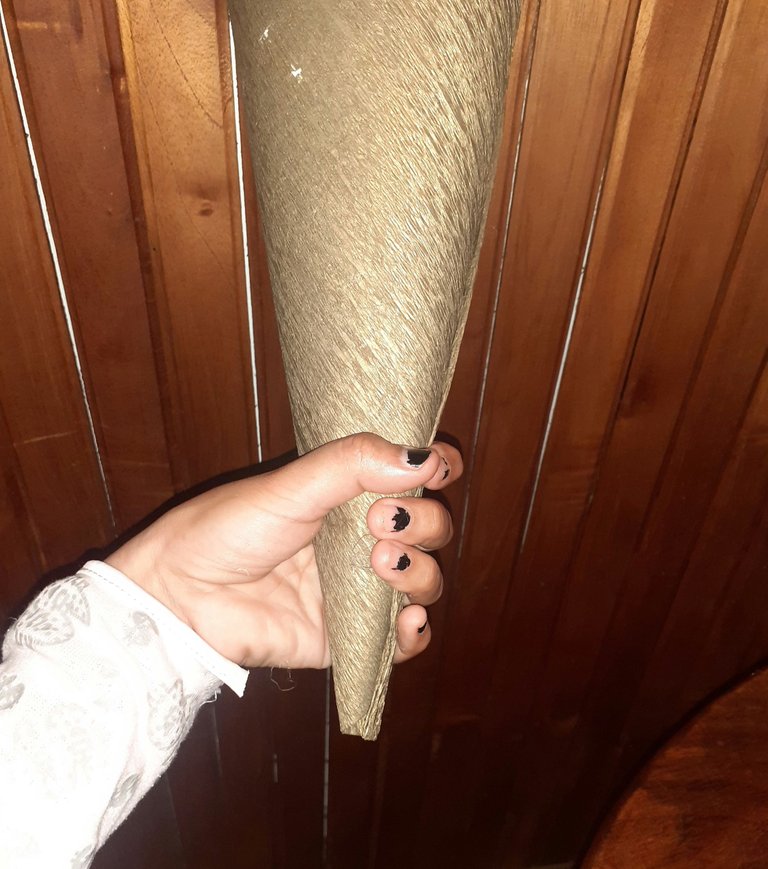
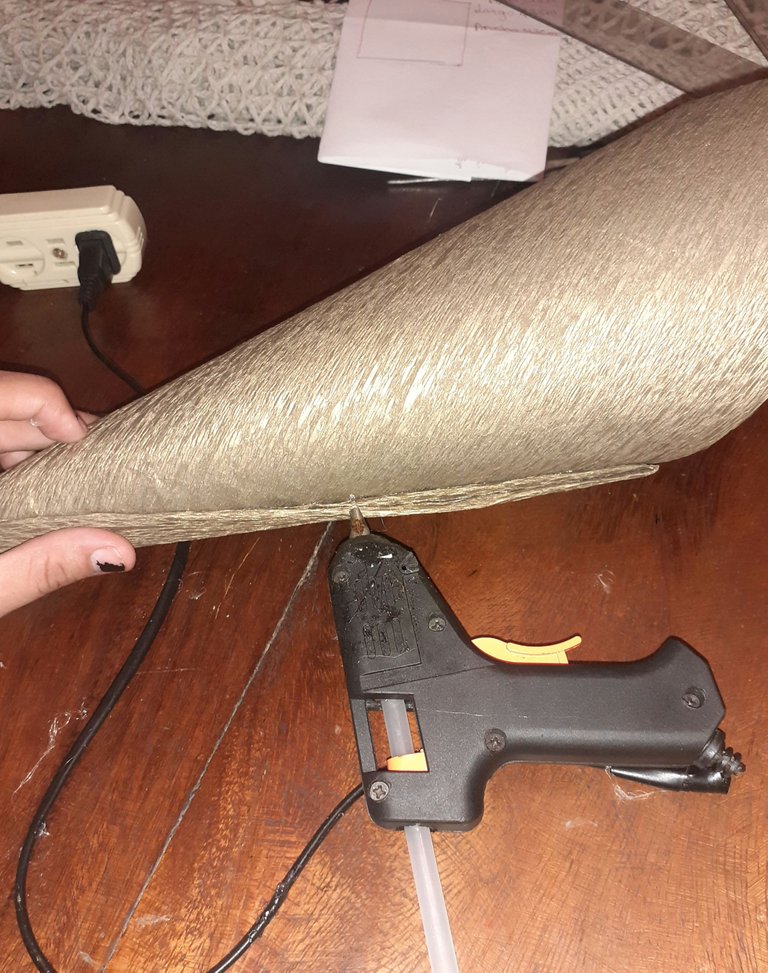
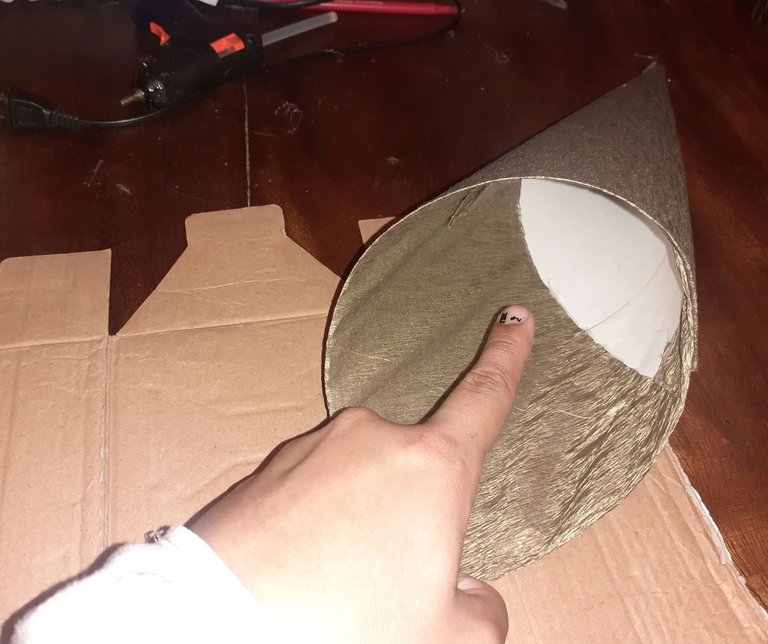
step 7 Now we are going to glue the bouquet 💐, at the bottom, that is, at the tip, at the inside and also on the side. In the following images I will show you much better.
paso 7
Ahora vamos a pegar el ramo 💐, en la parte de abajo es decir, en la punta, en la parte de adentro y también en el lado. En las siguientes imagenes les mostrare mucho mejor.

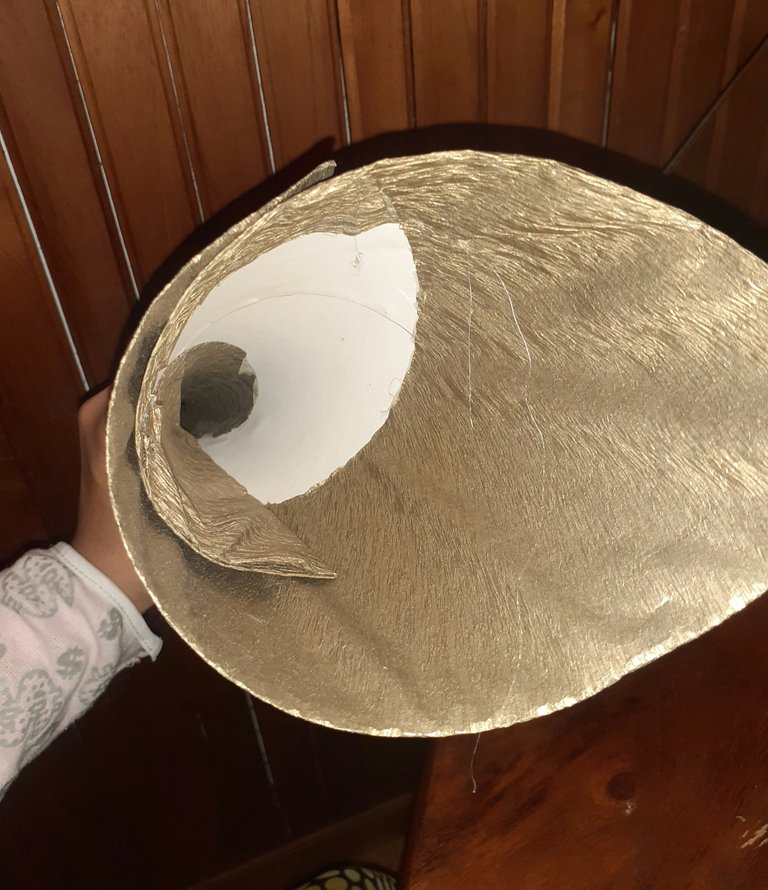
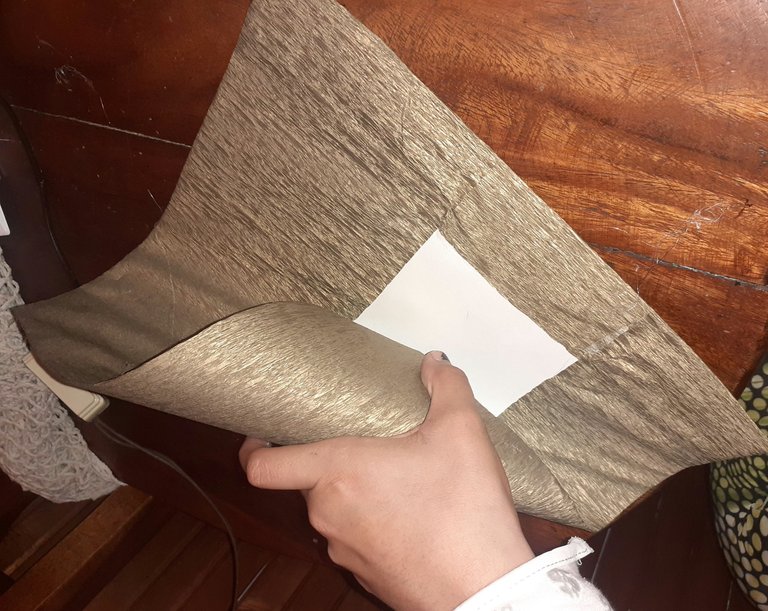
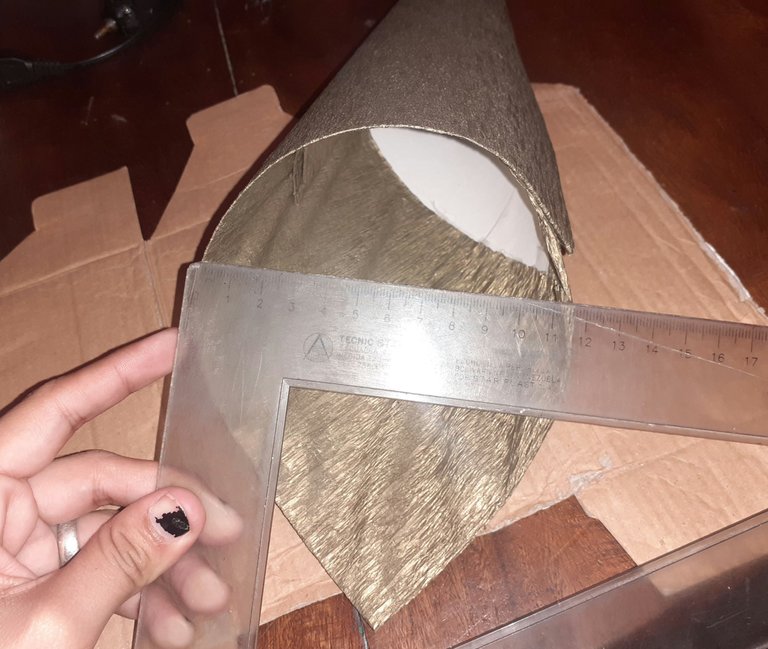
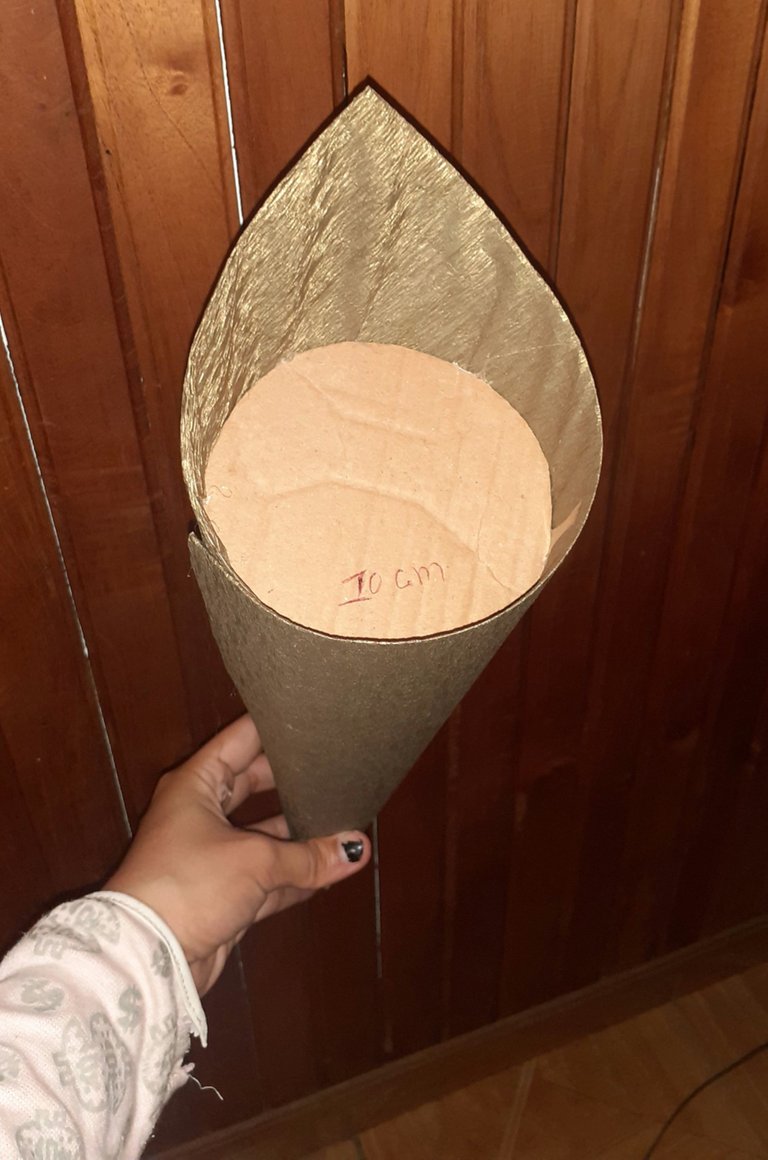
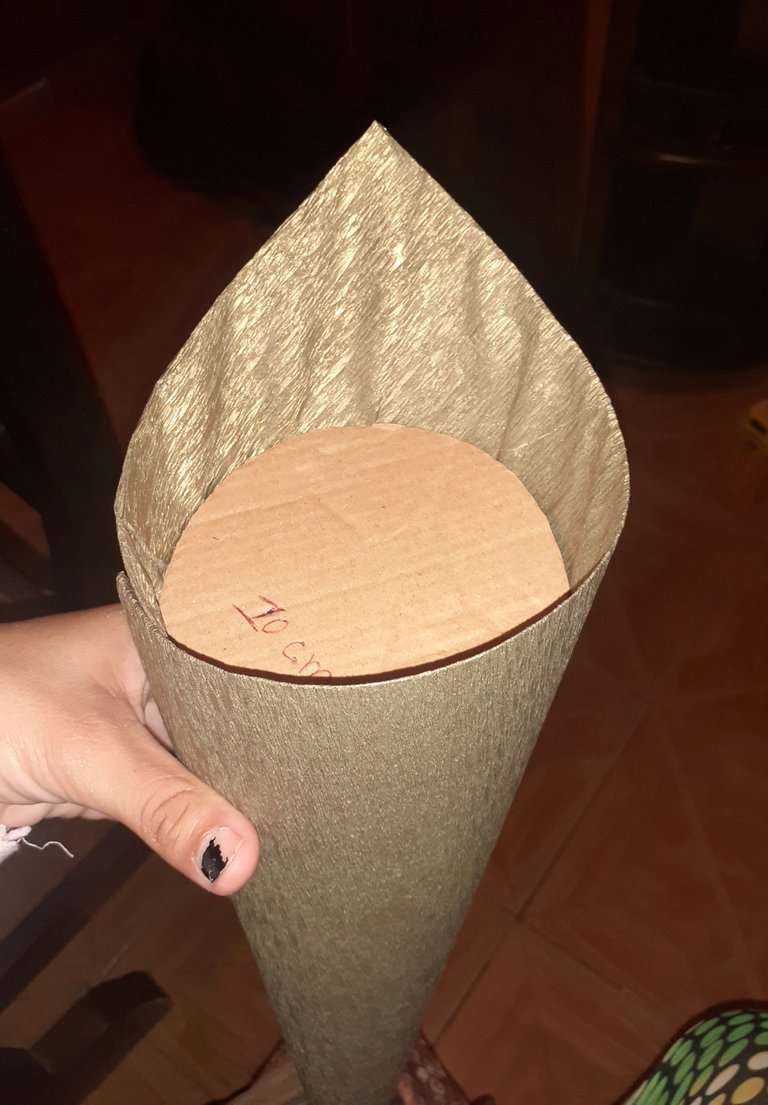
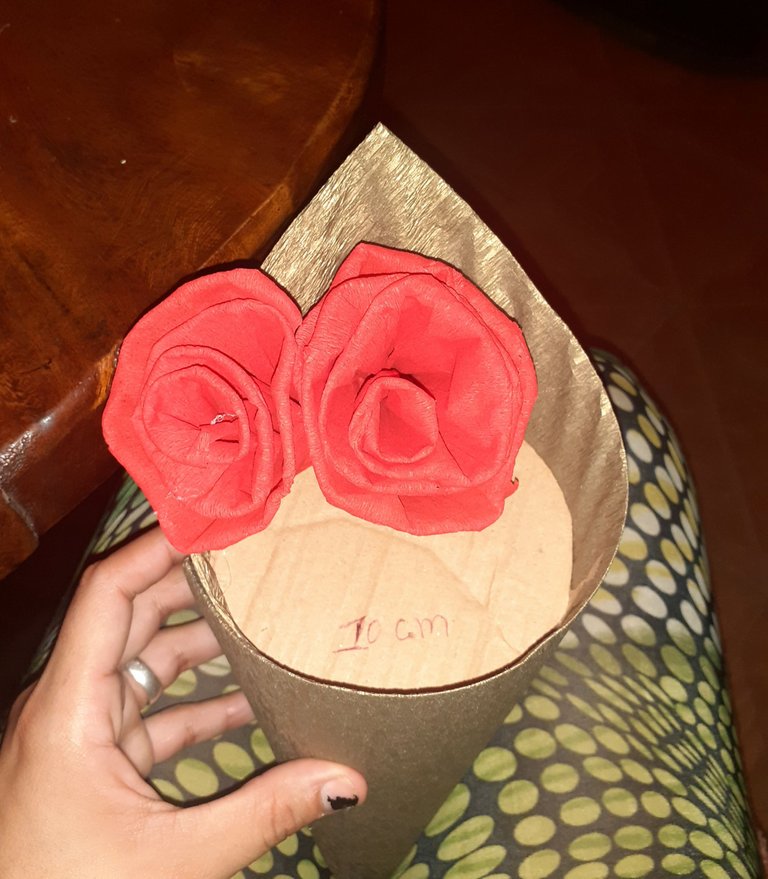
step 8 Now what we are going to do is measure the inside of the bouquet. To take out a cardboard box and stick it on the inside to stick the roses on it. I leave the following images so you can see the measurements and the result.
paso 8
Ahora lo que vamos hacer es medir la parte de adentro del ramo. Para sacar un depazo de cartón y pegarlo en la parte de adentro para allí pegarle las rosas. Les dejo las siguientes imagenes para que vea las medidas y el resultado.


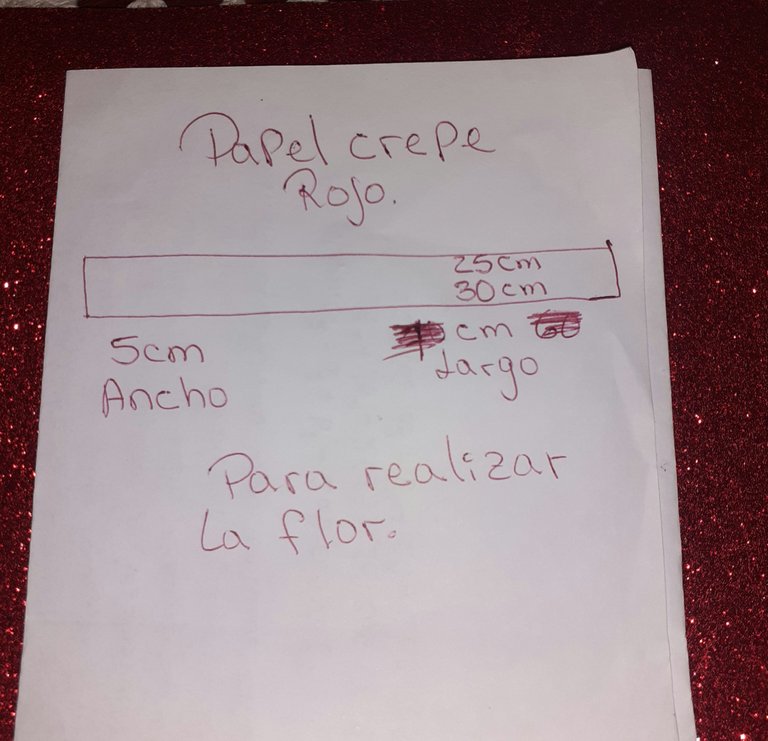
step 9 Our bouquet is ready. Now we are going to make the roses 🌹 with red crepe paper. I leave the template in the following images.
paso 9
Ya listo nuestro ramo. Ahora vamos a realizar las rosas 🌹 con papel crepe rojo. La plantilla se la dejo en las siguientes imagenes.
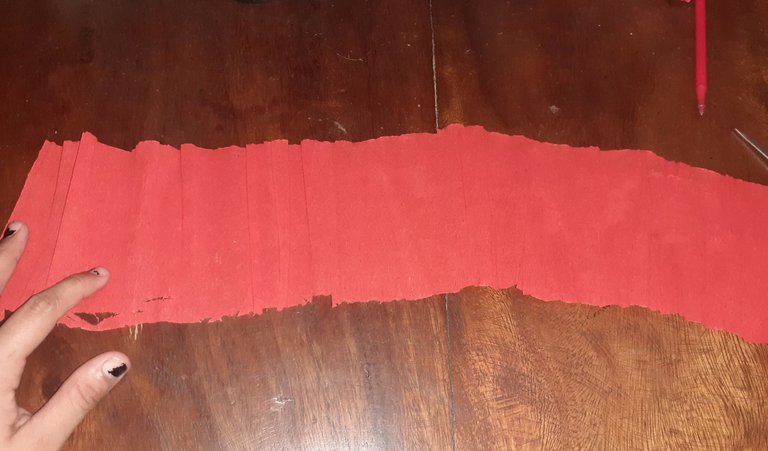
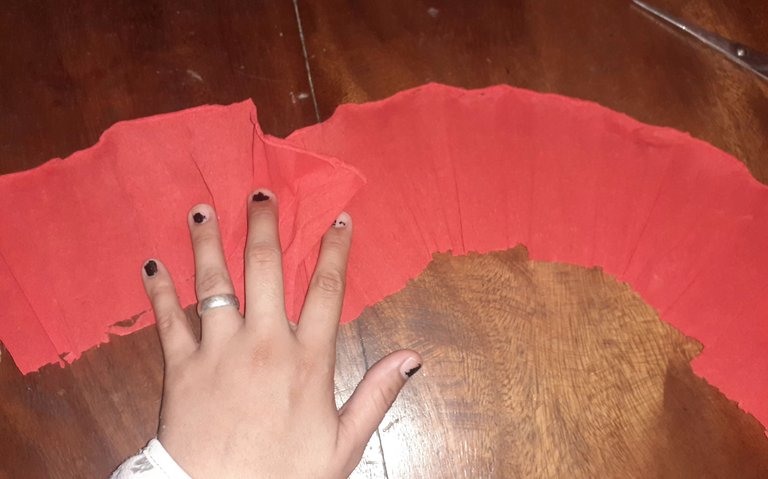
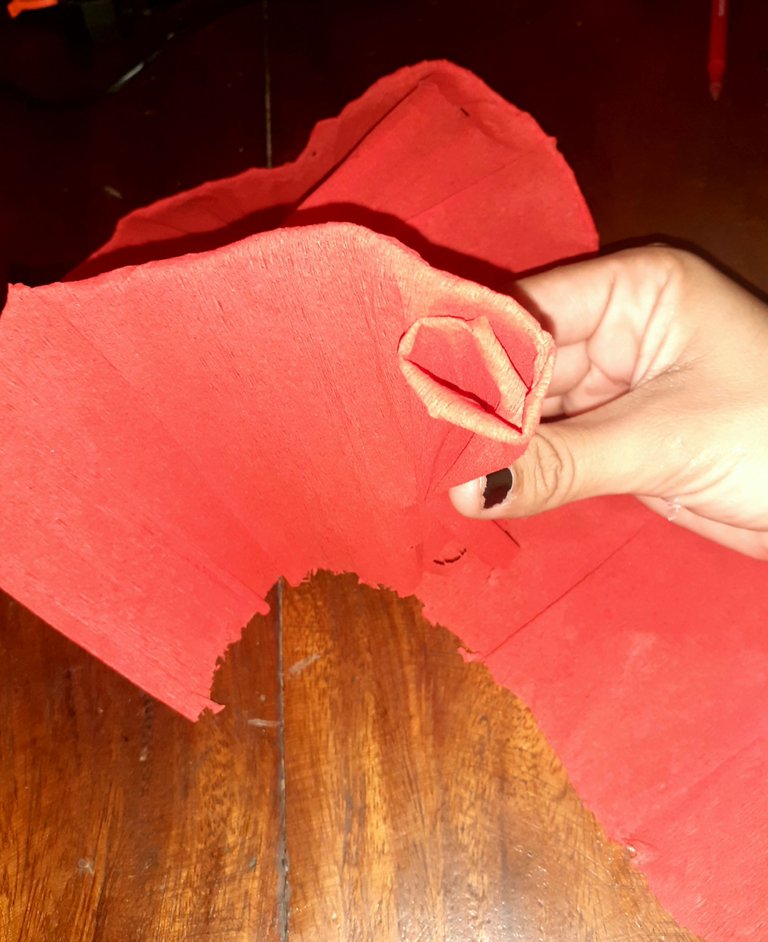
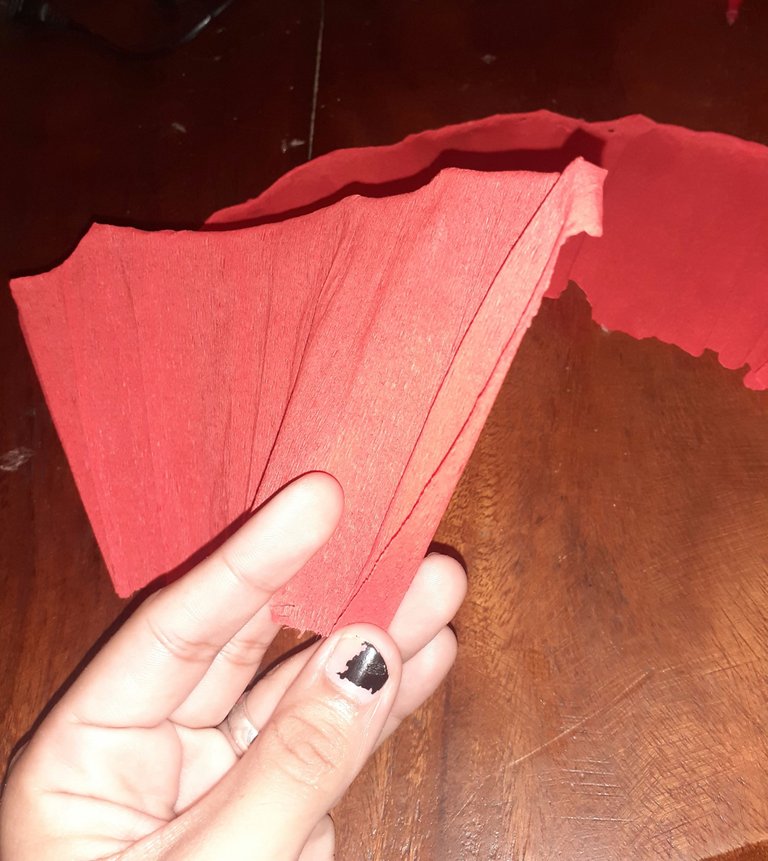
step 10 We are going to roll up the top part of the crepe paper a little... all the cm indicated on the template.
paso 10
Vamos a ir enrollando un poquito la parte de arriba del papel crepe... todo los cm que se indica en la plantilla.
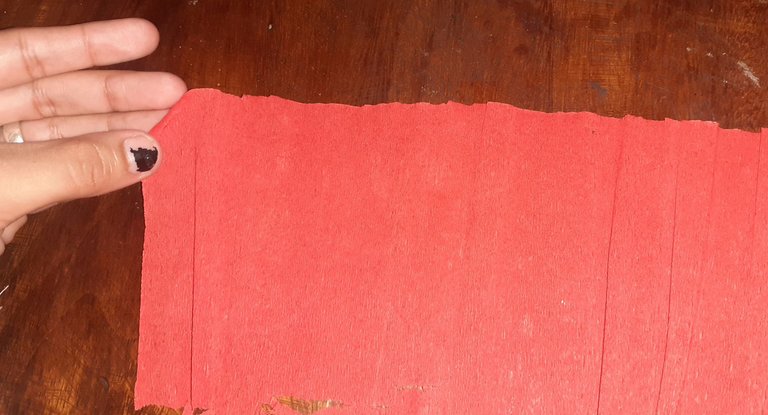
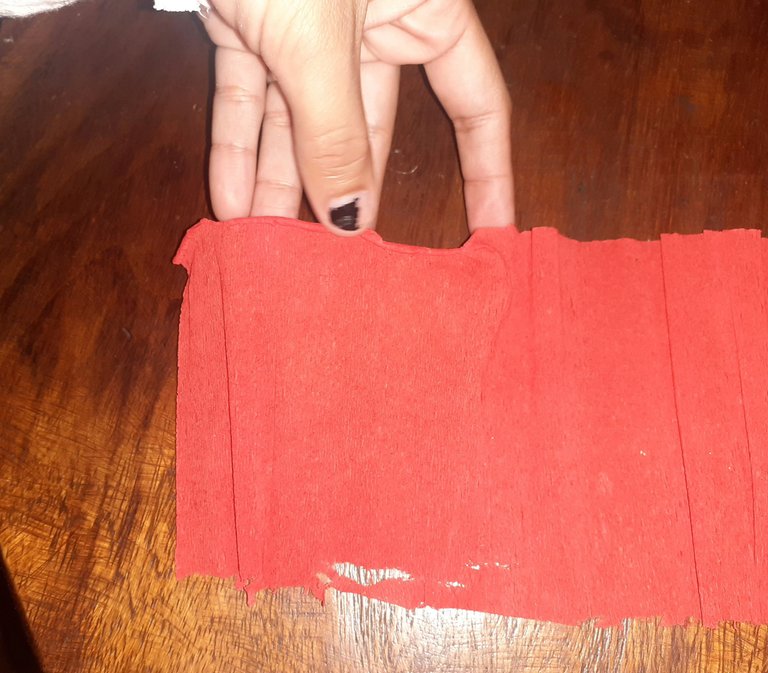
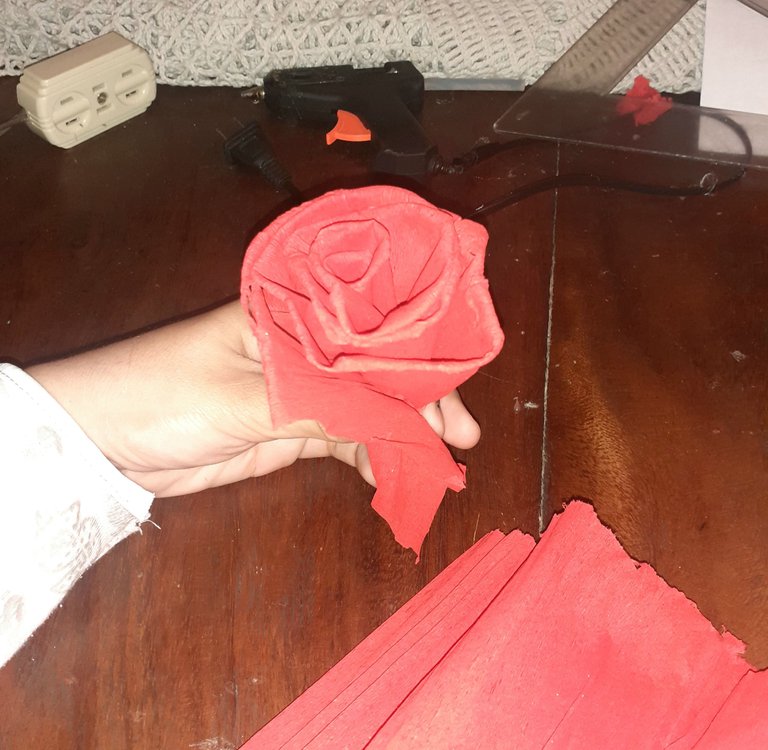
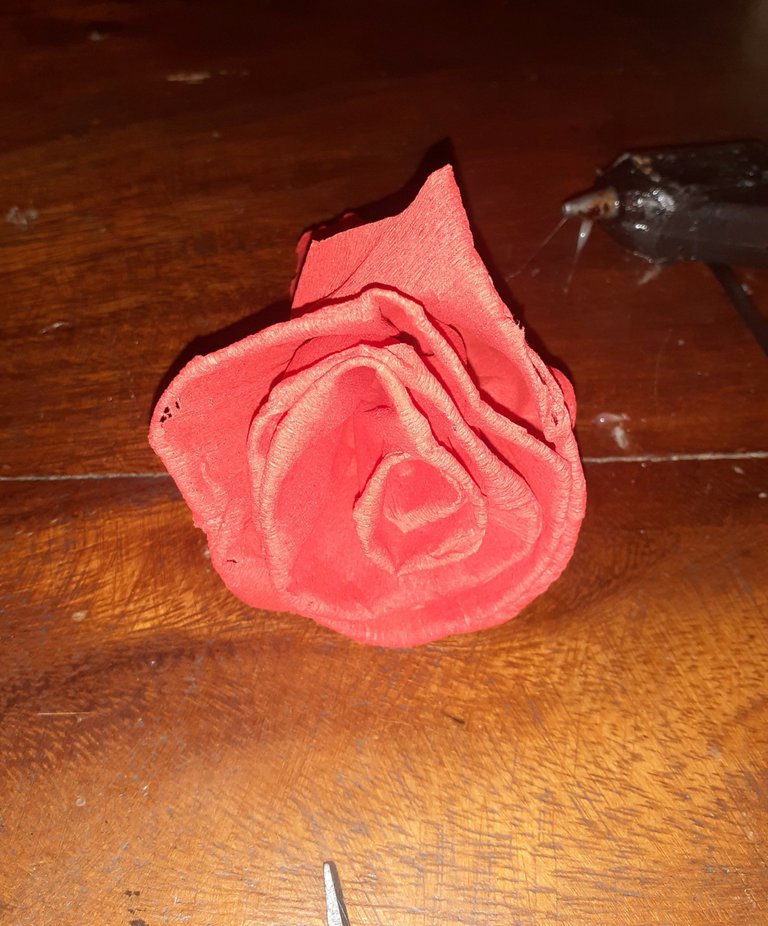
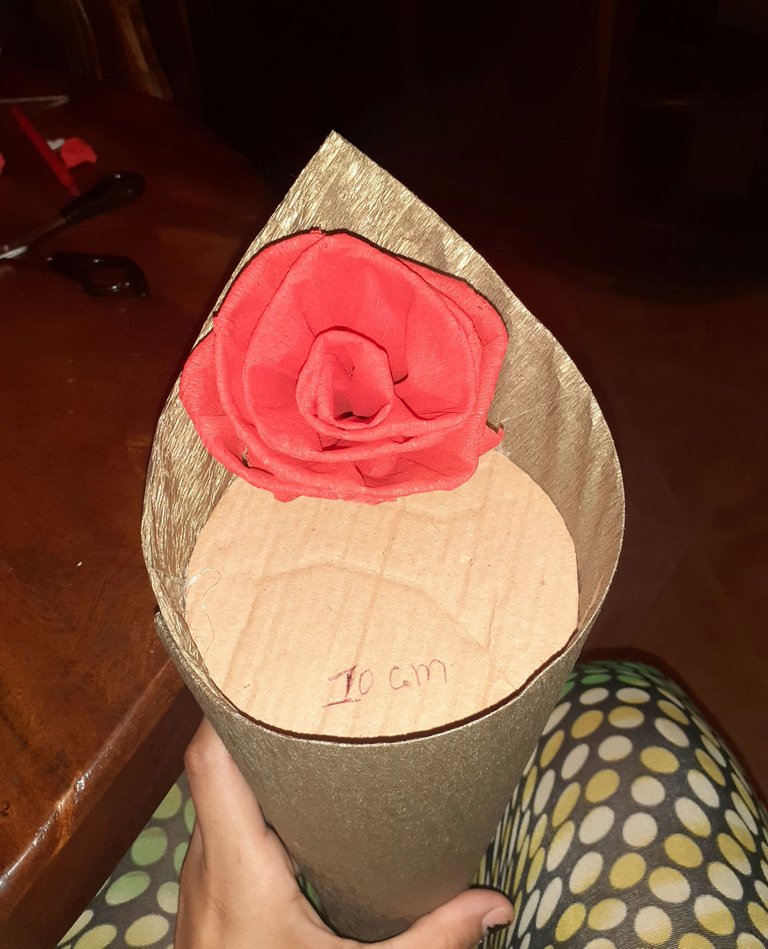
step 11 Now we are going to roll up our crepe paper and shape it and finally we glue it, so that it becomes a beautiful rose 🌹
paso 11
Ahora vamos a ir enrollando nuestro papel crepe y ir dándole forma y a lo último la pegamos, para que se convierte en un hermosa rosa 🌹
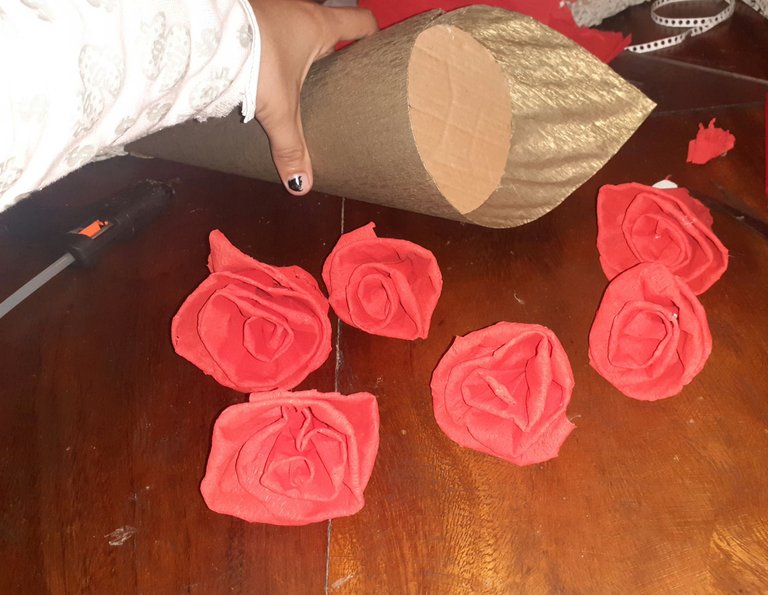
step 12 Now ready, now we are going to stick it one by one, in the circumference that we stick inside the bouquet.
paso 12
Ya listas, ahora vamos a ir pegandola uno por uno, en la circunferencia que pegamos dentro del ramo.
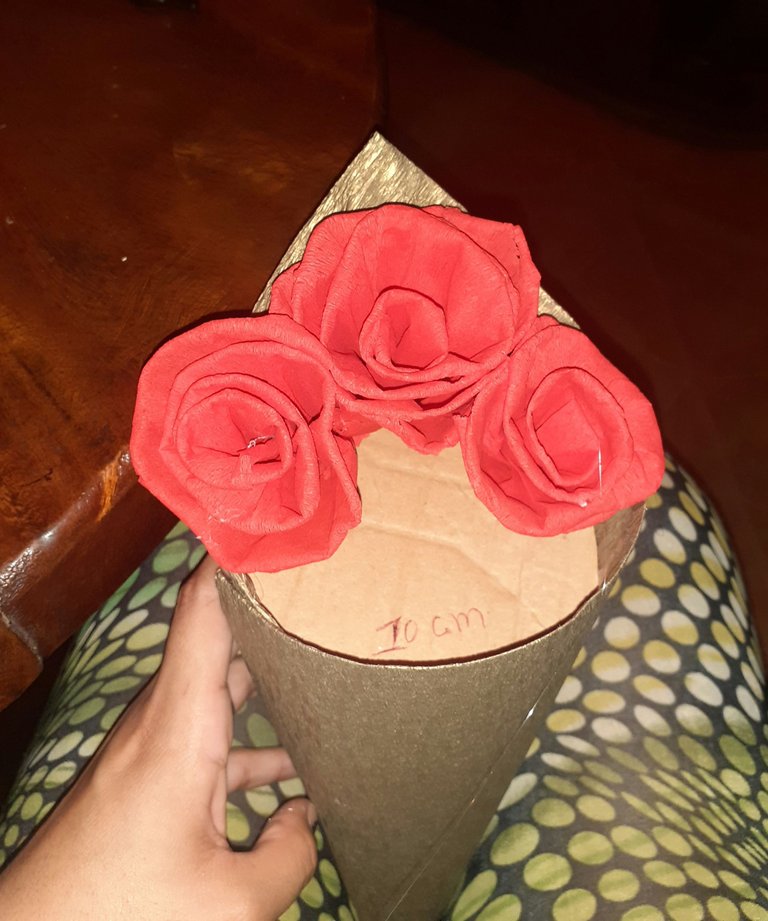
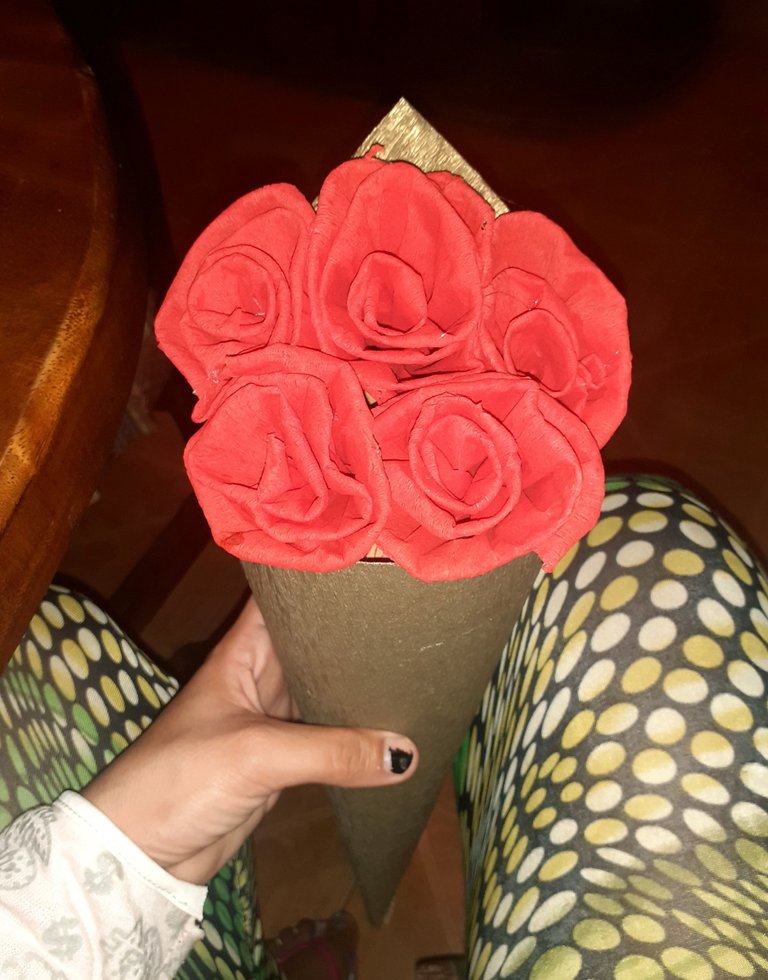

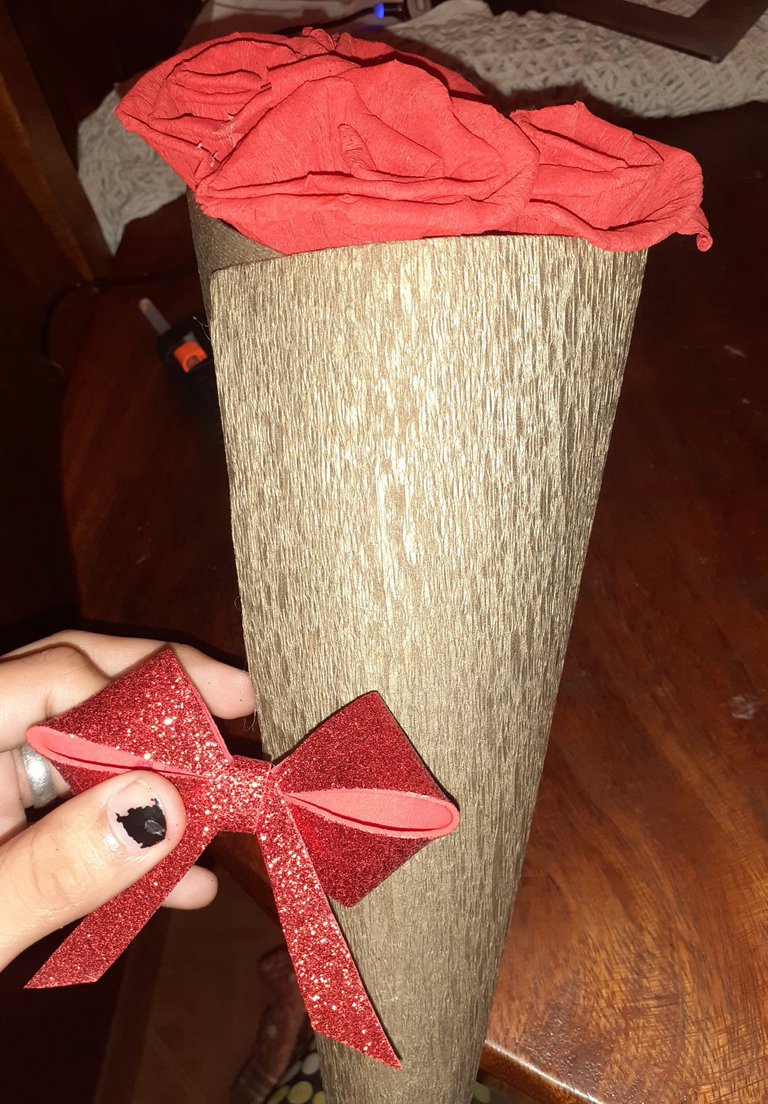
step 13 To complete our beautiful creation of the bouquet of roses 🌹 💕. We glued a small detail that was a beautiful foami bow. And ready ✅.
paso 13
Para ya culminar nuestra hermosa creación del ramo de rosas 🌹 💕. Le pegamos un pequeño detalle que fue un precioso lazo de foami. Y listo ✅.
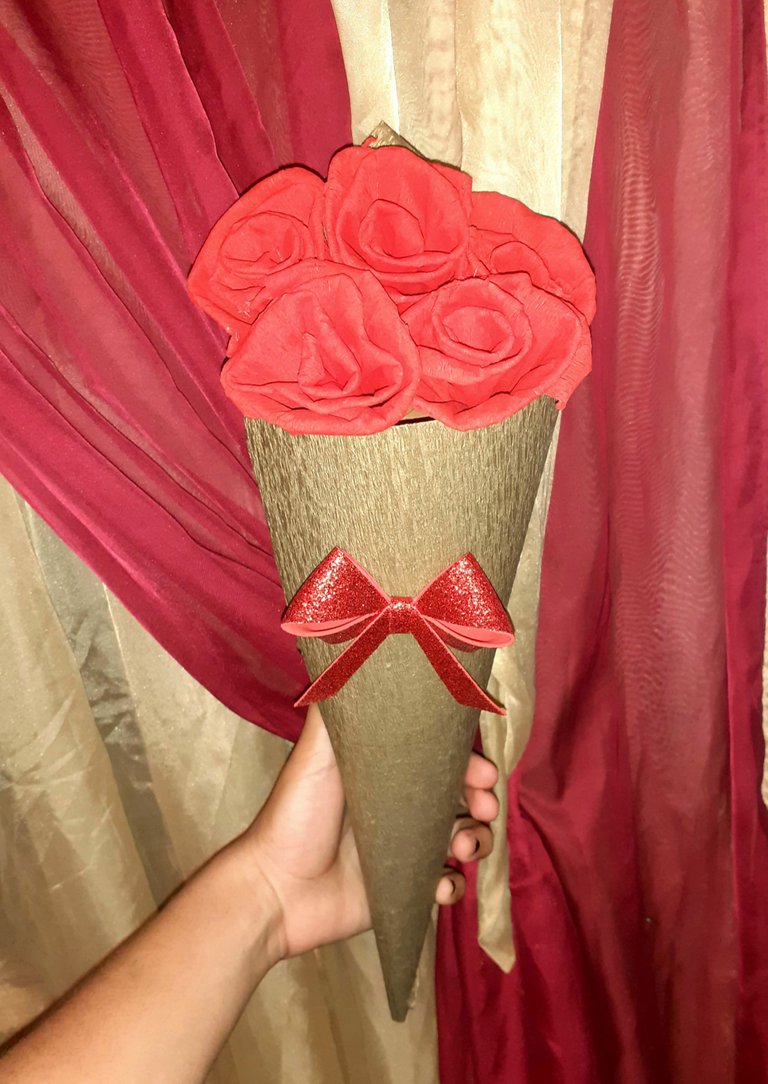

How beautiful. I love roses, they are my favorites. Ideal to give a detail on Mother's Day. ¡Thank you very much!
❤
Me gusta mucho, el color es muy bonito, un ramo muy elegante. Excelente creación
Mil gracias querida amig. Si una idea excelente 👌 para conquistar a esa persona especial.
Thank you for sharing this amazing post on HIVE!
non-profit curation initiative!Your content got selected by our fellow curator @rezoanulvibes & you just received a little thank you via an upvote from our
You will be featured in one of our recurring curation compilations and on our pinterest boards! Both are aiming to offer you a stage to widen your audience within and outside of the DIY scene of hive.
Join the official DIYHub community on HIVE and show us more of your amazing work and feel free to connect with us and other DIYers via our discord server: https://discord.gg/mY5uCfQ !
If you want to support our goal to motivate other DIY/art/music/homesteading/... creators just delegate to us and earn 100% of your curation rewards!
Stay creative & hive on!
Congratulations @emilym! You received a personal badge!
You can view your badges on your board and compare yourself to others in the Ranking
Check out the last post from @hivebuzz:
Support the HiveBuzz project. Vote for our proposal!