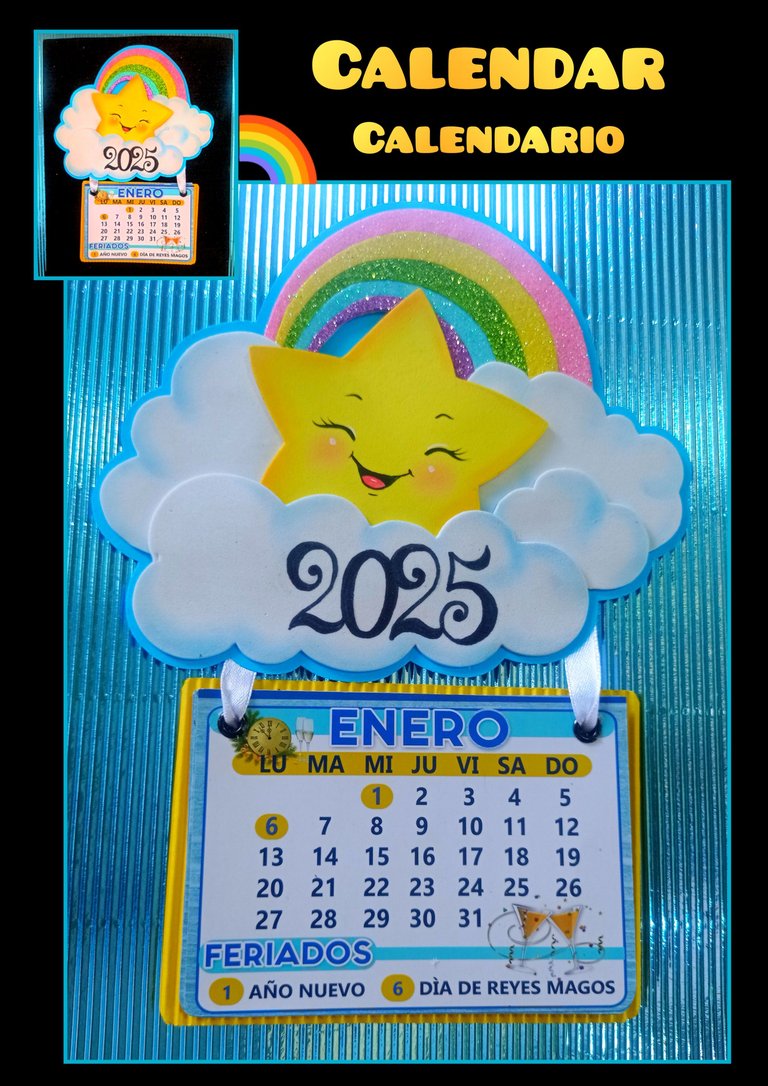
¡Así que te invito a que ver como lo hice!
Para este proyecto necesitas:
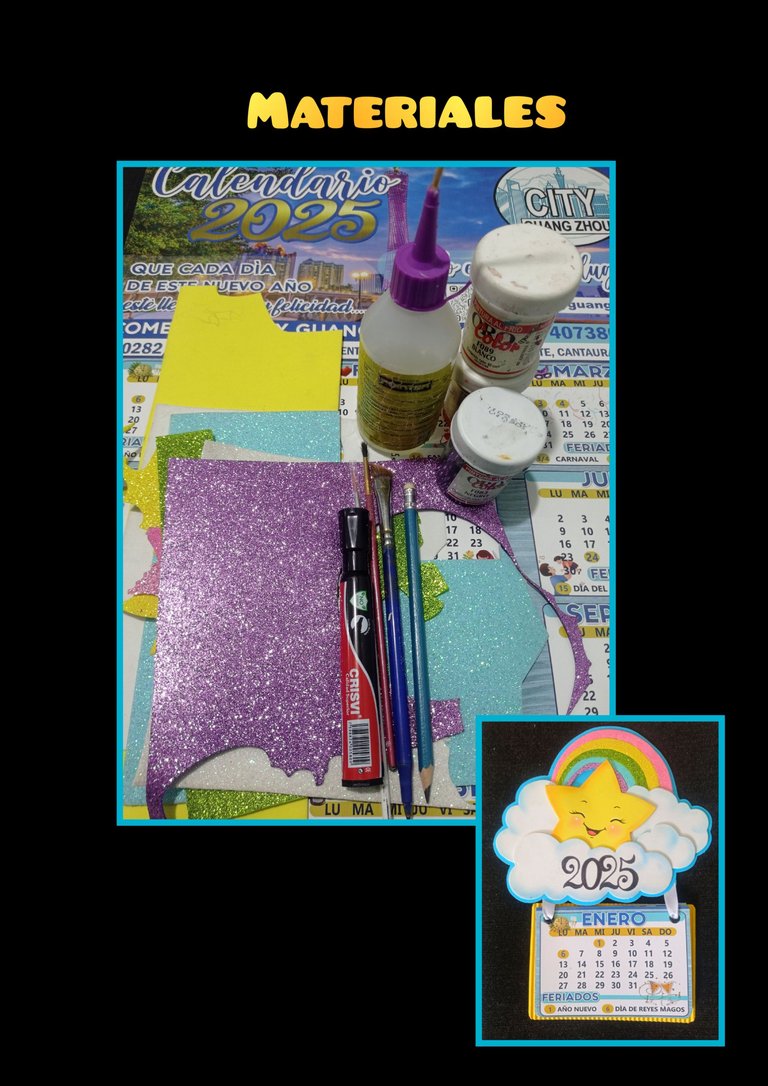
| Calendario | Foami de colores, escarchado y mate |
|---|---|
| Pinturas y pinceles | Tizas de colores |
| Silicón | Tijera |
| Lápiz y marcador | Cartulinas de colores |
| Cinta de raso | Sacabocado o aguja de tejer |
Es hora de comenzar:
Paso 1:
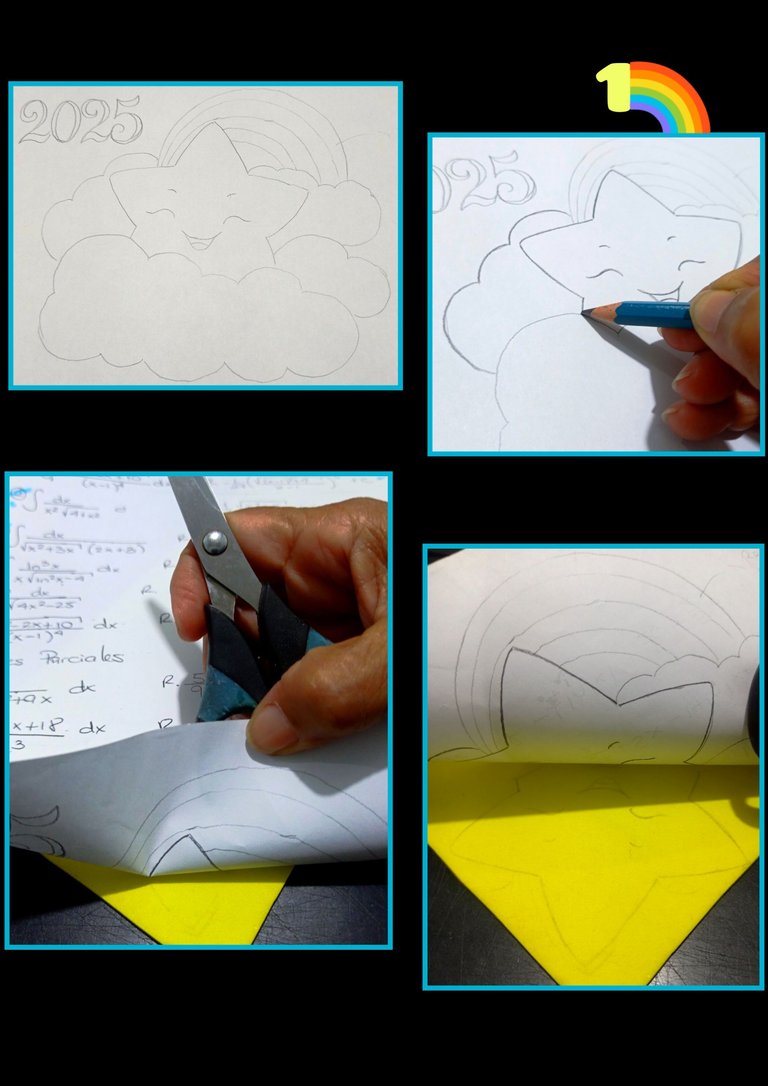
- Calca, dibuja o imprime las figuras que deseas usar, luego con un lápiz de mina blanda yo uso (3B,4B) porque el carbón se adhiere muy fácil al foami, remarca el dibujo.
- Ahora para transferir el dibujo, colócalo sobre el foami y con la ayuda de la tijera, frota el papel y revisa que se esté pasando todo el dibujo.

Paso 2:
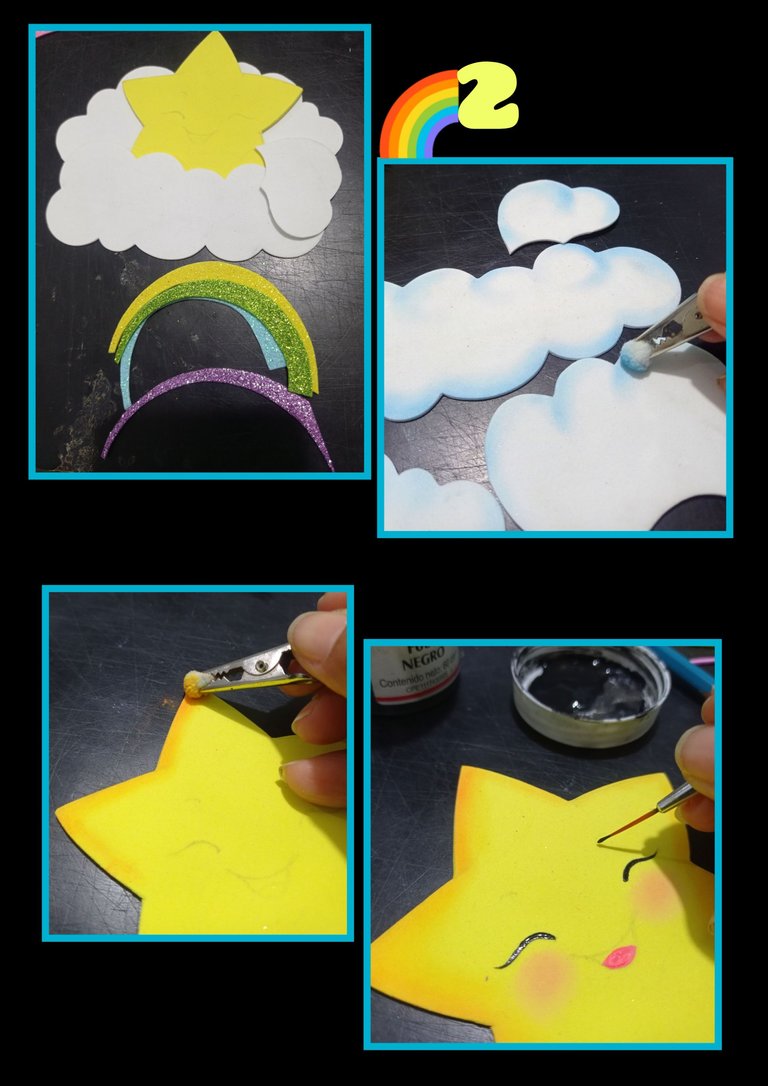
- Recorta todas las piezas y comienza a pintar con la tiza por todo el contorno, luego con un pincel o marcador punta fina delinea la carita de la estrellita y deja secar.

Paso 3:
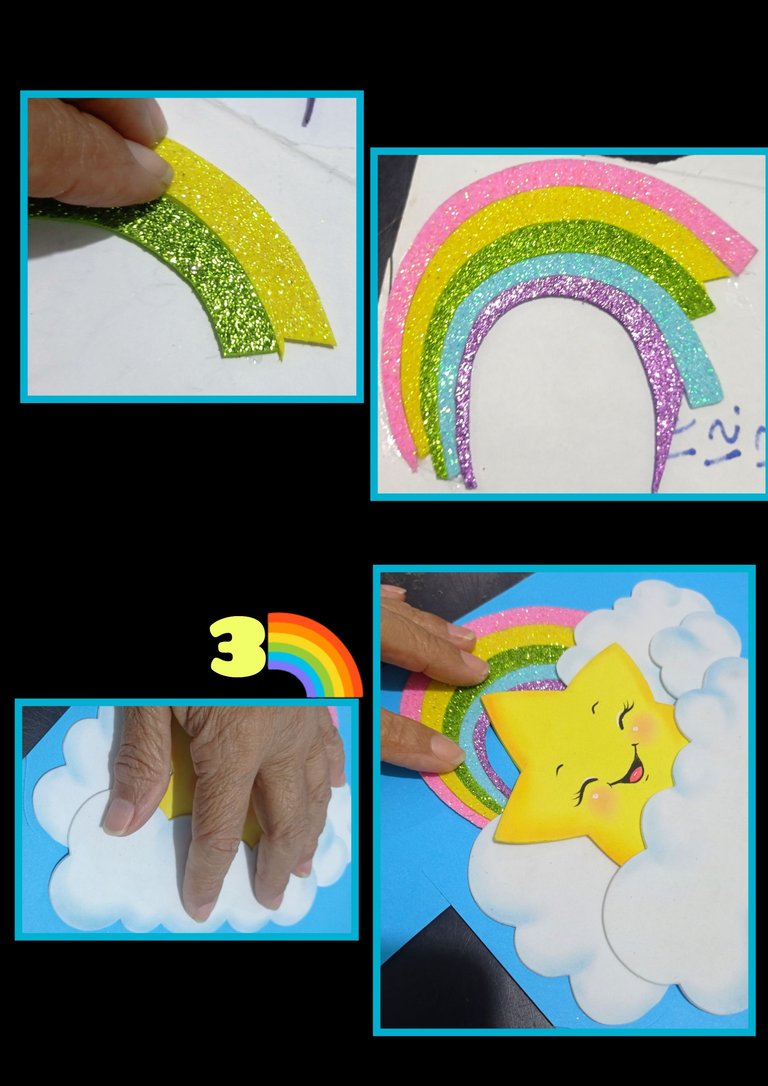
- Para armar el arco iris, aplica silicón en la parte posterior de cada color y pega sobre un pedazo de papel blanco, deja secar y recorta por todo el contorno sin dejar borde.
- Ahora comienza a armar y pegar todas las figuras, luego pega sobre un pedazo de cartulina azul y recorta por todo el contorno, dejando un borde de 2 ó 3 milímetros.
Paso 4:
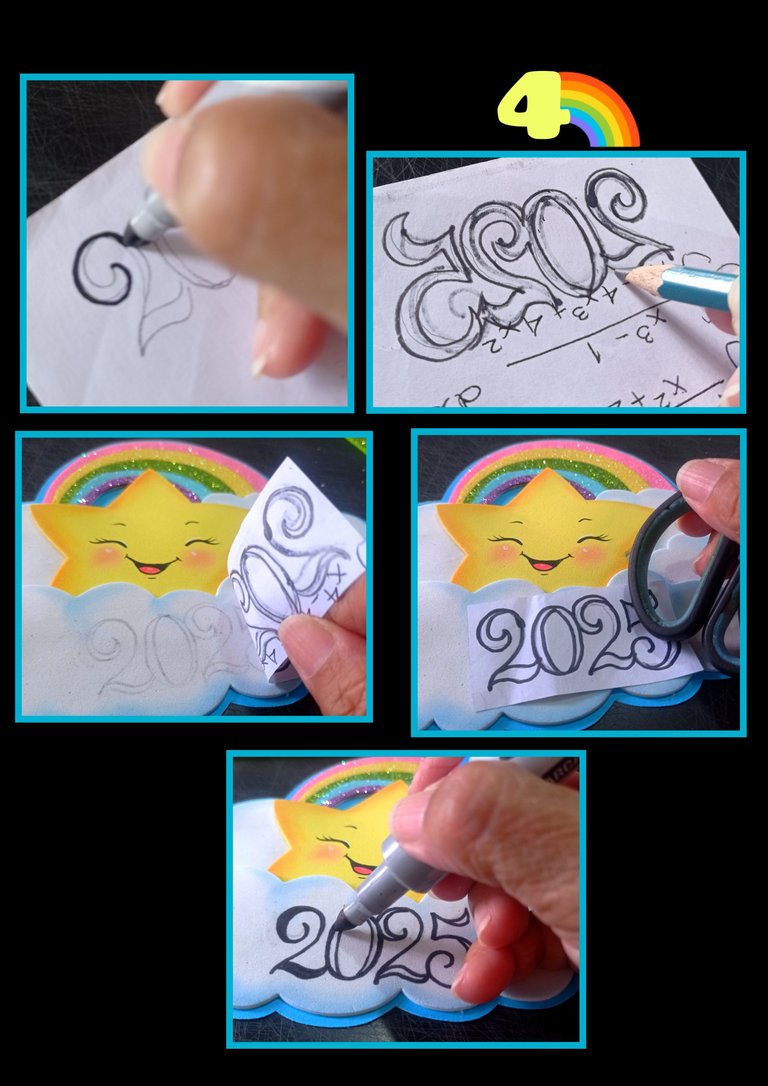
- Remarca con marcador negro los números, luego por el lado posterior, con el lápiz de mina blanda, vuelve a remarcar, coloca sobre las nubes y con la ayuda de la tijera, frota hasta transferir el número.
- Luego con marcador negro pinta sobre el foami.

Paso 5:
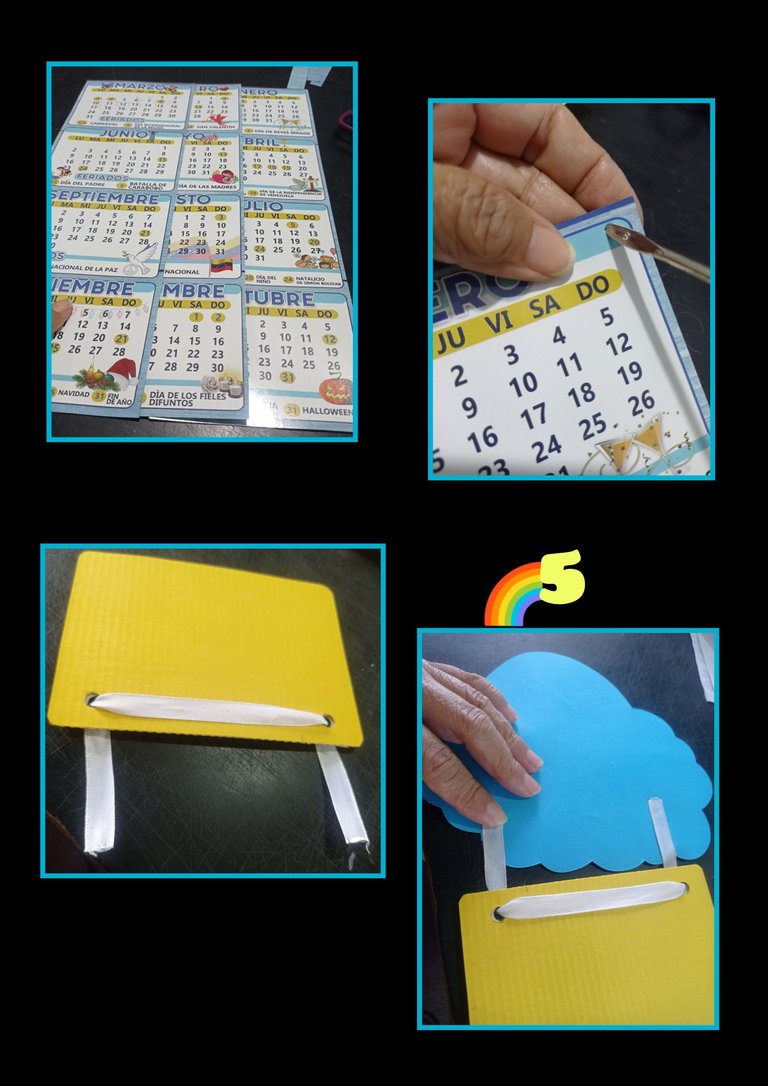
- Recorta el calendario en tiras y luego en cuadros individuales por meses, después puedes abrir orificios con sacabocados o con una aguja perfora y luego le puedes insertar una aguja de tejer para ensanchar los orificios, ahora mide los cuadros y recorta un rectángulo amarillo o del color deseado aumentando 1cm de cada lado, haz también 2 orificos e introduce la cinta como se aprecia en la foto.
- Luego mide y marca donde pegarás la cinta en la parte superior (azul).

Paso 6:
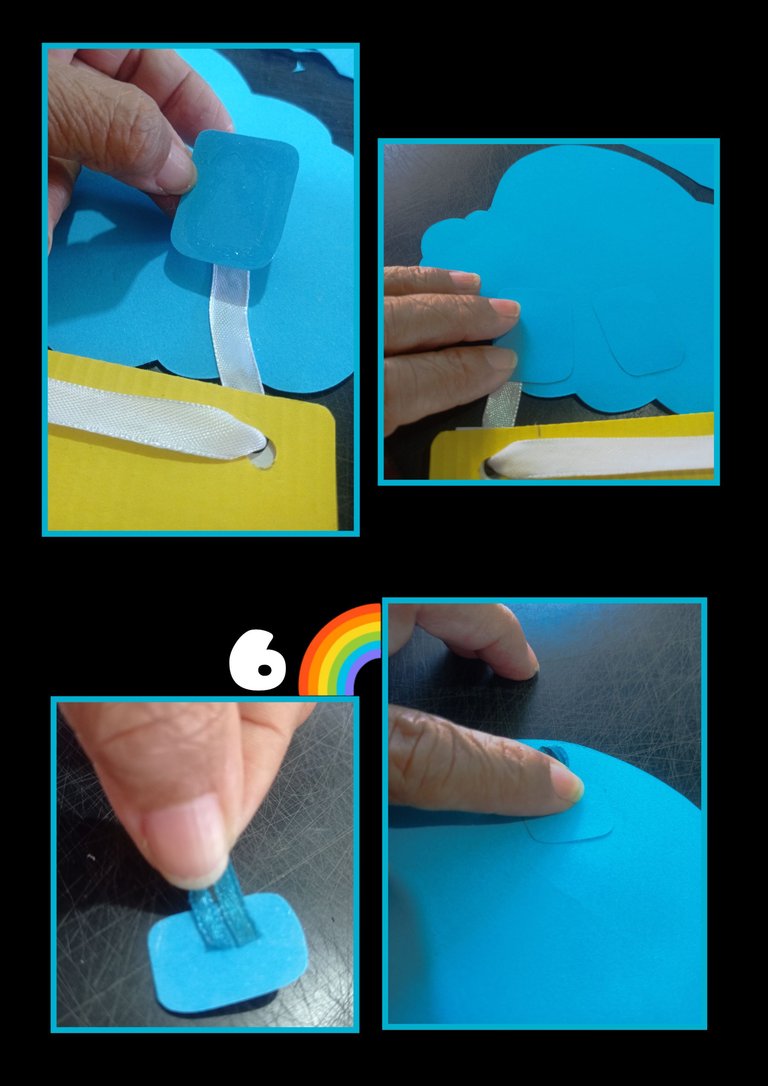
- Recorta 2 cuadritos en cartulina y pega sobre la cinta para tapar las imperfecciones.
- Por último, recorta otro cuadrito y pega cinta azul haciendo una lazada, aplica silicón y pega en la parte superior para colgar.

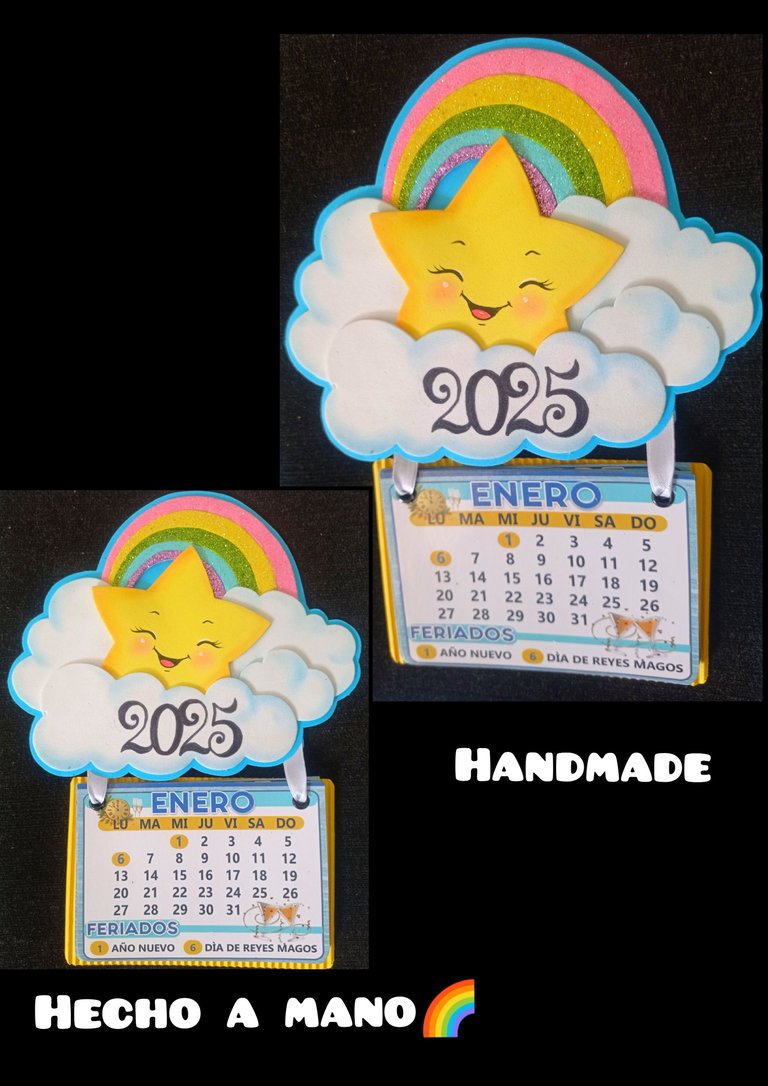
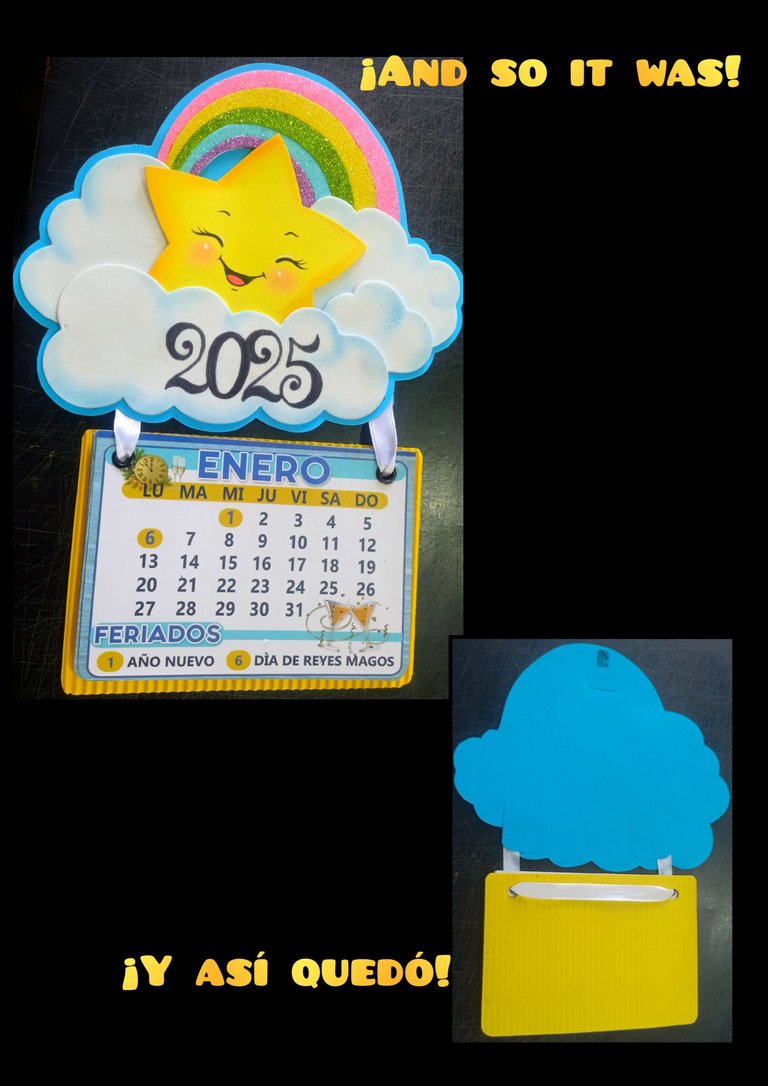
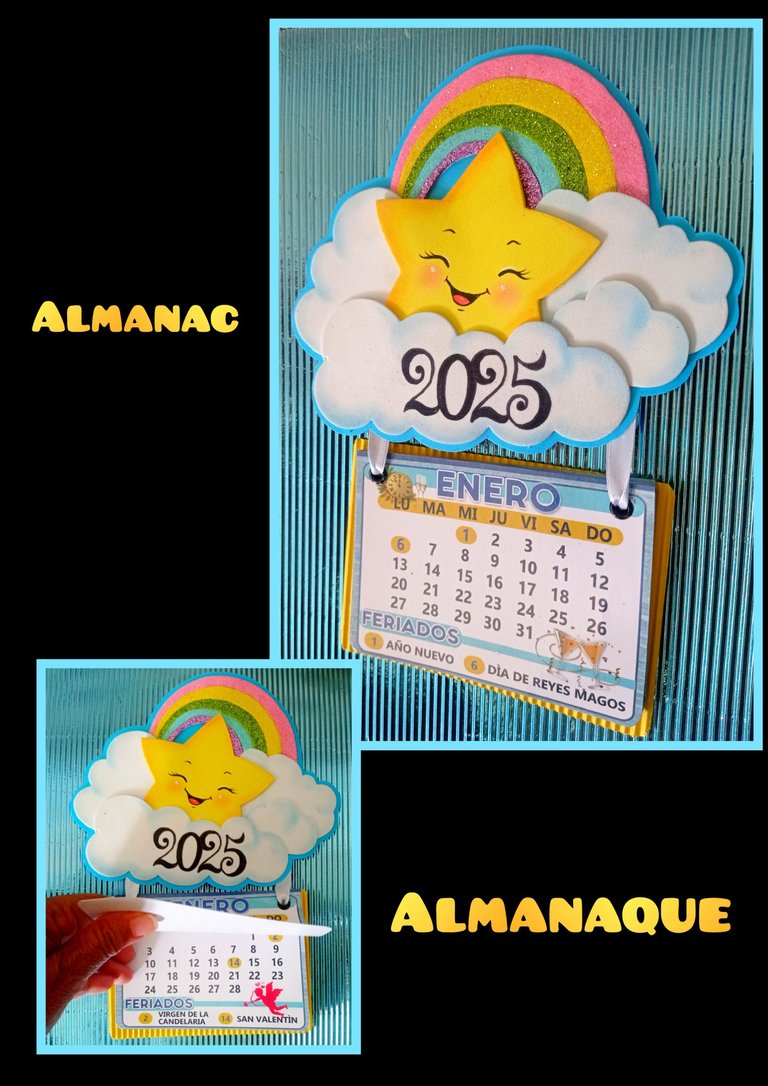
Aquí te muestro el resultado final

DeepL.
Fotos capturadas con mi Redmi Note 9
Editor de fotos: GridArt
Mis redes sociales: X @elmundodebetty Instagram: @elmundodebetty
Fuente:https://es.pinterest.com/pin/476255729363313215/

Ahora llegó la hora de despedirme, no sin antes agradecer tu visita, apoyo y comentario, espero que mi tutorial te sirva de guía para futuros proyectos.
Saludos y hasta mi próximo paso a paso.


So I invite you to see how I did it!.
For this project you need:

| Calendar | Colorful foami, frosted and matte |
|---|---|
| Paints and brushes | Colored chalks |
| Silicone | Scissors |
| Pencil and marker | Colored cardboard |
| Satin ribbon | Punch or knitting needle |
It's time to begin:
Step 1:

- Trace, draw or print the figures you want to use, then with a soft lead pencil I use (3B,4B) because the charcoal adheres very easily to the foami, outline the drawing.
- Now to transfer the drawing, place it on the foami and with the help of the scissors, rub the paper and check that all the drawing is going through.

Step 2:

- Cut out all the pieces and start painting with the chalk all around the contour, then with a brush or fine tip marker outline the face of the little star and let it dry.

Step 3:

- To assemble the rainbow, apply silicone on the back of each color and glue on a piece of white paper, let dry and cut all around the contour without leaving a border.
- Now start to assemble and glue all the figures, then glue on a piece of blue cardboard and cut all around the contour, leaving a border of 2 or 3 millimeters.
Step 4:

- Outline with black marker the numbers, then on the back side, with the soft lead pencil, outline again, place on the clouds and with the help of the scissors, rub until transferring the number.
- Then, with a black marker, paint on the foami.

Step 5:

- Cut the calendar into strips and then into individual squares by months, then you can open holes with a punch or a needle punch and then you can insert a knitting needle to widen the holes, now measure the squares and cut a yellow rectangle or the desired color by increasing 1cm on each side, also make 2 holes and insert the ribbon as shown in the photo.
- Then measure and mark where you will glue the ribbon at the top (blue).

Step 6:

- Cut out 2 squares of cardboard and glue over the ribbon to cover the imperfections.
- Finally, cut out another square and glue blue ribbon making a loop, apply silicone and glue on top to hang.

Here I show you the final result


DeepL.
Photos captured with my Redmi Note 9.
Photo editor: GridArt
My social networks: X @elmundodebetty Instagram: @elmundodebetty
Fuente:https://es.pinterest.com/pin/476255729363313215/


Now it's time to say goodbye, but not before thanking you for your visit, support and comment, I hope my tutorial will serve you as a guide for future projects.
Greetings and until my next step by step.
This is lovely!
Super attractive and guaranteed to brightened your day when you look at it:)
Hola, que bueno saber que te gustó!
Gracias por tan lindo comentario.
Wow que hermoso y fascinante quedó tu calendario. Es toda una obra de arte.
Paz!!
Saludos, muchas gracias por tu comentario, me alegra mucho saber que te gustó.
Te quedo muy bonito. Gracias por compartir tu paso a paso
Saludos @elmundodebetty
Un placer siempre compartir con ustedes.@mafalda2018, muchas gracias por tu apoyo y comentario.
Tu proyecto es demasiado lindo, la cara de la estrella es demasiado carismática, el efecto de las nubes reflejan un bonito efecto con cada pieza de este sistema de cuerpos celestes.💗💗💗💗💗
Hola Laura, que hermoso saber que te gustó mi trabajo y la forma en que lo describes.
Muchas gracias por tu comentario.
Feliz día.
😃 Hola linda!!, estoy encantada con tus tiernas ideas.💗Feliz y bendecida noche y semana, muchos abrazos.
Bonita noche, gracias amiga.
Me alegra mucho el que te gusten mis trabajos.
Tusa abrazos son muy bien recibidos, igual para ti.
💞🙂