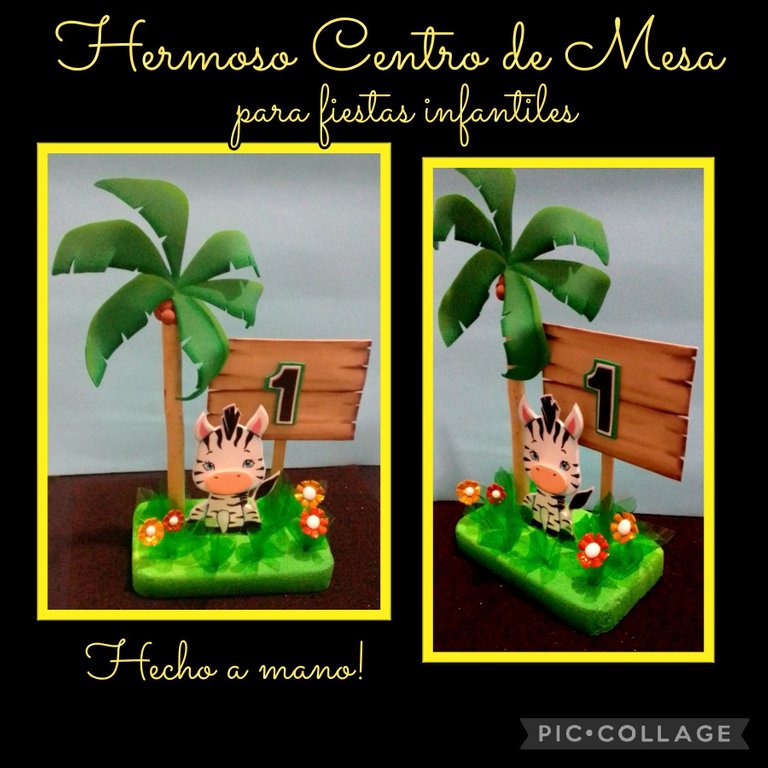
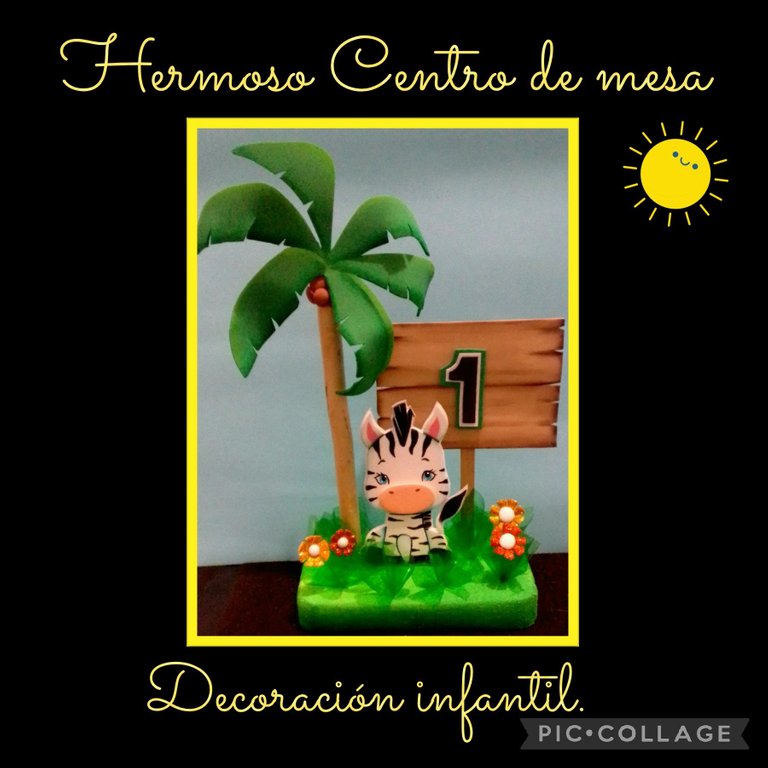
Hola, hola mis queridos amigos.
Buenas noches a todos.
Entonces acompáñame y aprende viendo el procedimiento.
Para este proyecto necesitas los siguientes materiales:
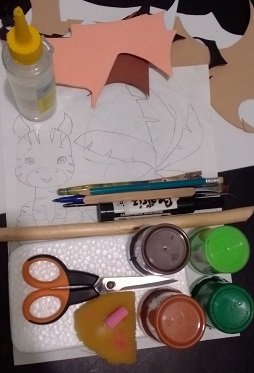
| Anime (rectángulo) | Foami mate y escarchado |
|---|---|
| Cartulina | Marcador y lápiz |
| Pinturas y pinceles | Tijera |
| Tiza y esponja | Palito y palillos de madera |
| Papel celofán verde | Silicón liquido |
| Dibujos o impresiones | Plancha eléctrica |
| Cuchilla | Lija |
Comencemos:
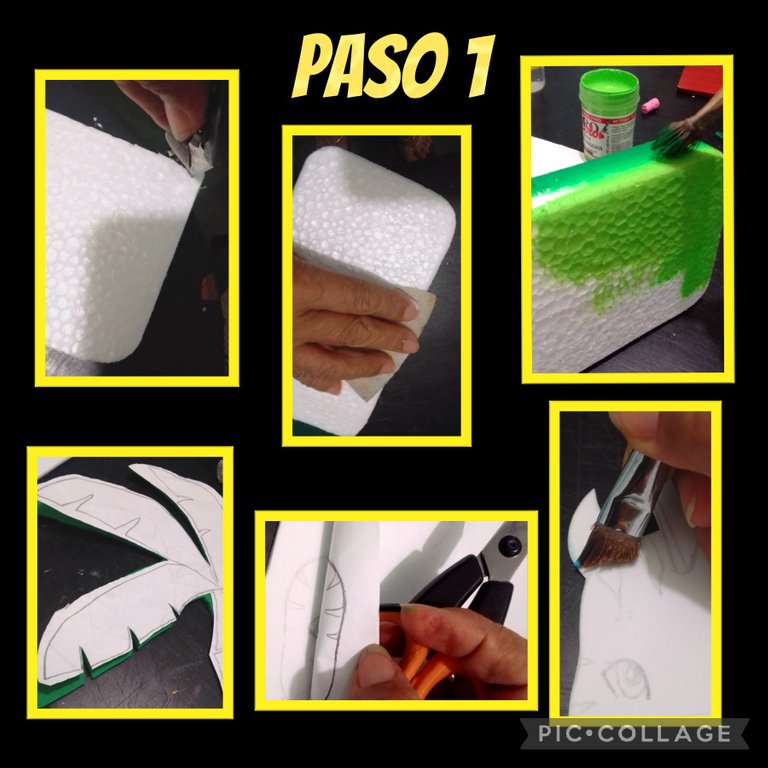
- Recorta con una cuchilla, un rectángulo en anime, redondea las esquinas y pasa una lija para quitar los imperfectos, luego aplica pintura verde claro y sin dejar secar, moja el pincel en pintura verde oscura y une los dos colores para que quede difuminado, esto hazlo por todo el borde del anime y deja secar.
- Aparte remarca los dibujos y si quieres puedes recortar la palmera en el foami directamente guiándote con el dibujo. La cebra si la debes transferir al foami frotando con la tijera el dibujo y luego recorta.
- Luego moja el pincel en agua, pasa por un pañito y déjalo húmedo y moja en pintura la punta para empezar a dar color a la cebra por el borde y deja secar.
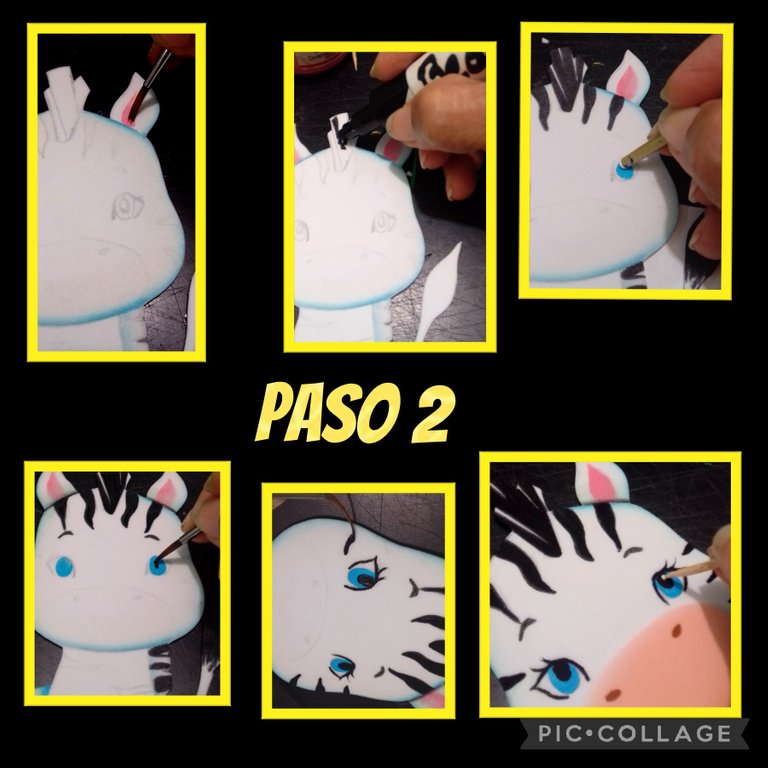
- Rellena el centro de las orejas con pintura rosada y con un marcador, rellena la crín y manchas de la cebra.
- Seguido con la parte trasera del pincel, moja en pintura y marca los ojos.
- Y con un pincel delgado rellena el centro de los ojos y pinta cejas, pestañas y coloca un punto de luz en los ojos.
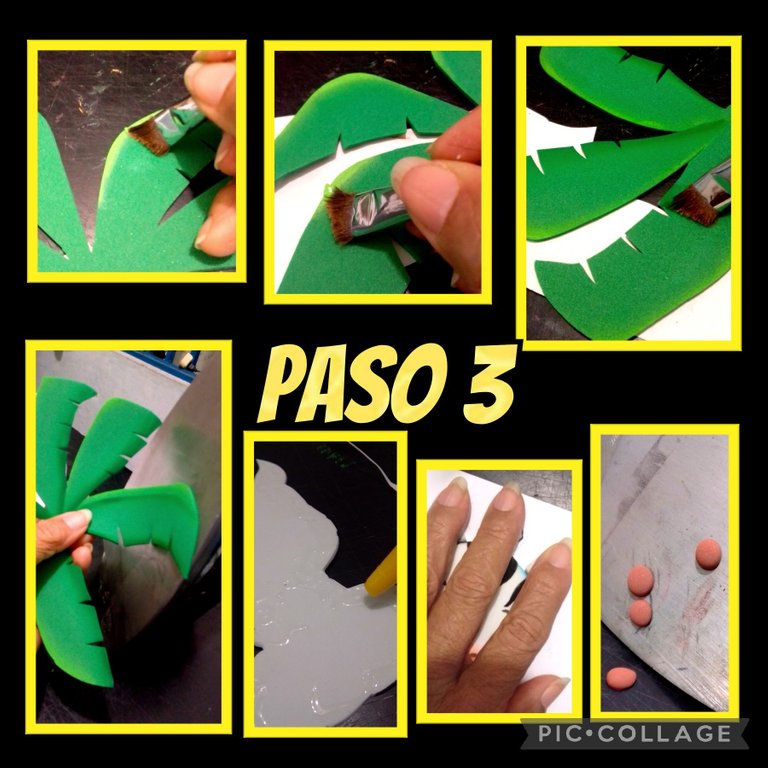
- Ahora pinta la palmera usando el procedimiento anterior y pinta en color verde claro las orillas superiores de las palmeras y
verde oscuro las orillas inferiores, deja secar. - Aplica en la parte posterior de la cebra silicón y pega a la cartulina, haciendo presión para que pegue bien.
- Aparte recorta 4 círculos en foami marrón y dale forma con la plancha caliente (estos serán cocos).
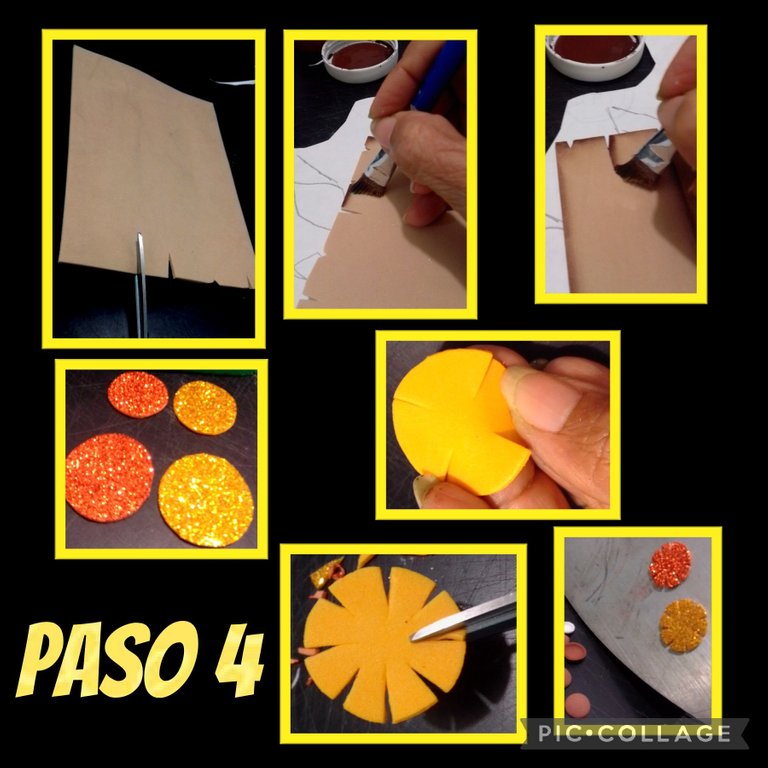
Para el aviso o tabla, recorta en foami beige o marrón, un rectángulo y saca formas en la orilla como semejando grietas de la madera y empieza a pintar con pintura marrón por todo el borde y haciendo divisiones y líneas semejando betas.
Ahora recorta 4 círculos en foami escarchado(flores) y cuatro blancas pequeñitas para los centros de las flores.
Recorta o divide la flor en 8 pétalos, calienta la plancha y monta las flores para que tomen forma y pega los centros blancos.
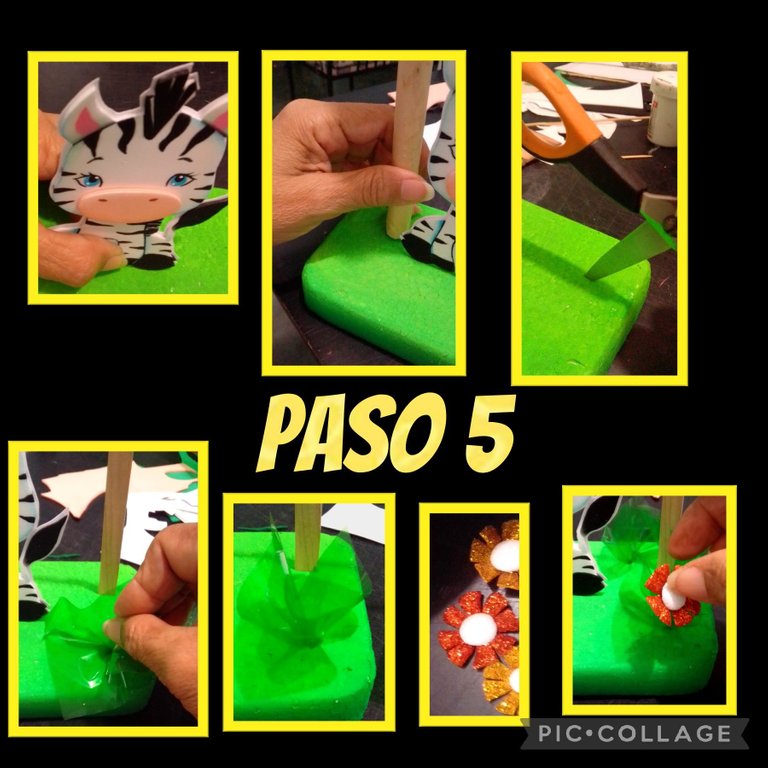
- Seguidamente, aplica silicón en la parte de abajo de la cebra y pega en el centro del anime.
- Vuelve a aplicar silicón el tallo del palito y pega.
- Y con la ayuda de la tijera, haz un corte en el anime y pega la paleta que será la base del anuncio.
- Ahora recorta cuadritos de papel celofán e inserta en el anime, con la ayuda de un palillo (ver foto) y rellena donde gustes con estos papeles y pegas las florecitas.
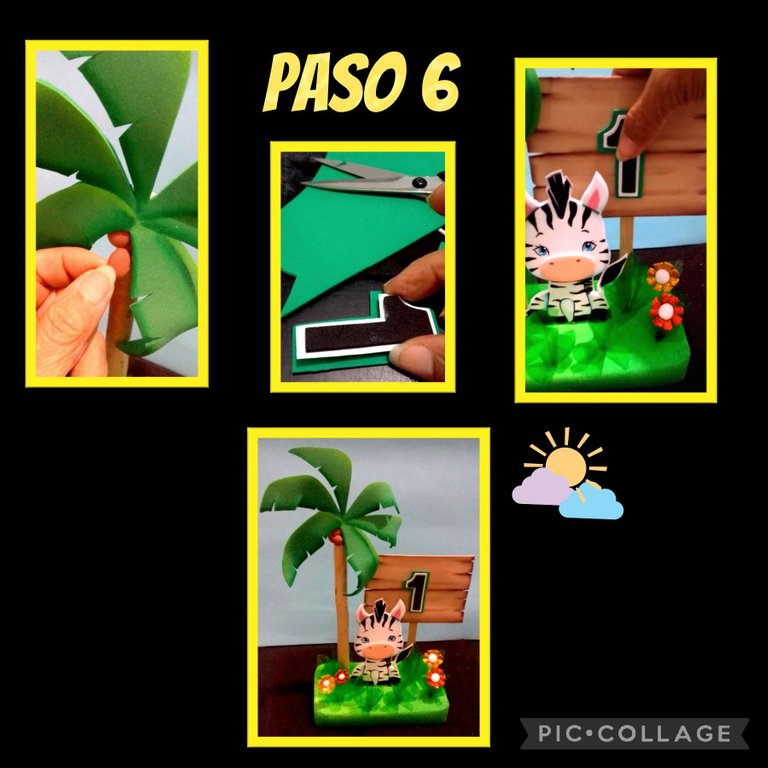
- Y ya para terminar, pega los cocos y recorta lo que vayas a colocar en el anuncio, yo recorté un número 1 en varias tamaños y pegué uno sobre otro, aplica silicón y pegué a la tablilla.
Ahora mira el resultado!
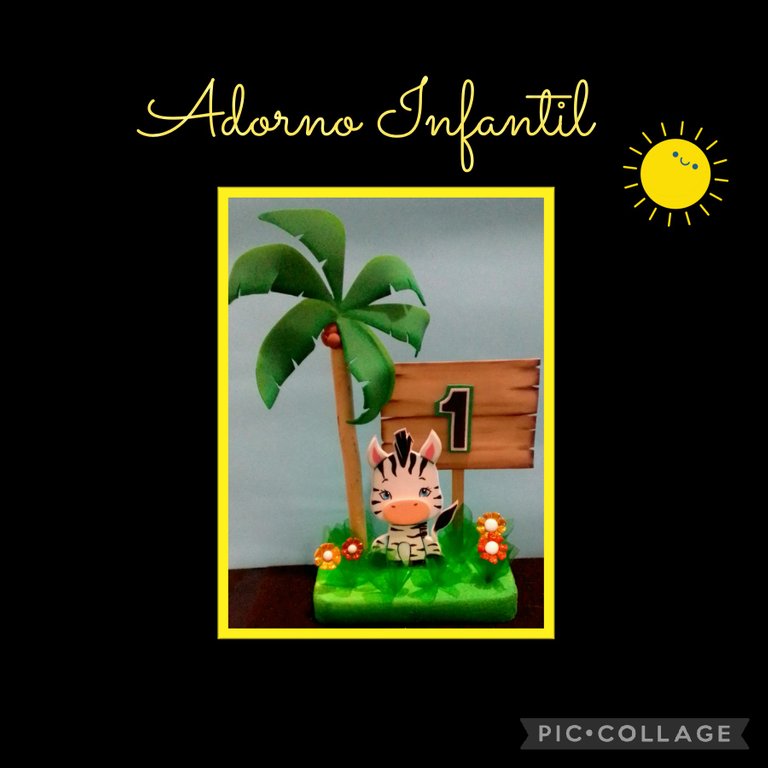
Mi publicación está editada con etiquetas HTML, traducida con DeepL y las fotos capturadas por mi con un Blu G5 y editadas con Pic Collage.


Saludos.
English:


Hola, hola mis queridos amigos.
Buenas noches a todos.
Entonces acompáñame y aprende viendo el procedimiento.
Para este proyecto necesitas los siguientes materiales:

| Anime (rectángulo) | Foami mate y escarchado |
|---|---|
| Cartulina | Marcador y lápiz |
| Pinturas y pinceles | Tijera |
| Tiza y esponja | Palito y palillos de madera |
| Green cellophane paper | Liquid silicone |
| Drawings or impressions | Electric iron |
| Knife | Sandpaper |
Let's start:

- Cut out with a knife, a rectangle in anime, round the corners and pass a sandpaper to remove imperfections, then apply light green paint and without letting it dry, dip the brush in dark green paint and unite the two colors so that it is blurred, do this around the edge of the anime and let it dry.
- Besides highlight the drawings and if you want you can cut out the palm tree in the foami directly guiding you with the drawing. The zebra should be transferred to the foami by rubbing the drawing with the scissors and then cut it out.
- Then dip the brush in water, pass it through a small cloth and leave it wet and dip the tip in paint to start coloring the zebra around the edge and let it dry.

- Fill in the center of the ears with pink paint and with a marker, fill in the zebra's mane and spots.
- Then with the back of the brush, dip in paint and mark the eyes.
- And with a thin brush fill in the center of the eyes and paint eyebrows, eyelashes and place a light spot on the eyes.

- Now paint the palm tree using the previous procedure and paint in light green the upper edges of the palms and dark green the lower edges.
dark green on the bottom edges, let dry. - Apply silicone to the back of the zebra and glue to the cardboard, pressing down to make sure it sticks well.
- Cut out 4 circles in brown foami and shape them with the hot iron (these will be coconuts).

For the sign or board, cut out a rectangle in beige or brown foami and draw shapes on the edge to resemble cracks in the wood and start painting with brown paint all around the edge and making divisions and lines resembling betas.
Now cut out 4 circles in frosted foami (flowers) and four small white ones for the flower centers.
Cut or divide the flower into 8 petals, heat the iron and assemble the flowers so that they take shape and glue the white centers.

- Next, apply silicone to the underside of the zebra and glue in the center of the anime.
- Reapply silicone to the stem of the stick and glue.
- And with the help of the scissors, make a cut in the anime and glue the palette that will be the base of the advertisement.
- Now cut out squares of cellophane paper and insert them into the anime, with the help of a toothpick (see photo) and fill in wherever you like with these papers and glue the little flowers.

- And to finish, glue the coconuts and cut out what you are going to place on the announcement, I cut out a number 1 in various sizes and glued one on top of the other, apply silicone and glued to the board.
Now look at the result!

My post is edited with HTML tags, translated with DeepL and the photos captured by me with a Blu G5 and edited with Pic Collage.


Greetings.
Hi elmundodebetty,
Join the Curie Discord community to learn more.
Muy buenos días @curie muchas gracias por el apoyo a mi publicación.
Igualmente y que este día sea de provecho y cargado de bendiciones para ti.
Gracias a ustedes @equipodelta por su apoyo
Congratulations @elmundodebetty! You have completed the following achievement on the Hive blockchain and have been rewarded with new badge(s):
Your next target is to reach 15000 upvotes.
You can view your badges on your board and compare yourself to others in the Ranking
If you no longer want to receive notifications, reply to this comment with the word
STOPCheck out the last post from @hivebuzz:
Me encanta todas las manualidades que haces, son tan perfectas
Ay amiga @marifranci73, muchas gracias por tus palabras.
Siempre cuando se hacen las cosas con amor, tratamos en lo posible que nos queden bien y la mayor recompensa es ver comentarios tan bonitos como el tuyo, que nos alegran la vida y eso nos incentiva a hacerlo bien.
Buenas noches y nuevamente gracias.
Bendiciones para ti.