CÓMO HACER UNA PIÑATA EN CASA.
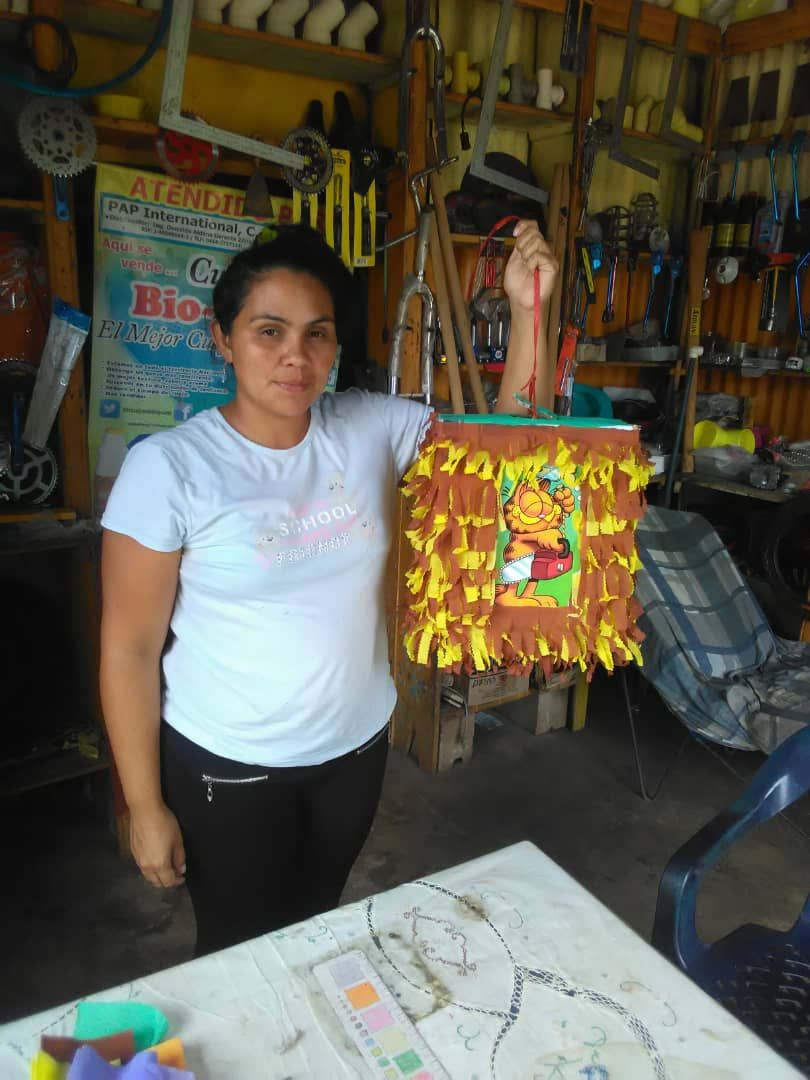
Hacer una piñata en la casa es cuestión sólo de dedicarse y ponerle corazón. Claro que tienes que buscar todos los materiales necesarios para hacerla.
Making a piñata at home is just a matter of dedicating yourself and putting your heart into it. Of course you have to find all the necessary materials to make it.
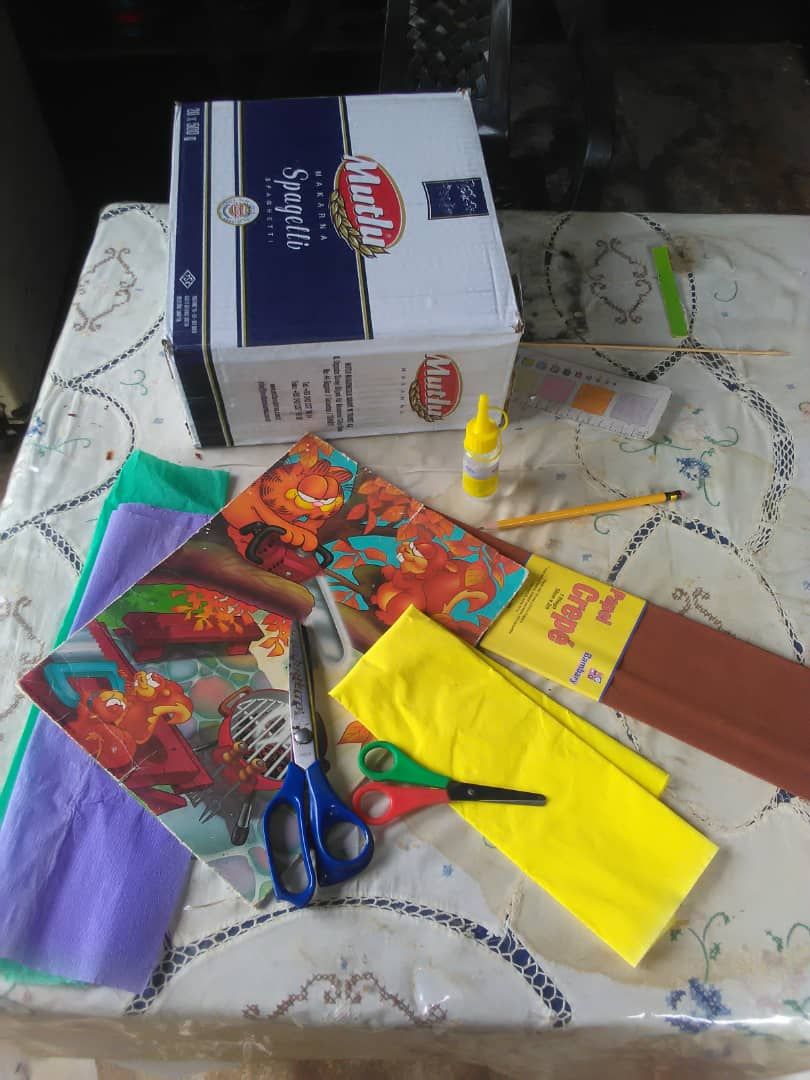
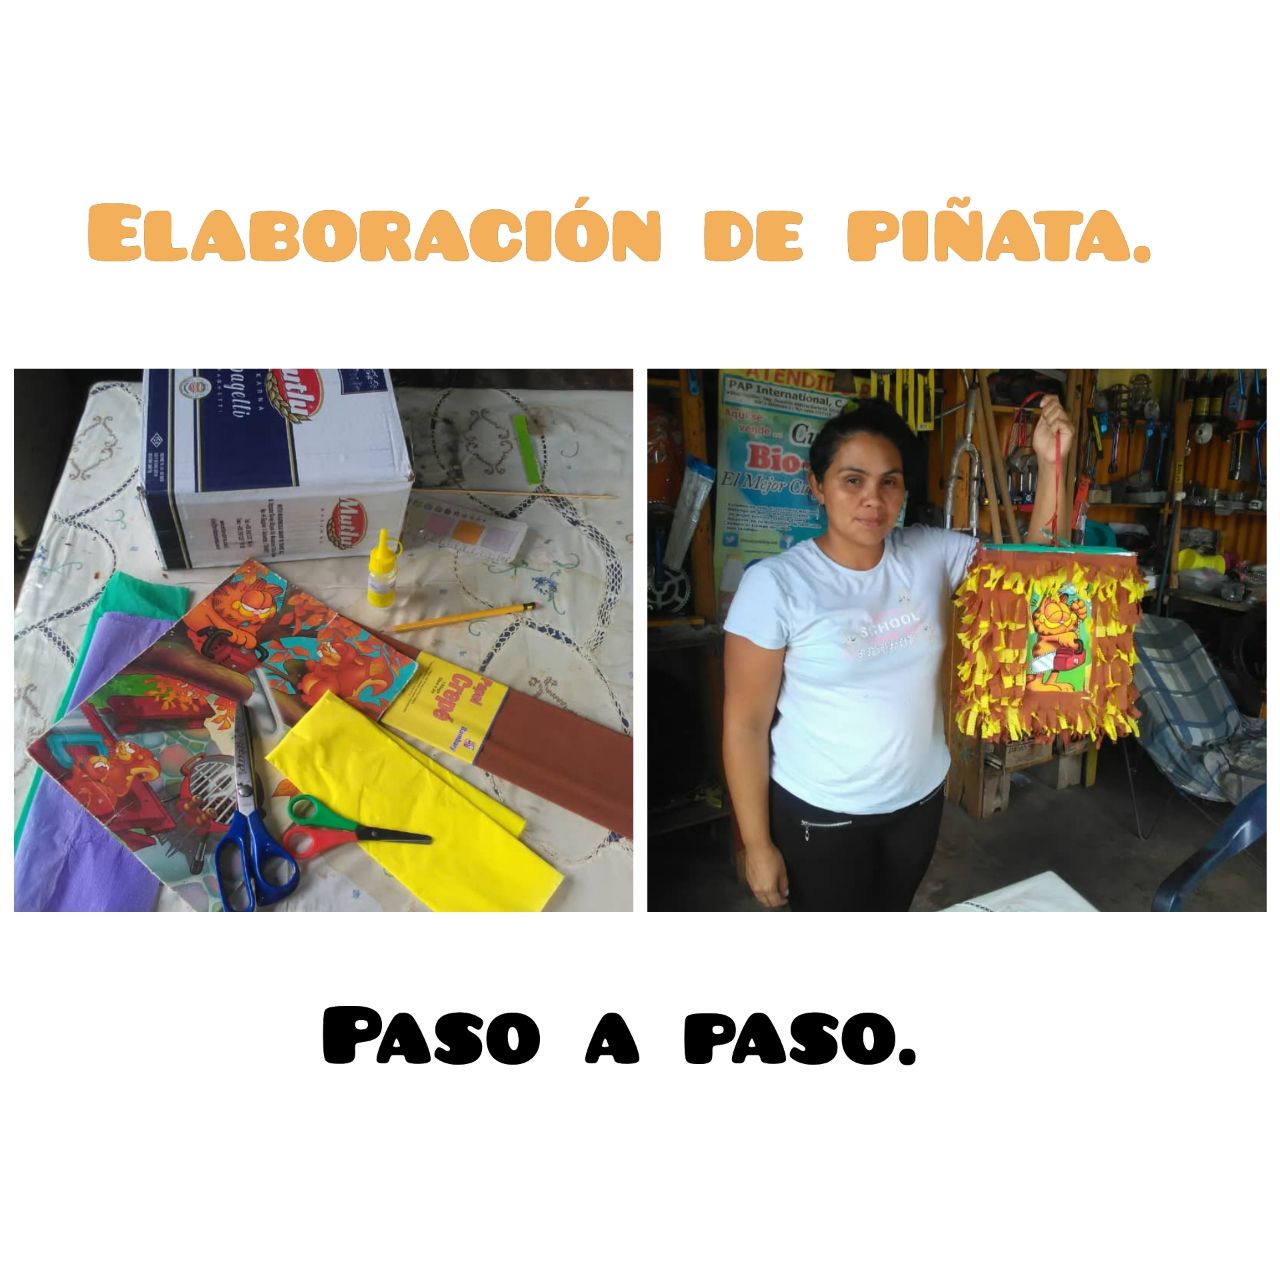
- Caja de cartón.
- Papel crepé que combine con la temática de la piñata.
- Pega líquida (silicón), pega blanca y silicón caliente.
- Las tijeras: normales y de corte con formitas.
- El dibujo a calcomanía del tema de la piñata.
- Foami de variados colores. Lisos y escarchados.
- Lápiz de grafito.
- Rotulador de letras.
- Reglas.
- Carton box.
- Crepe paper that matches the theme of the piñata.
- Liquid glue (silicone), white glue and hot silicone.
- Scissors: normal and cut with shapes.
- The sticker drawing of the piñata theme.
- Foami of various colors. Smooth and frosted.
- Graphite pencil.
- Letter marker.
- Rules.
Cómo empezar.
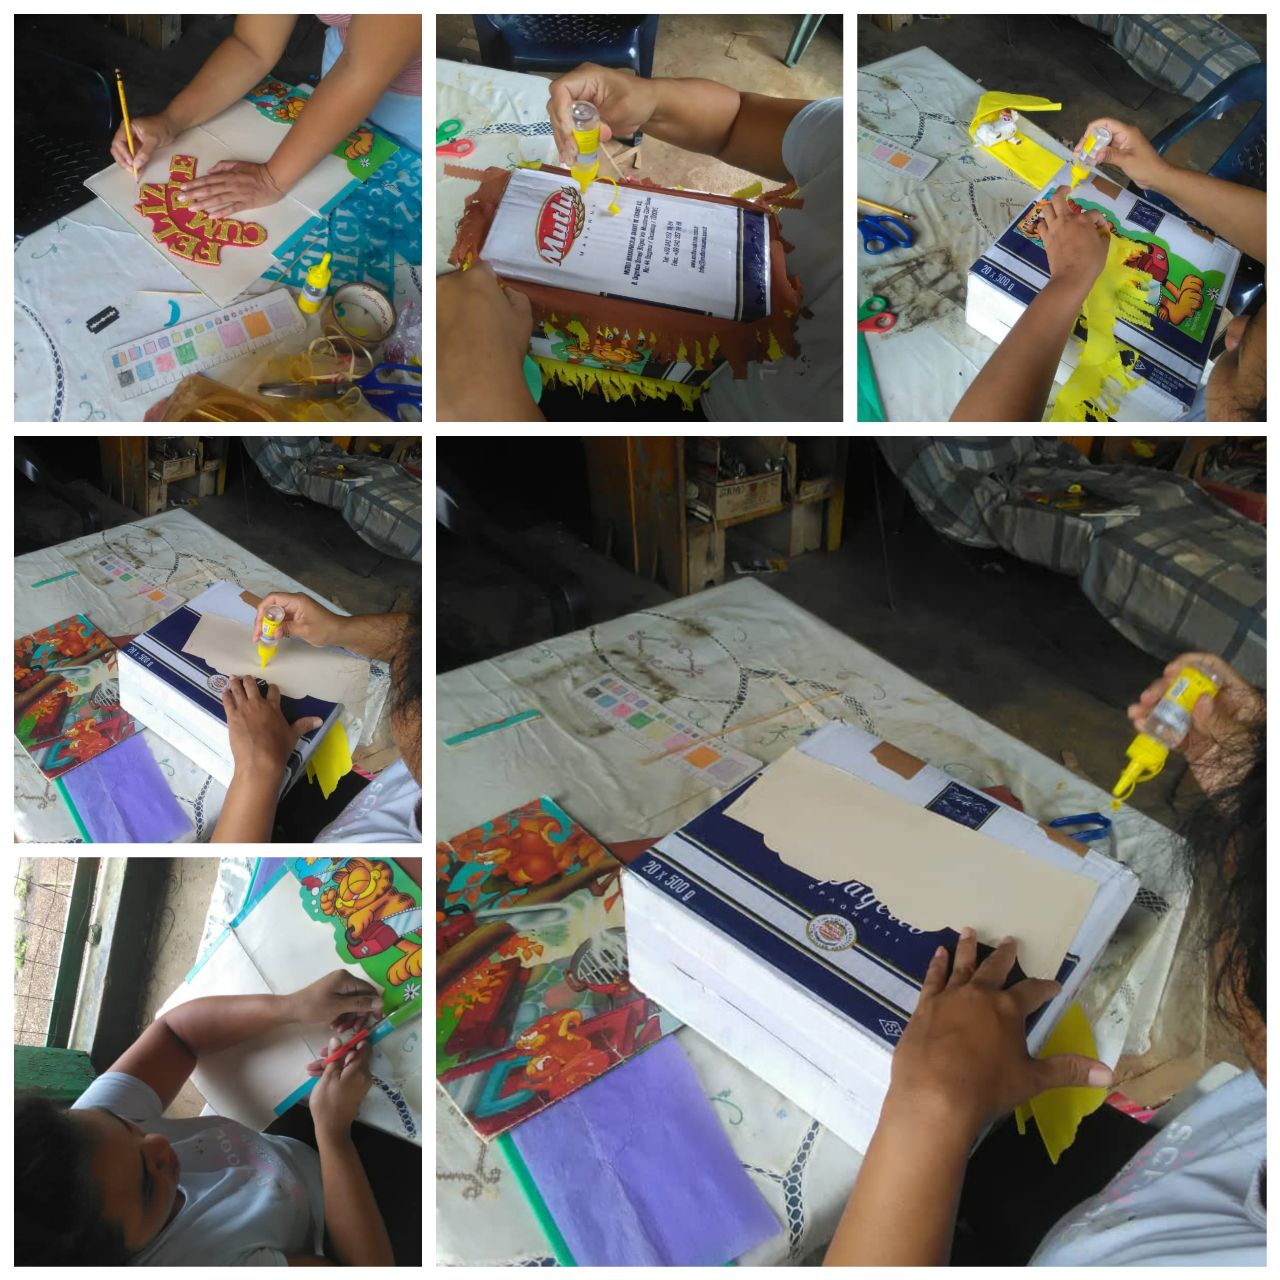
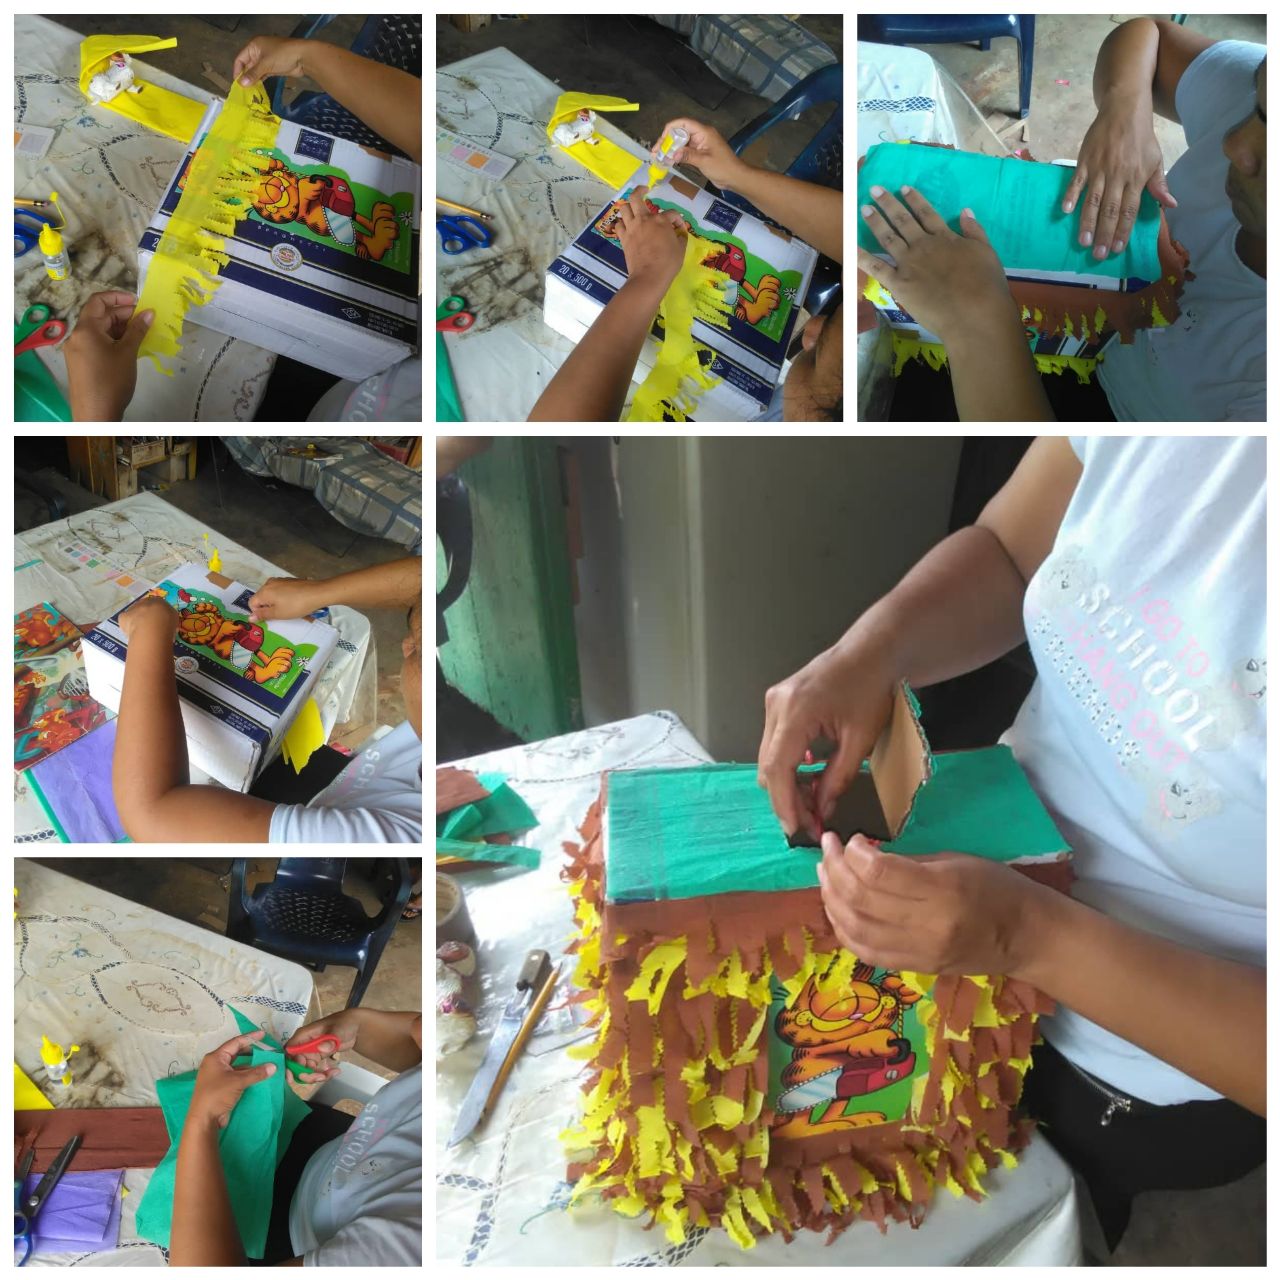
Al tener la idea clara todo lo demás es sencillo. Por acá te muestro en la imagen los avances para que tengas una idea. Es muy sencillo. Yo lo realizo durante el día, por parte porque mis dos niños pequeños me necesitan a cada rato y debo atenderlos, pero en una mañana puedes hacerla.
- Sacude bien la caja de cartón.
- Ubica los colores de papel crepé que vas a usar. Mide el contorno de la caja y luego corta tiras de esa medida, con 5 cm de ancho del papel. Para cada tira de papel (usé amarillo y marrón) harás unos flecos de 3 cm aproximadamente. Dejando el espacio para pegar en la caja.
- Haz cuantos necesites para cubrirla toda.
- Selecciona la imagen que vas a usar, la mía la recorté de una revista infantil que tenía en abandono. Es un gato.
- También vas a visualizar de qué tamaño harás las letras con el mensaje para la piñata.
How to start.
By having a clear idea, everything else is simple. Here I show you the progress in the image so that you have an idea. It is very simple. I do it during the day, partly because my two small children need me all the time and I have to attend to them, but in one morning you can do it.
- Shake the cardboard box well.
- Locate the colors of crepe paper that you are going to use. Measure the outline of the box and then cut strips of that measure, 5 cm wide from the paper. For each strip of paper (I used yellow and brown) you will make fringes of approximately 3 cm. Leaving the space to paste on the box.
- Do as many as you need to cover it all.
- Select the image that you are going to use, I cut mine from a children's magazine that I had in abandonment. It is a cat.
- You will also visualize the size of the letters with the message for the piñata.
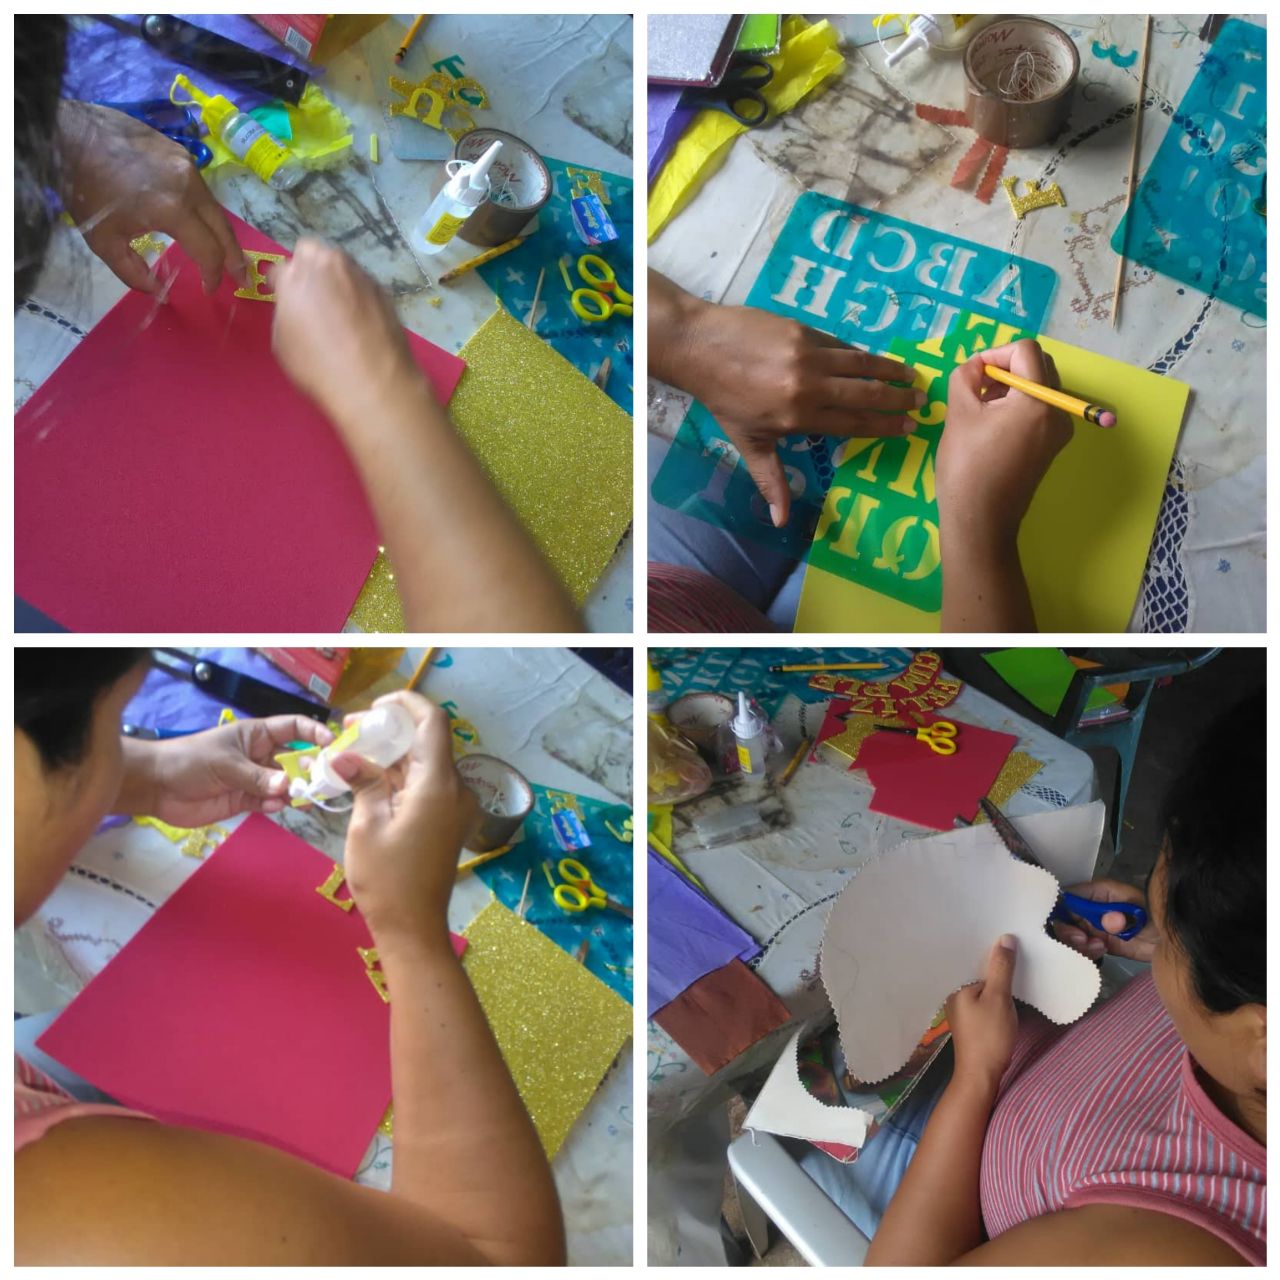
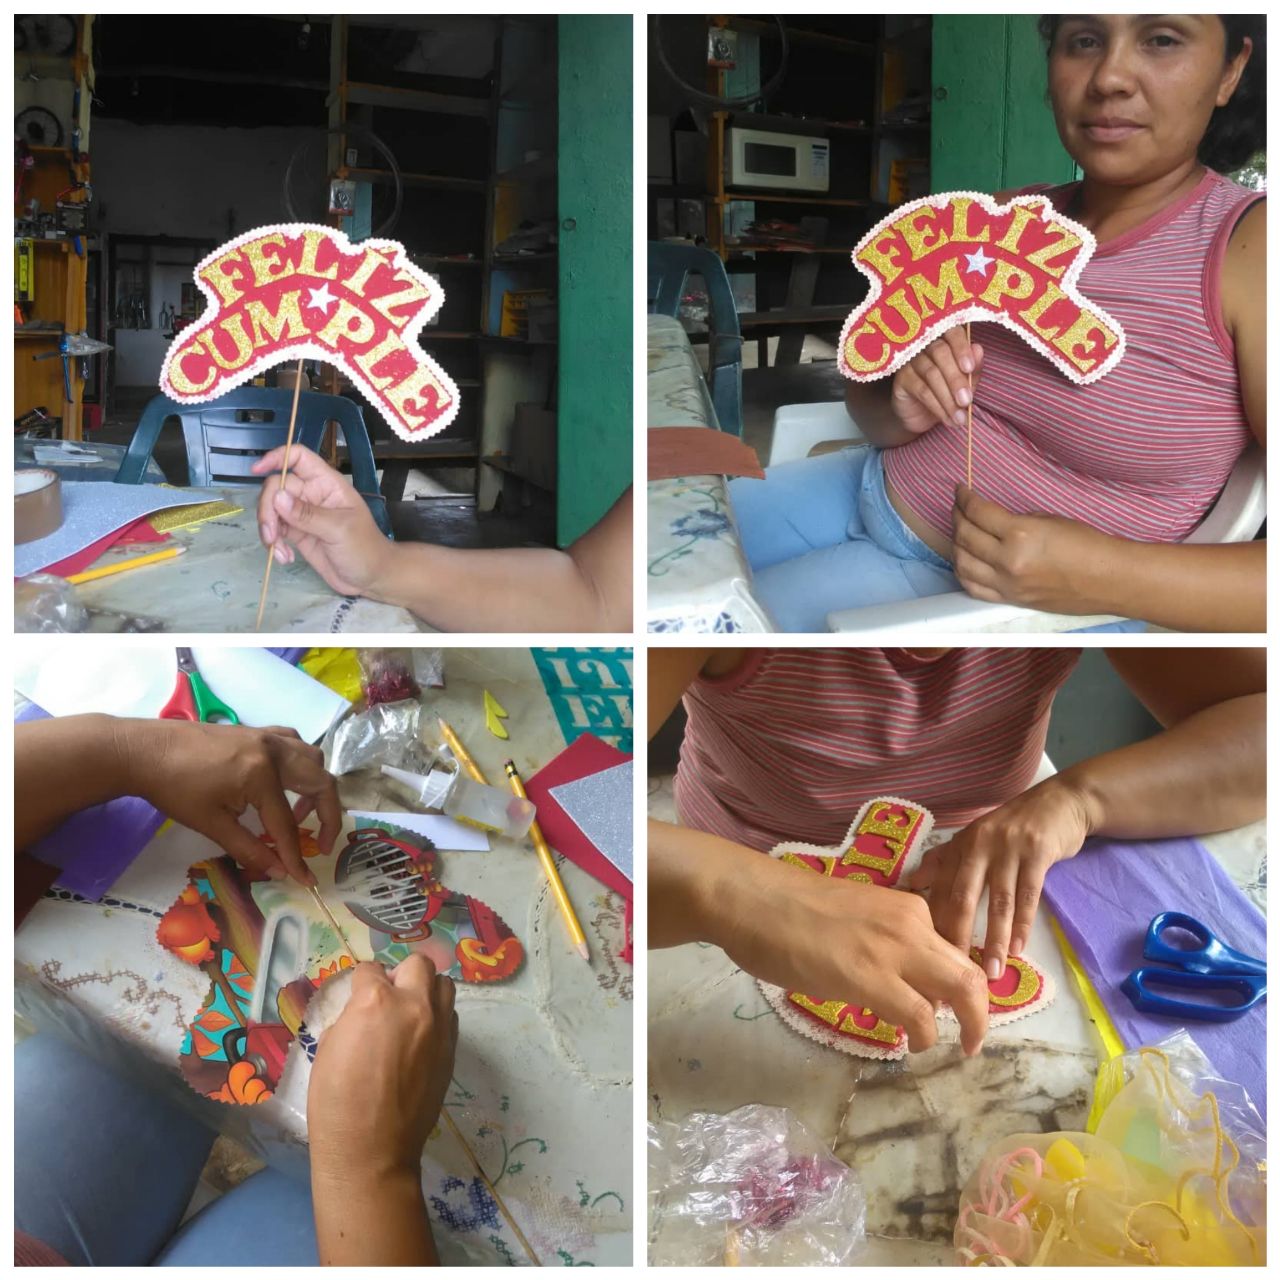
- Para hacer las letras te recomiendo usar una plantilla o rotulador de letras.
- Usarás tres colores. Para que se vean muy bonitas. Escribe el mensaje y luego recorta cada letra.
- Estas letras las montas sobre un foami de otro color y luego sobre otro color para lograr este efecto.
- To make the letters I recommend you use a letter template or marker.
- You will use three colors. So that they look very pretty. Write your message and then cut out each letter.
- You mount these letters on a foami of another color and then on another color to achieve this effect.
- En la parte de atrás colocas un palito de altura y pegas con silicón caliente.
- Así debe verse.
- On the back you place a tall stick and stick with hot silicone.
- This is how it should look.
- Al tener todos los materiales preparados, recortados y organizados empiezas a ensamblar la piñata.
- No olvides abrir la ranura para colocar el relleno. Esa parte parte de la caja (superior) y la de la base (inferior) le colocas un pedacito de papel crepé.
- By having all the materials prepared, cut out and organized, you begin to assemble the piñata.
- Do not forget to open the slot to place the filling. That part of the box (upper) and that of the base (lower) you put a piece of crepe paper.
- Hemos terminado. Piñata hecha en casa para los cumpleañeros del mes.| | We're done. Homemade piñata for the birthday of the month.
MUCHAS GRACIAS POR VISITAR MI BLOG. Si aún no me conoces te invito a leer mi perfil @eliza2807
Todas las fotos las tomé con mi teléfono, edité con polish y realicé la traducción con Google.
THANKS SO MUCH FOR VISITING MY BLOG. If you still don't know me, I invite you to read my profile @ eliza2807
I took all the photos with my phone, edited with polish and did the translation with Google.
Thank you for sharing this amazing post on HIVE!
Your content got selected by our fellow curator @stevenson7 & you just received a little thank you via an upvote from our non-profit curation initiative!
You will be featured in one of our recurring curation compilations and on our pinterest boards! Both are aiming to offer you a stage to widen your audience within and outside of the DIY scene of hive.
Join the official DIYHub community on HIVE and show us more of your amazing work and feel free to connect with us and other DIYers via our discord server: https://discord.gg/mY5uCfQ !
If you want to support our goal to motivate other DIY/art/music/homesteading/... creators just delegate to us and earn 100% of your curation rewards!
Stay creative & hive on!