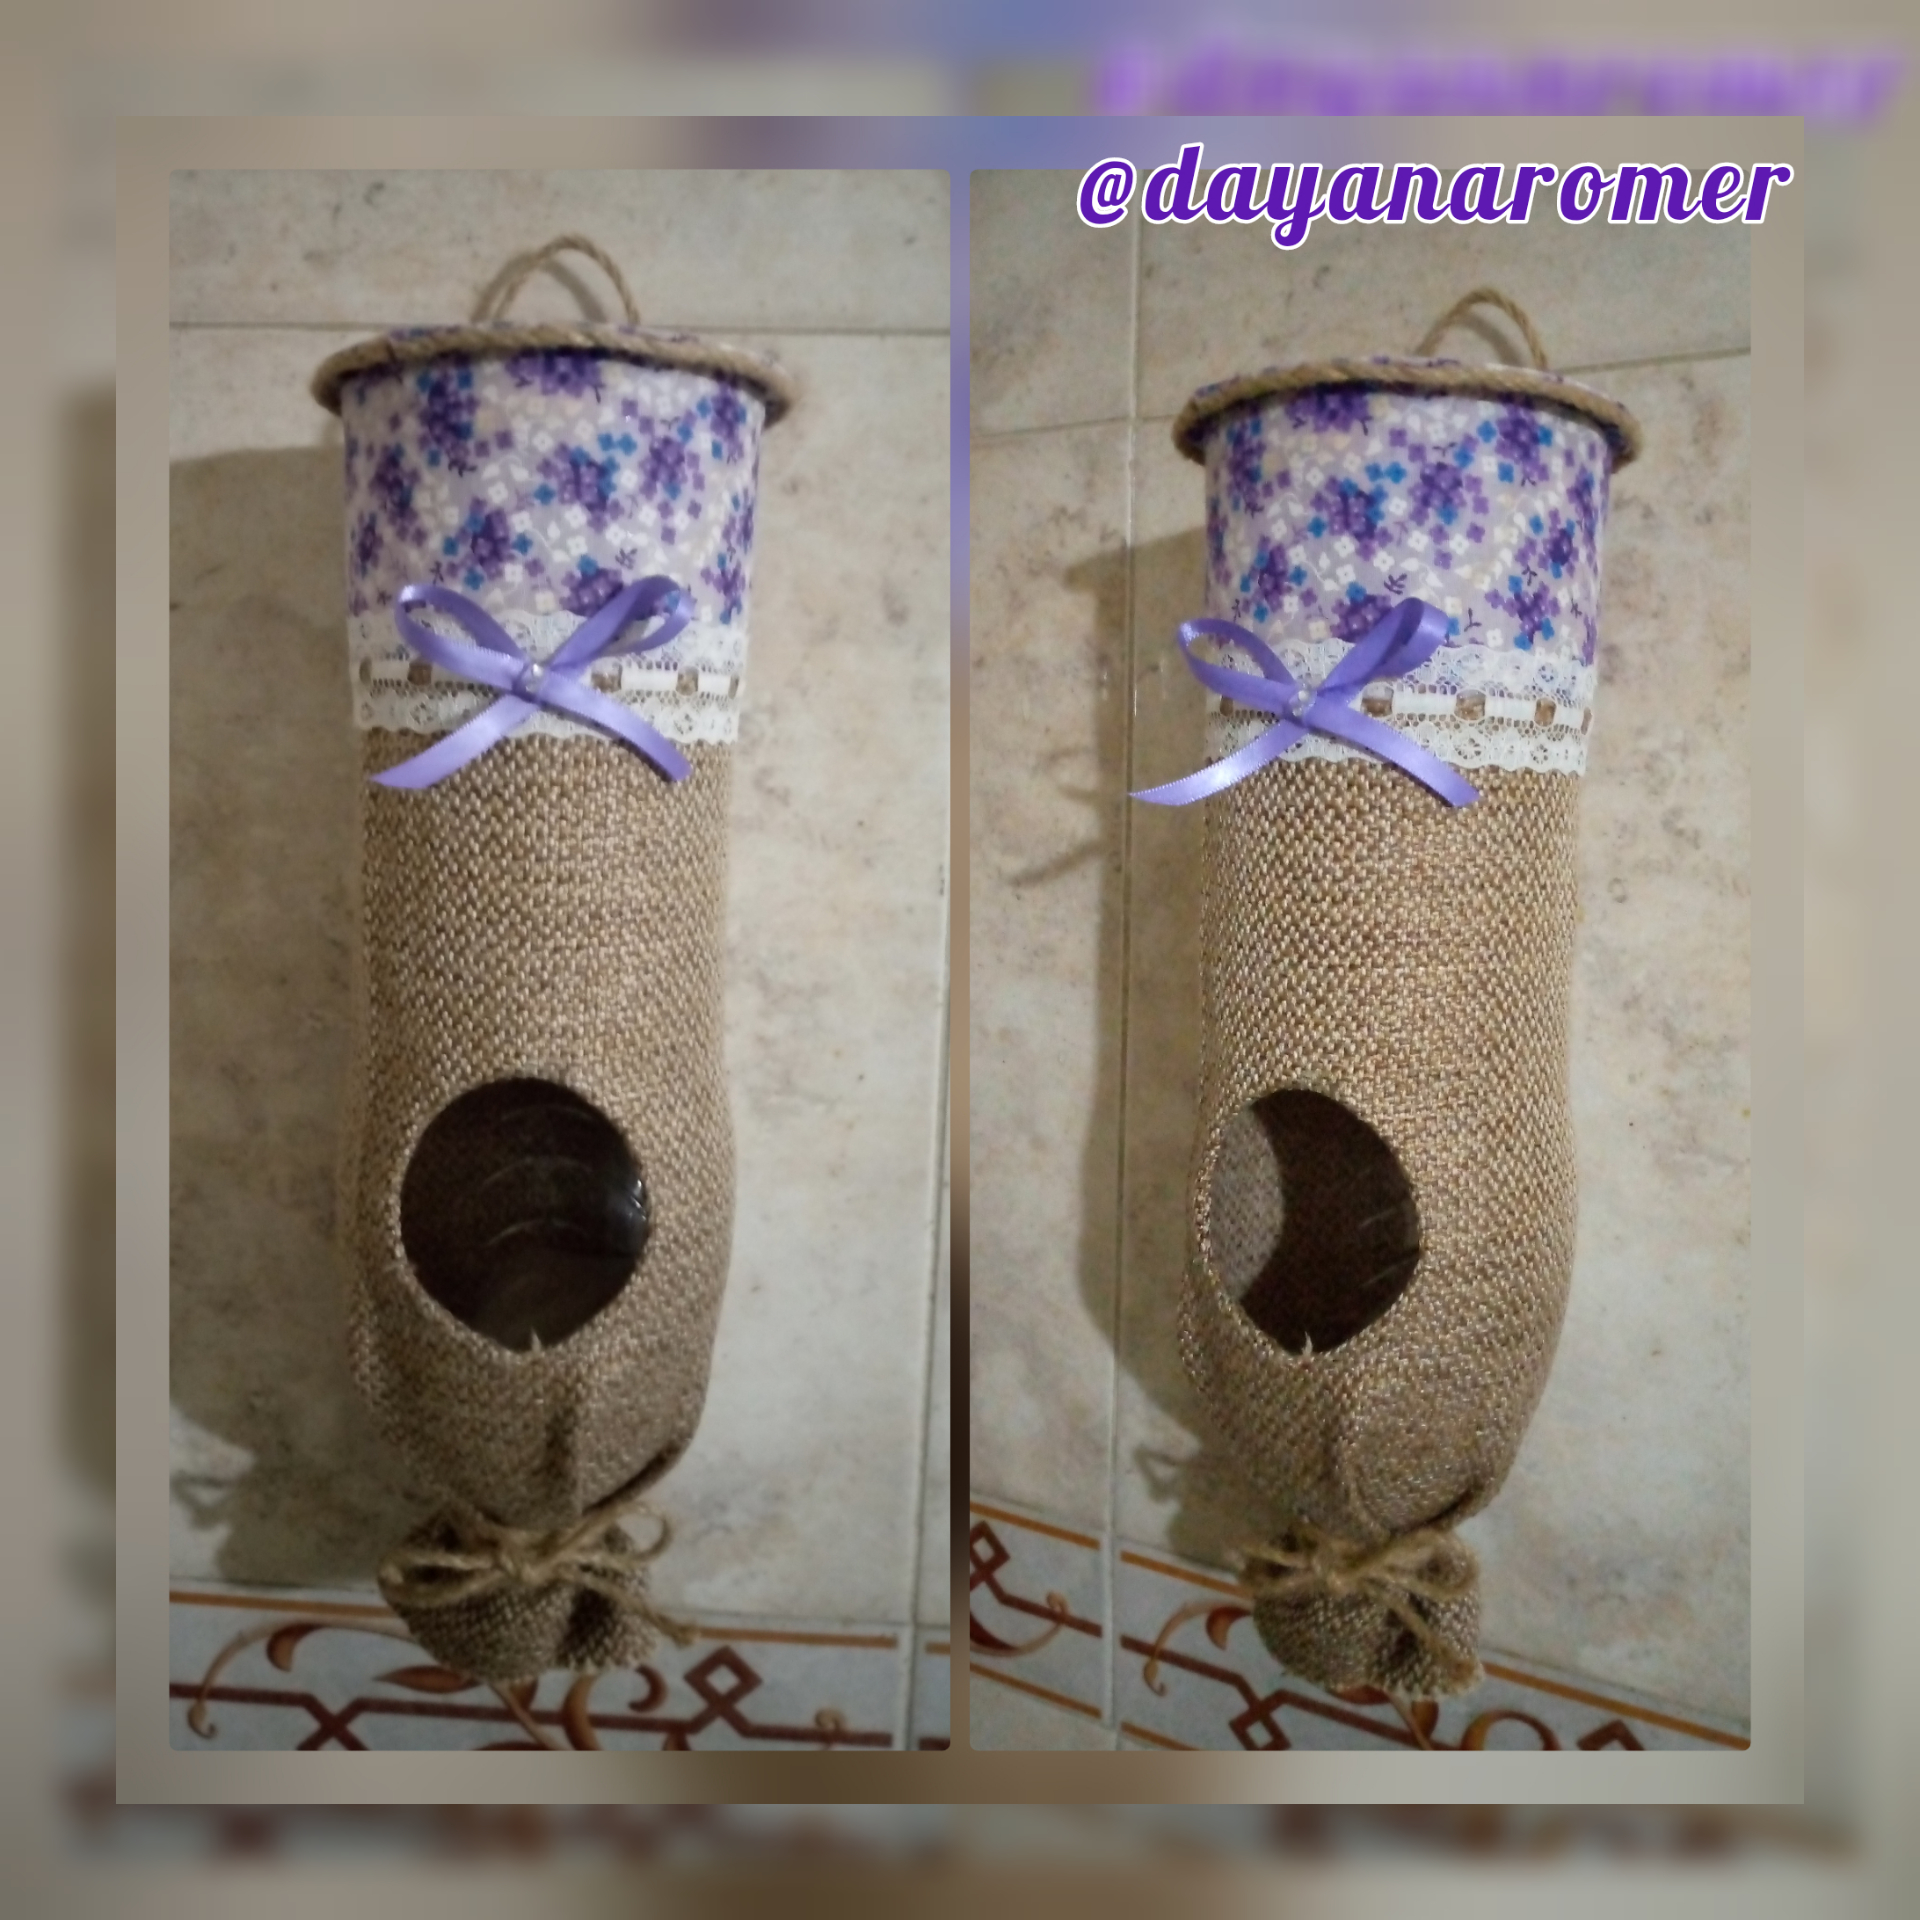
Buenas tardes estimados amigos creativos #hivediy, excelente y bendecido Domingo para todos, espero se encuentren bien disfrutando de un merecido descanso y compartiendo con sus seres queridos.
Good afternoon dear creative friends #hivediy, excellent and blessed Sunday for everyone, I hope you are well enjoying a well deserved rest and sharing with your loved ones.
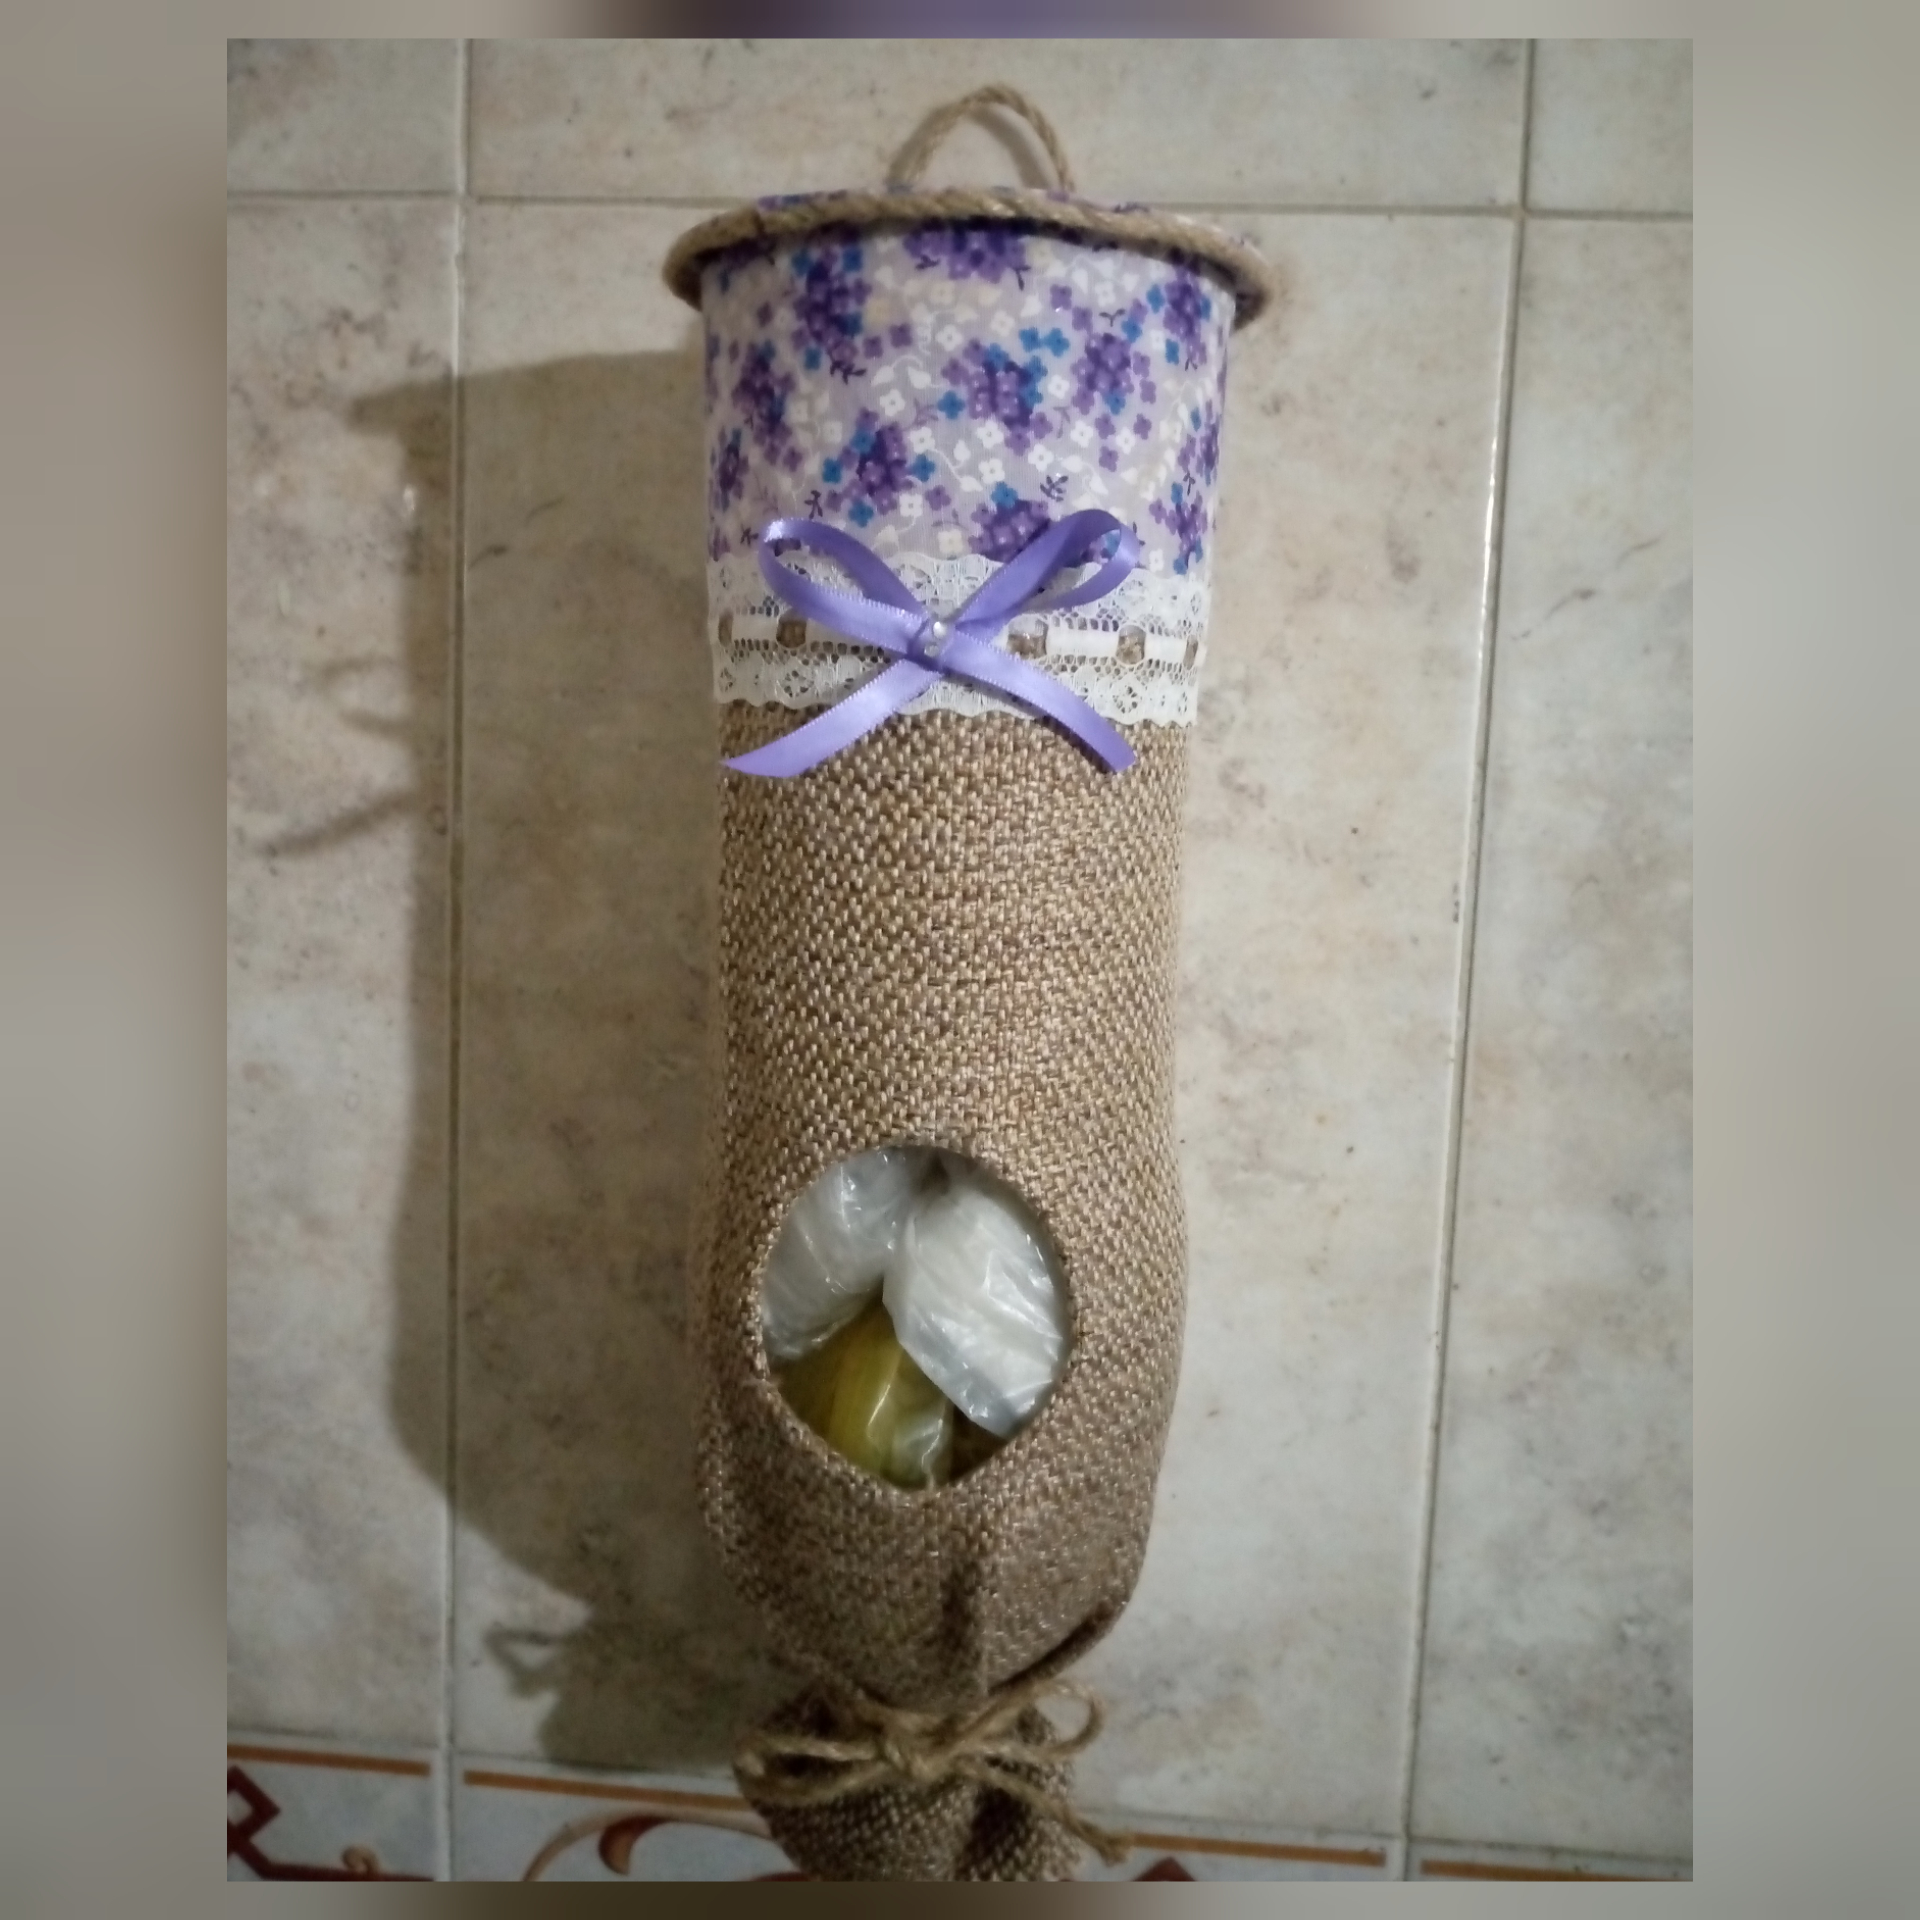
Hoy les quiero compartir una linda manualidad útil y decorativa a partir de una botella de plástico, como siempre reciclando y dando vida a aquellos objetos destinados a la basura y que contaminan nuestro medio ambiente, se trata de un Dispensador o Porta bolsas que aparte de ayudarnos a tenerlas organizadas, decora el espacio donde irá colocada.
Today I want to share a nice useful and decorative craft from a plastic bottle, as always recycling and giving life to those objects destined to the trash and pollute our environment, this is a Dispenser or Bag Holder that apart from helping us to have them organized, decorates the space where it will be placed.
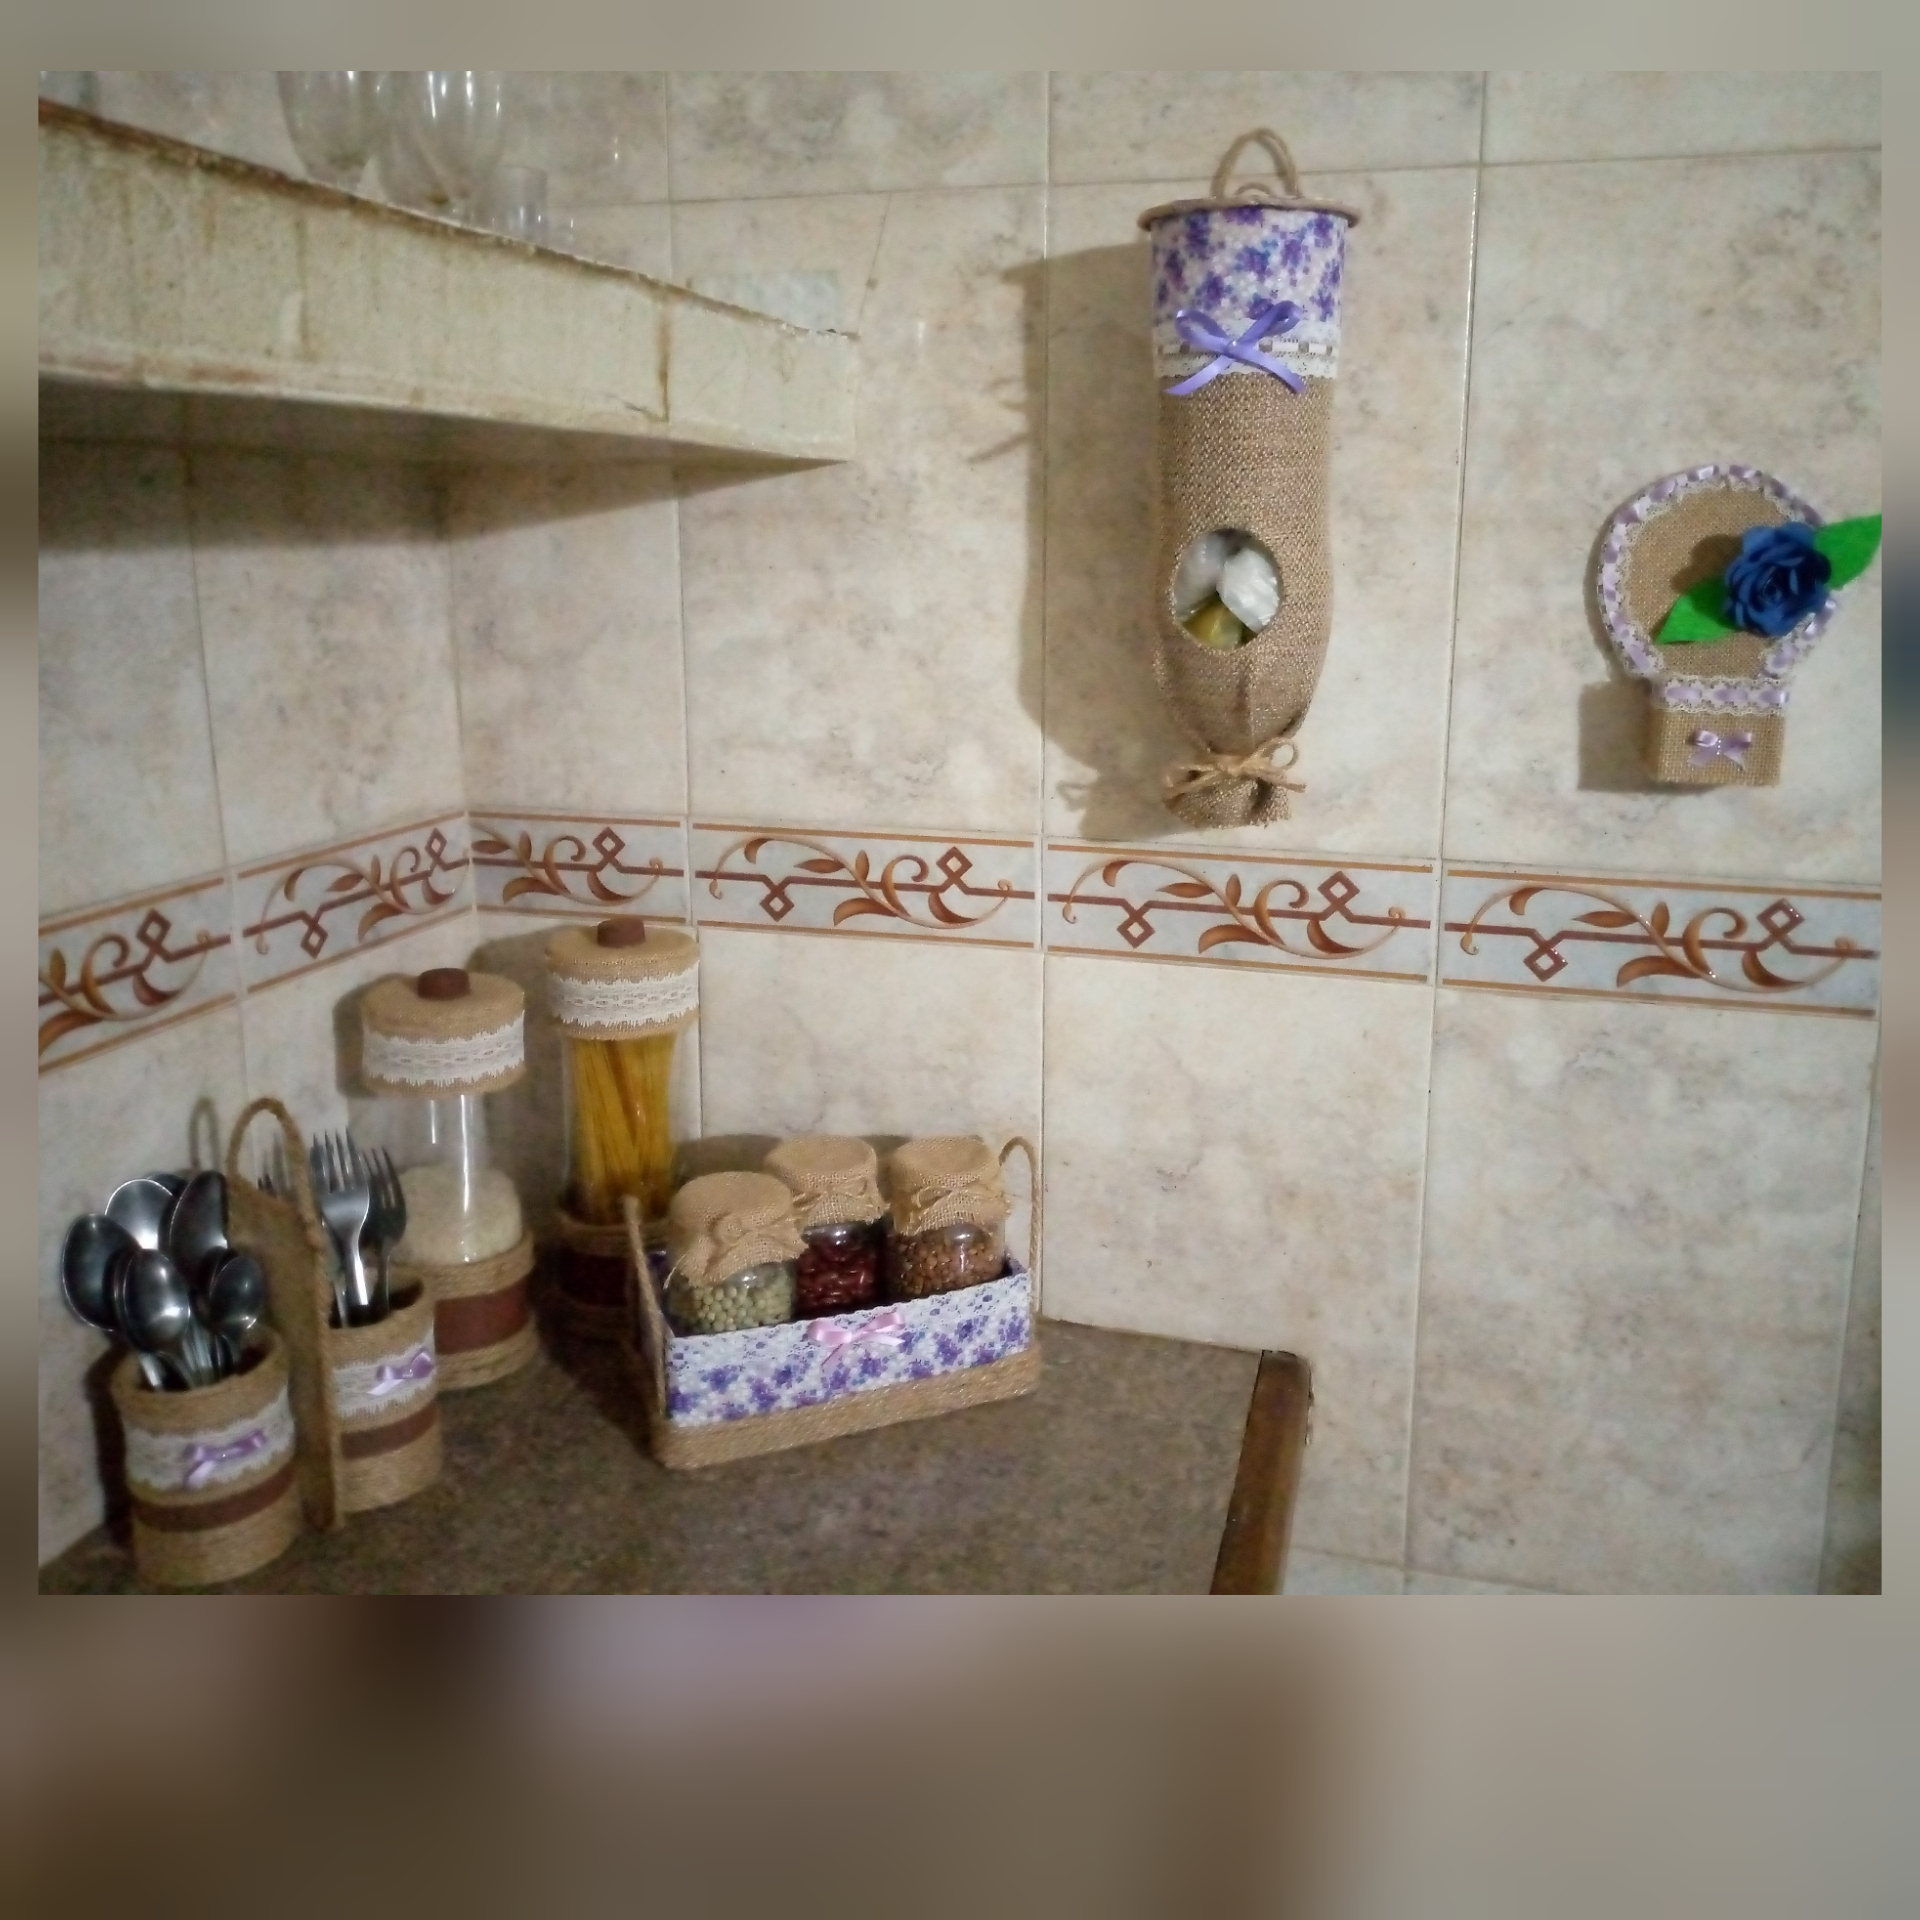
Yo particularmente siempre mantenía las bolsas regadas, unas guardas por aquí otras por alla o todas metidas en una sola bolsa y desordenadas, por lo que se me ocurrió entonces hacer este Dispensador y poder tenerlas en un solo lugar y aparte decorando mi cocina que fue donde lo coloque haciendo juego con otras manualidades todas hechas con material útil que anteriormente compartí con ustedes, a continuación les muestro como lo realicé.
I particularly always kept the bags scattered, some stored here others there or all tucked in one bag and messy, so it occurred then to make this dispenser and to have them in one place and besides decorating my kitchen was where I put it matching with other crafts all made with useful material that previously share with you, then I show you how I did it.
Materiales
Materials
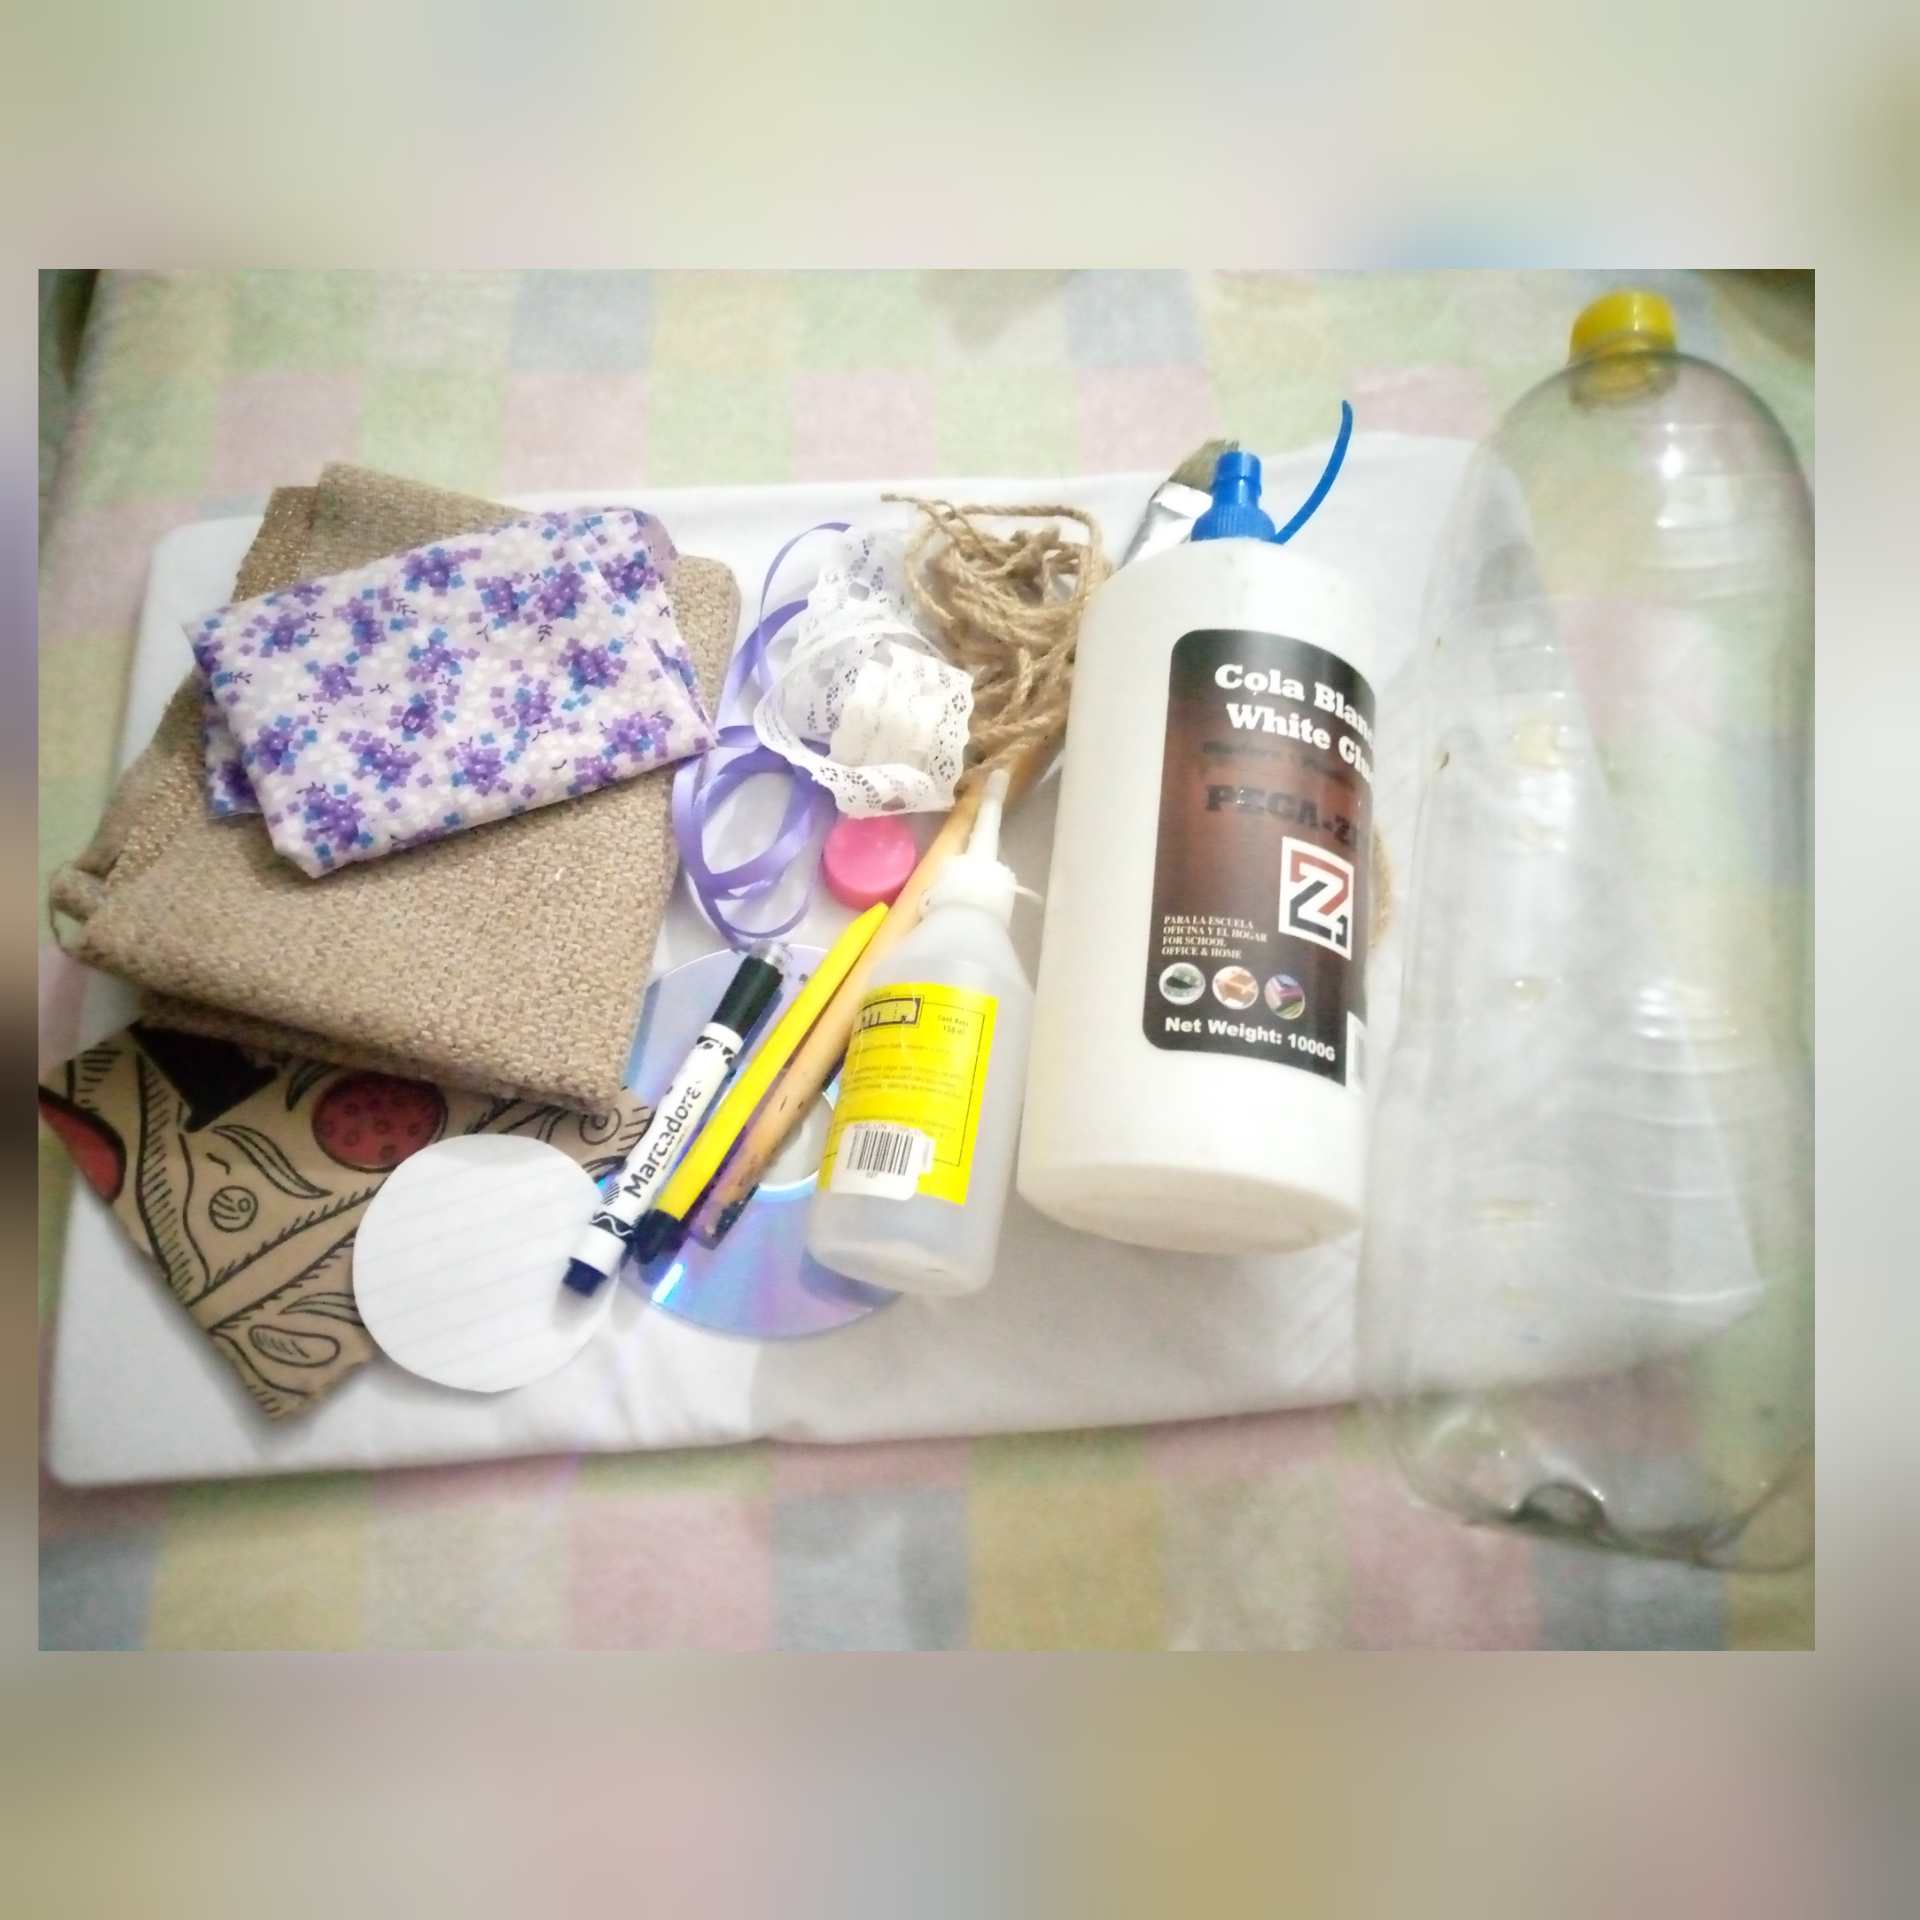
✓ Botella de plástico de. 2.5 litros
✓ Tela estampada
✓ Tela de yute
✓ Hilo de yute
✓ Pegamento
✓ Pincel grueso
✓ Silicón liquido
✓ listón de color morado
✓ Cinta de encaje
✓ Piedras decorativas
✓Marcador negro
✓ Cutter
✓ Tijera
✓ Circunferencia de papel de 6 cm de diámetro
✓ 1 cd's
✓ Trozo de cartón
✓ Plastic bottle of. 2.5 liters.
✓ Printed fabric
✓ Jute fabric
✓ Jute thread
✓ Glue
✓ Thick brush
✓ Liquid silicone
✓ purple ribbon
✓ Lace ribbon
✓ Decorative stones
✓ Black marker
✓ Cutter
✓ Scissors
✓ Circumference of paper 6 cm in diameter.
✓ 1 cd's
✓ Piece of cardboard
Paso a paso
Step by step
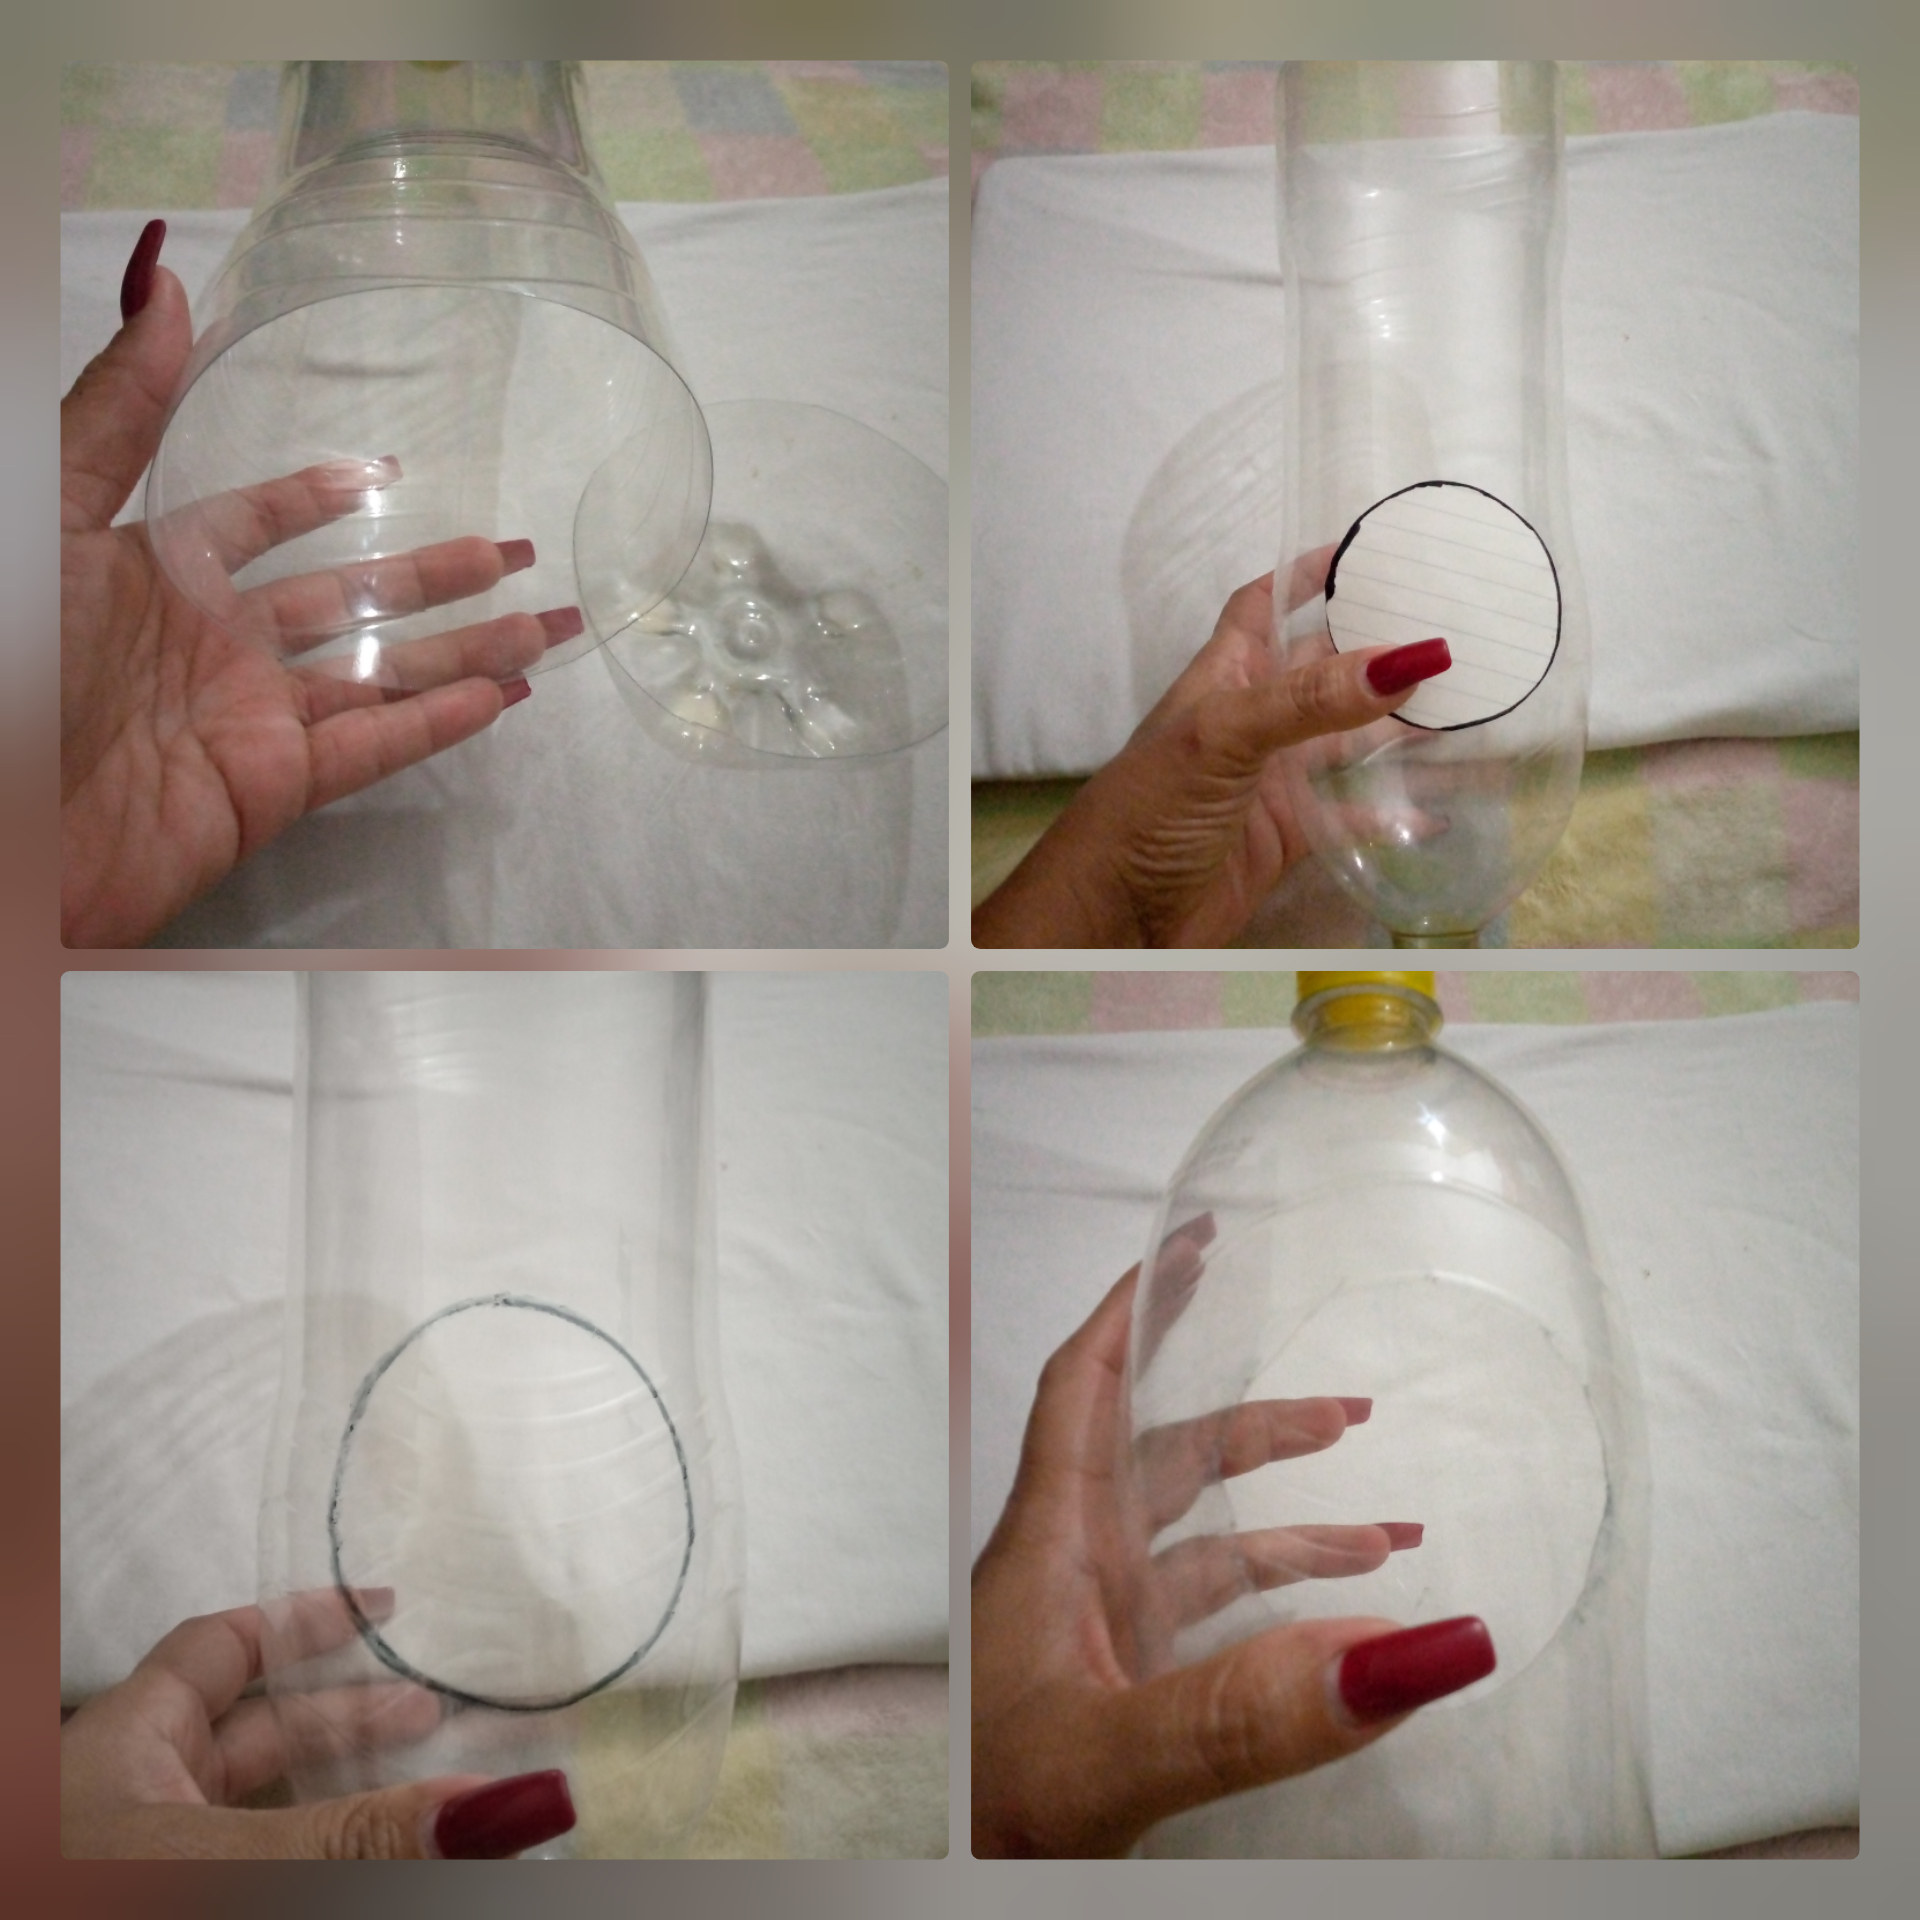
1- Corta la botella en la parte inferior justo en la marca que trae que es de 4 cm aproximadamente, coloca la botella con la tapa hacia abajo, traza sobre ella la circunferencia de papel a 9 cm de la tapa hacia arriba y recorta.
1- Cut the bottle at the bottom just at the mark it comes with which is approximately 4 cm, place the bottle with the cap down, trace on it the paper circumference at 9 cm from the cap upwards and cut out.
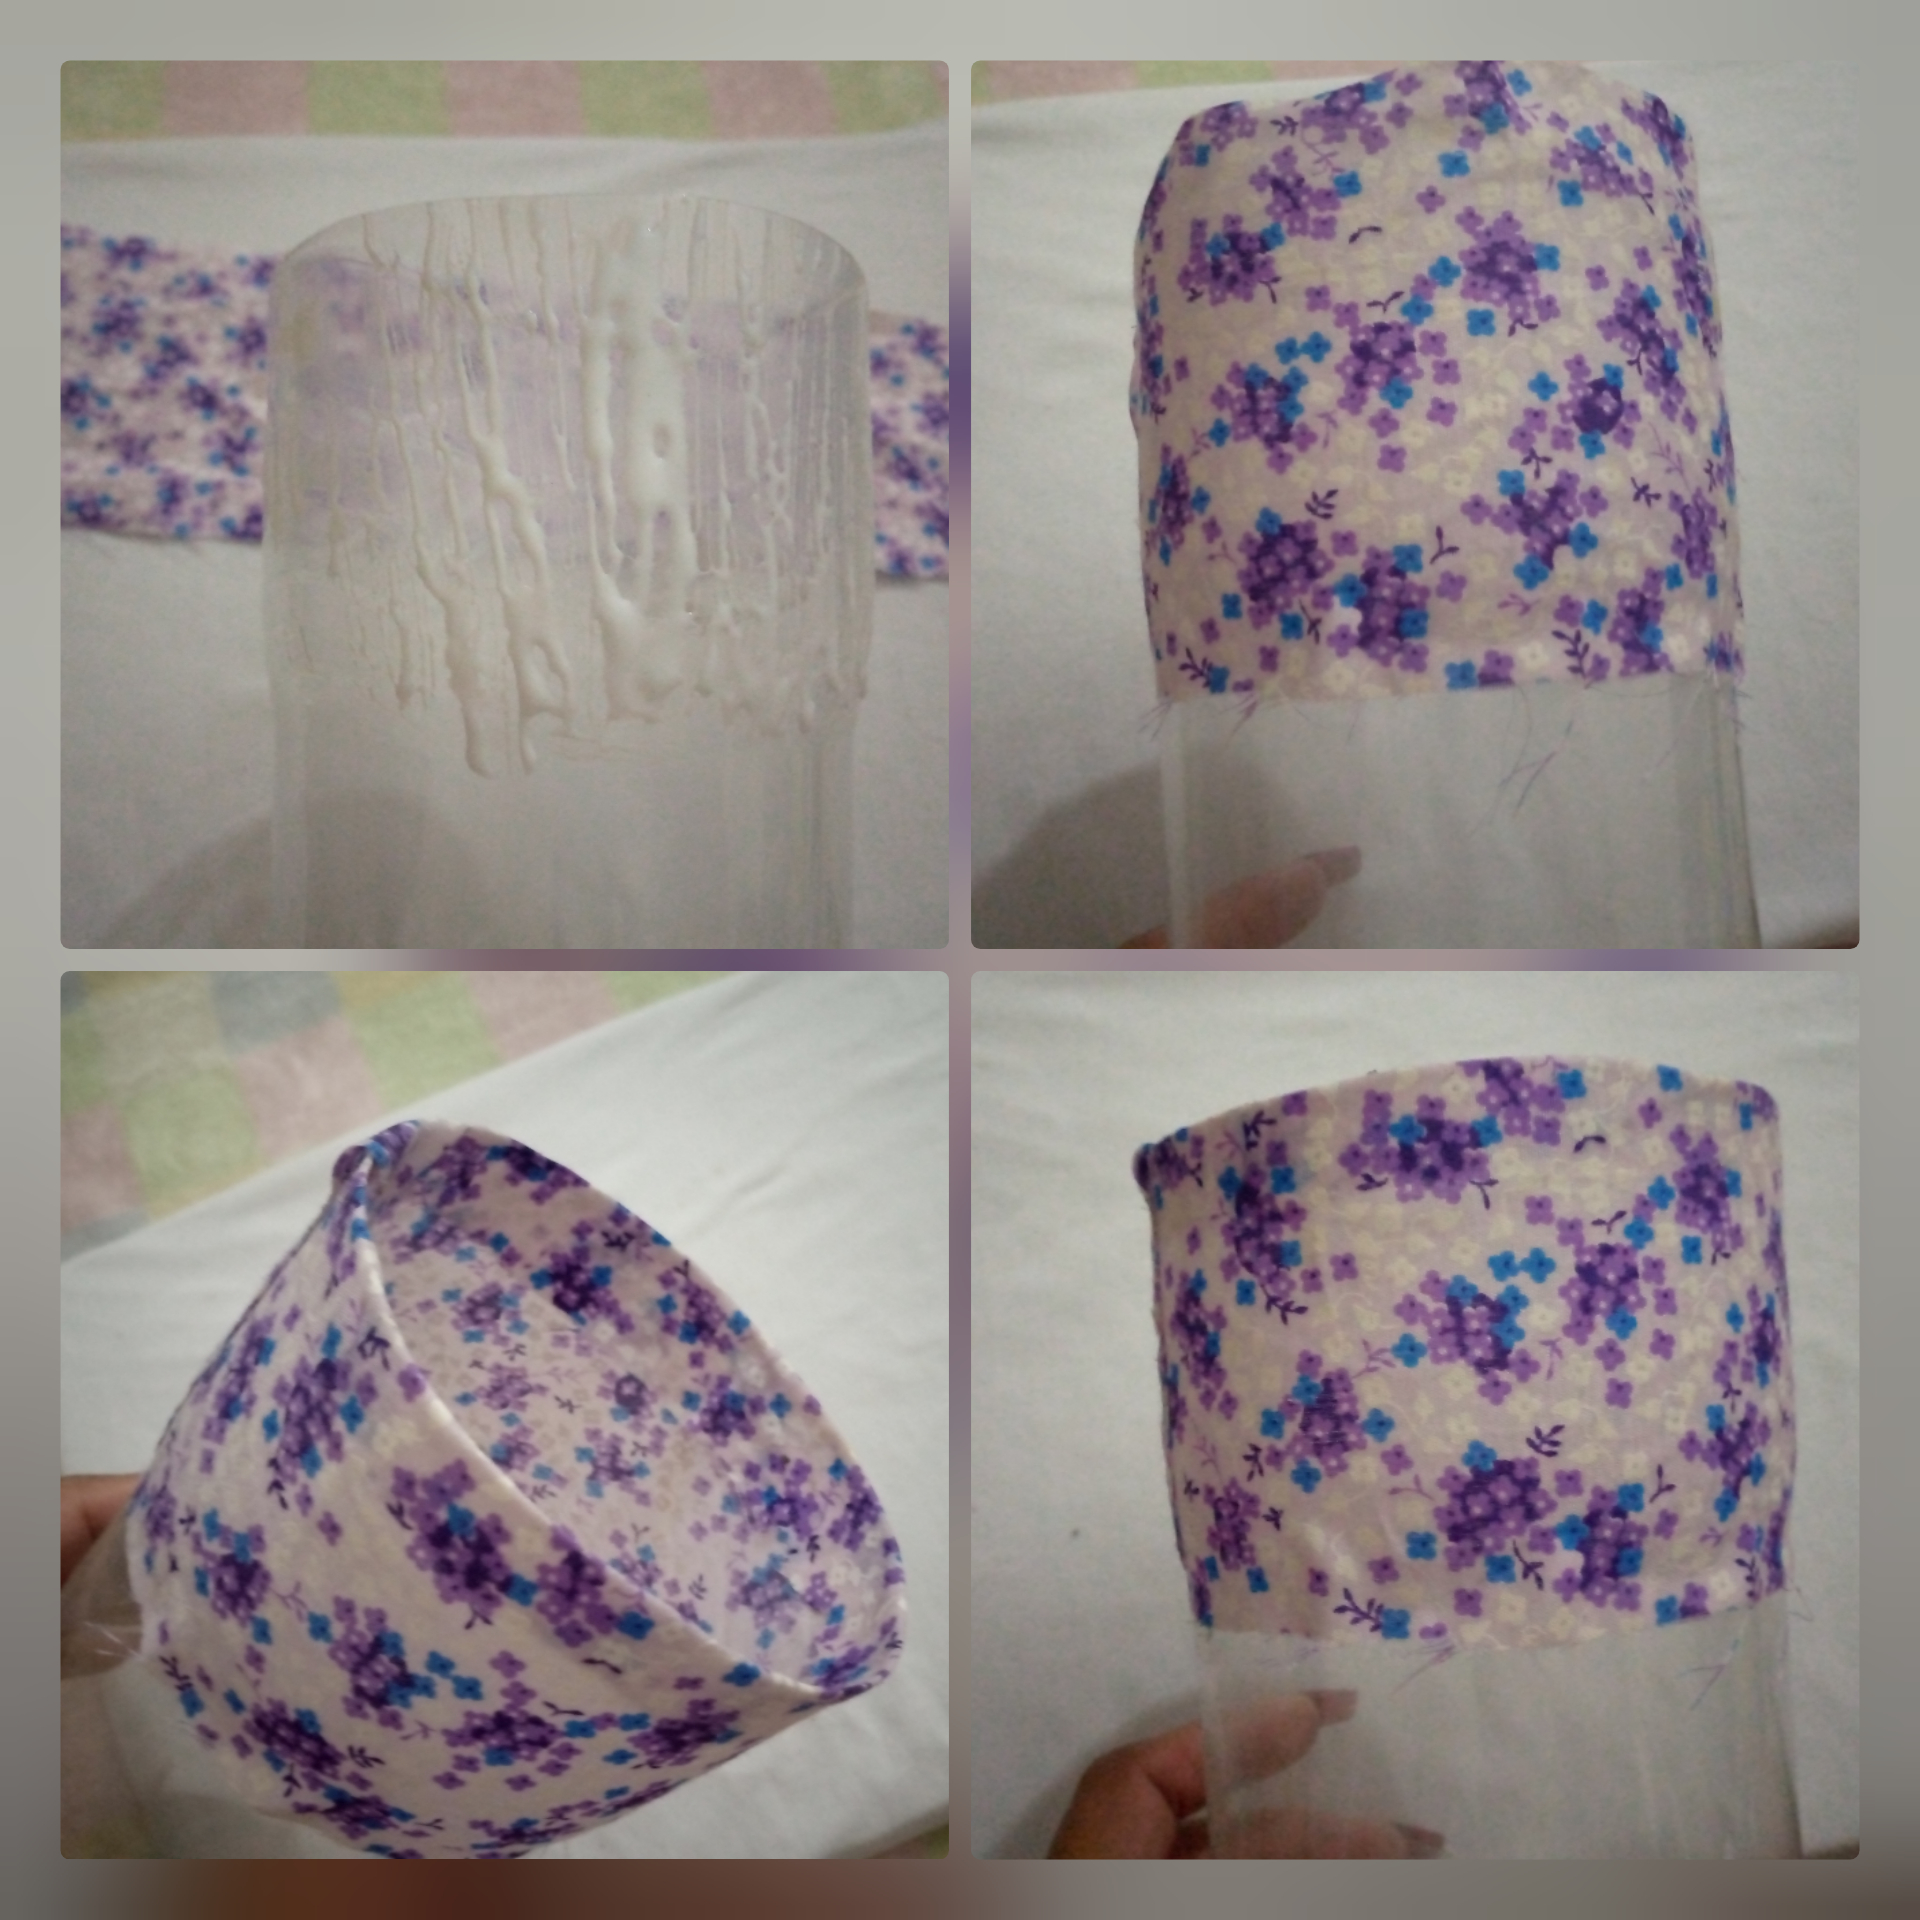
2- Recorta una tira de tela estampada a la medida de la circunferencia de la botella con 9 cm de ancho, pega en la parte superior, estira muy bien la tela para que no se arrugue dejando 1 cm de más, el cual también vamos a pegar hacia el interior.
2- Cut a strip of printed fabric to the size of the circumference of the bottle with 9 cm wide, paste on top, stretch the fabric very well so that it does not wrinkle leaving 1 cm more, which we will also paste to the inside.
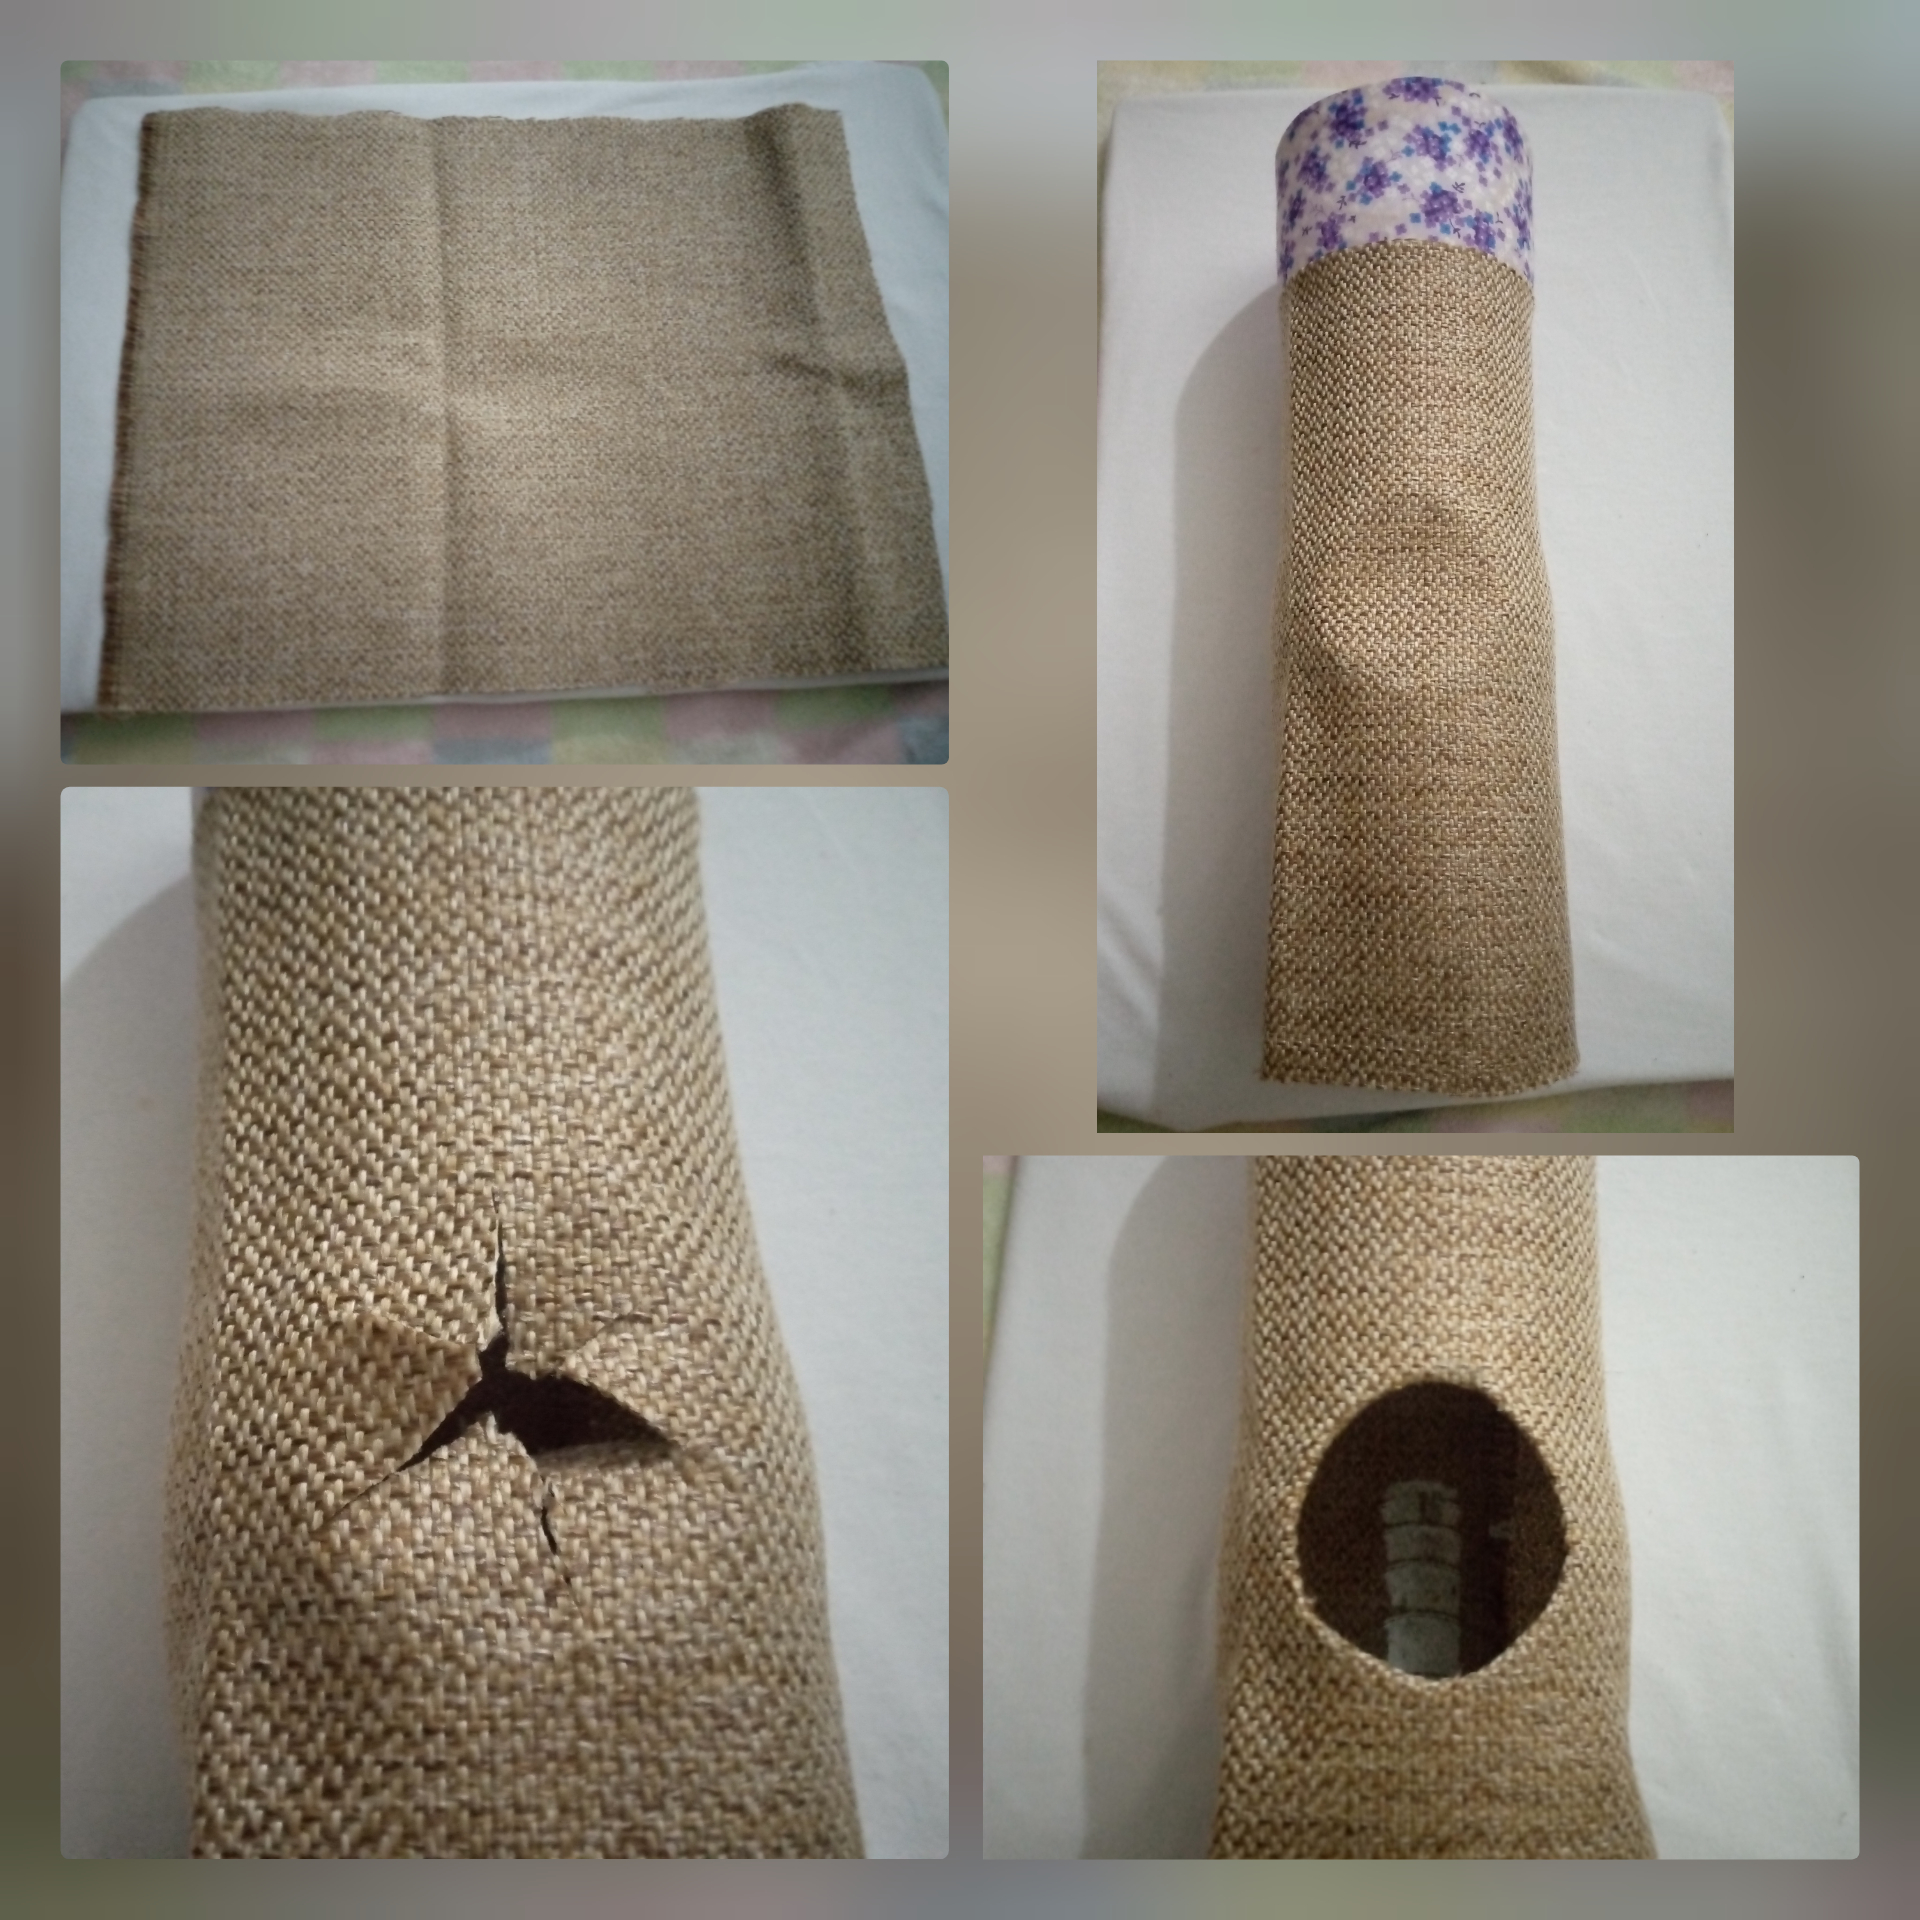
3- Recorta un trozo de tela de yute a la medida de la circunferencia de la botella con 30 cm de ancho, ésta debe sobrepasar la tapa, pega cubriendo toda la botella, deja secar unos minutos, corta en el agujero marcado en picos y pega hacia adentro.
3- Cut a piece of jute fabric to the circumference of the bottle with 30 cm wide, this should exceed the lid, glue covering the entire bottle, let dry a few minutes, cut in the hole marked in peaks and glue inside.
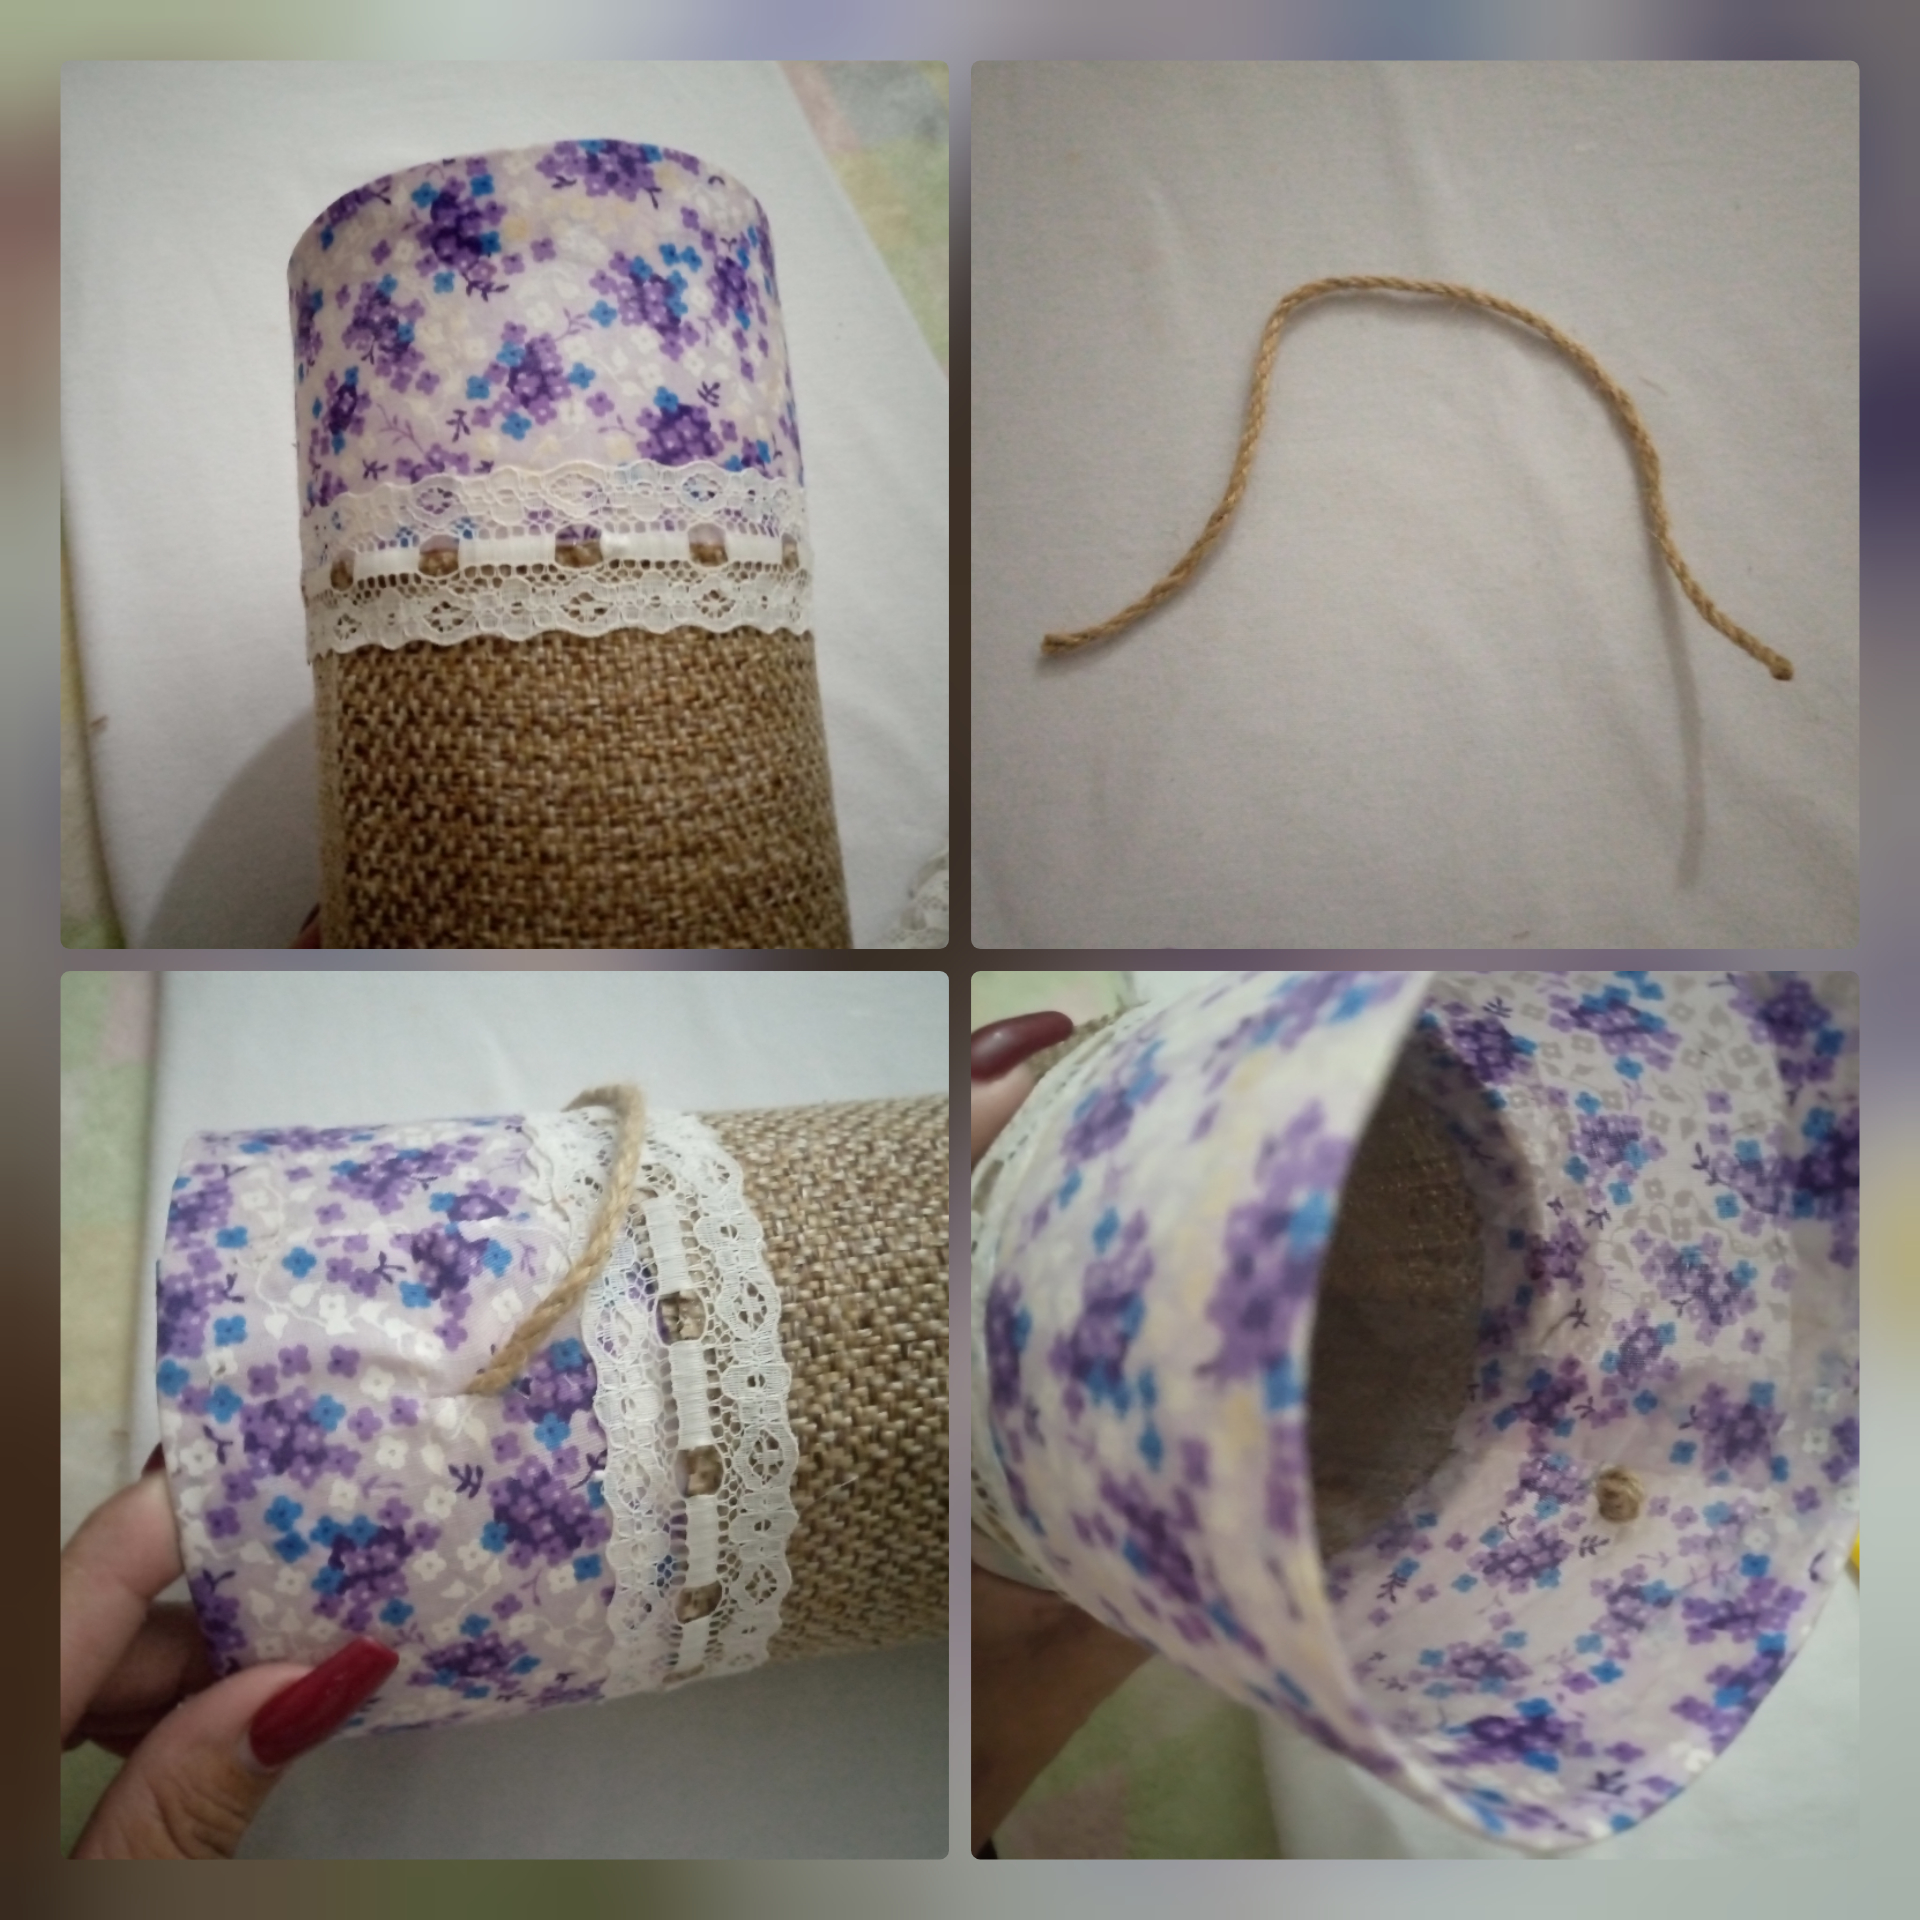
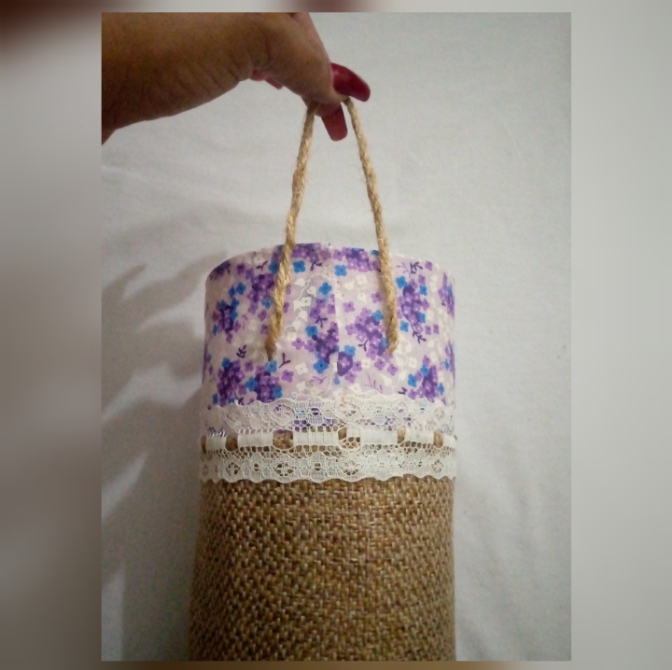
4- Ahora pega en la unión de la tela estampada y la tela de yute la cinta de encaje centrada entre ambas, luego recorta una tira de hilo de yute, perfora con el cutter dos orificios en la parte superior trasera e introduce cada extremo del hilo haciendo unos nudos en la punta para asegurar, nos queda un asa para colgar.
4- Now glue the lace ribbon centered between the printed fabric and the jute fabric, then cut a strip of jute thread, cut two holes in the upper back part with the cutter and insert each end of the thread making knots at the end to secure it, we have a handle for hanging.
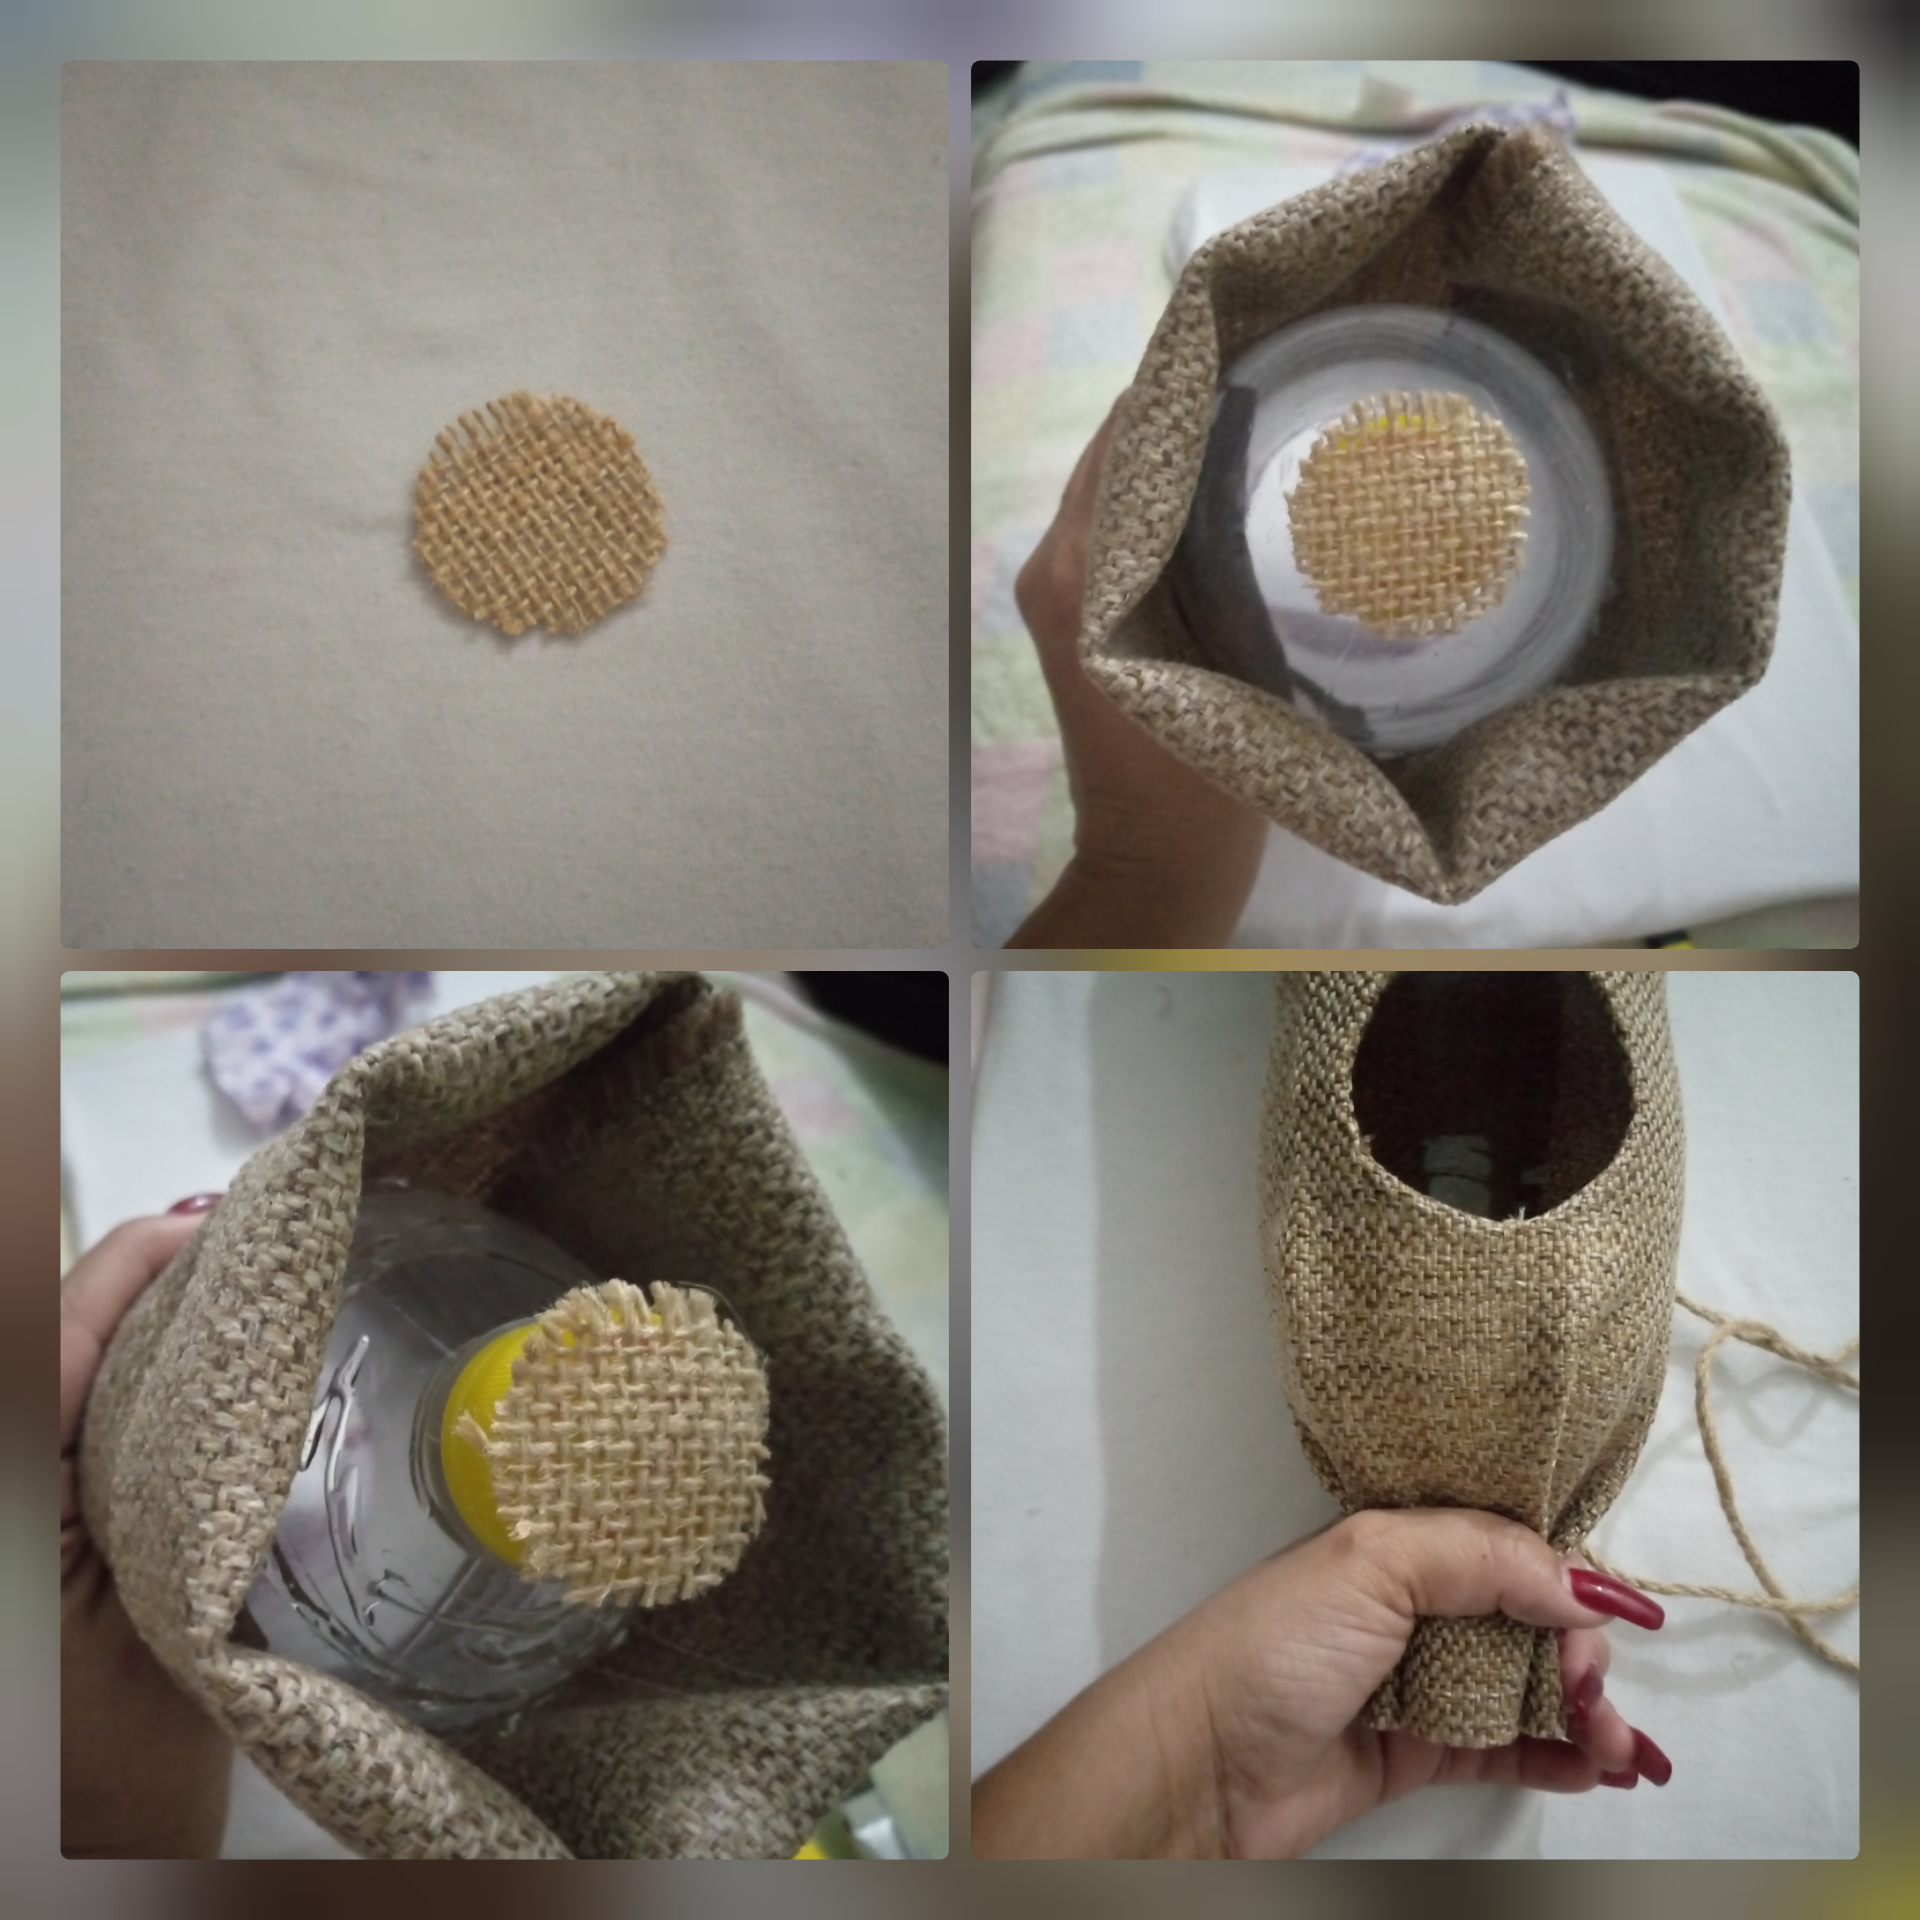
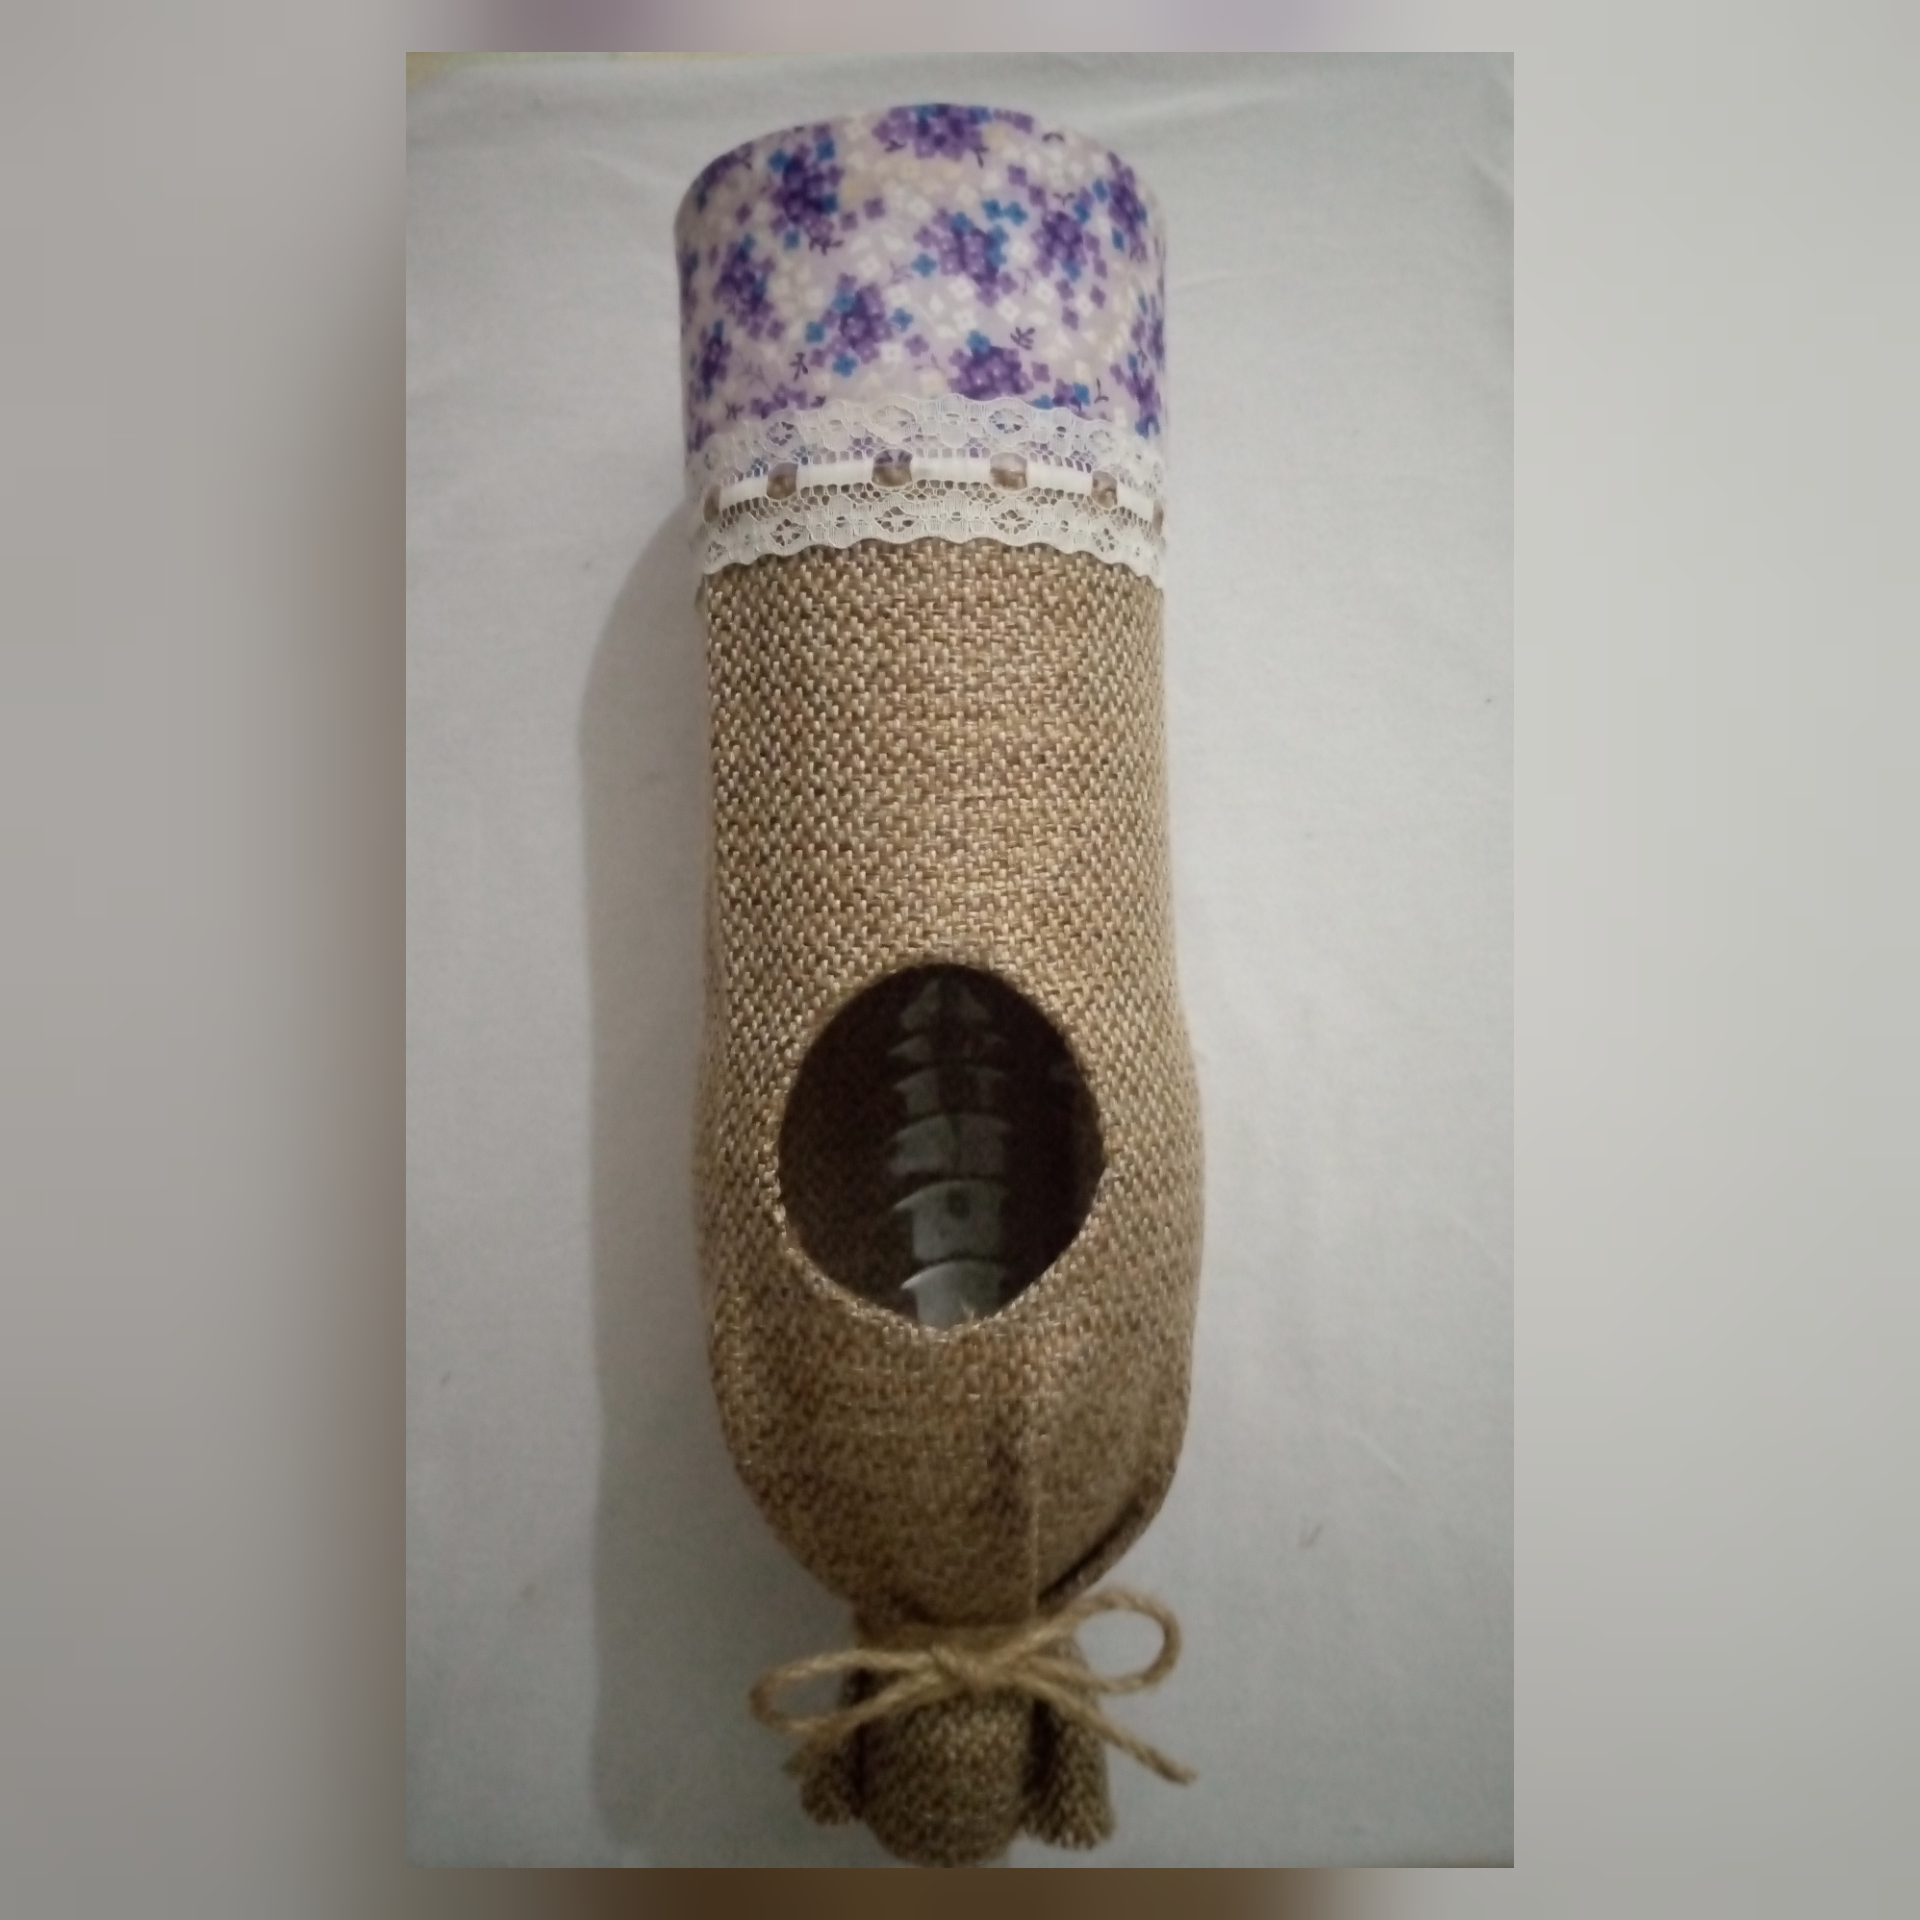
5- Recorta un pequeño círculo con la tela de yute para cubrir la superficie de la tapa, luego agrega silicón liquido alrededor y pega llevando la tela hacia la tapa como atar un caramelo, asegura con hilo de yute y lindo lazo.
5- Cut out a small circle with the jute fabric to cover the surface of the lid, then add liquid silicone around it and glue the fabric towards the lid like tying a candy, secure with jute thread and a nice bow.
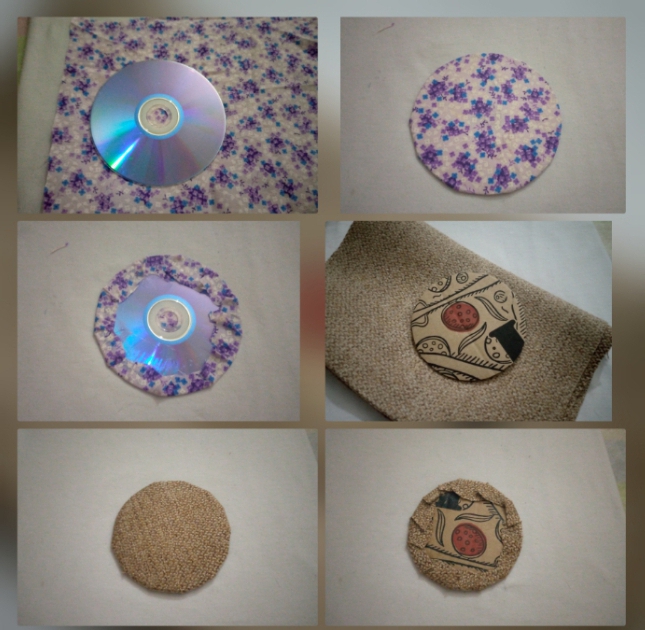

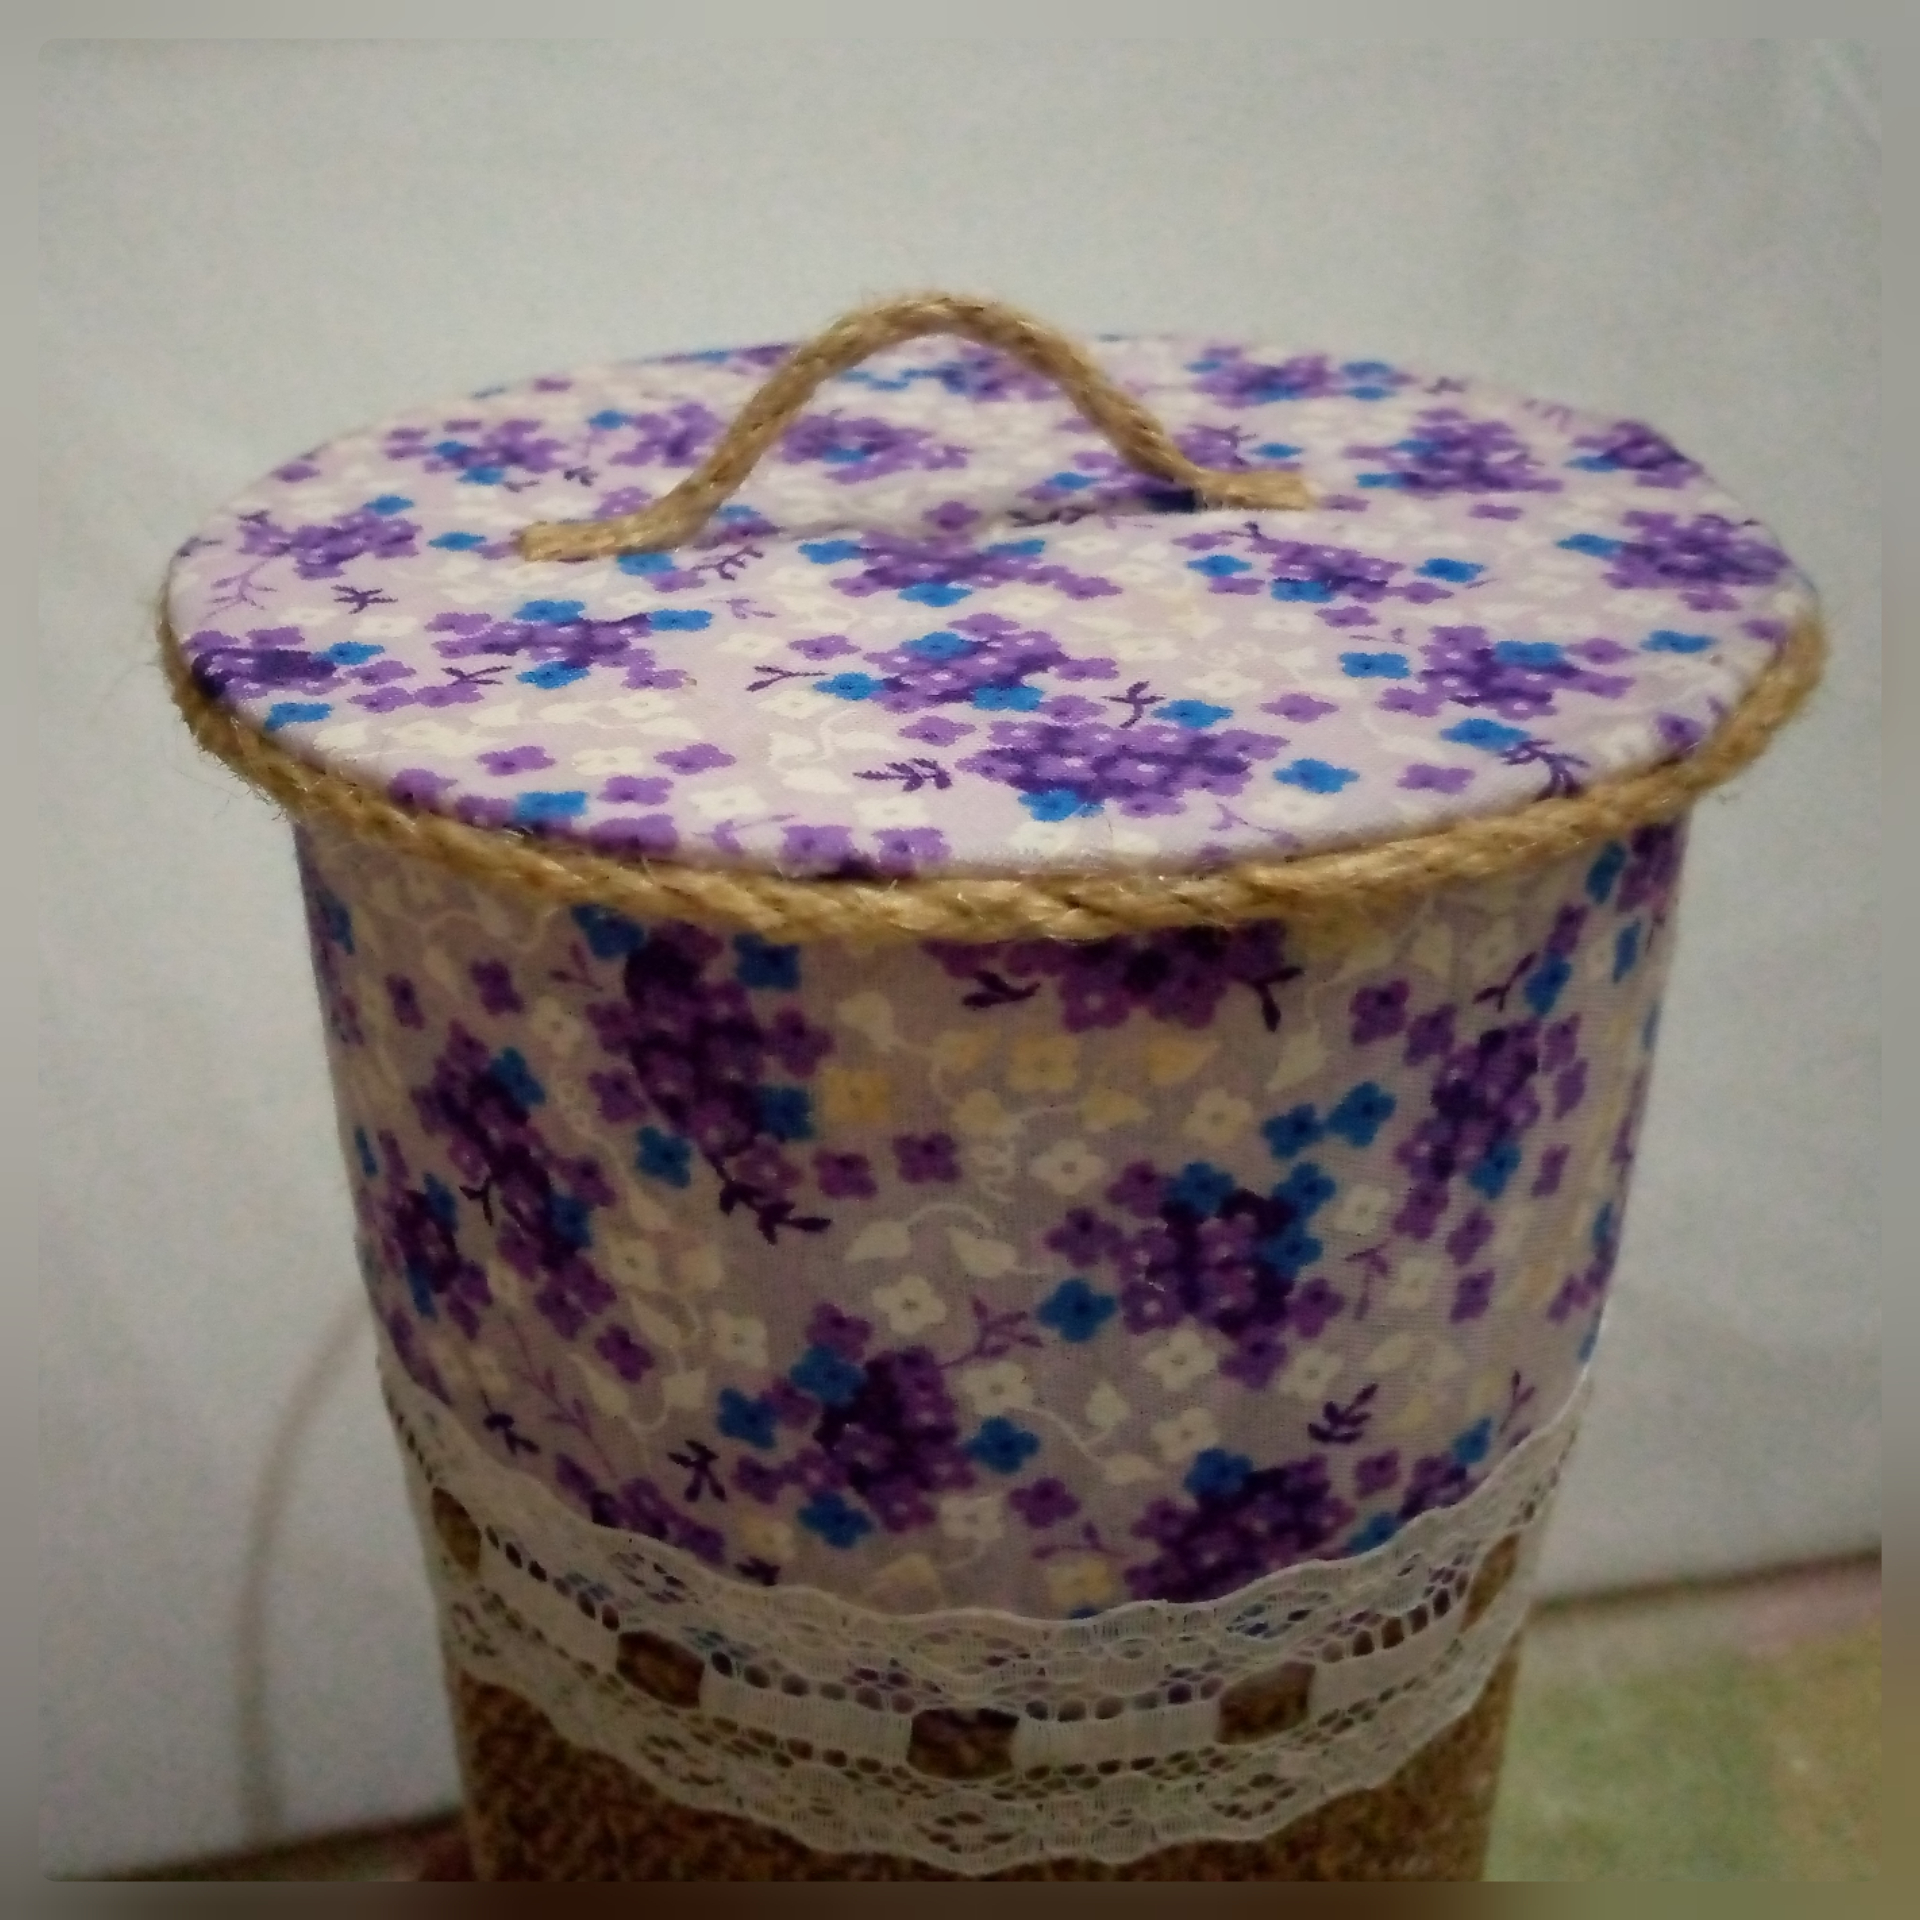
6- Cubre el cd's con la tela estampada solo por un lado, recorta un circunferencia un poco más pequeña que la del cd's del trozo de cartón y cubre con tela de yute también un solo lado, ahora pega una sobre otra centradas entre los lados sin forrar, obtendremos la tapa del dispensador, luego corta 2 tiras de hilo de yute, pega una en el borde de la tapa y la más pequeña pega en la parte superior en forma de asa.
6- Cover the cd's with the printed fabric only on one side, cut a circumference a little smaller than the cd's from the piece of cardboard and cover with jute fabric also only one side, now glue one over the other centered between the sides without lining, we will obtain the dispenser lid, then cut 2 strips of jute thread, glue one on the edge of the lid and the smaller one glue on the upper part in the form of a handle.
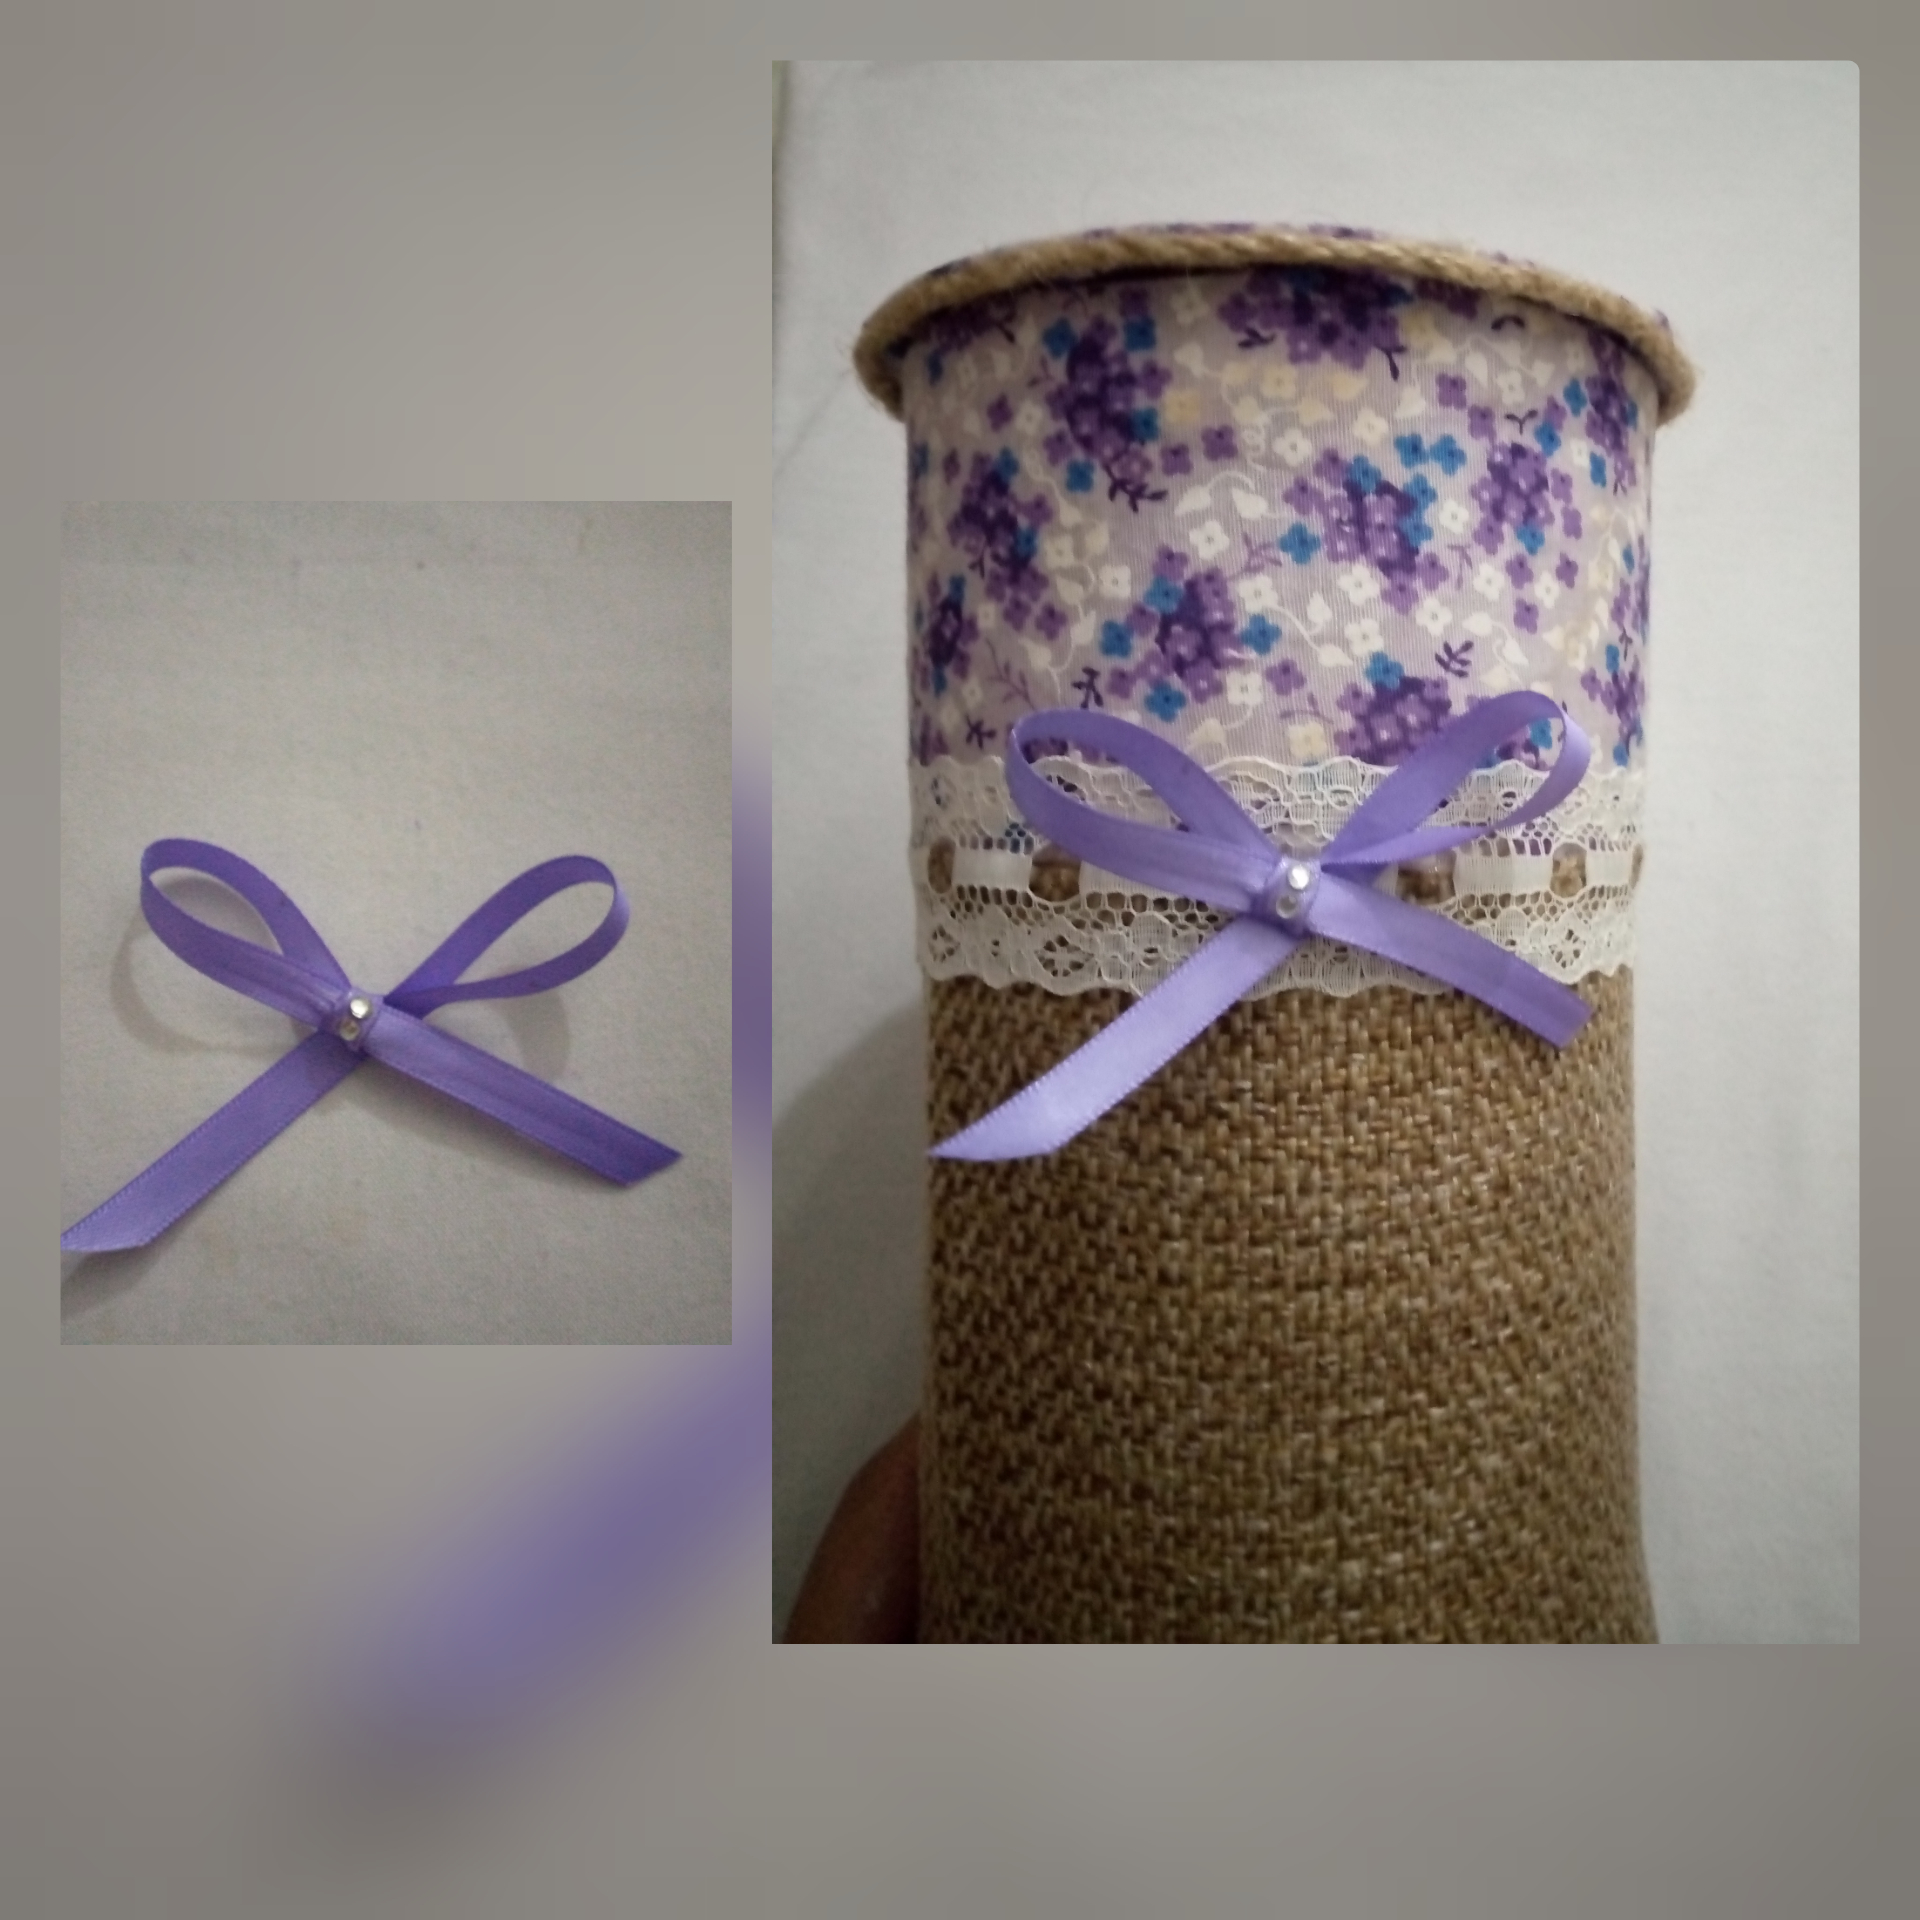
7- Para finalizar haremos un lindo lazo con el listón morado, decora con las piedras y pega en la parte central del encaje.
7- To finish we will make a pretty bow with the purple ribbon, decorate with the stones and glue in the central part of the lace.
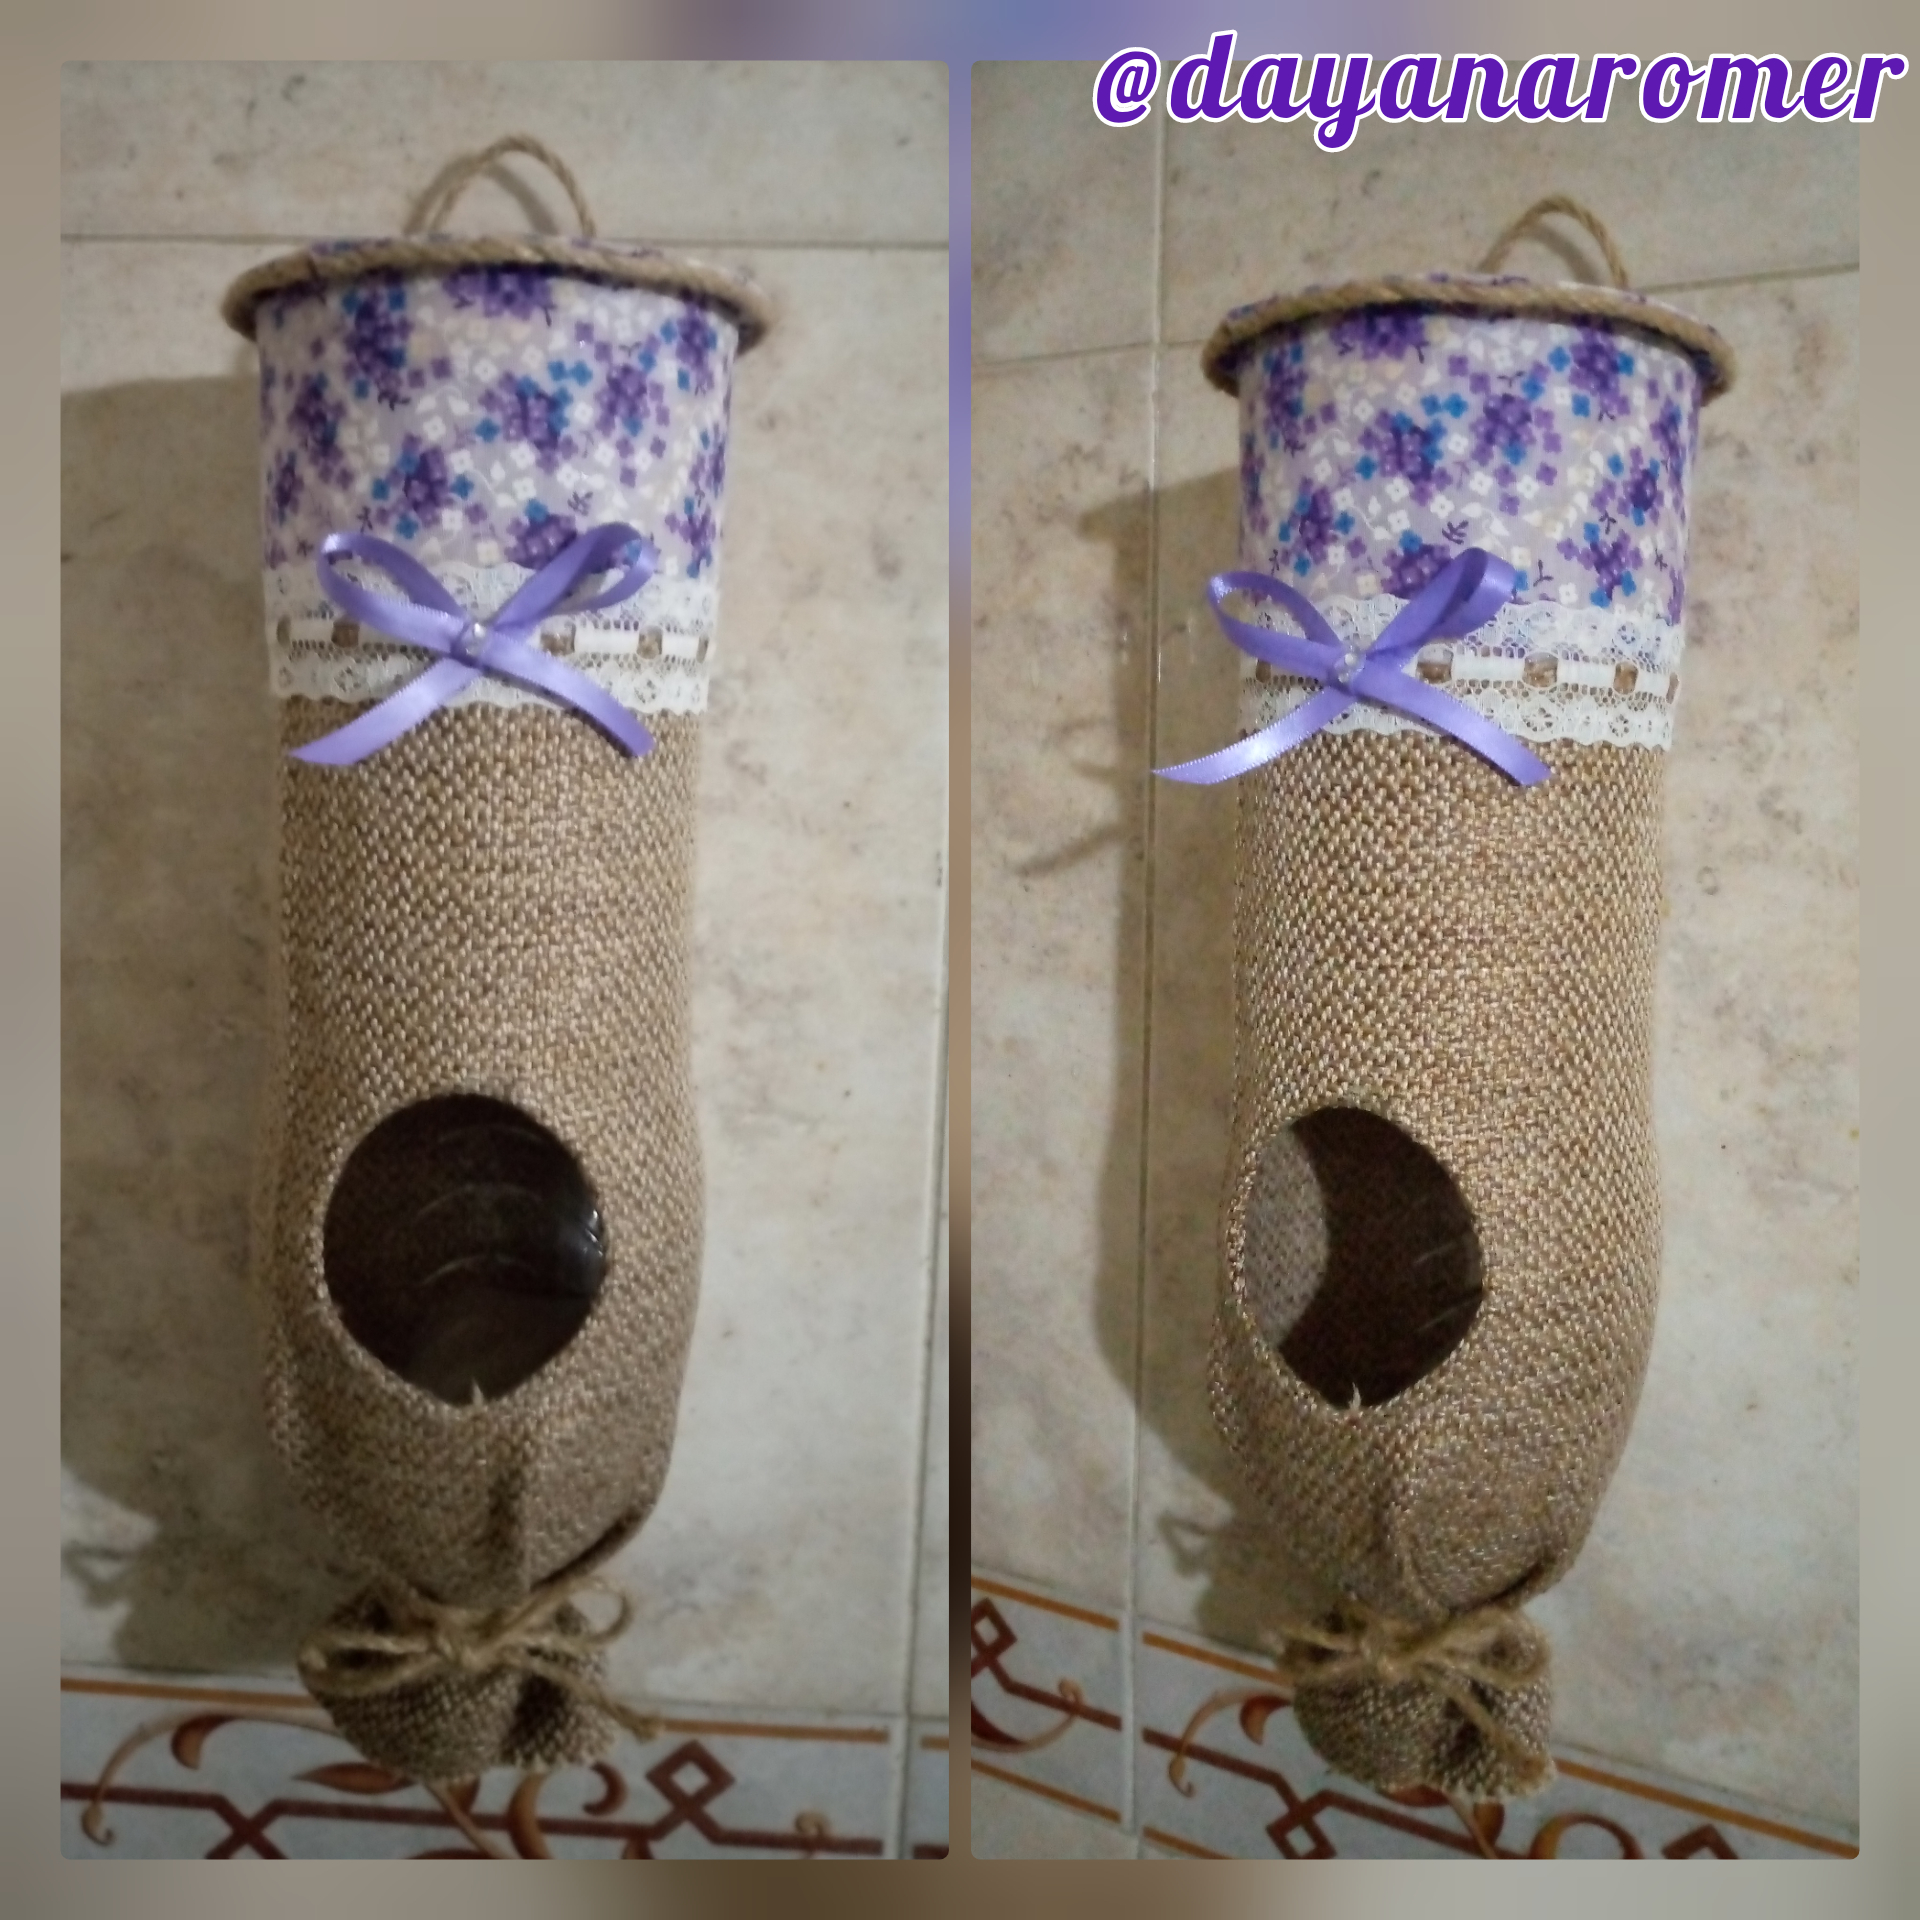
Hemos terminado este hermoso trabajo mis queridos amigos, muy fácil de hacer, espero les haya gustado la idea, y espero verlos pronto.
We have finished this beautiful work my dear friends, very easy to do, I hope you liked the idea, and I hope to see you soon.
Muchas gracias por leerme, que sigan teniendo un grandioso día con la Bendición de Dios.
Thank you very much for reading me, have a great day with God's Blessing.
@dayanaromer💜
Editadas con inShop.
Traducido con Deepl traductor.
All photos are my own, taken with my Tecno Spark 6 go cell phone.
Edited with inShop.
Translated with Deepl translator.
Congratulations @dayanaromer! You have completed the following achievement on the Hive blockchain and have been rewarded with new badge(s):
Your next target is to reach 550 posts.
You can view your badges on your board and compare yourself to others in the Ranking
If you no longer want to receive notifications, reply to this comment with the word
STOPTo support your work, I also upvoted your post!
Check out the last post from @hivebuzz:
Support the HiveBuzz project. Vote for our proposal!
Hola Dayana, me gusto mucho tu creación y se ve muy bonita en tu cocina, hace unos dias vi una idea similar por tik tok y si que es fácil de hacer y queda muy linda
algo que me gusto es las telas que escogiste se ve muy bonito todo
Hola amiga, muchas gracias me alegra que te haya gustado, saludos 😊
Que idea tan buena para organizar nuestras bolsas, yo también tengo las mías por allí 😁. Felicitaciones🤗
Gracias amiga! 😊
Súper original y bonito!!!🥰
Gracias amiga 🤗
Tengo un montón de bolsas en un cajón, está idea es perfecta 💗
Linda creatividad y muy útil, gracias por compartir, feliz día.