#13 ✍️Improving my portraiture pt.1/✍️Mejorando mi nivel haciendo retratos pt.1 [ESP/ENG]

in Hive Diy2 months ago

InShot_20250119_124429811.jpg


Hello, Hive Diy community, I welcome you to my blog and I hope everyone is feeling great today. After a few weeks since my last post portraying people, in which, despite having a significant progress, I felt unsatisfied with the quality in which I portrayed a person, that's why in this post I want to demonstrate an advance, which I believe is one of the biggest steps to meet my goal of being able to portray a face. It is in this case that I present a portrait I made of the well known movie author Jackie Chan; during the process I will be explaining some important points when portraying a person. Without further ado, I leave you below with the rest of the post.

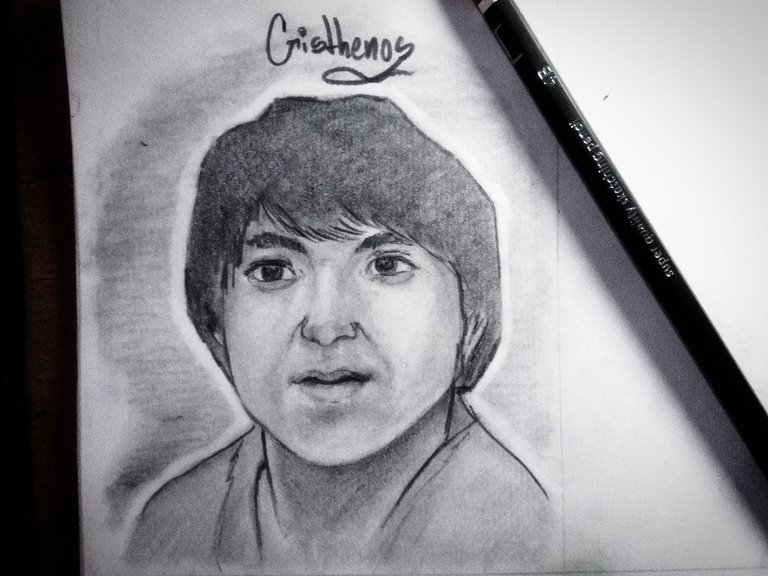
Hola, comunidad de Hive Diy, les doy la bienvenida a mi blog y espero que todos se encuentren muy bien el día de hoy. Tras unas semanas desde mi última publicación retratando personas, en la cual, a pesar de tener un avance significativo, me sentía insatisfecho por la calidad en la que retrataba una persona, es por eso que en este post quiero demostrar un avance, el cual yo creo que es uno de los pasos más grandes para cumplir mi meta de poder retratar un rostro. Es en este caso que les presento un retrato que hice del conocido autor de películas Jackie Chan; durante el proceso estaré explicando algunos puntos importantes a la hora de retratar una persona. Sin más nada que agregar, los dejo abajo con el resto del post.

procedure/Procedimiento

The first thing we are going to do is to draw a circle and then develop the whole structure from it. This method is known as Loomis and is one of the easiest ways to draw a face.

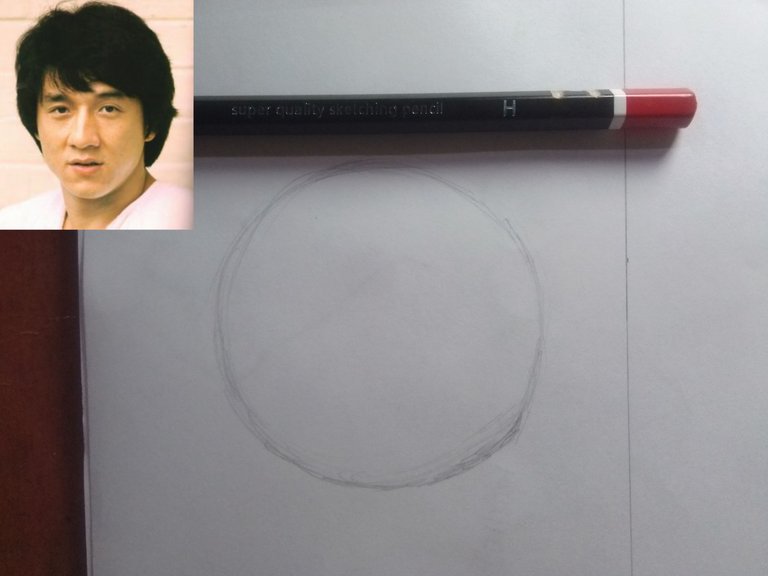
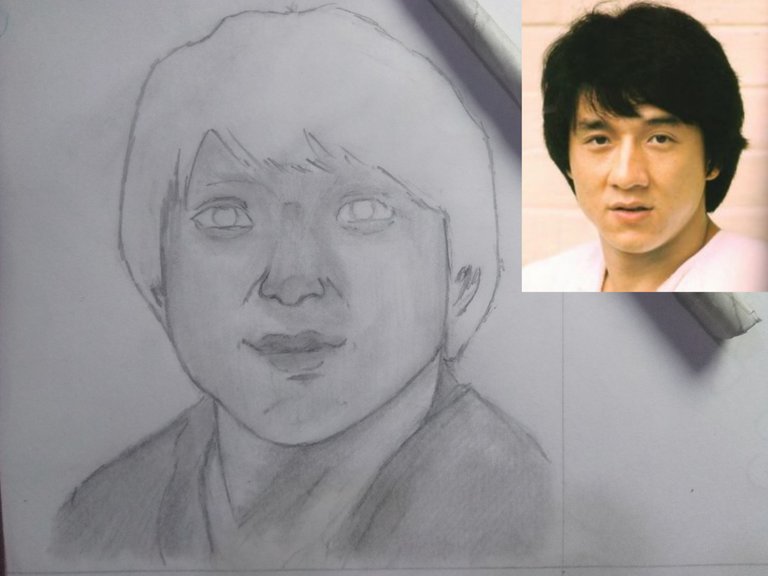
Lo primero que vamos a hacer será dibujar un círculo para luego ir desarrollando toda la estructura a partir de este. A este método se le conoce como Loomis y es una de las formas más fáciles de dibujar un rostro.

InShot_20250115_232241998.jpg

InShot_20250115_232459914.jpg

InShot_20250115_232614810.jpg


Once we have all the structure already drawn, we erase the sketch to highlight only the most important features of the sketch, such as the eyes,
nose and lips; preferably I recommend to highlight it with HB2.

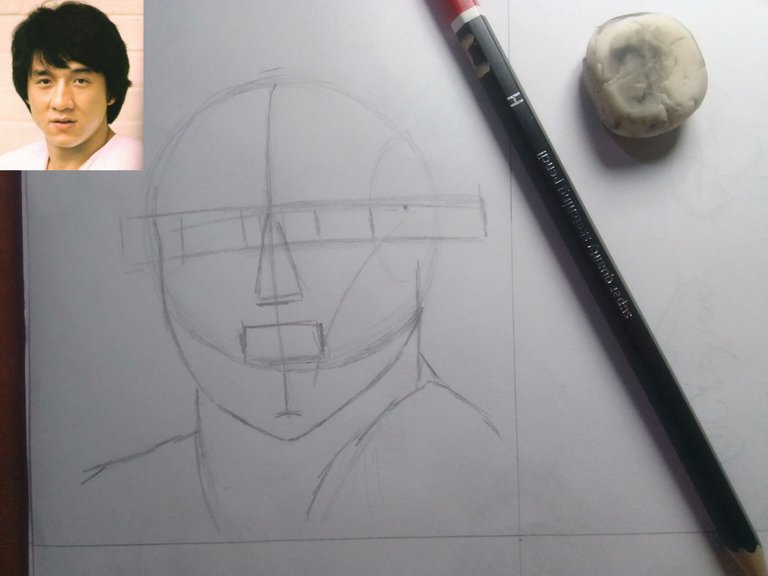
Una vez tengamos toda la estructura ya trazada, pasamos a borrar el boceto para remarcar solo los rasgos más importantes del boceto, como los ojos, la nariz y los labios; preferiblemente les recomiendo remarcarlo con HB2.

InShot_20250115_232716383.jpg

InShot_20250119_120004945.jpg


Once we have all the shape, we will give shadows to the sketch. For the shadows we will use an H pencil or an HB2 for the tone of the skin and the clothes. What we will try to do is to shade with the help of a sketch pencil or whatever you have at hand to create a different tonality to that of the leaf.

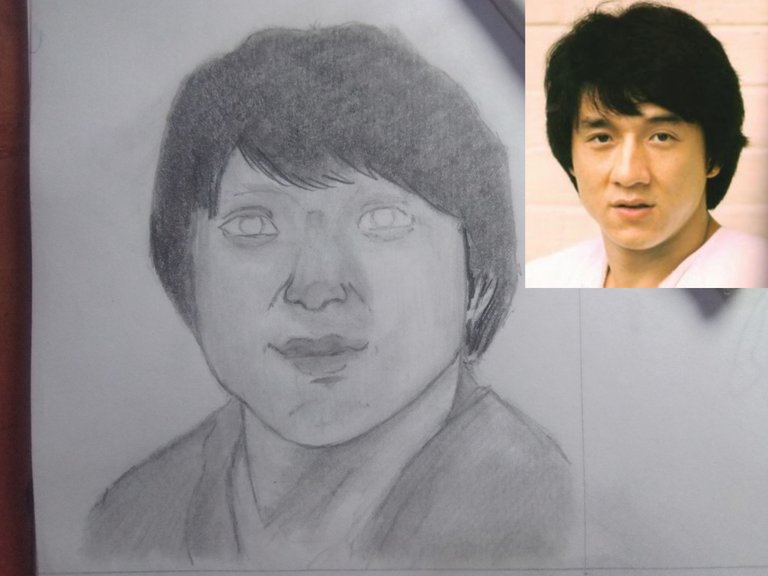
Ya cuando tengamos toda la forma, pasamos a darle sombras al boceto. Para las sombras utilizaremos un lápiz H o un HB2 para la tonalidad de la piel y la ropa. Lo que buscaremos será sombrear con la ayuda de un esfumino o lo que tengan a la mano para crear una tonalidad distinta a la de la hoja.

InShot_20250119_120401049.jpg


For the hair I used a 4B pencil and with the blender we were able to give it that slightly finer tone. For the eyes I used a 2B pencil to give them some depth.

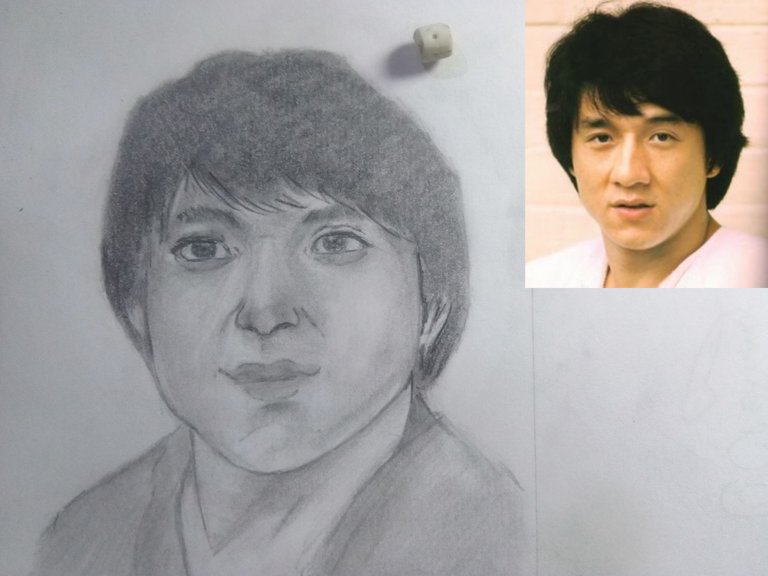
Para el cabello utilice un lápiz 4B y con el esfumino logramos darle esa tonalidad un poco más fina. Para los ojos utilice un lápiz 2B para darles un poco de profundidad.

InShot_20250119_120956792.jpg


To give that feeling of light on the face, we can use a pencil eraser and press on the drawing, but not too hard so as not to completely erase the skin of the sketch, but to create that feeling of reflection.

Para darle esa sensación de luz en la cara, podemos utilizar una goma de lápiz y presionar en el dibujo, pero no demasiado fuerte para no borrar completamente la piel del boceto, sino crear esa sensación de reflejo.

InShot_20250119_122616469.jpg


One of the most complicated parts in this drawing was the mouth, since I'm not used to give realism to drawings, but that specific part was a headache, since I couldn't capture the grimace I had in that picture and I had a lot of time drawing this part.

Una de las partes que más se me complicó en este dibujo fue la boca, ya que no estoy muy acostumbrado a darle realismo a los dibujos, pero esa parte en específico fue un dolor de cabeza, ya que la mueca que tenía en esa foto no lograba capturarla y tuve mucho tiempo dibujando esta parte.

InShot_20250119_122758471.jpg


A tip I give you if you are beginners like me is not to draw exactly the lip as it is in the photo or in the reference you are using. What we can do to avoid this mistake is to just draw the dividing line with a 2B pencil, preferably, and then give it shadows above and below to give it that touch of naturalness and that's it.

Un consejo que les doy si son principiantes como yo es que no dibujen exactamente el labio tal cual como está en la foto o en la referencia que están utilizando. Lo que podemos hacer para evitar este error es que solo dibujemos la línea divisora con un lápiz 2B,preferiblemente, para luego darle sombras arriba y abajo para darle ese toque de naturalidad y listo.

InShot_20250119_122826988.jpg


The rest is a matter of practice and, to be honest, I know it can be better, but for the moment I'll be satisfied with this result while I keep practicing to bring you a better quality drawing. That's all for today; I hope it can help you for future drawings. With nothing more to contribute, I say goodbye until the next publication. Bye.

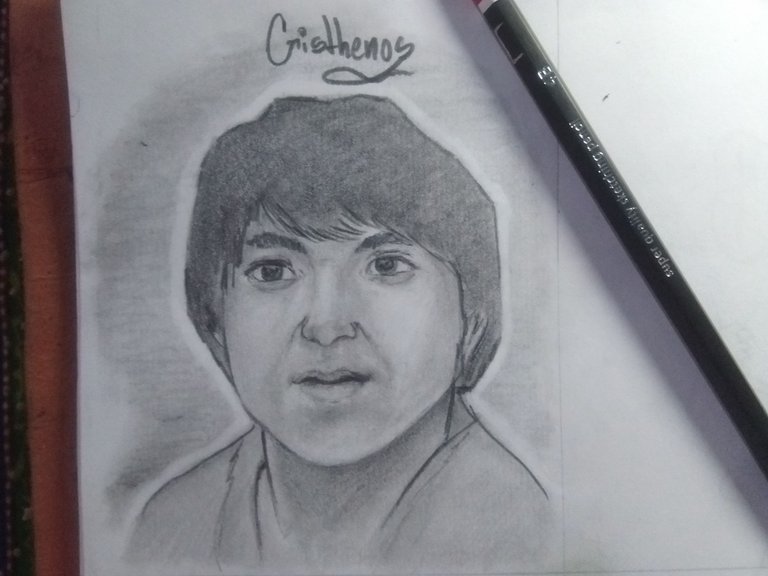
Ya el resto es cuestión de práctica y, siendo sincero, sé que puede quedar mejor, pero por el momento me voy a conformar con este resultado mientras sigo practicando para traerle un dibujo de más calidad. Esto fue todo por el día de hoy; espero les pueda ayudar para futuros dibujos. Sin más nada que aportar, me despido hasta la siguiente publicación. Chao.


todas las fotos fueron tomadas con mi telefono Yezz art 2 pro/all photos were taken with my Yezz art 2 pro phone.

link de la imagenes utilizadas en este post/link to the images used in this post👇


Traducción
Translation

Muchas gracias por leer mi publicación!
Thank you very much for reading my post!
Redes Sociales
Social Network


20241010_221758.jpg


Sort:  


SaludosHola @cristhenos me encanto tu paso a paso, y el resultado final.

Muchas gracias 🫂